
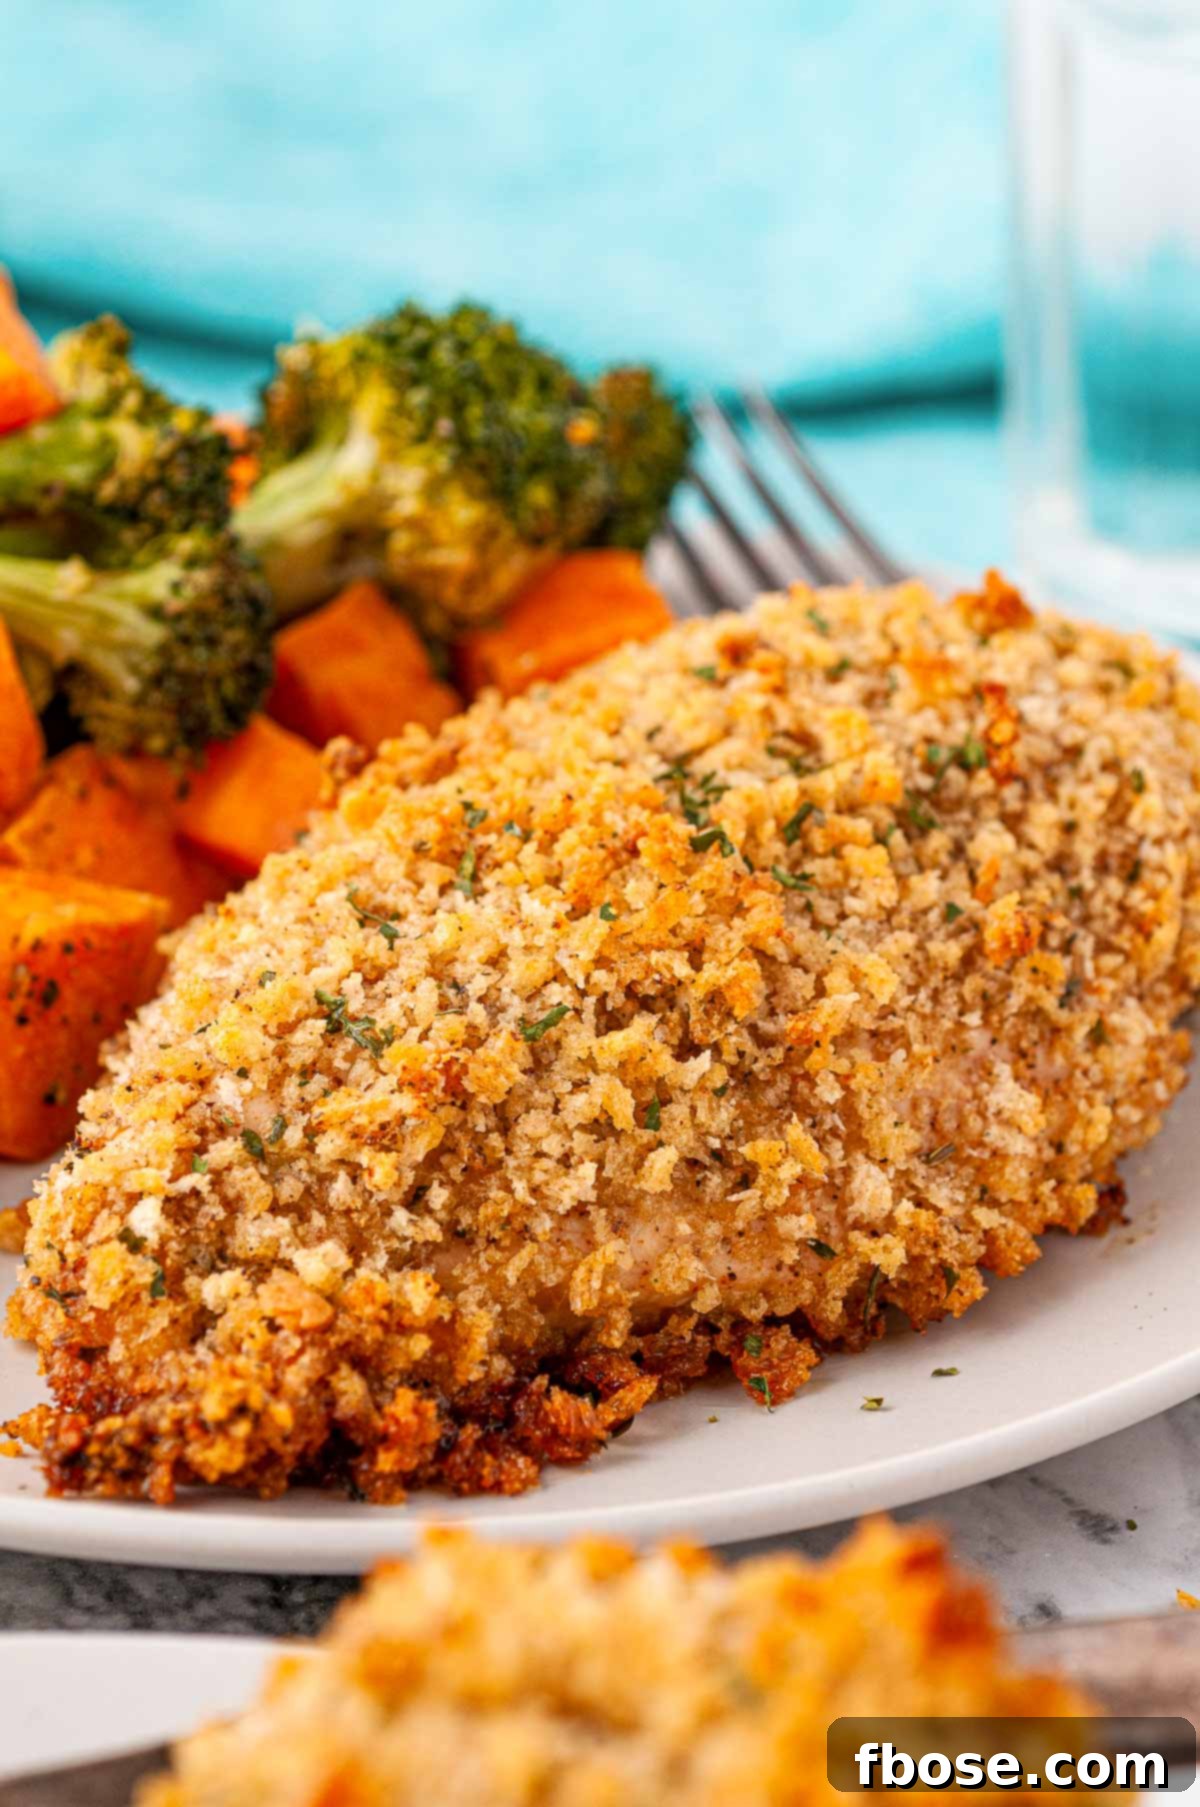
Oven Fried Chicken Breast offers a beloved comfort food experience with a healthy twist! This incredibly easy recipe transforms ordinary chicken breasts into crispy, flavorful delights by coating them in a perfectly seasoned breadcrumb mixture and baking them to golden perfection. It’s light on fat but undeniably rich in taste, making it an ideal choice for a delicious and wholesome meal.
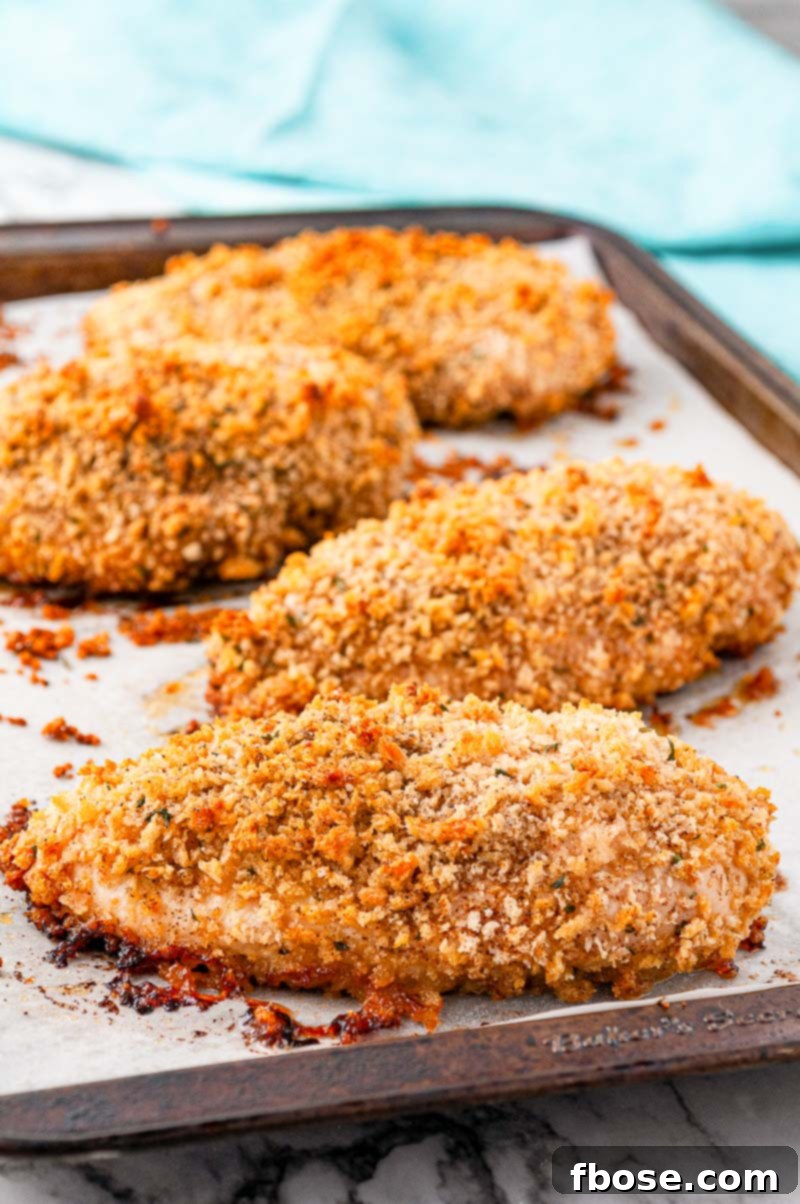
Discover the Joy of Oven Baked Chicken Breasts
Are you a fan of classic fried chicken but looking for a lighter, less messy alternative? Our Oven Fried Chicken is the perfect solution! This recipe delivers all the satisfying crunch and succulent tenderness of traditional fried chicken without the need for deep-frying. It’s a healthier method that’s also incredibly simple to prepare, making it a fantastic addition to your weekly meal rotation.
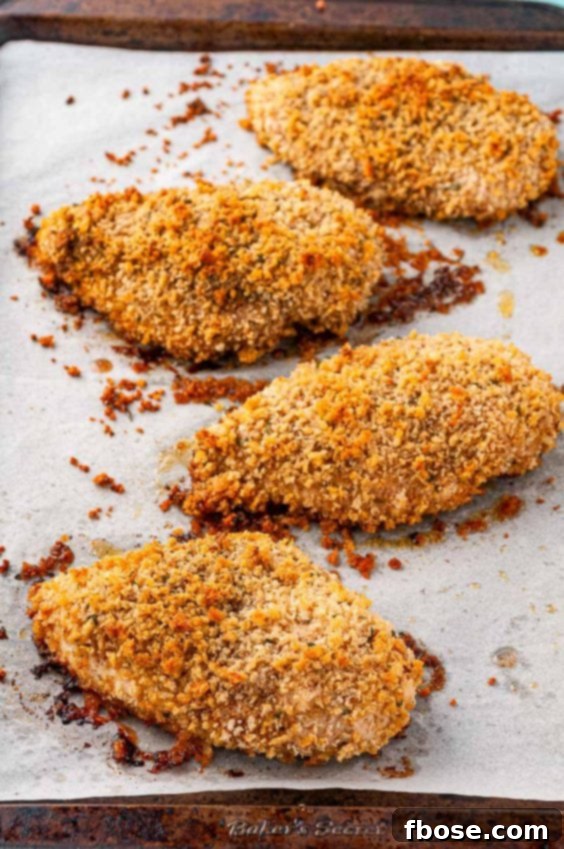
Imagine a busy weeknight where you want a delicious, satisfying meal without spending hours in the kitchen. This oven-fried chicken recipe is your answer! It requires minimal hands-on time and promises a crowd-pleasing dish that even the pickiest eaters will rave about. The chicken emerges from the oven with a beautifully golden, super crispy crust and a remarkably juicy interior, proving that you don’t need excessive oil to achieve incredible flavor and texture.
The versatility of this dish is another reason it will quickly become a family favorite. Enjoy these perfectly coated chicken breasts with traditional, hearty sides like creamy Mashed Potatoes, rich Creamy Corn, or fluffy Cheddar Drop Biscuits for a comforting, homestyle dinner. For a lighter, protein-packed option, slice the baked chicken and serve it atop a vibrant, fresh salad, such as our refreshing Strawberry Spinach Salad. This adaptability ensures it fits seamlessly into any meal plan or craving.
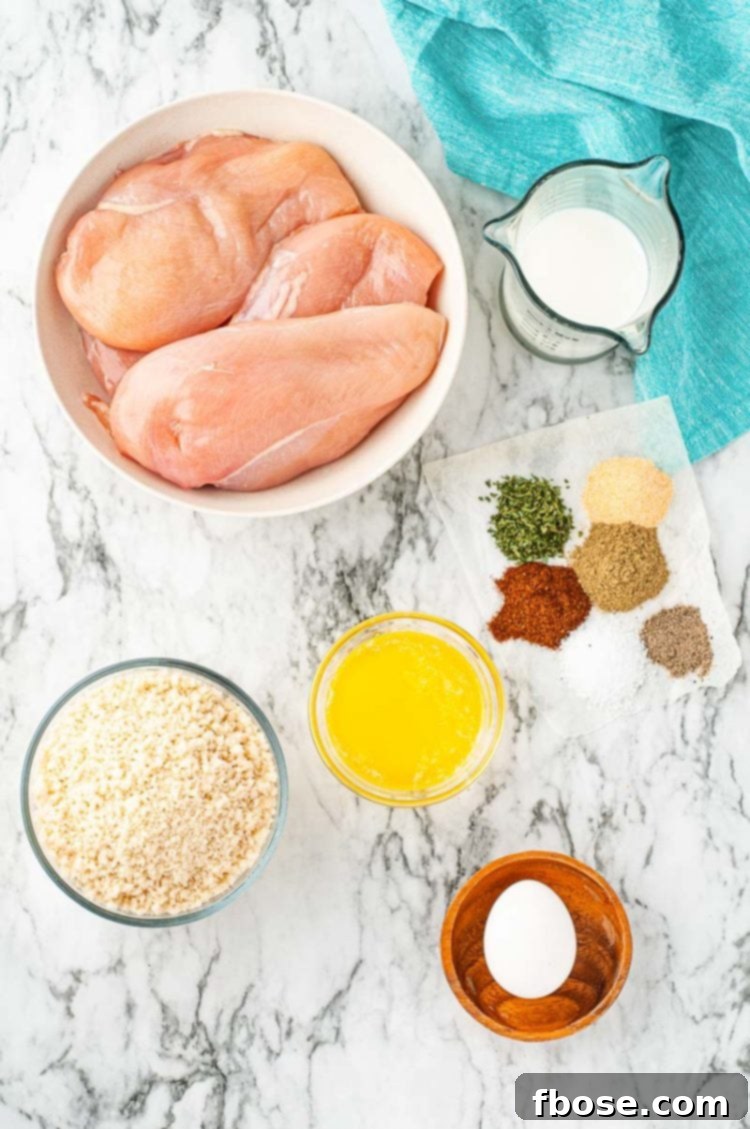
Essential Ingredients for Perfect Oven Breaded Chicken
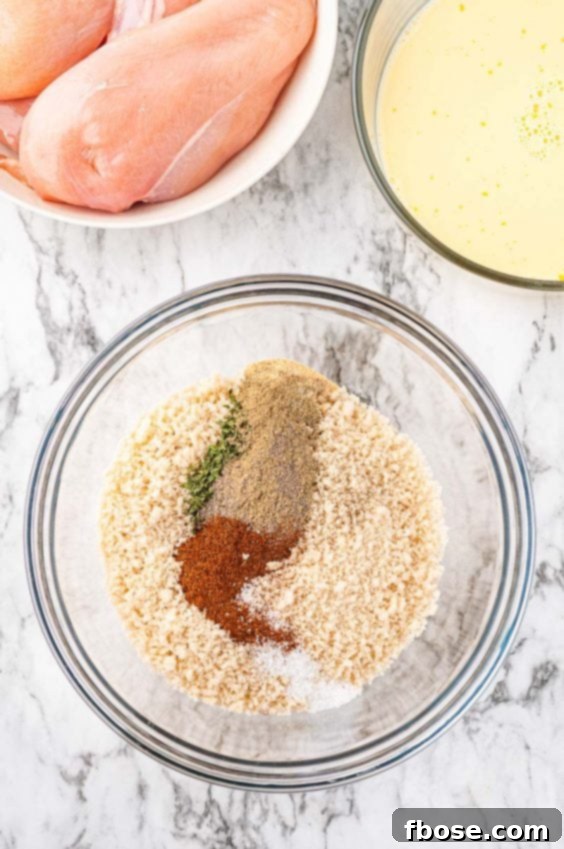
Crafting this incredible Oven Baked Chicken involves three simple yet crucial components: succulent chicken breasts, a binding egg and milk mixture, and a flavorful breadcrumb and seasoning blend. Each element plays a vital role in creating the ultimate crispy and juicy result.
First, we start with high-quality chicken breasts. For optimal results and even cooking, aim for chicken breasts of similar size and thickness. If your chicken breasts are particularly thick, consider pounding them lightly to an even ½-inch thickness. This ensures they cook uniformly and remain tender throughout.
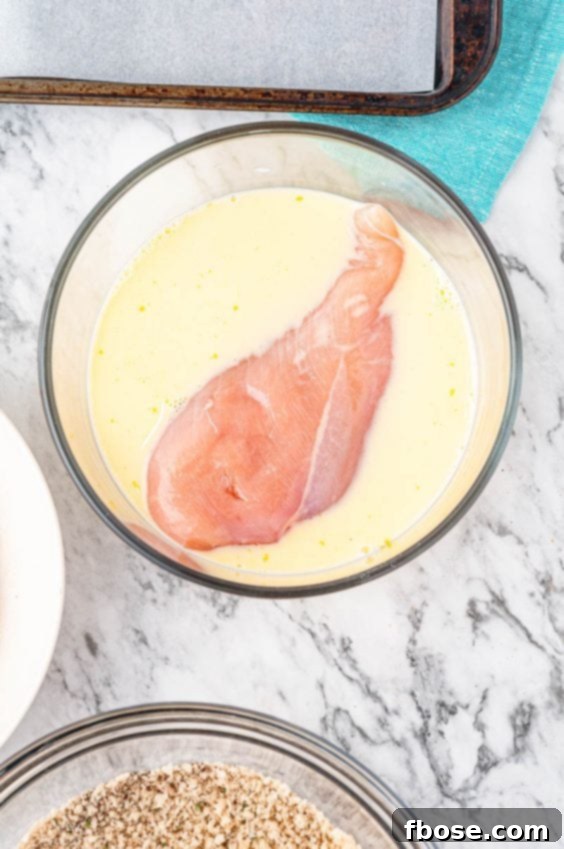
Next, each chicken piece receives a dunk in a simple yet effective mixture of eggs and milk. This wet coating acts as the essential adhesive, allowing the breadcrumb mixture to firmly cling to the chicken, creating a robust and crispy crust. Using milk in the egg wash adds a touch of richness and helps in browning.
Finally, the chicken is generously coated in our special blend of breadcrumbs and seasonings. This mixture typically includes standard breadcrumbs (panko breadcrumbs are an excellent choice for extra crispiness!), aromatic poultry seasoning, vibrant paprika, pungent garlic powder, earthy dried parsley, and, of course, salt and pepper to taste. Once baked, this coating transforms into a beautiful golden-brown, crunchy shell that tricks your taste buds into thinking it’s been deep-fried, all while being baked in the oven.
Oven Baked Fried Chicken: Creative Substitutions and Flavorful Variations
One of the best aspects of this Oven Baked Fried Chicken recipe is its adaptability. Feel free to experiment with these simple substitutions and exciting variations to tailor the dish to your taste and pantry availability:
- **Butter vs. Olive Oil:** While melted butter adds a rich, savory flavor that enhances the “fried” illusion, you can easily substitute it with olive oil for a slightly lighter and equally delicious result. Olive oil also helps achieve a wonderful crispiness and can be a good option if you’re looking to reduce dairy.
- **Spice It Up Your Way:** The breadcrumb coating is a canvas for flavor! Beyond the recommended paprika and garlic powder, consider adding a dash of onion powder for sweetness, a pinch of celery salt for a unique savory note, dried oregano or basil for an Italian twist, or a touch of chili powder or cayenne pepper for a subtle or fiery kick. A smoky chipotle powder could also add a fantastic depth of flavor.
- **Explore Other Chicken Cuts:** While chicken breasts are fantastic for their lean protein content and quick cooking time, this recipe works beautifully with boneless, skinless chicken thighs. Keep in mind that chicken thighs are generally more forgiving and tend to stay juicier, but their thicker nature will require an adjustment in baking time. Always ensure they reach an internal temperature of 165°F (74°C).
- **Dipping Delights:** Elevate your oven-fried chicken experience with a variety of dipping sauces. Classic ketchup or tangy BBQ sauce are always crowd-pleasers. For something a bit more gourmet, try our delicious maple mustard sauce, or even a creamy ranch or honey mustard. Don’t be afraid to mix and match!
- **Transform into Chicken Parmesan:** For an incredibly easy weeknight meal, turn this into a quick chicken Parmesan. A few minutes before the chicken is done baking, top each breast with a slice of mozzarella cheese and return it to the oven until melted and bubbly. Once out of the oven, garnish with fresh grated Parmesan cheese and a generous dollop of your favorite marinara sauce. Serve with a side of pasta for a complete Italian-inspired feast!
- **Gluten-Free Option:** For those with dietary restrictions, simply swap regular breadcrumbs for your favorite gluten-free variety. Ensure all other seasonings are also gluten-free if necessary.
- **Add Cheese to the Breading:** For an extra layer of flavor and a slightly richer crust, mix a few tablespoons of finely grated Parmesan cheese into your breadcrumb mixture.
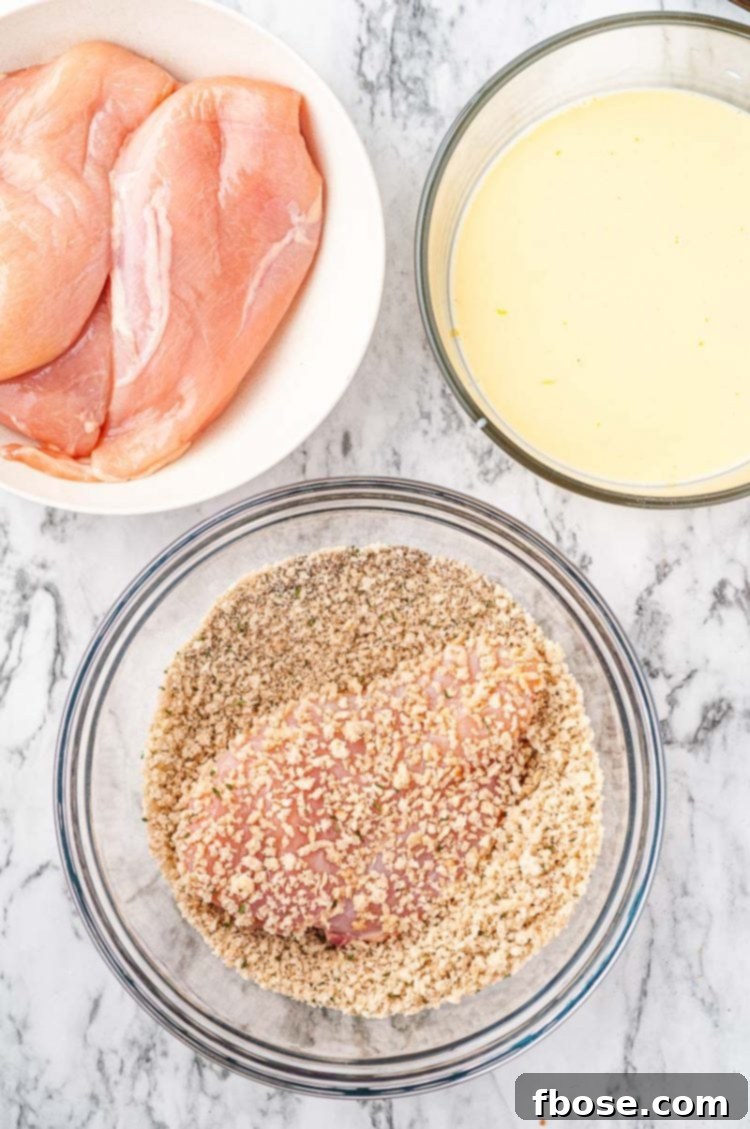
Simple Steps to Make Perfect Oven Fried Chicken Breast
This “fried” chicken recipe is not only incredibly delicious but also surprisingly straightforward to make. Whether you’re a seasoned chef or a kitchen novice, you’ll find joy in how easily this dish comes together. Here’s a detailed breakdown of the steps:
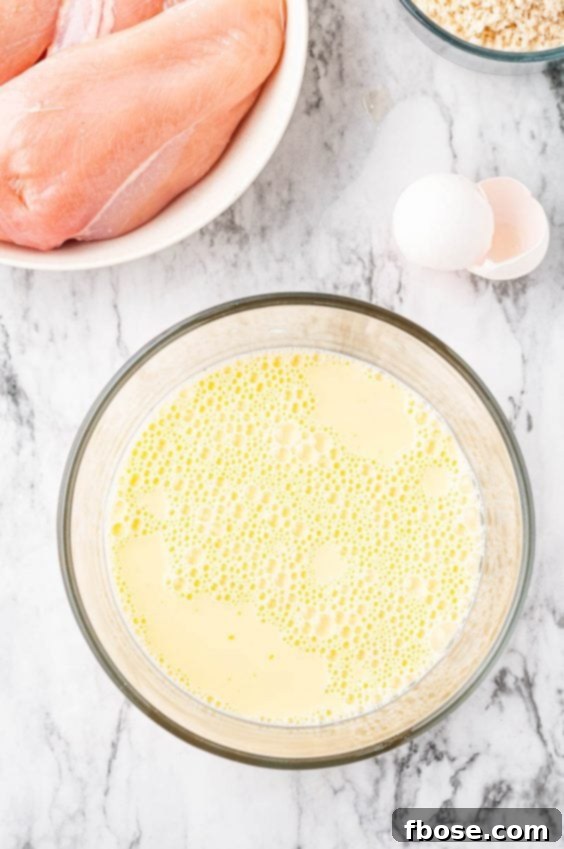
- **Prepare Your Stations:** Begin by setting up your breading stations. In one shallow bowl, whisk together the wet ingredients (egg and milk) until well combined. In a separate, larger shallow bowl, thoroughly mix all your dry ingredients (breadcrumbs and spices). This two-bowl setup ensures a smooth and efficient dredging process. Don’t forget to preheat your oven to 400°F (200°C) and line a baking sheet with parchment paper for easy cleanup and to prevent sticking.
- **Dredge the Chicken:** Take one chicken breast at a time and first dip it into the egg and milk mixture, allowing any excess liquid to drip off for a few seconds. This prevents the coating from becoming too thick and soggy. Next, transfer the chicken to the breadcrumb mixture. Press the chicken firmly into the breadcrumbs, ensuring every surface is completely coated. Gently shake off any excess breadcrumbs, then place the coated chicken breast onto the prepared parchment-lined baking sheet. Repeat this process for all remaining chicken breasts, spacing them out evenly on the sheet.
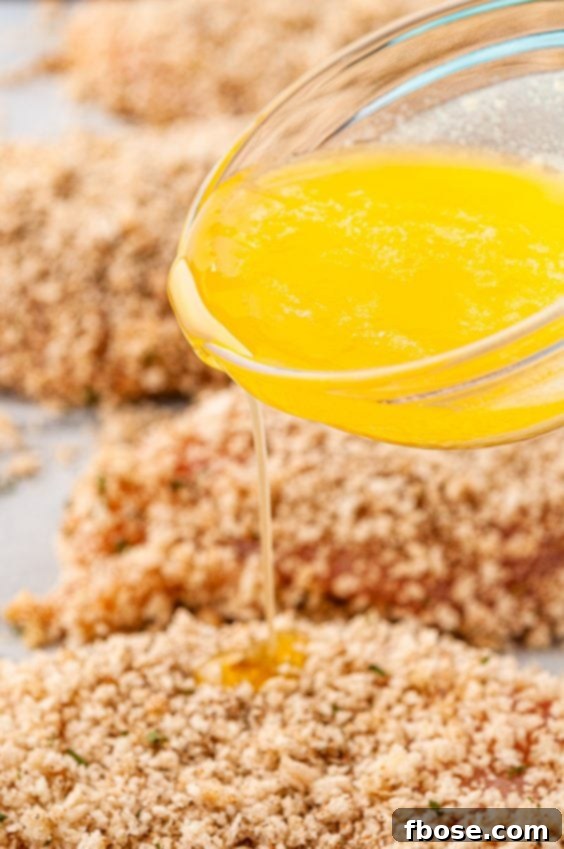
- **Drizzle with Flavor:** Once all chicken breasts are breaded and arranged on the baking sheet, evenly drizzle the melted butter (or olive oil, if preferred) over the tops of each piece. This butter not only adds incredible flavor but also plays a crucial role in achieving that coveted golden-brown, crispy crust during baking.
- **Bake to Perfection:** Transfer the baking sheet to your preheated oven. Bake for approximately 22 to 25 minutes. The most critical factor is ensuring the chicken reaches a safe internal temperature of 165°F (74°C). Use a reliable meat thermometer inserted into the thickest part of the chicken breast to confirm doneness. Once cooked, remove the chicken from the oven and allow it to rest on the baking sheet for about 5 minutes before slicing and serving. This resting period is essential as it allows the juices to redistribute throughout the meat, resulting in exceptionally tender and juicy chicken.
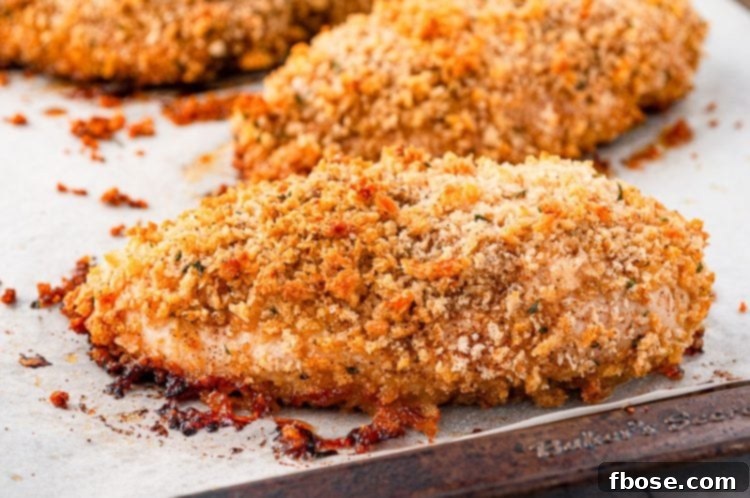
Achieving Perfect Doneness: How Long to Bake Breaded Chicken
Getting the baking time and temperature just right is crucial for perfectly cooked, juicy oven-fried chicken. While chicken breast size can cause slight variations, sticking to a specific temperature and approximate cooking duration is key to avoiding dry, overcooked meat or, worse, raw chicken.
We aim for a relatively hot oven (400°F or 200°C) and a faster cooking time (22-25 minutes) to achieve that desired crispy exterior and tender interior. Baking at a lower temperature for too long, say 350°F (175°C) for 30 minutes or more, often results in dry, stringy chicken as the moisture has too much time to escape. The higher initial temperature helps quickly crisp the breading and seal in the juices.
Conversely, simply cranking up the heat to drastically shorten the baking time can lead to a burnt crust on the outside while the inside remains undercooked or raw. It’s a delicate balance to strike.
The single most important factor, regardless of estimated time, is that the chicken’s internal temperature reaches a safe 165°F (74°C). This is where a good meat thermometer becomes an indispensable kitchen tool. If you don’t already own one, I highly recommend investing in an instant-read thermometer. It takes the guesswork out of cooking and ensures your chicken is always safe and perfectly cooked.
A helpful tip for maximum juiciness: I often remove my chicken from the oven when the thermometer reads around 160°F (71°C). The chicken will continue to cook slightly (carryover cooking) as it rests in the pan, typically reaching the perfect 165°F (74°C) by the time I’m ready to slice it. Allowing the chicken to rest for about 5 minutes after baking also allows the internal juices to redistribute, leading to a much more succulent and flavorful final product.
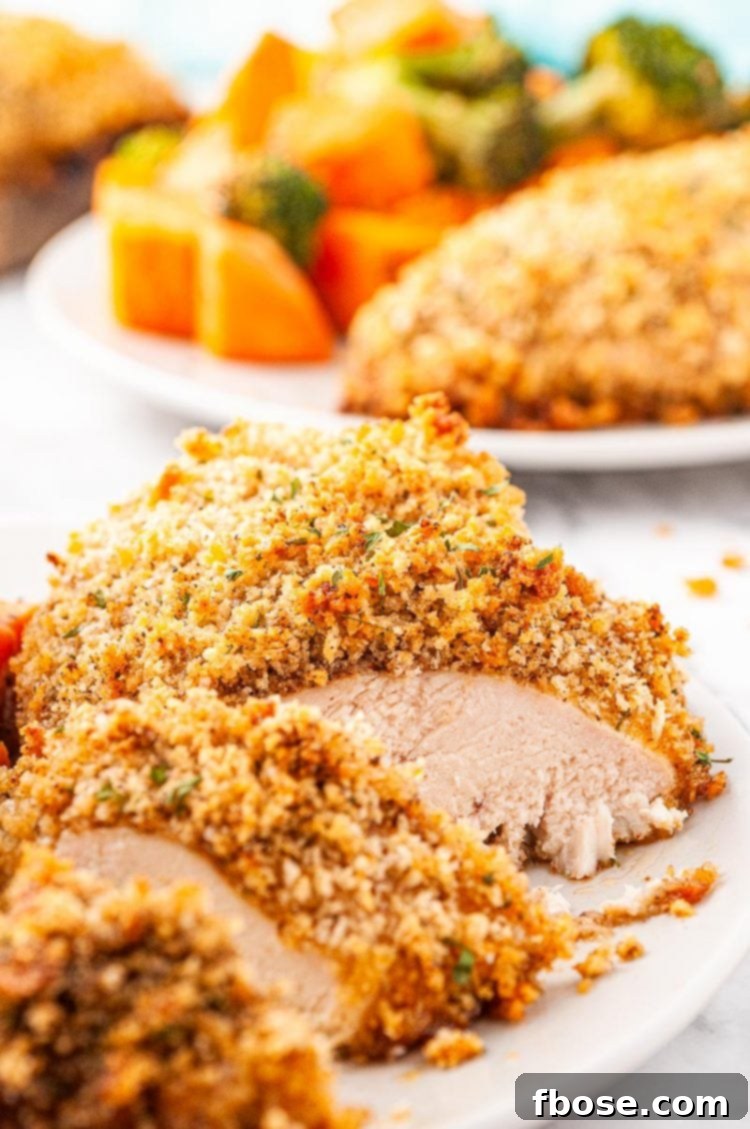
Serving Your Delicious Oven Breaded Chicken
This Oven Breaded Chicken is best enjoyed fresh from the oven, when the crust is at its crispiest and the interior is at its juiciest. Its comforting flavor profile makes it incredibly versatile for pairing with a variety of side dishes, suitable for any occasion.
For a quintessential home-cooked dinner experience, we love serving this chicken with hearty Oven Roasted Veggies and warm, fluffy Homemade Rolls. The combination creates a satisfying and well-rounded meal that evokes a sense of comfort and tradition.
Beyond these classics, consider a vibrant green salad to add freshness and crunch, or a creamy, indulgent side like Stovetop Mac and Cheese for ultimate comfort. Simple steamed rice or a flavorful pilaf can also be excellent accompaniments, soaking up any delicious juices. For a lighter touch, pair it with quinoa or a refreshing coleslaw. Don’t forget your favorite dipping sauces for an extra burst of flavor!
Storing and Reheating Baked Breaded Chicken Breast
If you happen to have any leftovers of this delicious Baked Breaded Chicken, you can easily store them for future enjoyment. Place the cooked chicken breasts in an airtight container and refrigerate for up to 4 days. While the flavor will remain excellent, it’s worth noting that the crispy “fried” texture will soften in the refrigerator.
When it comes to reheating, you have a few options to try and regain some of that initial crispness:
- **Microwave:** For a quick reheat, the microwave works, but it’s generally not recommended for retaining crispness. The chicken will be heated through but likely soft.
- **Oven:** Reheating in the oven is your best bet for bringing back some crispiness. Preheat your oven to 350°F (175°C) and place the chicken breasts on a wire rack over a baking sheet. Bake for 10-15 minutes, or until heated through and the breading starts to crisp up again.
- **Air Fryer:** The air fryer is an excellent tool for reheating this chicken. Preheat your air fryer to 375°F (190°C) and cook for 5-8 minutes, flipping halfway through, until the chicken is hot and crispy. This method often yields the best results for texture.
Baked Breaded Chicken Breast FAQs
Absolutely! These oven-cooked chicken breasts are a significantly healthier alternative to traditional deep-fried chicken. By baking instead of frying, you drastically reduce the amount of added fats and calories, making it a more waistline-friendly option without sacrificing flavor. To further enhance its healthy profile, consider serving sliced Oven Baked Fried Chicken on top of a vibrant salad packed with fresh greens and vegetables. This is not only a fantastic way to enjoy your meal but also a brilliant strategy for transforming leftovers into a whole new, light dish. And, since you’re making such a healthy choice for your main course, you might feel inclined to indulge a little with dessert, perhaps a delightful Soft Sugar Cookie or a decadent piece of Brown Sugar Bacon Chocolate Cake. You’ve earned it! 😉
Preventing dry chicken is all about proper technique and timing. The seasoned breading acts as a protective layer, helping to seal in moisture during baking. However, overbaking is the main culprit for dry chicken. Here are a few key tricks: First, keep a close eye on your chicken, especially after the 10-minute mark of cooking. Chicken breasts can cook quickly, and even a few extra minutes can make a difference. Second, I personally like to remove my chicken from the oven when an instant-read kitchen thermometer reads 160°F (71°C). This is because chicken continues to cook (known as “carryover cooking”) even after it’s removed from the heat. By the time it rests in the pan for 5 minutes, it usually reaches the perfect and safe internal temperature of 165°F (74°C). Resting is also vital as it allows the juices to redistribute evenly throughout the chicken breast, ensuring every bite is tender and succulent.
No, this particular recipe is designed to deliver a “fried” texture and flavor without any actual frying beforehand. The whole idea is to provide a similar crispy breaded cutlet experience with significantly less hassle and fewer calories than deep-frying. This method harnesses the heat of the oven to crisp the coating and cook the chicken thoroughly. If you are specifically craving traditionally fried chicken, our Fried Chicken Recipe remains a highly popular reader favorite!
A common pitfall is a soggy crust, but it’s easily avoidable with a simple trick during the breading process. After dipping the chicken into the egg wash, make sure to let any excess liquid drip off for a few seconds before transferring it to the breadcrumb mixture. This prevents too much egg from clinging to the chicken, which can in turn cause an excessive amount of flour or breadcrumbs to stick. When the coating is too thick with too much moisture, it often steams rather than crisps in the oven, leading to a less-than-desirable soggy texture. A light, even dredge is all you need for that perfect crunch.
While regular breadcrumbs work well, panko breadcrumbs are highly recommended for the ultimate crispy crust. Panko, a type of Japanese breadcrumb, is coarser and flakier than traditional breadcrumbs, which allows it to absorb less oil and become exceptionally crunchy when baked. You can also use seasoned breadcrumbs for an extra flavor boost, or make your own from stale bread.
You can certainly do some prep work in advance. You can mix the dry breading ingredients and store them in an airtight container. The chicken can also be pounded to an even thickness ahead of time. However, for the crispiest results, it’s best to dredge and bake the chicken immediately before serving. If you bread the chicken too far in advance, the moisture from the chicken can seep into the breading, causing it to become soggy during baking.
More Flavorful, Healthy Chicken Recipes:
- Baked Chicken Wings — Enjoy all the savory deliciousness of chicken wings without the deep-frying, offering a healthier yet equally tasty alternative!
- Ranch Chicken — Perfect for summer grilling or a quick bake, these zesty chicken skewers are infused with tangy ranch flavor.
- Lemon Chicken Thighs — Indulge in tender, juicy chicken thighs bursting with vibrant lemon and zesty Asian-inspired ginger-soy flavors.
- Honey Ginger Chicken — Simplify dinner with this easy sheet pan meal, roasting flavorful honey ginger chicken and an assortment of colorful veggies all on one pan.
- Healthy Baked Chicken Nuggets — A guilt-free twist on a childhood favorite, these crunchy chicken chunks are baked, not fried, and ideal for dipping in your favorite sauces.
Let’s Connect!
If you’ve tried this recipe and loved it, please let me know how it turned out for you in the comments below! Your feedback and ratings are incredibly valuable to me.
Don’t forget to tag me – @sugarandsoulco – on Instagram and Pinterest with your beautiful photos, or even better, join our vibrant Sugar & Soul Show-offs Community on Facebook and share your culinary triumphs there. We love seeing your creations and you can even participate in our exciting recipe challenges!
Oven Baked Fried Chicken
Ingredients
- 1 large egg
- ½ cup milk
- 2 cups bread crumbs
- 1 teaspoon paprika
- 1 teaspoon garlic powder
- 1 teaspoon poultry seasoning
- 1 teaspoon dried parsley
- 1 teaspoon kosher salt
- ½ teaspoon ground black pepper
- 4 boneless skinless chicken breasts
- ⅓ cup salted butter melted
Instructions
-
Preheat oven to 400°F (200°C) and line a baking sheet with parchment paper, then set aside.
-
In a medium bowl, beat together the egg and milk until well combined.1 large egg, ½ cup milk

-
In a large bowl, thoroughly mix together the bread crumbs, paprika, garlic powder, poultry seasoning, parsley, salt, and pepper.2 cups bread crumbs, 1 teaspoon paprika, 1 teaspoon garlic powder, 1 teaspoon poultry seasoning, 1 teaspoon dried parsley, 1 teaspoon kosher salt, ½ teaspoon ground black pepper
-
Dip each chicken breast into the egg/milk mixture, allowing excess to drip off, then transfer to the crumb mixture. Press firmly to ensure each piece is evenly coated with breadcrumbs.4 boneless skinless chicken breasts
-
Place the coated chicken on the prepared baking sheet. Evenly drizzle the melted butter over the top of each chicken breast.⅓ cup salted butter
-
Bake for 22 to 25 minutes, or until the chicken has an internal temperature of 165°F (74°C). Allow your chicken to rest for about 5 minutes before slicing and serving.
Video
Notes
- You can drizzle olive oil over the chicken in place of butter for a lighter option.
- Feel free to add other spices to the chicken breast seasoning like onion powder, celery salt, oregano, basil, or chili powder for a spicy kick and varied flavor.
- Chicken thighs can be used in place of chicken breast, but remember to adjust the cooking time accordingly as thighs are typically thicker.
- Serve these crispy chicken breasts with your favorite dipping sauces such as ketchup, BBQ sauce, ranch, or our delightful maple mustard sauce.
- For a quick Chicken Parmesan, melt a piece of mozzarella cheese on top during the last few minutes of baking. Garnish with fresh grated Parmesan and a touch of marinara sauce.
Nutrition
Did You Make This Recipe?
Don’t forget to share it with me on Instagram @sugarandsoulco and follow on Tiktok @sugarandsoulco and Pinterest @sugarandsoulco for more!
Pin Recipe
Share Recipe