
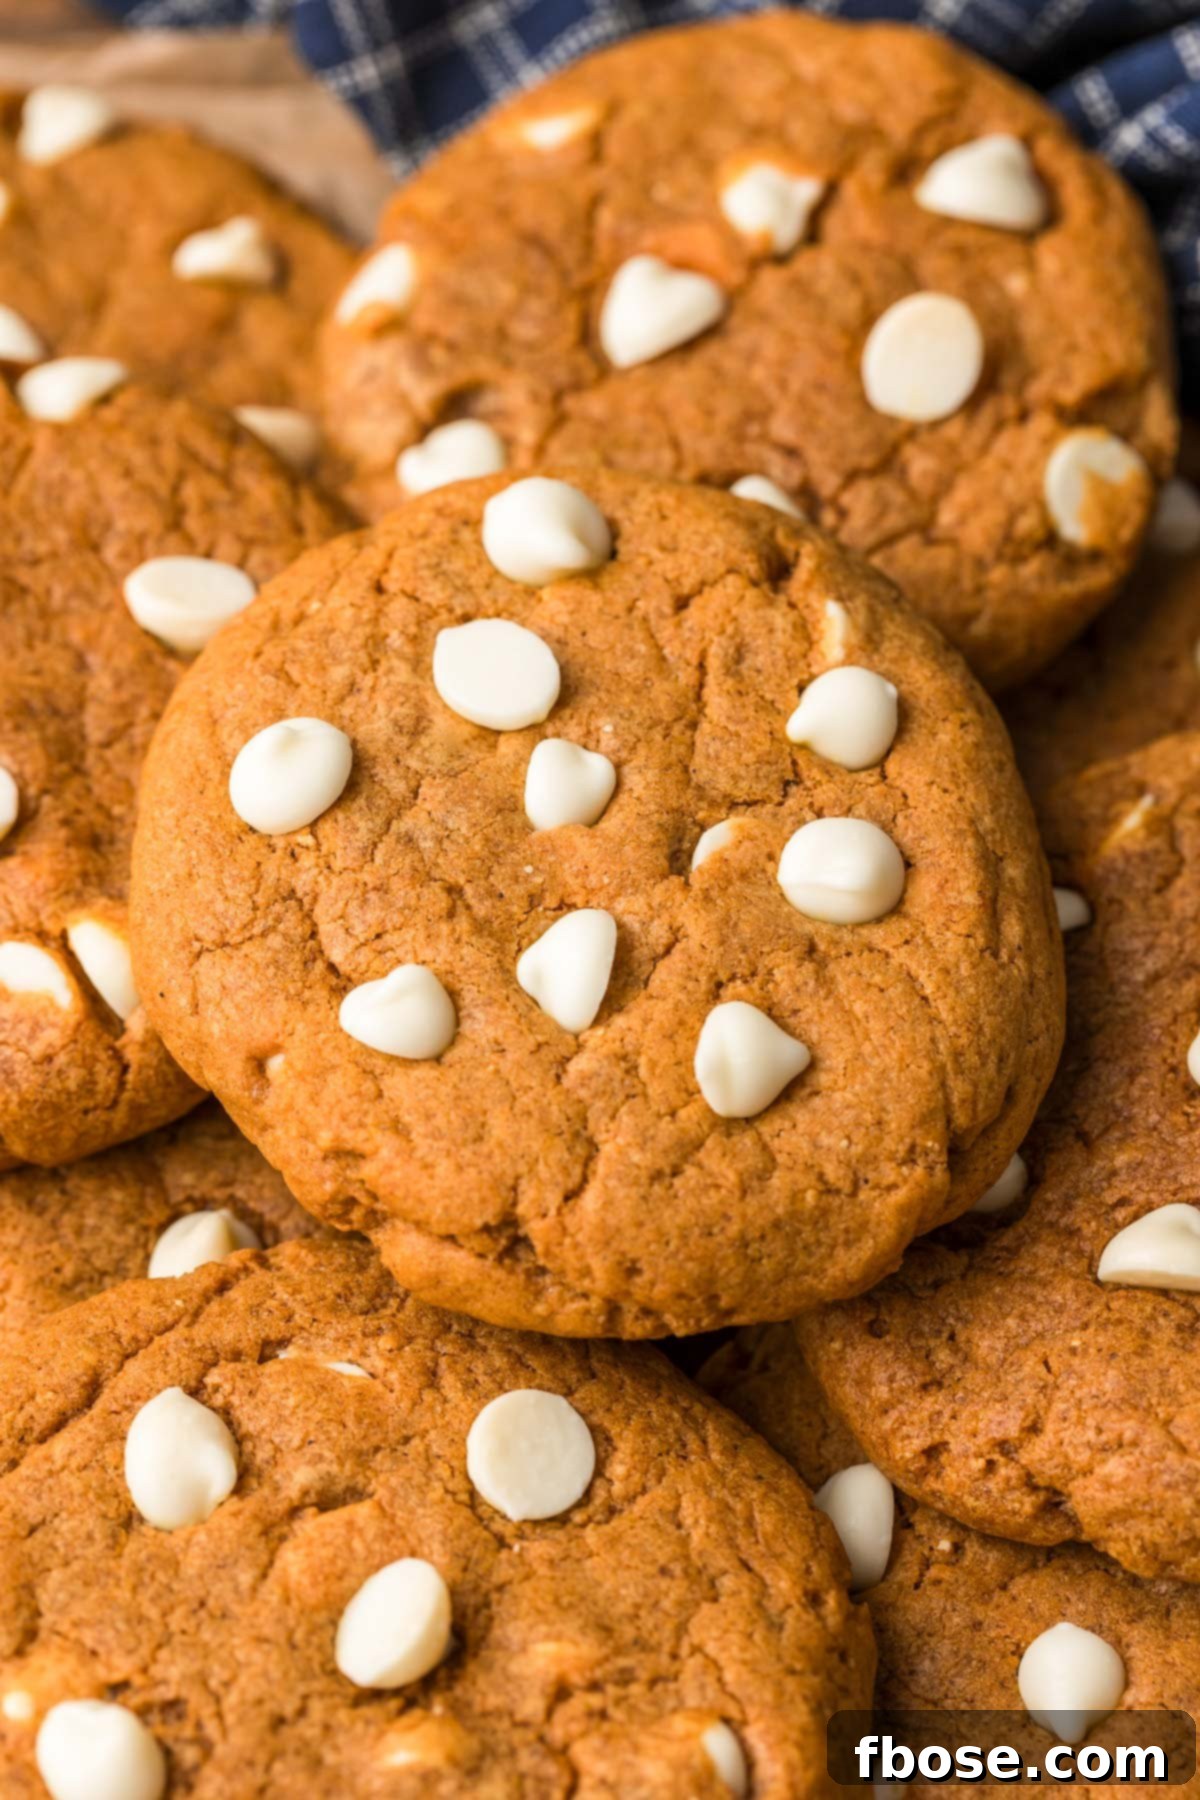
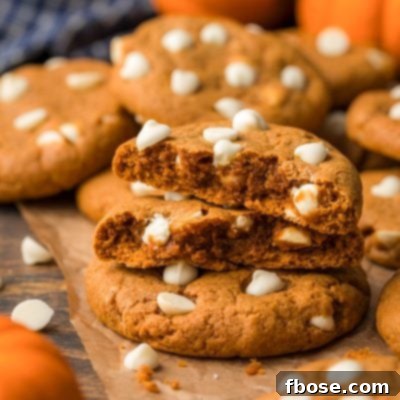
Step into a world of cozy autumn flavors with these irresistible **Pumpkin White Chocolate Chip Cookies**. Imagine your kitchen filled with the enchanting aroma of fall spices, perfectly blended with the comforting essence of pure pumpkin and the sweet, luxurious creaminess of white chocolate. These soft, chewy cookies are more than just a treat; they’re an experience, a delightful embrace of the season that promises to satisfy your deepest cravings. Get ready to bake a batch that will warm your heart and delight every palate!
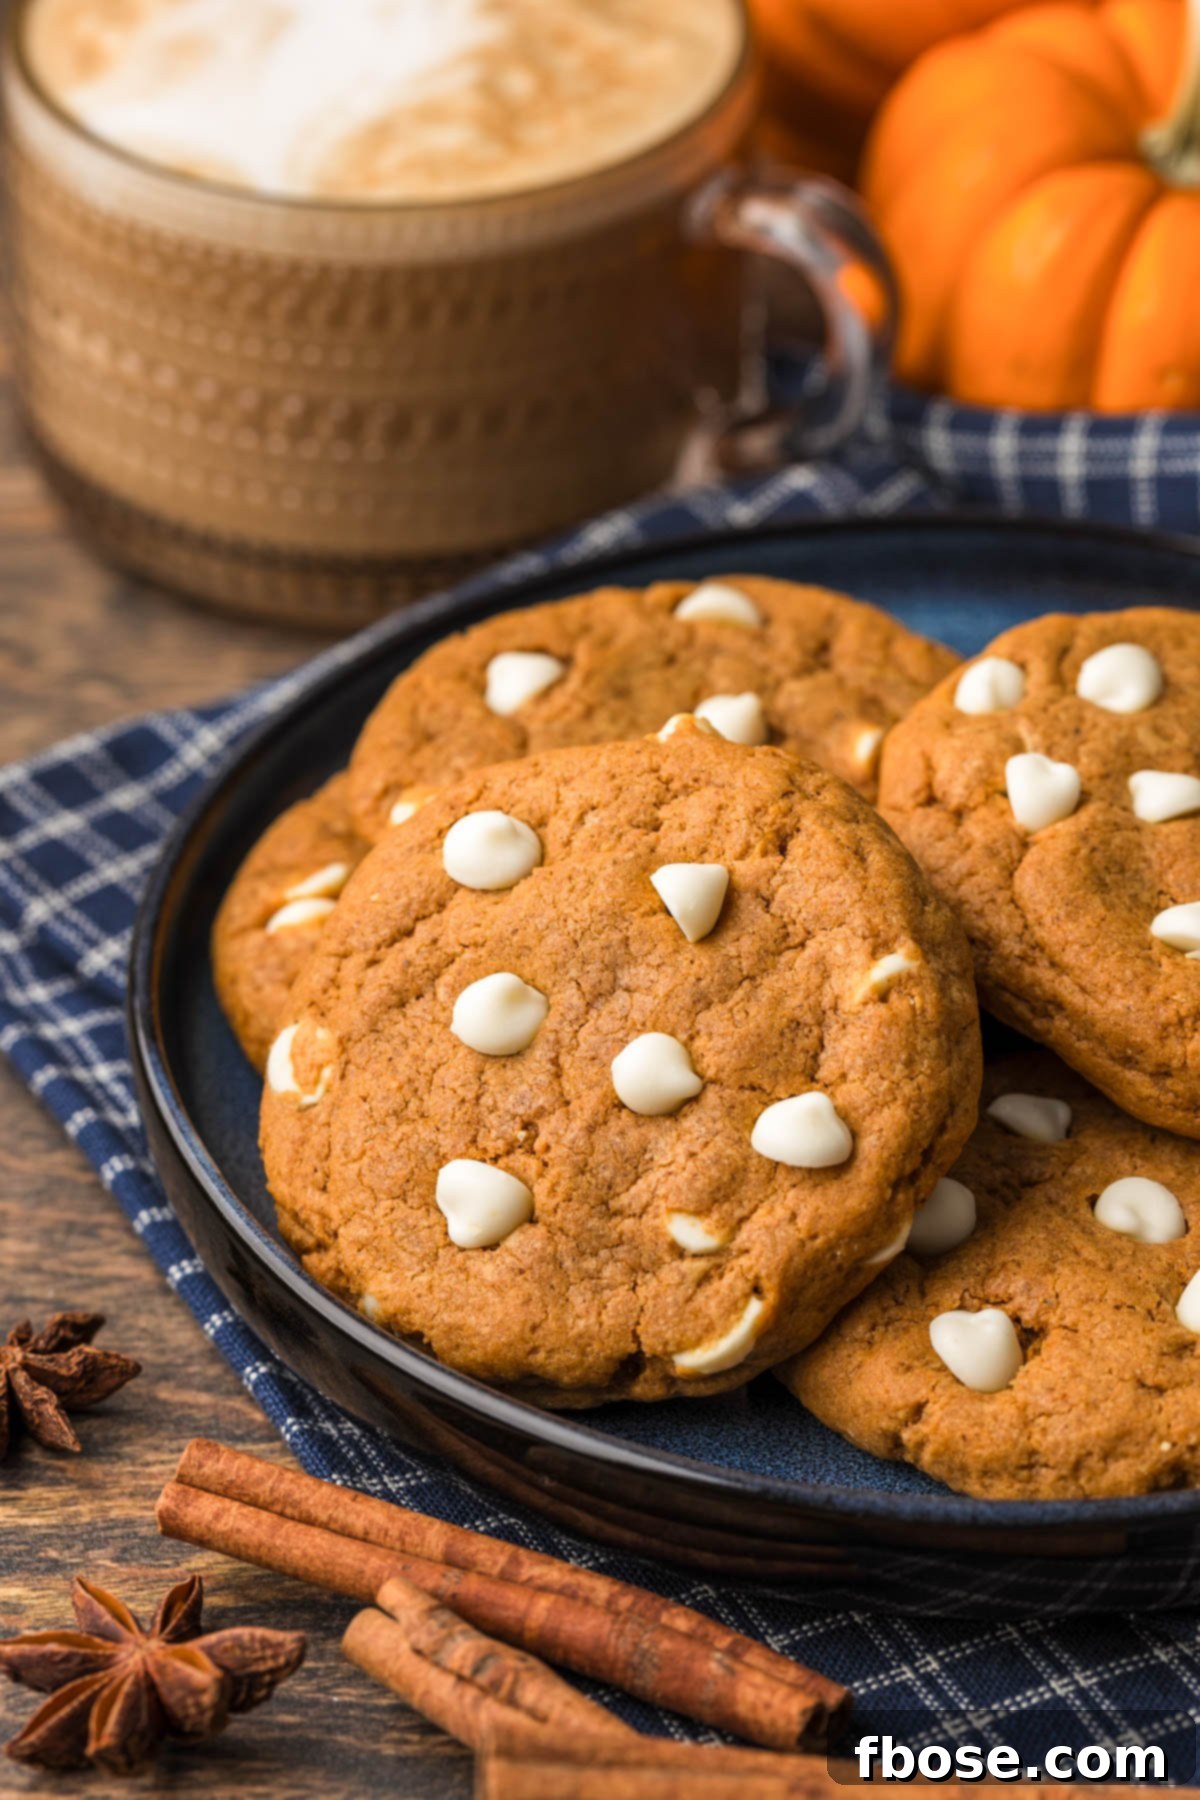
Pumpkin and White Chocolate: A Match Made in Autumn Heaven
While classic Pumpkin Chocolate Chip Cookies have their charm, prepare to elevate your fall baking game with these remarkable Pumpkin White Chocolate Chip Cookies! We’re making room for a delightful twist, swapping traditional milk chocolate chips for the smooth, melt-in-your-mouth richness of white chocolate. This simple change creates an exquisite contrast that perfectly complements the earthy warmth of pumpkin, making these cookies an unparalleled fall indulgence. If you’re looking for a dessert that stands out, these are it.
What truly sets these cookies apart is our commitment to maximizing that authentic pumpkin flavor. We’ve infused them with “triple pumpkin goodness” through a strategic combination of instant pumpkin pudding mix, 100% pure pumpkin puree, and a generous dash of aromatic pumpkin pie spice. This carefully crafted blend ensures every bite is bursting with the vibrant, comforting taste of autumn, delivering the profound pumpkin flavor you’ve eagerly awaited all year. This isn’t just a hint of pumpkin; it’s a celebration!
Whether you’re someone who adores the classic pumpkin and chocolate pairing or prefers a different flavor profile, these cookies are designed to impress. The sweet, creamy white chocolate chips offer a milder, more delicate counterpoint to the robust pumpkin, appealing to a wide range of tastes. They are truly a universal favorite for the autumn season.
Pin This Recipe For Later
Rebecca’s Recipe Review: A Deep Dive into These Delights
Taste: These cookies offer a beautifully balanced flavor profile. The rich, warm notes of pumpkin spice meld harmoniously with the creamy sweetness of white chocolate, creating a delightful contrast that dances on your palate. It’s a comforting yet exciting taste experience perfect for fall.
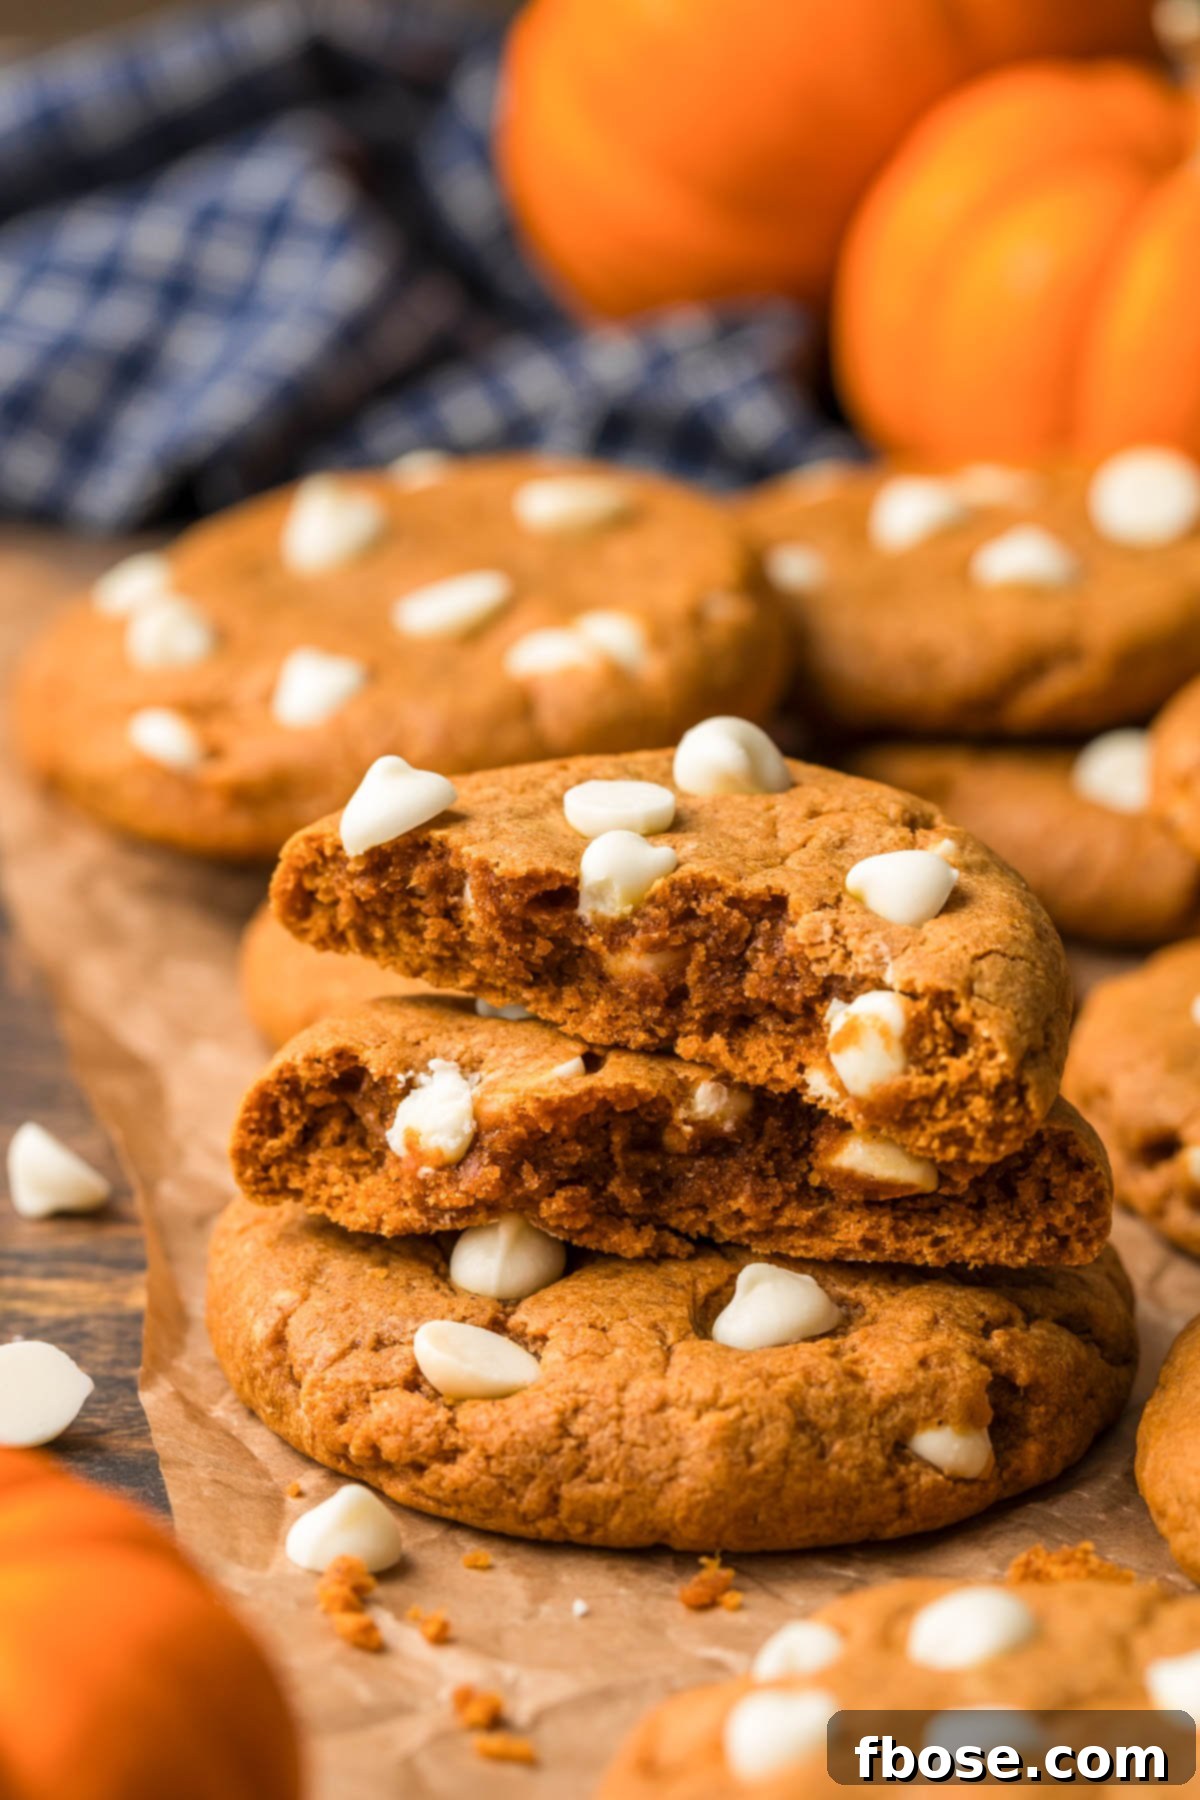
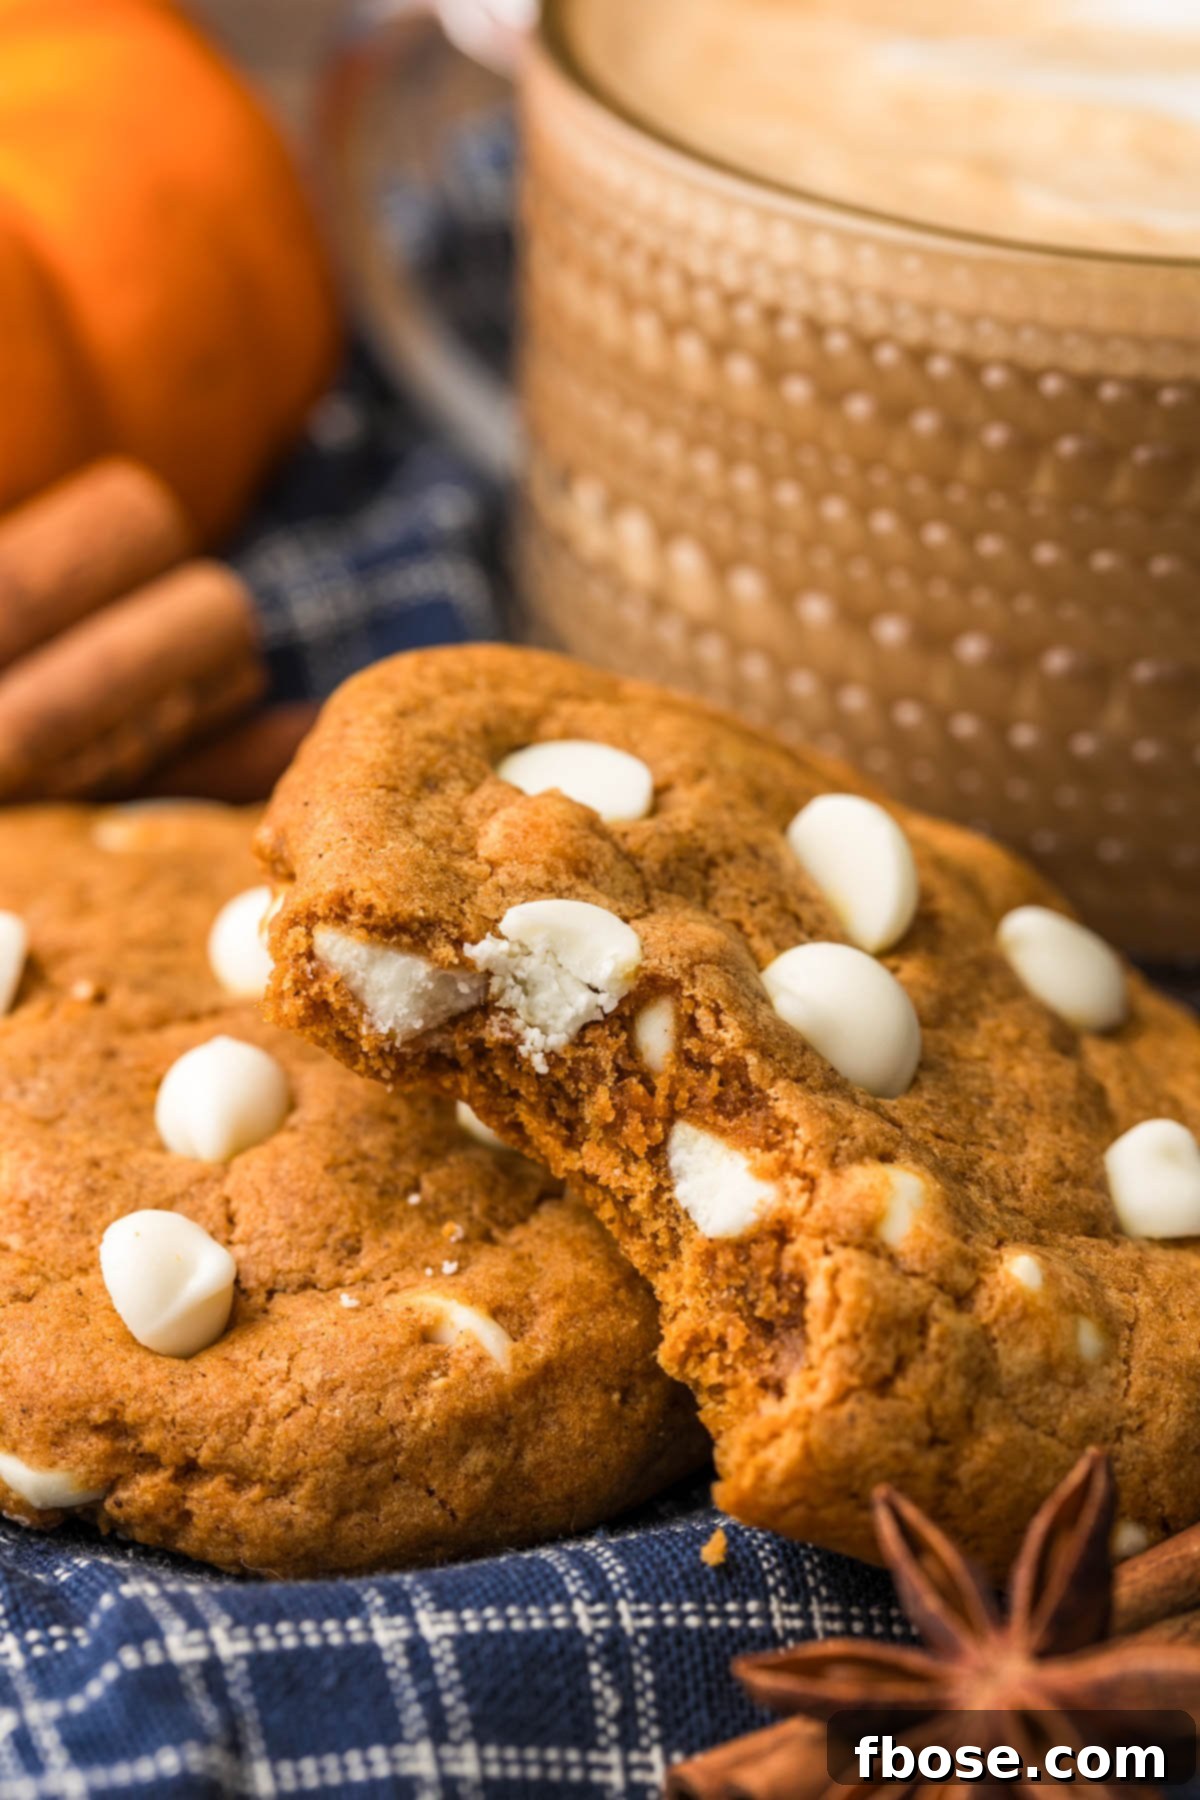
Texture: Prepare for pure bliss! These cookies boast an incredibly soft, tender interior with a wonderfully chewy bite around the edges. They are never dry or crumbly, maintaining their moisture and delightful chewiness even after cooling. Each cookie melts in your mouth, leaving you craving another.
Ease: 3/10 (Beginner-Friendly!) This recipe is surprisingly straightforward, making it an excellent choice for bakers of all skill levels. With clear instructions and common ingredients, you’ll find the process enjoyable and rewarding.
Pros: The pumpkin flavor truly shines in this recipe, thanks to our “triple pumpkin” approach. Using 100% pure pumpkin puree, aromatic pumpkin pie spice, and instant pumpkin pudding mix ensures an unparalleled depth of flavor that is both authentic and incredibly delicious. The inclusion of white chocolate chips adds a luxurious sweetness that perfectly complements the pumpkin without overpowering it.
Cons: A common challenge with any cookie dough is ensuring all ingredients are fully incorporated. Sometimes, especially with larger batches, dry ingredients like flour can settle at the bottom of the mixing bowl. If this happens, the last few cookies might turn out slightly drier or less consistent in texture. To prevent this, always take a moment before portioning the dough to manually mix the bottom of the bowl with a sturdy spatula or even your hands. This ensures a uniform dough consistency throughout, guaranteeing every single cookie is as perfect as the first.
Would I Make This Again? Absolutely, without a doubt! These cookies have earned a permanent spot in my fall baking rotation and are always a huge hit with family and friends.
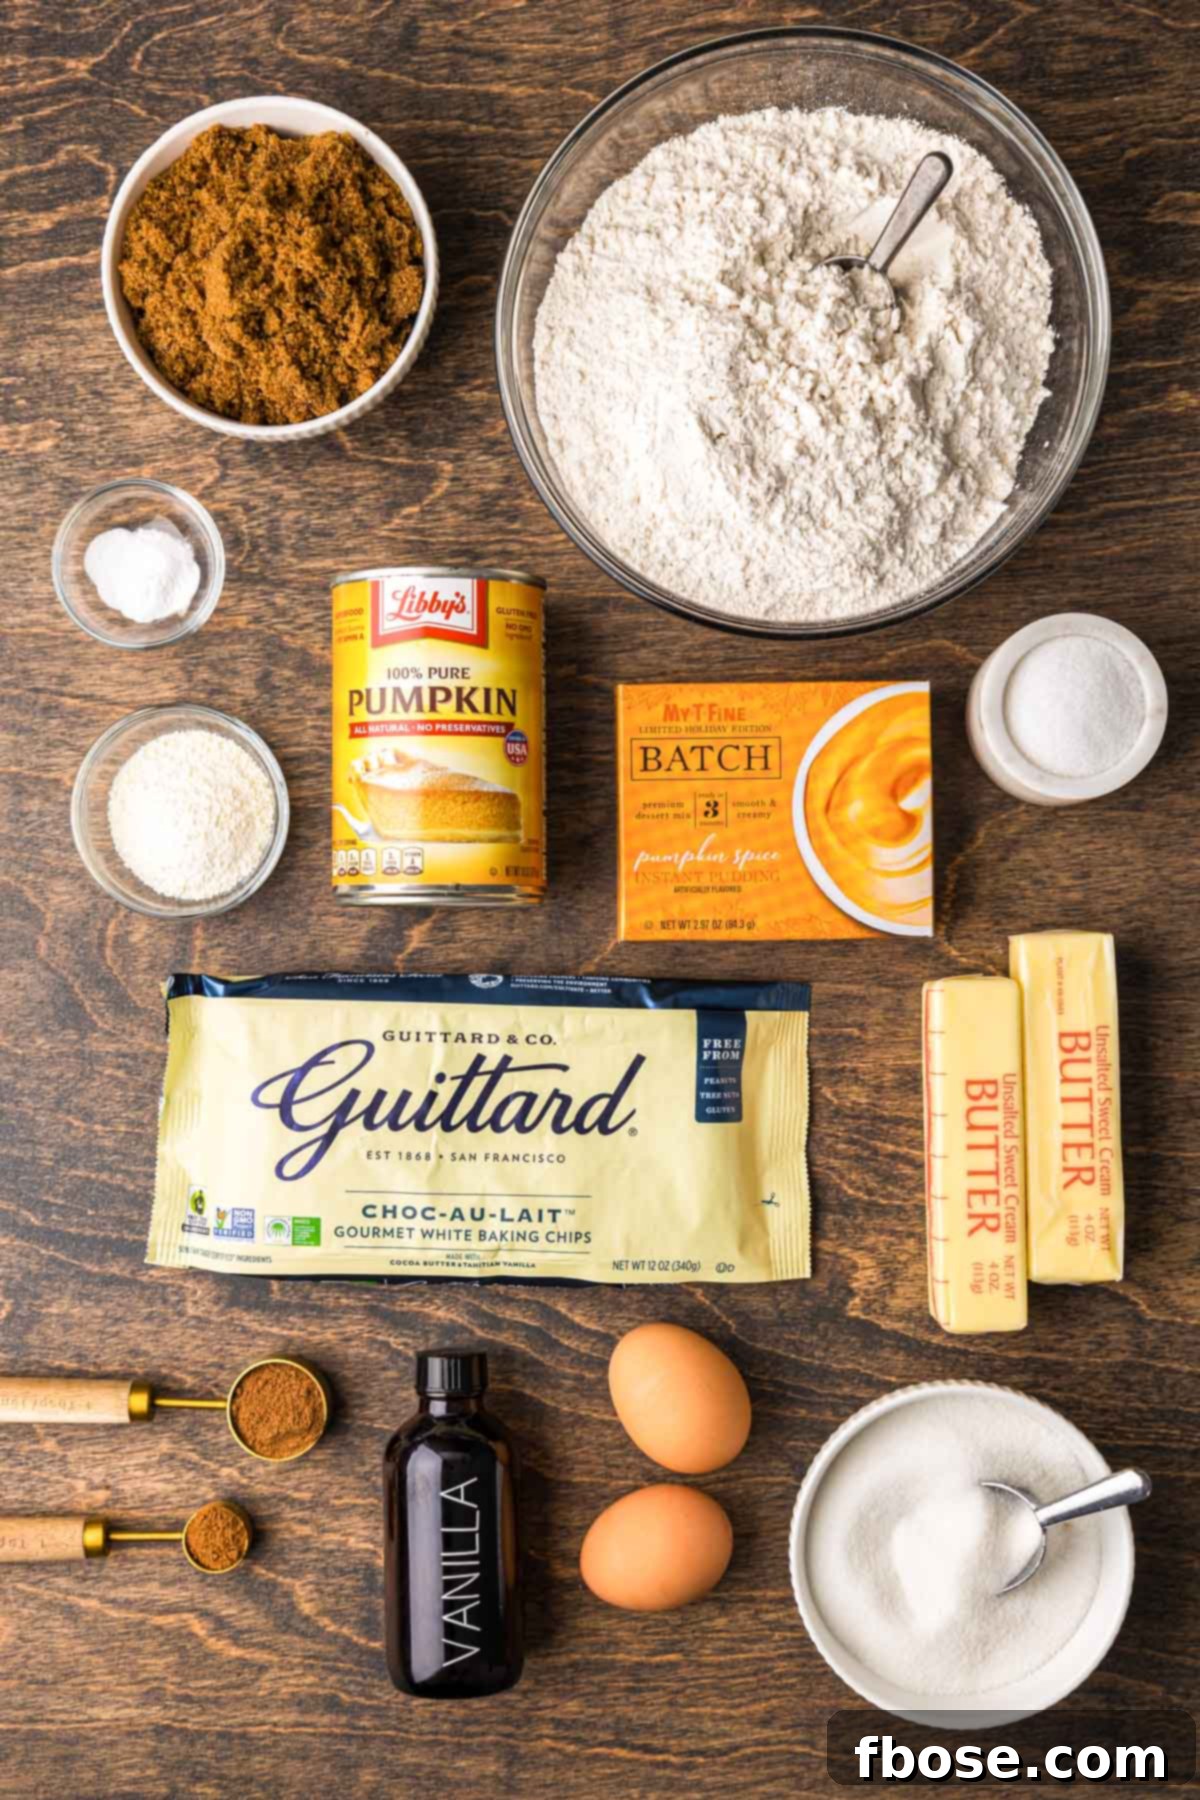
Essential Ingredients for Your Pumpkin White Chocolate Chip Cookies
Crafting these delectable fall cookies requires a thoughtful selection of pantry staples and special ingredients to achieve that signature “triple pumpkin” flavor and perfect texture. Here’s what you’ll need:
- Unsalted Butter: Essential for rich flavor and tender cookies. Ensure it’s softened to room temperature for optimal creaming with sugars.
- Dark Brown Sugar: Contributes to the cookies’ chewiness, moisture, and deep, molasses-like flavor that pairs beautifully with pumpkin.
- Granulated Sugar: Provides sweetness and helps achieve that delightful crisp exterior.
- Large Eggs: Act as a binder, adding richness and helping the cookies rise. Room temperature eggs emulsify better with the butter mixture.
- 100% Pure Pumpkin: The star ingredient! Make sure to use pure pumpkin puree, not pumpkin pie filling, which contains added sugar and spices.
- Vanilla Extract: Enhances all the other flavors, adding a touch of classic sweetness.
- All-Purpose Flour: The structural base of our cookies. Properly measured flour is key to avoiding dense or crumbly results.
- 1 Box of Instant Pumpkin Pudding Mix: A secret weapon for intensifying pumpkin flavor and contributing to an incredibly soft, chewy texture.
- Powdered Milk: While optional for structure, powdered milk significantly boosts the overall flavor depth, making the cookies taste richer and more nuanced.
- Pumpkin Pie Spice: The quintessential fall spice blend that brings warmth and classic autumn aroma.
- Ground Cinnamon: A touch more cinnamon enhances the spice profile, complementing the pumpkin beautifully.
- Salt: Balances the sweetness and amplifies the flavors of all the ingredients.
- Baking Soda: The leavening agent that helps the cookies rise and spread, contributing to their soft texture.
- Guittard White Chocolate Chips: High-quality white chocolate chips are crucial here. Their creamy, sweet profile perfectly contrasts the spiced pumpkin.
This carefully curated blend of ingredients ensures perfectly flavored pumpkin cookies that are rich in autumn taste without being overwhelmingly spiced. Each component plays a vital role in creating these soft, chewy, and utterly delightful treats.
The Secret to Perfect Texture: Drying Canned Pumpkin
One of the most critical steps to achieving soft, chewy pumpkin cookies, rather than dense or cakey ones, is effectively removing excess moisture from canned pumpkin puree. Canned pumpkin contains a significant amount of water, which, if not reduced, can throw off the delicate balance of your cookie dough, leading to undesirable results. Drying the pumpkin concentrates its flavor and prevents the cookies from becoming soggy or spreading too much during baking.
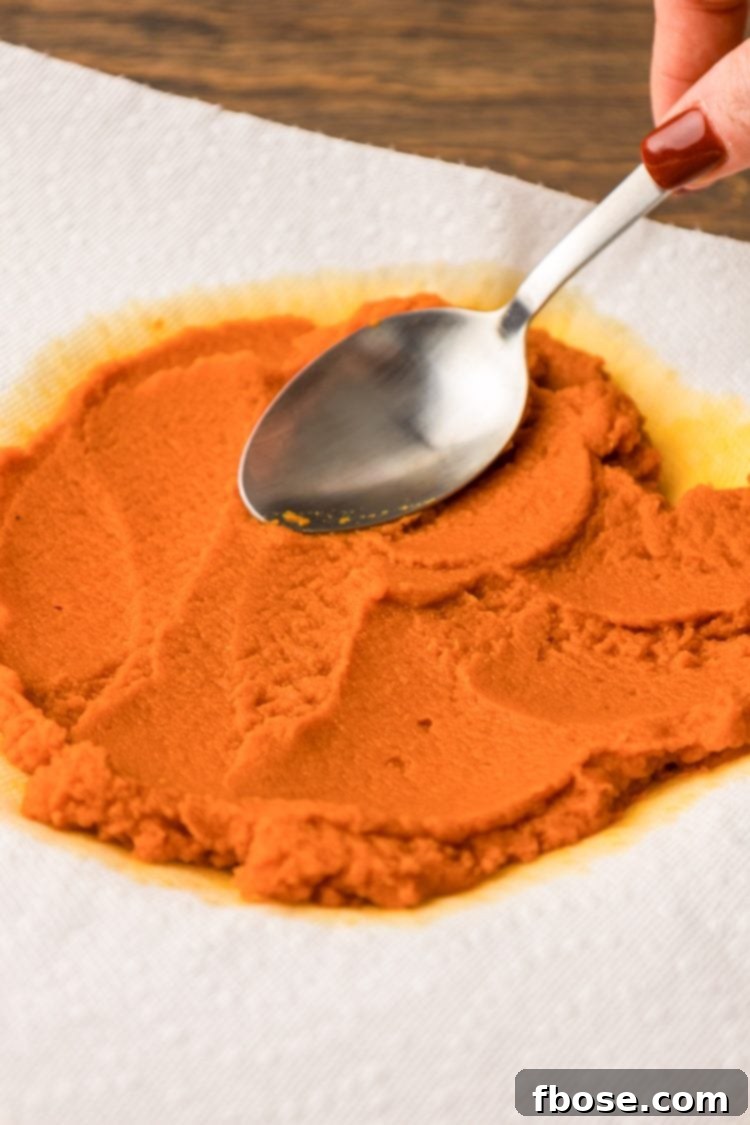
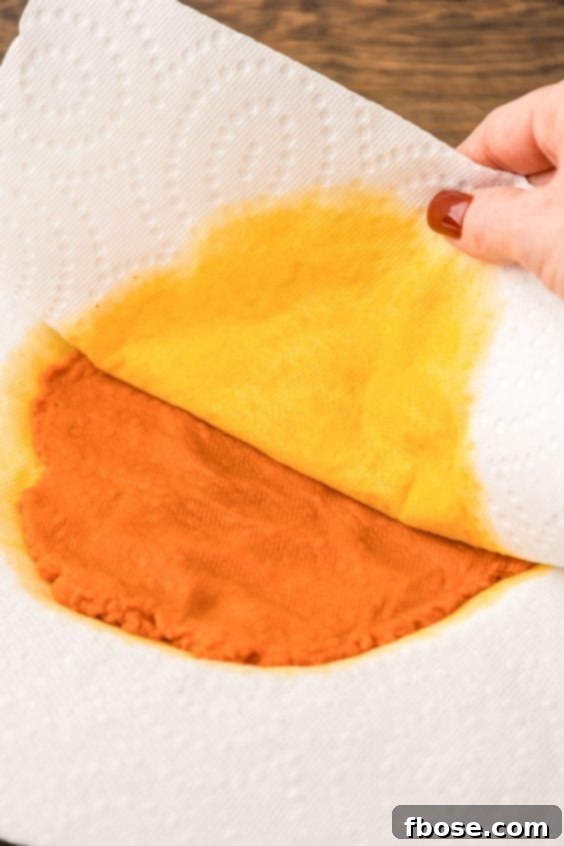
The best method I’ve found for drying pumpkin puree is both simple and effective. Begin by measuring out the required amount of 100% pure pumpkin. Spread this measured pumpkin thinly over several layers of strong paper towels – I typically use four select-a-size sheets or two regular sheets folded for the base. Once the pumpkin is spread, gently press down on the surface with another stack of fresh paper towels. You’ll notice the paper towels absorbing moisture almost immediately.
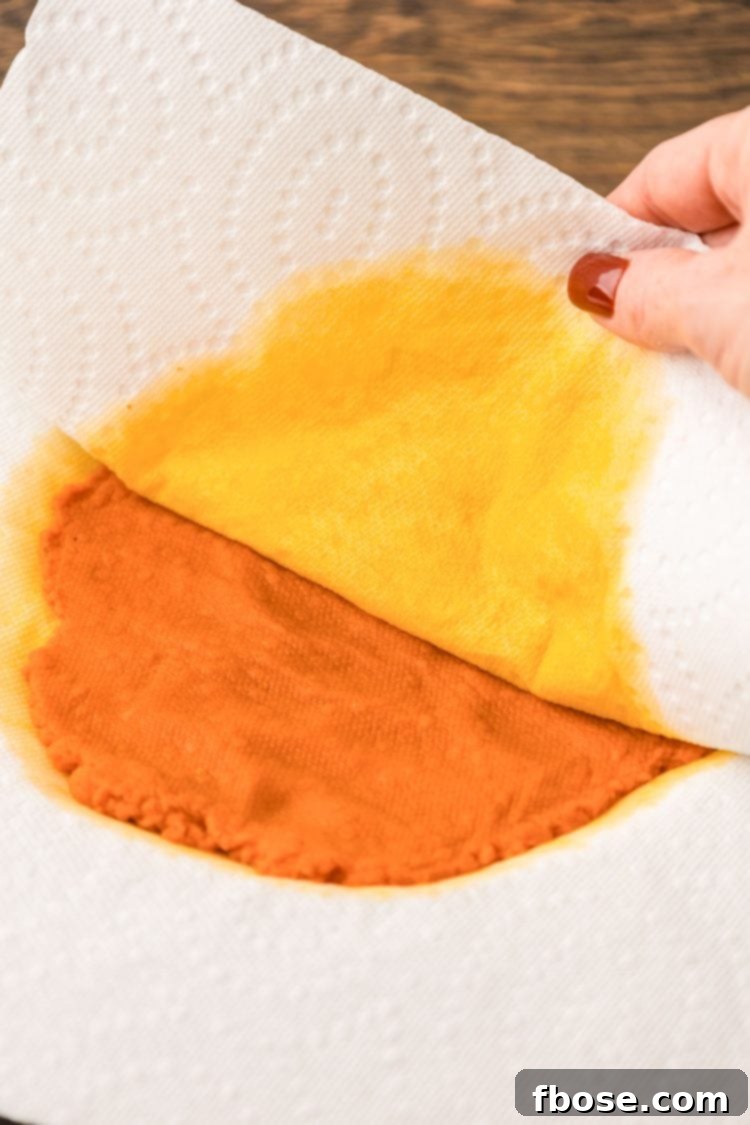
For even more thorough drying, carefully top the pumpkin with new paper towels, then invert the entire pumpkin-and-towel stack so that the original top towels are now on the bottom. Discard the now-soggy original bottom towels and press dry paper towels onto the newly exposed surface of the pumpkin once again. Repeat this pressing process until the paper towels no longer absorb significant moisture. This flipping and pressing technique ensures maximum moisture removal from all sides of the pumpkin puree.
After this drying process, you should aim to have approximately 100 grams of visibly drier, more concentrated pumpkin puree ready to be incorporated into your cookie dough. This small but vital step makes a tremendous difference in the final texture and flavor of your Pumpkin White Chocolate Chip Cookies, ensuring they are perfectly soft, chewy, and packed with pumpkin goodness.
How To Make the Best Pumpkin White Chocolate Chip Cookies
- Prepare Your Baking Environment: Begin by preheating your oven to 350°F (175°C). Line two large baking sheets with parchment paper or silicone baking mats. This crucial step prevents sticking and ensures even baking. Set them aside as you prepare the dough.
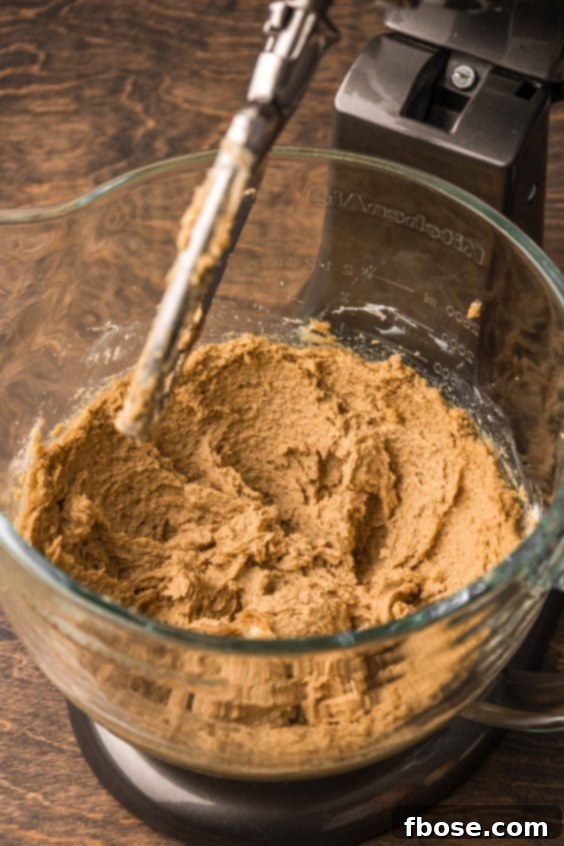
- Cream Butter and Sugars: In a large mixing bowl, preferably with a stand mixer fitted with a paddle attachment (though a hand mixer works too!), combine the softened unsalted butter, dark brown sugar, and granulated sugar. Cream these ingredients together on medium speed for at least 2 minutes, or until the mixture is light, fluffy, and pale in color. Remember to pause halfway through to scrape down the sides of the bowl with a spatula, ensuring everything is thoroughly incorporated. This creaming process adds air to the dough, contributing to the cookies’ light and tender texture.
- Dry the Pumpkin Puree: As detailed in the previous section, measure out the 100% pure pumpkin and spread it onto multiple layers of paper towels. Press firmly with additional paper towels, then flip and press again to remove as much excess moisture as possible. Aim for about 100g of dried pumpkin after this process. This step is vital for the cookies’ texture.
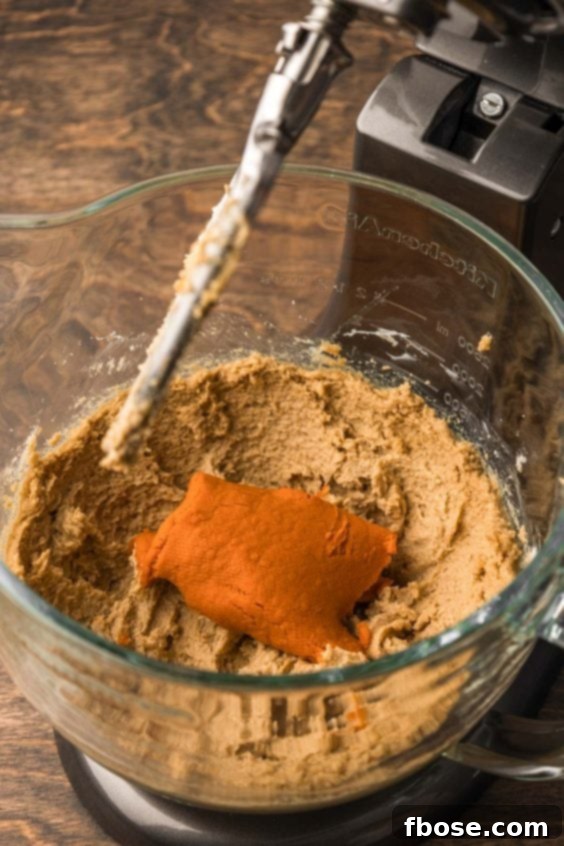
- Incorporate Pumpkin: Carefully transfer the dried pumpkin puree into the creamed butter and sugar mixture. Mix on low speed until the pumpkin is fully incorporated and the mixture is uniformly orange. Scrape down the sides of the bowl to ensure no streaks remain.
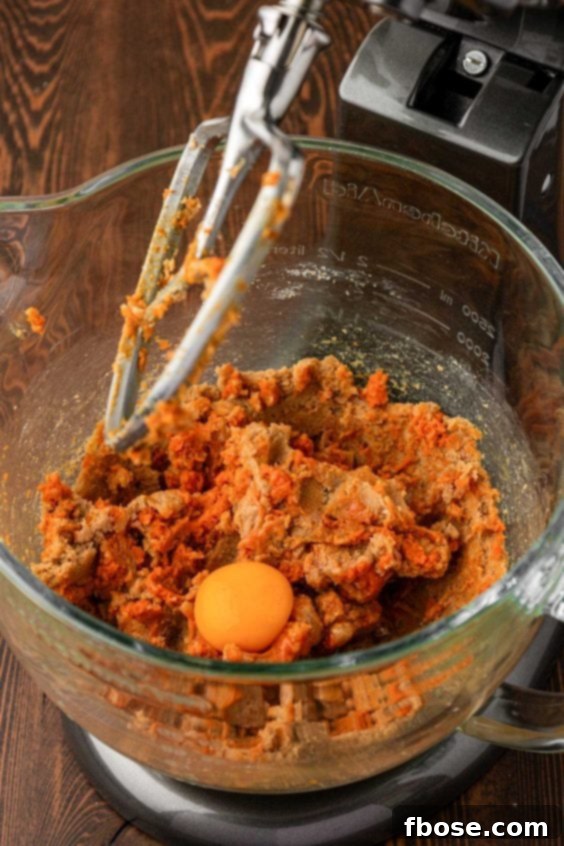
- Add Eggs and Vanilla: Introduce the large eggs, one at a time, mixing briefly after each addition until the yolk just disappears into the dough. Avoid overmixing here. Once the eggs are incorporated, pour in the vanilla extract and mix just until combined.
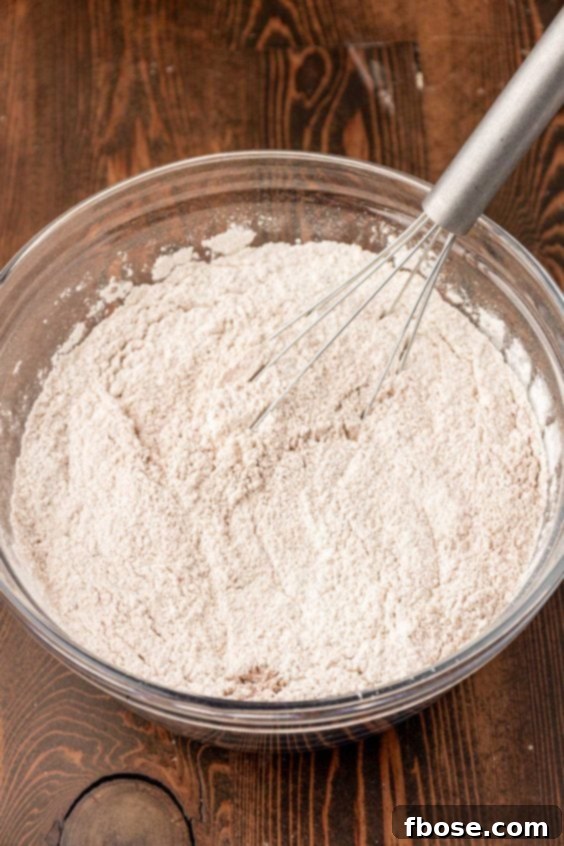
- Combine Dry Ingredients: In a separate, medium-sized bowl, whisk together the all-purpose flour, instant pumpkin pudding mix, powdered milk, pumpkin pie spice, salt, ground cinnamon, and baking soda. Whisk thoroughly to ensure all leavening agents and spices are evenly distributed.
- Gradually Add Dry to Wet: With your mixer set to low speed, slowly add the dry ingredient mixture to the wet ingredients, about one cup at a time. Mix until just combined. Be careful not to overmix the dough, as this can lead to tough cookies. Once all dry ingredients are added, increase the mixer speed to medium briefly, then turn it off. Use a sturdy rubber spatula to hand-mix any remaining flour or dry bits from the bottom and sides of the bowl into the dough. This ensures consistency without overworking the gluten.
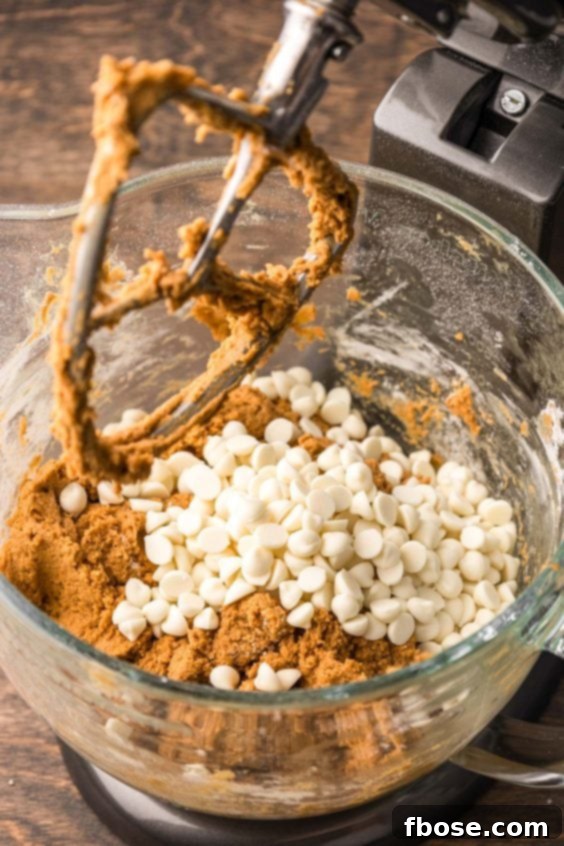
- Fold in White Chocolate Chips: Add the majority of the white chocolate chips to the dough, reserving about ⅓ cup for later. Mix on low speed, or gently fold them in by hand with a spatula, until they are just evenly distributed. Again, be mindful not to overmix.
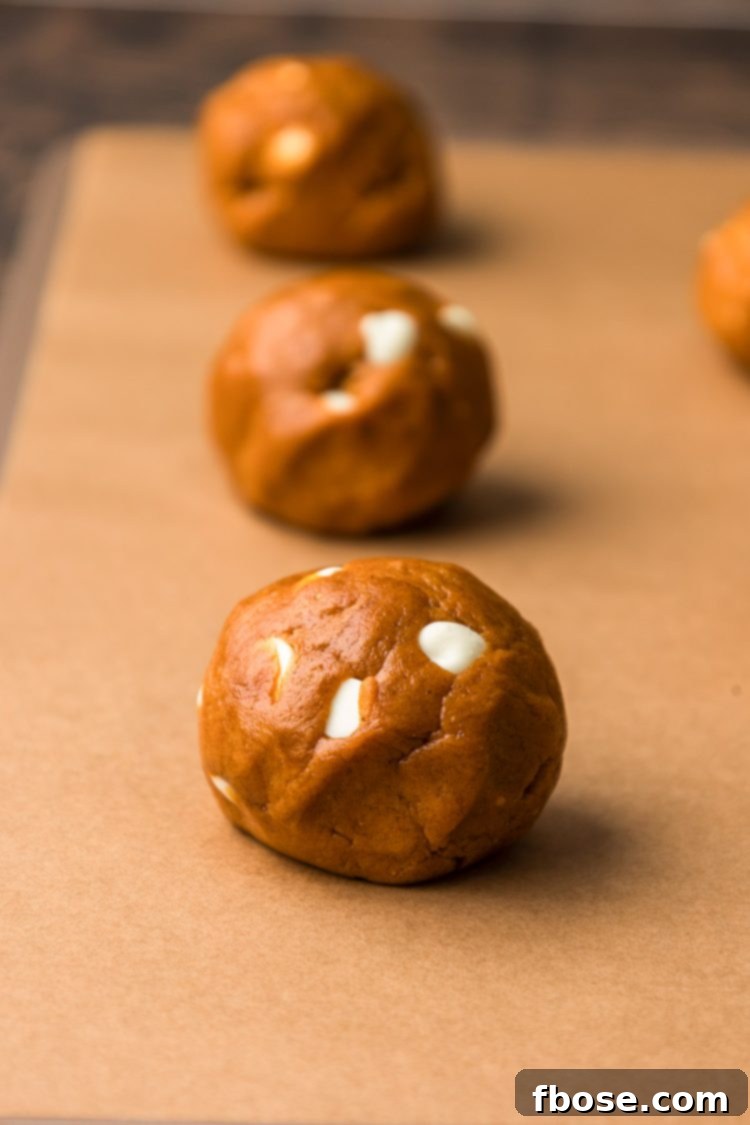
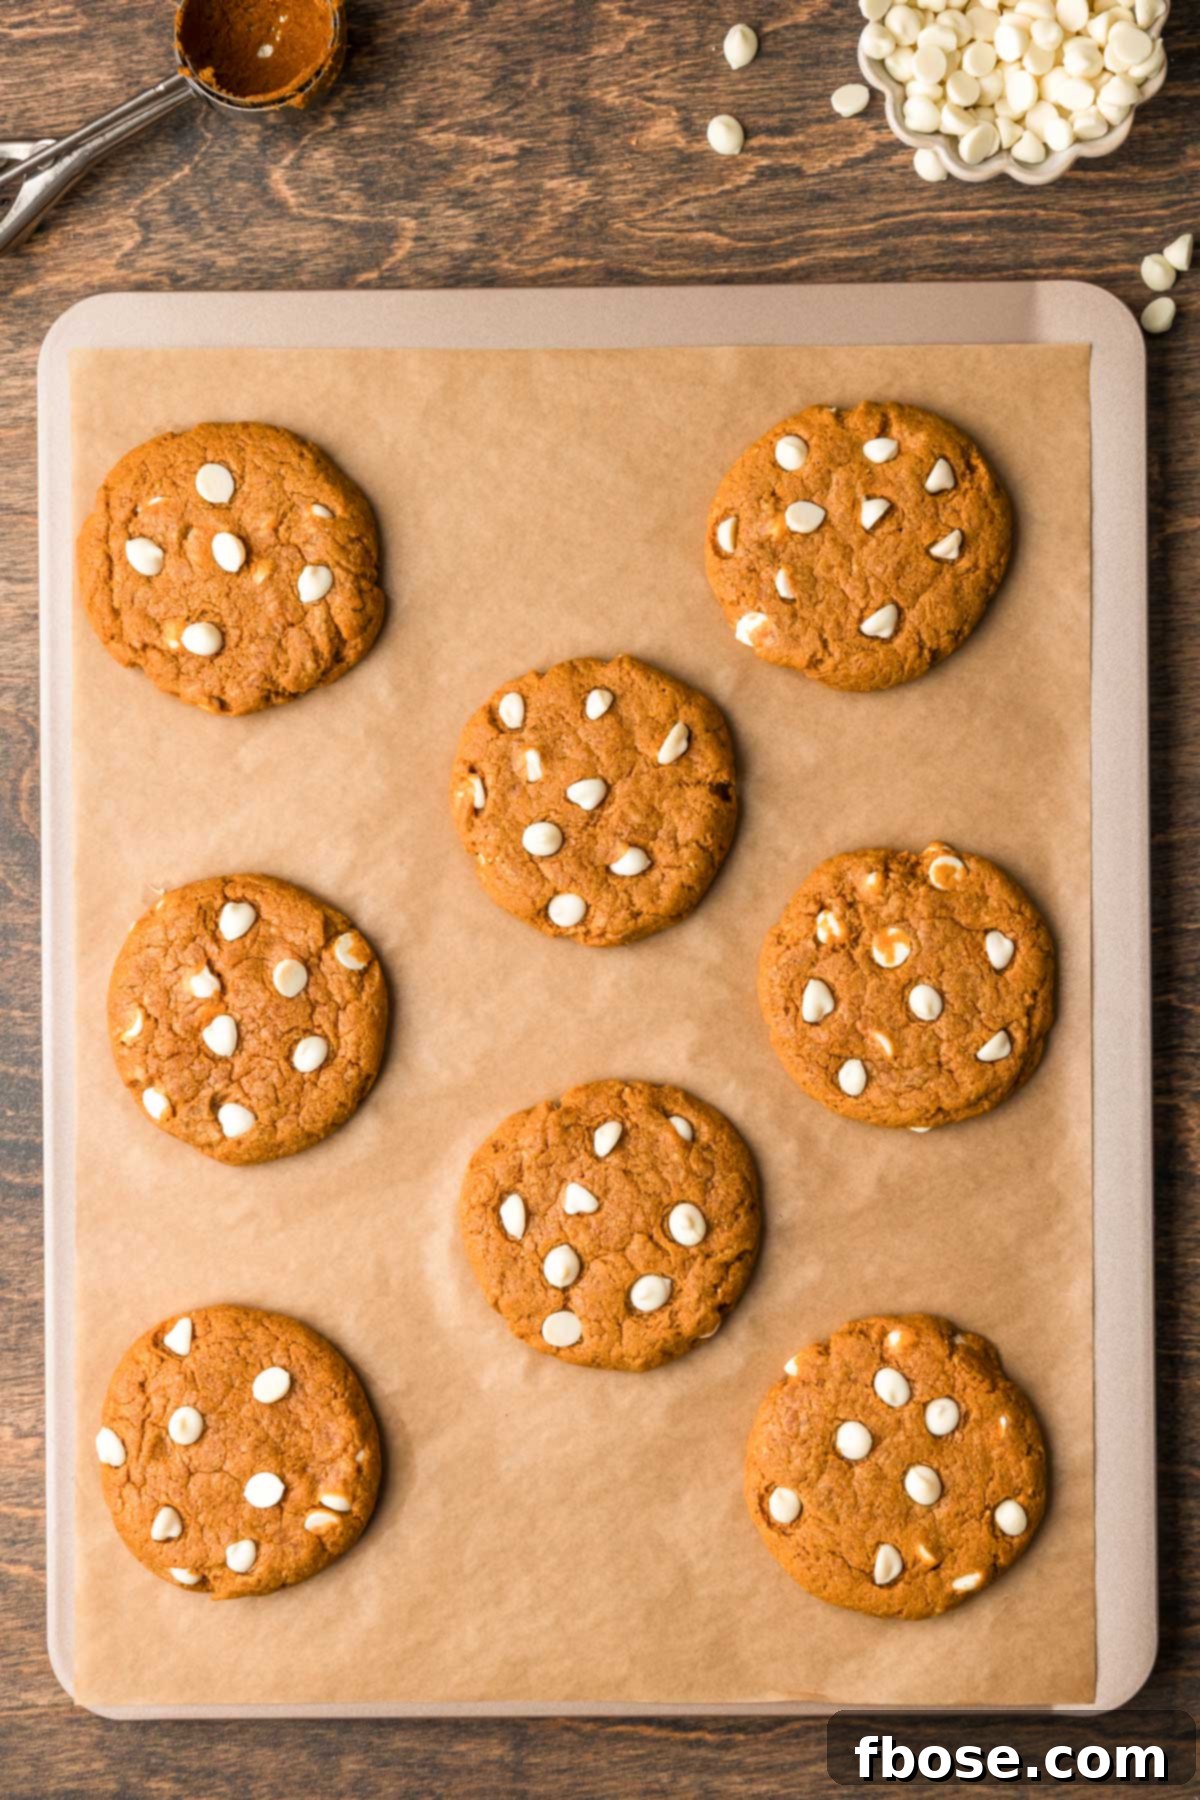
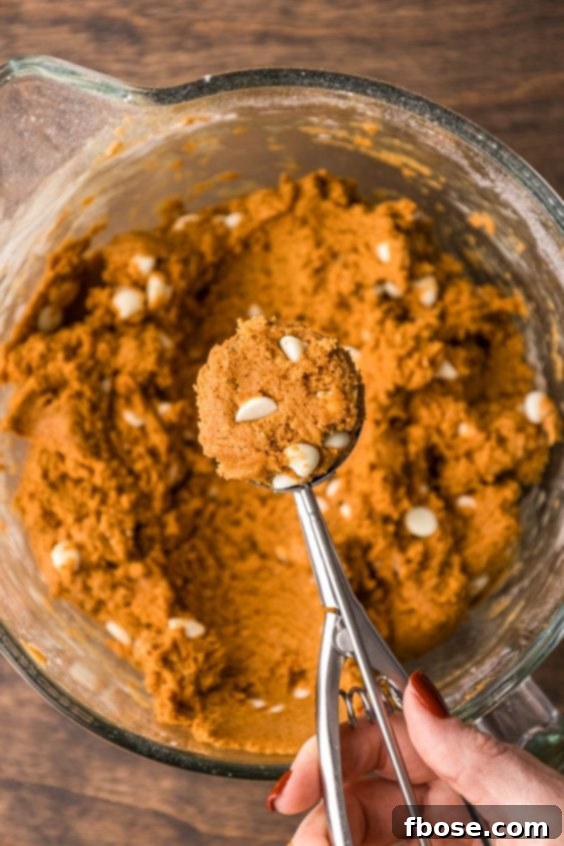
- Portion and Shape the Dough: Use a large #16 cookie scoop (approximately 2.5 ounces) to portion out the cookie dough. Gently roll each portion into a smooth ball between your palms. Place the dough balls onto the prepared baking sheets, leaving about 2 to 3 inches of space between each cookie to allow for spreading. Typically, 8 cookies fit comfortably on a 12×17-inch baking sheet, arranged in offset pairs.
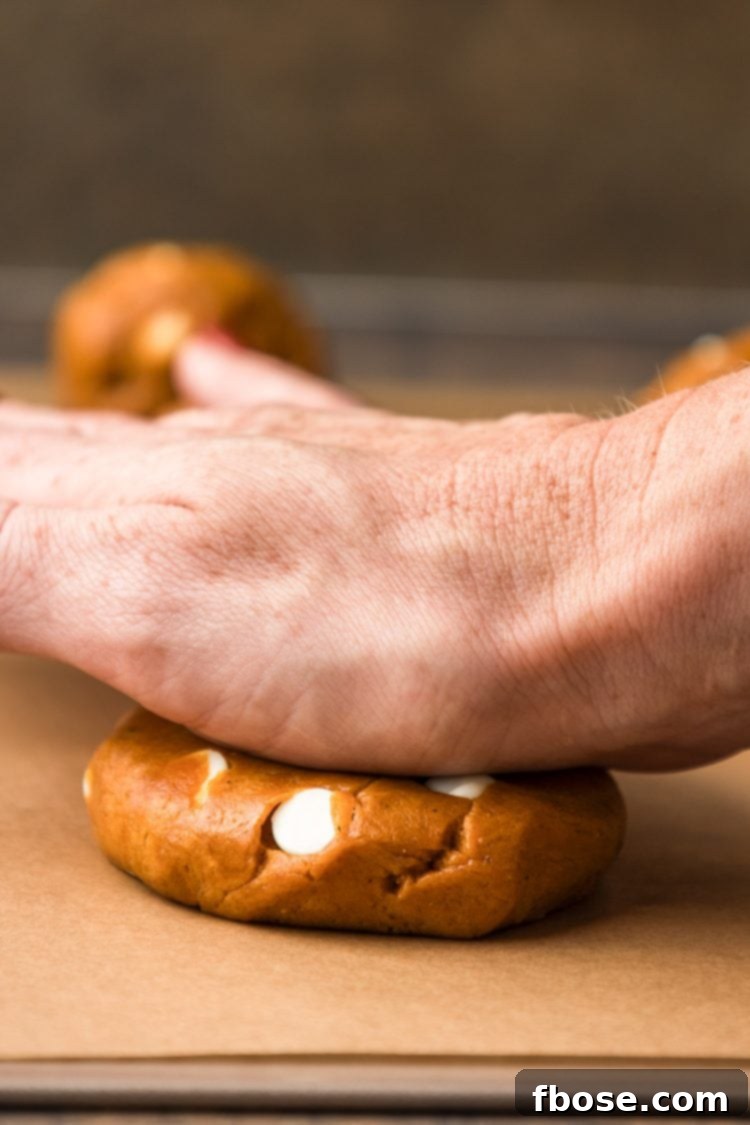
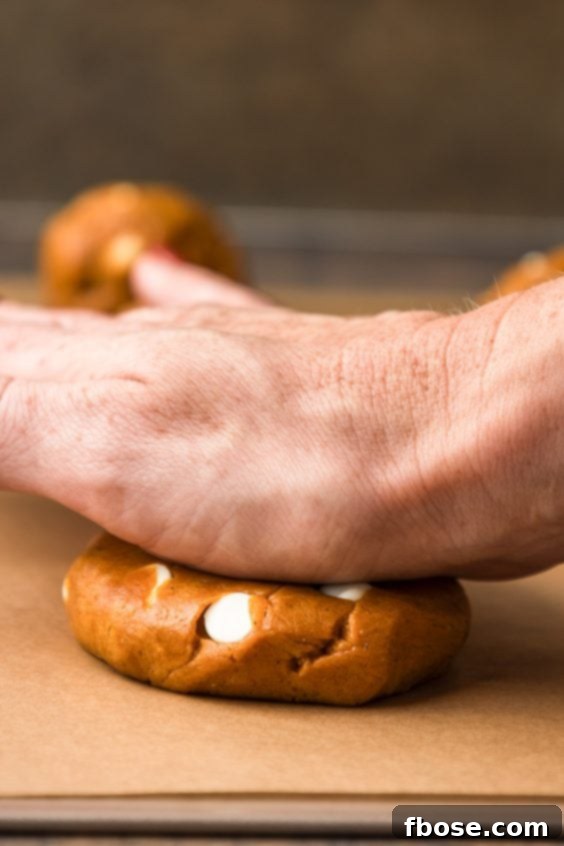
- Flatten Slightly: With the palm of your hand, gently press down on each cookie dough ball until it is approximately ¾-inch thick. This helps them bake more evenly and achieve a desirable shape.
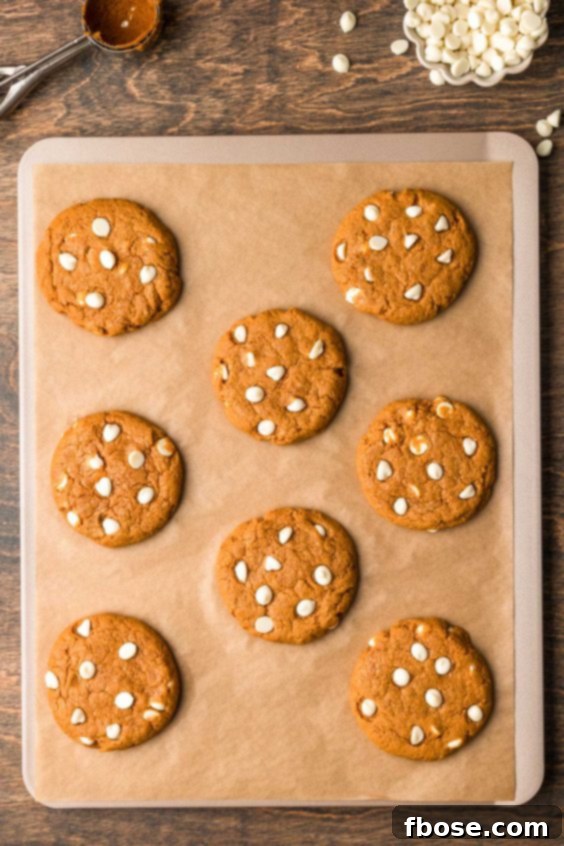
- Bake and Adorn: Bake the cookies one sheet at a time in your preheated oven. After 5 minutes of baking, carefully remove the cookie sheet from the oven. Take the reserved white chocolate chips and gently press them onto the tops of the partially baked cookies. This optional but highly recommended step prevents the chips from browning too much during baking and ensures beautiful, distinct white chocolate pieces on top of your finished cookies. Return the sheet to the oven and continue baking for another 7 minutes, or until the edges are just beginning to turn a light golden brown. The centers should still look slightly soft.
- Cool and Enjoy: Once baked, remove the cookies from the oven and let them cool on the baking sheet for about 5 minutes. This allows them to set and firm up before moving. Then, carefully transfer them to a wire rack to cool completely. Allowing them to cool fully helps them achieve their ideal chewy texture.
Achieving Perfectly Round Cookies: A Simple Trick!
Ever wonder how bakers get those perfectly round cookies that look like they came straight out of a professional bakery? It’s a simple trick that yields impressive results, and it’s perfect for these Pumpkin White Chocolate Chip Cookies. As soon as your cookies come out of the oven, while they are still warm and pliable, grab a biscuit cutter that is slightly larger than your cookies.
Place the biscuit cutter around a warm cookie, ensuring the cookie is completely enclosed within the cutter. Gently swirl the biscuit cutter around the cookie, using its inner edge to push and shape the warm dough into a perfect circle. The warmth of the cookie allows it to be reshaped easily without crumbling. Repeat this step for all the cookies you wish to perfect. This technique not only makes your cookies visually appealing but also ensures a consistent size and shape across your batch. Try it, and you’ll be amazed at the difference!
Rebecca’s Expert Baking Tips for Success
- Canned Pumpkin Pointers: When you’re at the grocery store, pay close attention to the label! Always choose 100% pure pumpkin puree, not pumpkin pie filling. These two products are often placed side-by-side but are vastly different. Pure pumpkin is simply cooked and pureed pumpkin, whereas pumpkin pie filling is pre-sweetened and spiced, which would drastically alter the flavor balance of this recipe.
- Accuracy in Measurement is Key: Baking is a science, and precise measurements are paramount for perfect results. Too much or too little of an ingredient can significantly impact the texture and flavor, potentially leading to hard, dry, or overly cakey cookies. For the most accurate results, I highly recommend using a kitchen scale for weighted measurements (grams are provided in the recipe card). If you prefer using measuring cups, especially for flour, ensure you use the “spoon and level” method: spoon flour into the measuring cup until overflowing, then level it off with a straight edge, rather than packing it down. This prevents adding too much flour.
- The Art of Creaming Butter and Sugars: Do not rush the creaming process! This initial step is vital for incorporating air into your butter and sugar mixture, which creates the light and tender structure of your final cookies. Creaming for the full two minutes (or until light and fluffy) might seem long, but it’s worth every second. It’s the foundation for a soft, airy cookie.
- Incorporating Without Overmixing: After adding the dry ingredients, it’s common for some flour to settle at the bottom of the mixing bowl, especially with a stand mixer. While it might be tempting to just keep the electric mixer running, this can easily overwork the dough, developing too much gluten and resulting in tough cookies. Instead, once the dough is mostly combined, switch to a sturdy rubber spatula or even your hands. Use it to gently fold and scrape the bottom of the bowl, ensuring all dry bits are fully incorporated into the dough without excessive mixing. This technique keeps your cookies delightfully tender.
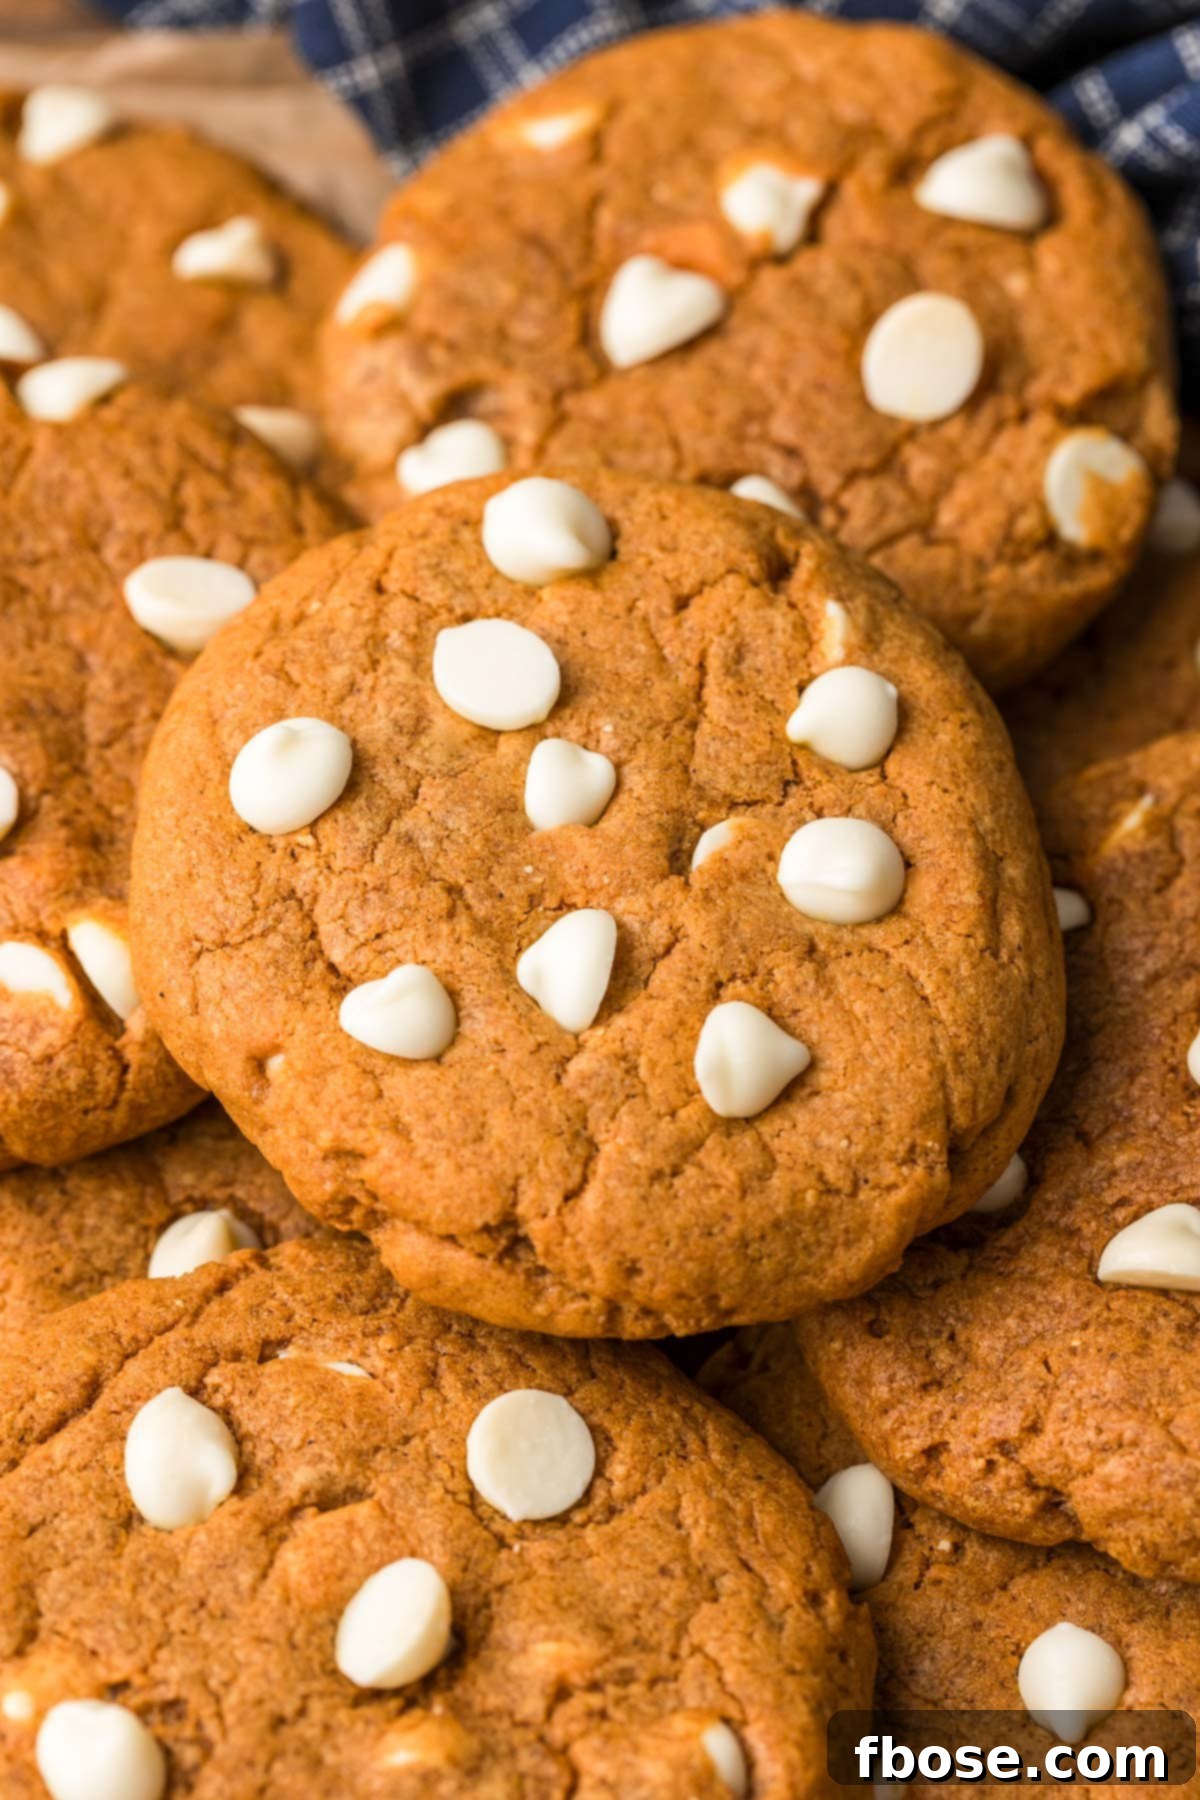
- The Extra White Chocolate Chip Touch: The step of removing the baking sheet partway through baking to press additional white chocolate chips onto the tops of the cookies is optional but highly recommended for a beautiful presentation. This prevents the chips from over-browning in the oven and ensures they melt beautifully into the cookie dough, creating those picture-perfect white chocolate pools on the surface. If you prefer, you can add all the chips at the beginning or press them into the cookies immediately after they come out of the oven, though the latter might result in less uniform melting.
- Utilize Two Baking Sheets: For optimal baking results and efficiency, it’s best to use two separate baking sheets when preparing this recipe. This allows one batch to cool on its pan while you prepare and bake the next. Critically, avoid dropping fresh cookie dough onto a hot baking sheet. A hot sheet can cause the butter to melt too quickly before the cookies have a chance to set, leading to excessive spreading and an altered texture. Always allow your baking sheets to cool completely between batches, or use a fresh, cool sheet.
Creative Substitutions and Exciting Variations
This Pumpkin White Chocolate Chip Cookie recipe is incredibly versatile, allowing for several substitutions and variations to suit your preferences or what you have on hand. Don’t be afraid to get creative!
- Unsalted Butter Alternatives: If you only have salted butter, you can absolutely use it. Simply adjust the salt content in the recipe: reduce the added salt from 1 teaspoon to ½ teaspoon. This prevents your cookies from becoming too salty.
- Brown Sugar Choices: While dark brown sugar contributes a deeper molasses flavor and extra chewiness, light brown sugar can be used as a substitute if that’s all you have. Keep in mind that using light brown sugar might result in cookies with a slightly milder flavor and a marginally less chewy texture.
- Pudding Mix Flavor Swaps: Can’t find instant pumpkin pudding mix? No problem! Instant vanilla pudding mix or cheesecake pudding mix are excellent alternatives. Vanilla will provide a classic sweet backdrop, while cheesecake will add a subtle tangy richness that complements the pumpkin wonderfully, offering a delightful flavor variation.
- Powdered Milk’s Role: Powdered milk is included in this recipe primarily for its flavor-enhancing qualities. It provides a richer, more nuanced depth to the cookies. While it doesn’t significantly impact the texture or structure, you can omit it if necessary without compromising the cookie’s integrity. However, for the best possible flavor, I highly recommend including it.
- White Chocolate Chip Explorations: I prefer high-quality white chocolate chips like Guittard for their superior melt and flavor, but feel free to use your favorite brand. You can also experiment with different forms of white chocolate: white chocolate chunks for larger pockets of melty sweetness, or a finely chopped white chocolate bar for a more even distribution. For those who prefer classic chocolate, feel free to substitute the white chips with milk chocolate, semi-sweet, or even dark chocolate chips for a bolder contrast.
- Cinnamon Sugar Coating: For an extra layer of sweetness and a delightful, slightly crunchy exterior, try rolling your cookie dough balls in a cinnamon sugar mixture before baking. Combine 2 tablespoons of ground cinnamon with 1 cup of granulated sugar. After portioning and rolling the dough into balls, roll each ball thoroughly in this mixture before placing it on the baking sheet and pressing it down. This adds a beautiful sparkle and an enhanced spiced flavor.
Storing Your Pumpkin White Chocolate Chip Cookies for Freshness
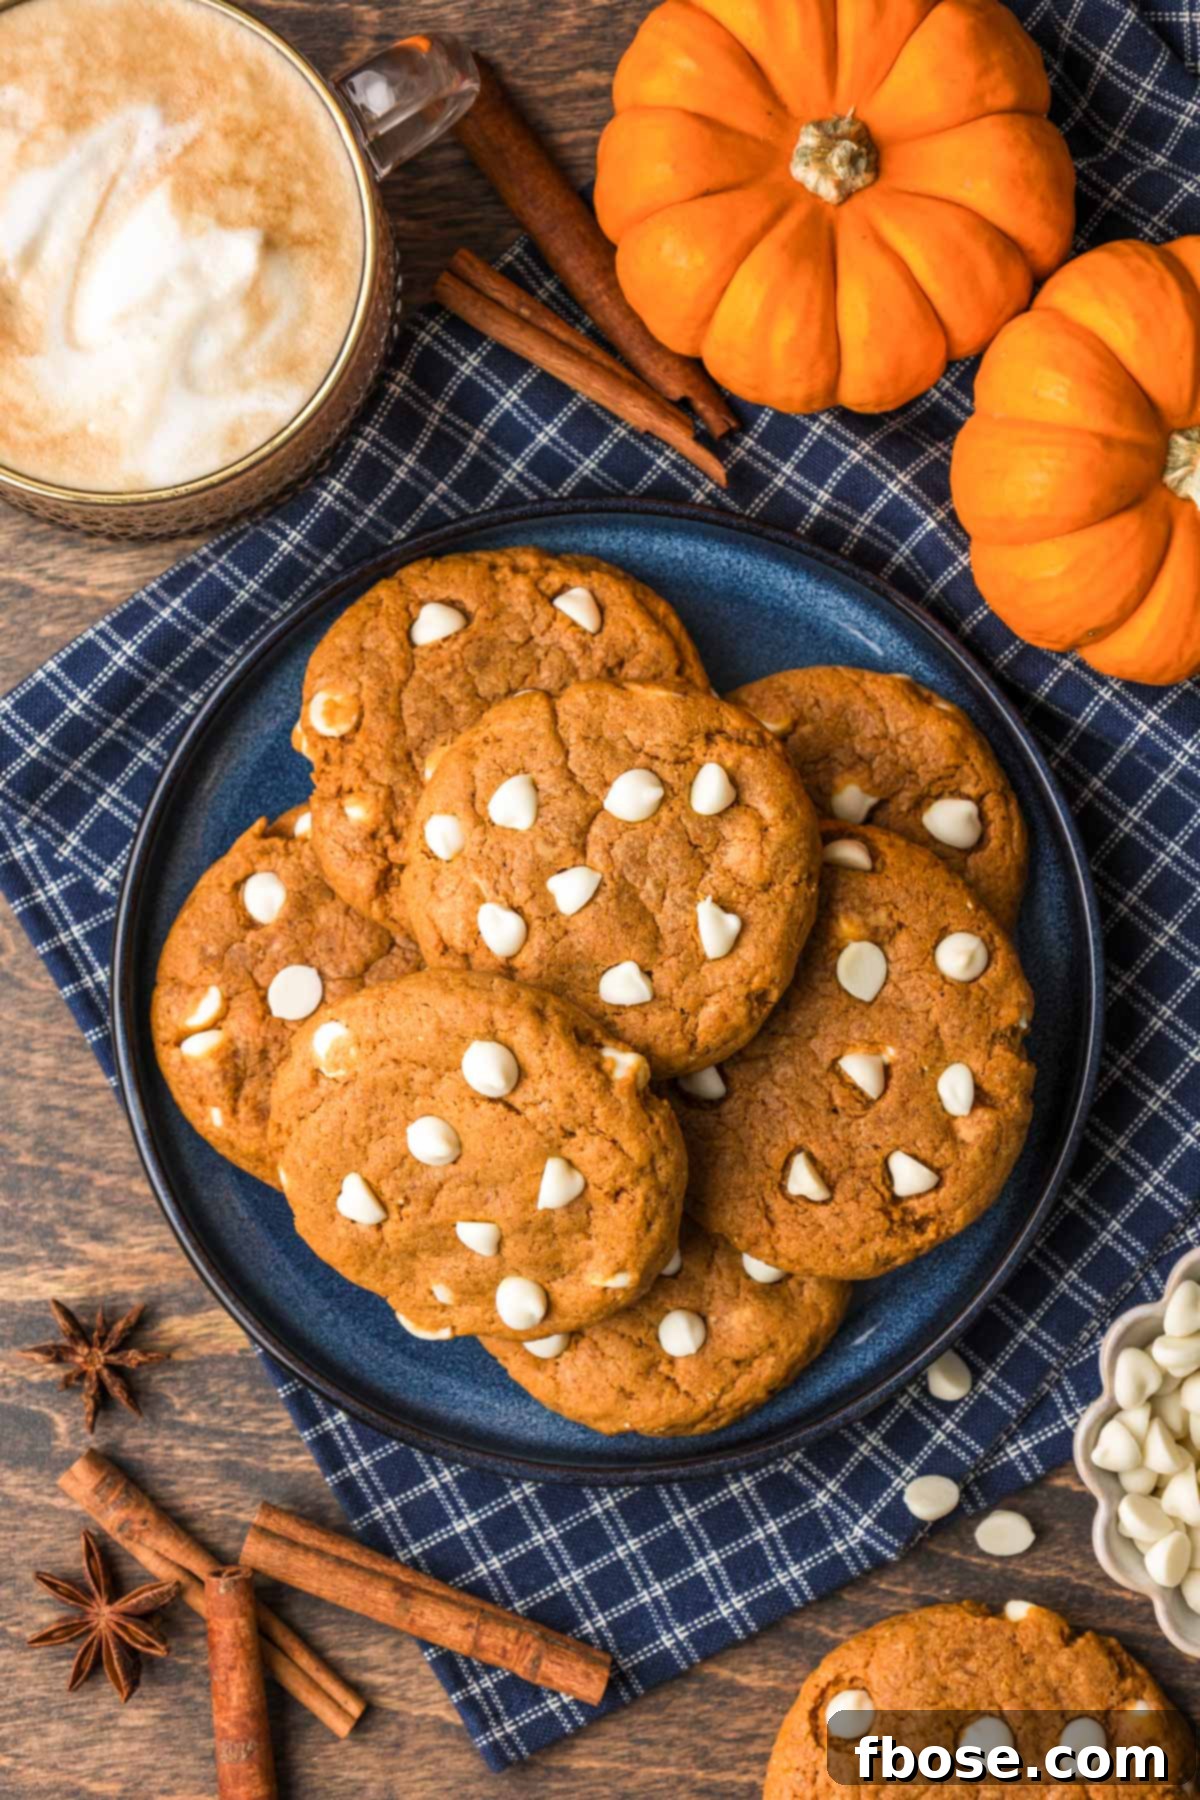
To keep your delicious white chocolate pumpkin cookies tasting their best, proper storage is essential. Once they have cooled completely to room temperature, transfer them to an airtight container. To prevent them from sticking together, especially if you’re stacking them, place a piece of parchment paper between each layer of cookies. This simple trick helps maintain their perfect texture and prevents the white chocolate from smudging.
These cookies will stay wonderfully fresh at room temperature for up to 3 days, making them perfect for everyday enjoyment or last-minute treats. If you want to extend their freshness, storing them in the refrigerator can keep them delicious for up to a week. Just be sure to allow them to come to room temperature or warm them slightly before serving for the best flavor and texture experience.
How To Freeze Pumpkin Cookies for Future Enjoyment
Freezing these pumpkin cookies is an excellent way to prepare ahead for upcoming fall gatherings, holiday feasts like Thanksgiving, or simply to have a ready supply of treats on hand. They freeze beautifully and taste just as good as fresh once thawed!
To freeze your baked cookies, ensure they are completely cooled to room temperature first. This prevents condensation and ice crystal formation. Once cool, arrange the cookies in a single layer on a baking sheet. Place the baking sheet into the freezer for about an hour, or until the cookies are firm. This “flash freezing” step prevents them from sticking together once they’re bagged.
After flash freezing, transfer the firm cookies into a heavy-duty freezer-safe Ziploc bag or an airtight container. Make sure to remove as much air as possible from the bag to prevent freezer burn. Label the bag or container with the date. These frozen delights can be stored in the freezer for 2 to 3 months. When you’re ready to enjoy them, simply remove the desired number of cookies from the freezer and let them thaw at room temperature for an hour or so. You can even gently warm them in the microwave for a few seconds for that fresh-baked feel!
Discover More Delicious Pumpkin Cookie Recipes:
- Soft Pumpkin Spice Snickerdoodles – Delight in these puffy, tender cookies, often enhanced with crunchy pecans for an extra layer of flavor!
- Pumpkin No Bake Cookies – The perfect fall treat for those days you want a delicious dessert without turning on the oven!
- Easy Pumpkin Chocolate Chip Cookies – Incredible flavor made with an impressively simple list of just 4 ingredients!
- Pumpkin Cookies with Cream Cheese Filling – Experience a decadent cheesecake-like center nestled within a soft pumpkin cookie, ideal for autumn.
- Pumpkin Oreo Cookies – A fun and flavorful twist, packed with delightful pieces of crunchy Oreo cookies!
Did You Make This Recipe?
If you’ve tried this recipe, please leave a review in the comments below. I love hearing from you! Don’t forget to tag me – @sugarandsoulco – on Instagram and Pinterest with your photos, or join our Sugar & Soul Show-offs Community and share them there.
Pumpkin White Chocolate Cookie Recipe
Equipment
-
2 Cookie sheets
-
#16 Cookie Scoop
-
Stand mixer recommended, not required
-
Paddle attachment recommended, not required
-
Mixing Bowl
-
Whisk
-
Measuring Cups
-
Measuring spoons
-
Kitchen Scale recommended, not required
Ingredients
Pumpkin Dough
- 1 cup unsalted butter 227g, softened
- 1 cup dark brown sugar 225g, packed
- 1 cup granulated sugar 200g
- 2 large eggs room temperature
- ¾ cup 100% pumpkin 172g
- 1½ teaspoons vanilla extract
- 4 cups all-purpose flour 520g, spooned and leveled
- 1 (3.4oz.) box instant pumpkin pudding mix 96g, unprepared, see notes
- 2 tablespoons powdered milk 10g
- 1 tablespoon pumpkin pie spice
- 1 teaspoon ground cinnamon
- 1 teaspoon salt
- ½ teaspoon baking soda
- 11 ounces Guittard White Chocolate Chips
Instructions
-
Preheat oven to 350°F (175°C) and line 2 large baking sheets with parchment paper and set aside.
-
In a large bowl or stand mixer (a stand mixer is highly recommended for this recipe) fitted with a paddle attachment, cream together 1 cup unsalted butter, 1 cup dark brown sugar, and 1 cup granulated sugar on medium speed for 2 minutes, scraping down the sides of the bowl halfway through.

-
Measure and spread the ¾ cup 100% pumpkin out on paper towels. I usually start with four of the select-a-size sheets on the bottom or two regular folded over, then press the pumpkin with another set of paper towels on top. Replace the top paper towel with two select-a-size sheets and flip the pumpkin so the new top towels are now on the bottom of the pumpkin. Discard the original bottom towels and replace them with two more, pressing to remove the excess moisture. You should have about 100g of pumpkin after squeezing.
-
Add the pumpkin to the mixing bowl. It should peel off the towel easily, but you can use a rubber spatula to assist. Mix until fully incorporated.
-
Add the 2 large eggs one at a time, mixing after each one just until the yolk is streaky throughout the dough. Add 1½ teaspoons vanilla extract and mix just until combined.
-
In a medium mixing bowl, whisk together the 4 cups all-purpose flour, 1 (3.4oz.) box instant pumpkin pudding mix, 2 tablespoons powdered milk, 1 tablespoon pumpkin pie spice, 1 teaspoon salt, 1 teaspoon ground cinnamon, and ½ teaspoon baking soda. With the mixer beating at low (stir) speed, slowly add the flour mixture a cup at a time. If you have a flour shield for your mixer, I recommend using it as this recipe creates a lot of dough. Increase to medium speed and mix just until combined, then remove from the mixer and use a rubber spatula to mix up any loose flour from the bottom of the bowl into the dough.
-
Add in all but ⅓ cup of the 11 ounces Guittard White Chocolate Chips and mix at low speed just until combined; be careful not to overmix.
-
Use a large #16 cookie scoop to portion out the dough into 2.5 ounce portions. Roll the balls of dough between your palms to round, then place on the prepared baking sheets, leaving 2 to 3 inches between each (8 cookies will fit in offset pairs on a 12×17-inch cookie sheet).
-
Use the palm of your hand to gently press the cookies down so they are about ¾-inch thick.
-
Bake the cookies one cookie sheet at a time for 5 minutes. Pull out the baking sheet and press some of the reserved white chocolate chips into the tops of the cookies, then return them to the oven for an additional 7 minutes or until the edges are just turning light brown. This is an optional step that helps prevent the chips from browning but still lets them melt into and bind with the dough while baking. You may add them at the beginning or right out of the oven if that is your preference.
-
Remove from the oven and allow them to cool for 5 minutes on the pan before transferring them to a wire rack to cool completely.
Video
For a visual guide to making these delicious cookies, watch our quick video tutorial below!
Notes
- If you cannot find Pumpkin Pudding Mix, you can use Cheesecake or Vanilla flavored instant pudding mix instead. This will alter the specific “pumpkin” intensity but still contribute to the lovely soft texture.
- The powdered milk can be left out as it won’t impact the texture or structure of the cookies. However, it significantly enhances the overall flavor, making the cookies taste richer and more complex, even though it seems like a small amount.
- Creaming the butter and sugar for the full 2 minutes is crucial for the final structure and tenderness of the cookie; do not shortcut this step. This process incorporates air, which is essential for light, fluffy cookies.
- There will likely be some flour that settles at the bottom of the mixing bowl, especially if using a stand mixer with a smaller bowl. Make sure you get this all mixed in. Do not just start portioning the dough from the top, or you’ll end up with a couple of dry cookies near the end of your batch. So, use a rubber spatula or your hands to work the drier bits into the dough. Do not just keep mixing in the mixer; this will overwork the dough and won’t be as effective. This observation was based on my experience with a 4.5 qt Artisan stand mixer; a larger size mixer might combine the dough more uniformly.
- A ¼ cup measuring cup can also be used to portion out the dough if you do not have a cookie scoop, though a scoop ensures more consistent sizing.
Nutrition
Did You Make This Recipe?
Don’t forget to share it with me on Instagram @sugarandsoulco and follow on Tiktok @sugarandsoulco and Pinterest @sugarandsoulco for more!
Pin Recipe
Share Recipe