
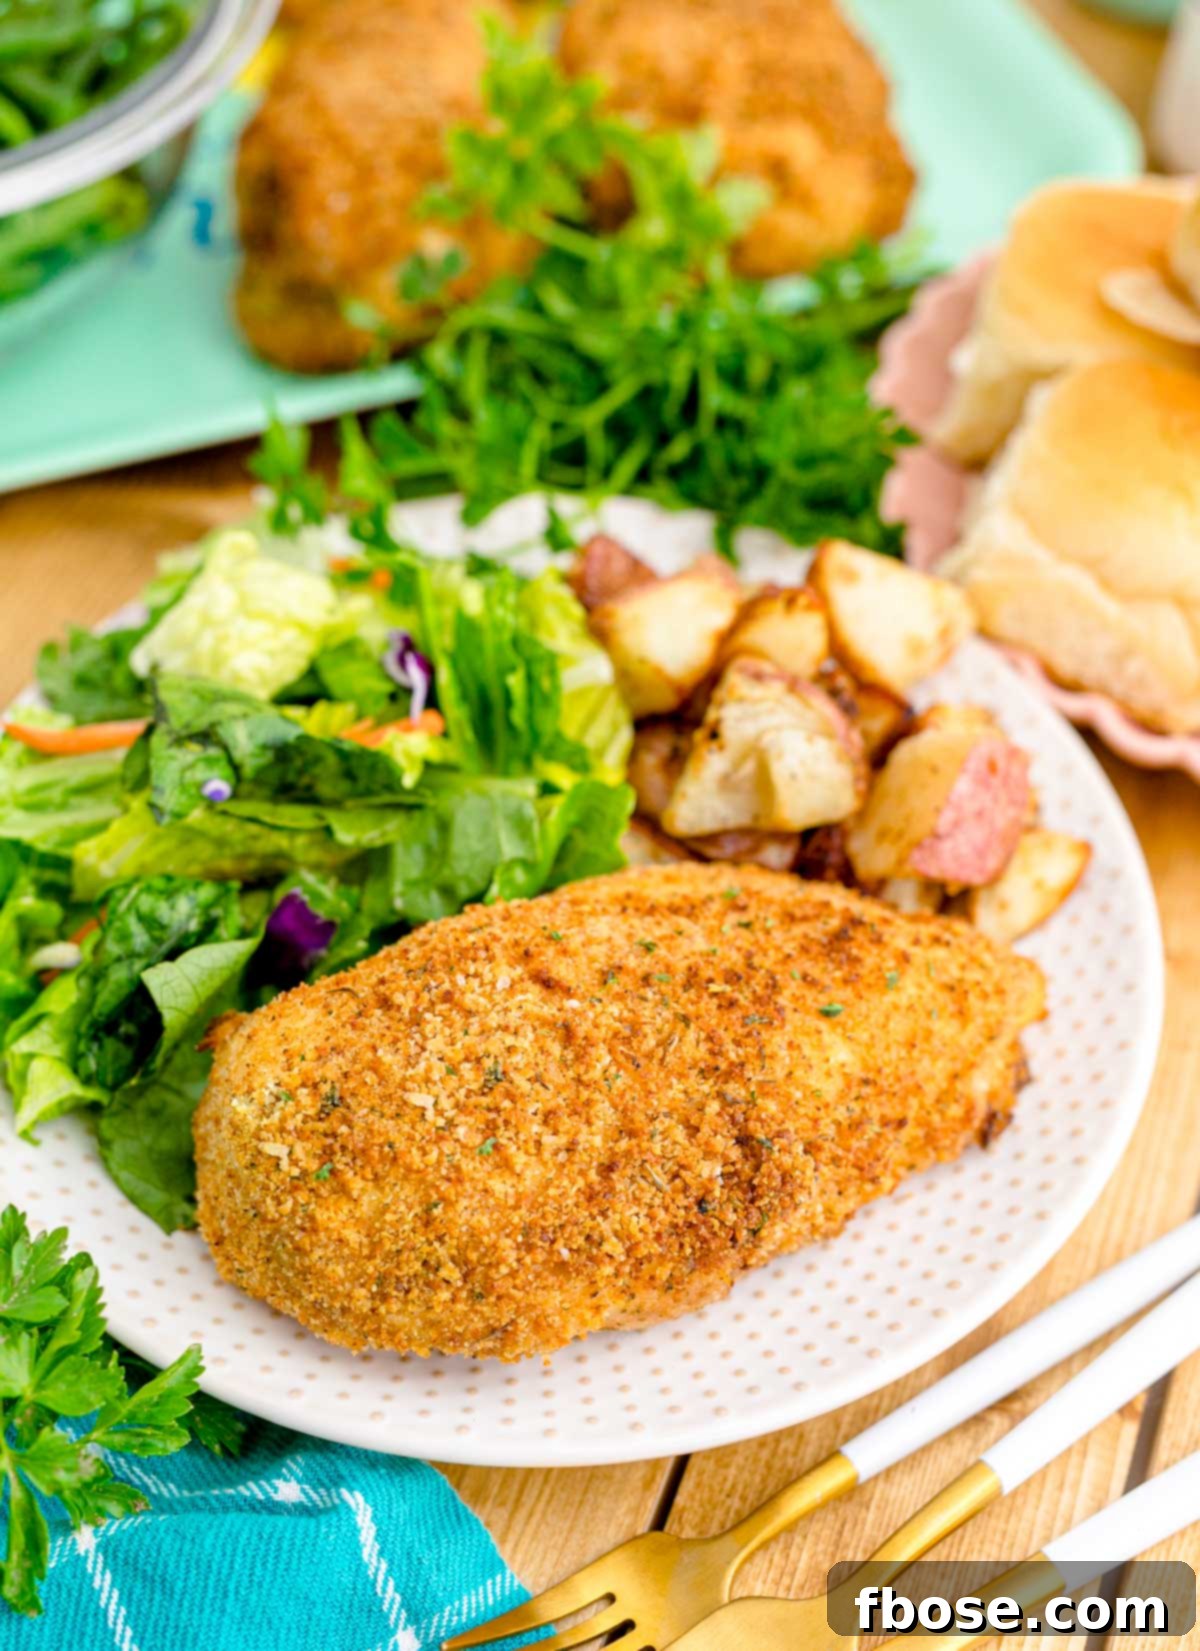
Mastering Homemade Shake and Bake Chicken: Your Guide to Crispy, Juicy Perfection
There’s nothing quite like the nostalgic taste and satisfying crunch of a perfectly cooked piece of Shake and Bake chicken. This timeless classic, often associated with convenient boxed mixes, can be elevated to new heights in your own kitchen. Our comprehensive guide to **Homemade Shake and Bake Chicken** brings you a recipe that promises exceptionally tender, juicy chicken enveloped in a vibrant, spice-filled, and incredibly crispy coating. Forget the store-bought versions; this homemade rendition is surprisingly simple, requiring only about 15 minutes of active preparation time before your oven takes over to create a meal your entire family will adore.
Imagine gathering your loved ones around the dinner table, presenting them with golden-brown chicken that’s bursting with flavor and boasts an irresistible texture. This recipe is more than just a meal; it’s an experience, transforming humble pantry staples into a comforting culinary masterpiece. Pair this easy-to-follow recipe with your favorite delicious side dishes and conclude your feast with a delightful sweet dessert for the ultimate family dining experience.
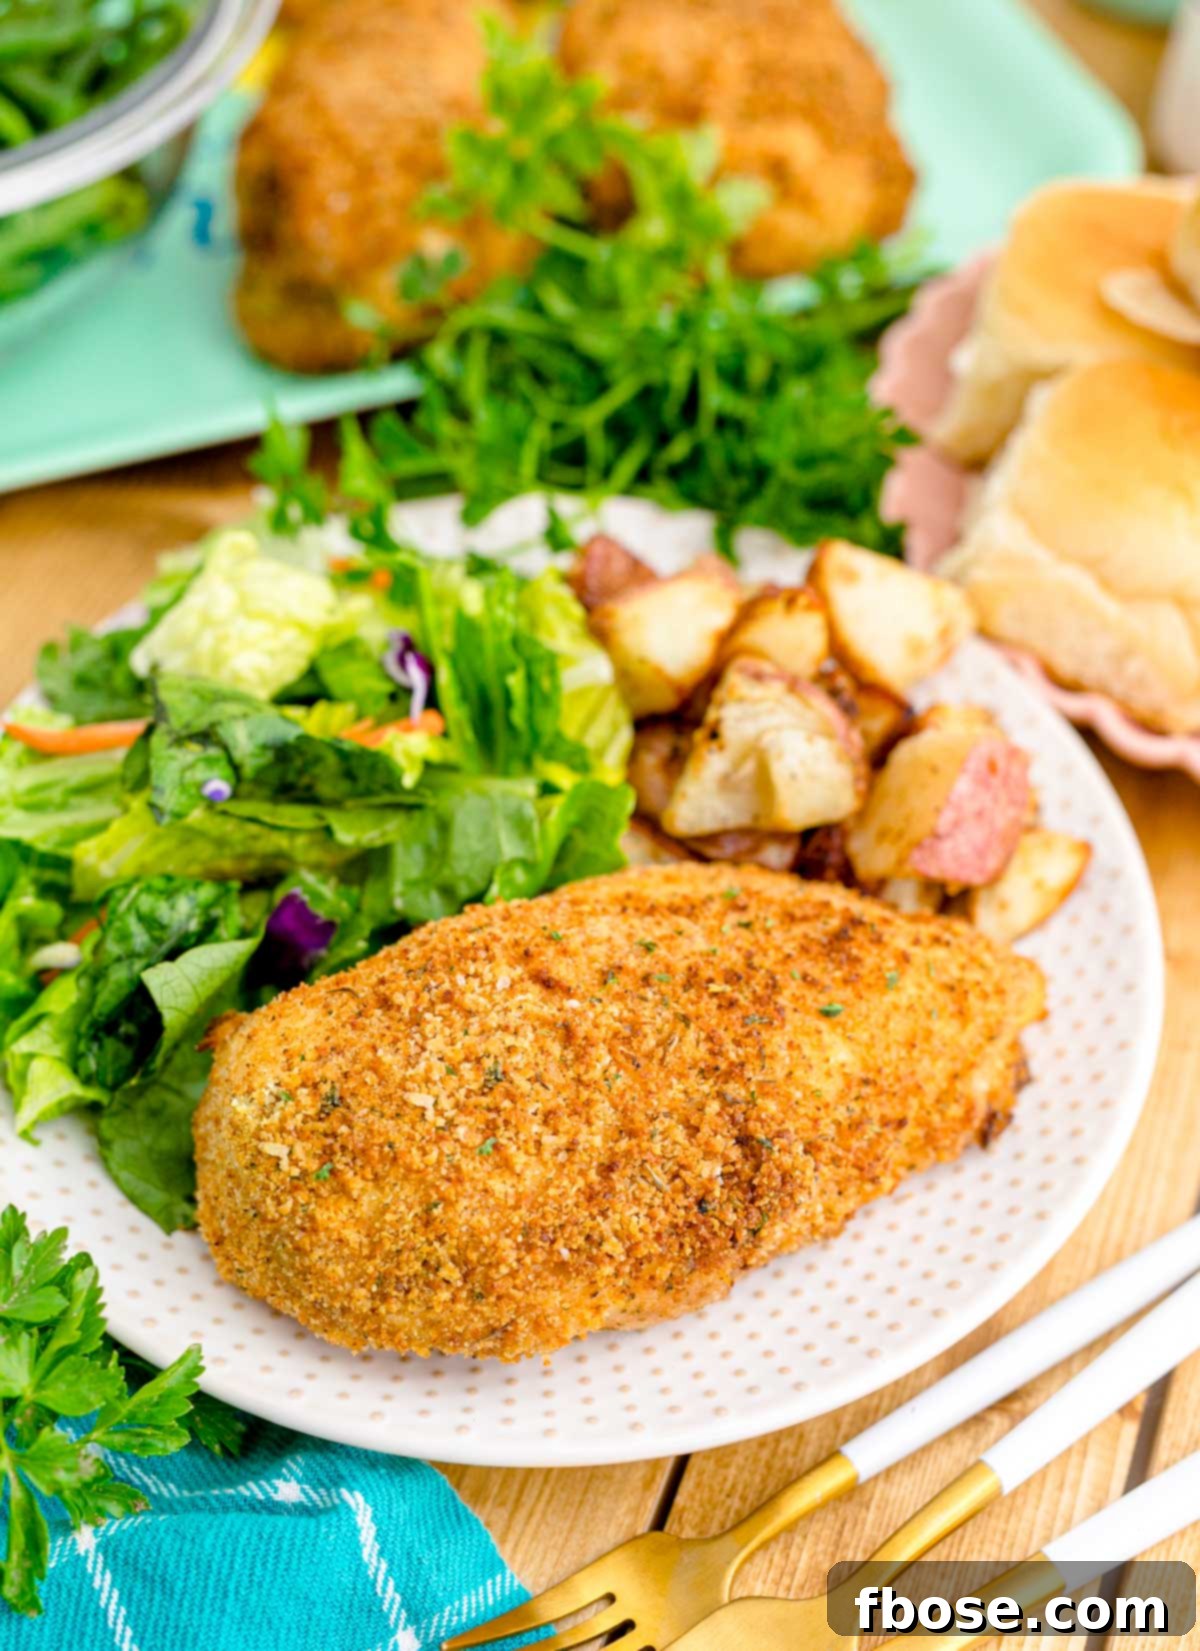
Why Choose Our Homemade Shake and Bake Chicken Recipe?
While the concept of “Shake and Bake” has been around for decades, our homemade recipe offers distinct advantages that make it a superior choice for any home cook. It’s not just about creating a copycat; it’s about crafting a dish that surpasses expectations in terms of flavor, texture, and nutritional value.
Unmatched Flavor and Texture
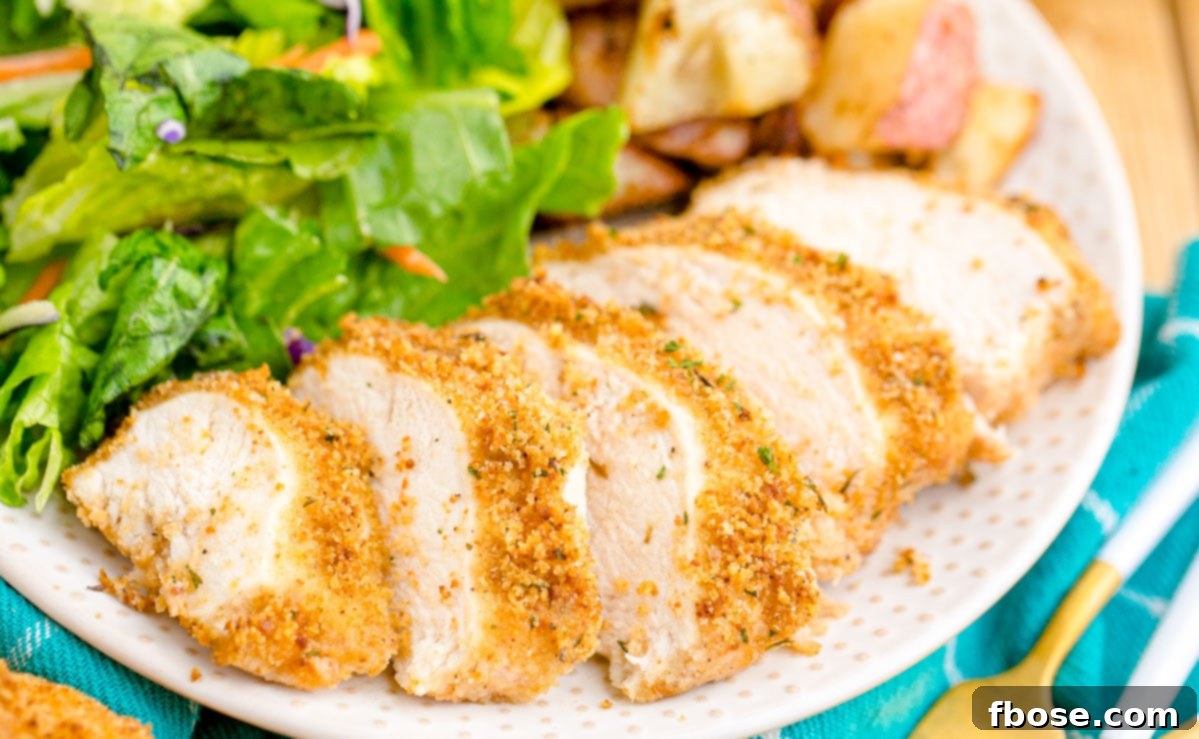
The beauty of making your own Shake and Bake lies in the ability to control and customize every element. This recipe delivers a depth of flavor that store-bought kits simply can’t match, thanks to fresh, high-quality spices. Each piece of chicken emerges from the oven wonderfully crunchy on the outside, yet incredibly moist and tender on the inside – a testament to the perfect balance of ingredients and cooking technique. It’s truly a delicious upgrade that will make you wonder why you ever settled for the boxed stuff.
Effortless Preparation for Busy Lives
Despite its gourmet-level taste, this homemade chicken dish is remarkably easy to prepare. The process involves a few simple steps: blending fresh breadcrumbs with a carefully selected blend of spices, coating your chosen chicken pieces, and letting your oven do the heavy lifting. This straightforward approach means you can whip up a wholesome, delicious meal for your family even on the busiest weekdays, without compromising on taste or quality. With only about 15 minutes of hands-on time, it’s an ideal solution for a quick and satisfying dinner.
Versatility Beyond Chicken
One of the fantastic aspects of this coating mixture is its versatility. While “Shake and Bake Chicken” is the classic application, the seasoned breading is equally delightful on other proteins. Don’t have chicken on hand, or simply prefer another option? This recipe works beautifully with boneless pork chops, yielding a similarly crispy and flavorful result. You can even experiment with thick-cut fish fillets for a delightful oven-baked twist. The possibilities are endless, making this recipe a valuable addition to your culinary repertoire.
The Advantage of Making Your Own Breadcrumbs
While store-bought breadcrumbs are perfectly acceptable for this recipe, taking the extra step to make your own adds an unparalleled freshness and texture. It’s an incredibly simple process that uses leftover bread and enhances the overall crispiness of the coating. We’ll provide clear instructions below on how to easily transform stale bread into perfectly fine, flavorful crumbs that will make your homemade Shake and Bake truly exceptional.
Key Ingredients for Your Flavorful Shake and Bake Chicken
The magic of this Homemade Shake and Bake Chicken recipe lies in its simple yet impactful ingredients. Each component plays a crucial role in delivering that signature crunchy texture and savory taste. Understanding these building blocks will help you achieve perfection every time.
Choosing Your Protein
The first step is selecting your cut of meat. We recommend using boneless, skinless chicken breasts for quick cooking and easy serving, especially if you’re planning to cut them into chicken tenders or even bite-sized nuggets for children. However, this recipe is incredibly adaptable, so if you prefer the rich flavor and bone-in juiciness of chicken thighs, they work wonderfully too. Just be aware that cooking times will vary slightly.
Crafting the Perfect Coating
The heart of our homemade Shake and Bake is its expertly seasoned breadcrumb mixture. Here’s what you’ll need:
- Dry Breadcrumbs: This is the foundation. You can opt for your favorite store-bought variety, or for the best results, easily make your own from day-old bread. Using a food processor to achieve a fine crumb consistency is key for an even coating. Panko breadcrumbs also offer an extra layer of crispiness if you prefer a lighter, flakier crunch.
- Cornstarch: A secret weapon for crispiness! Cornstarch helps absorb moisture from the chicken surface and creates an extra-crispy, golden crust when baked.
- Aromatic Spices: This blend is where the flavor truly shines. Our chosen spices include:
- **Garlic Salt:** Provides both savory garlic flavor and essential seasoning.
- **Black Pepper:** Adds a subtle warmth and enhances other flavors.
- **Onion Powder:** Contributes a foundational savory depth.
- **Dried Parsley:** Offers a touch of herbaceous freshness and visual appeal.
- **Thyme:** Delivers an earthy, aromatic note that complements chicken beautifully.
- **Paprika:** Lends a gentle smokiness and a beautiful reddish hue to the coating.
Each spice is carefully measured to ensure a balanced and incredibly flavorful crust that will tantalize your taste buds.
- Olive Oil: Essential for both binding the breading to the chicken and helping it crisp up in the oven. The oil ensures a rich, golden finish and contributes to the overall moisture of the chicken. While olive oil is preferred for its flavor, other neutral oils like vegetable oil can be used as a substitute.
With these simple ingredients, you’re well on your way to creating a homemade Shake and Bake Chicken that’s far superior to any pre-packaged alternative.
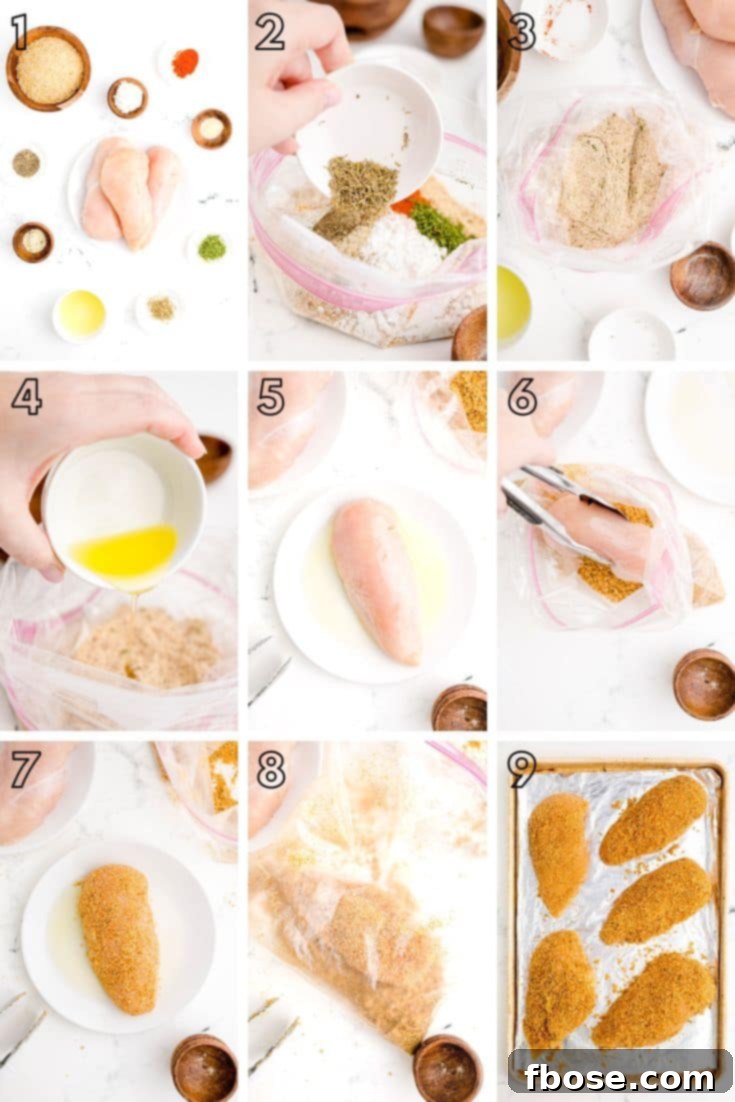
Simple Steps to Homemade Shake and Bake Chicken
Creating this delicious homemade Shake and Bake Chicken is a straightforward process, perfect for cooks of all skill levels. Follow these detailed steps to achieve a perfectly crispy, juicy, and flavorful meal every time.
- Prepare Your Oven and Baking Sheet: Begin by preheating your oven to 400°F (200°C). This ensures the oven is at the optimal temperature for immediate crisping. Line a large-rimmed baking sheet with aluminum foil for easy cleanup, then lightly spray it with non-stick cooking spray. Set this aside.
- Craft Your Signature Breading Mixture: In a gallon-sized resealable plastic bag, combine all the dry ingredients: breadcrumbs, cornstarch, garlic salt, pepper, onion powder, paprika, parsley, and thyme. Seal the bag and shake it vigorously to ensure all the spices are thoroughly and evenly mixed with the breadcrumbs.
- Incorporate the Olive Oil: Open the bag and add 1 tablespoon of olive oil to the breadcrumb mixture. Reseal the bag and shake again until the oil is fully incorporated and the mixture has a sandy, slightly clumpy texture. This initial oil helps to “activate” the flavors and ensures a more cohesive coating. Next, pour the remaining 5 tablespoons of olive oil into a shallow bowl or a wide plate.
- Prepare and Coat the Chicken: Take each piece of chicken and dip it into the shallow bowl of olive oil, ensuring it’s fully coated. Then, transfer the oiled chicken piece into the Ziploc bag with the breading mixture. Seal the bag tightly, removing as much air as possible, and then “shake and bake” by gently squishing and moving the bag around until the chicken is completely and evenly coated with the seasoned breadcrumbs. If you desire an extra-thick breading, simply dip the already breaded chicken back into the olive oil and then return it to the breadcrumb bag for a second coating.
- Arrange on Baking Sheet: Carefully remove each coated chicken piece from the bag and arrange them in a single layer on your prepared baking sheet. Ensure there is some space between each piece to allow for even air circulation, which is crucial for achieving that desirable crispiness.
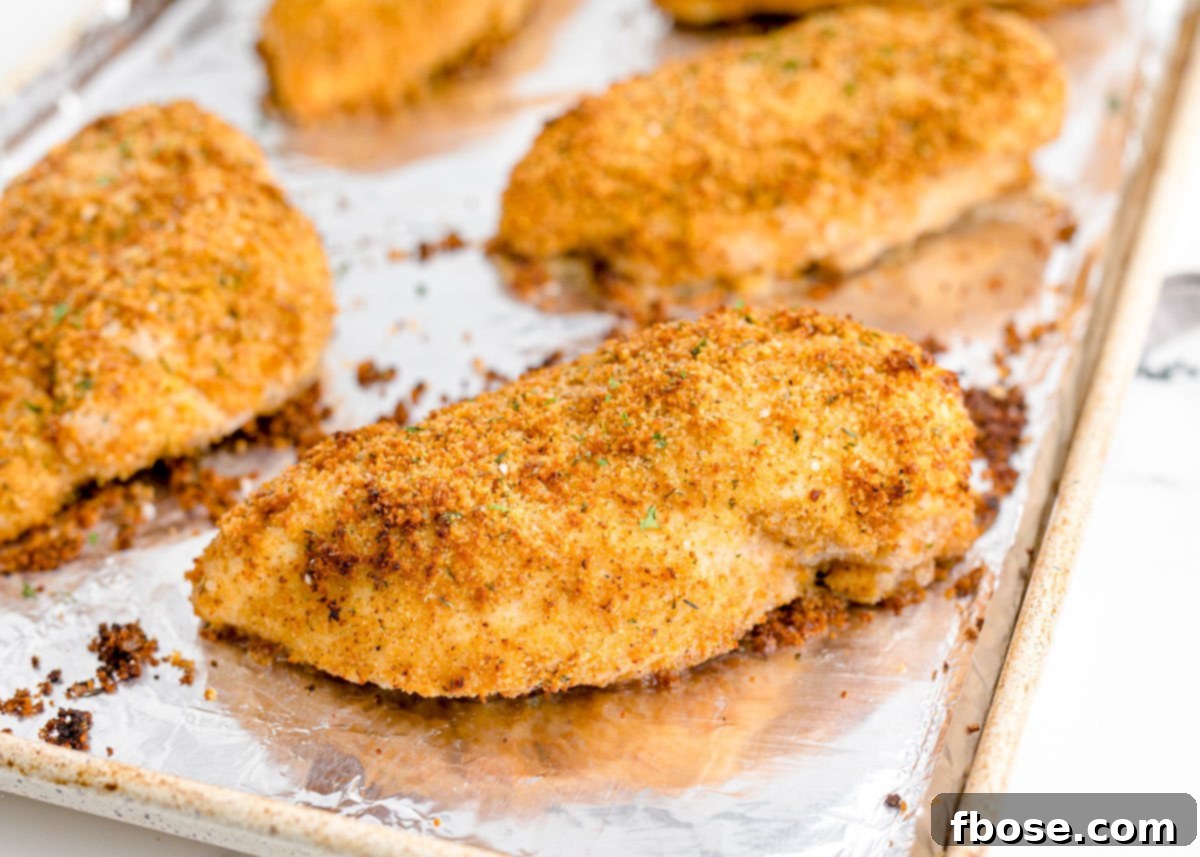
- Bake to Golden Perfection: Place the baking sheet in the preheated oven. Bake boneless chicken breasts for approximately 20 minutes, or until they reach an internal temperature of 165°F (74°C). If using bone-in chicken pieces, the baking time will be longer, typically 35-45 minutes. Always use a meat thermometer to confirm doneness. The chicken should be golden brown and the juices should run clear when pierced.
- Rest and Serve: Once cooked, remove the chicken from the oven. Immediately transfer the pieces onto a wire cooling rack set over a tray. Allowing the chicken to rest on a rack prevents the bottom from becoming soggy, preserving that all-important crispiness. Let it rest for a few minutes before serving to allow the juices to redistribute, ensuring maximum tenderness and flavor.
Serving Suggestions: What to Pair with Homemade Shake and Bake Chicken
The best way to enjoy your freshly baked Homemade Shake and Bake Chicken is right after it comes out of the oven, when its crispiness and flavors are at their peak. This versatile main dish pairs wonderfully with a variety of accompaniments, allowing you to create a well-rounded and satisfying meal. For a complete and delightful dinner, consider serving it alongside some delicious vegetable side dishes and comforting breads.
Classic and Comforting Side Dishes
Here are some tried-and-true side dishes that perfectly complement the savory crunch of Shake and Bake Chicken:
- Roasted Duck Fat Potatoes: Crispy on the outside, fluffy on the inside, these potatoes offer an indulgent counterpoint to the chicken.
- Balsamic Mushrooms: Sautéed mushrooms with a hint of tanginess provide an earthy and flavorful vegetable option.
- Roasted Sweet Potatoes: A naturally sweet and healthy choice that adds vibrant color and nutrients to your plate.
- Buttermilk Cornbread: A warm, slightly sweet cornbread is excellent for soaking up any chicken juices and adding a hearty touch.
- Steamed Green Beans with Almonds: A simple, fresh, and vibrant green vegetable that adds a pleasant snap and a nutty crunch.
- Creamy Macaroni and Cheese: For the ultimate comfort food experience, a rich and cheesy mac and cheese is always a winner.
- Fresh Garden Salad: A light, crisp salad with a vinaigrette dressing can provide a refreshing contrast to the richness of the chicken.
Expert Tips for Perfect Homemade Shake and Bake Chicken
Achieving consistently delicious results with your Homemade Shake and Bake Chicken is easy with a few key tips and tricks. These pointers will help ensure your chicken is always crispy, juicy, and packed with flavor.
- For Maximum Crispiness: Ensure your oven is fully preheated before putting in the chicken. Don’t overcrowd the baking sheet, as this can steam the chicken instead of crisping it. Using a wire rack for cooling immediately after baking is crucial for preventing the bottom from becoming soggy. For reheating, an air fryer or re-baking in a hot oven will help restore some of the initial crispiness.
- Guaranteed Juiciness: The most important factor for juicy chicken is not to overbake it. Use a meat thermometer to ensure it reaches exactly 165°F (74°C) internal temperature, then remove it promptly. Allowing the chicken to rest for a few minutes after baking also helps the juices redistribute, keeping the meat tender. Our recipe uses olive oil as a simple moistening agent, which, combined with proper baking, delivers wonderfully tender results.
- Thicker Breading: If you love a more substantial crust, simply repeat the oil dip and breading process. After the first coating, dip the chicken back into the olive oil, then place it again in the breadcrumb mixture and shake to apply a second layer.
- Customizing Your Spice Blend: While our spice blend is perfectly balanced, feel free to adjust it to your liking. Add a pinch of cayenne pepper for a subtle kick, or a dash of dried sage for a more earthy flavor. Experiment with different ratios to discover your family’s favorite version.
- Preparing Ahead of Time: You can certainly prepare the dry breading mixture in advance. Mix all the breadcrumbs and spices together and store it in an airtight container for several weeks. When you’re ready to cook, simply add the olive oil, coat your chicken, and bake.
Frequently Asked Questions About Homemade Shake and Bake Chicken
Here are answers to some common questions you might have when making this classic comfort food.
How Do I Make My Own Breadcrumbs To Use In This Recipe?
Making your own breadcrumbs is incredibly easy and adds a fresh touch to your coating. To do so, place three slices of day-old bread on a baking sheet. Bake at 300°F (150°C) for 10 minutes, then flip the slices and bake for another 5 minutes, keeping a close eye to ensure they dry out without browning. Once cooled, break the dried bread into pieces and pulse them in a food processor until fine crumbs form. This yields about 1 cup of fresh breadcrumbs.
How Do You Get Shake and Bake To Stick To Chicken?
In this recipe, olive oil is used to help the seasoned breading adhere firmly to the chicken. For even better adhesion, pat each piece of chicken thoroughly dry with paper towels before coating it in oil. Alternatively, you can dip the chicken in beaten eggs or a simple egg-flour mixture before breading.
Can I Coat The Chicken In Vegetable Oil Instead Of Olive Oil?
Yes, absolutely! While olive oil offers a distinct flavor, vegetable oil is a perfectly acceptable substitute and will work just fine for coating the chicken and achieving a crispy crust.
How Can I Get A Thicker Breading Onto The Chicken?
If you prefer a more robust breading, simply repeat the coating process. After the initial oil dip and breadcrumb coating, dip the chicken back into the olive oil, and then return it to the bag of breadcrumbs for a second generous coating. This technique ensures a deliciously thick and crunchy crust.
What Can I Substitute For Garlic Salt?
If you don’t have garlic salt on hand, you can easily create your own substitute. Combine 3/4 teaspoon of regular salt with 1/4 teaspoon of garlic powder to achieve a similar flavor profile.
What Is The Correct Internal Temperature For Cooked Chicken?
Chicken is fully cooked and safe to eat when it reaches an internal temperature of 165°F (74°C). Always use a reliable meat thermometer inserted into the thickest part of the chicken, avoiding the bone, to ensure accurate doneness.
How Long Does Shake and Bake Chicken Take to Bake?
Baking times vary depending on the cut of chicken:
- For boneless chicken breasts, it typically takes about 20 minutes to reach the correct internal temperature.
- For bone-in chicken pieces, expect a baking time of approximately 35 to 45 minutes.
Regardless of the cut, the best way to confirm doneness is to use a meat thermometer. You can also make a small cut into the thickest part of the chicken; if the juices run clear, it’s cooked. If they appear pink or red, it needs more time in the oven.
Can I Make The Seasoned Breading Mixture Ahead Of Time?
Yes, you can certainly prepare the dry breading mixture in advance. Simply combine all the breadcrumbs and dry spices (garlic salt, pepper, onion powder, paprika, parsley, and thyme). Store this dry mixture in an airtight container in your pantry, where it will remain fresh for several weeks. Only add the olive oil when you are ready to coat and bake the chicken.
How Do I Store The Leftovers?
Leftover Homemade Shake and Bake Chicken can be stored in an airtight container in the refrigerator for up to 4 days. For longer storage, you can freeze the cooked chicken for up to 3 months. Thaw frozen chicken in the refrigerator before reheating.
What’s The Best Way To Moisten Chicken For Shake And Bake?
Our recipe achieves tender and juicy chicken without brining or marinating. The chicken is simply dipped in olive oil before being breaded and baked. The key to moist results is not to overbake; once it reaches the safe internal temperature, remove it from the oven.
Should You Rinse Chicken Before Shake And Bake?
It is generally not recommended to wash raw chicken before cooking. Studies by organizations like the USDA have concluded that washing raw poultry can spread bacteria around your kitchen, doing more harm than good. The cooking process itself effectively kills any bacteria present. For more detailed information, refer to articles such as the USDA’s “Our Science, Your Choice” on food safety.
How Do You Keep Shake N Bake Crispy?
The chicken will be at its crispiest right out of the oven. While it’s challenging to fully restore that initial crispiness after storage, transferring the chicken to a wire rack immediately after baking helps prevent the bottom from becoming soggy. For reheating leftovers, an air fryer is your best bet to regain some of that delightful crunchy texture.
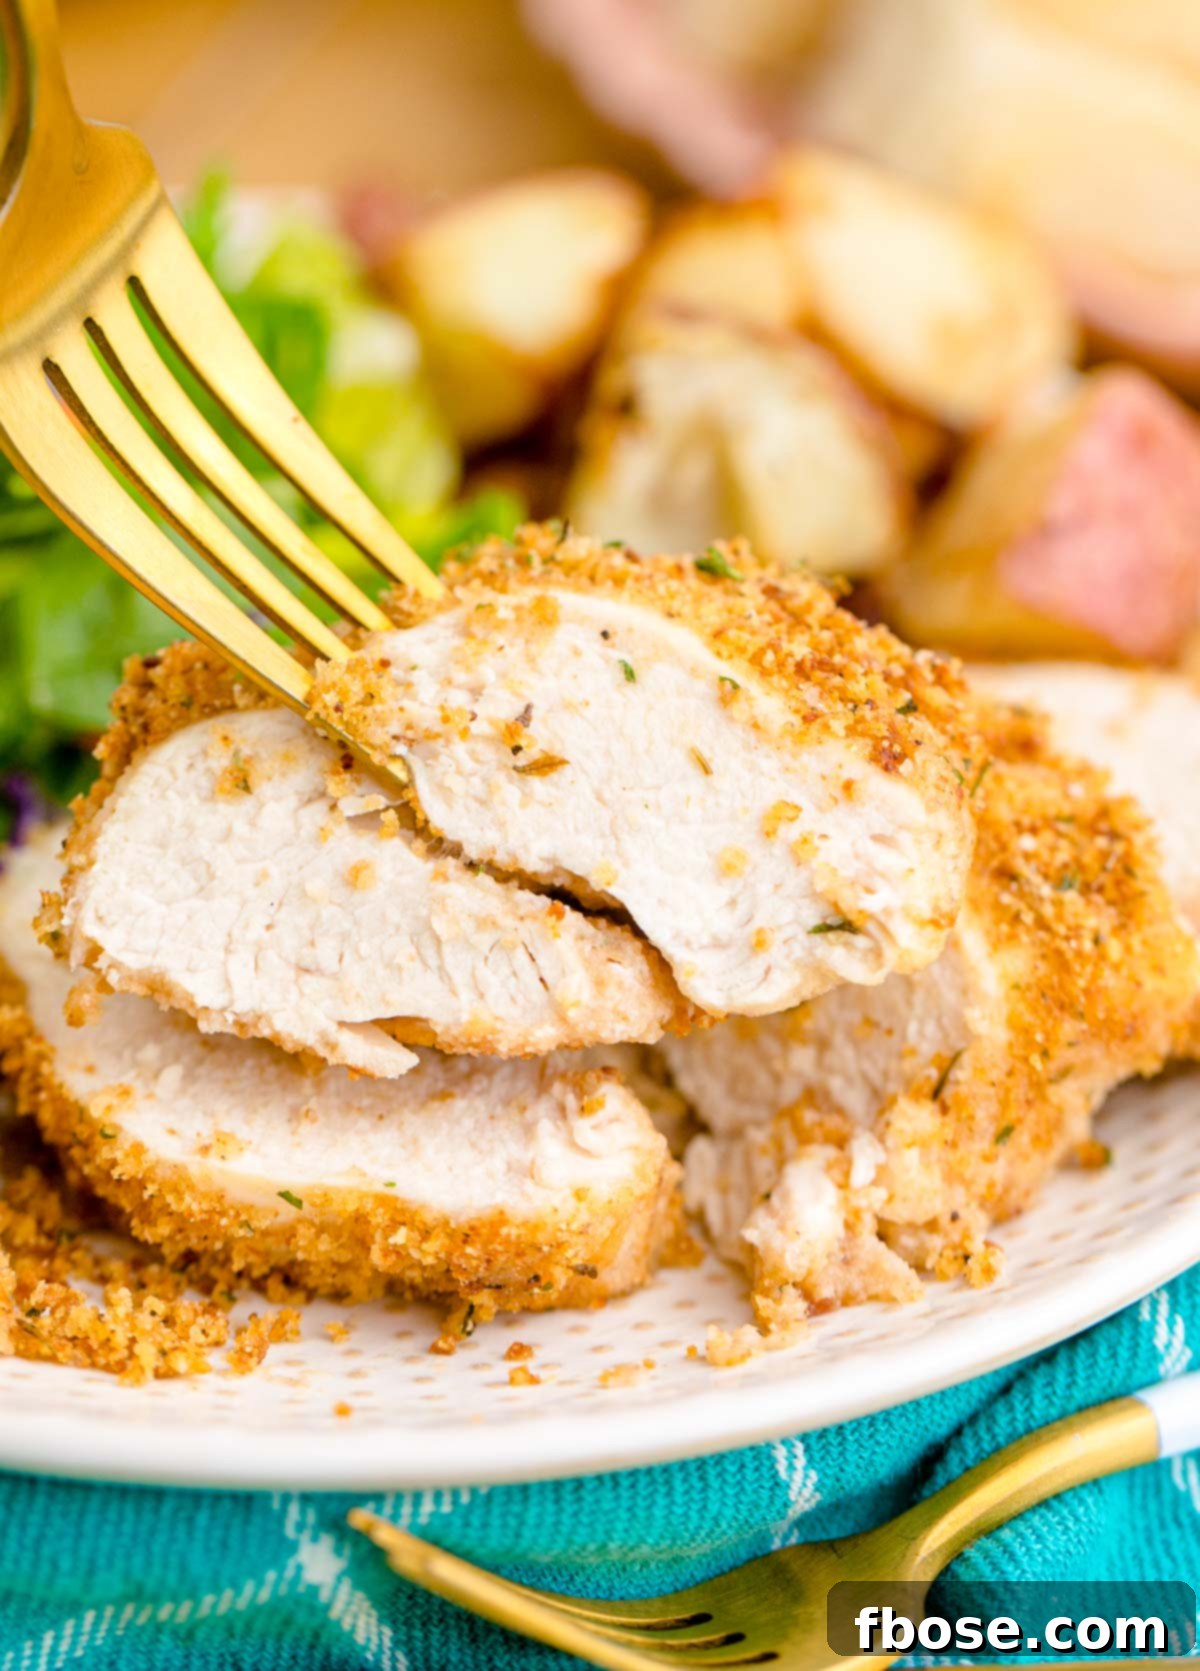
You won’t hear a single complaint at the dinner table when you serve this deliciously crisp, juicy, and flavorful Homemade Shake and Bake Chicken! It’s a guaranteed crowd-pleaser and a perfect addition to your regular meal rotation.
Homemade Chicken Shake and Bake Recipe
This Homemade Shake and Bake Chicken is a classic comfort food recipe that covers tender, juicy chicken with a spice-filled crunchy coating! Requires only 15 minutes of hands-on prep time, your oven does the rest!
- Author: Rebecca Hubbell
- Course: Dinner
- Cuisine: American
- Prep Time: 15 minutes
- Cook Time: 45 minutes
- Total Time: 1 hour
- Servings: 5 people
Equipment
- Measuring cup
- Measuring spoons
- Baking Sheet
- Gallon-sized Ziploc bag
- Shallow bowl or plate
- Wire cooling rack
- Meat thermometer (optional, but recommended)
Ingredients
- 1 cup dry breadcrumbs
- 1 Tablespoon cornstarch
- 1 teaspoon garlic salt
- ½ teaspoon pepper
- ½ teaspoon onion powder
- ½ teaspoon dried parsley
- ½ teaspoon thyme
- ¼ teaspoon paprika
- 6 Tablespoons olive oil, divided
- 1½ pounds chicken breasts (about 5 breasts)
Instructions
- Preheat the oven to 400°F (200°C). Line a large-rimmed baking sheet with aluminum foil and spray with non-stick cooking spray. Set aside.
- Combine the breadcrumbs, cornstarch, garlic salt, pepper, onion powder, paprika, parsley, and thyme in a gallon-sized Ziploc bag. Seal the bag and shake to thoroughly mix the dry ingredients.
- Add 1 tablespoon of olive oil to the breadcrumb mixture in the bag and shake again until the mixture is sandy in texture. Pour the remaining 5 tablespoons of olive oil into a shallow bowl or plate. Dip each piece of chicken into the olive oil, ensuring it is well coated.
- Place the oiled chicken pieces one at a time into the Ziploc bag with the breading. Seal the bag and shake vigorously to coat the chicken well. For a thicker breading, dip the breaded chicken in oil again, then return it to the bag of breadcrumbs and shake for a second coat.
- Arrange the coated chicken pieces on the prepared baking sheet, ensuring they are in a single layer with space between them.
- Bake the chicken for about 20 minutes (for boneless breasts) or 35-45 minutes (for bone-in pieces), or until it reaches an internal temperature of 165°F (74°C). Cooking times may vary depending on the size and cut of the chicken.
- Remove the chicken from the oven and immediately transfer it to a wire cooling rack to rest for a few minutes before serving. This prevents the bottom of the chicken from becoming soggy and helps to maintain its crispiness.
Notes
- How Do You Get Shake and Bake To Stick To Chicken? In this recipe, olive oil helps the breading stick. For best results, pat chicken dry with paper towels before oiling. You can also use beaten eggs or an egg-flour blend for coating.
- Can I Coat The Chicken In Vegetable Oil Instead Of Olive Oil? Yes, vegetable oil is a fine substitute.
- How Can I Get A Thicker Breading Onto The Chicken? For a thicker crust, repeat the olive oil dip and breading mixture coating.
- What Can I Substitute For Garlic Salt? Use ¾ teaspoon of salt and ¼ teaspoon of garlic powder.
- How Do I Know The Chicken Is Done Cooking? Cook chicken until its internal temperature reaches 165°F (74°C).
- Can I Make The Seasoned Breading Mixture Ahead Of Time? Yes, mix all dry ingredients together and store for weeks. Add oil only when ready to cook.
- How Do I Store The Leftovers? Store in an airtight container in the fridge for up to 4 days, or freeze for up to 3 months.
Nutrition Information (per serving)
Calories: 397kcal | Carbohydrates: 17g | Protein: 32g | Fat: 21g | Saturated Fat: 3g | Polyunsaturated Fat: 3g | Monounsaturated Fat: 14g | Trans Fat: 0.02g | Cholesterol: 87mg | Sodium: 782mg | Potassium: 555mg | Fiber: 1g | Sugar: 1g | Vitamin A: 101IU | Vitamin C: 2mg | Calcium: 50mg | Iron: 2mg
More Delicious Chicken Recipes You’ll Love
If you enjoyed this recipe, be sure to explore more of our crowd-pleasing baked chicken creations:
- Garlic Chicken – A dairy-free dinner option bursting with the incredible flavor of 40 cloves of garlic!
- Oven Fried Chicken – Enjoy the crispy goodness of fried chicken with a healthier, oven-baked twist.
- Lemon Chicken Thighs – Experience slow-roasted chicken thighs infused with vibrant lemon and savory ginger-soy flavors.
- Salsa Chicken – A remarkably juicy and flavorful chicken dish made with just 4 ingredients in under an hour!
- Baked Chicken Wings – Achieve incredibly crispy chicken wings without the mess and hassle of deep-frying.
Connect With Us!
If you’ve tried this recipe and loved it, please let us know your thoughts in the comments below and leave a review! We absolutely love hearing from you and seeing your culinary creations.
Don’t forget to tag us – @sugarandsoulco – on Instagram and Pinterest with your beautiful photos. You can also join our Sugar & Soul Show-offs Community on Facebook and share your dishes there, where you can also participate in our fun recipe challenges!