

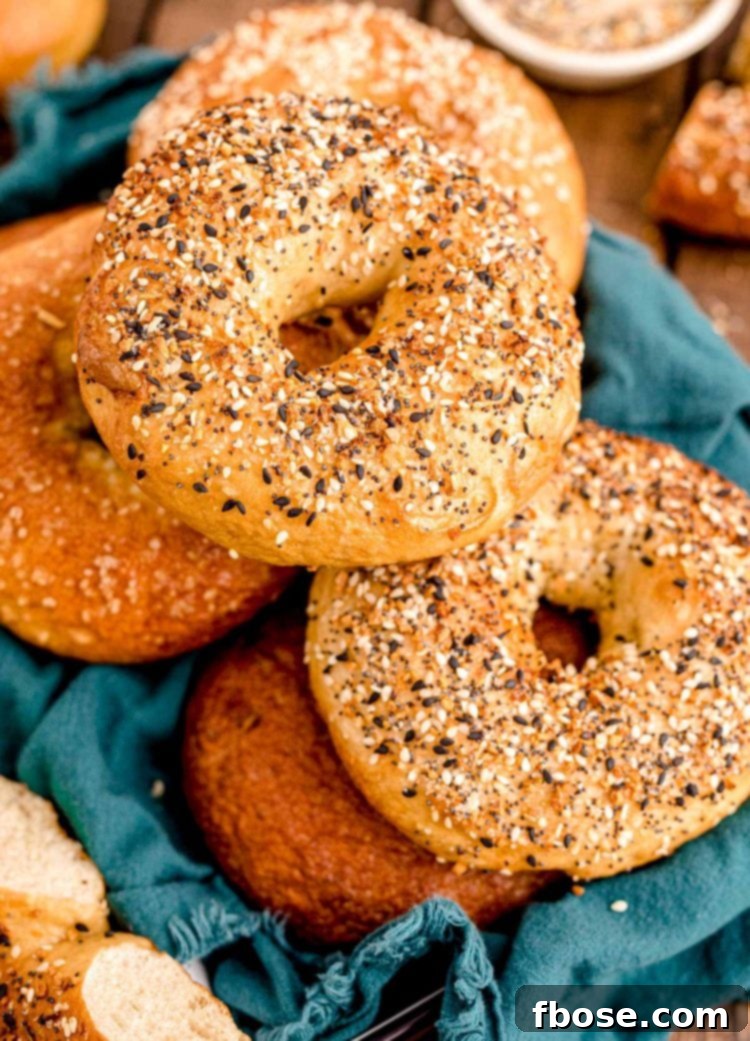
There’s nothing quite like the warmth and aroma of freshly baked goods filling your kitchen. When it comes to breakfast staples, few things compare to a perfectly crafted bagel. Forget the dry, mass-produced versions from the grocery store – with this easy-to-follow recipe, you can create the most incredible Homemade Bagels right in your own home. Made with simple pantry ingredients, these bagels emerge from the oven golden brown, wonderfully soft on the inside, and, most importantly, possess that quintessential, irresistible chewiness that defines a truly great bagel. Best of all, you can have these delectable treats prepped and ready for baking in just 45 minutes!
Imagine starting your family’s day with a stack of these delightful bagels, ready to be topped with your favorite spreads. If you’re looking to expand your breakfast repertoire, consider exploring other fantastic morning options like Sheet Pan Pancakes for a fuss-free feast or savory Breakfast Sliders With Hawaiian Rolls for a fun, handheld meal. But for now, let’s dive into the world of homemade bagels and discover just how rewarding this baking project can be.

The journey of making homemade bagels is an experience in itself, offering numerous benefits beyond just a delicious outcome. From the moment the yeast activates and the dough begins to rise, a wonderful aroma will start to fill your entire home, promising a comforting treat. There’s a genuine joy in the hands-on process of mixing, kneading, and shaping each bagel, transforming basic ingredients into something truly special. And then there’s that first bite – a moment of pure bliss as you experience the perfect balance of a slightly crisp exterior giving way to a dense, chewy interior. It’s a culinary triumph that’s incredibly satisfying.
Why settle for a bag of store-bought bagels that often fall short in texture and flavor? This homemade bagel recipe allows you to achieve a superior product in a surprisingly short amount of time, with active prep taking just 45 minutes before they go into the oven. The beauty of baking your own is the complete control you have over the ingredients and, of course, the toppings! You can customize them exactly how you like them, ensuring every bite is a perfect reflection of your preferences.
Personally, I adore topping my bagels with a generous sprinkle of everything bagel seasoning. This magical blend elevates a plain bagel into a flavor powerhouse, offering a delightful combination of savory and aromatic notes. Ingredients like dried onion, garlic, and an assortment of sesame, poppy, and caraway seeds create a toasty, complex flavor profile that is utterly addictive. If you haven’t yet discovered the joy of everything bagel seasoning, I highly recommend adding it to your culinary to-do list – it will not disappoint!
Why This Homemade Bagel Recipe is a Must-Try!
Embarking on the journey of making your own bagels might seem daunting, but this recipe is designed for success. Here are several compelling reasons why this easy bagel recipe stands out and why you’ll want to make it a regular in your baking rotation:
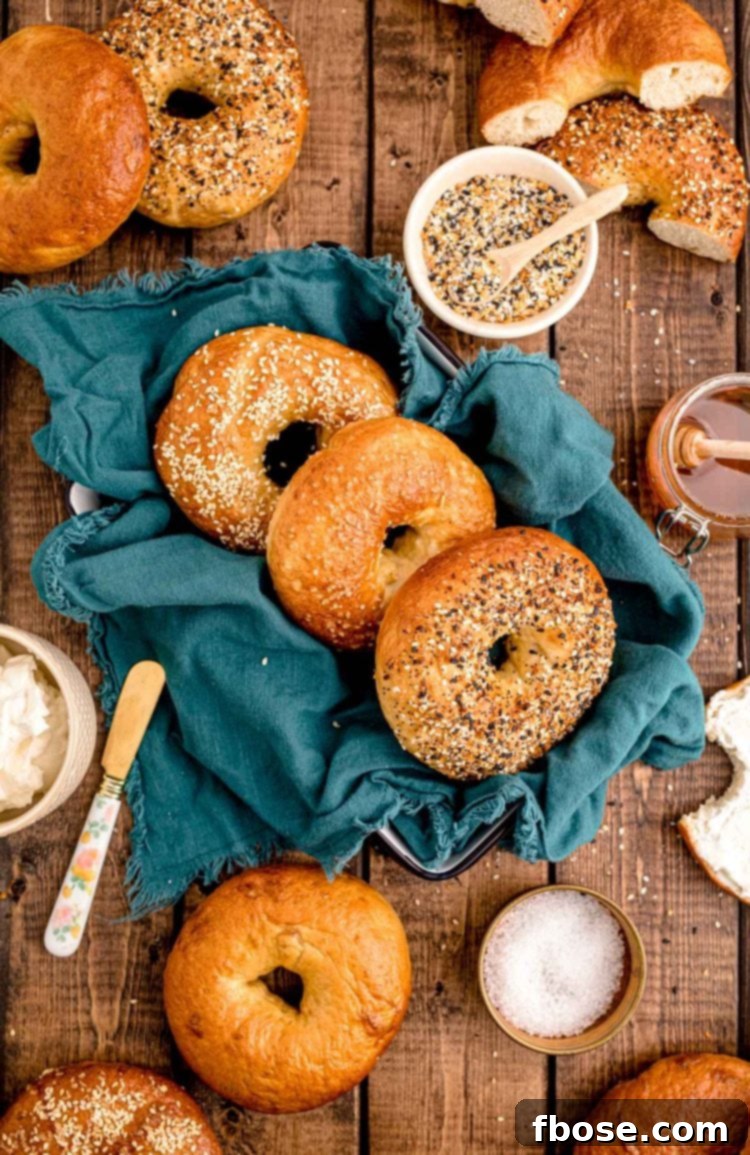
- Endless Topping Possibilities: One of the greatest joys of baking bagels at home is the freedom to personalize them with a variety of mouthwatering toppings. Beyond the popular everything bagel seasoning, you can experiment with classic choices like toasted sesame seeds for a nutty crunch, poppy seeds for a subtle texture, or caraway seeds for a unique, earthy flavor. For a simpler yet equally satisfying option, a sprinkle of coarse salt before baking enhances the flavor and provides a delicate crunch.
- Delightful Spread Pairings: A fresh, warm bagel is merely a canvas for delicious spreads. This recipe encourages creativity in serving by pairing your homemade creations with an assortment of fun and flavorful options. Lay out a selection of creamy plain or flavored cream cheeses, rich butter, vibrant fruit jams, or even a decadent cinnamon sugar mixture. The possibilities are truly endless, allowing everyone to customize their perfect bagel experience.
- Convenient Make-Ahead Option: Life can be busy, but that doesn’t mean you have to sacrifice the joy of homemade bagels. This recipe is wonderfully accommodating if you need to prepare elements in advance. By following specific make-ahead instructions (detailed further down), you can streamline your baking process, making fresh bagels a possibility even on hectic mornings or for entertaining a crowd. This flexibility makes them perfect for weekend baking or special brunches.
- The Ultimate Breakfast Sandwich Base: Elevate your breakfast sandwich game with these incredible homemade bagels. Their sturdy yet tender texture makes them the ideal foundation for layering all your favorite breakfast ingredients. Pile on fluffy scrambled eggs, melted cheese, creamy avocado slices, crispy bacon, or savory sausage patties. A breakfast sandwich made with a homemade bagel transforms a simple meal into an extraordinary culinary experience.
- Designed for Easy Success: We understand that trying new baking recipes can sometimes feel intimidating. That’s why this homemade bagel recipe is meticulously crafted to be exceptionally easy to follow, with clear instructions and helpful tips integrated throughout. We aim to demystify the bagel-making process, ensuring that even novice bakers can achieve perfectly golden, chewy bagels with confidence.
Essential Ingredients for Perfect Homemade Bagels
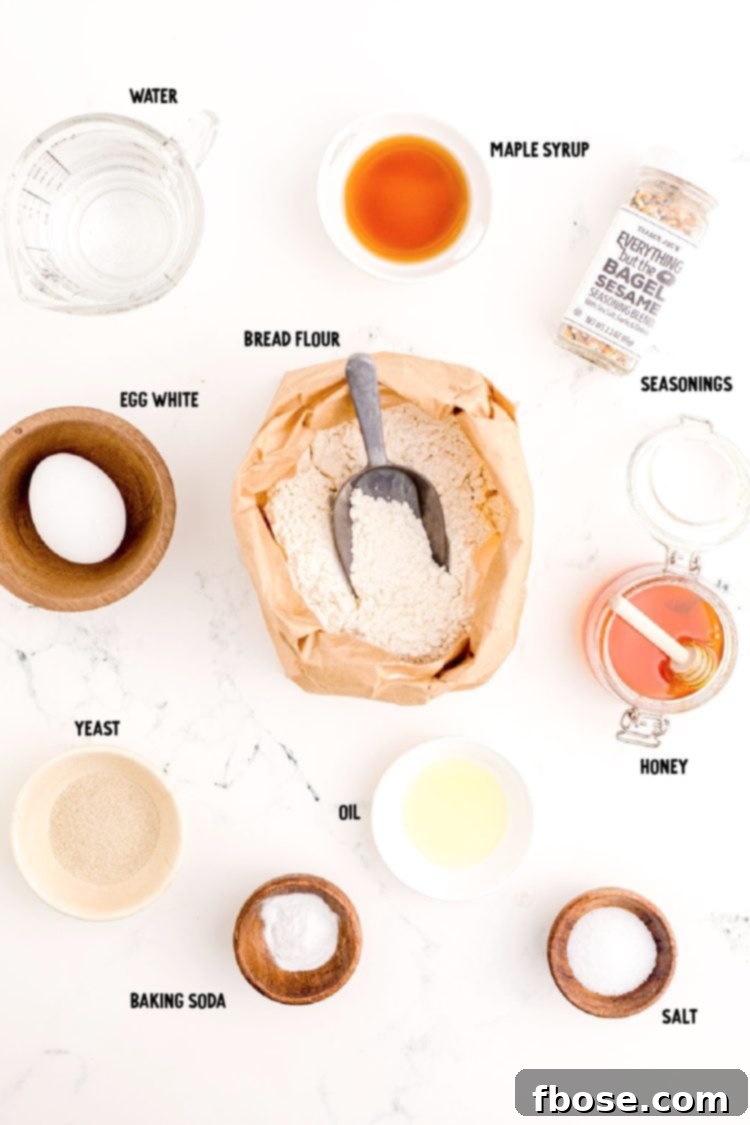
Crafting these delectable homemade bagels relies on a few key ingredients, most of which are likely already in your pantry. The recipe is divided into three distinct yet equally important components, each contributing to the unique taste and texture of a classic bagel.
First, let’s look at the **bagel dough ingredients**. You’ll need warm water to activate the yeast, maple syrup which provides a subtle sweetness and helps with browning, and active dry yeast, the essential leavening agent that gives the bagels their rise and airy pockets. Crucially, this recipe calls for bread flour. Bread flour has a higher protein content than all-purpose flour, which is vital for developing the strong gluten network needed to create that signature chewy texture that bagels are famous for. A touch of salt enhances flavor, and a small amount of vegetable oil helps keep the dough pliable and prevents sticking.
Once the dough is shaped, it’s time for the second crucial step: the **boiling bath**. This step is what truly transforms mere bread rolls into authentic bagels. For this, you’ll need water, honey, and baking soda. The honey adds another layer of sweetness and aids in the caramelization of the crust, contributing to the beautiful golden-brown color. Baking soda increases the pH of the boiling water, which helps to create the characteristic glossy, slightly crispy exterior and the dense, chewy interior. Skipping this boiling process would result in bagels that are more akin to regular bread rolls, lacking the distinct texture and flavor we all crave.
Finally, before the bagels make their way into the hot oven, they receive a simple yet effective **egg wash coating**. This is prepared with just egg whites and a tablespoon of water, whisked together. The egg wash serves multiple purposes: it helps the toppings adhere firmly to the bagels, provides a beautiful sheen, and contributes to the rich, golden-brown crust. Each of these components, from the carefully selected dough ingredients to the essential boiling bath and the finishing egg wash, plays a vital role in creating a truly exceptional homemade bagel.
Step-by-Step Guide to Crafting Chewy Homemade Bagels
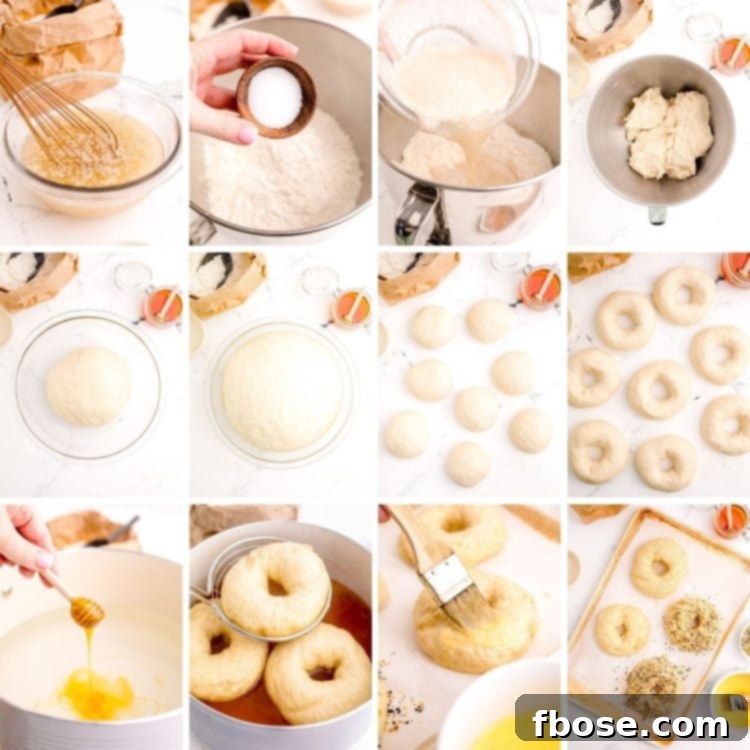
Making bagels from scratch is a rewarding process that yields incredibly delicious results. Follow these detailed steps to create your own batch of perfectly chewy, golden-brown bagels:
- Activate the Yeast: In a small bowl, combine the warm water, maple syrup, and sprinkle the active dry yeast over the top. Give it a gentle stir and let it sit for 5 to 10 minutes. This process allows the yeast to activate, indicated by a foamy layer forming on the surface. If your mixture doesn’t foam, the water might have been too hot or too cold, or your yeast may be expired. This step is crucial for light and airy bagels.
- Prepare the Dry Ingredients: In the bowl of your stand mixer, fitted with the dough hook attachment, whisk together 4 cups of the bread flour and the salt. Using a stand mixer simplifies the kneading process significantly.
- Combine Wet and Dry: Pour the activated yeast mixture into the center of the flour and salt mixture. Start mixing on low speed until all the ingredients are just combined and a shaggy dough begins to form.
- Knead the Dough: Increase the mixer speed to medium and continue beating for approximately 5 minutes. The dough should become moist, firm, and elastic. If at any point the dough appears too dry or stiff, add 1 tablespoon of water at a time until the desired consistency is reached.
- Hand Kneading and First Rise: Transfer the dough onto a lightly floured surface (using the remaining ¼ cup of bread flour). Knead the dough by hand for another 3 to 5 minutes until it is smooth, moist, and firm, incorporating any additional flour as needed. Form the dough into a smooth ball. Lightly grease a large bowl with vegetable oil, place the dough ball in it, and roll it around to coat. Cover the bowl tightly with plastic wrap and place it in a warm spot, allowing the dough to rise until it has doubled in size, which usually takes about 1 hour. This process is called proofing and is essential for developing flavor and texture.
- Punch Down and Rest: Once the dough has doubled, gently punch it down to release the air. Cover it again and let it rest for another 10 minutes. This allows the gluten to relax, making the dough easier to shape.
- Preheat Oven and Prep Baking Sheets: While the dough rests, preheat your oven to 425°F (220°C). Line two baking sheets with parchment paper; these will be used for baking the bagels.
- Divide and Shape the Dough: Divide the rested dough evenly into 8 portions. For best results and consistent bagel sizes, you can use a bench scraper and a kitchen scale. Shape each portion into a smooth ball. To create the classic bagel hole, press your thumb or finger through the center of each dough ball and gently stretch the opening until it’s about 2 inches in diameter. This prevents the hole from closing up during baking.
- Second Rest: Place the shaped bagels onto a separate baking sheet and cover them with a damp towel. Let them rest for 10 to 15 minutes while you prepare the boiling water bath.
- Prepare the Water Bath: In a large pot, combine 8 cups of water, honey, and baking soda. Bring the mixture to a rolling boil over high heat. This boiling step is non-negotiable for achieving that classic chewy bagel texture.
- Boil the Bagels: Carefully add 2 to 3 bagels at a time to the boiling water, ensuring not to overcrowd the pot. Boil them for 1 minute on one side, then use tongs or a slotted spoon to flip them over and boil for an additional 1 minute on the other side. If the water threatens to bubble over, simply reduce the heat slightly.
- Drain and Transfer: As you remove each boiled bagel from the water, place them onto the prepared parchment-lined baking sheets (distributing 4 bagels per sheet).
- Prepare the Egg Wash: In a small bowl, whisk together the egg white and water until well combined. This mixture will give your bagels a beautiful golden crust and help toppings adhere.
- Apply Egg Wash and Toppings: Lightly brush the top of each boiled bagel with the egg wash. If desired, sprinkle your chosen toppings generously at this stage. Everything bagel seasoning, sesame seeds, poppy seeds, or coarse salt are all excellent choices.
- Bake to Perfection: Transfer the baking sheets to the preheated oven and bake for 20 minutes, or until the bagels are beautifully golden brown and firm to the touch. Once baked, carefully transfer them to a wire rack to cool completely before slicing and enjoying their irresistible chewiness. Cooling is important to allow the internal structure to set.
Expert Tips for the Best Homemade Bagels
Achieving bakery-quality bagels at home is entirely possible with a few insider tips. These pointers will help ensure your homemade bagels turn out wonderfully chewy, perfectly golden, and utterly delicious every single time:
- Mastering Yeast Activation: The success of any yeast-based recipe hinges on properly activated yeast. When you combine warm water (ideally between 105-115°F or 40-46°C), maple syrup, and yeast, look for a bubbly, foamy layer to form on top after 5-10 minutes. This foam is a clear indicator that your yeast is alive and ready to work its magic. If you don’t see this activity, your water may have been too hot (killing the yeast) or too cold (preventing activation), or your yeast might be expired. Always check the expiration date and ensure the water temperature is correct for optimal results.
- Adjusting Dough Moisture: Bagel dough needs to be firm yet pliable. If you find your dough is too dry during the mixing process – perhaps it’s crumbly or not coming together – don’t panic. Simply add water, 1 tablespoon at a time, allowing each addition to fully incorporate before adding more. Overly dry dough can result in dense, hard bagels, so getting the hydration right is key.
- Understanding Proofing: Proofing is a critical stage where the dough rests in an oiled bowl in a warm environment. During this period, the active yeast ferments the sugars in the dough, producing carbon dioxide gases. These gases are trapped within the gluten structure, causing the dough to rise and expand. Proper proofing develops the dough’s flavor and contributes to the bagel’s characteristic airy interior and chewy crumb. Don’t rush this step; allow the dough to double in size for optimal texture.
- Never Skip the Boil: This is arguably the most crucial step for authentic bagels. Boiling the shaped dough in a honey and baking soda solution for a short period gelatinizes the starch on the surface of the bagel. This creates a slightly crisp, glossy crust and locks in moisture, resulting in that dense, chewy interior unique to bagels. Without boiling, you’d simply have bread rolls with a hole – a very different (though still tasty) product.
- The Power of Bread Flour: For that distinctive, crave-worthy chewy bagel texture, bread flour is essential. Its higher protein content (typically 12-14%) means it has more gluten-forming proteins. When kneaded, this gluten develops into a strong, elastic network that can trap the gases produced by the yeast, giving bagels their characteristic structure and resilience. While all-purpose flour can work, it won’t yield the same intense chewiness.
- Accurate Flour Measurement: When measuring flour, resist the urge to scoop directly from the bag with your measuring cup. This action compacts the flour, leading to an excess amount being used, which can result in heavy, dry, and dense bagels. Instead, use the “spoon and level” method: spoon the flour into your measuring cup until it overflows, then use a straight edge (like the back of a knife) to level off the excess. This ensures a more accurate measurement and lighter, chewier bagels.
Frequently Asked Questions About Homemade Bagels
Making bagels at home often brings up a few common questions. Here are detailed answers to help you navigate the process and achieve bagel perfection:
How To Make These Bagels Ahead Of Time
Preparing bagels in advance is a fantastic way to enjoy fresh bagels without the early morning rush. To make the dough ahead of time, simply follow the instructions up to step 5 (after kneading and forming the dough ball). Instead of placing the bowl in a warm spot for proofing, cover it tightly with plastic wrap and refrigerate it for up to 24 hours. The cold temperature will significantly slow down the yeast activity. When you’re ready to bake, remove the dough from the fridge and let it sit at room temperature for about an hour to take the chill off. Afterward, gently punch down the dough and allow it to rest for an additional 10 minutes before proceeding with shaping your bagels and continuing with the remaining recipe instructions from step 8 onwards. This method ensures delicious, fresh bagels with minimal fuss on baking day.
How Long Do These Homemade Bagels Last?
Fresh homemade bagels are best enjoyed within a day or two of baking. When stored in an airtight container at room temperature, they will maintain their freshness for a few days. For optimal preservation, you can also wrap individual bagels tightly in plastic wrap before storing them. If you wish to extend their shelf life, you can store them in the refrigerator for up to 1 week. For longer storage, bagels freeze exceptionally well. Place them in a freezer-safe bag or container, and they will keep for up to 3 months. When ready to enjoy, simply thaw them at room temperature and toast to refresh their texture.
Can I Roll The Bagels Into Ropes To Make The Bagel Shape?
While some recipes suggest rolling the dough into ropes and then joining the ends to form a circle, we’ve found that this method can sometimes lead to issues. When boiled, the seam where the ends are joined tends to come apart in the water, resulting in misshapen bagels. For a more consistent and reliable bagel shape, it works best to form the dough into a ball and then press your finger or thumb directly into the middle to create a hole. Once the hole is formed, gently stretch the opening out to about 2 inches in diameter. This technique creates a stronger, seamless bagel that holds its shape beautifully through the boiling and baking process.
Can I Just Use All-Purpose Flour In This Homemade Bagel Recipe?
Technically, you can use all-purpose flour in this recipe, and your bagels will still be edible. However, for the true, classic chewy bagel texture, we highly encourage the use of bread flour. Bread flour has a higher protein content than all-purpose flour, which means it develops more gluten when kneaded. This stronger gluten network is what gives bagels their characteristic elasticity and chewiness. If you use all-purpose flour, your bagels will likely turn out softer and more bread-like, lacking that satisfying chew that makes a bagel a bagel. For an authentic experience, bread flour is definitely the preferred choice.
What Can I Use Instead Of Maple Syrup?
If you don’t have maple syrup on hand or prefer an alternative, you can easily substitute it. You can swap the maple syrup for 1 tablespoon of brown sugar or 1 tablespoon of white sugar. Both will provide the necessary sweetness and aid in browning. Personally, I find that brown sugar imparts a slightly richer, more complex flavor profile, which complements the savory notes of the bagel dough wonderfully. However, white sugar will work just fine for a more neutral sweetness.
When The Bagels Are Added To The Boiling Water It Bubbles Over, What Should I Do?
It’s quite common for the boiling water bath to become very active and sometimes bubble over, especially when adding the bagels. This is usually due to the rapid displacement of water and the reaction with the baking soda. Not to worry – this is easily remedied. Simply reduce the heat slightly. Lowering the heat will calm the boil and prevent overflow without significantly impacting the boiling process essential for the bagels’ texture. Maintain a steady, gentle boil rather than a vigorous one, and you should be fine.
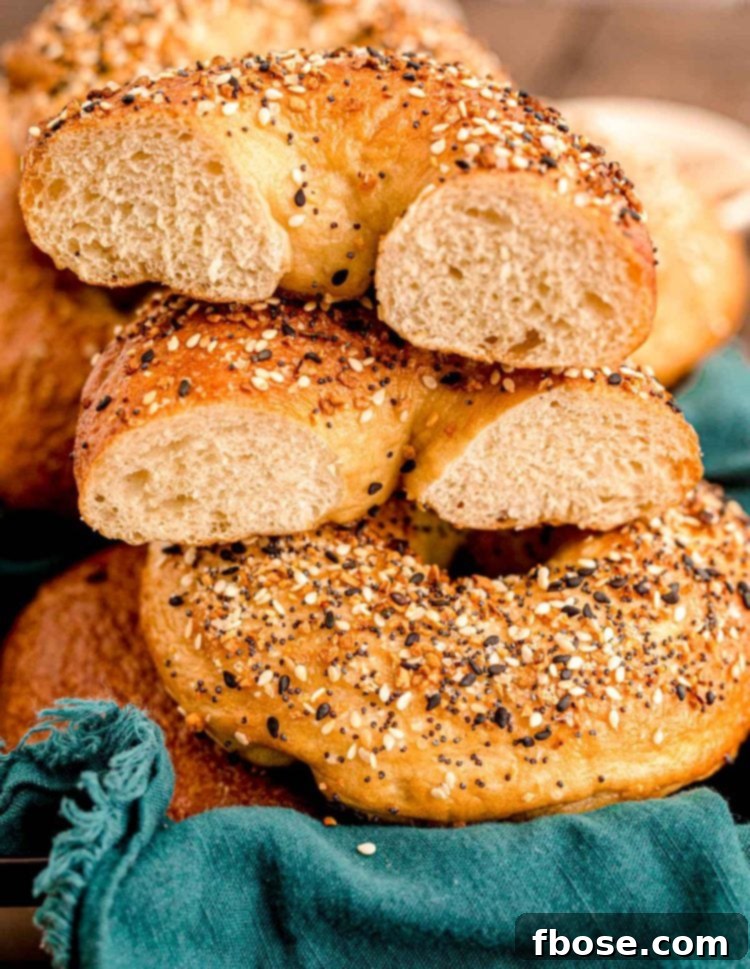
There’s a unique satisfaction that comes from spending time in the kitchen, especially when working with yeast to create delicious baked goods like these homemade bagels. The process, from activating the yeast to watching the dough rise and finally pulling warm, fragrant bagels from the oven, is truly rewarding. If you’ve enjoyed this recipe and are looking for more delightful baking projects that utilize yeast, we have several other fantastic options for you to explore. Each recipe promises a unique and tasty experience that will further enhance your baking skills.
- New Orleans Style Beignets – Indulge in these light, deep-fried delights, generously dusted with powdered sugar for a truly authentic treat!
- Cinnamon Swirl Bread – A tender, sweet loaf featuring beautiful ribbons of cinnamon, requiring just 30 minutes of hands-on prep time for a comforting bake.
- Best Pecan Sticky Buns – A beloved classic breakfast indulgence, these buns are amazingly gooey, sweet, and topped with crunchy pecans.
- Homemade Brioche – Experience the richness of this buttery, soft bread, perfect for crafting the most exquisite French toast or simply enjoying on its own.
- Brioche Donuts with Vanilla Cream – Light and crisp, these delectable donuts are generously filled with a smooth, homemade vanilla cream for an unforgettable dessert or breakfast.
Homemade Bagels Recipe Card
Homemade Bagels
Rebecca Hubbell
Breakfast
American
45 minutes
45 minutes
1 hour
2 hours 30 minutes
8 bagels
These Homemade Bagels are made with pantry staple ingredients and turn out golden brown, soft, and most importantly, perfectly chewy! Prep this easy to follow recipe in just 45 minutes!
Equipment
- Small bowl
- Whisk
- Stand mixer
- Measuring Cups
- Measuring spoons
- Large pot
- Parchment paper
- 3 Baking sheets
- Pastry brush
- Slotted spoon
Ingredients
Dough
- 1½ cups warm water
- 1 tablespoon maple syrup
- 2¼ teaspoons active dry yeast (One ¼-ounce packet)
- 4¼ cups bread flour (divided – save ¼ cup for kneading later)
- 2 teaspoons salt
- 1 teaspoon vegetable oil
Water Bath
- 8 cups water
- 3 tablespoons honey
- 1 teaspoon baking soda
Egg Wash
- 1 large egg white (beaten)
- 1 tablespoon water
Instructions
- Add the warm water to a small bowl with the maple syrup. Then sprinkle on the yeast and give it a gentle stir. Allow this to sit for 5 to 10 minutes to activate the yeast. It should get foamy. If it doesn’t, your water may have been too cold, or too hot. Or your yeast may have expired.
- In the bowl of a stand mixer fitted with a dough hook, mix together 4 cups of flour with the salt.
- Pour the activated yeast mixture into the middle of the flour and mix at low speed until the ingredients are incorporated.
- Then increase the speed to medium speed and beat for an additional 5 minutes, or until the dough is moist and firm. If you find that the dough is too dry, try adding 1 Tablespoon of water at a time.
- Use the remaining ¼ cup of flour to dust a clean flat surface. Remove the dough from the mixer and place it on the floured surface. Knead the dough until it is moist and firm, this will take 3 to 5 minutes, working in the remaining ¼ cup of flour as you are able to.
- Form the dough into a ball and place it into a large bowl greased with 1 teaspoon of oil (roll the ball of dough around so it is covered in the oil). Cover the dough with plastic wrap and place it in a warm area to proof. Allow the dough to rise for an hour or until about double in size.
- Punch down the dough and allow it to rest for 10 minutes.
- Preheat the oven to 425°F (220°C). Line 2 baking sheets with parchment paper and set aside.
- Divide the dough evenly into 8 pieces (use a bench scraper and kitchen scale for best results). Shape each piece into a ball, and press your finger through the middle to make a hole about 2 inches in diameter.
- Place the formed bagels onto a separate baking sheet and cover with a damp towel. Allow these to rest for 10 to 15 minutes while you prepare the water bath.
- Add the water, honey, and baking soda to a large pot and bring it to a boil.
- Boil 2 to 3 bagels at a time (if you are able to do this without crowding). Boil them on for 1 minute, then flip them and boil for 1 additional minute. Use tongs or a slotted spoon to flip them.
- As you remove the bagels from the boiling water, place them on the baking sheets (4 per sheet).
- In a small bowl, beat together the egg white and water to make the egg wash.
- Brush each bagel lightly with the egg wash. Add toppings such as sesame seeds or coarse salt, if desired.
- Bake the bagels for 20 minutes or until golden brown. Then transfer them to a wire rack to cool completely before cutting.
Notes
- How To Make The Bagels Ahead Of Time: Just follow the instructions up to step 5 but then skip putting the dough in a warm place. Instead, you’re going to cover it and place it in the fridge. When you’re ready to use it, remove the dough from the fridge. Then allow it to sit at room temperature for an hour. Afterward, punch it down and let it sit for an additional 10 minutes. Then you can begin shaping your bagels and continue on with the recipe instructions.
- How Long Do These Bagels Last? When stored in an airtight container at room temperature these bagels will last for a few days. You could also wrap them individually in plastic wrap. The bagels can also be stored in the fridge for up to 1 week. Or freeze for up to 3 months.
- Can I Roll The Bagels Into Ropes To Make The Bagel Shape? We actually tried that but found that the bagel would come apart in the water. It works best to just make a hole in the ball of dough. Then just simply stretch the opening out about 2 inches in diameter.
- Can I Just Use All-Purpose Flour In This Homemade Bagel Recipe? All-purpose flour will work but the texture does turn out to be different. For the perfect bagel texture, I’d highly encourage bread flour.
- What Can I Use Instead Of Maple Syrup? You can swap that out for 1 Tablespoon of brown sugar or 1 Tablespoon of white sugar. I prefer brown sugar because of its flavor.
- When The Bagels Are Added To The Boiling Water It Bubbles Over, What Should I Do? Not to worry, just turn the heat down a little bit!
Nutrition
Calories: 283kcal | Carbohydrates: 58g | Protein: 10g | Fat: 1g | Saturated Fat: 1g | Polyunsaturated Fat: 1g | Monounsaturated Fat: 1g | Sodium: 742mg | Potassium: 115mg | Fiber: 3g | Sugar: 8g | Vitamin A: 1IU | Vitamin C: 1mg | Calcium: 23mg | Iron: 1mg
If you’ve tried this recipe, please let me know how you liked it in the comments below and leave a review. I love hearing from you!
Don’t forget to tag me – @sugarandsoulco – on Instagram and Pinterest with your photos or join our Sugar & Soul Show-offs Community and share them there, where you can join our recipe challenges!
Did You Make This Recipe?
Don’t forget to share it with me on Instagram @sugarandsoulco and follow on Tiktok @sugarandsoulco and Pinterest @sugarandsoulco for more!