
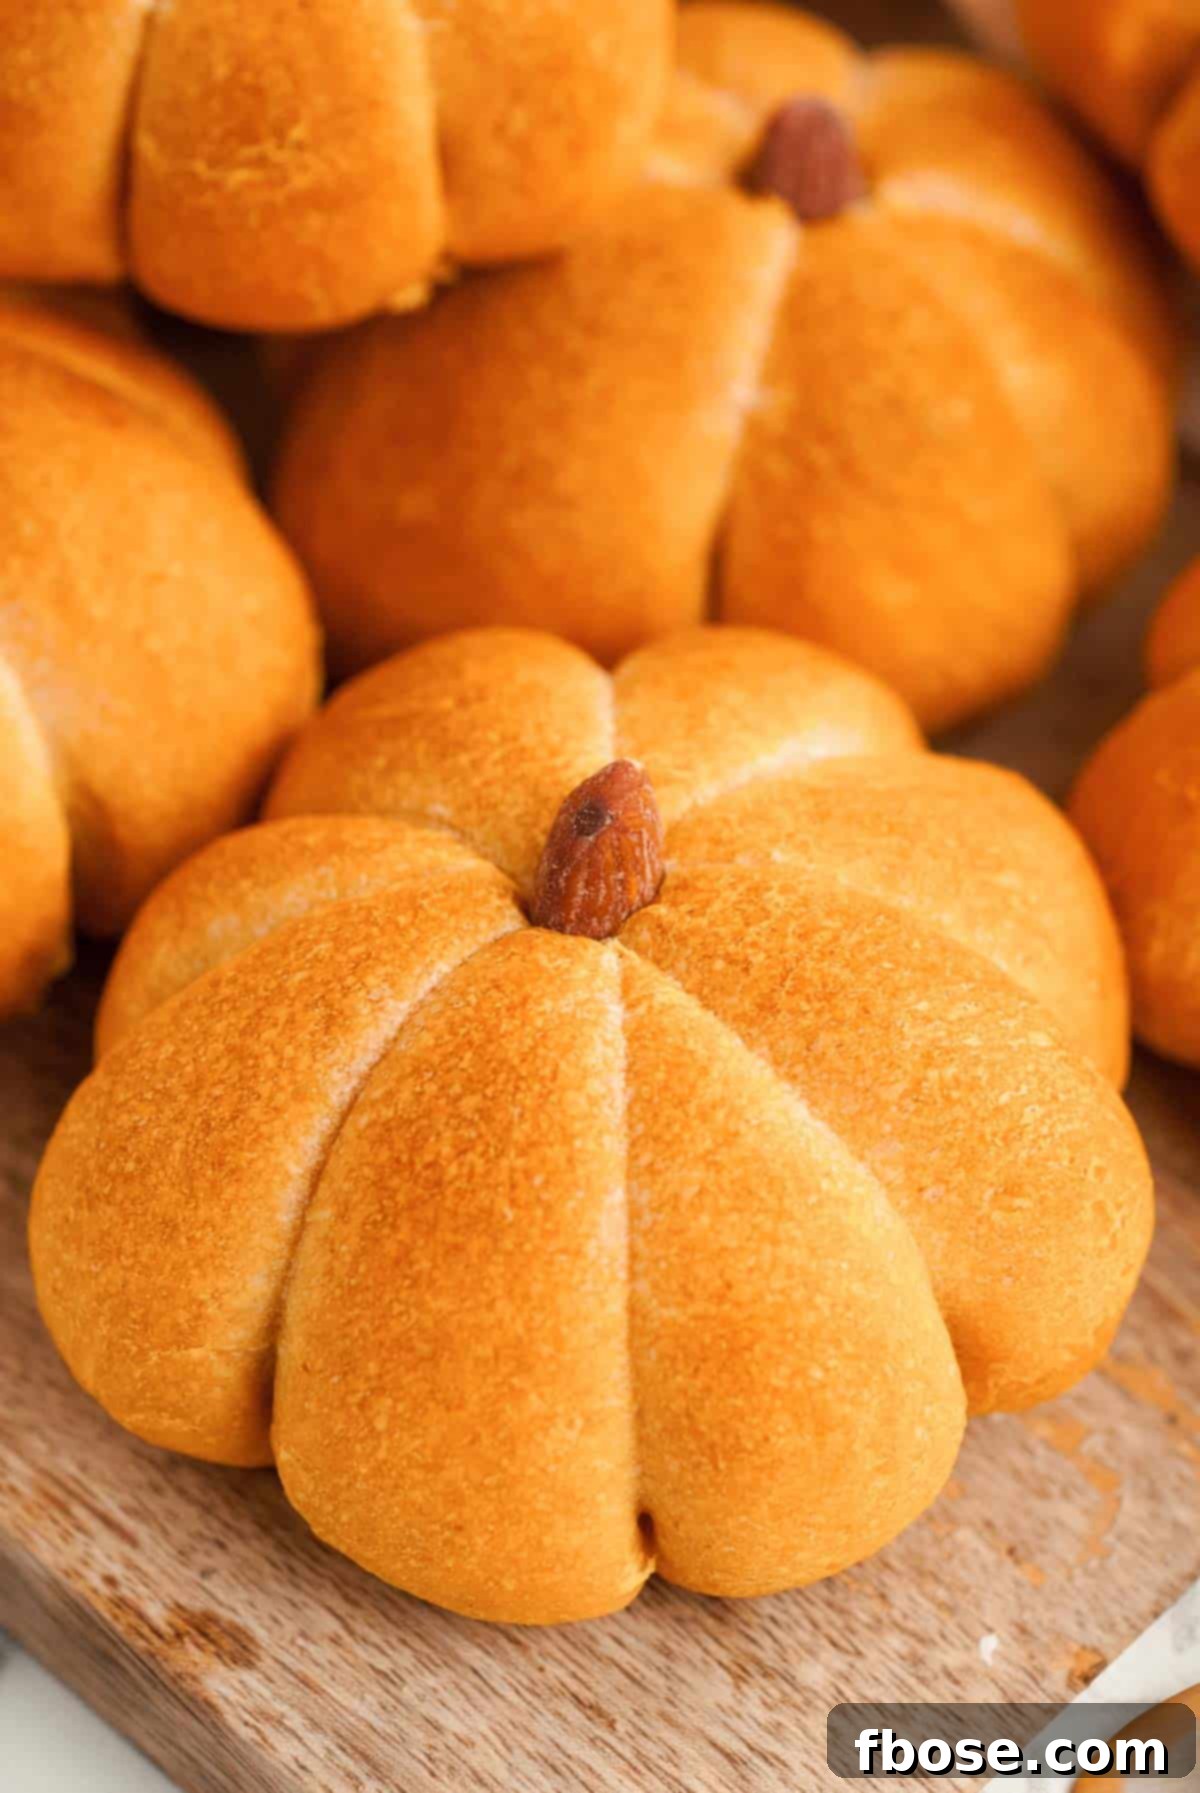
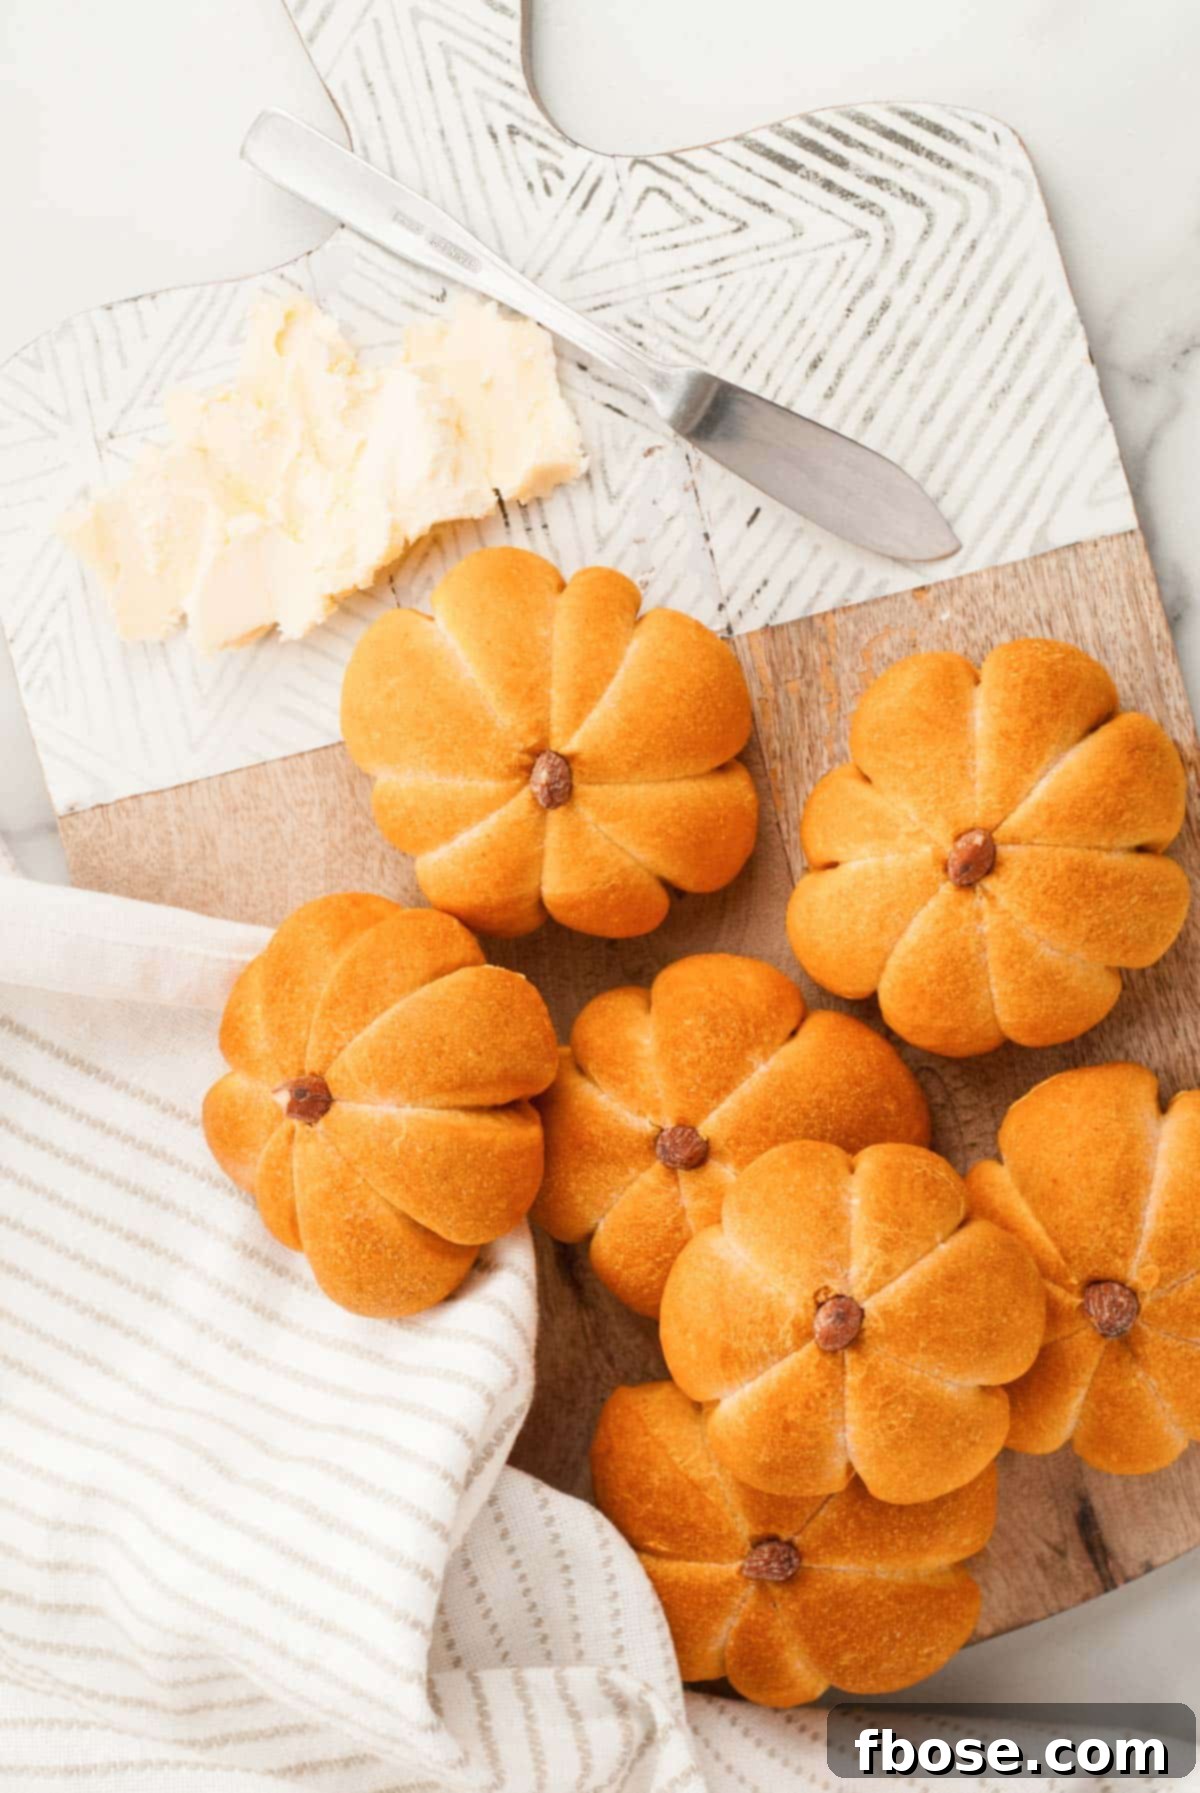
Welcome the cozy ambiance of autumn into your home with these utterly charming and irresistibly delicious Pumpkin Dinner Rolls. Crafted from a soft, savory yeast dough, these rolls are not just a treat for the palate but a feast for the eyes, cleverly shaped into miniature pumpkins using food-safe twine and crowned with a delicate almond “stem.” Preparing over a dozen of these festive rolls is surprisingly quick, requiring only about 15 minutes of active prep time, making them a perfect addition to your fall baking repertoire.
There’s an undeniable joy in serving food that’s as delightful to look at as it is to eat, and these pumpkin-shaped rolls perfectly embody that spirit. Just like our beloved Easy Mini Pumpkin Bundt Cakes, brimming with sweet cream cheese frosting, these dinner rolls transform a simple staple into a memorable occasion. They are designed to bring a smile to every face at your table, adding a touch of whimsical elegance to any meal, particularly during the festive fall season.
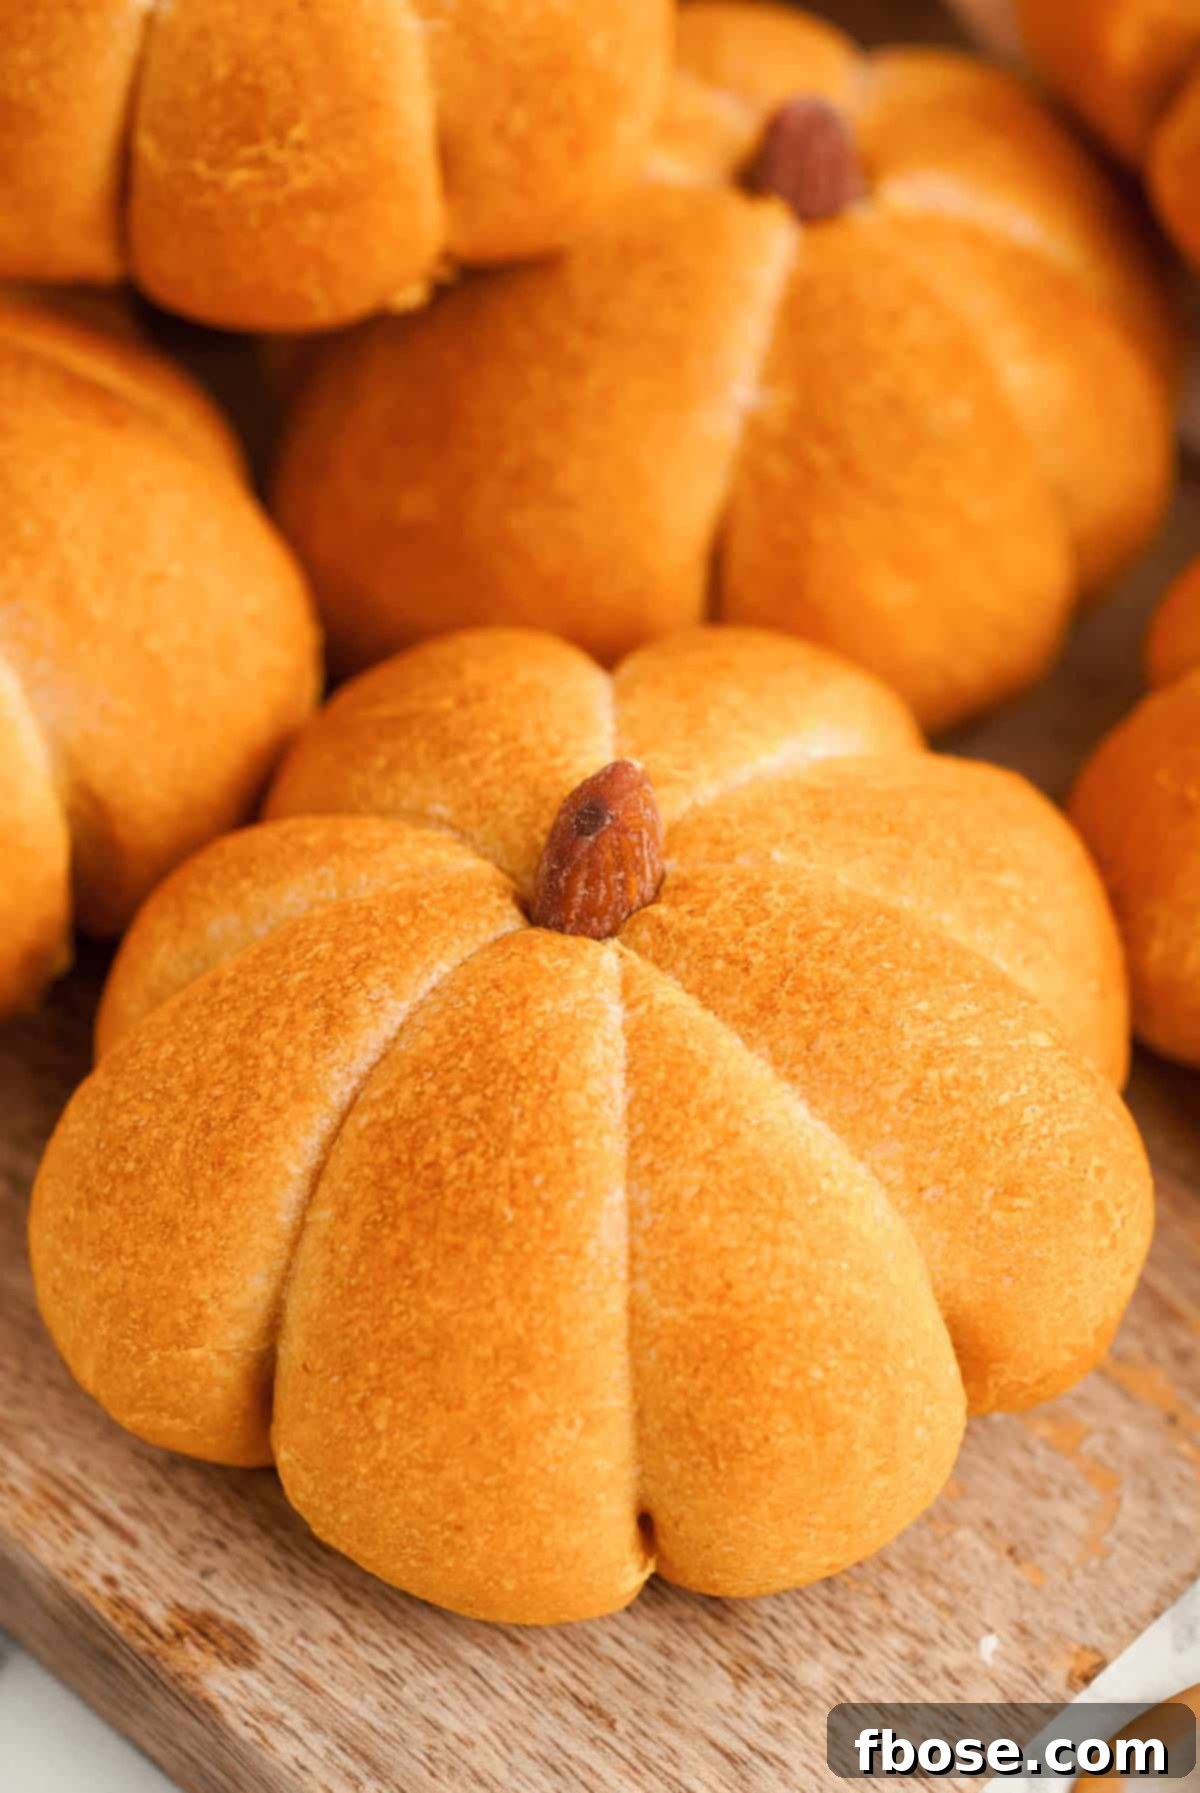
Imagine the delightful surprise when your guests see these soft and fluffy Pumpkin Dinner Rolls gracing your fall table. Their inviting aroma and unique appearance instantly elevate any meal, making them a centerpiece of conversation. More than just visually appealing, their rich, subtle flavor ensures they’ll vanish quickly, becoming an instant favorite. Each batch is made with essential pantry ingredients – active yeast, rich pumpkin puree, and a few everyday staples – allowing you to cultivate your very own “pumpkin patch” of rolls ready to bake to golden perfection in just about 30 minutes.
A Culinary Harvest: What to Expect from Your Pumpkin Dinner Rolls!
Taste Profile: These easy-to-make pumpkin dinner rolls offer a wonderful blend of classic yeast roll comfort with a delicate, savory hint of pumpkin. They are perfect served warm, allowing their subtle flavors to truly shine. For an enhanced experience, spread them generously with your favorite butter. To create flavorful pumpkin rosemary dinner rolls, simply incorporate some aromatic Herb Butter. If you prefer a sweeter touch, these rolls pair magnificently with Honey Butter, offering a delightful balance of sweet and savory notes that will tantalize your taste buds.
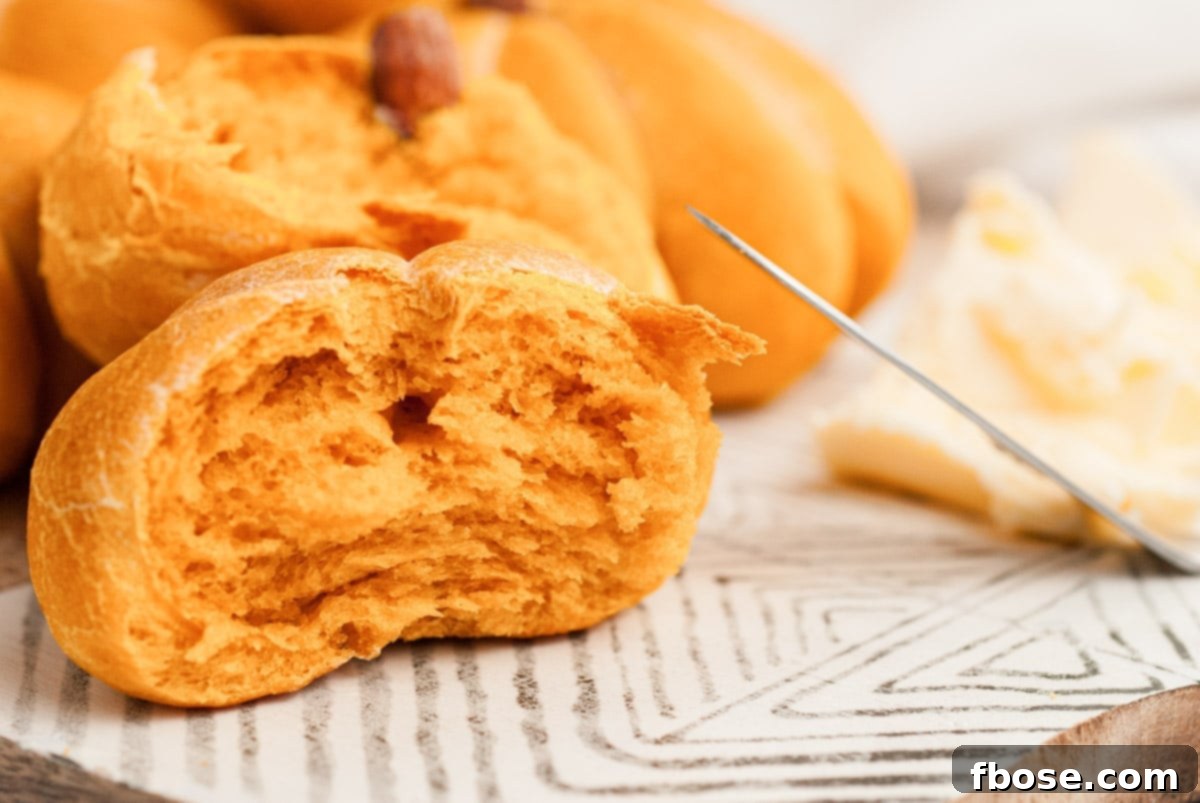
Texture Sensation: Upon baking, these rolls achieve a gorgeous golden exterior that beautifully accentuates their distinct pumpkin shape. The crust is tender enough to yield easily but firm enough to hold its form. Bite into one, and you’ll discover an interior that is incredibly tender, fluffy, and perfectly soft – everything a superb dinner roll should be. This delightful contrast between the gently crisp exterior and the pillowy inside makes each bite an absolute pleasure, ensuring these rolls are not only a visual spectacle but a truly satisfying culinary experience.
Unlocking the Magic of Yeast: Essential Proofing Tips and Tricks!
Working with yeast dough is a rewarding process that requires patience and a good understanding of proofing – the crucial resting and rising period before baking. During this time, the active yeast ferments the sugars in the dough, producing carbon dioxide gases that cause the dough to expand and become light and airy. The key to successful proofing is a warm, consistent environment. While finding the perfect spot can sometimes be a bit challenging, here are some of our most reliable and helpful proofing methods to ensure your dough rises beautifully every time:
- Embrace a Warm Spot in Your Home: Often, the simplest solution is the best. Covering your bowl of bread dough and placing it in a naturally warm area of your home will typically do the trick. Ideal locations might be near a sun-drenched window, on top of a warm appliance (like a refrigerator, if it emits a gentle heat), or conveniently close to a woodstove or pellet stove, which provides consistent, gentle warmth.
- The Cold Oven, Hot Water Method: This technique creates a perfectly warm and humid environment for your dough. Place a bowl or pot of freshly boiled water on the bottom rack of a cold, unheated oven. Then, position your covered bowl of dough on the shelf directly above it. The steam from the hot water will gently warm the oven, creating an ideal, draft-free atmosphere for your dough to rise to its full potential.
- A Quick Oven Preheat Trick: For a rapid warm-up, preheat your oven to its absolute lowest temperature setting for just 1 to 2 minutes. Immediately turn the oven off. Place your oven-safe bowl of covered dough inside the now-warm oven and quickly close the door. The residual heat will provide the perfect environment for proofing without risking overheating the yeast.
- Utilize Your Oven’s “Proof” Setting: Many modern ovens come equipped with a dedicated “proof” setting. This intelligent feature maintains an optimal low temperature and humidity level specifically designed for yeast doughs. If your oven has this option, it’s an incredibly convenient and foolproof way to ensure consistent and successful proofing results.
Mastering the Art: How to Shape Your Rolls into Perfect Pumpkins!
The delightful, festive shape of these rolls might seem intimidating at first glance, but rest assured, transforming them into charming little pumpkins is surprisingly straightforward and incredibly fun! With a few simple steps and helpful tips, you’ll be crafting perfectly shaped pumpkin rolls in no time:
- Selecting the Right Twine: The secret to achieving that signature pumpkin indentation lies in using food-safe twine. When purchasing, make sure to choose 100% natural cotton twine, often labeled as butcher’s, kitchen, or cooking twine. This type is specifically designed to safely withstand high-heat cooking temperatures in the oven. It is crucial to avoid jute twine; while it may be food-safe, it is not suitable for oven use. You can easily find suitable food-safe twine at most grocery stores or online.
- Pre-Cut for Efficiency: To streamline your baking process and keep things moving smoothly, we highly recommend pre-cutting your twine into manageable 10-inch pieces before you start shaping the dough. This simple preparation step saves time and reduces stress during assembly.
- The Essential Oil Soak: Before using, immerse your pre-cut twine pieces in a small bowl of vegetable oil. This vital step prevents the twine from sticking to the dough during baking, allowing for effortless removal once the rolls are cooked. Oiled twine will slide off cleanly, preserving the beautiful pumpkin shape without damaging your rolls.
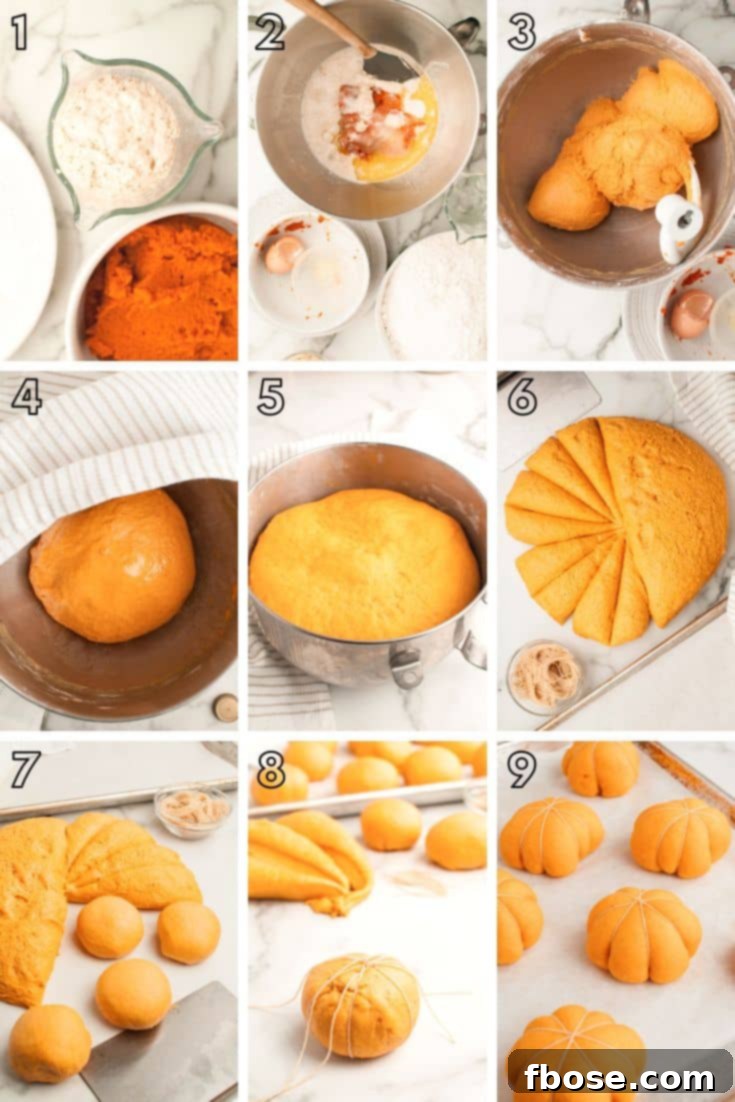
- Assembling Your Pumpkins: Lay four pieces of your oiled, cut twine on your clean work surface, arranging them in a starburst pattern that resembles a sliced pie, ensuring the sections are roughly equal. Place a perfectly rounded ball of dough directly into the center where the twine pieces intersect. Next, take the two ends of one piece of twine and gently tie them together over the top of the dough ball, forming a snug but not overly tight loop. Repeat this process with the remaining three pieces of twine, creating four distinct segments around the dough ball. After tying, trim any excess twine for a neat finish.
- The Second Rise Unveils the Shape: Once all your little pumpkins are assembled and tied, arrange them on parchment-lined baking sheets, leaving ample space between each roll for expansion. Cover them loosely and place them in a warm area for their second rise. As the dough proofs and expands during this period, it will naturally push against the twine, gradually taking on those charming, segmented pumpkin contours. This is where the magic truly happens, transforming simple dough balls into festive autumnal masterpieces!
To ensure your rolls are perfectly cooked through and safe to eat, you can utilize a kitchen thermometer. Insert it into the center of a roll; the internal temperature should register at least 190°F (88°C) when fully baked.
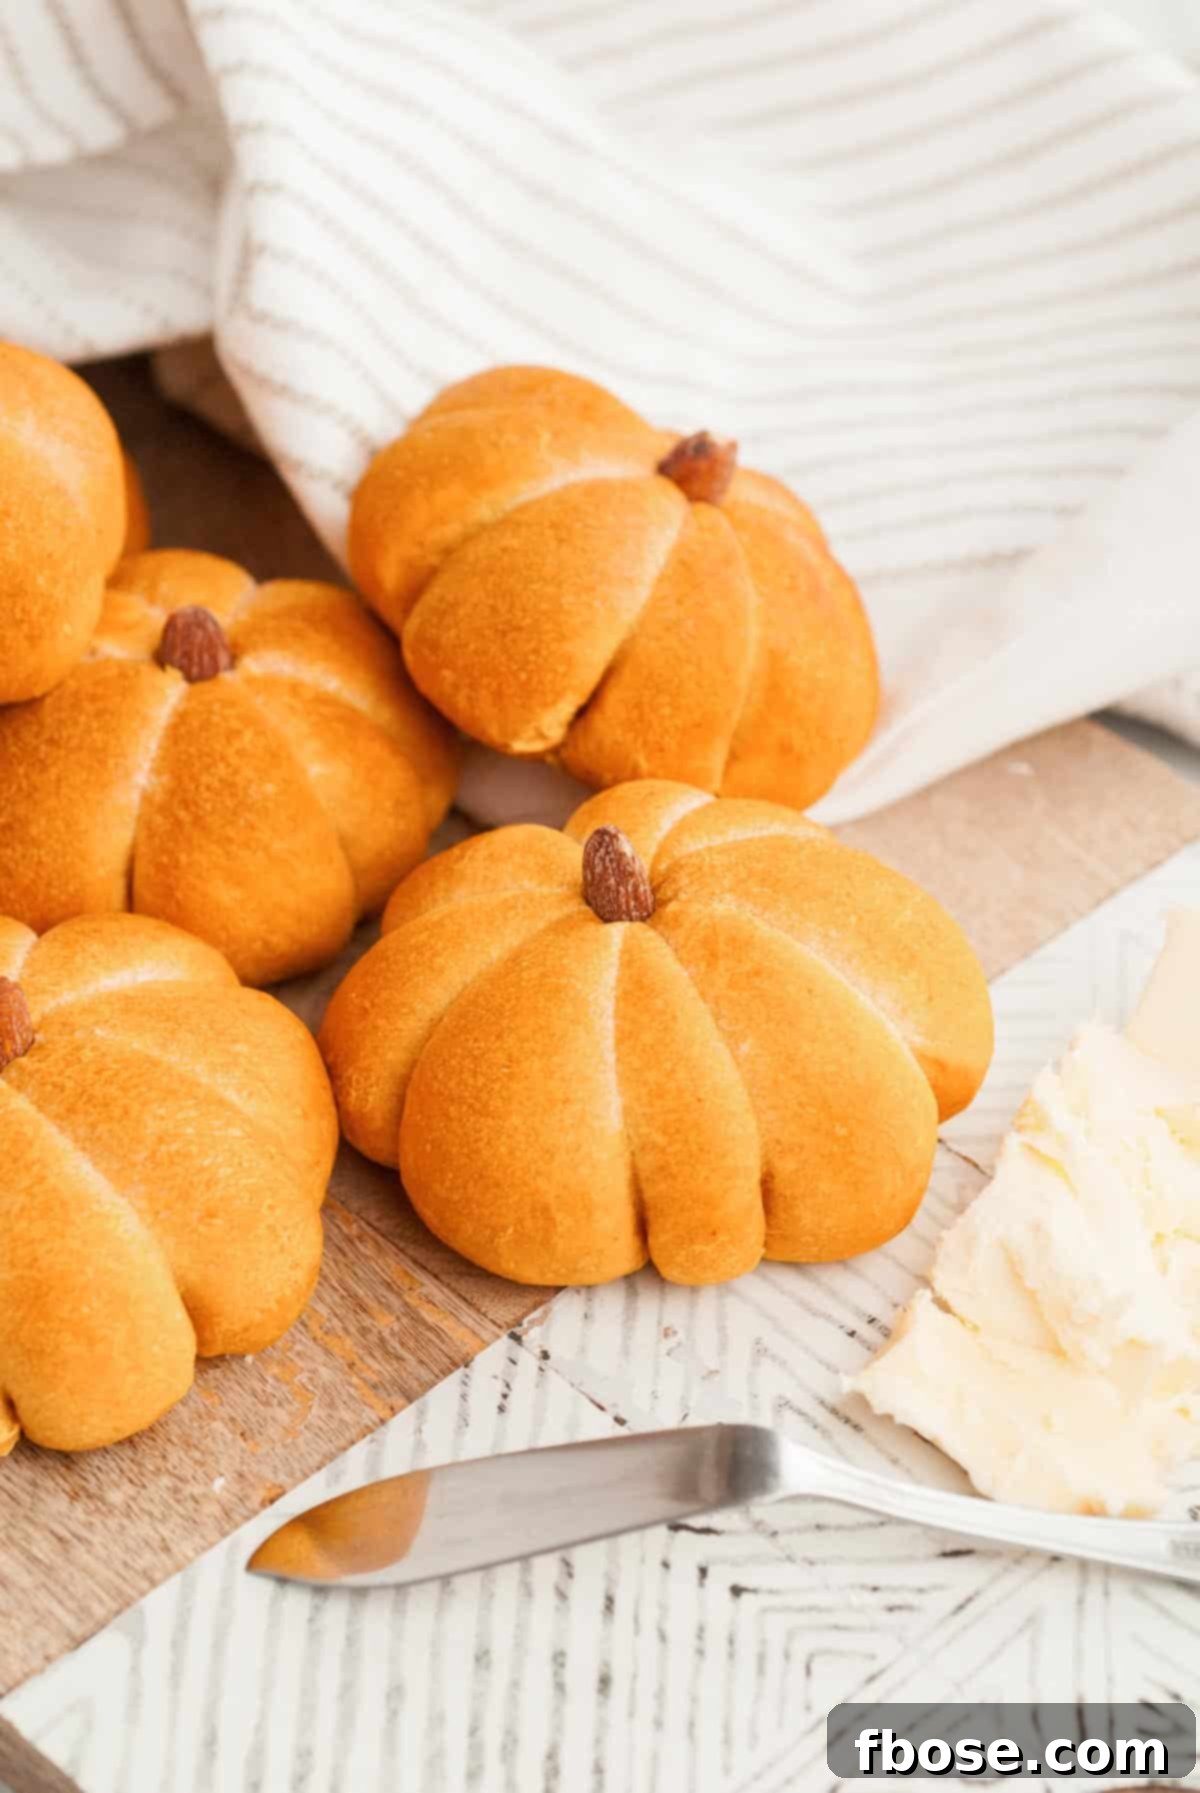
These delightful Pumpkin Dinner Rolls are guaranteed to impress and “WOW” all your friends and family at any dinner gathering! They are an especially perfect and memorable addition to the grand Thanksgiving Day meal. After all, when you’re dedicating effort to preparing a succulent, tender Perfect Thanksgiving Roast Turkey, why not continue to go the extra mile with every detail? From the comforting sweetness of a Homemade Apple Pie to the vibrant tang of Classic Cranberry Sauce and the creamy richness of Crockpot Cheesy Corn, these festive rolls will fit right in, completing your holiday spread with both charm and flavor.
Storing Your Seasonal Delights: Best Practices for Pumpkin Dinner Rolls
To keep your Pumpkin Dinner Rolls fresh and delicious for as long as possible, proper storage is key. Once completely cooled, place them in an airtight container or a high-quality Ziploc bag, making sure to gently squeeze out any excess air before sealing. When stored at room temperature, these rolls will retain their wonderful texture and flavor for up to 3 days. For longer storage, they can be frozen for up to 2-3 months. To reheat, simply warm them gently in the oven or microwave until soft and fragrant, bringing back their freshly baked goodness.
Yield and Flexibility: How Many Pumpkin-Shaped Rolls Does This Recipe Make?
This recipe is designed to yield a generous batch of 16 beautifully pumpkin-shaped dinner rolls, making it ideal for most family meals or small gatherings. If you find yourself hosting a larger crowd, or simply want to ensure you have plenty of leftovers (which are always a treat!), you can easily whip up a second batch. Since you’ll already have your ingredients and equipment out, doubling the recipe is a breeze and takes very little extra time, ensuring everyone gets to enjoy these festive treats.
The Science of Yeast: What Temperature Should the Milk Be?
The temperature of your milk is critically important when working with yeast, as it directly impacts the yeast’s activity. For optimal results, the milk should be warmed to a temperature between 100°F and 110°F (38°C to 43°C). If the milk is too hot, it can unfortunately kill the delicate yeast organisms, preventing your dough from rising. Conversely, if the milk is too cold, the yeast will remain dormant and won’t activate properly, leading to a flat, dense dough. To ensure precision and success every time, we highly recommend using a simple kitchen thermometer to accurately monitor the milk’s temperature before adding the yeast.
Confirming Yeast Activity: How Do I Know My Yeast Is Ready?
Ensuring your yeast is active and ready to work its magic is a crucial first step in any yeast-based recipe. After combining the yeast with warm milk and a pinch of sugar, allow the mixture to sit for about 5 minutes. During this time, active yeast will begin to “bloom,” creating a noticeable bubbly or foamy layer on the surface of the liquid. This frothy appearance is your visual cue that the yeast is alive, thriving, and ready to be incorporated into your dough, guaranteeing a light and airy texture for your delicious pumpkin dinner rolls.
Let’s Connect and Share Your Creations!
We love seeing your culinary creations! If you’ve tried this delightful Pumpkin Dinner Roll recipe, please share your thoughts and experience in the comments section below and consider leaving a review. Your feedback is incredibly valuable and always appreciated!
Don’t forget to tag us – @sugarandsoulco – on Instagram and Pinterest with your photos of these festive rolls. You can also join our Sugar & Soul Show-offs Community on Facebook and share them there, where you can also participate in our fun recipe challenges!
★★★★★ (5 out of 5 stars, based on 3 votes)
Pumpkin Dinner Rolls
Author: Rebecca Hubbell
Course: Bread
Cuisine: American
Prep Time: 15 minutes
Cook Time: 30 minutes
Proof Time: 2 hours
Total Time: 2 hours 45 minutes
Servings: 16 rolls
Pin Recipe
Rate This Recipe
These Pumpkin Dinner Rolls are made with a delicious yeast dough and shaped into pumpkins using food-safe twine with almonds as the stem! Over a dozen of these dinner rolls take only 15 minutes to prep!
Equipment
- Stand mixer
- Dough hook
- Measuring Cups
- Measuring spoons
- Kitchen towel
- Large mixing bowl
- Baker’s twine
- 2 Baking sheets
Ingredients
- ½ cup whole milk
- 2½ teaspoons active dry yeast
- ¼ cup granulated sugar (divided)
- 15 ounces 100% pumpkin puree
- ¼ cup salted butter (melted)
- 1 large egg
- 1½ teaspoons salt
- 4½ cups all-purpose flour (more if needed)
- 2-3 tablespoons vegetable oil
- 16 whole almonds
Instructions
- Warm the milk to 100-110°F (38-43°C) in the microwave using a small measuring cup or bowl.
- Add the yeast and one tablespoon of sugar to the warm milk. Gently stir to combine, then let the mixture sit for about 5 minutes to allow the yeast to bloom and become foamy.
- In the bowl of a stand mixer fitted with a paddle attachment, combine the pumpkin puree, the remaining granulated sugar, melted butter, egg, and salt. Mix on low speed until all ingredients are well combined.
- Once the yeast mixture has bloomed and appears frothy, add it to the pumpkin mixture in the stand mixer bowl. Mix on low speed until everything is thoroughly incorporated.
- Gradually add the all-purpose flour to the mixture. After about half of the flour has been added, switch to a dough hook attachment. Continue adding the remaining flour slowly until the dough starts to come together.
- The dough will be soft and may initially feel a bit sticky. Continue to knead the dough with the dough hook for a total of 7 to 10 minutes. It should eventually pull away from the sides of the bowl and become smooth and elastic. If the dough remains too sticky after a few minutes of kneading, add a little extra flour, one tablespoon at a time, until the desired consistency is reached.
- Pour a small amount of vegetable oil (about 1-2 tablespoons) into the bottom of a large, clean mixing bowl. Form the kneaded dough into a smooth ball and roll it in the oil to ensure it’s lightly coated on all sides. Leave the dough ball in the oiled bowl, cover it with a clean kitchen towel, and place it in a warm, draft-free spot to proof for approximately 1 hour, or until the dough has visibly doubled in size.
- While the dough is undergoing its first rise, prepare your twine. Cut 64 pieces of food-safe twine, each about 10 inches long. Place these cut pieces of twine into a small bowl with 1 to 2 tablespoons of vegetable oil and let them soak. This crucial step will prevent the twine from sticking to your rolls during baking, allowing for easy removal later.
- Once the dough has doubled in size, gently punch it down to release the air, then turn it out onto a lightly oiled work surface. Divide the dough into 16 equal pieces. Take each piece and shape it into a smooth ball by pulling all the edges towards the center and pinching them tightly to seal. Set these dough balls aside.
- Now, prepare for shaping. Take 4 pieces of the oiled, cut twine. Arrange them on your work surface so that their centers cross each other, fanning out like the spokes of a wheel or a sliced pie. Ensure the sections formed by the twine are roughly equal in size.
- Place one of your prepared dough balls, seam-side up, directly in the center of the arranged twine. Take the ends of one pair of twine strands and gently tie them together over the top of the dough ball, creating a snug loop. Repeat this tying process with each of the remaining 3 pairs of twine, ensuring an even distribution around the dough ball. Trim any excess twine. Carefully place the shaped dough ball onto a parchment-lined baking sheet, knot-side down, making sure the twine is underneath the roll.
- Repeat the tying and shaping process for all 16 dough balls. Arrange them on your baking sheets, ensuring ample space between each roll for their second rise (you will likely need 2 baking sheets to accommodate all 16 rolls comfortably).
- Cover the tied rolls loosely with a clean kitchen towel or plastic wrap and place them in a warm area for their second rise. Allow them to rise for 30 to 60 minutes, or until they have almost doubled in size and the pumpkin shape has become more defined as the dough expands against the twine.
- Preheat your oven to 375°F (190°C). Bake the rolls in the preheated oven for 20 to 30 minutes, or until they are golden brown and sound slightly hollow when tapped on the bottom. For extra assurance, you can use a kitchen thermometer to check the internal temperature; it should register at least 190°F (88°C).
- Once baked to perfection, remove the rolls from the oven and transfer them to a wire rack to cool slightly.
- After the rolls have cooled sufficiently to handle, gently cut and remove the twine from each roll. Be careful not to damage the beautiful pumpkin shape.
- Finally, to create the “stem” of your pumpkins, gently press one whole almond, pointy-end down, into the center top of each roll. Serve warm and enjoy your festive, homemade Pumpkin Dinner Rolls!
Notes
- Storing Your Pumpkin Dinner Rolls: Store cooled rolls in an airtight container or a Ziploc bag with excess air removed. They will stay fresh at room temperature for up to 3 days. For longer storage, freeze for up to 2-3 months and reheat gently when ready to serve.
- Recipe Yield: This recipe makes 16 pumpkin-shaped rolls. It’s easy to double the recipe if you’re serving a larger gathering, as the ingredients and process scale up efficiently.
- Ideal Milk Temperature for Yeast: When activating yeast, the milk should be between 100°F (38°C) and 110°F (43°C). Too hot will kill the yeast, and too cold will prevent it from activating. A kitchen thermometer is recommended for precision.
- Checking Yeast Activity: You’ll know your yeast is active and ready when the milk and yeast mixture becomes bubbly and forms a foamy layer on top after sitting for 5 minutes.
- Proofing Methods Revisited: For successful dough rising, always ensure a warm environment. Options include placing the covered dough in a warm spot in your home (like near a woodstove), using a cold oven with a pot of boiling water on the bottom shelf, quickly preheating the oven to its lowest setting for 2 minutes then turning it off, or using your oven’s “proof” setting if available.
Nutrition
Calories: 195kcal | Carbohydrates: 33g | Protein: 6g | Fat: 4g | Saturated Fat: 2g | Polyunsaturated Fat: 0.4g | Monounsaturated Fat: 1g | Trans Fat: 0.1g | Cholesterol: 19mg | Sodium: 251mg | Potassium: 134mg | Fiber: 2g | Sugar: 5g | Vitamin A: 4252IU | Vitamin C: 1mg | Calcium: 27mg | Iron: 2mg
Did You Make This Recipe?
Don’t forget to share it with me on Instagram @sugarandsoulco and follow on Tiktok @sugarandsoulco and Pinterest @sugarandsoulco for more delicious recipes and inspiration!
Pin Recipe
Share Recipe on Facebook