

The Ultimate No-Churn Vanilla Ice Cream Recipe: Creamy, Dreamy, and Effortlessly Homemade
Imagine a dessert that’s rich, wonderfully creamy, and bursting with authentic vanilla flavor, all without the need for a specialized ice cream maker. Our incredible No-Churn Vanilla Ice Cream recipe delivers exactly that, using just a handful of simple ingredients. It’s so luxuriously smooth, you might even mistake it for a classic vanilla frozen custard. This is the perfect solution for anyone craving homemade ice cream with minimal effort!
This versatile no-churn vanilla ice cream serves as an exquisite stand-alone treat, yet it’s equally superb as a sweet accompaniment to a variety of desserts. Picture it alongside a warm slice of Berry Pie, a decadent piece of Chocolate Cake, or even as the star of a nostalgic Root Beer Float. Its creamy texture and deep vanilla notes elevate any occasion, making it a truly indispensable recipe for your dessert repertoire.

Why No-Churn Ice Cream is a Game-Changer for Homemade Desserts
Do you remember the days of making homemade ice cream as a child? I vividly recall the annual ritual with my softball team. It was a true team effort, literally requiring all of us to take turns cranking the handle of an old-fashioned ice cream barrel for what felt like an eternity. While the end result was undeniably delicious, the sheer amount of time and physical labor involved often made it a rare indulgence. In today’s fast-paced world, who has hours to dedicate to churning ice cream?
Just like my Blender Butter revelation, I’m always on the hunt for clever kitchen hacks that simplify my life without sacrificing quality. Discovering the world of no-churn ice cream has been nothing short of revolutionary. This method allows me to create incredibly rich and creamy ice cream in a fraction of the time, sparing my wrists and letting my mixer and freezer do all the heavy lifting. It’s truly a modern marvel for anyone who loves homemade treats but is short on time or equipment.

The No-Churn Difference: Unveiling the Taste and Texture
Let’s be clear upfront: no-churn ice cream, by its very nature, offers a distinct experience compared to traditional churned ice cream. The churning process introduces air and breaks down ice crystals, resulting in a very specific, often lighter, texture. However, the no-churn method, when executed correctly, yields an equally delightful dessert that is both quicker and more economical to prepare. It boasts a unique richness and density that many find incredibly satisfying.
The fundamental base for most no-churn recipes is a simple combination of whipped cream and sweetened condensed milk. For vanilla-flavored versions, many recipes simply call for adding vanilla extract. In my culinary experience, this approach, while good, often leaves the vanilla flavor somewhat muted and the texture slightly less refined than I desire. This is precisely why my recipe incorporates a special, secret ingredient. This addition isn’t just about boosting the vanilla; it fundamentally transforms the texture, making this no-churn creation taste remarkably like the rich, creamy, and wonderfully golden vanilla ice cream or even a proper frozen custard we all adore.
This secret ingredient acts as a brilliant stabilizer, helping to prevent the formation of large ice crystals that can often make homemade ice cream feel icy rather than smooth. It also contributes to a thicker, denser body, which is a hallmark of premium frozen desserts. The result is a dessert that truly captures the essence of classic vanilla, offering a depth of flavor and a velvety mouthfeel that far surpasses what you might expect from a “no-churn” method. It proves that you don’t need fancy equipment to achieve gourmet results right in your own kitchen.

Key Ingredients for Perfect No-Churn Vanilla Ice Cream
Traditional ice cream production is a lengthy process, often requiring several days of preparation and chilling with a base typically made from milk, cream, and sugar. Our no-churn method, however, dramatically streamlines this, opting for a simpler yet equally effective ingredient list that bypasses complex cooking and lengthy freezing cycles. Here’s what makes our vanilla ice cream exceptionally rich and creamy:
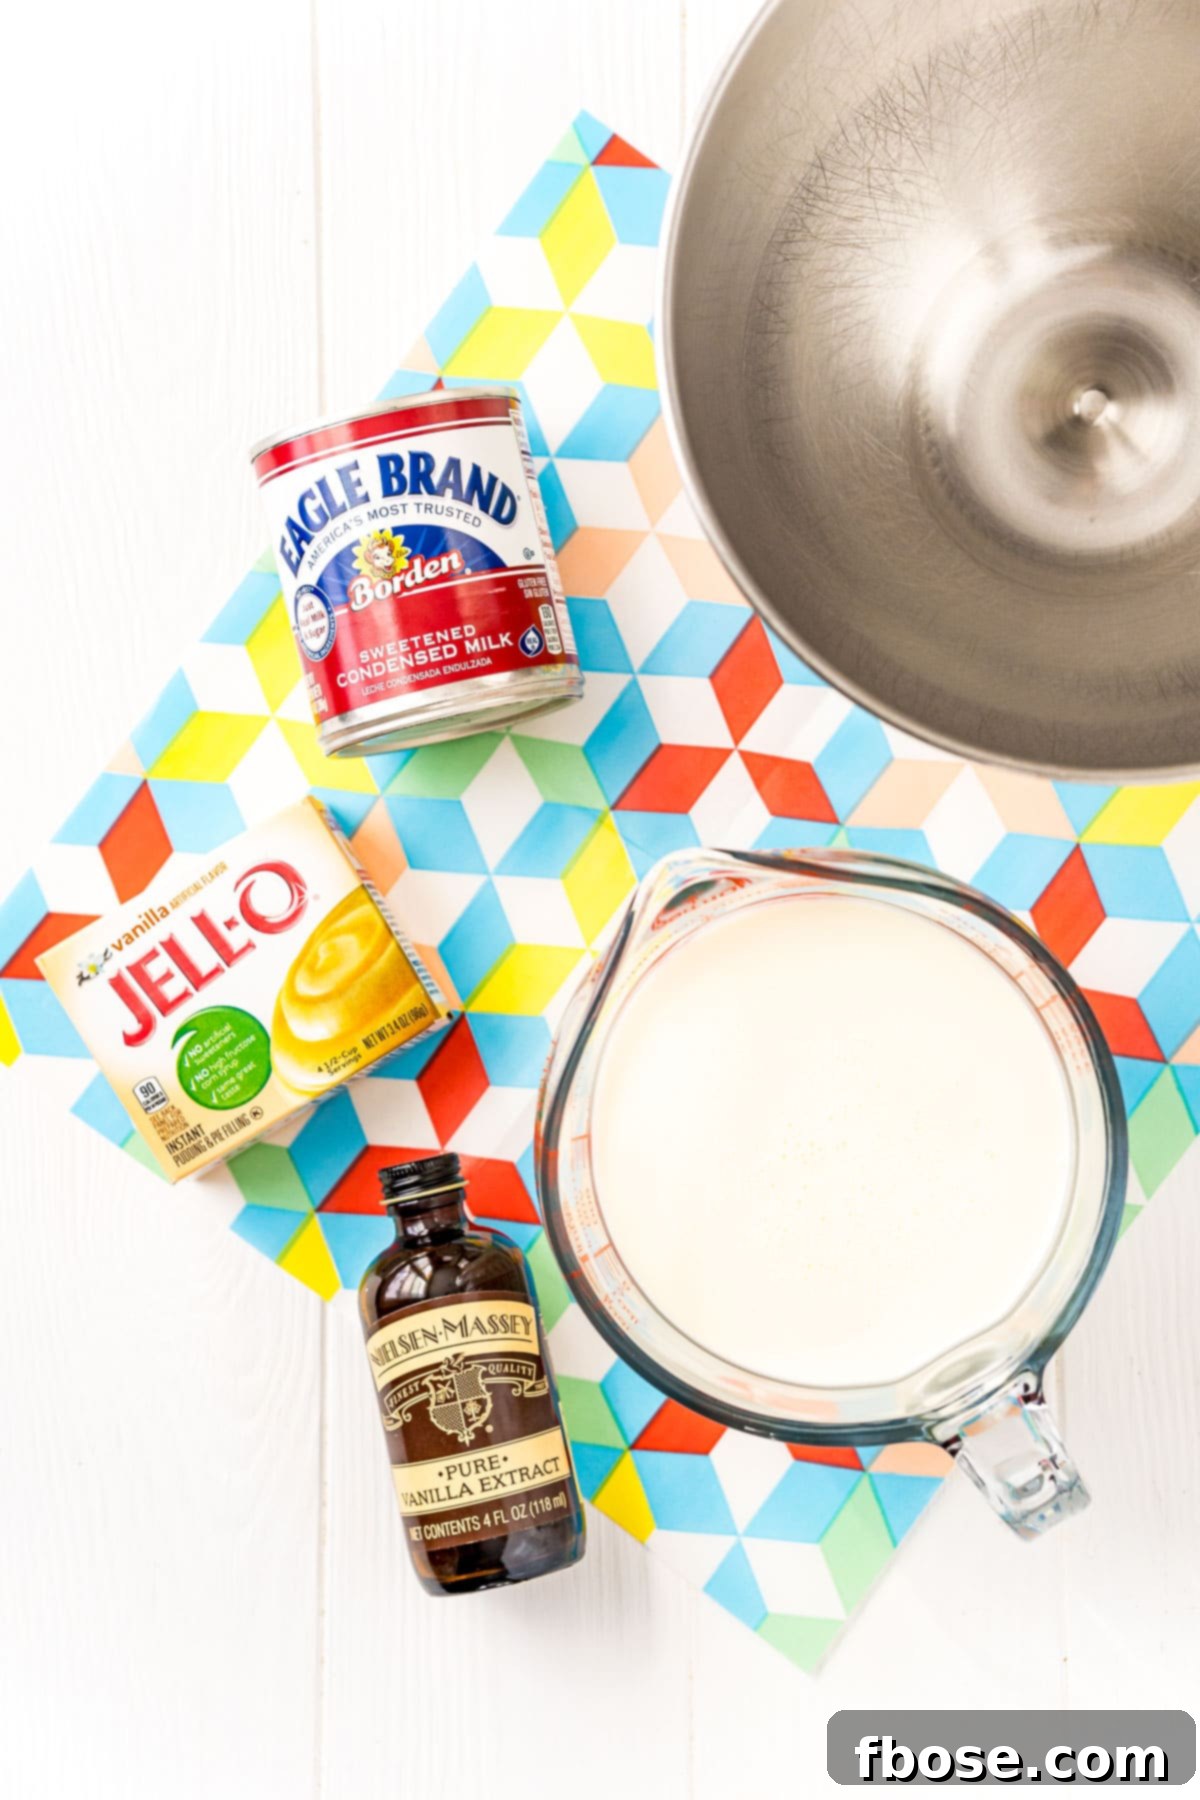
- Heavy Whipping Cream: This is the foundation of our no-churn recipe. When whipped, heavy cream incorporates air, creating the light, airy volume that gives ice cream its characteristic texture. It also provides the necessary fat content for a truly rich and decadent mouthfeel. Always ensure your cream is very cold for optimal whipping results.
- Sweetened Condensed Milk: This magical ingredient serves a dual purpose. It provides all the necessary sweetness for the ice cream base, eliminating the need for granulated sugar, and it also contributes to the incredible creaminess and smooth texture. Its thick consistency also helps reduce ice crystal formation.
- Pure Vanilla Extract: The soul of vanilla ice cream! We recommend using a high-quality pure vanilla extract to ensure a robust and authentic vanilla flavor that shines through. Avoid imitation vanilla for the best taste.
- The KEY Secret Ingredient: Instant Vanilla Pudding Mix! This is where our recipe truly stands out. Adding instant vanilla pudding mix (unprepared, straight from the box) is a game-changer for several reasons:
- Enhanced Flavor: It deepens the vanilla taste, giving it a more pronounced and authentic profile.
- Superior Texture: The pudding mix acts as a brilliant stabilizer, contributing to a wonderfully creamy and dense texture that closely resembles a premium frozen custard. This density prevents the ice cream from becoming overly icy.
- Prevents Rapid Melting: A common challenge with many no-churn recipes is their tendency to melt quickly. The pudding mix helps to bind the ingredients and slows down the melting process, allowing you more time to savor each spoonful.
- Eliminates Ice Crystals: By stabilizing the mixture, the pudding mix significantly reduces the formation of large, undesirable ice crystals, which are often responsible for a gritty or icy texture in homemade ice cream.
While this recipe achieves a delightful custard-like richness and density, it remains an ice cream (or a wonderful hybrid between the two!) because it doesn’t involve eggs, which are a defining characteristic of traditional frozen custards. The combination of these simple ingredients, especially the instant pudding mix, transforms ordinary components into an extraordinary dessert.
Crafting Your Homemade No-Churn Vanilla Ice Cream: Step-by-Step Guide
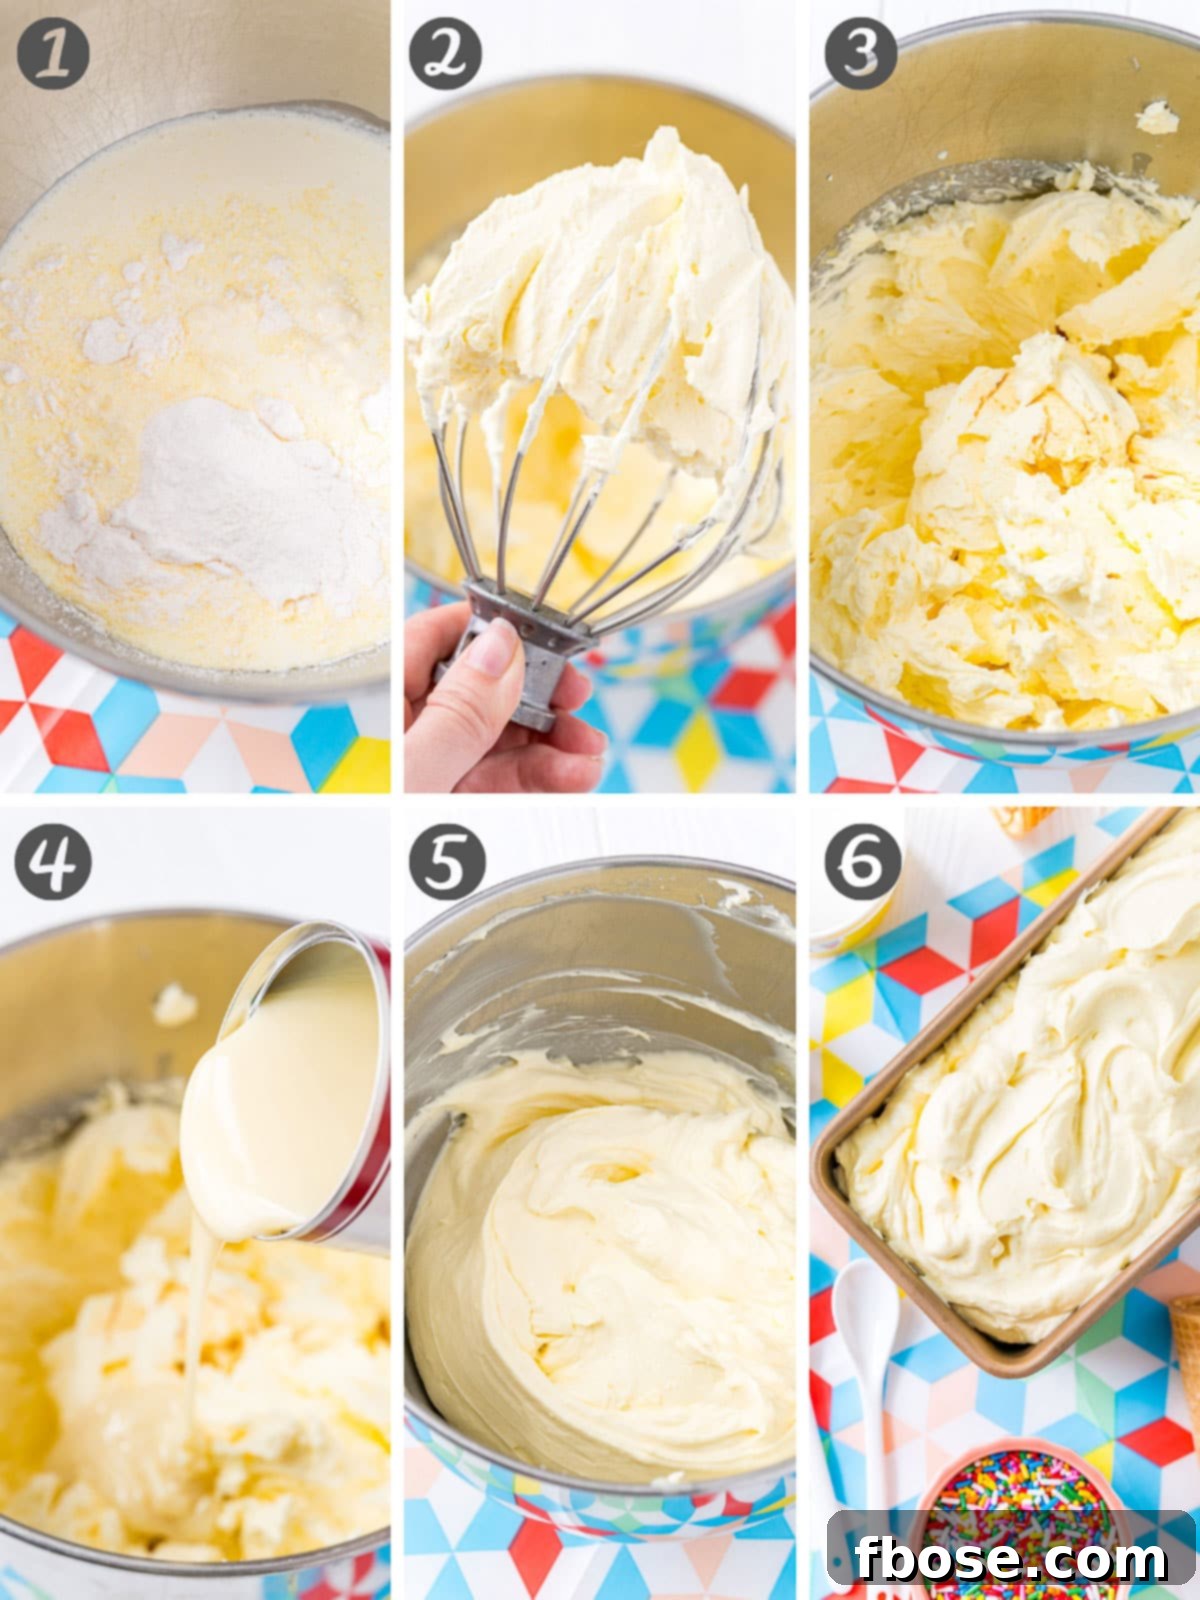
As highlighted, the foundation of this incredibly simple and delicious dessert is a blend of heavy cream and sweetened condensed milk. These two ingredients alone can create a decent no-churn ice cream. However, to truly elevate the flavor and texture, transforming it into something resembling a rich frozen custard, we add a touch of vanilla extract and our secret ingredient: instant vanilla pudding mix. Follow these easy steps to create your perfect scoop:
- Prepare Your Bowl: For optimal results, ensure your large metal mixing bowl and whisk attachment (if using a stand mixer) are thoroughly chilled. A cold environment is crucial for whipping heavy cream to stiff peaks quickly and efficiently.
- Whip the Cream and Pudding Mix: Add the very cold heavy cream to your chilled metal bowl. Sprinkle the instant vanilla pudding mix directly over the cream. Immediately begin whipping the mixture on high speed until stiff peaks form. This usually takes about 2 to 3 minutes. Stiff peaks mean that when you lift the whisk, the cream holds its shape firmly. Whipping immediately after adding the pudding mix is important to prevent any clumping.
- Incorporate Vanilla Extract: Once stiff peaks are achieved, gently fold in the vanilla extract using a rubber spatula. This ensures the pure vanilla flavor is evenly distributed throughout the airy cream.
- Add Sweetened Condensed Milk: Pour the sweetened condensed milk into the whipped cream mixture. This is the primary sweetener and contributes significantly to the smooth, creamy texture.
- Combine Thoroughly: Using your rubber spatula, carefully fold all the ingredients together. Continue folding until the mixture is completely smooth and no streaks of condensed milk remain. Be gentle to maintain as much of the whipped cream’s volume as possible.
- Freeze for Perfection: Transfer the finished ice cream mixture into a loaf pan or a dedicated reusable ice cream tub. Cover it tightly with plastic wrap or a lid to prevent ice crystals from forming on the surface. Place it in the freezer for at least 8 hours, or ideally overnight, to allow it to firm up completely and achieve that perfect scoopable consistency.
With these straightforward steps, you’ll be well on your way to enjoying homemade, deliciously creamy vanilla ice cream without any fuss or specialized equipment. It’s a testament to how simple ingredients can yield truly spectacular results.
Optimal Storage Solutions for Lasting Freshness
Proper storage is key to maintaining the creamy texture and preventing freezer burn, ensuring your homemade no-churn vanilla ice cream stays delicious for as long as possible. Once your ice cream is made and firm, it should be sealed tightly to protect it from the freezer air.
If you’re using a standard bread loaf pan, covering it tightly with a layer of plastic wrap pressed directly onto the surface of the ice cream, followed by aluminum foil, can help. However, achieving an airtight seal can be tricky, especially if you’re not planning to consume the entire batch immediately.
While metal pans are excellent for initially freezing the ice cream quickly due to their thermal conductivity, for long-term storage and convenience, I highly recommend investing in a reusable ice cream tub. These containers are specifically designed for frozen desserts, often featuring double-walled insulation and airtight lids that are superior at preventing freezer burn and maintaining optimal texture. They come in various sizes and are incredibly durable.
For an extra fun touch, consider getting mini ice cream containers. These are fantastic for portion control and allow everyone in the family to customize their own mix-ins directly into their personal container before freezing. Imagine everyone having their favorite flavor ready to grab and enjoy!
Regardless of the container you choose, always ensure it is filled as much as possible to minimize air exposure, which is the primary cause of freezer burn. With proper storage, your delicious no-churn vanilla ice cream can last for several weeks in the freezer, ready to be enjoyed whenever a craving strikes.
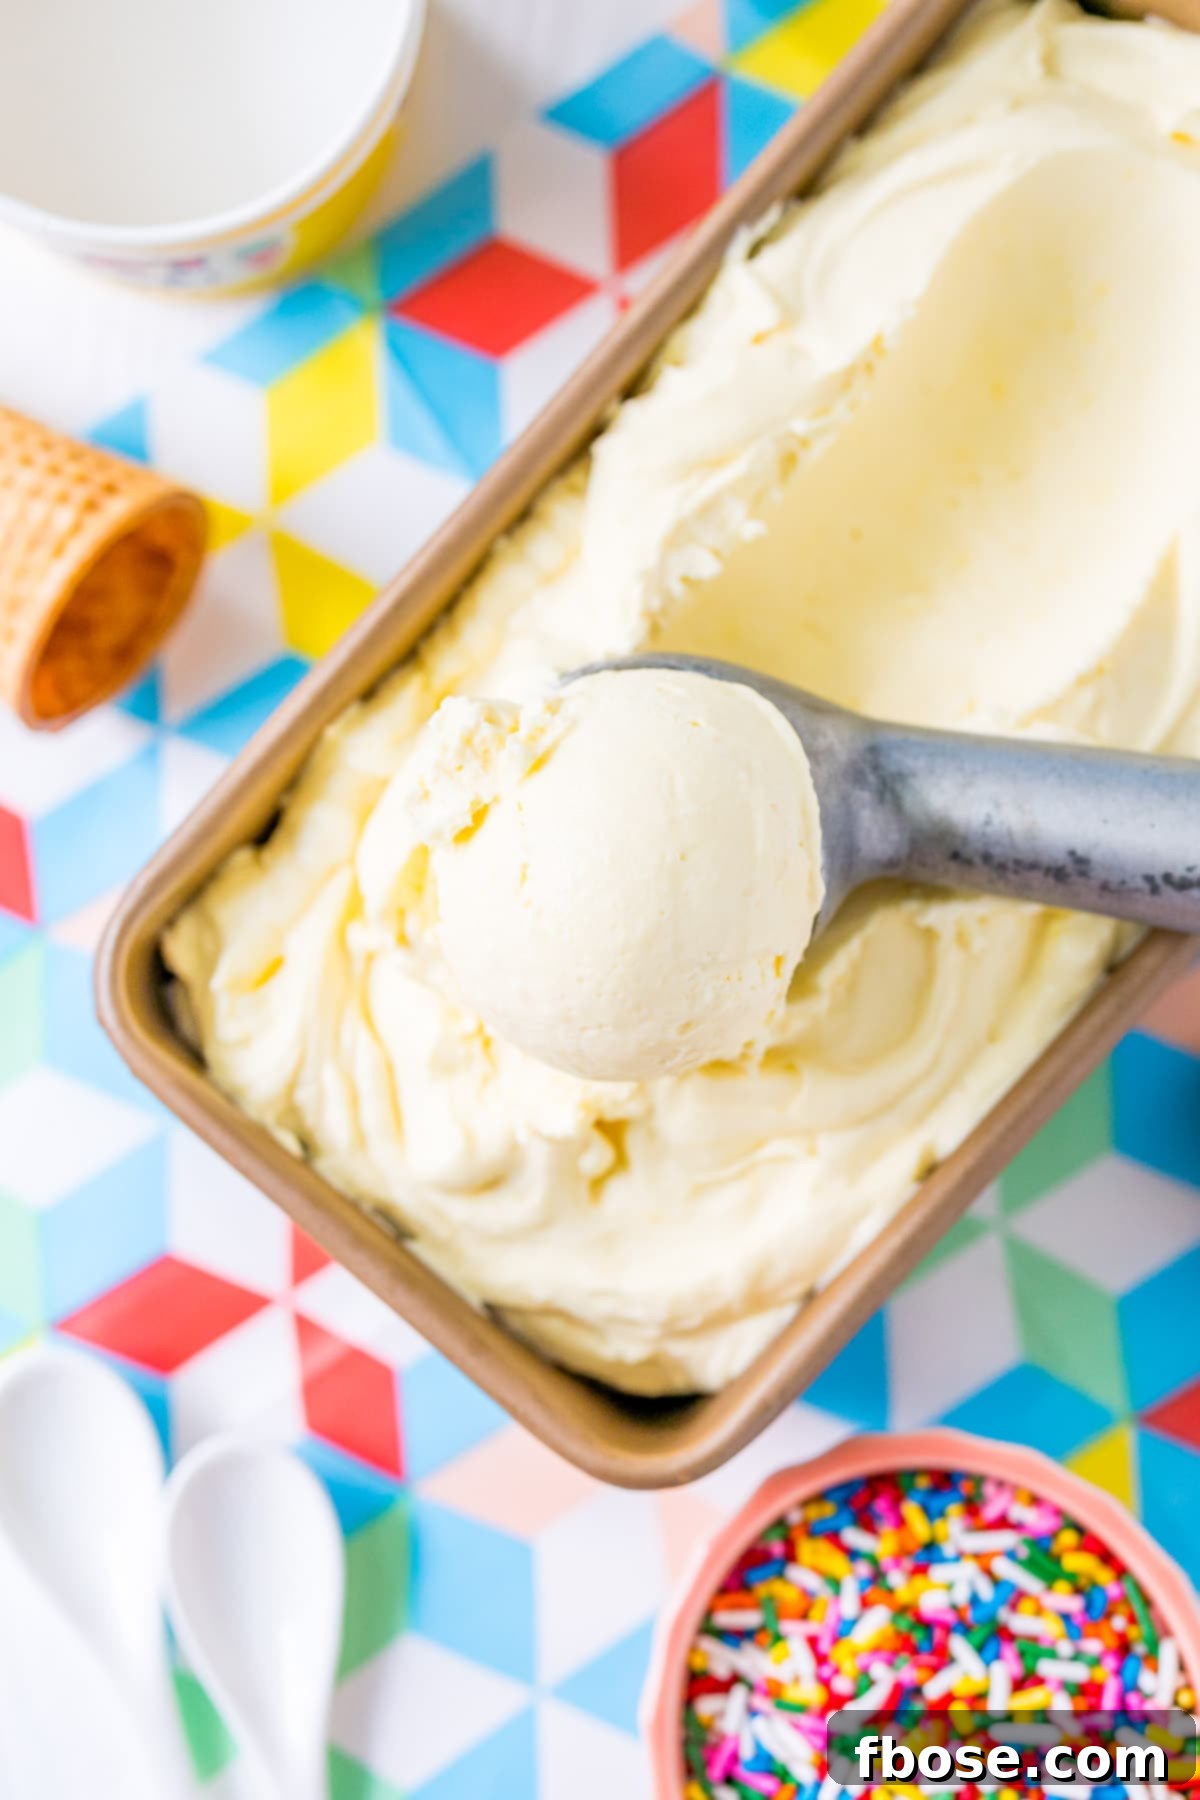
The future is looking deliciously sweet with all this ice cream, friends! What exciting No-Churn Ice Cream Flavors do you want me to share next? Let your imagination run wild!
Endless Possibilities: Delicious Mix-In Ideas
While our classic no-churn vanilla ice cream is utterly delicious on its own, it also serves as the perfect blank canvas for a multitude of creative flavor combinations. Don’t limit yourself to just vanilla! Adding a few extra ingredients can transform your base recipe into an entirely new dessert experience. The key is to fold everything in gently before transferring the mixture to the freezer. Here are some fantastic ideas to get you started:
- Cookies & Cream Dream: For a universally loved classic, simply fold in a generous amount of crushed Oreo cookies. The contrast of the creamy vanilla with the crunchy chocolate cookies is irresistible.
- Gourmet S’mores Adventure: Capture the magic of a campfire treat. Mix in crushed graham crackers for crunch, chopped chocolate pieces (milk, dark, or semi-sweet) for gooey pockets, and swirls of marshmallow fluff for that signature sticky sweetness.
- Decadent Peanut Butter Pie: Transform your ice cream into a rich, nutty dessert. Combine crushed graham crackers, creamy peanut butter, a drizzle of chocolate sauce, and chopped peanut butter cups for an explosion of flavor.
- Luscious Strawberry Cheesecake: For a fruity and tangy twist, fold in diced fresh strawberries, dollops of softened whipped cream cheese, and crushed graham crackers. It’s like eating a frozen cheesecake!
- Irresistible Cookie Dough Delight: Who can resist cookie dough? Prepare a batch of Edible Cookie Dough, roll it into small balls, and fold them into the vanilla base. A safe and delicious way to enjoy your favorite raw dough.
- Sophisticated Boozy Bourbon: For an adult-friendly treat, add a few tablespoons of your favorite bourbon to the mix. The bourbon adds a wonderful depth of flavor and a subtle warming kick, making it perfect for a grown-up indulgence.
- Rich Chocolate Chip: A simple yet satisfying choice. Fold in your favorite chocolate chips – milk, dark, or semi-sweet – for classic chocolate chip ice cream.
- Mint Chocolate Chip: Add a few drops of peppermint extract along with mini chocolate chips for a refreshing minty treat.
- Salted Caramel Swirl: Gently fold in ribbons of store-bought or homemade salted caramel sauce for a sweet and salty indulgence.
Feel free to experiment with your favorite candies, fruits, nuts, or sauces. The possibilities are truly endless, allowing you to create personalized ice cream flavors that will impress everyone!
Vanilla Ice Cream
Pin It For Later
Click the button above to save this delicious recipe to your board!

Let’s Connect!
I’ve cultivated a wonderful community on Facebook, and I would be absolutely thrilled for you to become a part of it! It’s a vibrant space where you can freely ask questions, share your culinary creations, and stay updated with all the latest from Sugar & Soul! If you’re interested in joining our growing family of food enthusiasts, simply request to join HERE.
Don’t forget to follow me on Instagram and use the hashtag #sugarandsoulco. I absolutely love seeing all the incredible recipes YOU create from this site! To ensure you never miss out on another delicious recipe, you can also Subscribe to my Newsletter and get fresh ideas delivered straight to your inbox.
This comprehensive recipe was originally published in June 2014 and has been thoroughly updated and expanded in July 2019 to provide even more value and delicious details.

No Churn Vanilla Ice Cream
Ingredients
- 4 cups heavy cream
- 1 (3.4oz.) box Instant Vanilla Pudding Mix unprepared
- 1 teaspoon vanilla extract
- 14 ounces sweetened condensed milk
Instructions
-
Add the very cold heavy cream and the instant vanilla pudding mix to a large, chilled bowl. Immediately beat the mixture on high speed until stiff peaks form, which typically takes about 2 to 3 minutes. Ensure there are no clumps of pudding mix.
-
Gently fold in the vanilla extract and the sweetened condensed milk with a rubber spatula until the mixture is completely smooth and well combined. Be careful not to deflate the whipped cream.
-
Transfer the creamy ice cream mixture to a loaf pan or a dedicated ice cream tub. Cover tightly and freeze for a minimum of 8 hours, or preferably overnight, to allow it to set perfectly.
Notes
- Feeling adventurous? Experiment with different pudding flavors! A chocolate pudding mix will yield a rich chocolate no-churn ice cream, or try butterscotch for a unique twist.
- It is absolutely crucial to use INSTANT pudding mix. The “cook and serve” varieties contain starches that require heat to thicken and will not work for this no-churn method.
- To prevent any lumps or clumps, begin whipping the heavy cream immediately after adding the instant pudding mix. The faster you start, the smoother your base will be.
- For the best texture, ensure your heavy cream is very cold before whipping. This helps it achieve stiff peaks more easily.
How To Store Your Homemade Ice Cream:
- To prevent freezer burn and keep your ice cream tasting fresh, it must be sealed properly after it’s made. If you’re using a bread loaf pan, press plastic wrap directly onto the surface of the ice cream before covering with foil.
- While metal pans are great for quick initial freezing, for longer storage and superior preservation of texture, I highly recommend investing in a reusable, airtight ice cream tub. These are designed to minimize air exposure.
- Consider purchasing mini individual ice cream containers. They’re perfect for portion control and allowing each family member to customize their own mix-ins and flavors!
Creative Ice Cream Mix-In Ideas:
- Cookies & Cream: Simply fold in generous amounts of crushed Oreo cookies for a classic favorite.
- S’mores Delight: Mix in crushed graham crackers, chopped chocolate pieces (milk, dark, or semi-sweet), and swirls of marshmallow fluff for that campfire taste.
- Peanut Butter Pie Dream: Combine crushed graham crackers, creamy peanut butter, a drizzle of chocolate sauce, and chopped peanut butter cups for a rich dessert.
- Strawberry Cheesecake Indulgence: Fold in diced fresh strawberries, softened whipped cream cheese, and crushed graham crackers for a fruity, tangy treat.
- Edible Cookie Dough: Prepare a batch of Edible Cookie Dough, roll it into small balls, and gently fold them into the vanilla base.
- Boozy Bourbon Twist: Add a few tablespoons of your favorite bourbon to the mix for a sophisticated, adult-friendly flavor.
Nutrition
Did You Make This Recipe?
We’d love to see your delicious creations! Don’t forget to share them with me on Instagram @sugarandsoulco. For more quick recipes and dessert inspiration, make sure to follow on Tiktok @sugarandsoulco and Pinterest @sugarandsoulco!
Pin Recipe
Share Recipe