
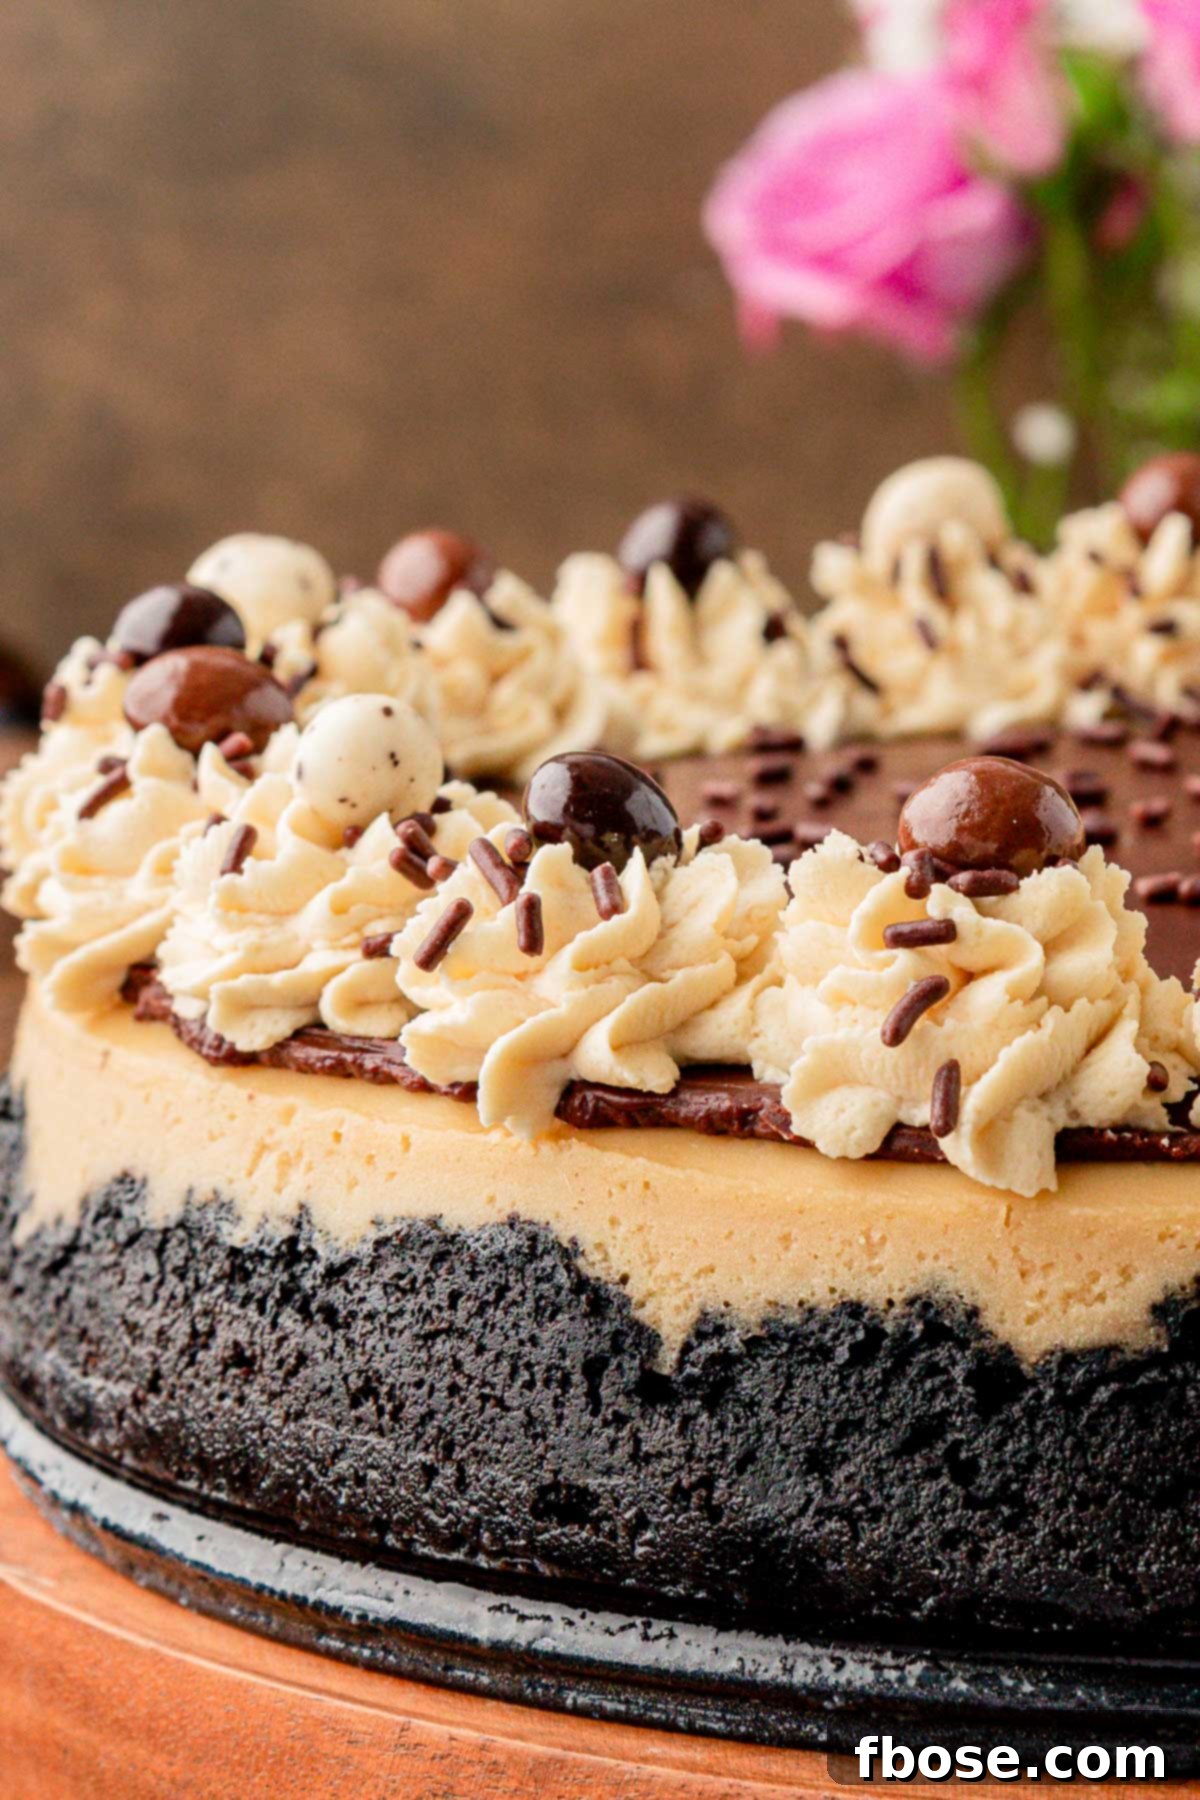
Indulge in the ultimate dessert experience with this exquisite recipe for **Coffee Cheesecake**. Crafted with premium ingredients and detailed step-by-step instructions, this recipe guarantees a flawlessly rich, velvety, and luxurious New York-style cheesecake. It’s truly a dream come true for every coffee enthusiast, blending the robust flavors of coffee with the creamy decadence of classic cheesecake.
Even if you’re not typically a coffee drinker, the subtle yet pronounced coffee notes in this dessert are incredibly appealing and create a harmonious flavor profile that’s simply irresistible!
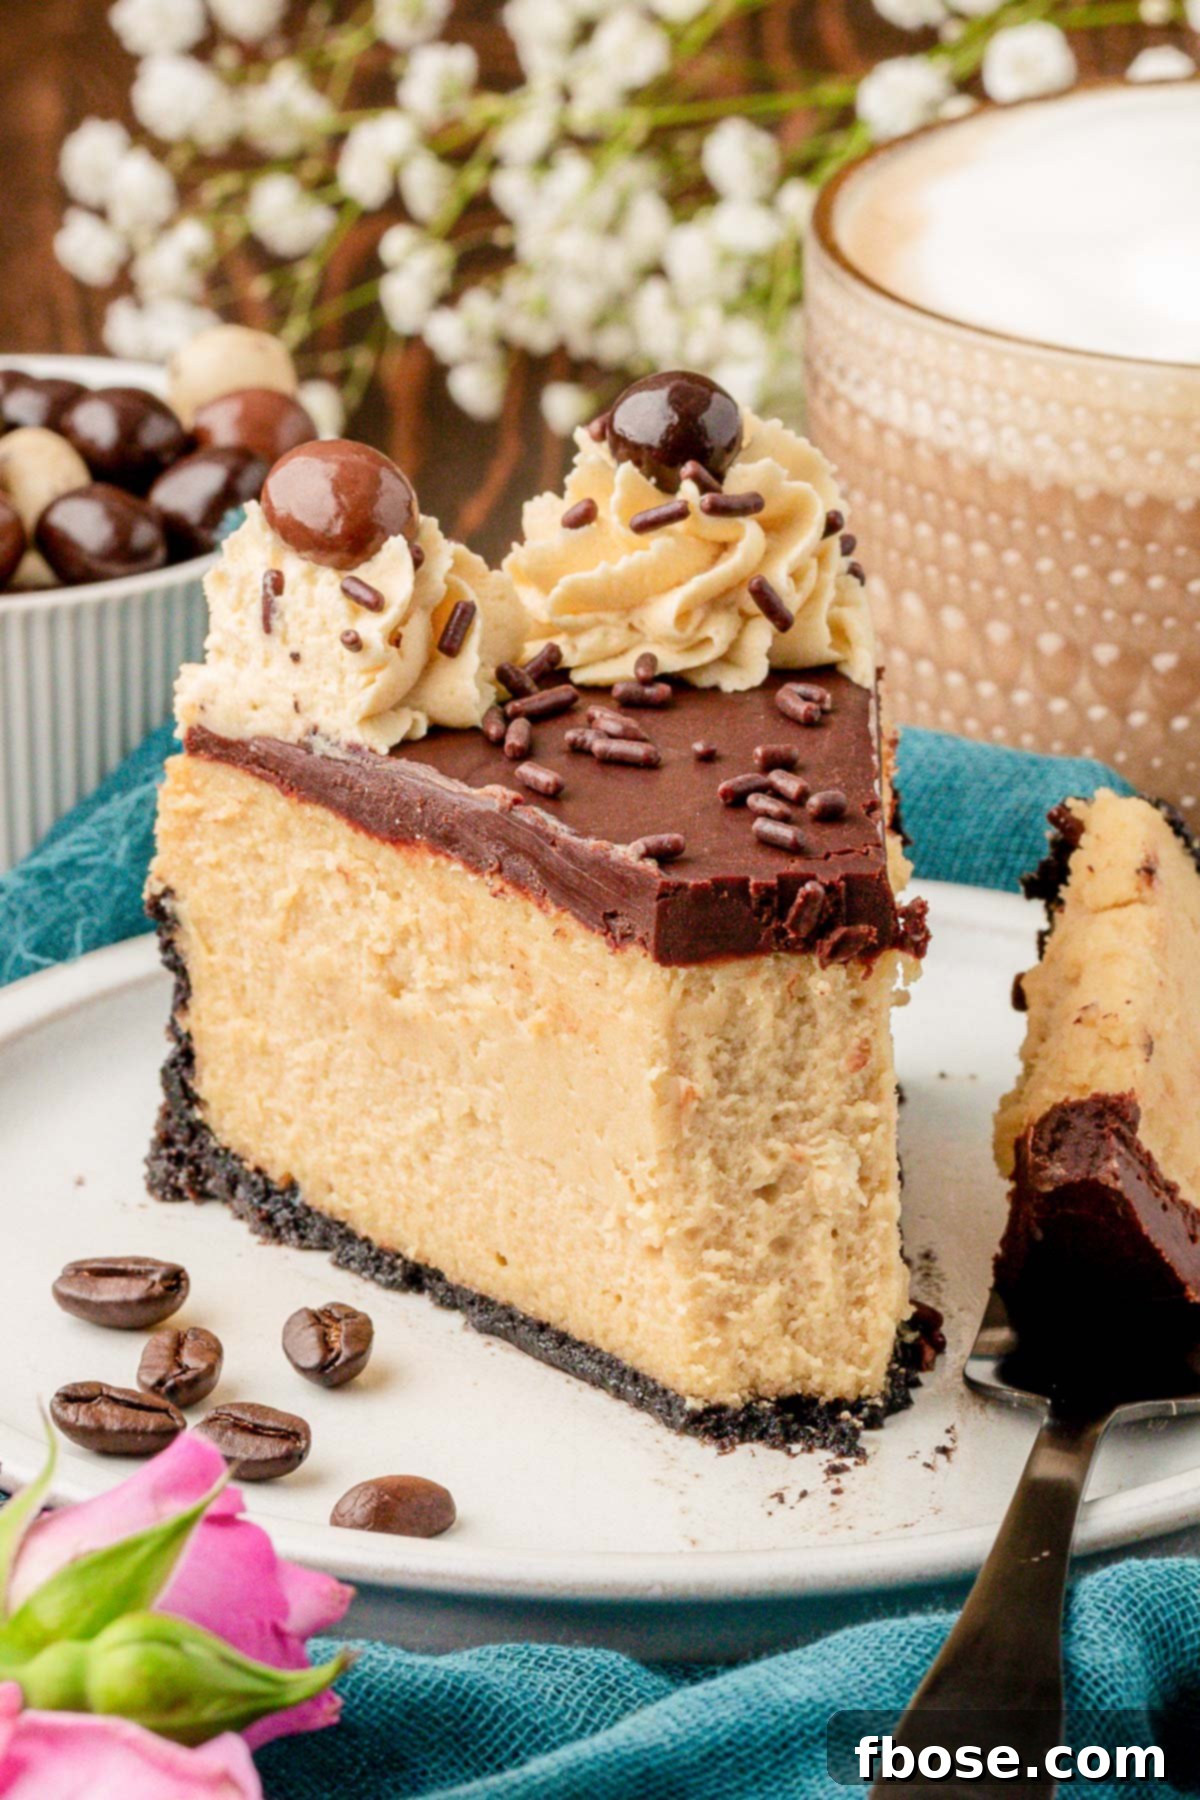
A Coffee Lover’s Dream Dessert: The Ultimate Coffee Cheesecake
Ever noticed how fine dining menus consistently feature both exquisite cheesecakes and a selection of gourmet coffee options? This Coffee Cheesecake recipe brilliantly combines these two beloved delights into one spectacular dessert. Why settle for one when you can savor the best of both worlds in a single, magnificent slice?
This homemade coffee cheesecake is a symphony of coffee flavor, meticulously infused throughout every layer. From the rich and robust Oreo crust, which forms the perfect base, to the silky-smooth cheesecake filling, and even the elegant piped topping, coffee takes center stage, delivering an unparalleled taste experience. Each element is carefully crafted to ensure a deep, satisfying coffee essence that elevates the classic cheesecake to new heights.
Why This Coffee Cheesecake Recipe Stands Out
Imagine your favorite latte transformed into a delectable cheesecake – that’s precisely the experience this Coffee Cheesecake offers! It’s a perfect fusion, where the comforting warmth and slight bitterness of coffee meet the luscious sweetness of a classic dessert. The result is a substantial slice of cheesecake that boasts a gloriously rich, intensely flavored, and utterly indulgent texture.
Having perfected over two dozen cheesecake recipes on this blog, I can confidently say that this Coffee Cheesecake is another masterpiece designed to be devoured. Its distinctive blend of flavors and textures ensures it will be a crowd-pleaser at any gathering. The secret lies in using multiple forms of coffee – espresso, coffee extract, and cold brew – to build layers of complex coffee flavor that truly sing.
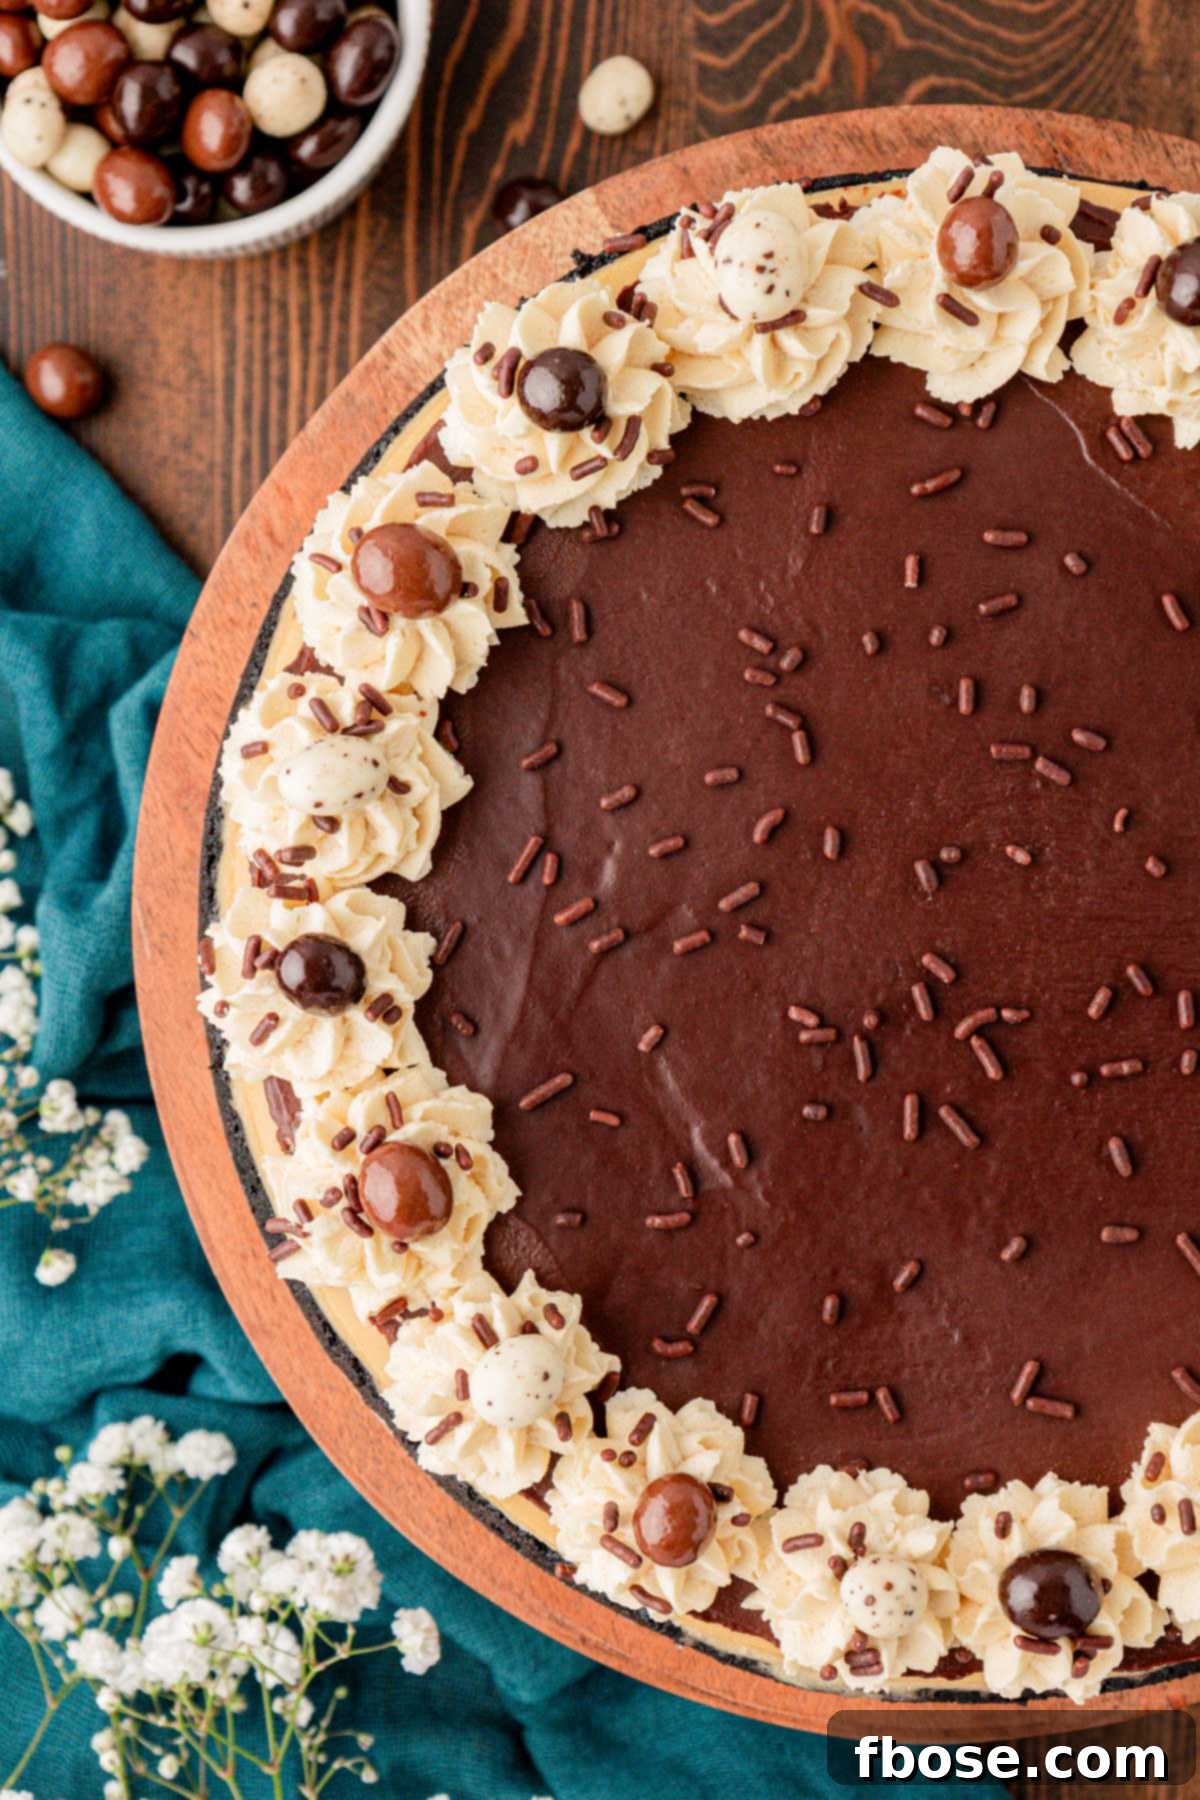
To elevate this Coffee Cheesecake even further, it’s elegantly draped with a rich, glossy chocolate ganache and crowned with a generous swirl of homemade whipped topping. For a truly show-stopping finish, I’ve added a delightful assortment of garnishes: delicate chocolate curls, festive sprinkles, and savory chocolate-covered espresso beans. (For those wondering, we found those delightful espresso beans at Trader Joe’s!). These additions not only enhance the visual appeal but also add delightful textural contrasts and bursts of flavor.
If you’re a cheesecake connoisseur, you might also enjoy exploring my Classic NY Style Cheesecake for a timeless treat or this vibrant Coconut Cheesecake recipe for a tropical twist.
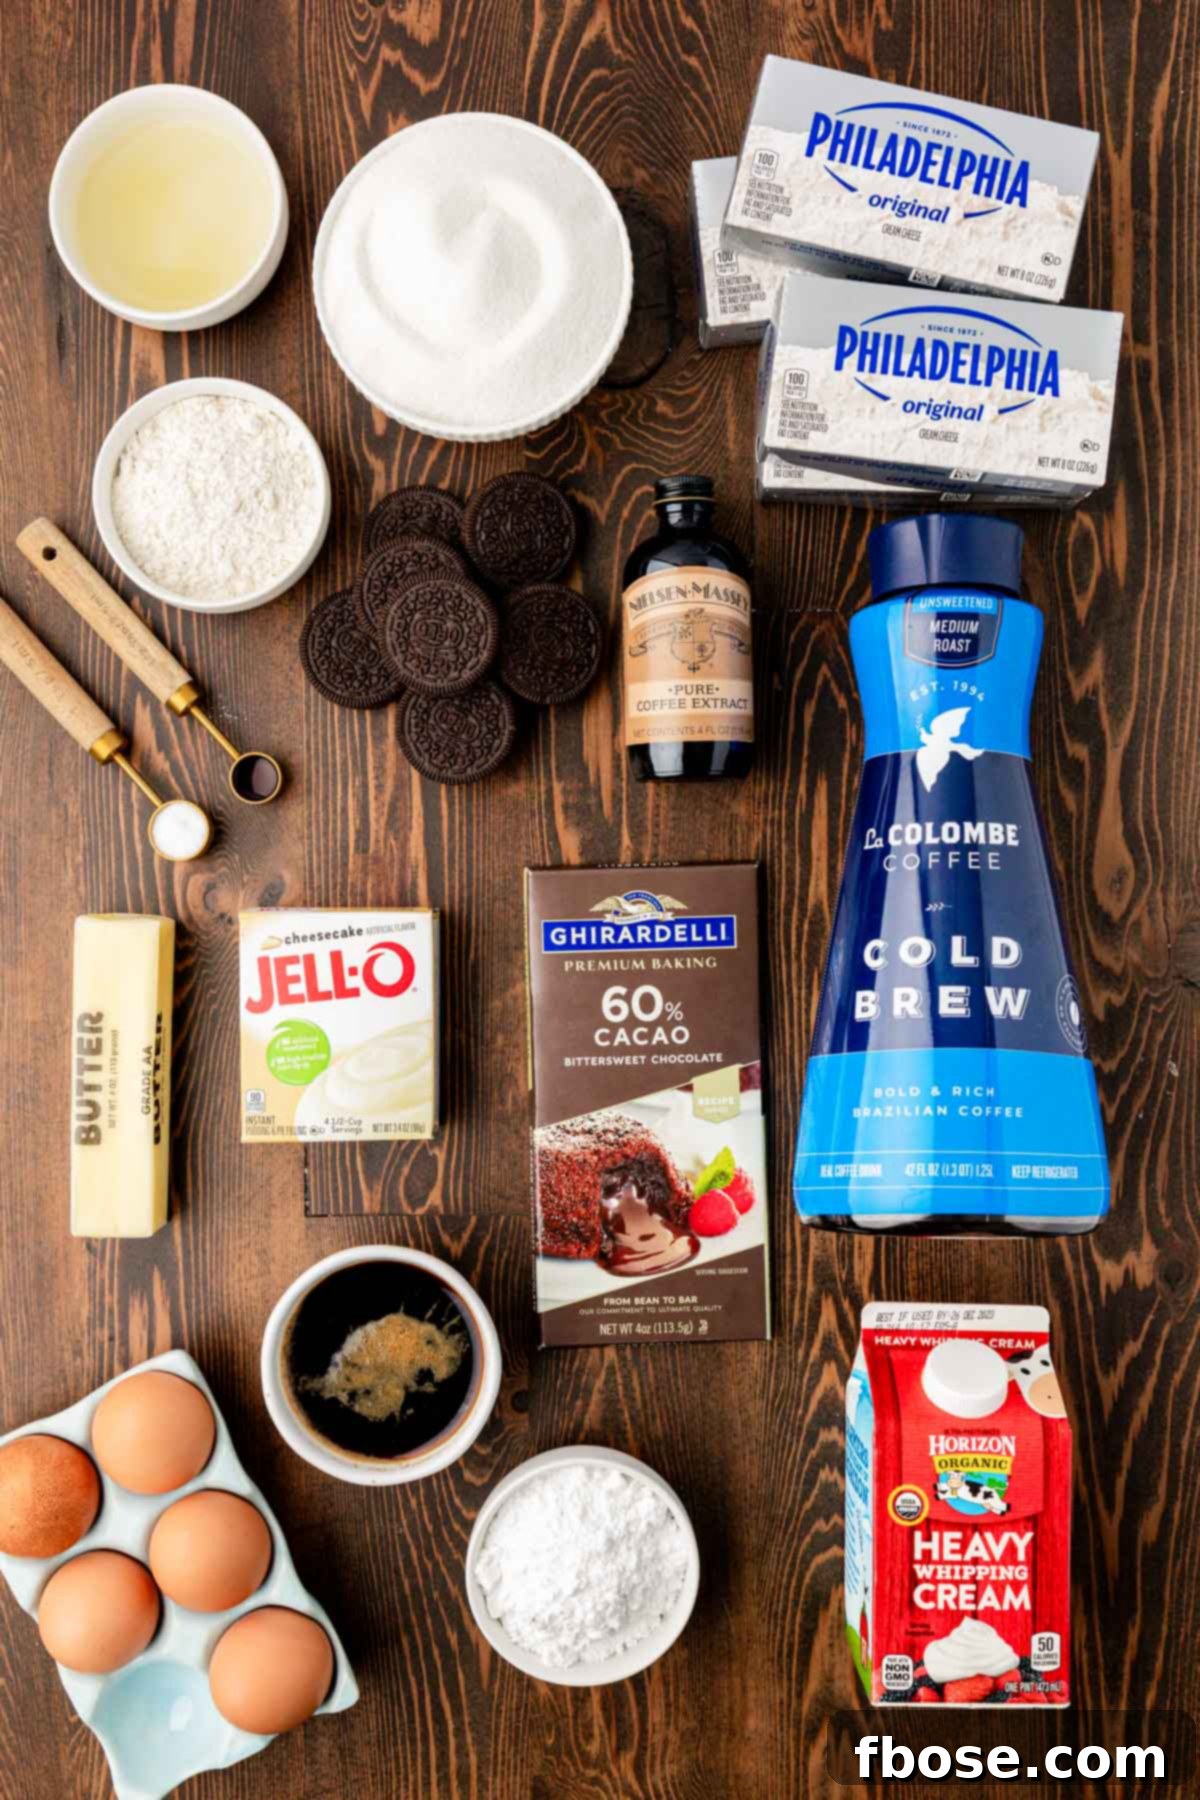
Key Ingredients for an Unforgettable Coffee Cheesecake
Achieving the very best coffee cheesecake requires not only precision in technique but also the careful selection of high-quality ingredients. For this recipe, we combine the finest cream cheese and dairy with a triumvirate of coffee essences: intense espresso powder for the crust, flavorful coffee extract for the filling and topping, and smooth cold brew coffee to deepen the cheesecake’s coffee profile. Each component plays a crucial role in creating the perfect balance of flavors and textures.
- For the Espresso-Infused Oreo Crust:
- Oreos: The classic chocolate sandwich cookie provides a rich, dark base.
- Salted Butter: Binds the crumbs and adds a hint of savory balance.
- Espresso Powder: Infuses the crust with a concentrated coffee kick.
- For the Velvety Coffee Cheesecake Filling:
- Cream Cheese: Essential for that signature creamy, tangy cheesecake flavor and texture. Opt for full-fat, brick-style cream cheese, softened to perfection.
- Granulated Sugar: Sweetens the filling without overpowering the coffee.
- Coffee Extract: A concentrated coffee flavor enhancer, ensuring a deep coffee presence.
- Large Eggs: Provide structure and richness, binding the cheesecake.
- Heavy Cream: Contributes to the luxurious, smooth consistency.
- Cold Brew Coffee: Offers a less acidic, mellow coffee flavor that blends beautifully. We recommend high-quality brands like La Colombe or Chobani for the best results.
- Lemon Juice: A touch of acidity brightens the flavors and helps with the texture.
- Salt: Balances sweetness and enhances all other flavors.
- All-Purpose Flour: A small amount stabilizes the cheesecake and helps prevent cracks.
- For the Decadent Chocolate Ganache:
- Bittersweet Chocolate: Provides a rich, deep chocolate flavor that complements coffee perfectly. Ghirardelli is a great choice.
- Heavy Cream: Creates a smooth, pourable ganache.
- Powdered Sugar: Adds a touch of sweetness and ensures a silky finish.
- Vanilla Extract: A classic flavor enhancer for both chocolate and coffee.
- For the Light & Airy Coffee Whipped Topping & Garnishes:
- Heavy Cream: Forms the base for the fluffy topping.
- Instant Cheesecake Pudding Mix (dry): Helps stabilize the whipped cream and adds a hint of cheesecake flavor.
- Powdered Sugar: Sweetens the topping and gives it a smooth texture.
- Coffee Extract: Reinforces the coffee theme in the topping.
- Optional Garnishes: Chocolate Curls, Sprinkles, Chocolate Covered Espresso Beans – for an extra touch of elegance and flavor.
This Coffee Cheesecake journey begins with a homemade Oreo crust, uniquely infused with espresso powder for an extra layer of coffee depth. While the Oreo crust offers a delightful contrast, you can easily opt for a classic graham cracker crust if that’s your preference.
Once the foundation is perfectly set, it’s time to fill it with the velvety-smooth coffee cheesecake filling. A key to achieving that exquisite texture and taste lies in using high-quality, full-fat cream cheese and heavy cream. These premium dairy products ensure a rich, dense, and creamy consistency that is the hallmark of a truly great cheesecake.
The filling’s magnificent coffee flavor is a result of a thoughtful combination: a potent coffee extract and smooth cold brew coffee. I personally find that cold brew brands like La Colombe or Chobani lend a beautifully balanced and less acidic coffee note to the cheesecake, enhancing its overall appeal without being overpowering.
Finally, the baked and chilled cheesecake is crowned with a luscious homemade chocolate ganache and a light, coffee-flavored whipped topping. For those who love to add a personal touch, dress this dessert up further with elegant chocolate curls, playful sprinkles, and irresistible chocolate-covered espresso beans. These garnishes don’t just add visual appeal; they provide an extra layer of texture and flavor that makes each bite an adventure.
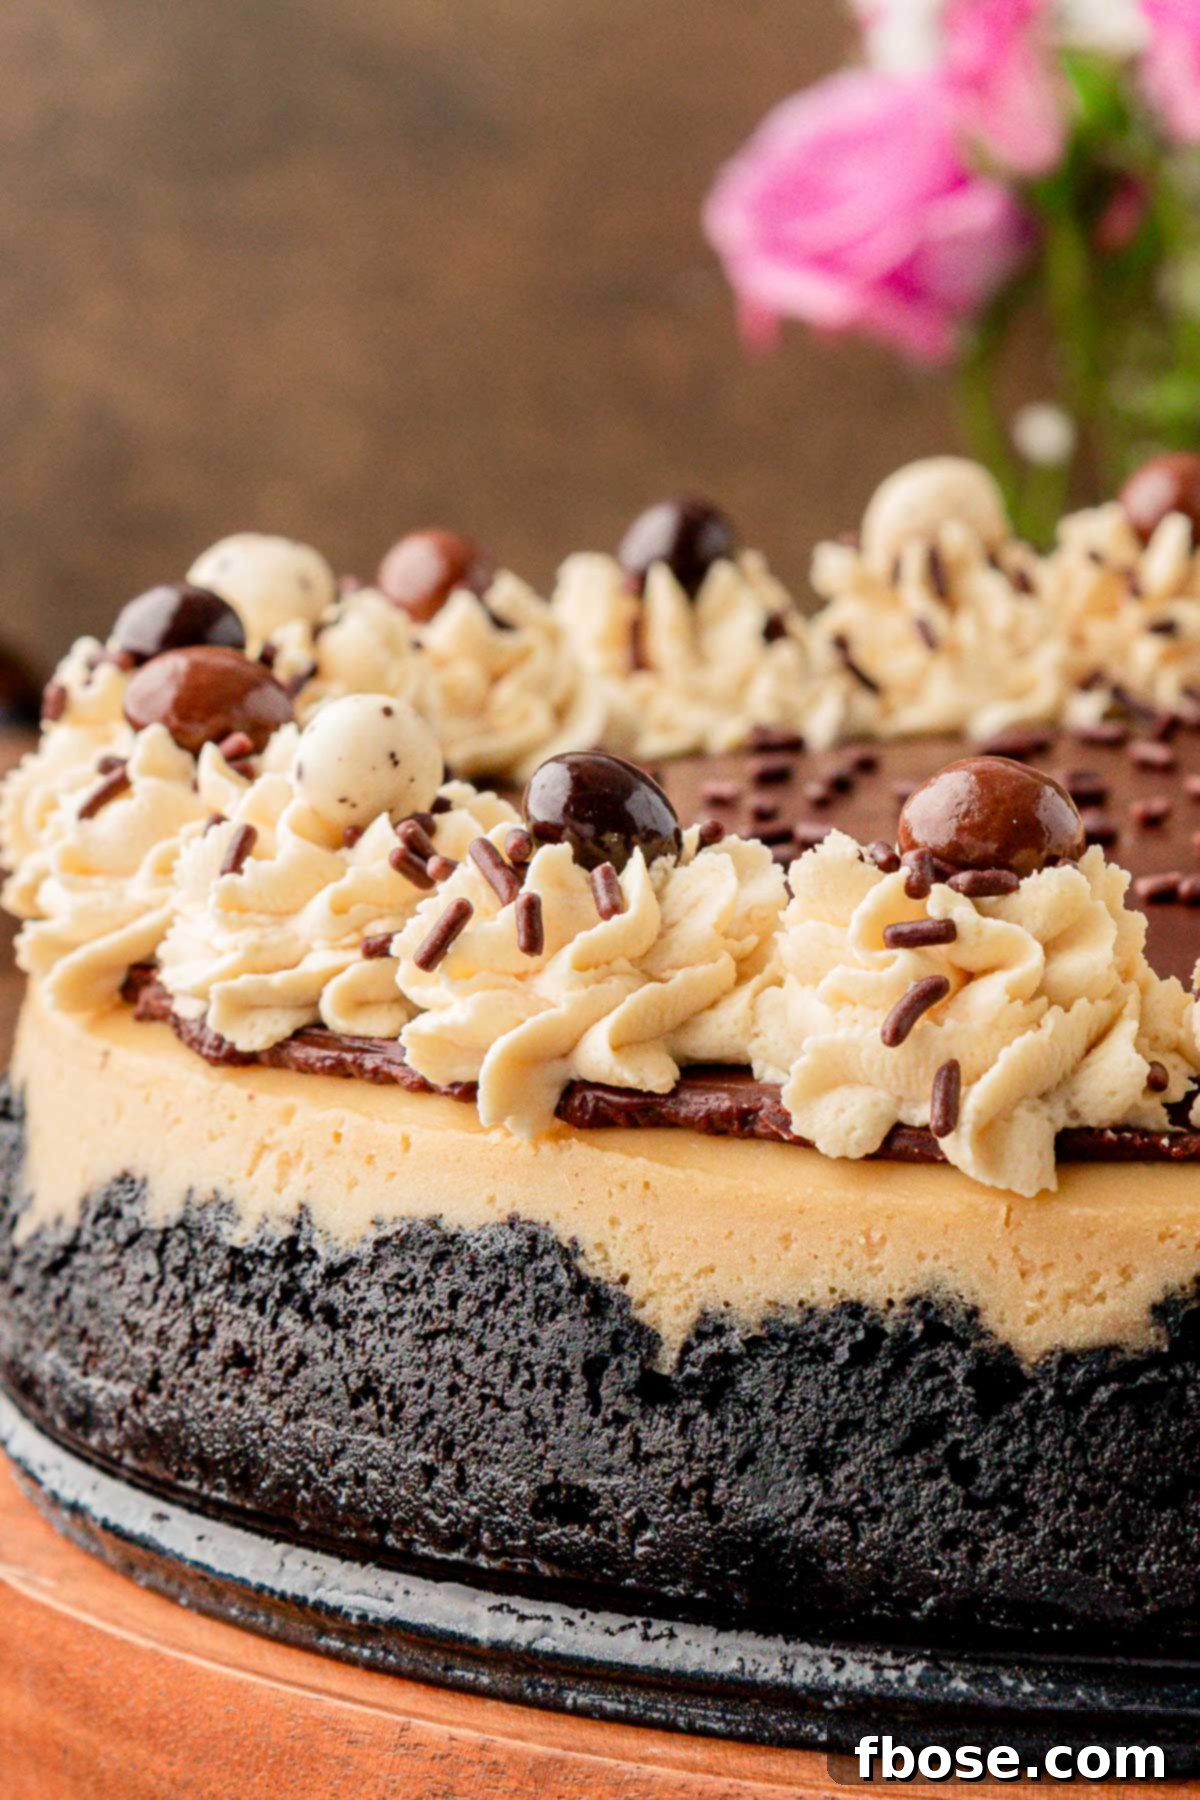
Mastering the Art: How To Make Homemade Coffee Cheesecake
Creating this gourmet Coffee Cheesecake at home is a rewarding experience. To ensure your success and confidence in the kitchen, I’ve outlined the process with clear, step-by-step instructions. Following these guidelines will lead you to a perfectly baked, incredibly delicious coffee cheesecake that will impress everyone!
Preparing the Espresso-Infused Oreo Crust
- Begin by preheating your oven to 300°F (150°C). Then, prepare your 9-inch springform pan by wrapping the bottom and sides tightly with heavy-duty aluminum foil. This prevents any water from the water bath (used later) from seeping into the crust. Set the prepared pan aside.
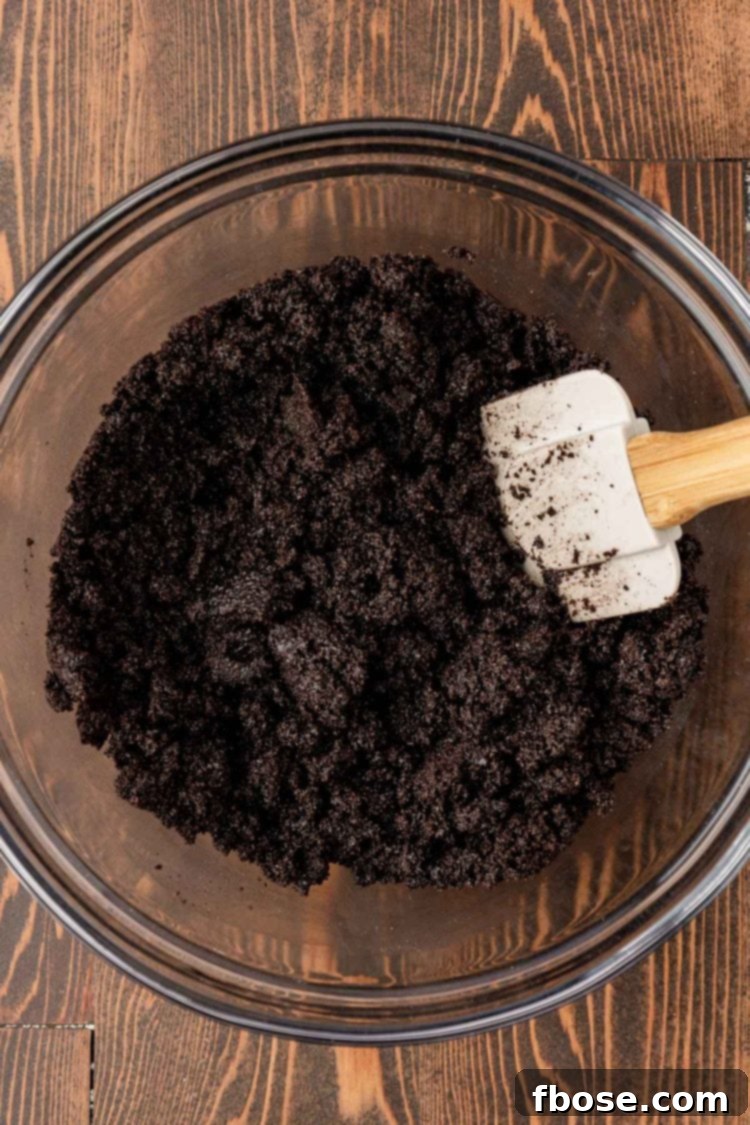
- In a large mixing bowl, combine the finely crushed Oreo cookie crumbs, melted salted butter, and espresso powder. Mix these ingredients thoroughly until the crumbs are uniformly moist and hold together when pressed. For convenience, you can use store-bought Oreo crumbs, or make your own by pulsing about 28 regular-filled Oreos in a food processor until fine.
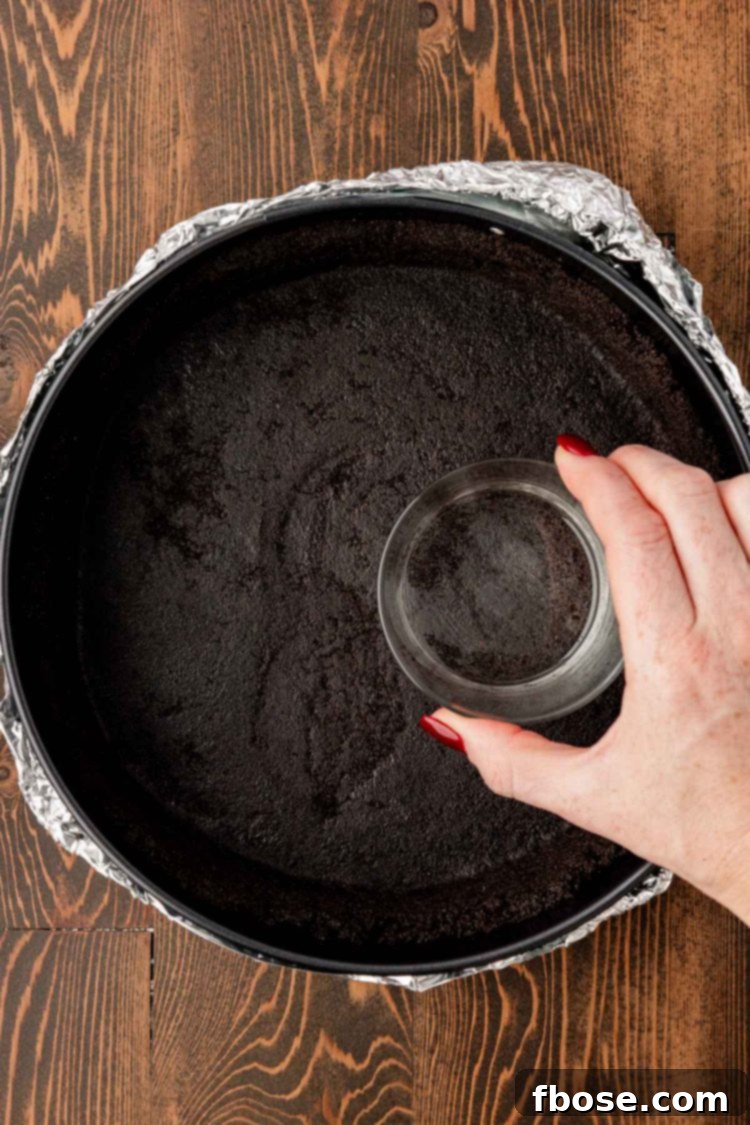
- Transfer the moist crust mixture into the bottom of the foil-wrapped springform pan. Using the bottom of a flat glass or a measuring cup, firmly press the mixture evenly into the bottom and partially up the sides of the pan. This creates a sturdy, flavorful base for your cheesecake.
Crafting the Silky Coffee Cheesecake Filling
- In a large mixing bowl or the bowl of a stand mixer fitted with a whisk attachment, combine the very soft, full-fat cream cheese with granulated sugar and coffee extract. Beat these ingredients on medium speed until the mixture is completely smooth, which usually takes about 2 minutes. Remember to stop and scrape down the sides of the bowl frequently (every 30 seconds) to ensure all ingredients are well incorporated and no lumps remain. The cream cheese must be very soft for a lump-free batter, ideally at room temperature for at least 4 hours.
- Add the large eggs one at a time, mixing on low speed after each addition. It’s crucial to mix just until the previous egg is incorporated and only a faint yellow streak remains before adding the next. Overmixing at this stage can introduce too much air, leading to cracks in the finished cheesecake.
- With the mixer still on low speed, slowly pour in the heavy cream, cold brew coffee, and lemon juice, then add the salt. Continue mixing gently until all these liquid ingredients are fully incorporated into the cream cheese mixture.
- Carefully sift the all-purpose flour directly into the mixing bowl. Mix on low speed for just 10 seconds. Stop, scrape down the sides of the bowl to catch any dry bits, then beat for another 10 seconds. The flour helps to stabilize the cheesecake and prevent cracking without affecting the texture.
- To create a crucial water bath, place the springform pan containing the crust into a larger roasting or baking pan. Fill the larger pan with hot water until it reaches about halfway up the sides of the springform pan. This water bath provides gentle, even heat, preventing the cheesecake from cracking and ensuring a creamy texture.
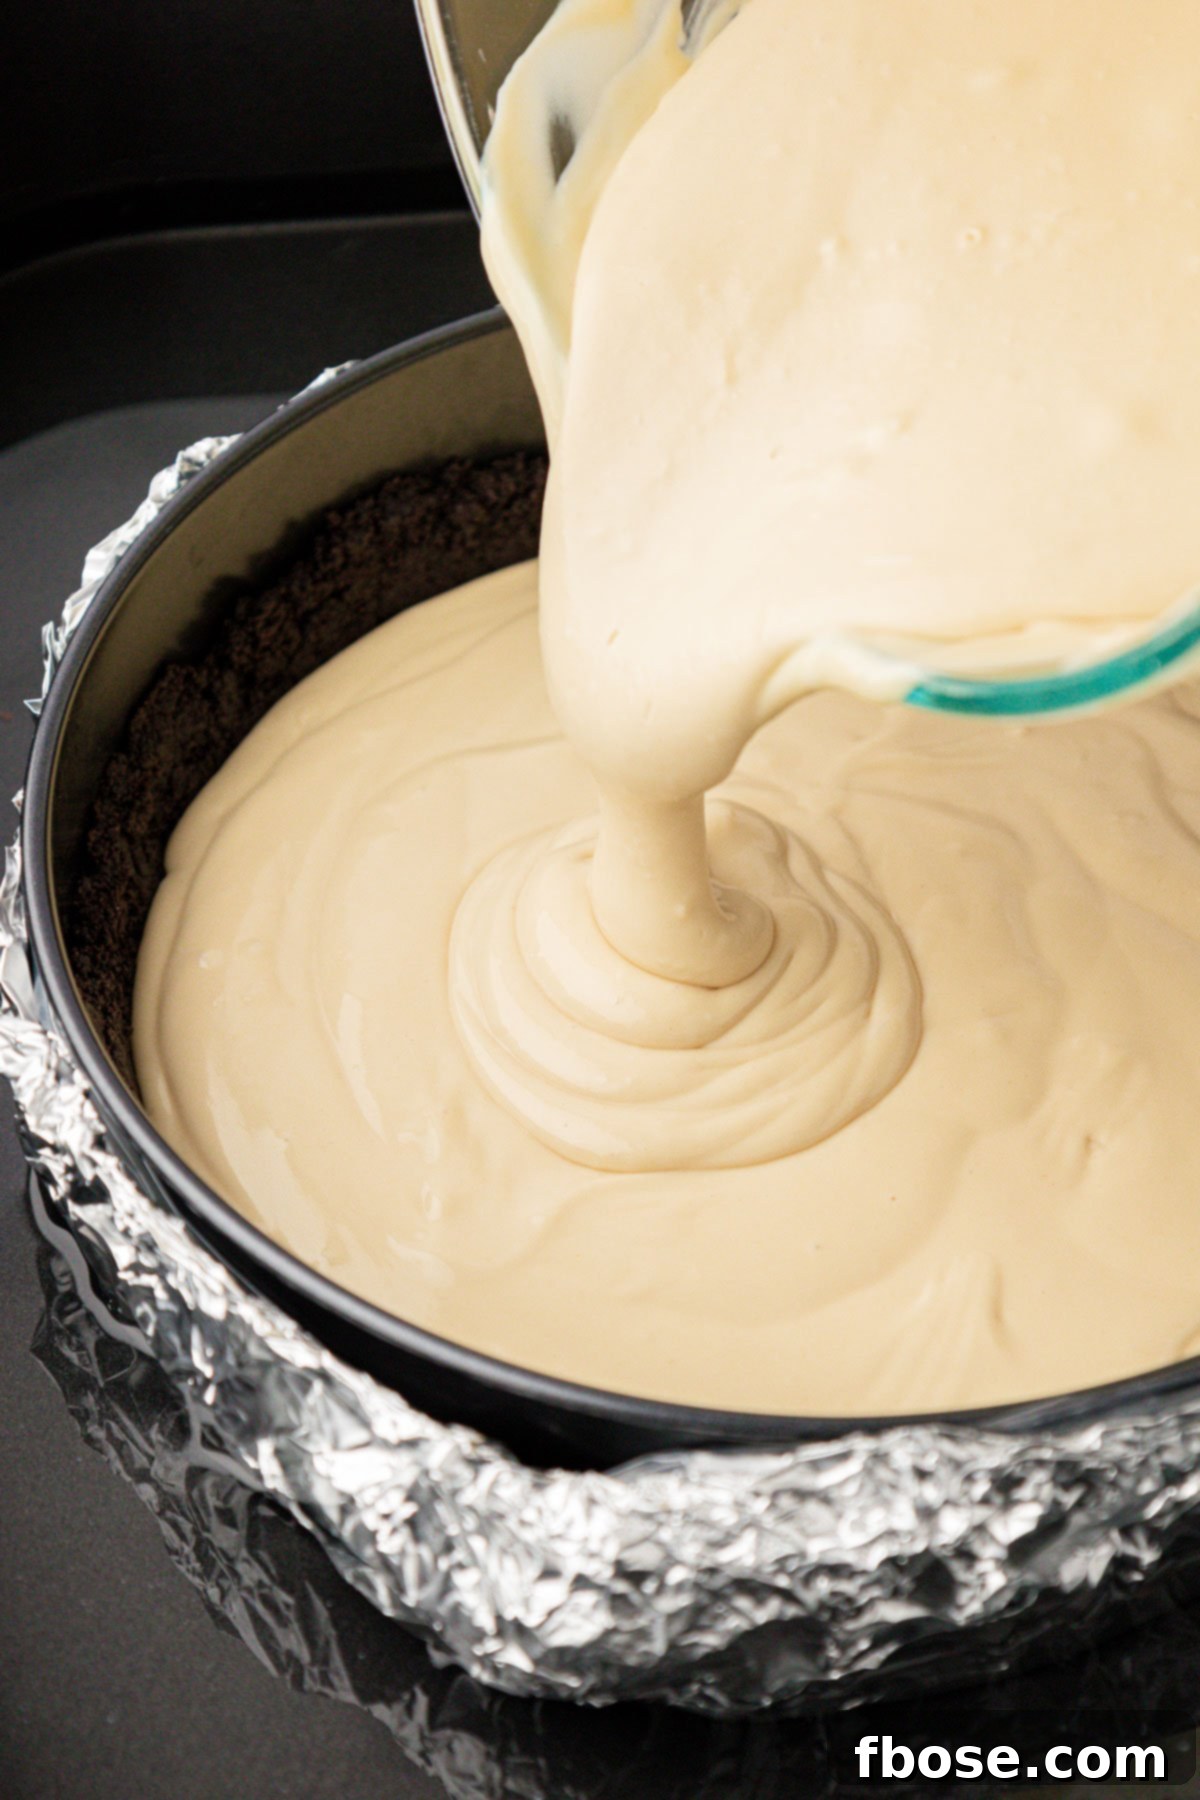
- Pour all of the prepared coffee cheesecake filling into the springform pan, on top of the crust. Don’t worry if the pan seems very full; the filling will bake down beautifully.
- Bake the cheesecake on the middle rack of your preheated oven for approximately 75 to 85 minutes. The cheesecake is done when the edges appear lightly golden and set, the center has a matte or dull appearance, but still exhibits a slight jiggly movement when gently shaken.
- Once baked, turn off the oven but leave the cheesecake inside for an additional 20 minutes with the oven door slightly ajar. This gradual cooling process helps prevent sudden temperature changes that can lead to cracking.
- Remove the homemade cheesecake from the oven. Immediately run a thin paring knife carefully around the inner edge of the springform pan to loosen the cheesecake. Then, remove the aluminum foil from the outside of the pan and transfer the cheesecake (still in the springform) to a wire rack to cool completely to room temperature, which typically takes about 3 hours.
- Once cooled, gently press a sheet of plastic wrap directly onto the surface of the cheesecake to prevent a skin from forming. Keep the cheesecake in the springform pan and transfer it to the refrigerator to chill for a minimum of 8 hours, though overnight is highly recommended. This chilling period is vital for the cheesecake to firm up and develop its signature silky, dense texture.
Preparing the Silky Chocolate Ganache
The chocolate ganache adds a layer of rich indulgence to this coffee cheesecake. It’s best prepared a few hours before you plan to serve the cheesecake to allow it to cool and thicken slightly.
- Finely chop the bittersweet chocolate and place it in a heat-safe bowl. Smaller pieces will melt more evenly and quickly.
- In a small saucepan over medium heat, gently simmer the heavy cream. Watch it closely and remove it from the heat as soon as tiny bubbles begin to form around the edges or in the center. Do not let it boil vigorously.
- Immediately pour the hot cream over the chopped chocolate in the bowl. Let it sit undisturbed for 4-5 minutes. This allows the heat from the cream to gently melt the chocolate.
- After the resting period, add the powdered sugar and vanilla extract to the bowl. Whisk gently starting from the center and gradually moving outwards, until a smooth, glossy, and rich chocolate ganache forms.
- Allow the ganache to sit at room temperature for about 15-20 minutes to cool slightly and thicken to a pourable consistency.
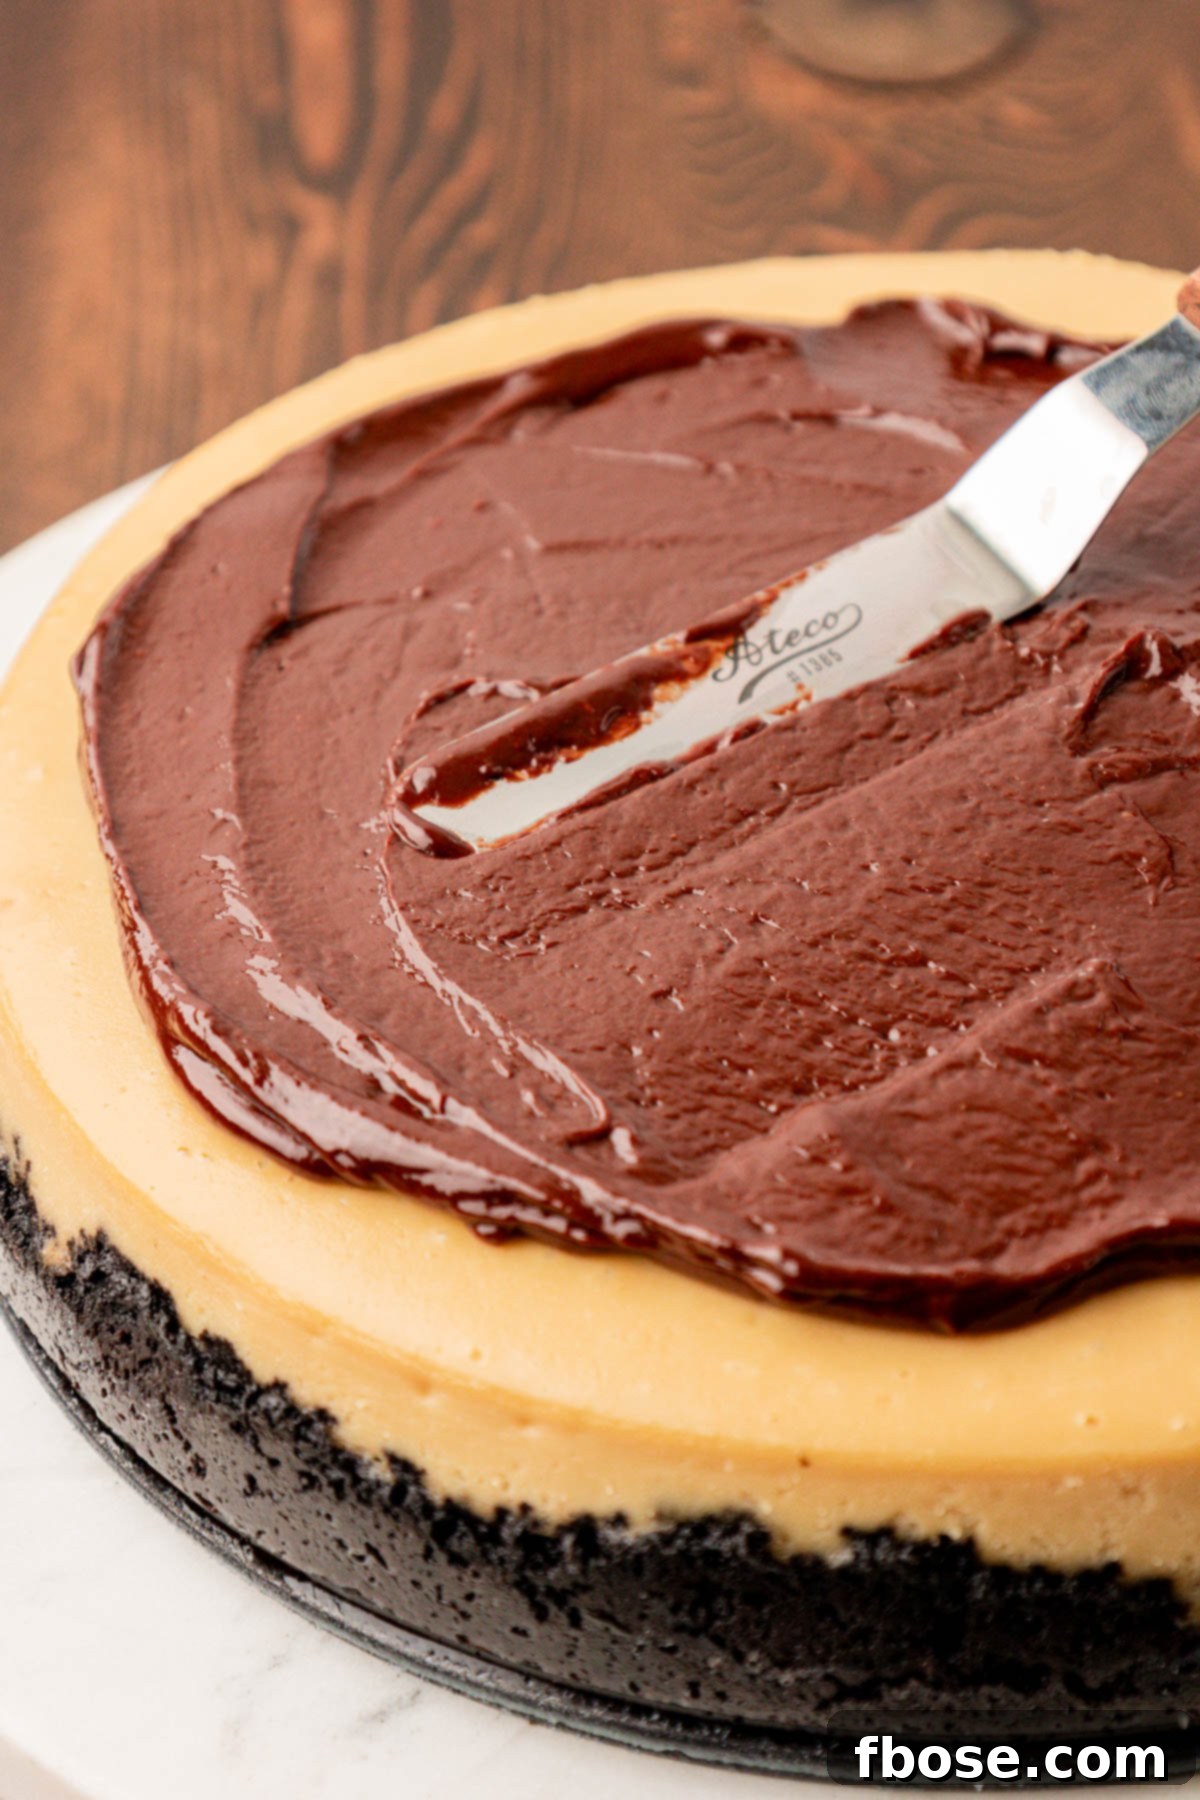
- Once the cheesecake has thoroughly chilled and is removed from the springform pan, carefully pour the ganache over the top of the cheesecake. Using an offset spatula or the back of a spoon, gently spread the ganache evenly, leaving about a ¼ to ½-inch border around the edge of the cheesecake for a visually appealing finish.
- Transfer the ganache-covered coffee cheesecake back to the refrigerator to chill for another 1 to 2 hours, allowing the ganache to set beautifully.
Perfecting the Topping and Serving Your Masterpiece
The final touches are what truly make this Coffee Cheesecake a showstopper. The light and airy coffee whipped topping, combined with festive garnishes, elevates its presentation and flavor.
- Just before you are ready to serve, in a clean, chilled bowl (preferably a stand mixer bowl), combine the heavy cream, instant cheesecake pudding mix (dry), powdered sugar, and coffee extract. Beat on medium-high speed until stiff peaks form. Be careful not to overmix, or it may become grainy.
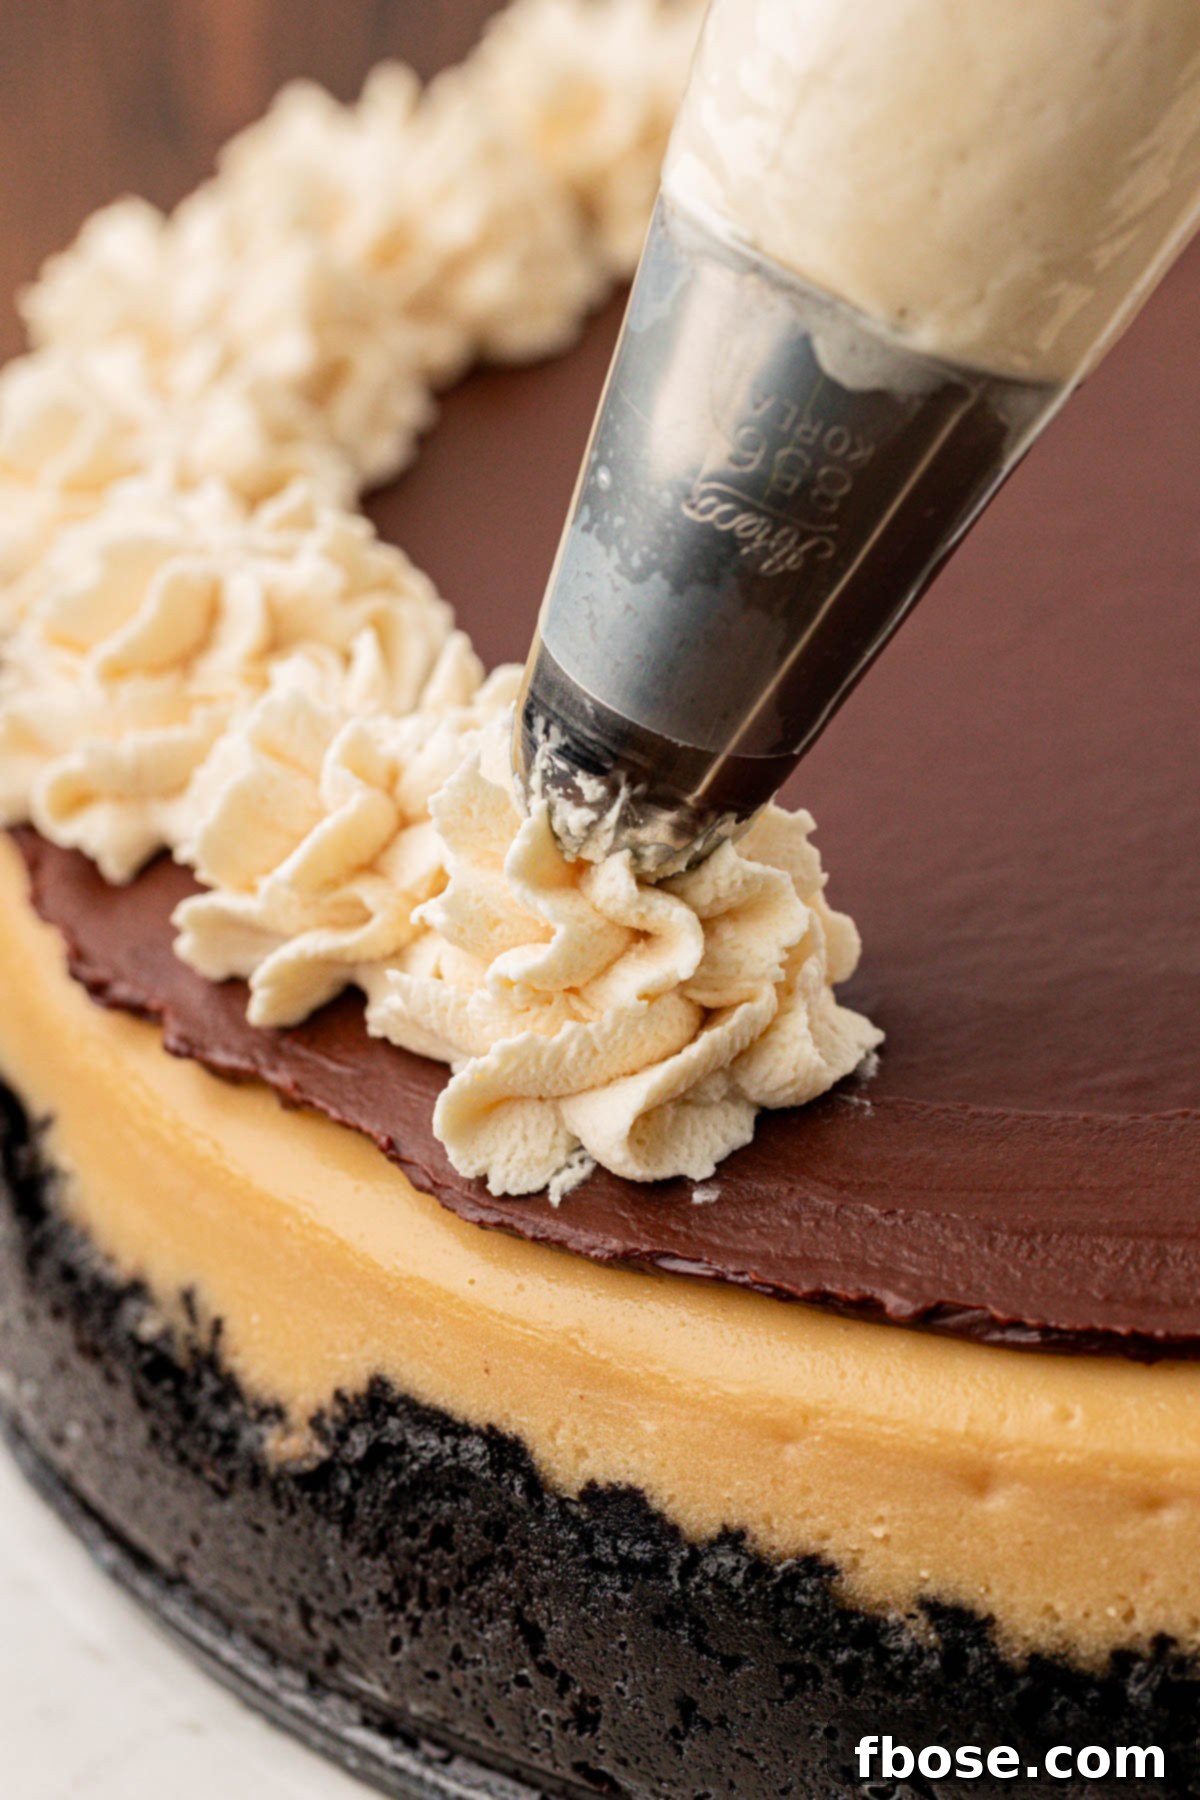
- Transfer the beautifully whipped coffee topping into a piping bag fitted with an extra-large star tip. Carefully pipe decorative swirls or rosettes around the entire edge of the coffee cheesecake, creating an elegant border.
- Complete the masterpiece by garnishing your cheesecake. Sprinkle with chocolate curls for sophisticated texture, add colorful sprinkles for a festive touch, or scatter chocolate-covered espresso beans for an extra coffee and chocolate crunch. These garnishes not only add visual appeal but also enhance the overall flavor experience.
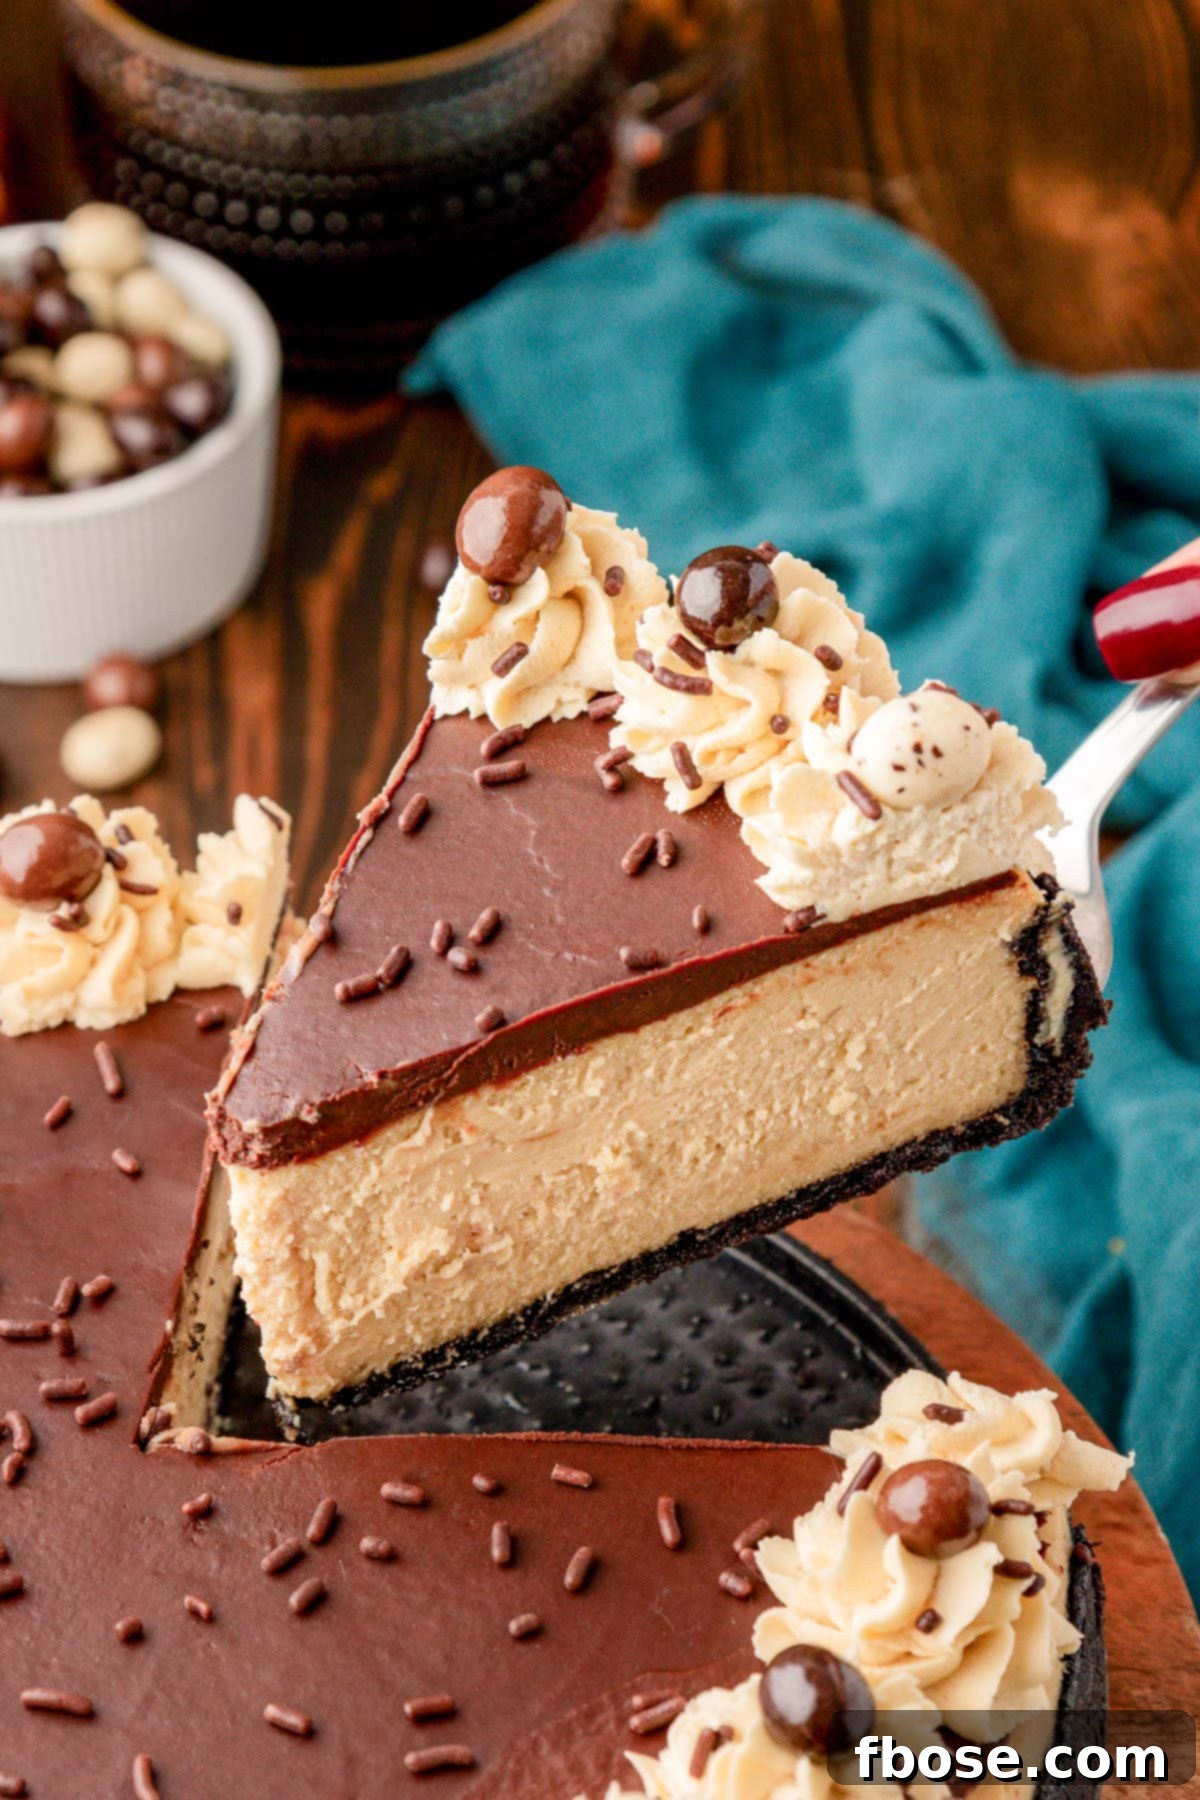
- For impeccably clean slices of cheesecake, a chef’s secret is to run a large, sharp knife under hot water for about 15-20 seconds, then wipe it dry before making each slice. Repeat this process for every cut, wiping and reheating the knife as necessary. This ensures clean, smooth slices every time.
Expert Tips for a Flawless Coffee Cheesecake
- Mind Your Mixing Speeds: When preparing the cheesecake filling, pay very close attention to the mixing speeds. It is crucial not to overwhip the eggs or cream cheese mixture. Overmixing can incorporate too much air, which can lead to air bubbles in the finished cheesecake or result in a less desirable souffle-like, spongy texture. The goal is slow, minimal mixing to ensure a dense, silky, and creamy cheesecake texture that we all adore.
- Cream Cheese Temperature is Key: For the smoothest, lump-free cheesecake batter, ensure your full-fat cream cheese is very soft. I recommend taking it out of the refrigerator at least 4 hours before you plan to use it. This allows it to reach optimal room temperature for seamless blending.
- Crumb Choices: You can use either boxed Oreo crumbs for convenience or make your own. To make homemade crumbs, pulse about 28 regular-filled Oreos in a food processor or high-speed blender until fine, uniform crumbs are formed.
- Choosing Your Pan: I personally prefer a 9-inch springform pan, as it yields a wonderfully thick slice of cheesecake. However, a 10-inch springform pan can also be used, but be aware that your cheesecake will be slightly thinner, and the baking time may be reduced. It is highly recommended to avoid using an 8-inch springform pan, as it is too small to accommodate the generous amount of cheesecake filling this recipe produces.
- Achieving Perfect Doneness: This coffee cheesecake typically bakes for about 75 to 85 minutes. You can gauge doneness by the cheesecake’s appearance: it should have a matte or dull surface, the edges should be just lightly golden, and the center should still be slightly jiggly when gently nudged. It will firm up considerably as it cools.
- Water Bath Importance: Do not skip the water bath! It’s essential for preventing cracks and ensuring an even, creamy bake. The consistent, moist heat helps the cheesecake cook gently.
Serving Your Exquisite Coffee Cheesecake
Presenting this Coffee Cheesecake perfectly enhances its enjoyment. Here are some tips to ensure every slice is a memorable experience:
- Essential Chill Time: Once your cheesecake goes into the refrigerator to set, it’s paramount to allow it at least 8 hours to chill, or even better, overnight. This extended time in the fridge is crucial for the cheesecake to fully firm up, allowing its flavors to meld beautifully and achieve that signature smooth, velvety texture. Patience here will be greatly rewarded.
- Elegant Garnishes: Elevate your cheesecake’s presentation with a selection of refined garnishes. The rich chocolate ganache provides a decadent topping, while the piped whipped cream adds a delicate, airy contrast. Finish with an artistic scattering of chocolate curls for sophistication, a playful touch of sprinkles for color, or a scattering of chocolate-covered espresso beans for an extra kick of coffee flavor and delightful crunch. These thoughtful garnishes are an easy way to transform your homemade dessert into a bakery-level masterpiece.
- Achieving Clean Slices: For those picture-perfect, clean slices that look like they came from a professional patisserie, employ this simple technique: run a large chef’s knife under hot water for 15-20 seconds. Wipe the blade completely dry before making each cut. The heated knife glides through the dense cheesecake effortlessly. Stop, wipe the knife clean, and reheat it under hot water as necessary between each slice to maintain pristine edges.
- Perfect for Any Occasion: This versatile Coffee Cheesecake is an ideal dessert for virtually any gathering or holiday celebration. It’s sophisticated enough for an elegant dinner party with friends or family, yet comforting enough to be the star dessert at a casual potluck. Its universal appeal makes it a guaranteed hit, no matter the event.
Storing Your Homemade Coffee Cheesecake
To preserve the freshness and flavor of your delicious Coffee Cheesecake, transfer any leftover slices into an airtight container. Alternatively, if you wish to store a larger portion or the entire cheesecake, simply wrap the serving dish or the springform pan tightly with plastic wrap. Stored in the refrigerator, this coffee cheesecake will remain delightful to enjoy for up to 1 week.
For longer preservation, this cheesecake freezes exceptionally well! To freeze your cheesecake, first allow it to cool completely in the refrigerator and become fully firm. Then, wrap it securely with several layers of plastic wrap, followed by an additional layer of heavy-duty aluminum foil. This double-wrapping method provides excellent protection against freezer burn and helps maintain its quality.
If you happen to have a cardboard cake round, commonly used to support cake layers, it can be incredibly useful for providing extra support to your cheesecake during freezing. For optimal results when freezing, I highly recommend storing the cheesecake without its toppings or garnishes. Instead, prepare and apply the ganache and whipped topping a few hours before you plan to serve the thawed cheesecake, ensuring they are fresh and vibrant.
Once the cheesecake is properly prepped for freezer storage, transfer it into the freezer. It can be safely stored there for up to 3 months, allowing you to enjoy a slice of this magnificent dessert whenever a craving strikes.
Explore More Delicious Cheesecake Recipes:
If you’ve fallen in love with this Coffee Cheesecake, you’ll surely enjoy these other delightful cheesecake creations from our kitchen:
- Basque Burnt Cheesecake – Discover a unique cheesecake with a beautifully caramelized exterior and an unbelievably silky, creamy interior!
- Deep Fried Cheesecake Bites – A fun, savory-sweet snack that comes together in just 15 minutes, perfect for parties or a quick indulgence!
- Peanut Butter Chocolate Cheesecake – Experience the irresistible combination of creamy peanut butter filling nestled in a decadent Oreo cookie crust!
- Chocolate Chip Cheesecake Bars – Enjoy the best of two beloved desserts, chocolate chip cookies and cheesecake, perfectly combined into convenient, delicious bars!
- No Bake Oreo Cheesecake Recipe – An incredibly easy, fuss-free cheesecake recipe packed with generous amounts of everyone’s favorite Oreos!
Did You Make This Recipe?
If you’ve tried this delightful recipe, we would absolutely love to hear from you! Please consider leaving a review in the comments section below to share your experience and feedback. Your insights are incredibly valuable to us and fellow bakers!
Don’t forget to tag us – @sugarandsoulco – on Instagram and Pinterest with your beautiful photos of this Coffee Cheesecake. You can also join our vibrant Sugar & Soul Show-offs Community on Facebook and share your creations there. We can’t wait to see your masterpieces!
Coffee Cheesecake Recipe Card
Ingredients
Crust
- 28 Oreos 316g, finely crushed
- 6 tablespoons salted butter 84g, melted
- ½ teaspoon espresso powder
Cheesecake Filling
- 32 ounces cream cheese 904g, very soft and full-fat only
- 1½ cups granulated sugar 335g
- 1 tablespoon coffee extract
- 5 large eggs room temperature
- ½ cup heavy cream 120ml, room temperature
- 2 ounces cold brew coffee I use La Colombe or Chobani brand
- 2 teaspoons lemon juice
- 1 teaspoon salt
- ⅓ cup all-purpose flour 43g, sifted
Chocolate Ganache
- 4 ounces bittersweet chocolate I use Ghirardelli brand, finely chopped
- 4 ounces heavy cream
- 1 tablespoon powdered sugar
- ½ teaspoon vanilla extract
Coffee Whipped Topping & Garnishes
- 1½ cup heavy cream
- 3 tablespoons instant cheesecake pudding mix dry
- 3 tablespoons powdered sugar
- ½ teaspoon coffee extract
- chocolate curls optional
- sprinkles optional
- chocolate covered espresso beans optional
Instructions
Crust
-
Preheat your oven to 300°F (150°C). Wrap the bottom and sides of a 9-inch springform pan securely with heavy-duty aluminum foil to prevent water from seeping in during baking. Set aside.
-
In a large bowl, combine the 28 Oreos (316g) (crushed into fine crumbs), 6 tablespoons (84g) salted butter (melted), and ½ teaspoon espresso powder. Mix thoroughly until the crumbs are evenly moistened. (You can use boxed crumbs or make your own by pulsing Oreos in a food processor.)
-
Press the crust mixture firmly into the bottom and partially up the sides of the prepared springform pan using the bottom of a glass or measuring cup.
Cheesecake Filling
-
In a large bowl or stand mixer fitted with a whisk attachment, beat together 32 ounces (904g) cream cheese (very soft and full-fat), 1½ cups (335g) granulated sugar, and 1 tablespoon coffee extract on medium speed for about 2 minutes, until smooth. Scrape down the sides of the bowl every 30 seconds to ensure no lumps remain.
-
Add the 5 large eggs (room temperature) one at a time, mixing on low speed after each addition. Mix just until the yellow from the previous egg is barely visible before adding the next.
-
With the mixer on low speed, add the ½ cup (120ml) heavy cream (room temperature), 2 ounces cold brew coffee, 2 teaspoons lemon juice, and 1 teaspoon salt. Mix until fully incorporated.
-
Sift the ⅓ cup (43g) all-purpose flour into the mixing bowl. Mix on low speed for 10 seconds. Scrape down the sides of the bowl and beat for another 10 seconds, just until combined.
-
Place the prepared springform pan into a larger baking pan. Carefully fill the larger pan with hot water until it reaches about halfway up the sides of the springform pan. This creates a water bath, essential for preventing cracks in your cheesecake.
-
Pour all of the coffee cheesecake batter into the prepared springform pan over the crust. The filling will seem substantial, but ensure it all goes in.
-
Bake for 75 to 85 minutes on the middle oven rack. The cheesecake is done when the center is almost set and has a matte/dull appearance, but still jiggles slightly, and the edges are just lightly golden.
-
Turn off the oven heat and allow the cheesecake to sit inside the oven for an additional 20 minutes with the door slightly ajar. This slow cooling prevents cracking.
-
Remove the cheesecake from the oven. Immediately run a thin paring knife around the inner edge of the pan to loosen the cheesecake. Then, remove the aluminum foil from the pan and transfer the cheesecake (still in its pan) to a wire rack to cool completely to room temperature (about 3 hours).
-
Once cooled, cover the cheesecake with plastic wrap, gently pressing the plastic wrap directly against the top surface. Transfer the cheesecake (still in the pan) to the refrigerator to chill for at least 8 hours, or preferably overnight. Prepare and add the ganache 2 to 3 hours before you plan to serve.
Chocolate Ganache
-
Chop 4 ounces bittersweet chocolate and place it in a heat-safe bowl.
-
Bring 4 ounces heavy cream to a low simmer in a small saucepan over medium heat. As soon as the center starts to bubble, remove from heat and pour over the chopped chocolate. Let sit undisturbed for 4 minutes to melt the chocolate.
-
Add 1 tablespoon powdered sugar and ½ teaspoon vanilla extract to the bowl with the chocolate and cream. Whisk until a rich, smooth chocolate ganache forms. Let it sit at room temperature for 15 minutes to cool and thicken slightly.
-
Once chilled, remove the cheesecake from the refrigerator and the springform pan. Pour the ganache over the top, spreading it out evenly to about ¼ to ½-inch shy of the edge. Chill for an additional 1 to 2 hours to allow the ganache to set.
Topping & Serving
-
When you are ready to serve, in a clean, chilled bowl, beat together 1½ cup heavy cream, 3 tablespoons instant cheesecake pudding mix (dry), 3 tablespoons powdered sugar, and ½ teaspoon coffee extract until stiff peaks form. Be careful not to overmix.
-
Transfer the coffee whipped topping to a piping bag fitted with an extra-large star tip. Pipe decorative swirls or rosettes around the edge of the coffee cheesecake.
-
Garnish the cheesecake with chocolate curls, sprinkles, or chocolate-covered espresso beans, as desired. For clean slices, heat a large chef’s knife under hot water, wipe dry, and slice, repeating for each cut.
Notes
- A whisk attachment is ideal for achieving a smooth cream cheese mixture. It’s vital that the cream cheese is very soft; I recommend removing it from the refrigerator at least 4 hours before use.
- Store any leftover cheesecake in an airtight container in the refrigerator for up to 1 week.
- This recipe can be made in a 10-inch springform pan, but the cheesecake will be thinner and may require slightly less baking time. An 8-inch springform pan is too small for this amount of batter.
- It’s extremely important to pay close attention to mixing speeds and times in this recipe. Avoid overwhipping the eggs or cream, as this can introduce too many air bubbles or result in a souffle-like texture. Slow and minimal mixing ensures the desired silky, creamy cheesecake texture.
- You can freeze this cheesecake for up to 3 months. After it cools completely in the refrigerator, wrap it securely with plastic wrap, then again with aluminum foil. Using a cardboard cake round can provide extra support. It’s best to freeze without toppings; add ganache and whipped topping a few hours before serving the thawed cheesecake.