

Spooktacularly Simple: The Ultimate Halloween Cookies and Cream Cookie Bars Recipe
Get ready to unleash your inner Halloween spirit with these incredibly easy-to-make Halloween Cookies & Cream Cookie Bars! Bursting with crushed Oreo pieces and festive Halloween M&Ms, this delightful dessert is the perfect treat for any spooky celebration. Best of all, it comes together in just 35 minutes, making it a stress-free option for busy October days.
As the air turns crisp and autumn leaves fall, there’s no better way to embrace the magic of October 31st than with a batch of homemade, seasonally themed sweets. If you’re looking for more fun and frightfully delicious ideas, be sure to check out our Halloween Seven Layer Magic Bars, which feature a convenient refrigerated cookie dough base, or these adorable Easy Halloween Monster Cookies, complete with playful candy eyes. These cookie bars, however, offer a unique blend of classic cookies and cream flavor infused with vibrant Halloween flair, ensuring they’ll be a hit at any ghoulish gathering.
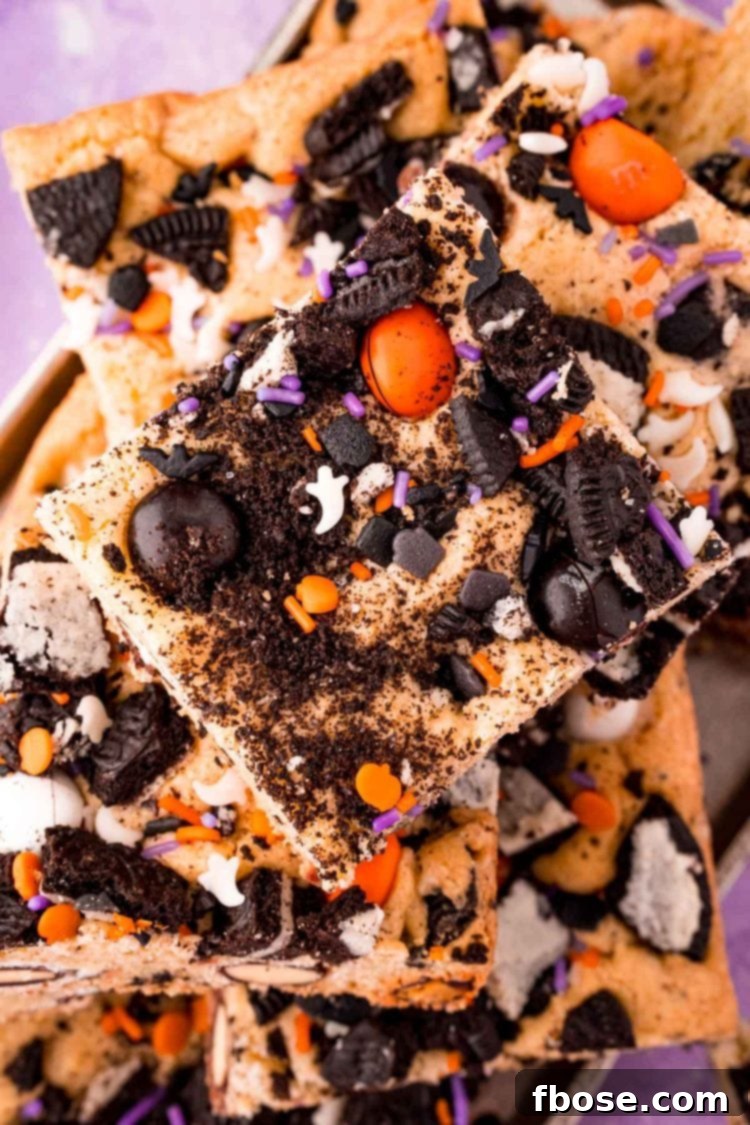
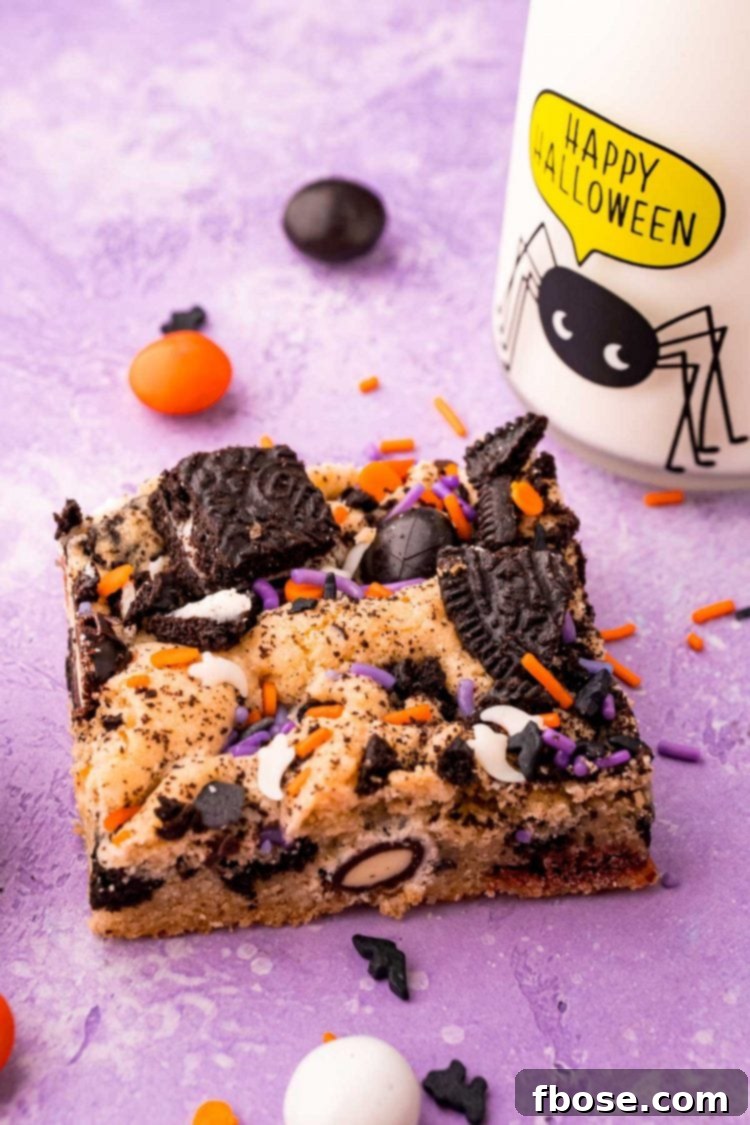
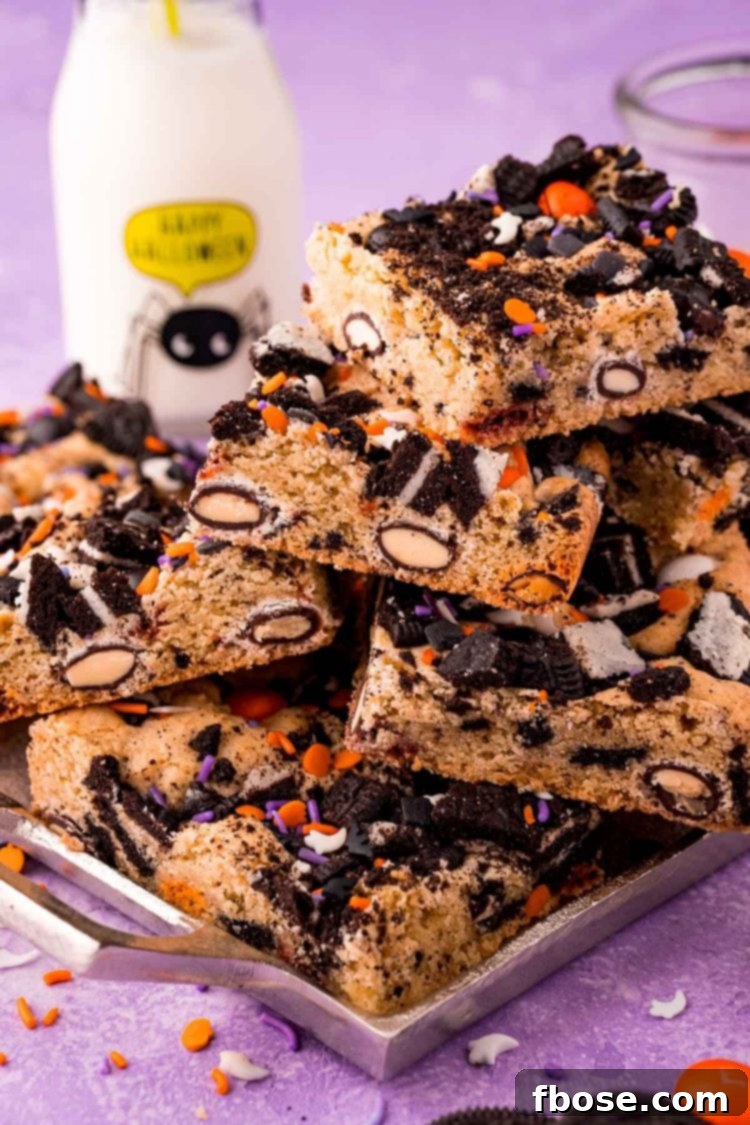
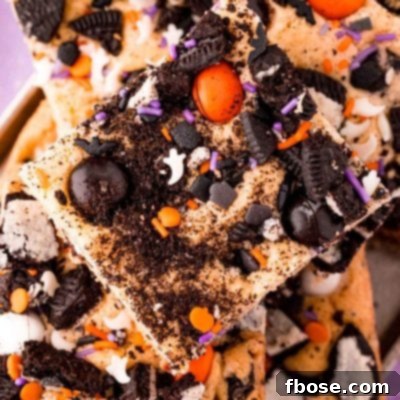
Imagine sinking your teeth into a buttery, tender cookie bar, rich with the familiar crunch of chopped Oreos and generously studded with vibrant brown, white, and orange Cookies & Cream M&M’s. These bars aren’t just delicious; they’re a visual masterpiece, thanks to the striking contrast of the black Oreo pieces, the festive M&M colors, and your choice of spooky Halloween sprinkles. The combination of textures and flavors creates an irresistible treat that will have everyone reaching for more.
For an extra touch of enchantment, I adorned my batch with some delightful sprinkles featuring purple jimmies, ghostly white shapes, and classic black bats. This simple addition instantly elevates the bars from tasty to truly “spooktacular,” bringing an undeniable Halloween charm to every bite. The beauty of these cookie bars lies not only in their captivating appearance but also in their incredible simplicity. The foundational cookie base is crafted from everyday pantry staples, meaning you likely have most of the ingredients on hand already. This convenience saves you a trip to the store and makes impromptu baking sessions a breeze.
The entire process is remarkably swift, requiring only about 10 minutes of active hands-on preparation time, followed by a mere 25 minutes in the oven. This means you can whip up a fresh batch of these festive delights in just 35 minutes from start to finish! Minimal effort for maximum Halloween spirit – what could be better? These bars boast eye-catching festive colors, a delicious flavor profile, and an unmatched ease of preparation. Trust me, you’ll want to make two batches!
Essential Ingredients for Your Halloween Cookie Bars
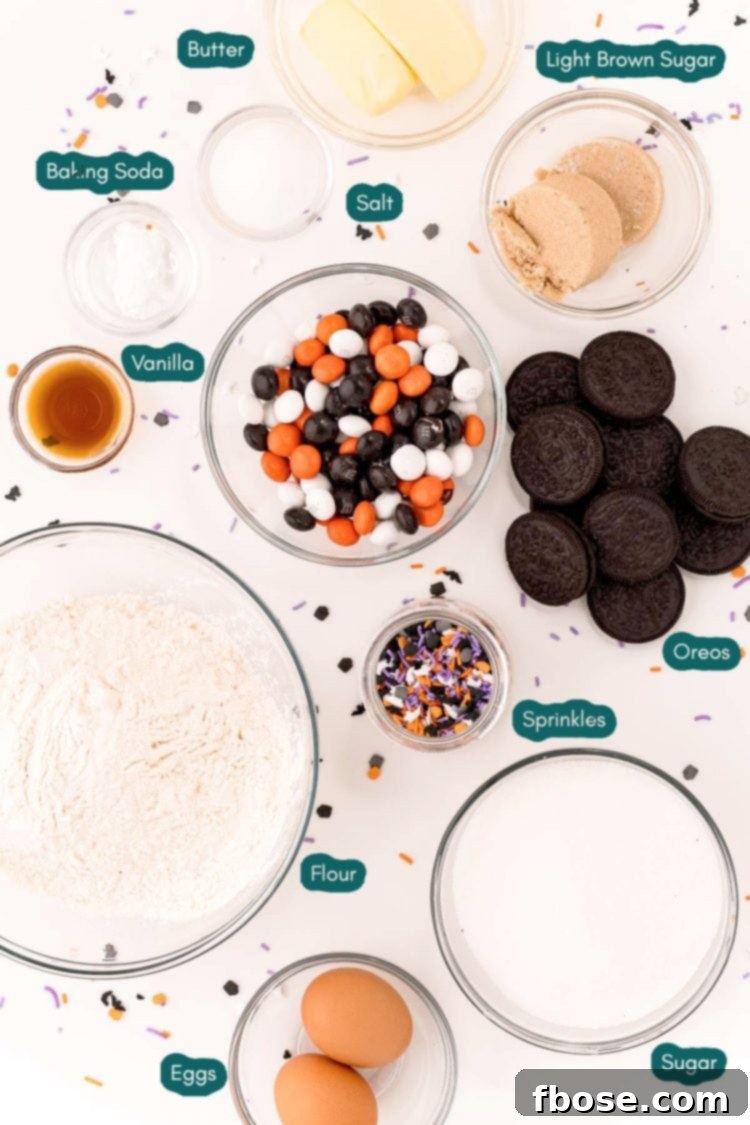
One of the many appealing aspects of these Halloween Cookies and Cream Cookie Bars is that their ingredient list primarily consists of items you probably already have stocked in your pantry. This convenience makes them an ideal last-minute Halloween treat, eliminating the need for a special grocery run. We can all appreciate that kind of baking ease!
To create the perfect buttery cookie base, you’ll need standard baking essentials: all-purpose flour, kosher salt to balance the sweetness, and baking soda for a perfect rise and tender texture. For the rich, moist foundation, gather softened unsalted butter, granulated sugar for sweetness, and light brown sugar (packed) which contributes to a chewier texture and a subtle caramel note. Rounding out the wet ingredients are large eggs, acting as a binder and adding richness, and pure vanilla extract to enhance all the flavors. These basic components lay the groundwork for a truly exceptional cookie bar.
Once your irresistible cookie batter is prepared, the fun begins with the mix-ins. You’ll incorporate festive Cookies & Cream M&M’s, which add not just color but also a delightful chocolatey crunch. The star of the show, of course, is chopped Oreos. These iconic cookies provide a satisfying texture and their signature chocolate flavor. After the batter is evenly spread into your prepared pan, it gets a final flourish. More Cookies & Cream M&M’s and additional chopped Oreos are scattered on top, ensuring every bite is loaded with goodness. And for that undeniable Halloween sparkle, don’t forget a generous sprinkle of Halloween-colored decorations! To further amplify the festive theme and add another layer of flavor, consider using Halloween Oreos, which often feature an orange cream filling. This small swap can make a big difference in both appearance and taste.
When preparing your Oreos for this recipe, a crucial tip is to aim for larger chopped chunks rather than fine crumbs. These substantial pieces are essential for providing that satisfying crunch and visual appeal within the bars. Fine crumbs would simply blend into the dough, losing their distinctive texture and presence. So, grab a knife or give them a quick pulse in a food processor, being careful not to over-process them into dust. The goal is discernible pieces of Oreo that stand out in every bite.
Crafting Your Cookies and Cream Cookie Bars: A Simple Guide
Creating these delightful Halloween Cookies and Cream Cookie Bars is a straightforward process, perfect for bakers of all skill levels. Follow these easy steps to bring your spooky sweet vision to life:
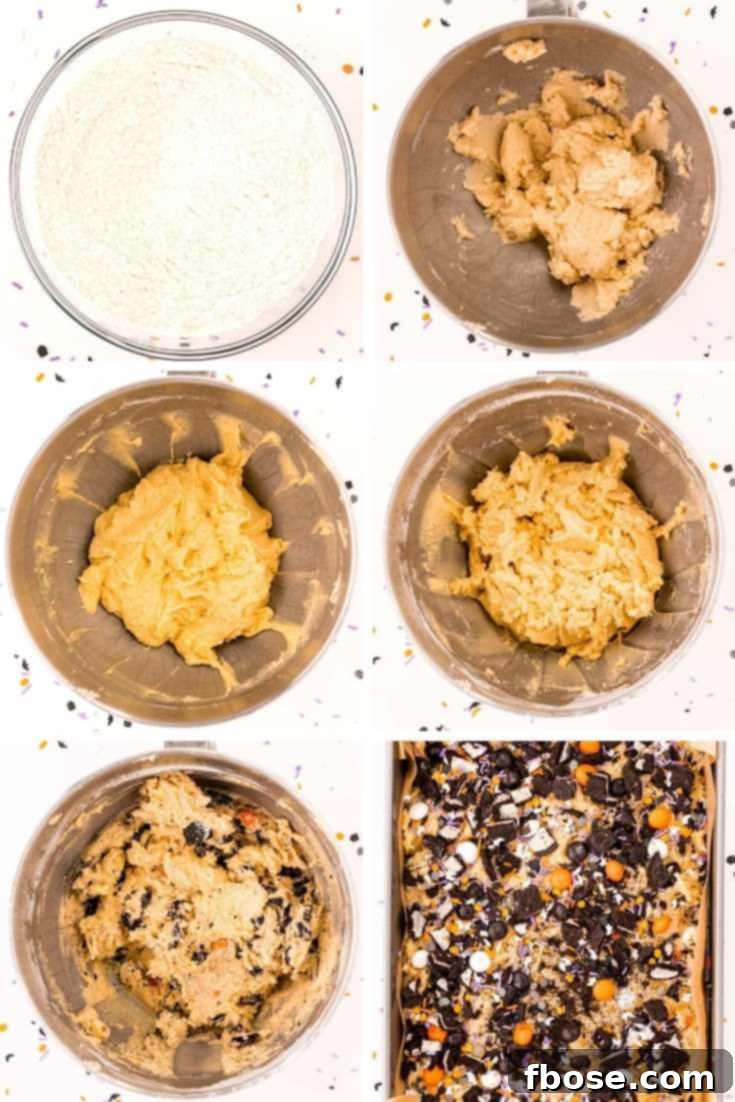
- Prepare Your Dry Ingredients: In a generously sized mixing bowl, combine the all-purpose flour, kosher salt, and baking soda. Whisk these dry ingredients together thoroughly to ensure they are well distributed. Proper mixing here prevents pockets of salt or baking soda in your finished bars. Set this bowl aside for later use.
- Cream Wet Ingredients: In a separate bowl (or the bowl of your stand mixer), beat the softened butter and both granulated and light brown sugars until they are light, fluffy, and well combined. This creaming process incorporates air, which contributes to the bars’ tender texture.
- Add Eggs and Vanilla: Introduce the eggs one at a time to the butter and sugar mixture, beating well after each addition. Finally, stir in the pure vanilla extract. Continue to beat until everything is fully incorporated and the mixture is smooth, scraping down the sides of the bowl as needed to ensure all ingredients are evenly mixed.
- Combine and Fold: Gradually add the reserved flour mixture to the wet ingredients, mixing on low speed until *just* combined. Be careful not to overmix, as this can lead to tough cookie bars. Once the dough forms, gently fold in the Halloween M&M candies and your chunky chopped Oreos. You want these delightful additions distributed throughout without crushing them too much.
- Spread and Garnish: Evenly spread the thick cookie batter into your prepared 9×13-inch pan, making sure it reaches all corners. For an extra festive touch and an explosion of flavor, scatter more M&Ms, additional chopped Oreos, and a generous amount of Halloween sprinkles over the top of the batter. This ensures a beautiful presentation and a delicious crunch in every piece.
- Bake and Cool: Transfer the pan to your preheated oven and bake until the edges turn a delicate golden brown. The center might still appear slightly soft, but it will set as it cools. Once baked, remove the pan from the oven and place it on a wire cooling rack. Allow the cookie bars to cool completely in the pan before attempting to slice them. Patience here is key, as warm bars can be crumbly. Once fully cooled, use the parchment paper overhang to lift the entire slab of cookie bars out of the pan, then cut them into squares and serve!
Frequently Asked Questions About These Halloween Cookie Bars
Here are some common questions and helpful tips to ensure your Halloween Cookies and Cream Cookie Bars turn out perfectly every time:
How To Store Your Delicious Cookie Bars
Once your cookie bars have completely cooled, transfer them to an airtight container. They will stay fresh and delicious when stored at room temperature for up to one week. For longer storage, you can individually wrap them and freeze them for up to 2-3 months. Thaw at room temperature before enjoying.
Can I Adjust the Pan Size for Thicker Bars?
While the temptation for thicker, chewier bars is understandable, I strongly advise against baking this particular recipe in a smaller pan, such as a 9×9-inch or 10×10-inch. The cookie dough is formulated for a 9×13-inch pan to ensure even baking. Using a smaller pan would result in a much thicker dough layer, which could prevent the center from baking through properly while the edges might overcook or burn. For best results and perfectly baked bars, stick to the recommended 9×13-inch pan.
What if the Edges are Browning Too Quickly While the Middle is Still Raw?
This is a common baking dilemma! If you notice the edges of your Halloween Cookies and Cream Cookie Bars are turning a deep brown, but the center still appears undercooked or jiggly, don’t fret. Simply remove the pan from the oven, and carefully but loosely cover it with aluminum foil. Return the pan to the oven and continue baking. The foil acts as a shield, preventing further darkening of the edges while allowing the heat to penetrate and finish baking the middle of the bars without overcooking the rest.
Tips for Perfect Halloween Cookies and Cream Cookie Bars
- Softened Butter is Key: Ensure your butter is truly softened, but not melted. It should yield slightly when pressed, but not be greasy. This allows for proper creaming with the sugars, creating a light and airy base.
- Don’t Overmix: Once you add the dry ingredients to the wet, mix only until just combined. Overmixing develops the gluten in the flour, leading to tough, dense bars instead of tender ones.
- Chunky Oreos: As mentioned, bigger pieces of chopped Oreos are essential for texture. If using a food processor, pulse them just a few times until you have varied sizes, avoiding fine crumbs.
- Parchment Paper is Your Friend: Lining your pan with parchment paper, leaving an overhang on the sides, makes removing the cooled bars incredibly easy. No sticking, no mess!
- Cool Completely: Resist the urge to cut into these bars while they’re warm. They need time to set and firm up. Cutting them too soon can result in a crumbly mess. Patience will be rewarded with perfectly shaped bars.
Delicious Variations & Customizations
These Halloween Cookies and Cream Cookie Bars are wonderfully versatile! Here are a few ideas to customize them for different holidays or preferences:
- Holiday Swap: Easily adapt this recipe for any holiday! Use red and green M&Ms for Christmas, pastels for Easter, or red, white, and blue for patriotic celebrations. Change up the sprinkles to match the theme.
- White Chocolate Drizzle: For an extra touch of decadence, melt some white chocolate chips and drizzle them over the cooled bars. You can even tint the white chocolate with food coloring to match your Halloween theme (orange or green!).
- Different Oreos: While classic Oreos are fantastic, feel free to experiment with other Oreo flavors. Golden Oreos could offer a different flavor profile, or even mint Oreos for a surprising twist. Just remember to aim for chopped chunks.
- Add Nuts: If you’re a fan of nuts in your desserts, a half cup of chopped walnuts or pecans could add another layer of texture and flavor to these bars.
Serving Suggestions for Your Spooky Treats
These Halloween Cookies and Cream Cookie Bars are delicious on their own, but here are some ideas to make them even more special:
- Classic Pairing: Serve them with a tall glass of cold milk for the ultimate comforting treat.
- Coffee or Hot Cocoa: Enjoy a bar alongside a warm cup of coffee, tea, or a festive Halloween hot cocoa.
- Halloween Party Platter: Arrange them on a platter with other Halloween-themed desserts for a show-stopping display.
- Dessert Table Centerpiece: Stack them artfully on a tiered stand to create an impressive centerpiece for your holiday gathering.
Holidays become infinitely more enjoyable when there are festive, fun desserts to share, and these Halloween Cookies and Cream Cookie Bars certainly deliver! They are the epitome of easy, delicious, and delightfully spooky. Why not grab another Halloween-themed recipe that’s just as fun and delicious as this one to complete your celebration?
- Mummy Halloween Cupcakes – These easy-to-make festive cupcakes are ready to bring to the Halloween bash in under an hour!
- Werewolf Punch – A homemade punch that gets filled with shredded coconut, gummy worms, and eerie gummy candy eyeballs!
- Easy Halloween Dirt Cups – Kids will go crazy for this fun dessert that they can even help make, making it a great family activity!
- Halloween Spider Cookies – Soft peanut butter cookies are creatively topped with a rich chocolate truffle, spooky candy eyes, and melted chocolate for legs!
- Goosebumps Halloween Punch – Made with only 4 ingredients and is sip-ready in just 10 minutes, perfect for quick party prep!
Let’s Connect and Share Your Creations!
If you’ve tried this fantastic recipe, please let me know how you liked it in the comments below and consider leaving a review. Your feedback is invaluable, and I love hearing from you!
Don’t forget to tag me – @sugarandsoulco – on Instagram and Pinterest with your photos so I can see your amazing creations! You can also join our Sugar & Soul Show-offs Community on Facebook and share them there, where you can participate in our fun recipe challenges!
Halloween Cookies and Cream Cookie Bars
Author: Rebecca Hubbell
Course: Dessert
Cuisine: American
Prep Time: 10 minutes
Cook Time: 25 minutes
Total Time: 35 minutes
Yields: 24 servings
Pin Recipe
Ingredients
- 2¼ cup all-purpose flour (Shop All-Purpose Flour)
- 1 teaspoon kosher salt (Shop Kosher Salt)
- ½ teaspoon baking soda (Shop Baking Soda)
- ¾ cup unsalted butter, softened (Shop Unsalted Butter)
- 1 cup granulated sugar (Shop Granulated Sugar)
- ½ cup light brown sugar, packed (Shop Light Brown Sugar)
- 2 large eggs (Shop Large Eggs)
- 1 teaspoon vanilla extract (Shop Vanilla Extract)
- 1¼ cup M&M’s Halloween Cookies & Scream Chocolate Candies (Shop Halloween M&M’s)
- 1½ cup Oreos, chopped and divided (Shop Oreos)
- Sprinkles (optional)
Instructions
- Preheat your oven to 350°F (175°C). Line a 9×13-inch baking pan with parchment paper, allowing some overhang on the sides for easy removal. Set aside.
- In a large bowl, whisk together the flour, salt, and baking soda until well combined. This ensures even distribution of leavening and seasoning.
- In the bowl of an electric mixer (or a large bowl with a hand mixer), cream together the softened butter and both granulated and light brown sugars until the mixture is light and fluffy. This usually takes about 2-3 minutes. Add the eggs one at a time, beating well after each addition, then stir in the vanilla extract. Scrape down the sides of the bowl as needed to ensure all ingredients are thoroughly mixed.
- Gradually add the whisked flour mixture to the wet ingredients, mixing on low speed until just combined. Be careful not to overmix the dough. Gently fold in 1 cup of the Halloween M&M candies and 1 cup of the chopped Oreos.
- Spread the cookie dough evenly into the prepared 9×13-inch pan. Sprinkle the remaining M&M candies, chopped Oreos, and your chosen Halloween sprinkles generously over the top of the batter for a festive finish.
- Bake for 24 to 27 minutes, or until the edges are golden brown and a toothpick inserted into the center comes out with moist crumbs attached (not wet batter). The center may look slightly soft but will set as it cools.
- Allow the cookie bars to cool completely in the pan on a wire rack. Once fully cooled, use the parchment paper overhang to lift the entire slab of cookie bars out of the pan. Place on a cutting board and slice into squares before serving.
Notes
- If you can’t find the special Halloween Cookies & Scream M&M’s, regular M&M’s work perfectly well. You could also use chopped Hershey’s Cookies n’ Cream bars for a similar flavor profile.
- Store any leftover cookie bars in an airtight container at room temperature. They will maintain their deliciousness for up to 3 days.
- I used classic Oreos for this recipe, but feel free to experiment with Double Stuf Oreos for an extra creamy twist, or even seasonal flavored Oreos for added fun.
Nutrition Information (Approximate per serving)
Calories: 250kcal | Carbohydrates: 36g | Protein: 3g | Fat: 11g | Saturated Fat: 6g | Polyunsaturated Fat: 1g | Monounsaturated Fat: 3g | Trans Fat: 1g | Cholesterol: 31mg | Sodium: 181mg | Potassium: 47mg | Fiber: 1g | Sugar: 24g | Vitamin A: 225IU | Vitamin C: 1mg | Calcium: 24mg | Iron: 2mg
Did You Make This Recipe?
We’d love to see your creations! Don’t forget to share your photos with us on Instagram @sugarandsoulco and follow us on Tiktok @sugarandsoulco and Pinterest @sugarandsoulco for more delicious recipes and inspiration!
Pin Recipe
Share Recipe