
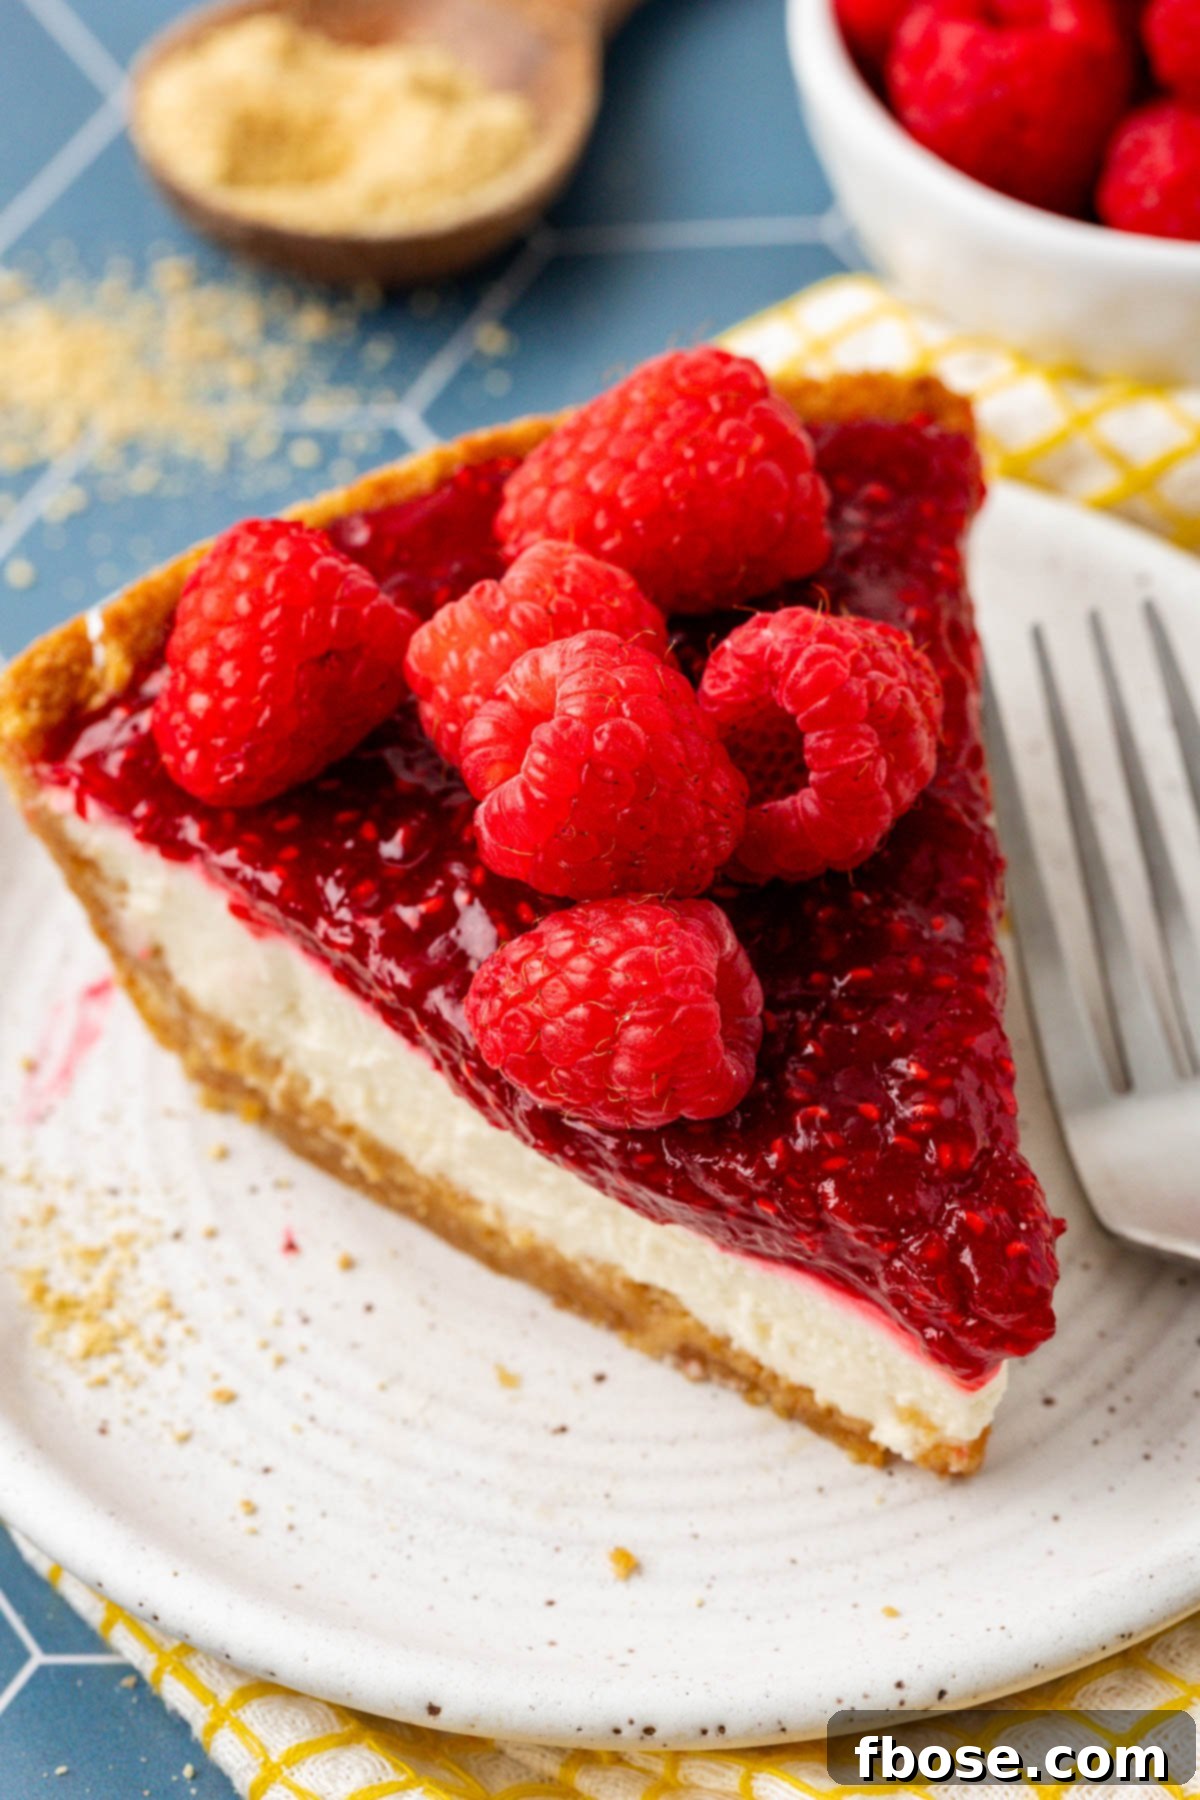
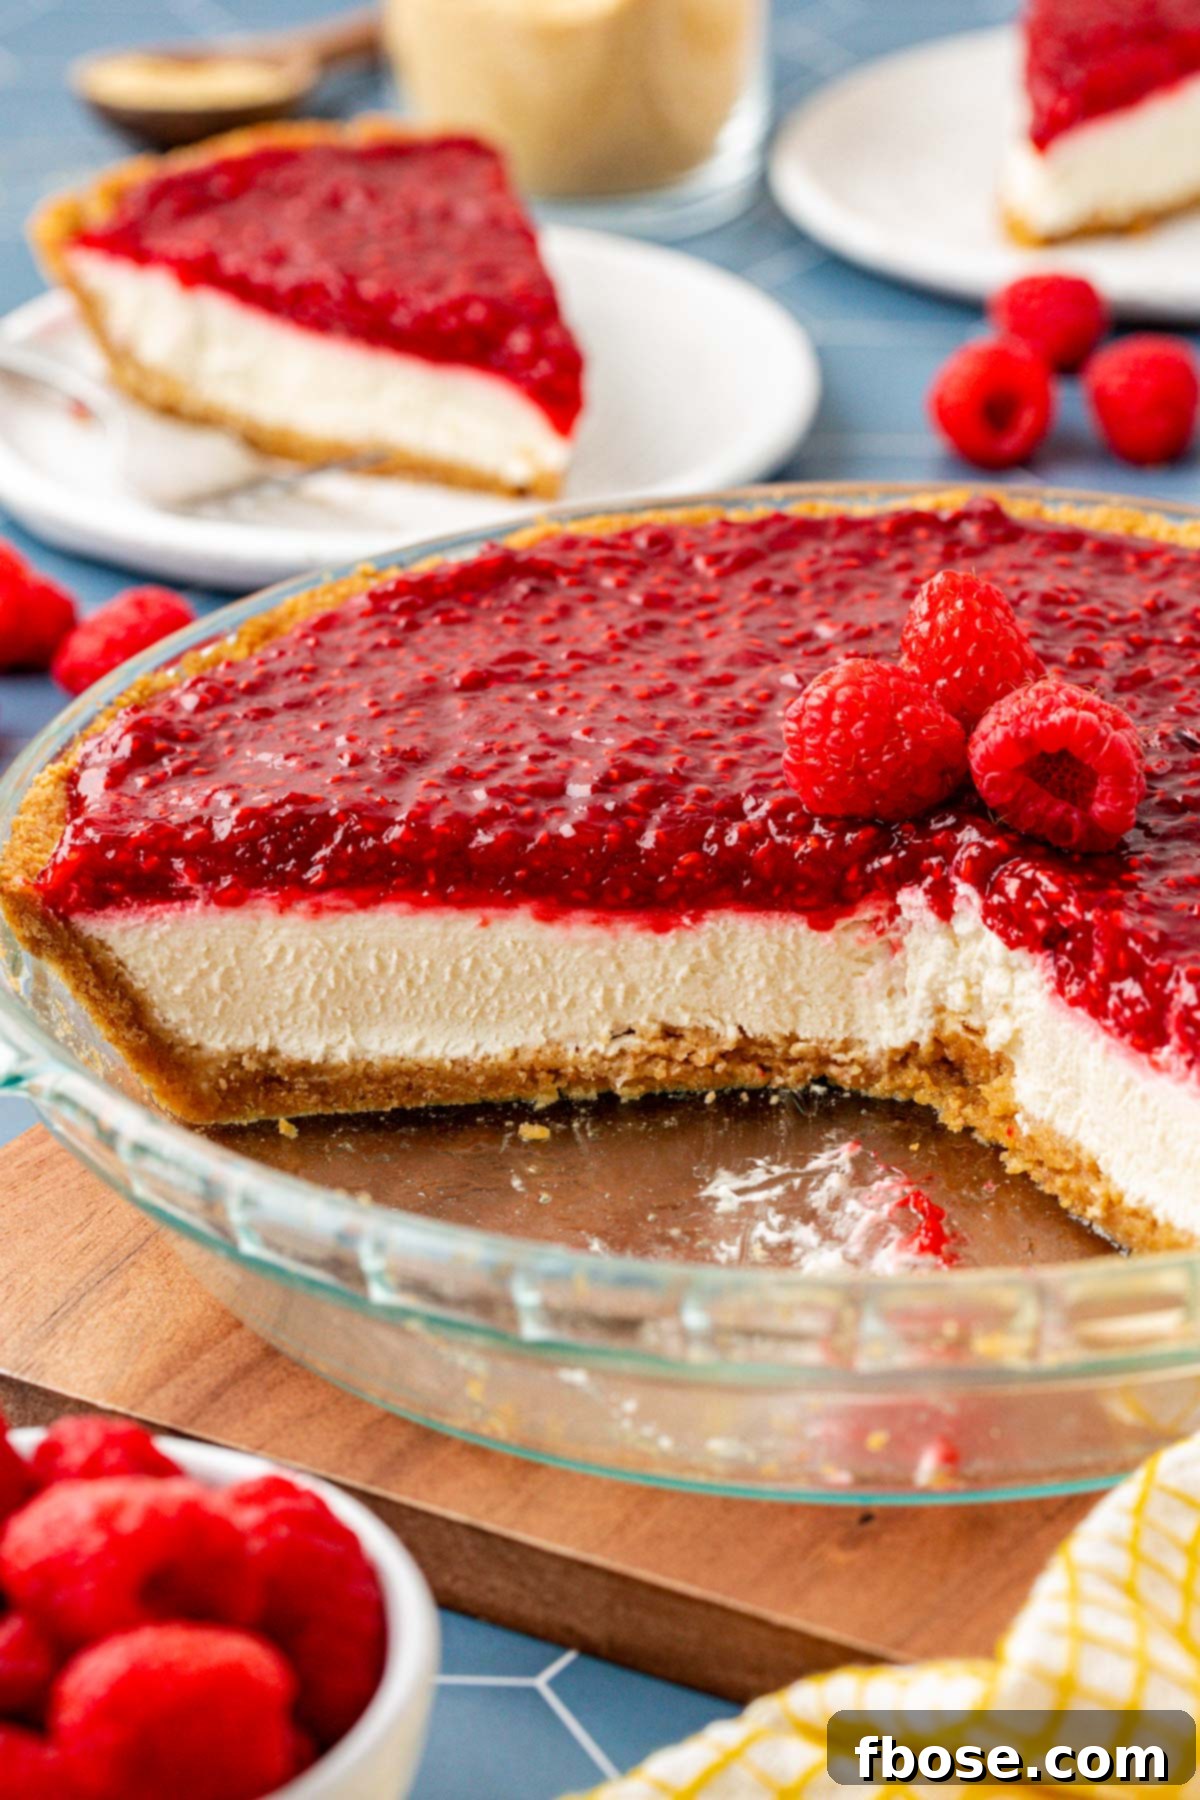
No Bake Raspberry Cream Pie is an absolute MUST-make dessert that promises to delight every palate! Imagine a lusciously sweet, exquisitely creamy, cheesecake-like filling, perfectly nestled within a golden, buttery graham cracker crust. This divine creation is then crowned with a vibrant, fresh-tasting raspberry topping, crafted effortlessly with just four simple ingredients and frozen berries. It’s a dessert that not only looks stunning but delivers an unforgettable burst of flavor with every spoonful.
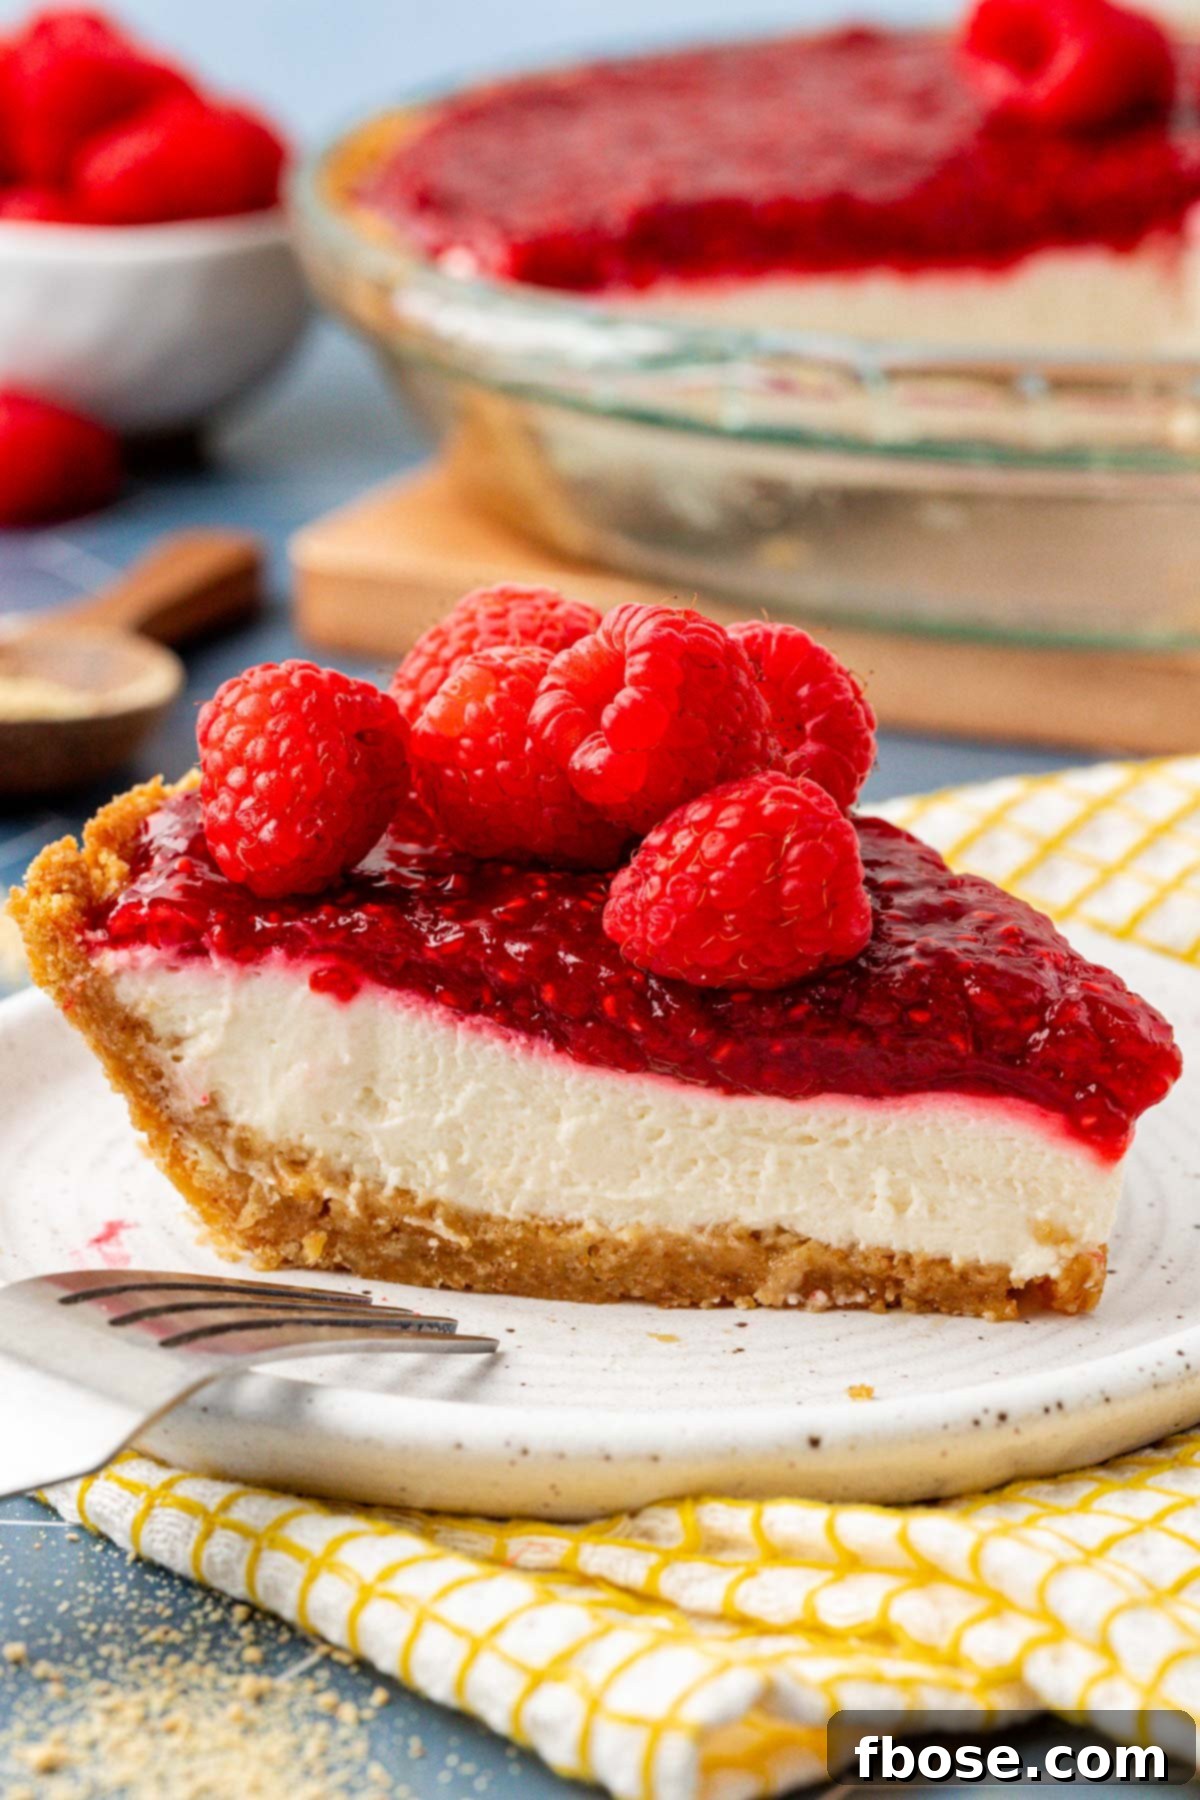
Why This No-Bake Raspberry Cream Pie Will Be Your New Favorite Dessert
Who says homemade pies have to be a complicated affair? This incredible No-Bake Raspberry Cream Pie is living proof that divine desserts can be surprisingly simple to create. Forget endless hours in the kitchen; with our clear, step-by-step instructions, you can whip up this homemade crust, velvety filling, and vibrant topping in approximately one hour of active preparation time, excluding the crucial chill time. This recipe streamlines the baking process, making it accessible for both seasoned bakers and complete novices.
The resulting dessert is nothing short of spectacular, promising to impress even the most discerning dessert connoisseurs. Each bite offers a harmonious blend of textures and flavors: the satisfying crunch of the buttery graham cracker crust, the smooth, rich embrace of the cheesecake-like filling, and a refreshing burst of sweet and tart raspberry topping. We’ve specifically chosen frozen raspberries for the topping, as they consistently deliver the perfect flavor and consistency, ensuring a foolproof and delicious outcome every time.
Given its cool and creamy nature, this chilled no-bake pie is an ideal indulgence for warm summer afternoons, making it a stellar centerpiece for BBQs, garden parties, and family gatherings. Yet, its elegance and rich flavor profile also make the Raspberry Cream Pie a cherished holiday staple, particularly during Thanksgiving. Its make-ahead convenience means you can prepare it well in advance, freeing up valuable oven space and precious time on busy celebration days. This versatility truly solidifies its status as a perfect dessert for any season or occasion.
Pin This Recipe For Later
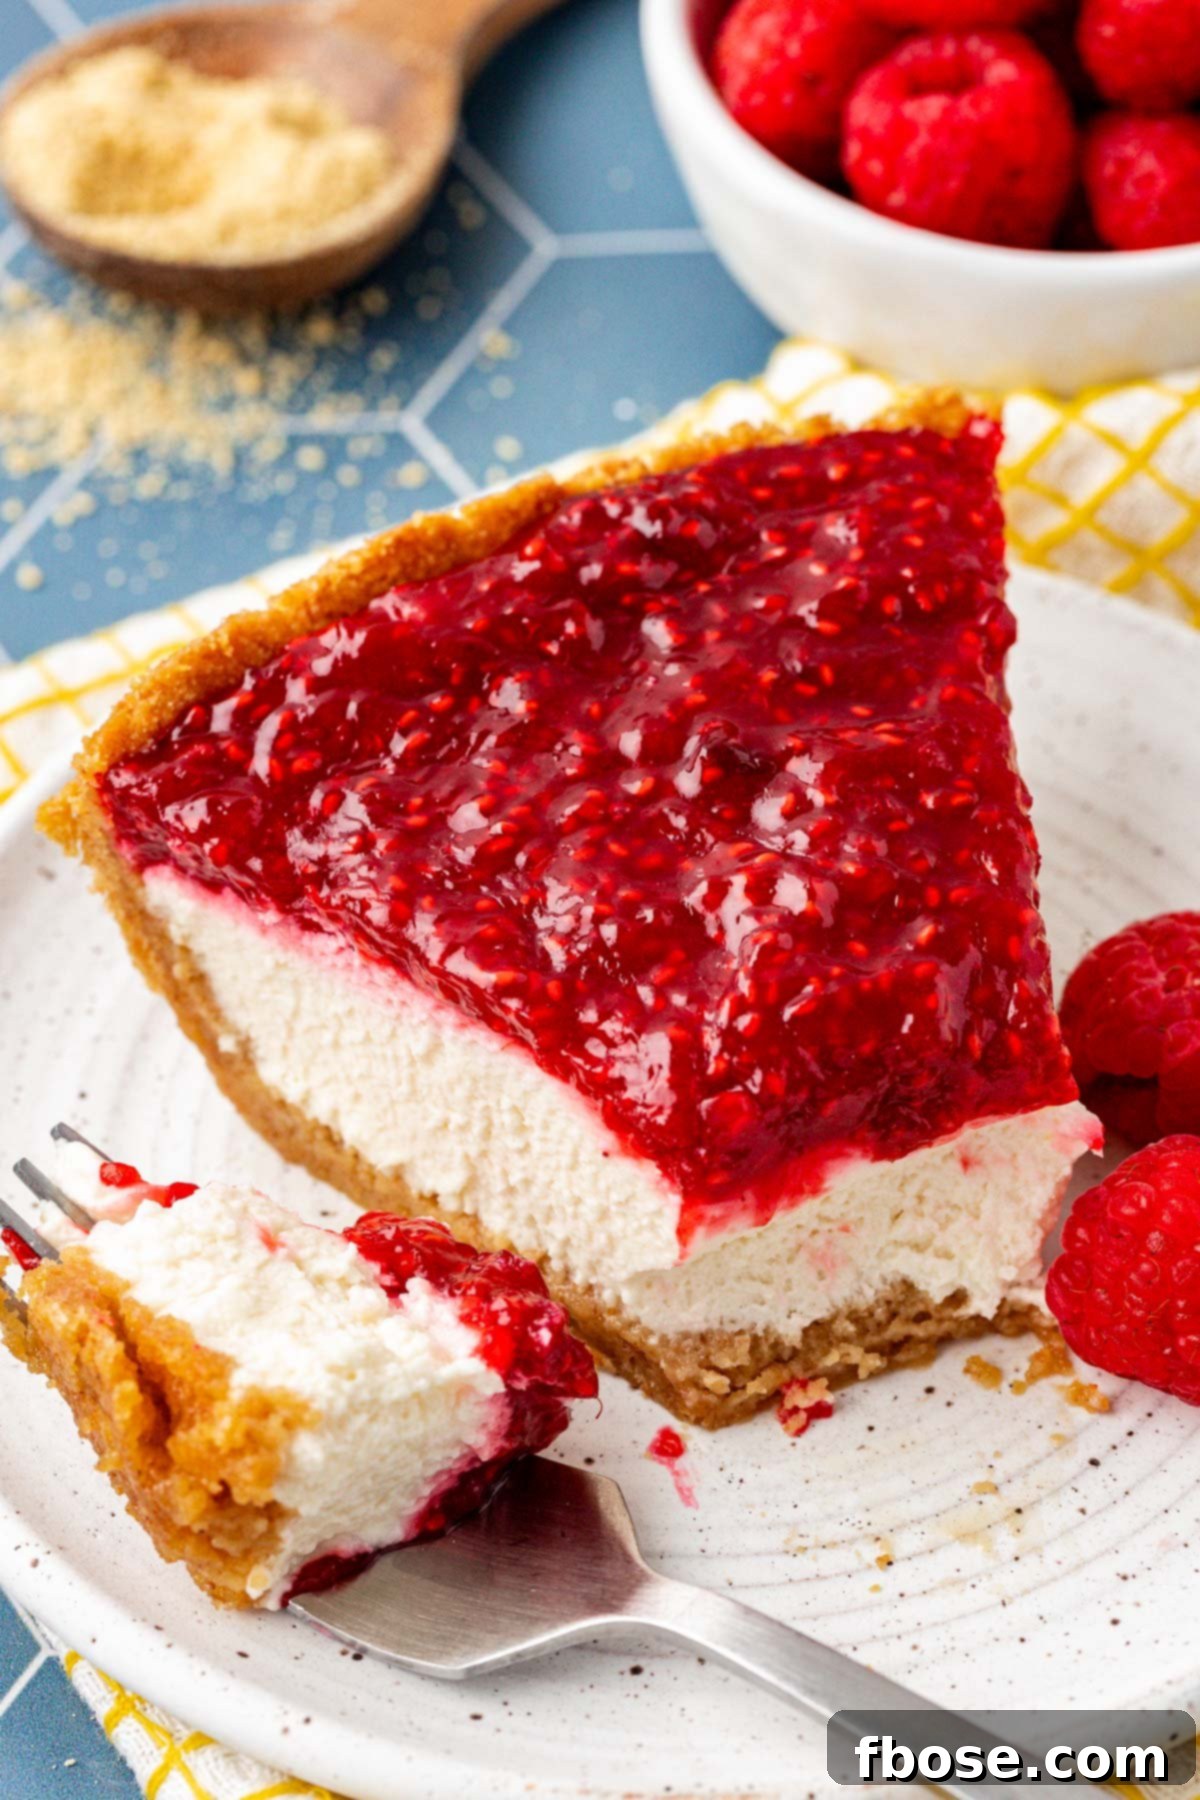
Rebecca’s Recipe Review: An Honest Look at this Delightful Pie
To give you the most authentic perspective on this dessert, here’s a detailed review:
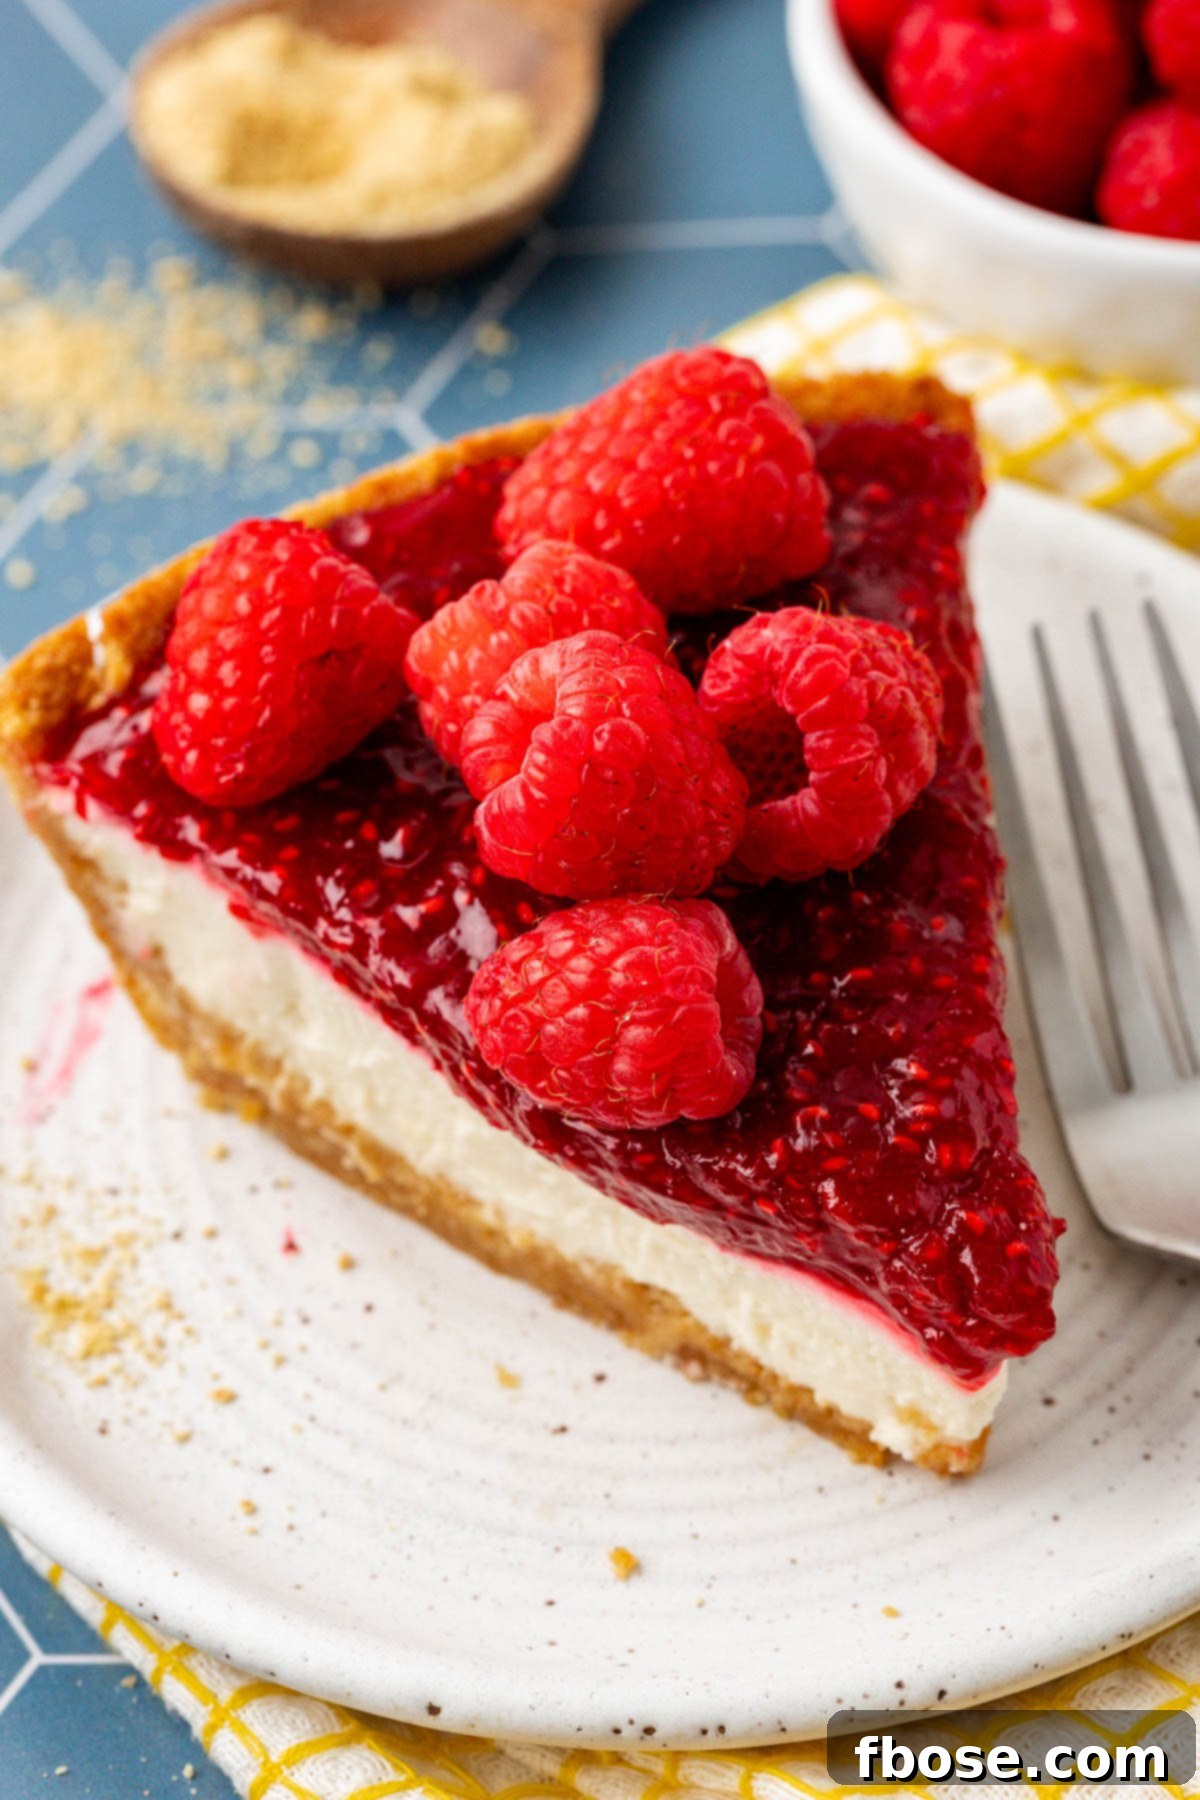
Taste: The experience begins with a buttery and incredibly flavorful graham cracker crust, providing a perfect base. This is followed by a subtly tangy yet wonderfully creamy filling that brings to mind a classic cheesecake. The true star of the show, however, is the raspberry topping. Its juicy, sweet, and tart composition creates a refreshing burst of flavor that perfectly balances the richness of the cream filling, making each mouthful a delightful symphony.
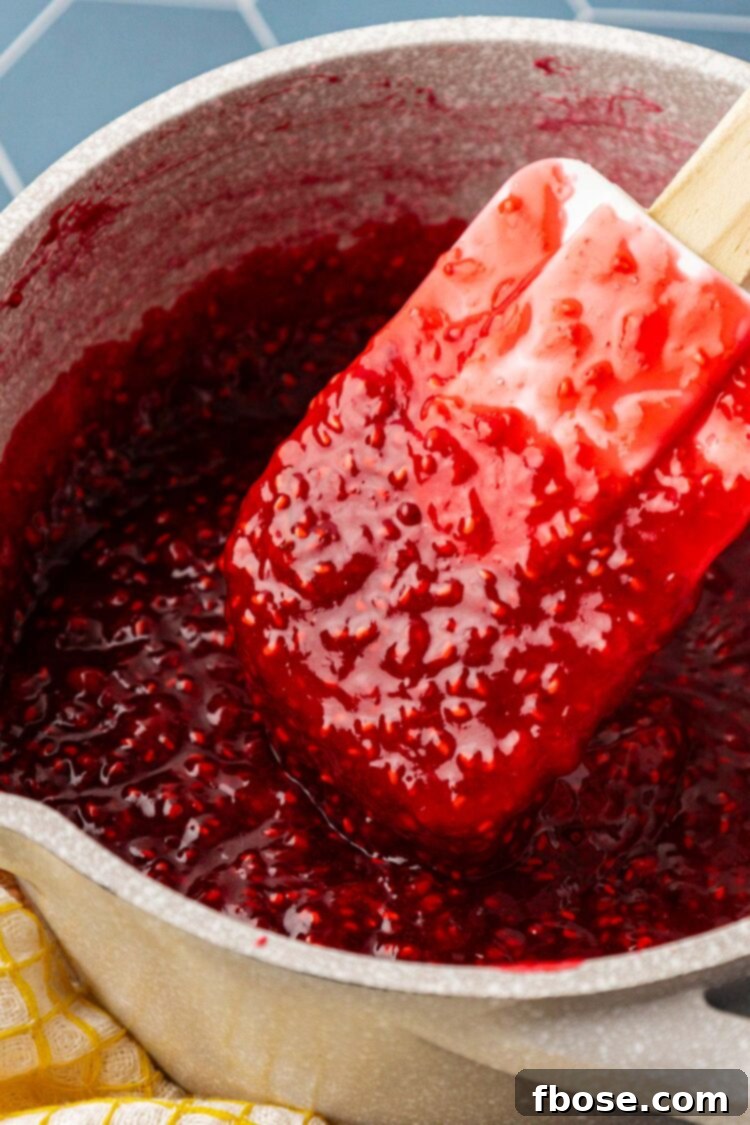
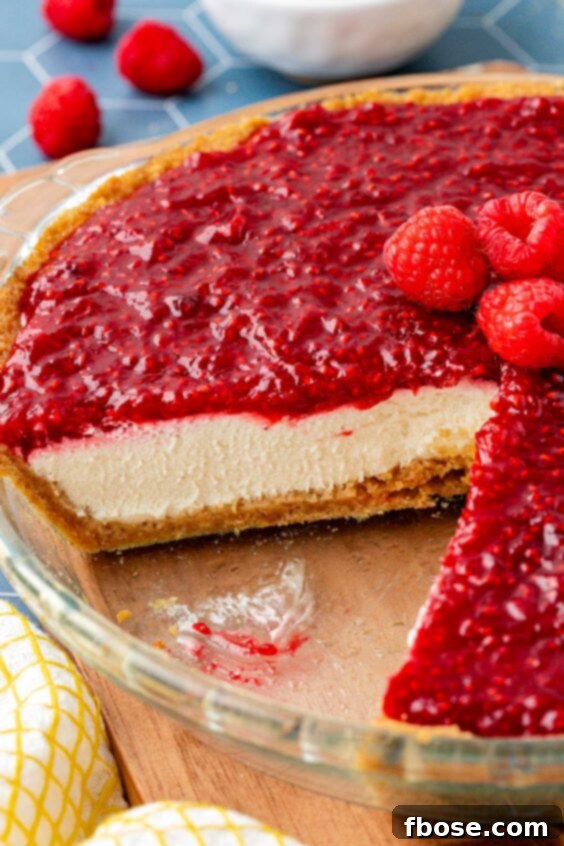
Texture: This pie offers a fantastic array of textures. The crust holds its form beautifully, firm enough to provide a satisfying bite, yet tender enough to melt in your mouth. The filling is smooth, velvety, and undeniably creamy, mirroring the luxurious texture of a no-bake cheesecake. The raspberry topping is thick and gooey, with just the right amount of body (not quite gelatinous), and naturally contains the pleasant, tiny seeds from the raspberries, adding a rustic charm and authentic berry feel.
Ease: 5/10 – While this recipe involves several distinct components and layers – the crust, the filling, and the topping – none of the individual steps are inherently difficult. The ease rating reflects the sequential preparation of these layers, which simply requires a bit of focused attention, but is entirely manageable for home bakers of all skill levels.
Pros: This recipe shines for several reasons. It’s a fantastic no-bake option, ideal for hot days or when your oven is busy. The flavor profile is outstanding, offering a perfect blend of sweet, creamy, and tart. Crucially, it’s an excellent choice for those who appreciate the creamy texture of cheesecake but prefer a milder, less pronounced cream cheese flavor.
Cons: The primary consideration for this pie is its chill time. To achieve the perfect set and optimal texture, you will need to prepare this dessert at least 6 hours in advance of serving. This isn’t a spur-of-the-moment dessert, so planning ahead is key.
Would I Make This Again? Absolutely, without hesitation! We enjoyed this pie multiple times throughout the summer, and it was consistently a resounding hit with all our friends and family members. Its popularity speaks volumes about its deliciousness and appeal.
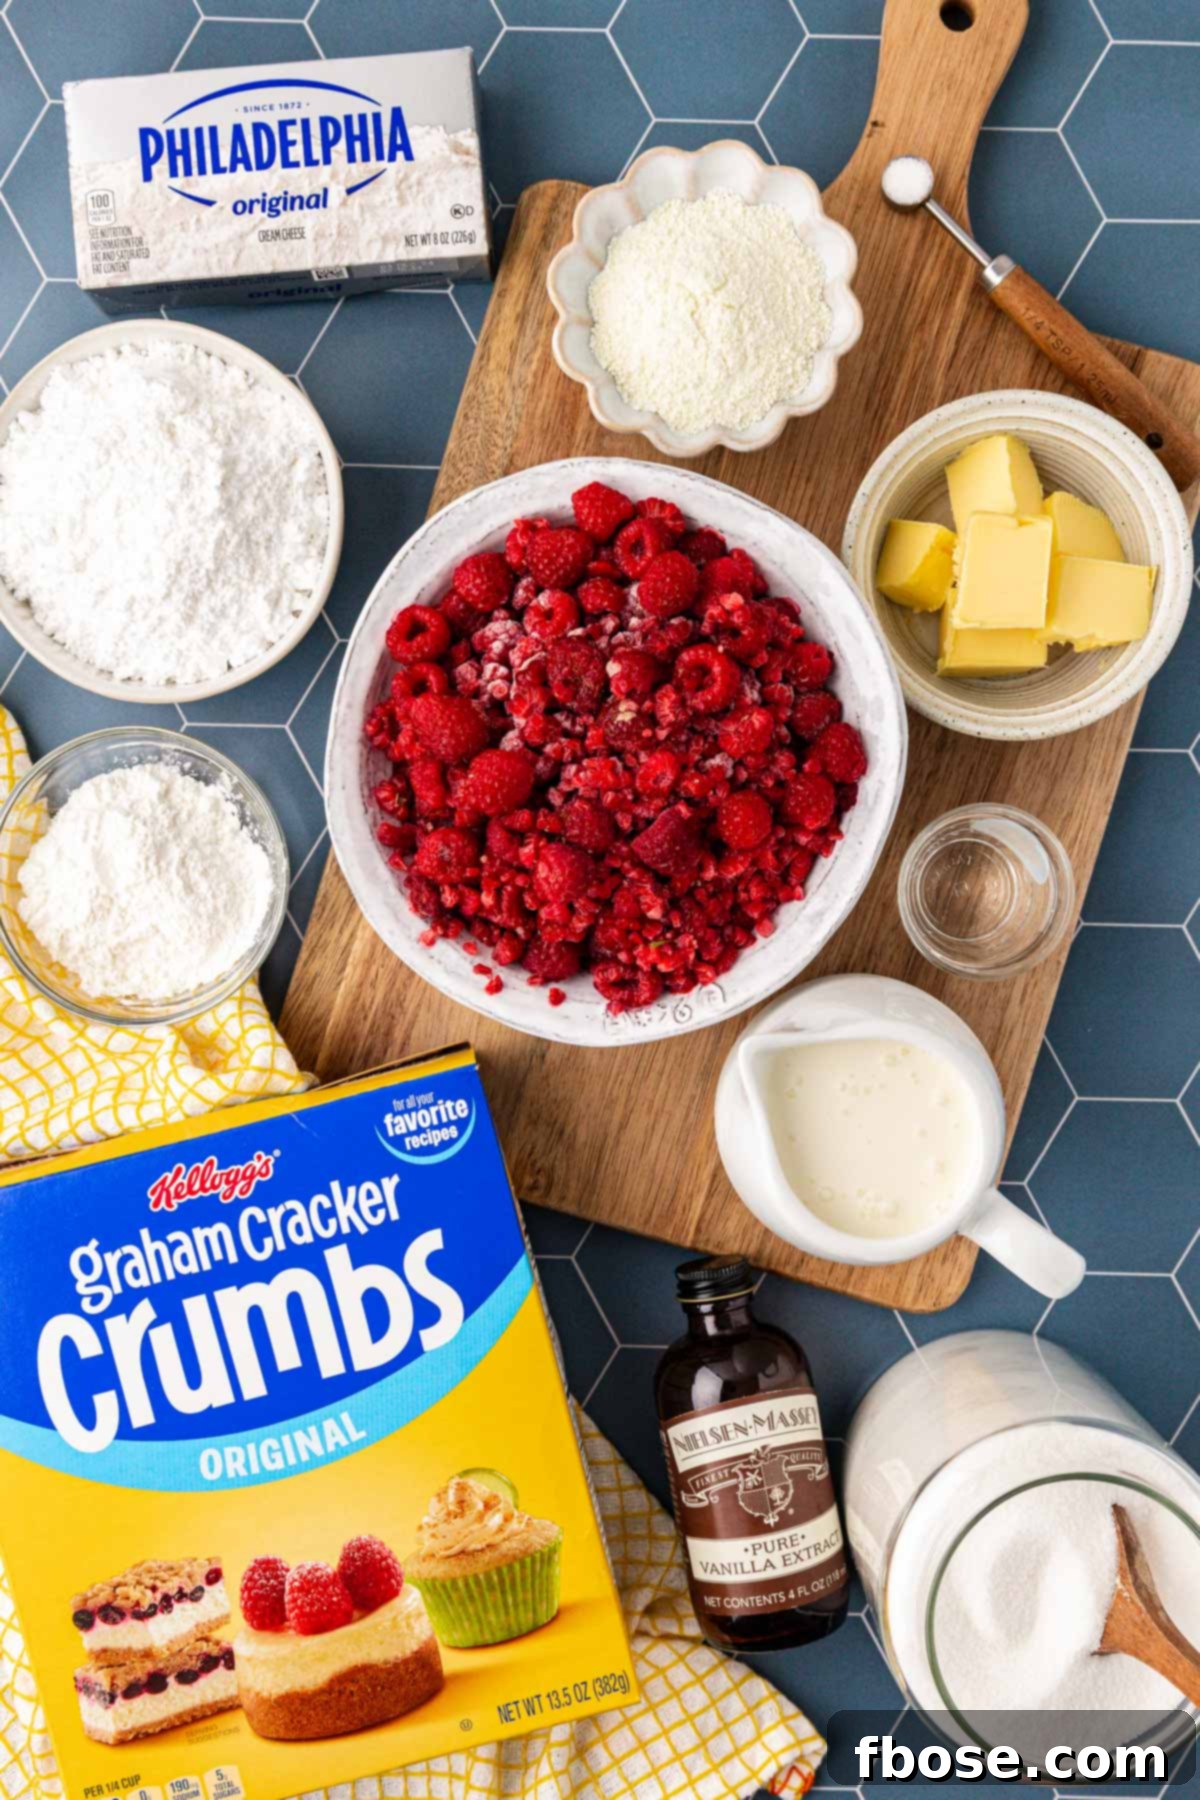
Mastering the Components: Key Ingredients for Raspberry Cream Pie
Homemade Graham Cracker Crust—Creating a homemade graham cracker crust is surprisingly simple and yields a far superior result to pre-made versions. This foundational layer is built from finely crushed store-bought graham cracker crumbs, which are then expertly bound together with rich melted butter and a touch of heavy cream for added moisture and stability. To achieve that quintessential, perfectly balanced flavor, we incorporate granulated sugar for sweetness, powdered milk for a subtle richness and improved texture, a hint of vanilla extract for warmth, and a pinch of salt to enhance all the sweet notes. This combination ensures a crust that is both sturdy and melt-in-your-mouth delicious.
Cream Filling—The heart of this raspberry cream pie is its decadent cream filling, which bears a delightful resemblance to a classic no-bake cheesecake. Achieving its silky smoothness and balanced flavor requires a careful blend of ingredients: heavy cream, whipped to airy perfection, provides lightness; softened cream cheese forms the rich, creamy base; powdered sugar adds sweetness and ensures a smooth, lump-free consistency. A secret ingredient, orange liqueur, introduces a subtle citrus note that brightens the entire filling, while vanilla extract contributes its classic comforting aroma and flavor. This filling is designed to be both luxurious and refreshing.
Raspberry Topping—Crowning this magnificent pie is a sweet, intensely fruity raspberry topping, which begins its journey by gently simmering frozen raspberries with granulated sugar. This process coaxes out the berries’ natural juices and sweetness, creating a vibrant base. To achieve the ideal thick, glossy, and perfectly spoonable consistency, a simple slurry made from cornstarch and cold water is whisked in. This natural thickener ensures the topping sets beautifully without becoming overly firm, providing a luscious layer of raspberry goodness that ties all the elements of the pie together.
This pie was easy to put together and tasted incredible! The tartness of the raspberry paired nicely with the creamy rich filling and the crunchy crust.
– Shauna M.
How To Make No-Bake Raspberry Pie: A Step-by-Step Guide
Crafting this stunning No-Bake Raspberry Cream Pie is a straightforward process, broken down into three simple components: the vibrant raspberry topping, the sturdy graham cracker crust, and the luscious cream filling. Follow these detailed steps for a perfect result:
Preparing the Raspberry Topping
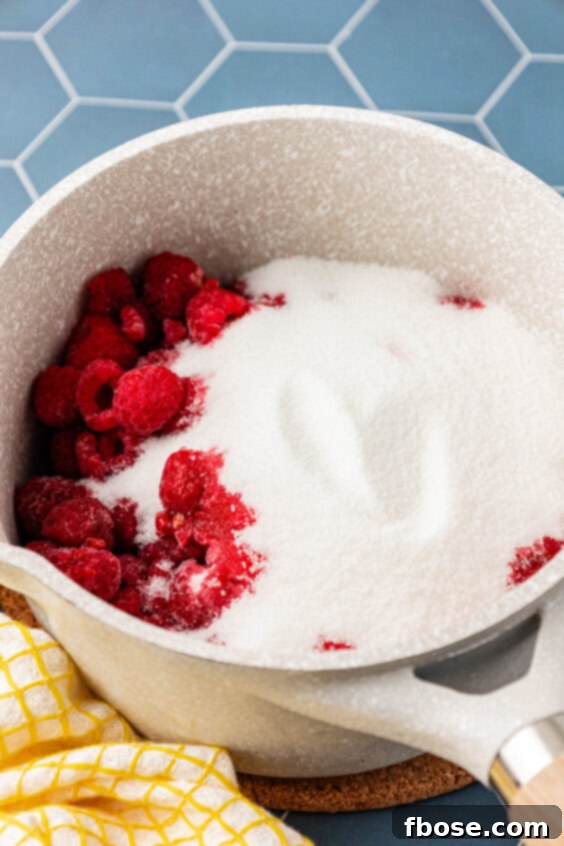
1. In a small saucepan, combine the frozen raspberries with granulated sugar. Heat this mixture over medium heat, bringing it to a gentle simmer. Stir occasionally to help the sugar dissolve and the berries release their juices.
2. While the raspberries are simmering, prepare a cornstarch slurry. In a small separate bowl, whisk together the cornstarch and cold water until a smooth, lump-free mixture forms. This slurry is essential for thickening the topping.
3. Once the raspberry mixture is simmering, slowly pour the cornstarch slurry into the saucepan while continuously whisking. This ensures the cornstarch is evenly distributed and prevents lumps.
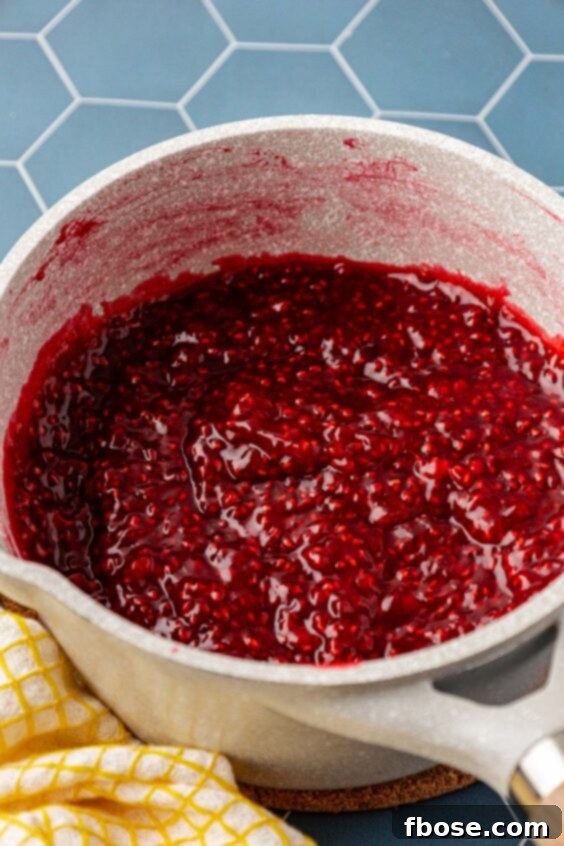
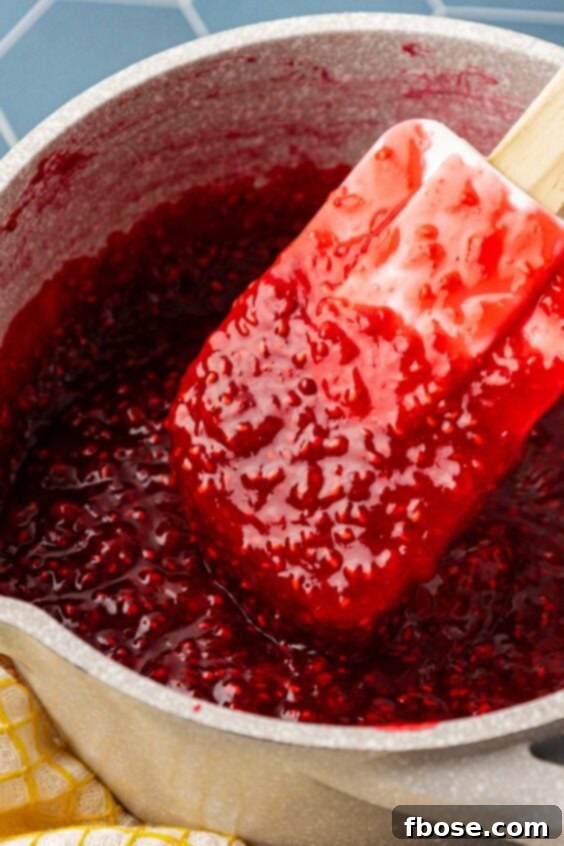
4. Continue cooking the raspberry topping over medium-high heat, stirring constantly, until the mixture visibly begins to thicken to a glossy, spoonable consistency. It should coat the back of a spoon.
5. Remove the thickened raspberry topping from the heat and transfer it to a separate bowl or container. Set it aside to cool completely to room temperature. This cooling process typically takes about an hour, which gives you ample time to prepare the pie crust and cream filling.
Assembling the Graham Cracker Crust
1. In a large bowl, whisk together the melted salted butter with the heavy cream until well combined. The butter provides richness, and the cream adds a tender quality to the crust.
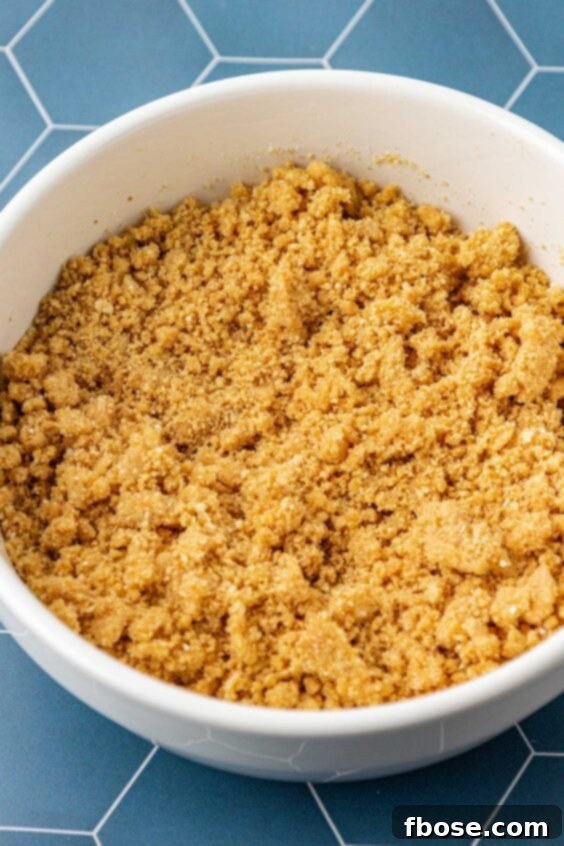
2. Add the graham cracker crumbs, powdered milk, granulated sugar, vanilla extract, and salt to the wet ingredients. Stir thoroughly until all the dry ingredients are fully moistened and a uniform, crumbly mixture forms. Ensure there are no dry pockets.
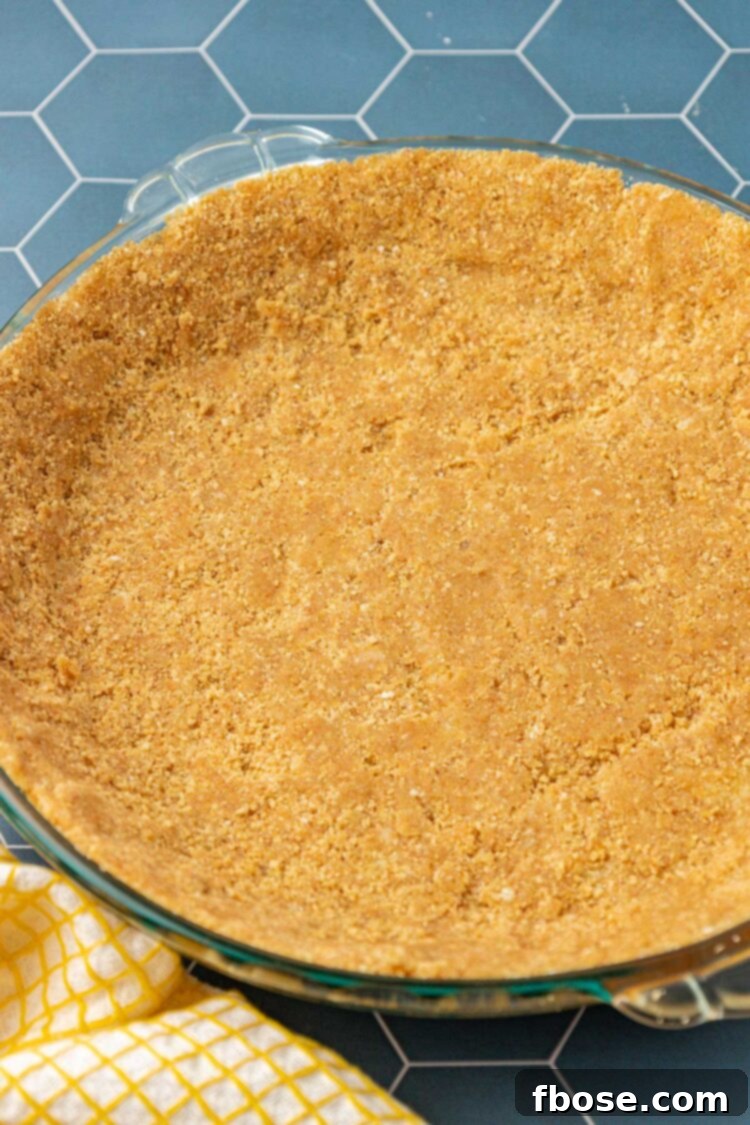
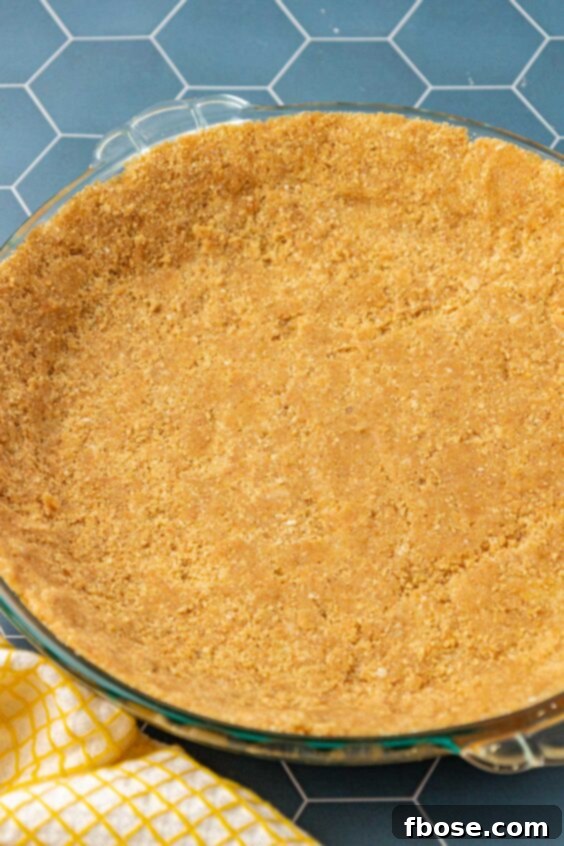
3. Pour the crust mixture into a 9-inch pie dish (a glass or metal dish is recommended for best results). Using the bottom of a flat glass cup or your knuckles, firmly press the mixture into the bottom and evenly up the sides of the pan. Compacting the crumbs well is crucial to prevent the crust from falling apart when served. Then, set the prepared pie crust aside until your filling is ready!
Crafting the Cream Filling
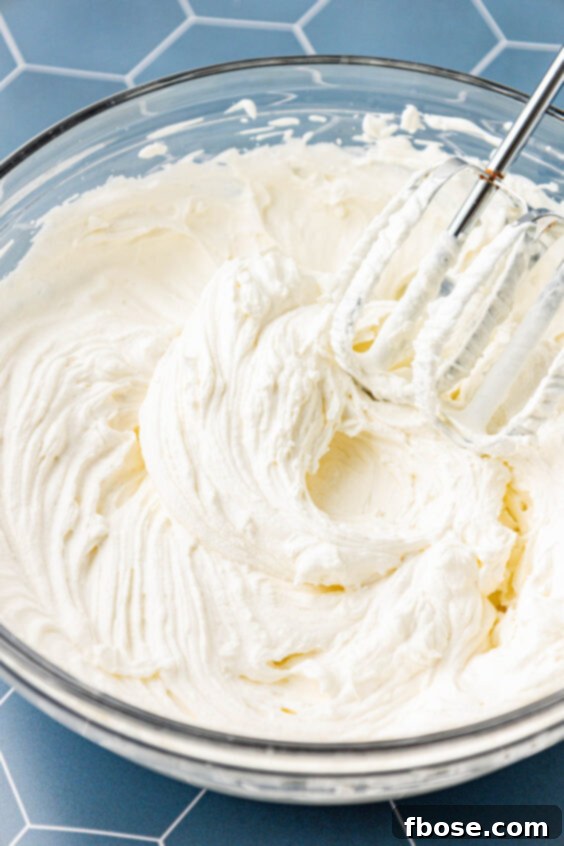
1. In a medium-sized, chilled bowl, beat the heavy cream using an electric mixer until stiff peaks form. The cream should be thick and hold its shape when the beater is lifted. Set this whipped cream aside.
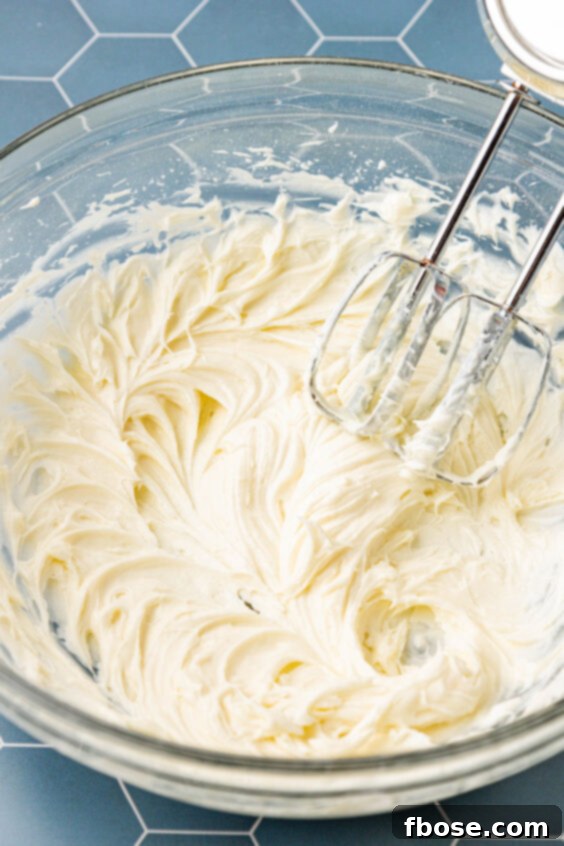
2. In a large mixing bowl, or the bowl of a stand mixer fitted with a paddle attachment, cream together the softened cream cheese and powdered sugar until the mixture is completely smooth and free of lumps. Scrape down the sides of the bowl as needed.
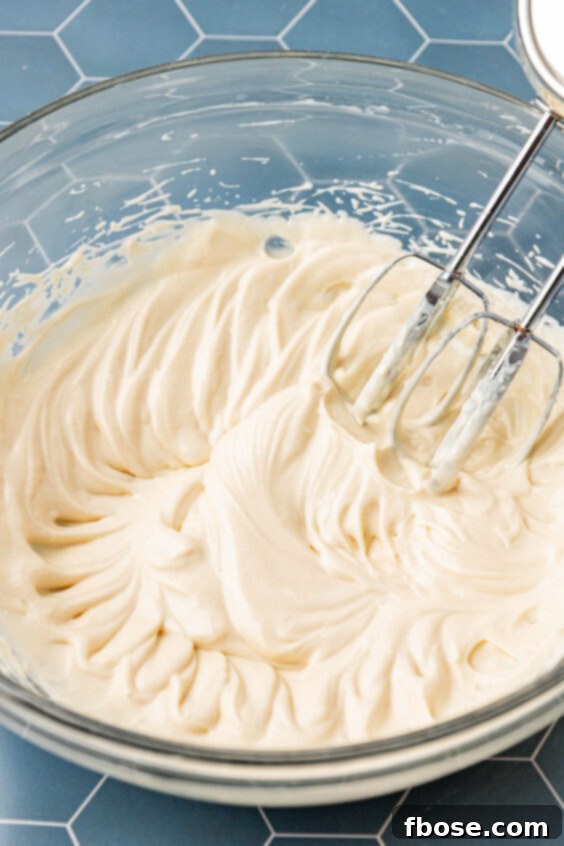
3. Pour in the orange liqueur and vanilla extract. Continue beating on medium speed until these flavorings are fully incorporated into the cream cheese mixture, ensuring a homogenous and aromatic filling.
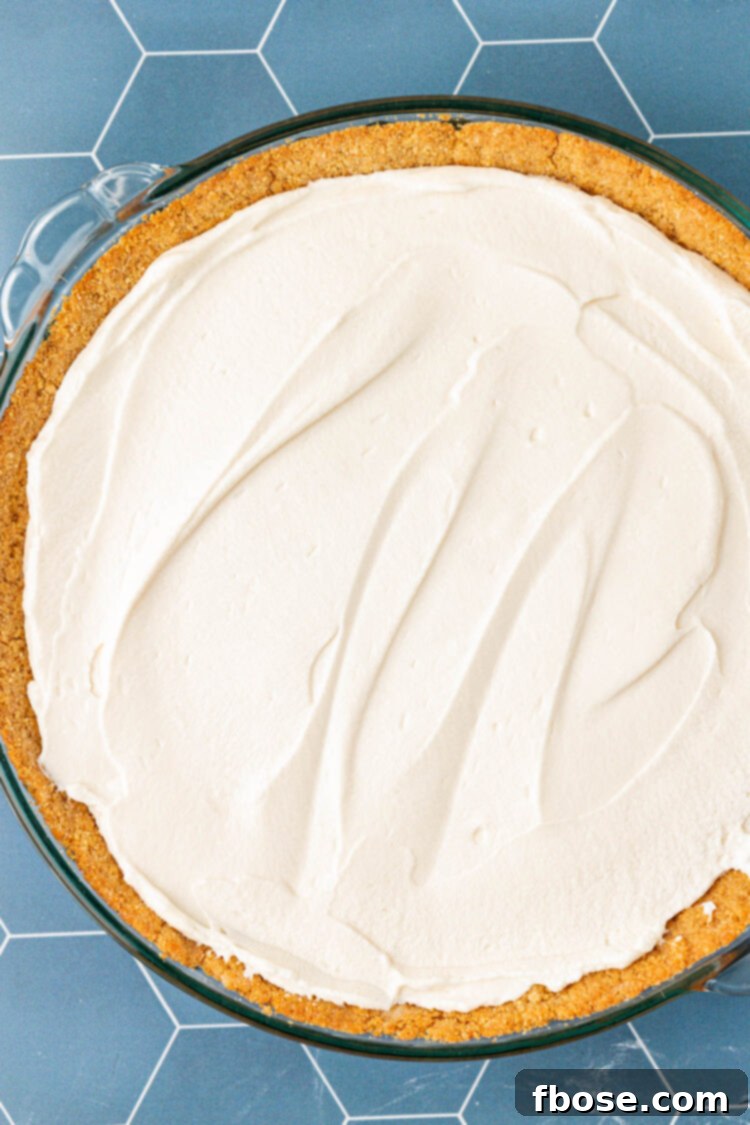
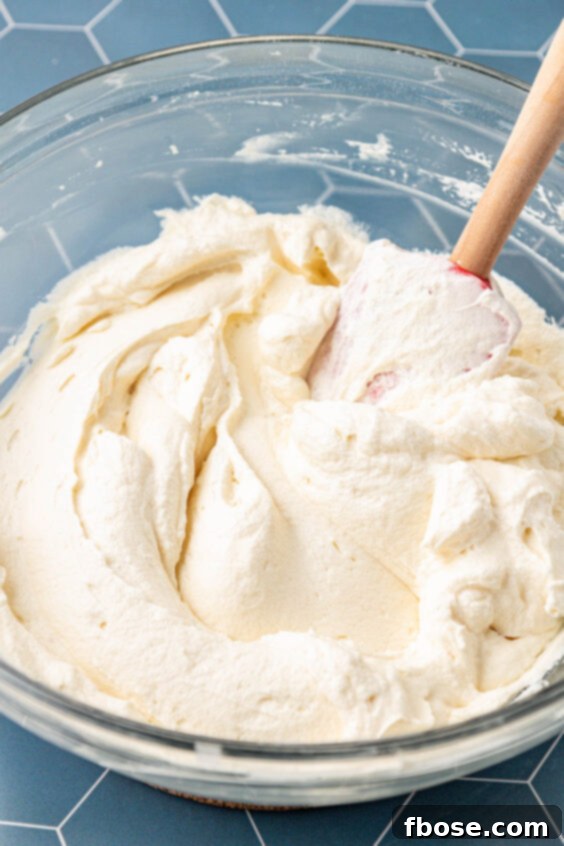
4. Gently fold in the previously whipped heavy cream into the cream cheese mixture using a spatula. Be careful not to deflate the whipped cream; fold until just combined and no streaks remain, creating a light and airy filling.
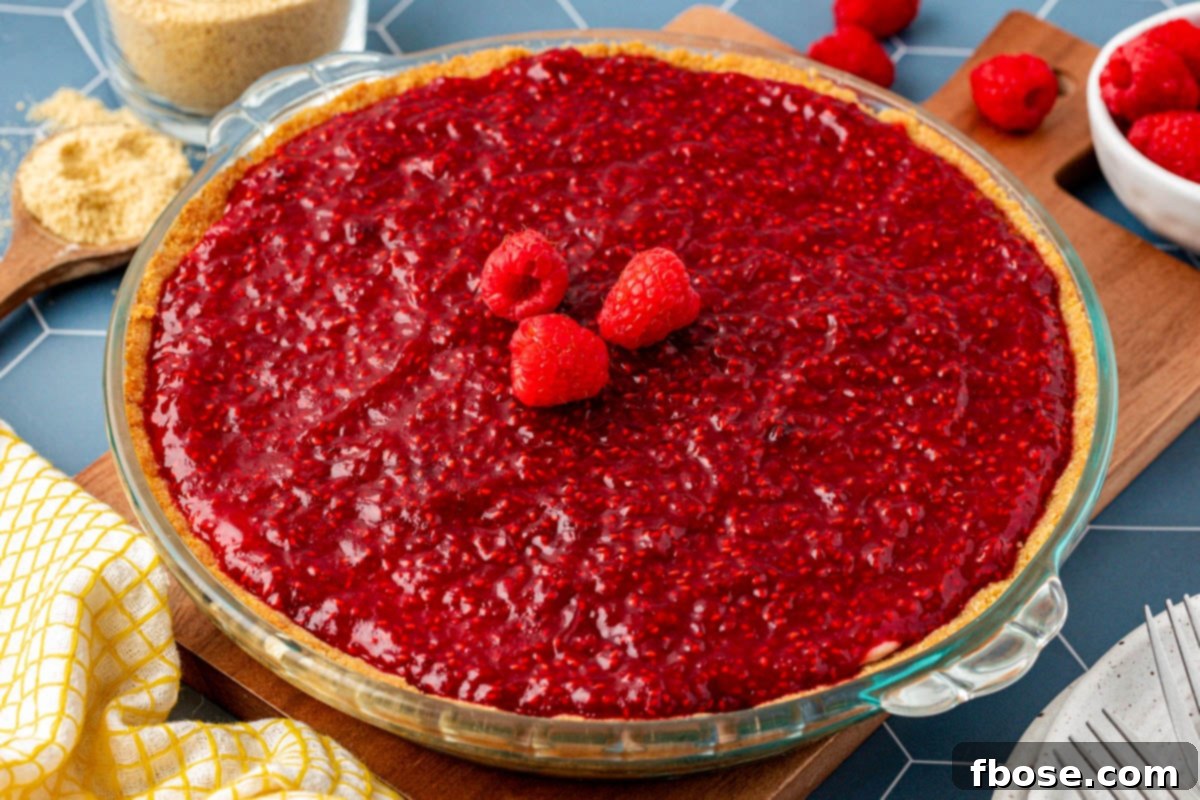
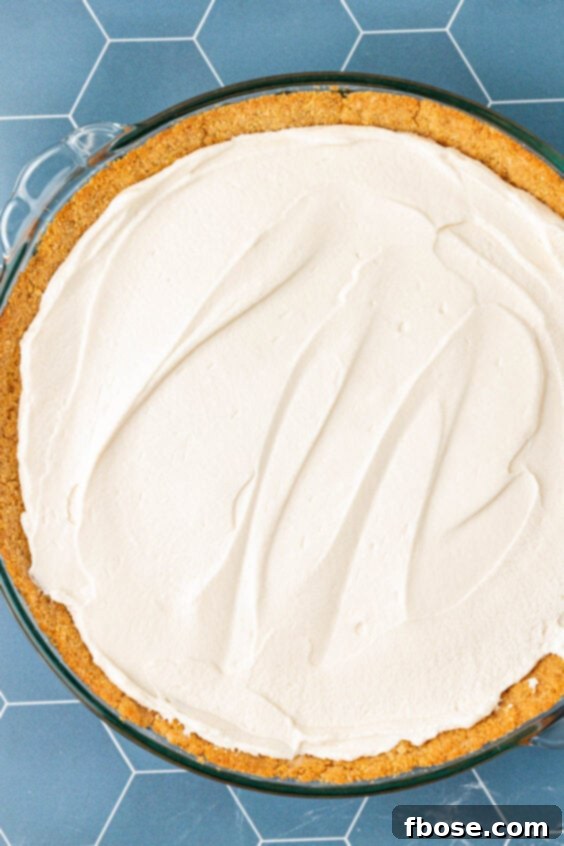
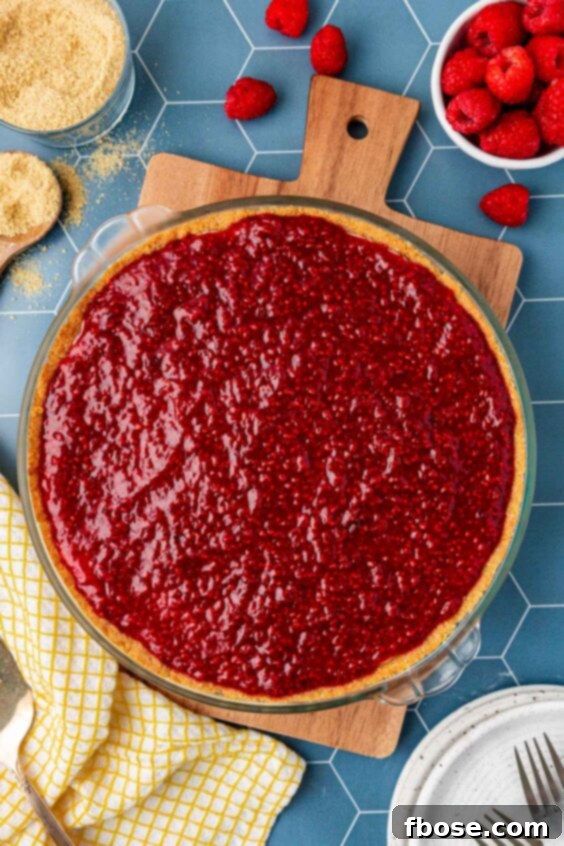
5. Carefully spread this luscious cream cheese layer evenly into the prepared graham cracker pie crust. Once smoothed, gently spoon and spread the cooled raspberry topping over the cream filling, creating a beautiful, vibrant top layer. Chill the entire pie in the refrigerator for at least 6 hours, or ideally overnight, to allow it to set perfectly.
Rebecca’s Expert Tips for a Flawless No-Bake Pie
Achieving a perfect No-Bake Raspberry Cream Pie is easy with a few insider tips:
Frozen vs. Fresh Berries: The Secret to a Consistent Topping – We conducted extensive testing with both fresh and frozen raspberries for the topping. Our findings conclusively showed that frozen raspberries yielded a much more consistent, smoother, and vibrantly flavored topping. This is because freezing and thawing help break down the cell walls of the fruit, releasing more liquid and natural pectins, which contributes to a better-setting, more uniformly flavored topping. While you can certainly use fresh raspberries if that’s your preference, be aware that the consistency and intensity of flavor might vary slightly.
Optimizing Your Graham Cracker Crumbs for the Perfect Crust – For the best results when making your homemade pie crust, we highly recommend using store-bought graham cracker crumbs. They are typically finer and more consistent than homemade crumbs, which ensures a more uniform crust. When it comes to pressing the crust mixture into the pie dish, a crucial step for stability, don’t just use your fingers. Utilize the bottom of a flat glass cup or a measuring cup to thoroughly and firmly compact the crumbs into the bottom and up the sides of the pan. This technique is vital; it prevents the crust from crumbling or falling apart when you slice and serve your stunning dessert.
Optional Crust Baking for Enhanced Stability – Personally, I prefer the soft, melt-in-your-mouth texture of an unbaked graham cracker crust, which perfectly complements the creamy filling. However, if you desire a slightly firmer crust that holds together even better and has a subtle toasted flavor, you are absolutely welcome to bake it. To do so, preheat your oven to 350°F (175°C) and bake the pressed crust for approximately 10 minutes. After baking, ensure you allow the crust to cool completely to room temperature before pouring in the cream filling. This prevents the filling from melting or becoming runny.
Effortless Slicing and Serving Techniques – For the cleanest, most aesthetically pleasing slices, and to ensure the pie is firm enough to handle, I suggest freezing the pie for about 30 minutes just before you plan to serve it. This short burst of cold will firm up the layers, making slicing much easier. When cutting, use a hot, sharp knife. To get those pristine, neat cuts, heat your knife under hot water, wipe it clean and dry, make a slice, and then repeat the process – reheating and wiping the knife – in between each cut. This prevents the filling and topping from sticking and dragging. Afterward, gently remove each perfect slice using a pie server.
Ingredient Temperature Matters: Softened Cream Cheese – Ensure your cream cheese is properly softened to room temperature before you begin making the filling. Cold cream cheese will result in a lumpy filling, no matter how much you beat it. Take it out of the refrigerator at least an hour before you plan to use it.
Don’t Rush the Chill Time – The 6-hour chill time isn’t just a suggestion; it’s a critical step. This allows the filling to fully set and firm up, ensuring the pie holds its shape and delivers the intended creamy, sliceable texture. Patience here will be rewarded with a superior dessert.
High-Quality Vanilla Extract – While it might seem like a small detail, using a good quality vanilla extract can significantly enhance the overall flavor profile of both the crust and the filling. It adds a depth of warmth and sweetness that artificial vanilla simply cannot replicate.
How To Serve Raspberry Cream Pie for Maximum Enjoyment
To ensure your No-Bake Raspberry Cream Pie reaches its full potential in both texture and consistency, it is absolutely essential to allow it to chill for at least 6 hours, or preferably overnight. This extended refrigeration period firms up the creamy filling and sets the raspberry topping, making it perfectly sliceable and delightful to eat. Once properly chilled and firm, the pie is ready to be finished with its beautiful raspberry topping (if you haven’t already spread it on before chilling) and then elegantly served. For an even more impressive presentation and an enhanced flavor experience, consider adding these optional toppings:
- A delicate sprinkle of mini chocolate chips or a light, artful drizzle of rich homemade chocolate syrup will add a wonderful layer of sweetness and a touch of elegance.
- Elevate your garnish game by scattering some frozen Tru Fru Chocolate Covered Raspberries over the top. Their luxurious chocolate coating and chilled berry center perfectly complement the pie.
- For a burst of fresh flavor and vibrant color, liberally top each slice with plump, juicy fresh raspberries. This adds a beautiful contrast and highlights the pie’s star ingredient.
- Indulge further by adding a generous dollop of fluffy Homemade Whipped Cream. Its light, airy texture and subtle sweetness are the quintessential accompaniment to this creamy dessert.
- A dusting of powdered sugar over the entire pie can add a final touch of sophistication and an extra hint of sweetness.
- For a sophisticated twist, a few fresh mint leaves can provide a refreshing aromatic contrast and a pop of green color.
How To Store Raspberry Cream Pie for Freshness
Proper storage is key to enjoying your delicious No-Bake Raspberry Cream Pie for days to come. If your pie dish is equipped with a fitted lid, that is the ideal way to cover and protect your pie. If not, simply cover the Raspberry Cream Pie loosely but securely with plastic wrap or aluminum foil, ensuring the covering doesn’t press directly onto the delicate raspberry topping. Once covered, store the pie in the refrigerator. It will maintain its exquisite taste and creamy texture for 3 to 4 days, making it an excellent make-ahead option for gatherings or a delightful treat to enjoy throughout the week.
Explore More Irresistible No-Bake Recipes
If you love the ease and deliciousness of this No-Bake Raspberry Cream Pie, you’re in for a treat! Discover more fantastic desserts that require no oven time:
- No Bake Nutella Cheesecake Bars – A decadent and quick dessert that requires only 15 minutes of prep time for a rich, hazelnut-chocolate experience.
- Chocolate Peanut Butter No Bake Cookies – These classic, chewy oat-based cookies are a nostalgic favorite, delivering big flavor without ever touching the oven.
- No Bake Pina Colada Pie – Transport yourself to a tropical paradise with this delightful pie, bursting with a rum-infused filling, crushed pineapple, and shredded coconut.
- Brownie Batter Dip Recipe – Indulge your chocolate cravings with this incredibly easy, creamy, and rich dessert dip made with just 5 ingredients. Perfect for sharing!
- Marshmallow Oreo Treats – An effortless-to-make chewy, sweet treat that combines the classic flavors of marshmallows and Oreos, ideal for parties, potlucks, or simply satisfying your snack cravings.
Did You Make This Recipe?
If you’ve tried this recipe, please let leave a review in the comments below. I love hearing from you! Don’t forget to tag me – @sugarandsoulco – on Instagram and Pinterest with your photos, or join our Sugar & Soul Show-offs Community and share them there.
No Bake Raspberry Cream Pie Recipe
Ingredients
Raspberry Topping
- 12 ounces frozen raspberries
- 1 cup granulated sugar 200g
- 3 tablespoons cornstarch
- 3 tablespoons water
Graham Cracker Crust
- 4 tablespoons salted butter 56g, melted
- ¼ cup heavy cream 60mL
- 1½ cups graham cracker crumbs 190g, storebought works best
- 2 tablespoons granulated sugar 25g
- ¼ cup powdered milk 20g
- 1 teaspoon vanilla extract
- ¼ teaspoon salt
Cream Filling
- 1 cup heavy cream 240mL
- 8 ounces cream cheese 227g, softened
- ⅔ cup powdered sugar 85g
- 2 tablespoons orange liqueur
- 2 teaspoons vanilla extract
Instructions
Raspberry Topping
-
Add 12 ounces frozen raspberries and 1 cup granulated sugar to a small saucepan and bring to a simmer.

-
In a small bowl, whisk together 3 tablespoons cornstarch and 3 tablespoons water until a slurry forms.
-
Pour the slurry into the raspberry mixture while constantly whisking.
-
Continue to whisk and cook over medium-high heat until the mixture begins thicken.
-
Remove from heat and set aside until room temperature, about 1 hour. Meanwhile, prepare the rest of the pie.
Crust
-
Melt 4 tablespoons salted butter in a large microwave-safe bowl.
-
Whisk 1½ cups graham cracker crumbs, ¼ cup heavy cream, ¼ cup powdered milk, 2 tablespoons granulated sugar, 1 teaspoon vanilla extract, and ¼ teaspoon salt in with the butter and mix until thoroughly moistened.
-
Pour the crust mixture into a 9-inch pie dish (glass or metal preferred) and press into the bottom and sides of the pan, using a glass to press firmly.
-
Set the pie crust aside until ready to fill. Optional: You can bake the crust for 10 minutes at 350°F if you want it to hold together a little better, but it’s not necessary.
Cream Filling
-
In a medium bowl, beat 1 cup heavy cream until stiff peaks form, set aside.
-
In a large bowl or stand mixer fitted with a paddle attachment, cream together 8 ounces cream cheese and ⅔ cup powdered sugaruntil smooth.
-
Add 2 tablespoons orange liqueur and 2 teaspoons vanilla extract and beat until fully incorporated.
-
Fold in the whipped cream until fully incorporated.
-
Spread the filling out in the prepared pie crust.
-
Spread the raspberry topping out over the filling and chill for at least 6 hours.
-
Slice with a hot, sharp knife and remove slices with a pie server. Heat and wipe off the knife in between slices for clean cuts.
Video
You can find a short video tutorial for this recipe on our social media channels or by searching for “REEL No Bake Raspberry Pie” on your preferred video platform.
Notes
- This recipe was extensively tested with both fresh and frozen raspberries. We consistently found that frozen raspberries yielded a much more consistent topping with better flavor and texture.
- For a firmer pie that is easier to slice and serve, you can freeze the pie for about 30 minutes just before slicing and serving.
- Ensure your cream cheese is at room temperature to achieve a lump-free and smooth filling.
- The orange liqueur adds a subtle brightness and depth of flavor but can be omitted or replaced with orange juice for an alcohol-free version.
Nutrition
Did You Make This Recipe?
Don’t forget to share it with me on Instagram @sugarandsoulco and follow on Tiktok @sugarandsoulco and Pinterest @sugarandsoulco for more!
Pin Recipe
Share Recipe