
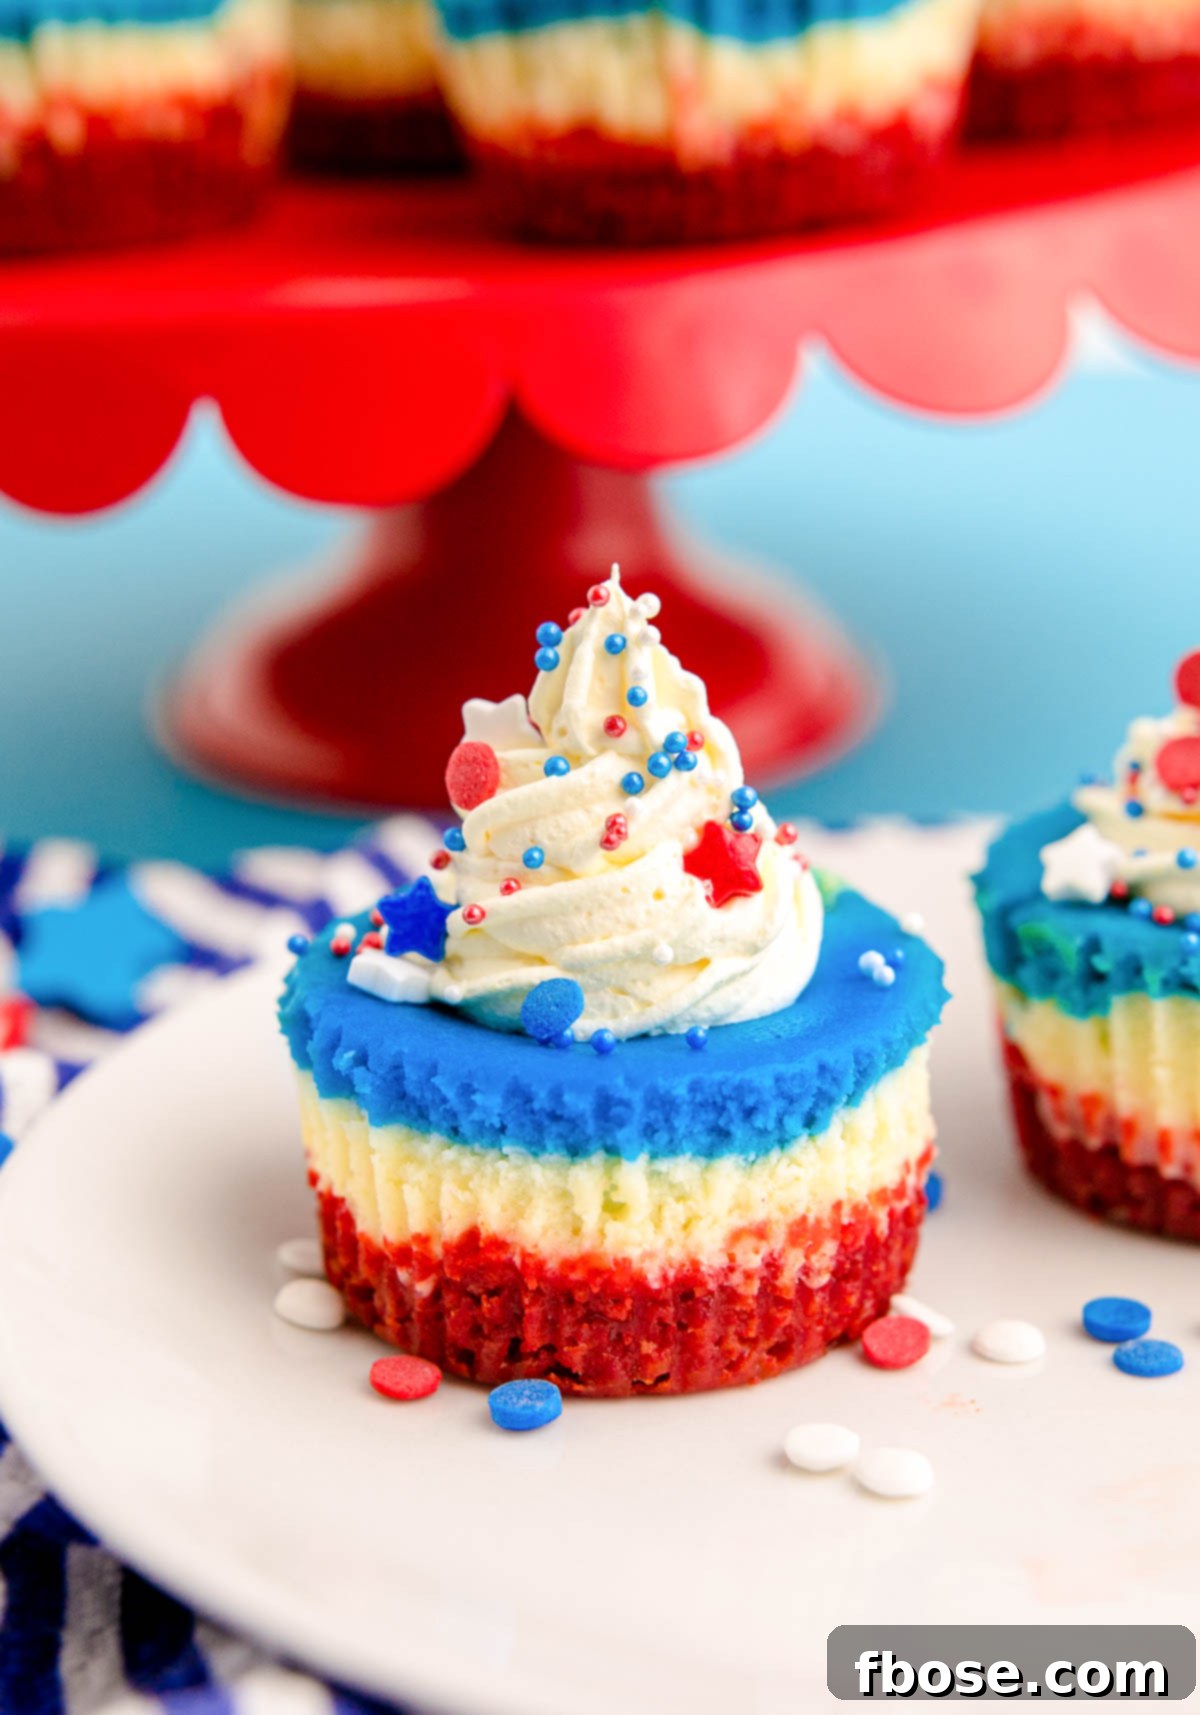
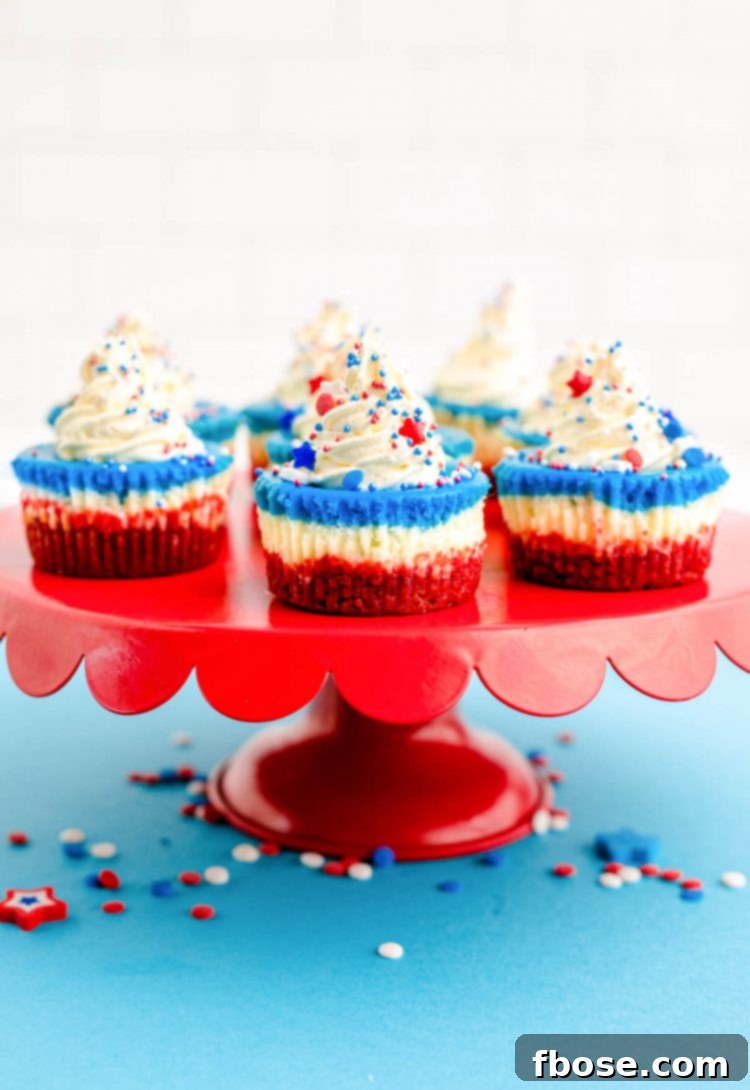
4th of July Mini Cheesecakes are the ultimate patriotic dessert, boasting vibrant red, white, and blue layers and a delightful shortbread crust filled with a rich, creamy cheesecake. This impressive yet incredibly easy recipe is perfect for any festive occasion, requiring only 20 minutes of active prep time. Imagine serving these individual portions of pure bliss at your next summer gathering!
For those eager to explore more patriotic dessert creations, consider whipping up a dense and moist Red, White, and Blue Marble Sheet Cake, a true showstopper. Alternatively, for a quick and effortless option, try the Red, White & Blue Cake Batter Dip, a delightful treat made with just four simple ingredients!
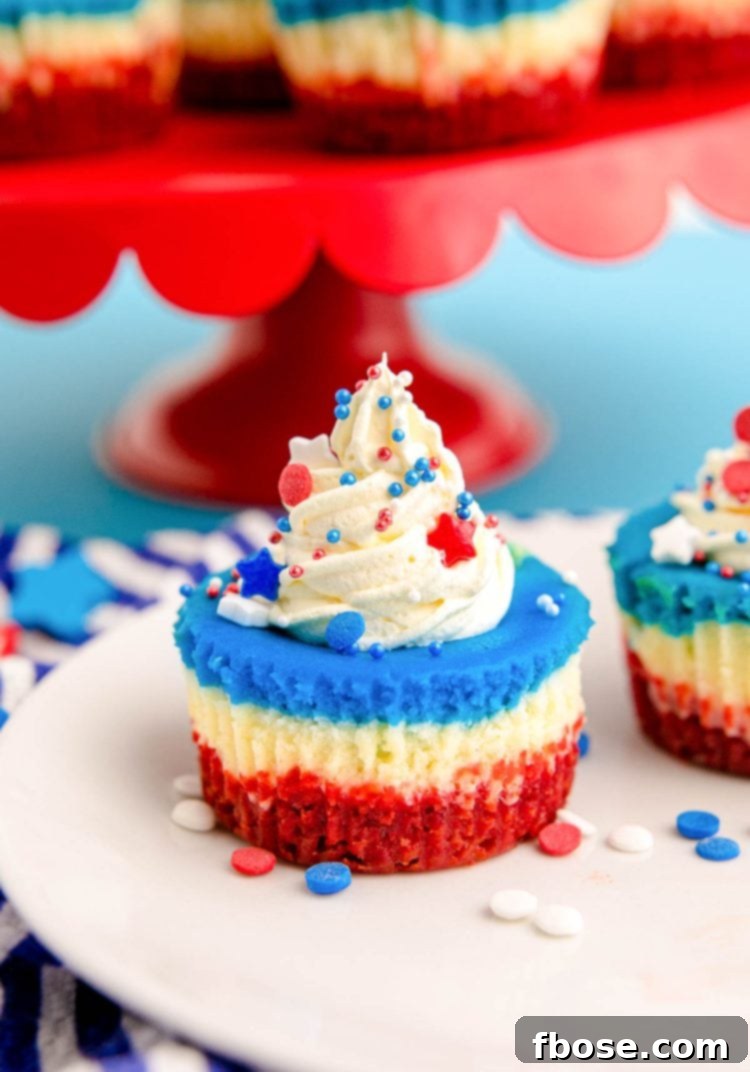
These 4th of July Mini Cheesecakes are destined to be the star attraction at all your Memorial Day and Independence Day celebrations. They offer an irresistible combination of flavor and visual appeal, featuring a buttery shortbread cookie crust paired with a luxurious, homemade cheesecake filling. The striking red, white, and blue layers make them an instant festive favorite.
Celebrating the spirit of America means gathering with cherished friends and family, marveling at dazzling fireworks, and indulging in delicious food. This easy-to-make, festive layered dessert provides a simple yet elegant solution to ensure the culinary aspect of your backyard cookouts and picnics is an absolute triumph. Say goodbye to complicated desserts and hello to these delightful, bite-sized cheesecakes that embody the joy and patriotism of the holiday season.
Why You’ll Love This Festive Cheesecake Recipe
These mini cheesecakes are more than just a dessert; they’re a celebration in every bite! Here are five compelling reasons why this recipe will quickly become a cherished part of your holiday traditions:
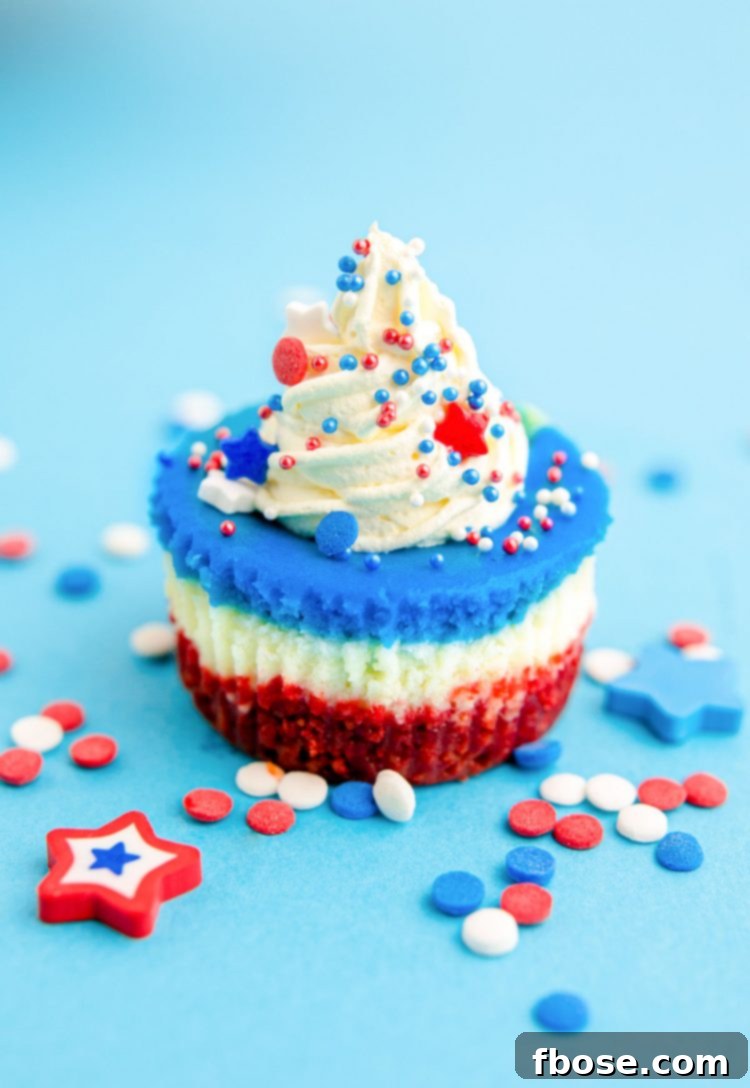
- Iconic Red, White, & Blue Design: There’s no mistaking the festive cheer these cheesecakes bring to any gathering. The vibrant red crust, pristine white cheesecake layer, and bold blue topping perfectly capture the patriotic colors of the American flag. This visually stunning dessert is guaranteed to impress your guests and elevate the celebratory atmosphere of your Memorial Day or 4th of July cookouts.
- Effortless Individual Servings: Forget the hassle of slicing and serving a large cheesecake. These charming mini desserts come in perfect, individual portions, making them incredibly easy for guests to grab and enjoy. They’re ideal for buffet-style parties, ensuring a clean and convenient serving experience without any mess. Each person gets their own delicious, perfectly portioned treat!
- Feeds Any Crowd with Ease: This recipe yields a dozen creamy, delightful cheesecakes, making it perfect for sharing with friends and family. Hosting a larger backyard bash? No problem! Simply double the recipe to effortlessly prepare two dozen, ensuring everyone gets a taste of this delectable patriotic treat. They’re designed for sharing and bringing people together.
- Convenient Make-Ahead Option: Simplify your holiday prep by making these red, white, and blue cheesecakes a night or even two days ahead of time. Their flavor and texture only improve with a good chill in the refrigerator. This allows you to focus on other aspects of your party planning, leaving you more time to relax and enjoy the festivities when the big day arrives.
- Versatile for Any Occasion: While perfectly themed for patriotic holidays, this recipe offers incredible versatility. By simply changing the food coloring, you can adapt these mini cheesecakes to match any celebration. Think reds and pinks for Valentine’s Day, various shades of green for St. Patrick’s Day, cheerful pastels for Easter, or classic red and green for Christmas. The possibilities are endless, making this a go-to recipe year-round!
Essential Ingredient Notes for Perfect Mini Cheesecakes
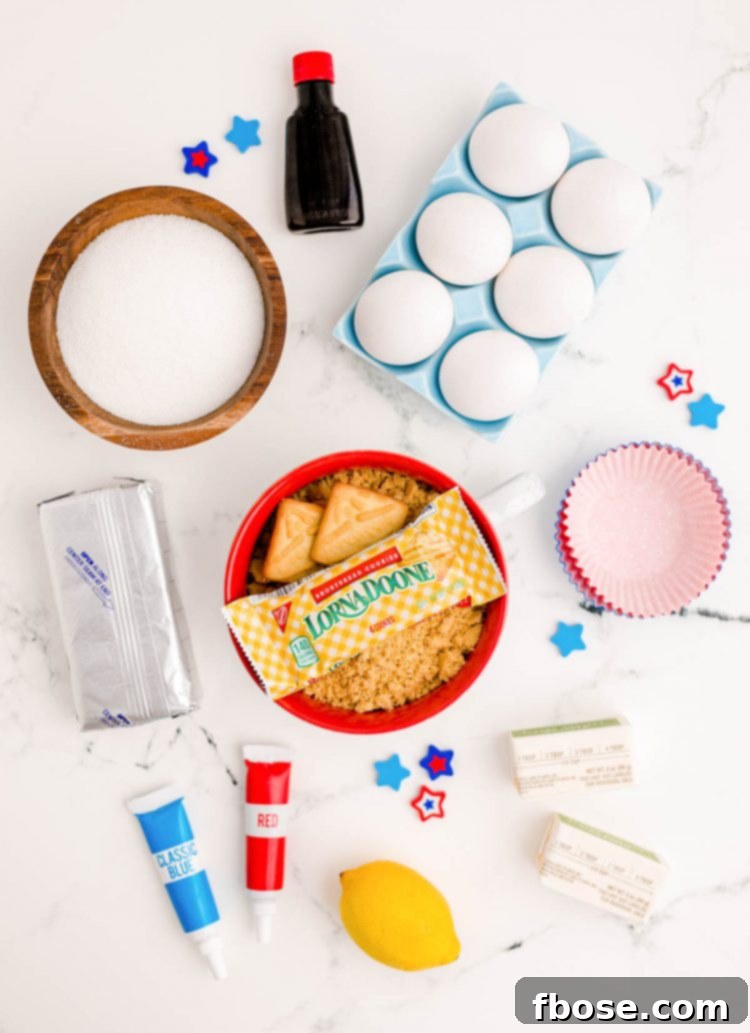
Crafting these delectable mini cheesecakes starts with understanding the role of each ingredient. The foundation of this dessert is a flavorful crust, made from finely crushed shortbread cookie crumbs, combined with rich melted butter, and given its vibrant red hue with food coloring. For the creamiest results, choose high-quality shortbread cookies.
The heart of these cheesecakes is a luscious, homemade filling. You’ll need softened cream cheese, which is crucial for a smooth, lump-free batter. Granulated sugar provides the perfect sweetness, while grated lemon peel (lemon zest) adds a bright, zesty counterpoint that perfectly balances the richness of the cheese. Pure vanilla extract enhances the overall flavor profile, and eggs bind everything together, creating that signature creamy cheesecake texture. Ensure your cream cheese is at room temperature for easy beating and a silky consistency.
The magic of the red, white, and blue layers comes from the careful application of food coloring. The shortbread cookie crust naturally forms the festive red layer. For the cheesecake filling, you’ll divide the batter into two equal halves. One half remains plain, creating the pristine white layer, while the other half is mixed with blue food coloring to form the patriotic blue layer. Using gel food coloring often yields more vibrant results without thinning the batter.
To elevate these cheesecakes even further, consider adorning them with toppings. A dollop of Perfect Homemade Whipped Cream or a ready-made cool whip adds a light, airy contrast to the creamy cheesecake. Finish them off with a generous sprinkle of red, white, and blue sprinkles for an extra festive flourish and a delightful textural element. Other optional garnishes could include fresh berries like blueberries and raspberries for a natural touch of color and freshness.
Crust Alternatives: If shortbread isn’t your preference or readily available, you have several excellent substitutes. Sugar cookie crumbs offer a similar sweet, buttery base. Vanilla wafer crumbs provide a classic, delicate flavor, while graham cracker crumbs are a timeless cheesecake crust option that adds a slightly nutty depth. Choose the one that best suits your taste or what you have on hand.
Step-by-Step Guide to Making 4th of July Mini Cheesecakes
Creating these festive mini cheesecakes is a straightforward process, designed for success even for novice bakers. Follow these detailed steps to achieve perfect, patriotic treats:
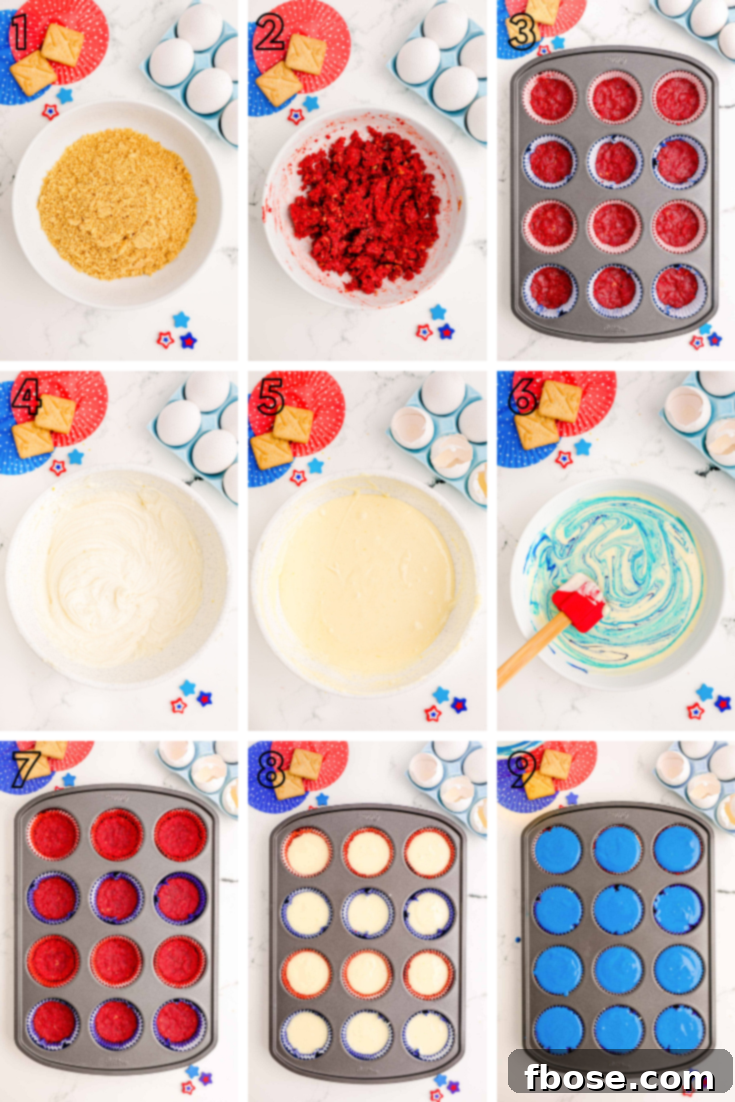
- Prepare Your Baking Environment: Begin by preheating your oven to 350°F (175°C). Next, line a standard 12-cup muffin pan with large paper muffin liners. These liners are essential not only for easy removal but also for maintaining the individual shape of each cheesecake and ensuring non-stick perfection.
- Craft the Red Shortbread Crust: In a medium bowl, combine your finely crushed shortbread cookie crumbs, the rich melted butter, and a few drops of red food coloring. Mix thoroughly until the crumbs are evenly coated and boast a vibrant red hue. Press about two tablespoons of this mixture firmly and evenly into the bottom of each prepared muffin cup. This creates a solid, flavorful base for your cheesecakes.
- Pre-Bake and Cool the Crust: Bake the prepared crusts in the preheated oven for 10 minutes. This crucial step helps to set the crust, preventing it from becoming soggy once the cheesecake filling is added. After baking, remove the pan from the oven and allow the crusts to cool completely on a wire rack. While the crust cools, reduce your oven temperature to 325°F (160°C) in preparation for the cheesecake.
- Prepare the Creamy Cheesecake Filling: In a large mixing bowl, using an electric mixer (either a stand mixer with a paddle attachment or a hand mixer), beat the softened cream cheese until it is completely smooth and free of any lumps. Gradually add the granulated sugar, beating until the mixture is light and fluffy. This ensures the sugar dissolves properly and integrates fully, resulting in a perfectly smooth and sweet filling.
- Incorporate Flavor and Eggs: With the mixer set to a low speed, gently blend in the grated lemon peel (zest) and vanilla extract. These ingredients infuse the cheesecake with bright, aromatic flavors. Continue mixing at a low speed as you add the eggs, one at a time. It’s important to blend just until each egg is incorporated, avoiding overmixing, which can introduce too much air and lead to cracks in your finished cheesecakes.
- Divide and Color the Batter: Evenly divide the smooth cheesecake batter between two separate bowls. Leave one bowl of batter plain; this will form your pristine white layer. To the other bowl, add several drops of blue food coloring and mix gently until the color is uniform and vibrant.
- Layer the Cheesecake Filling: Using a tablespoon or a small cookie scoop, carefully spoon the plain (white) cheesecake batter into each muffin cup, smoothing the tops with the back of the spoon. Next, very gently spoon the blue cheesecake batter directly on top of the white layer in each cup. Smooth the blue layer as well, being careful not to disturb or mix the two colors. The goal is distinct, beautiful layers.
- Bake the Mini Cheesecakes: Place the muffin pan into the oven, preheated to 325°F (160°C), and bake for approximately 20 minutes. Keep a close eye on them; cheesecakes can scorch if overbaked. The centers should be mostly set but still have a slight jiggle. Once baked, turn off the oven heat, prop the oven door open slightly, and allow the cheesecakes to remain in the warm oven for an additional 10 minutes. This gradual cooling prevents cracking.
- Cool and Chill Thoroughly: Remove the cheesecakes from the oven and transfer them to a wire cooling rack to cool completely to room temperature. This will take at least 30 minutes. Once at room temperature, transfer the mini cheesecakes, still in their muffin liners, to the refrigerator. Chill them for a minimum of 3 hours, or ideally, overnight. Proper chilling is essential for the cheesecake to fully set and achieve its perfect creamy texture.
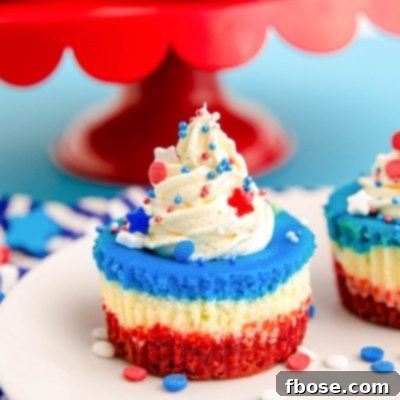
- Garnish and Serve: Just before serving, carefully remove the cheesecakes from their muffin liners. Garnish each one with a swirl of whipped cream and a sprinkle of festive red, white, and blue sprinkles. Arrange them artfully on a platter and prepare for compliments!
Frequently Asked Questions About Mini Cheesecakes
Cheesecake Shelf Life & How To Store
These delightful mini cheesecakes are best stored in an airtight container in the refrigerator. When properly stored, they will maintain their freshness and delicious taste for up to 5 days. If you plan to make them further in advance or wish to enjoy them later, they can be frozen for up to 3 months. To freeze, wrap each cheesecake individually in plastic wrap, then place them in an airtight freezer-safe container or bag. When you’re ready to serve, simply allow them to thaw slowly in the refrigerator overnight for the best texture and flavor.
How should I make the cookie crumbs?
Achieving fine, consistent cookie crumbs is key to a perfect crust. The easiest method is to use a food processor: simply add your cookies and pulse until they reach a sand-like texture. If you don’t have a food processor, don’t worry! Place the cookies in a sturdy freezer bag, seal it, and use a heavy rolling pin or a meat mallet to pound them into fine crumbs. Ensure there are no large chunks for an even crust.
I don’t have any lemon zest – is there a substitute?
Lemon zest adds a wonderful brightness to the cheesecake, but if you don’t have a fresh lemon, you have a few options. You could use zest from other citrus fruits like lime or orange for a different but equally delightful flavor profile. Alternatively, ½ teaspoon of lemon extract can provide a concentrated lemon flavor. If citrus isn’t available at all, you can simply omit the zest; the cheesecake will still be delicious, just without that extra bright note.
I’m not sure how to get lemon zest – any tips?
Zesting a lemon involves removing only the brightly colored outer layer of the peel, which contains all the aromatic oils. The white part underneath, called the pith, is bitter and should be avoided. The simplest way to get zest is by using a microplane or a fine box grater. Gently rub the lemon against the grater, turning the lemon as you go, until all the yellow skin is removed. Be careful not to grate too deeply. If you don’t have a grater, you can carefully use a paring knife to remove thin strips of the yellow peel, then finely mince these strips. A dedicated zester tool is also incredibly handy for this task.
Can I make them in a mini muffin pan?
Yes, you can absolutely make these cheesecakes in a mini muffin pan! Adjust the baking time accordingly; mini cheesecakes will bake faster, likely around 12-15 minutes for the crust and 15-18 minutes for the cheesecake filling. You will also yield more cheesecakes. Ensure you use mini muffin liners and adjust the amount of crust and filling per cup.
These Fourth of July Mini Cheesecakes are undeniably a fun, festive, and deliciously patriotic way to celebrate the holiday. Their individual serving size and vibrant colors make them an instant hit at any gathering. If you find yourself captivated by the creamy indulgence of cheesecake, don’t stop here! Explore other irresistible Cheesecake Recipes to enjoy throughout the year, celebrating every season with a new favorite.
- No Bake Oreo Cheesecake – A dream dessert for Oreo lovers! This easy no-bake cheesecake comes together in just 30 minutes and is loaded with chunks of crushed Oreo cookies. Perfect for a quick, impressive treat.
- Best Ever Blueberry Cheesecake Bars – Enjoy the delightful blend of fruity and creamy with these decadent bars. Featuring a crisp graham cracker crust, a rich cheesecake layer, and a luscious blueberry filling, they’re an absolute delight.
- Peanut Butter Chocolate Cheesecake – Indulge in the silky, peanut buttery goodness of this cheesecake. It’s perfectly sandwiched between a decadent chocolate graham cracker crust and topped with a smooth, glossy Chocolate Ganache.
- Apple Cheesecake Bars – A comforting autumn treat! These bars feature a sweet shortbread crust, a creamy cheesecake layer, tender cinnamon-baked apples, all crowned with a delicious oatmeal crumble topping.
- Sopapilla Cheesecake – A unique Spanish-inspired dessert that transforms simple ingredients into something extraordinary. Made with flaky crescent roll dough, a creamy cream cheese filling, a hint of cinnamon and sugar, baked with butter, and finished with a sweet drizzle of honey.
Let’s Connect and Share!
If you’ve tried this fantastic 4th of July Mini Cheesecakes recipe, we would absolutely love to hear from you! Please share your thoughts and let us know how you enjoyed it by leaving a comment and a review below. Your feedback truly makes our day!
Don’t forget to tag us – @sugarandsoulco – on Instagram and Pinterest with your beautiful photos of these cheesecakes. You can also join our vibrant Sugar & Soul Show-offs Community on Facebook and share your creations there, where you can also participate in our fun recipe challenges!
4th of July Mini Cheesecakes
Rebecca Hubbell
Dessert
American
20
40
3
4
Servings
12
people
Ingredients
- 2 cups shortbread cookie crumbs about 20 small shortbread cookies crushed in a food processor
- Red food coloring
- 6 tablespoons salted butter melted
- 16 ounces cream cheese softened
- 1 cup granulated sugar
- 2 teaspoons grated lemon peel lemon zest
- ½ teaspoon vanilla extract
- 2 large eggs
- Blue food coloring
- Optional garnish is whipped cream and sprinkles.
Instructions
-
Preheat the oven to 350°F and prepare muffin tins by placing large muffin papers into 12 muffin cups (standard muffin pan not mini muffin pan).
-
Mix the cookie crumbs with the melted butter and red food coloring until crumbly and evenly colored. Press this mixture evenly into the 12 muffin cups.
-
Bake the crust for 10 minutes. Remove from the oven and allow to cool.
-
Reduce the oven temperature to 325°F.
-
Using a stand mixer or hand mixer, beat the cream cheese. When it is smooth, gradually add the cup of sugar. Beat this until fluffy. At a low speed, add the lemon peel and vanilla. Also at a low speed, blend in the eggs, one at a time. Do not mix more than needed.
-
Divide this cheese mixture evenly between 2 bowls. Leave one bowl plain (white). Add blue food coloring to the other bowl.
-
Using a Tablespoon, divide the plain cheesecake batter into the muffin cups – smooth the top. Then divide the blue cheesecake batter among the muffin cups. (Do this very gently so that the layers don’t mix) Again, smooth the top.
-
Bake the mini cheesecakes at 325°F for 20 minutes on the middle or bottom rack. Watch these carefully, cheesecake can scorch. Then turn off the heat, prop the oven door open, and leave the cheesecakes in the oven for another 10 minutes.
-
Allow the cheesecakes to cool completely on a cooling rack (at least 30 minutes). Then, it is best to chill the mini cheesecakes in the fridge for at least 3 hours before serving.
-
Garnish with whipped cream and sprinkles.
Notes
- Storage Instructions: These mini cheesecakes will keep for up to 5 days in the fridge when stored in an airtight container. For longer storage, you may freeze them for up to 3 months. Be sure to allow them to thaw completely in the fridge before serving.
- How should I make the cookie crumbs? For the best results, place your cookies in a food processor and blend until they reach a fine, sand-like texture. If you do not have a food processor, you can place the cookies in a freezer bag and pound them into crumbs using a heavy rolling pin or a meat mallet.
- Can I substitute something else for the shortbread cookie crumbs? Yes, absolutely! Good substitutes for the crust include sugar cookie crumbs, vanilla wafer crumbs, or classic graham cracker crumbs. Each will provide a slightly different but equally delicious base.
- I don’t have any lemon zest – is there a substitute? If you’re out of fresh lemons, you can use lime zest or orange zest for a similar citrusy brightness. Alternatively, ½ teaspoon of lemon extract can be used, or you may simply omit the zest altogether if preferred.
- I’m not sure how to get lemon zest – any tips? To get lemon zest, use a box grater or a microplane to remove only the yellow part of the lemon peel. Be very careful not to grate too deeply, as the white pith underneath is bitter. You’ll need to keep turning the lemon to get all the zest. A dedicated zester is also a very handy tool for this. As a last resort, you may carefully use a paring knife to remove thin strips of the yellow peel and then chop this up finely.
Nutrition
Calories:
453
kcal
|
Carbohydrates:
44
g
|
Protein:
6
g
|
Fat:
29
g
|
Saturated Fat:
14
g
|
Polyunsaturated Fat:
2
g
|
Monounsaturated Fat:
10
g
|
Trans Fat:
1
g
|
Cholesterol:
92
mg
|
Sodium:
389
mg
|
Potassium:
104
mg
|
Fiber:
1
g
|
Sugar:
24
g
|
Vitamin A:
759
IU
|
Vitamin C:
1
mg
|
Calcium:
57
mg
|
Iron:
1
mg
Did You Make This Recipe?
Don’t forget to share it with me on Instagram @sugarandsoulco and follow on Tiktok @sugarandsoulco and Pinterest @sugarandsoulco for more!
Pin Recipe
Share Recipe