

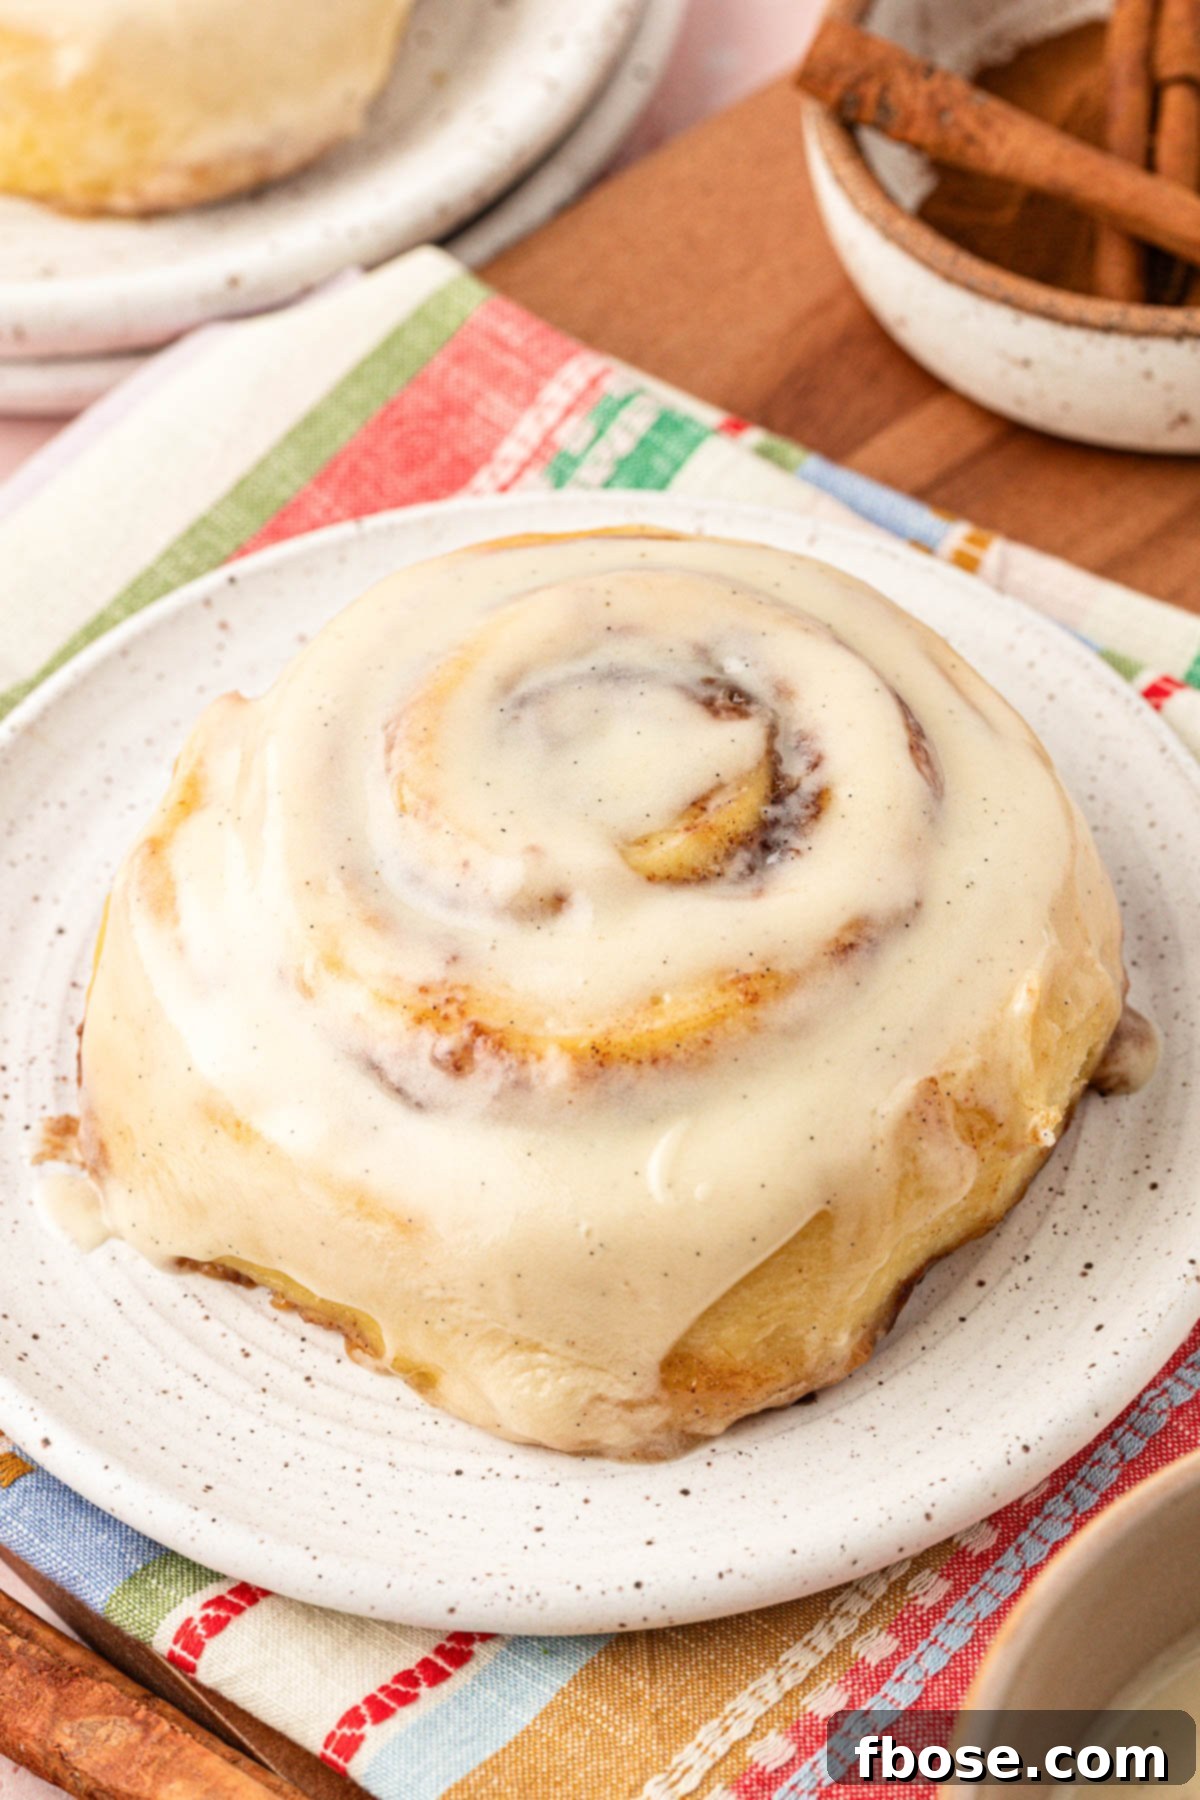
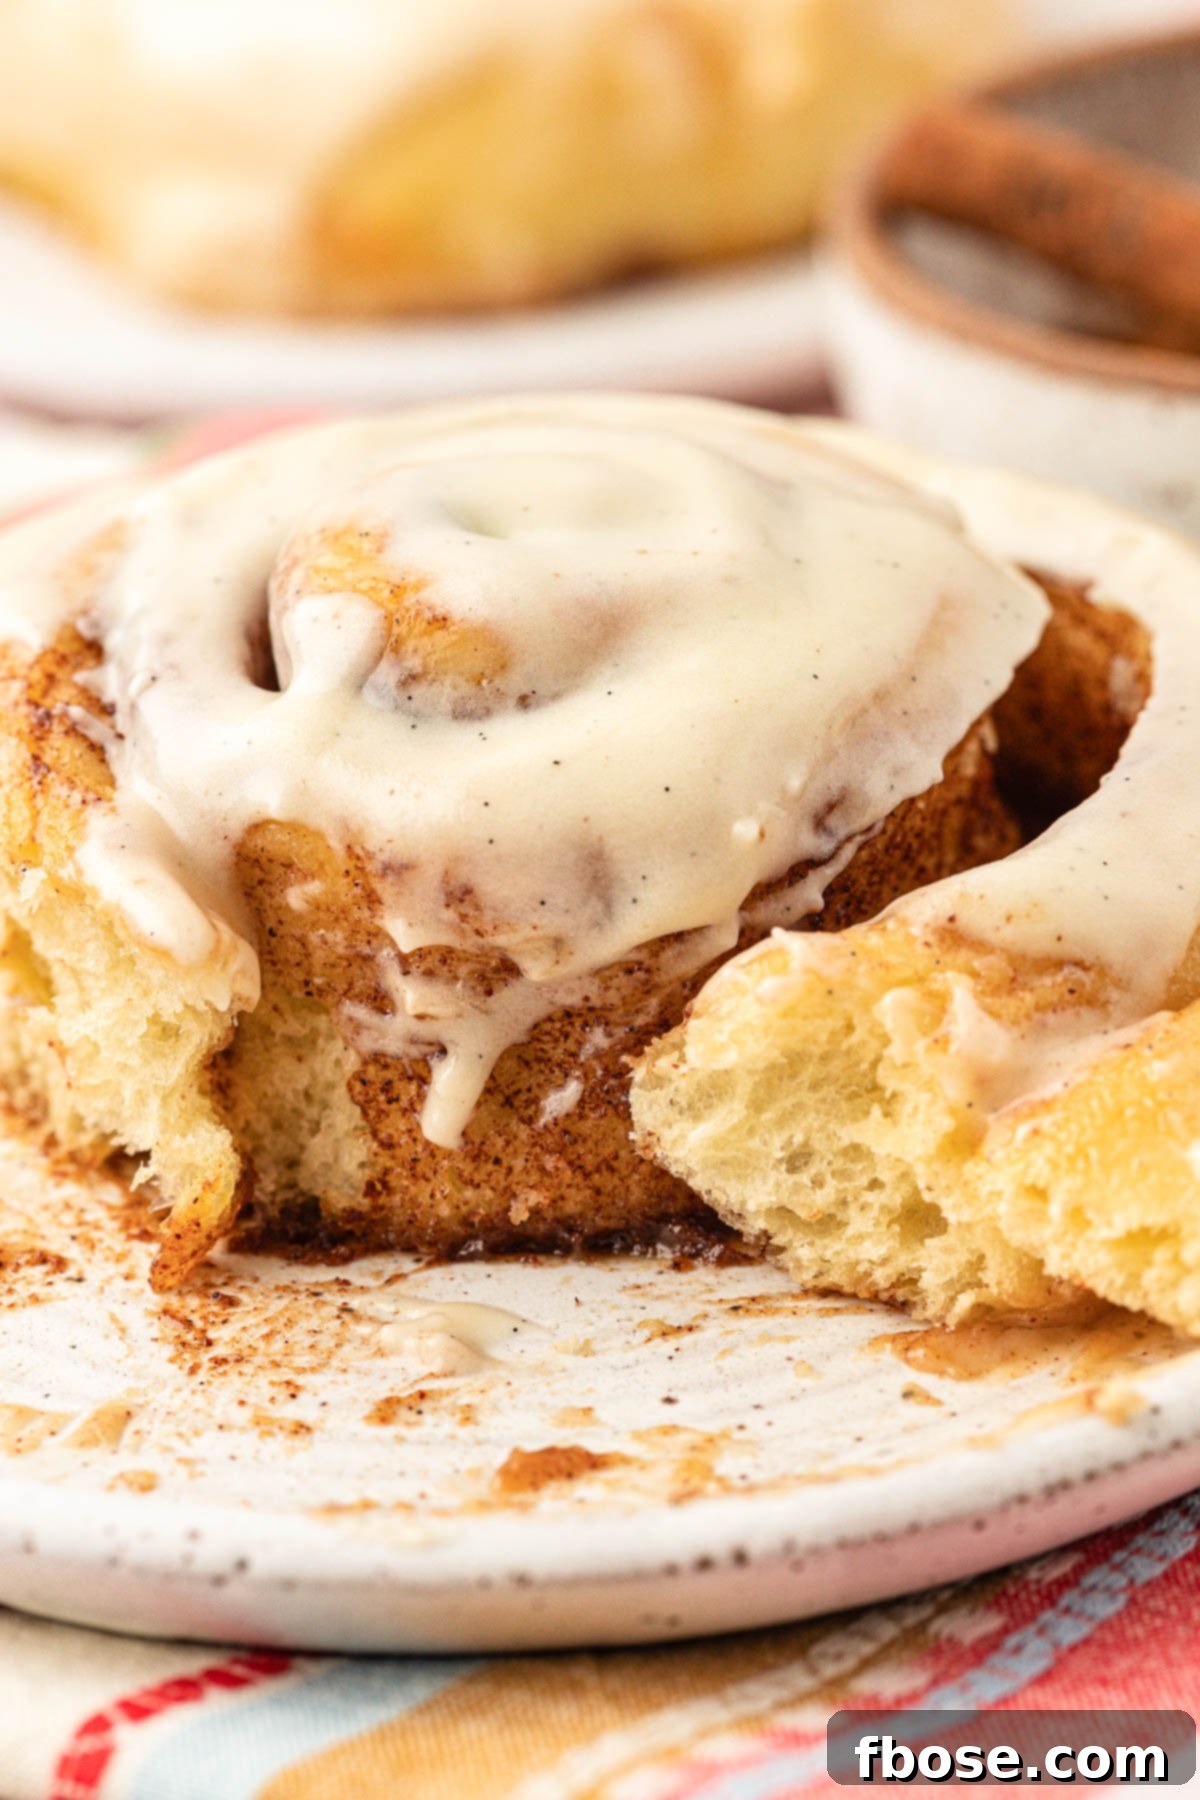
Unlock the secret to baking the most unbelievably soft, pillowy, and tender homemade cinnamon rolls you’ve ever tasted! This unique recipe for “County Cinnamon Rolls” incorporates an unexpected yet incredibly effective ingredient: instant potato flakes. Combined with bread flour and common pantry staples, this method guarantees super soft, irresistibly gooey cinnamon rolls that will become your new go-to indulgence. Prepare for a delightful baking experience that yields rolls so perfect, they practically melt in your mouth and stay fresh for days!

Discovering the Secret to Exceptionally Soft & Gooey Cinnamon Rolls
There’s an undeniable magic to country fairs – a symphony of sights, sounds, and most importantly, tantalizing aromas that pull you in. From crispy Funnel Cakes to sugary Churros and decadent Caramel Apples, the culinary delights are truly irresistible. Our “County Cinnamon Rolls” perfectly capture that nostalgic essence of country fair indulgence, delivering a taste and texture that stands out from the crowd.
While often associated with country fairs, these rolls hold a special significance for us, particularly being from Maine. We affectionately call them “County Cinnamon Rolls” as a nod to the northern counties of our state, renowned for their vibrant Amish communities and substantial potato harvests. This regional connection naturally leads us to the surprising, yet incredibly effective, secret ingredient that elevates these cinnamon rolls to an unparalleled level of deliciousness: potato!
Now, before you raise an eyebrow, let us assure you: you won’t taste the potato in these rolls. Its role is purely textural. The inclusion of instant potato flakes significantly increases the starch content within the dough. This heightened starch level acts as a moisture magnet, allowing the dough to retain more liquid throughout the baking process. The result? Unbelievably soft, extraordinarily tender cinnamon rolls that boast a moist, pillowy crumb and remain fresh and delightful for several days after baking. This ingenious addition transforms a good cinnamon roll into an exceptional one, guaranteeing a consistently perfect bite every time.
So, whether you’re yearning for a taste of country fair nostalgia, seeking the ideal breakfast treat, or simply craving a sweet, gooey dessert that maintains its incredible softness, these County Cinnamon Rolls are your answer. Bake up a batch and prepare to be amazed by their enduring tenderness and irresistible flavor!

Why You’ll Love This Potato Cinnamon Roll Recipe
Taste: A harmonious blend of sweet, warm cinnamon, and tangy cream cheese. Each bite offers a burst of comforting flavors that are perfectly balanced and incredibly satisfying, evoking memories of classic bakery treats.
Texture: Experience an unrivaled softness! The dough is exceptionally pillowy, yielding a tender bite complemented by a delightfully gooey bottom and a rich, moist center. These aren’t just soft; they’re melt-in-your-mouth decadent.
Ease: 7/10 – While cinnamon rolls can sometimes feel like a labor of love, this recipe is designed to be approachable. It’s not overly complicated, but it does require attention to detail and a bit of patience during the proofing stages. The steps are clearly laid out to guide you to success.
Pros: The standout qualities are undoubtedly the unparalleled texture and deeply satisfying flavor. The unique addition of potato flakes ensures a consistently soft and moist crumb that lasts.
Cons: The primary consideration is time. Plan for approximately 2.5 to 3.5 hours from start to finish. However, much of this duration involves hands-off resting and rising, allowing you to multitask or simply relax while the dough works its magic.
Would I Make This Again? Absolutely, yes! While my Tangzhong Cinnamon Rolls remain a personal favorite for their specific fluffiness, these potato-infused rolls offer a distinct and equally delicious experience, making them a worthy addition to any baker’s repertoire.
Essential Ingredients for Your Perfect County Cinnamon Rolls
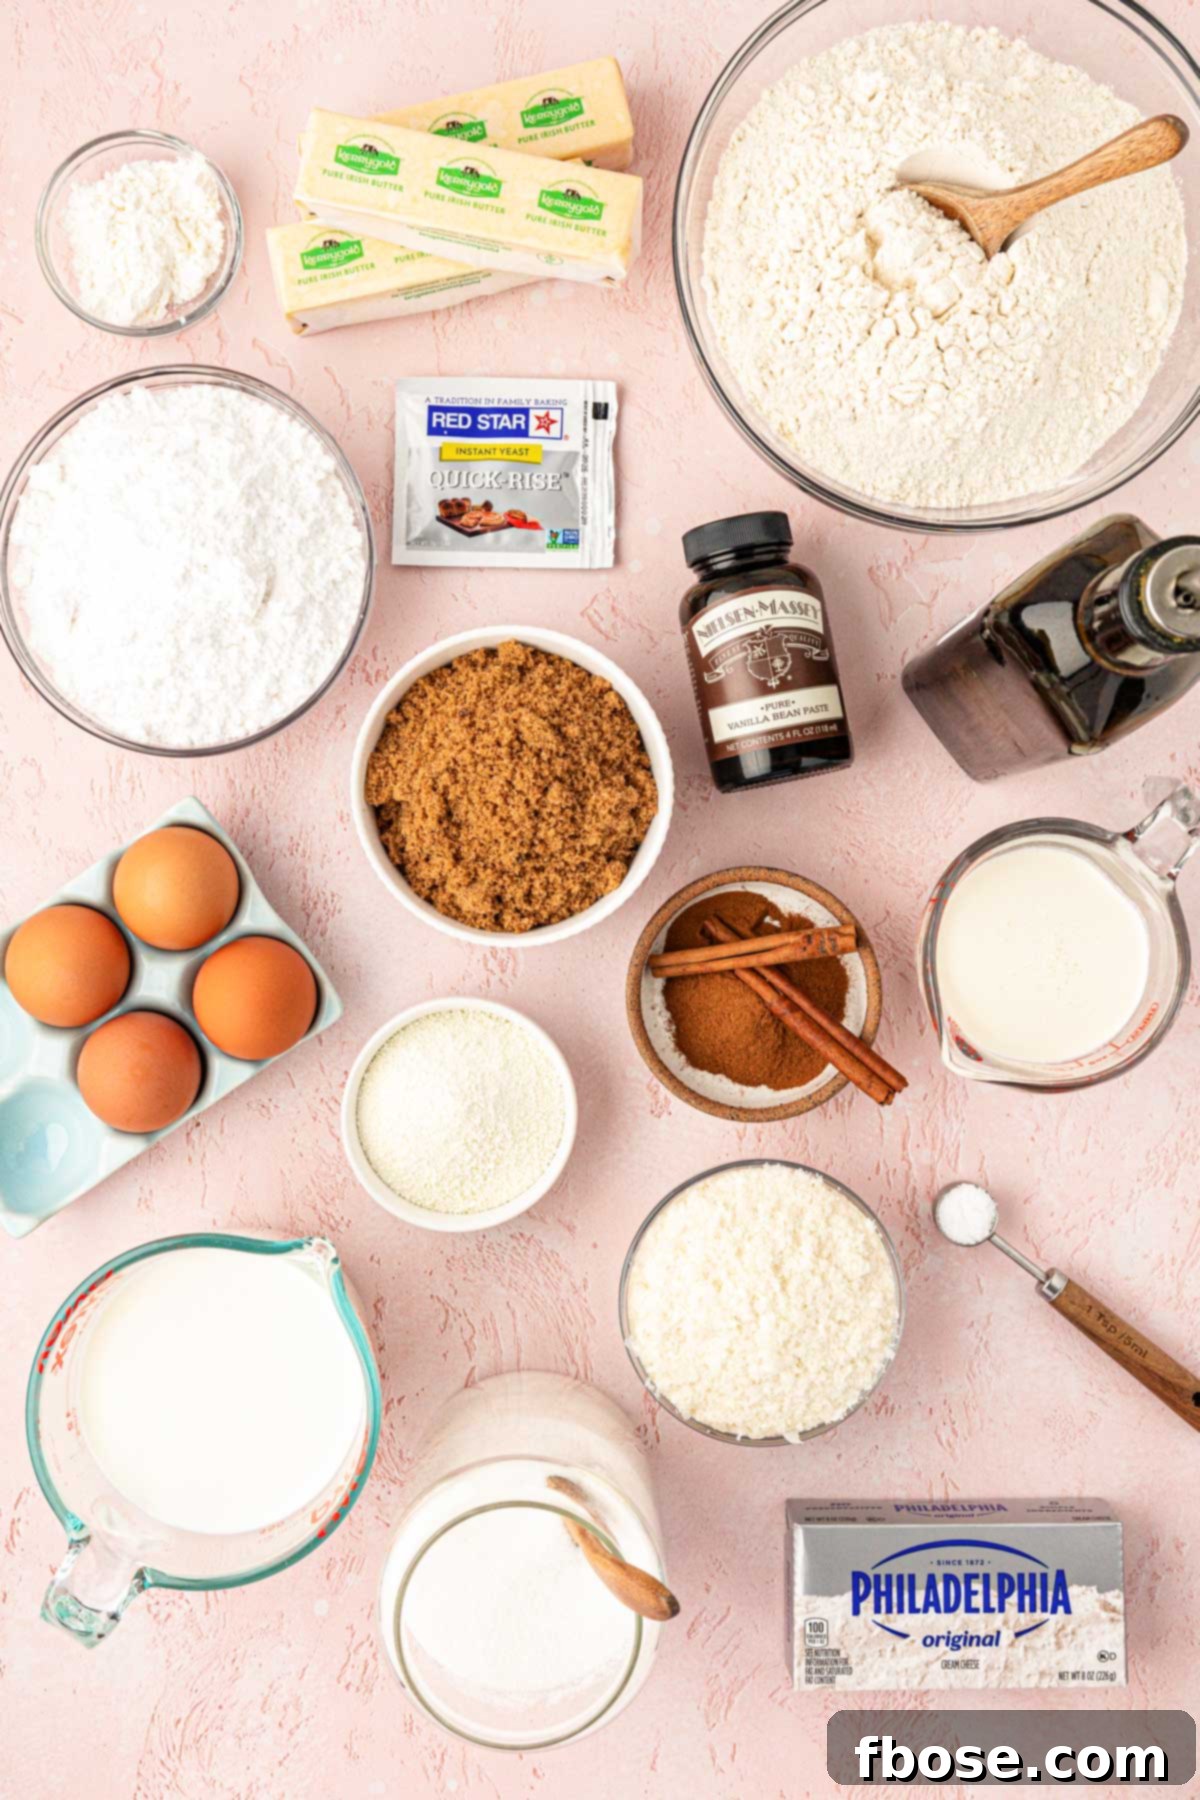
Crafting these exceptional county cinnamon rolls starts with a foundation of high-quality, fresh ingredients. The dough recipe calls for staples like granulated sugar, rich salted butter, a touch of salt, a hint of vegetable oil, powdered milk for added richness, whole milk for moisture, and both large eggs and additional large egg yolks for a tender, luxurious crumb. Our chosen leavening agent is a packet of instant yeast, which ensures a consistent and impressive rise, creating that signature fluffy texture.
The true genius behind the dough’s incredible structure lies in the strategic combination of bread flour and instant mashed potato flakes. Bread flour, with its higher gluten and protein content, provides the necessary strength and chewiness for a satisfying bite, preventing the rolls from being too delicate. Complementing this, the starch from the potato flakes works wonders by locking in extra moisture. This dynamic duo is what gives these rolls their signature super soft, tender, and moist consistency, ensuring they don’t dry out quickly.
Once the dough is perfectly proofed and rolled out, it’s brushed generously with partially melted butter. The key here is “partially melted” – this creates a thick, paste-like consistency, allowing the generous cinnamon-sugar filling to adhere beautifully and remain firmly in place during the rolling process. This prevents the filling from escaping, ensuring every swirl is packed with flavor.
The aromatic cinnamon sugar filling is a delightful blend of dark brown sugar, a touch of cornstarch (which helps prevent sugar migration and enhances gooeyness), fragrant ground cinnamon, and a pinch of salt to balance the sweetness. After carefully forming the dough into beautiful pinwheels and arranging them on a rimmed baking sheet, an optional yet highly recommended step is to pour heavy cream over the tops. This simple addition infuses the rolls with even more moisture, guaranteeing an utterly gooey and decadent outcome that will have everyone reaching for a second.
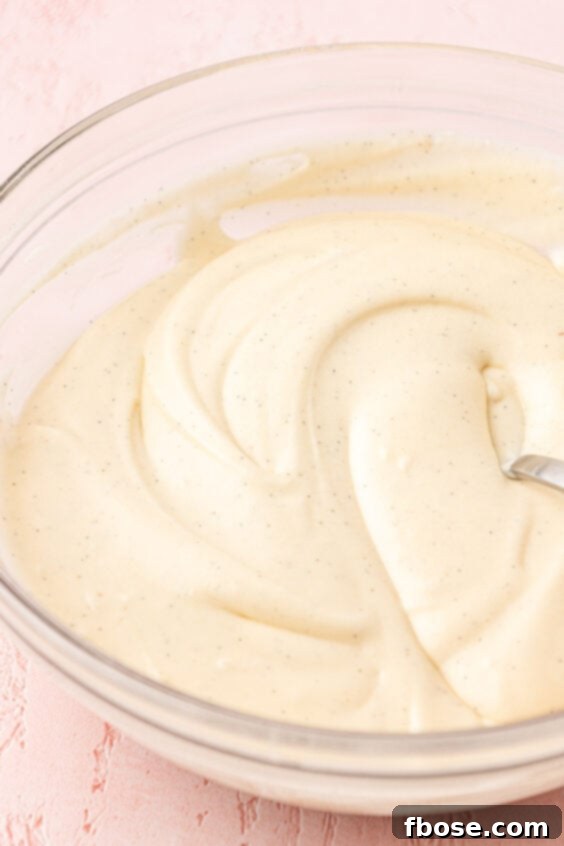
Finally, these county cinnamon rolls are crowned with a luxurious, smooth, and utterly delicious cream cheese icing. This frosting is prepared using softened salted butter, creamy cream cheese, powdered sugar for sweetness, a splash of heavy cream for the perfect consistency, aromatic vanilla bean paste for depth of flavor, and a tiny pinch of salt to enhance all the sweet notes. It’s the perfect sweet and tangy counterpoint to the rich cinnamon rolls, making them truly unforgettable.
Baking the Best Potato Cinnamon Rolls: A Step-by-Step Guide
This detailed guide provides step-by-step instructions to create these irresistible old-fashioned potato cinnamon rolls. Pay close attention to the details, and don’t hesitate to leave a comment with any questions you may have!
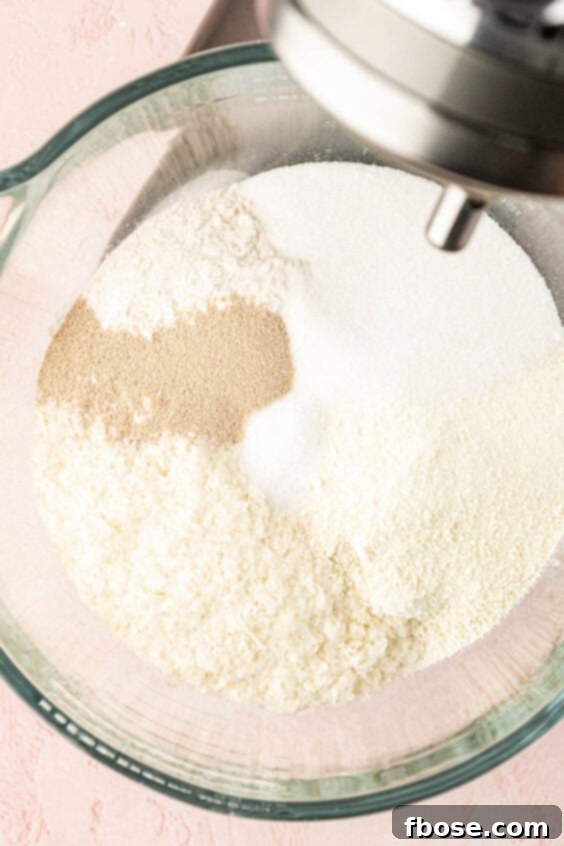
- Combine Dry Ingredients: In a large mixing bowl, or the bowl of a stand mixer fitted with a dough hook attachment, combine all the dry ingredients for the cinnamon roll dough: bread flour, instant mashed potato flakes, powdered milk, granulated sugar, instant yeast, and bread salt. Whisk briefly to ensure even distribution.
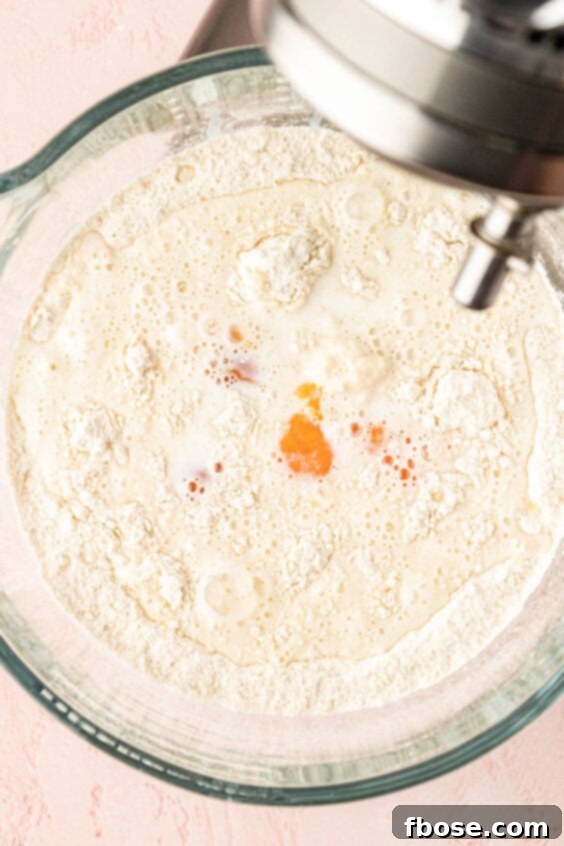
- Add Wet Ingredients & Initial Mix: Pour in the room temperature whole milk, large eggs, and the two additional large egg yolks. Mix on low speed for about 15 seconds until the dry ingredients are just incorporated and a shaggy dough forms.
- Incorporate Butter: Add the melted salted butter to the mixture. Continue mixing until the butter is thoroughly combined and the dough appears sticky.
- First Rest (Autolyse): Cover the bowl containing the sticky dough with plastic wrap and let it rest at room temperature for 20 minutes. This resting period allows the flour to fully hydrate, making the dough easier to knead and contributing to a more tender final product.
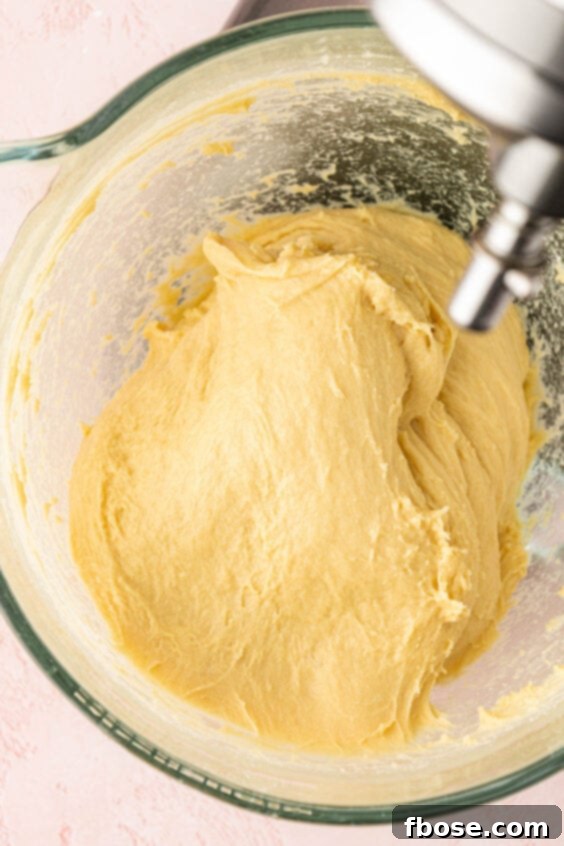
- Knead Until Smooth: After the rest, knead the dough on medium-high speed (around speed 6 on a stand mixer) for approximately 8 minutes. The goal is to achieve a smooth, elastic, and pliable dough. It should be tacky to the touch but not overly sticky. Resist the urge to add too much additional flour early on, as this can make the rolls tough.
- Adjust Flour (If Needed): If, after 8 minutes of kneading, the dough is still excessively sticky and unmanageable, add additional bread flour one tablespoon at a time. Mix for about 30 seconds after each addition until the dough reaches the desired tacky-but-not-sticky consistency.
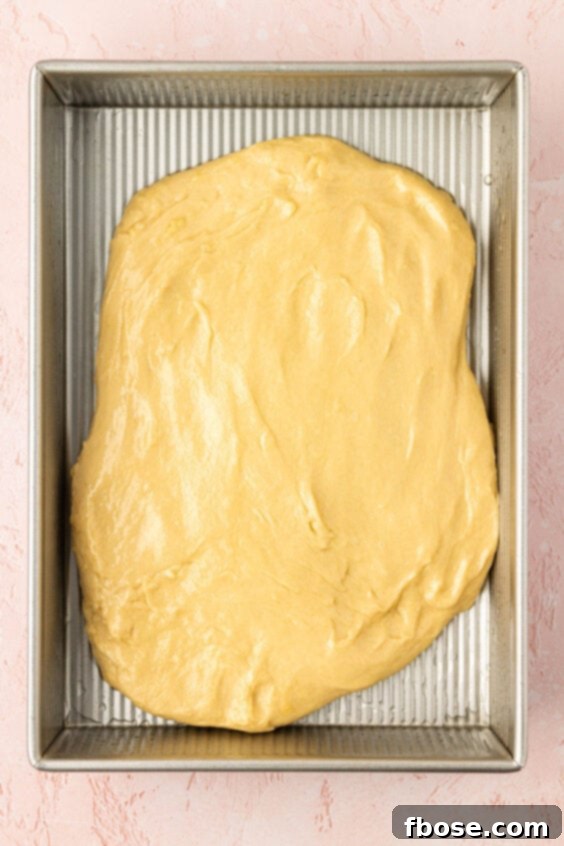
- Prepare for First Rise: Lightly brush a 9×13-inch pan with vegetable or canola oil (or spray with nonstick spray). Turn the dough out into the prepared pan, rotating it to ensure all sides are coated with oil. This prevents sticking and helps the dough rise evenly.
- First Rise (Proofing): Cover the pan tightly with cling wrap and allow the dough to rise in a warm area of your home until it has doubled in size. This usually takes 45-60 minutes in a warm environment or 75-90 minutes in an air-conditioned space. *Note: When proofing in a rectangular pan, the dough will expand outwards more than upwards, helping it naturally form a square shape, which is beneficial for the next step.*
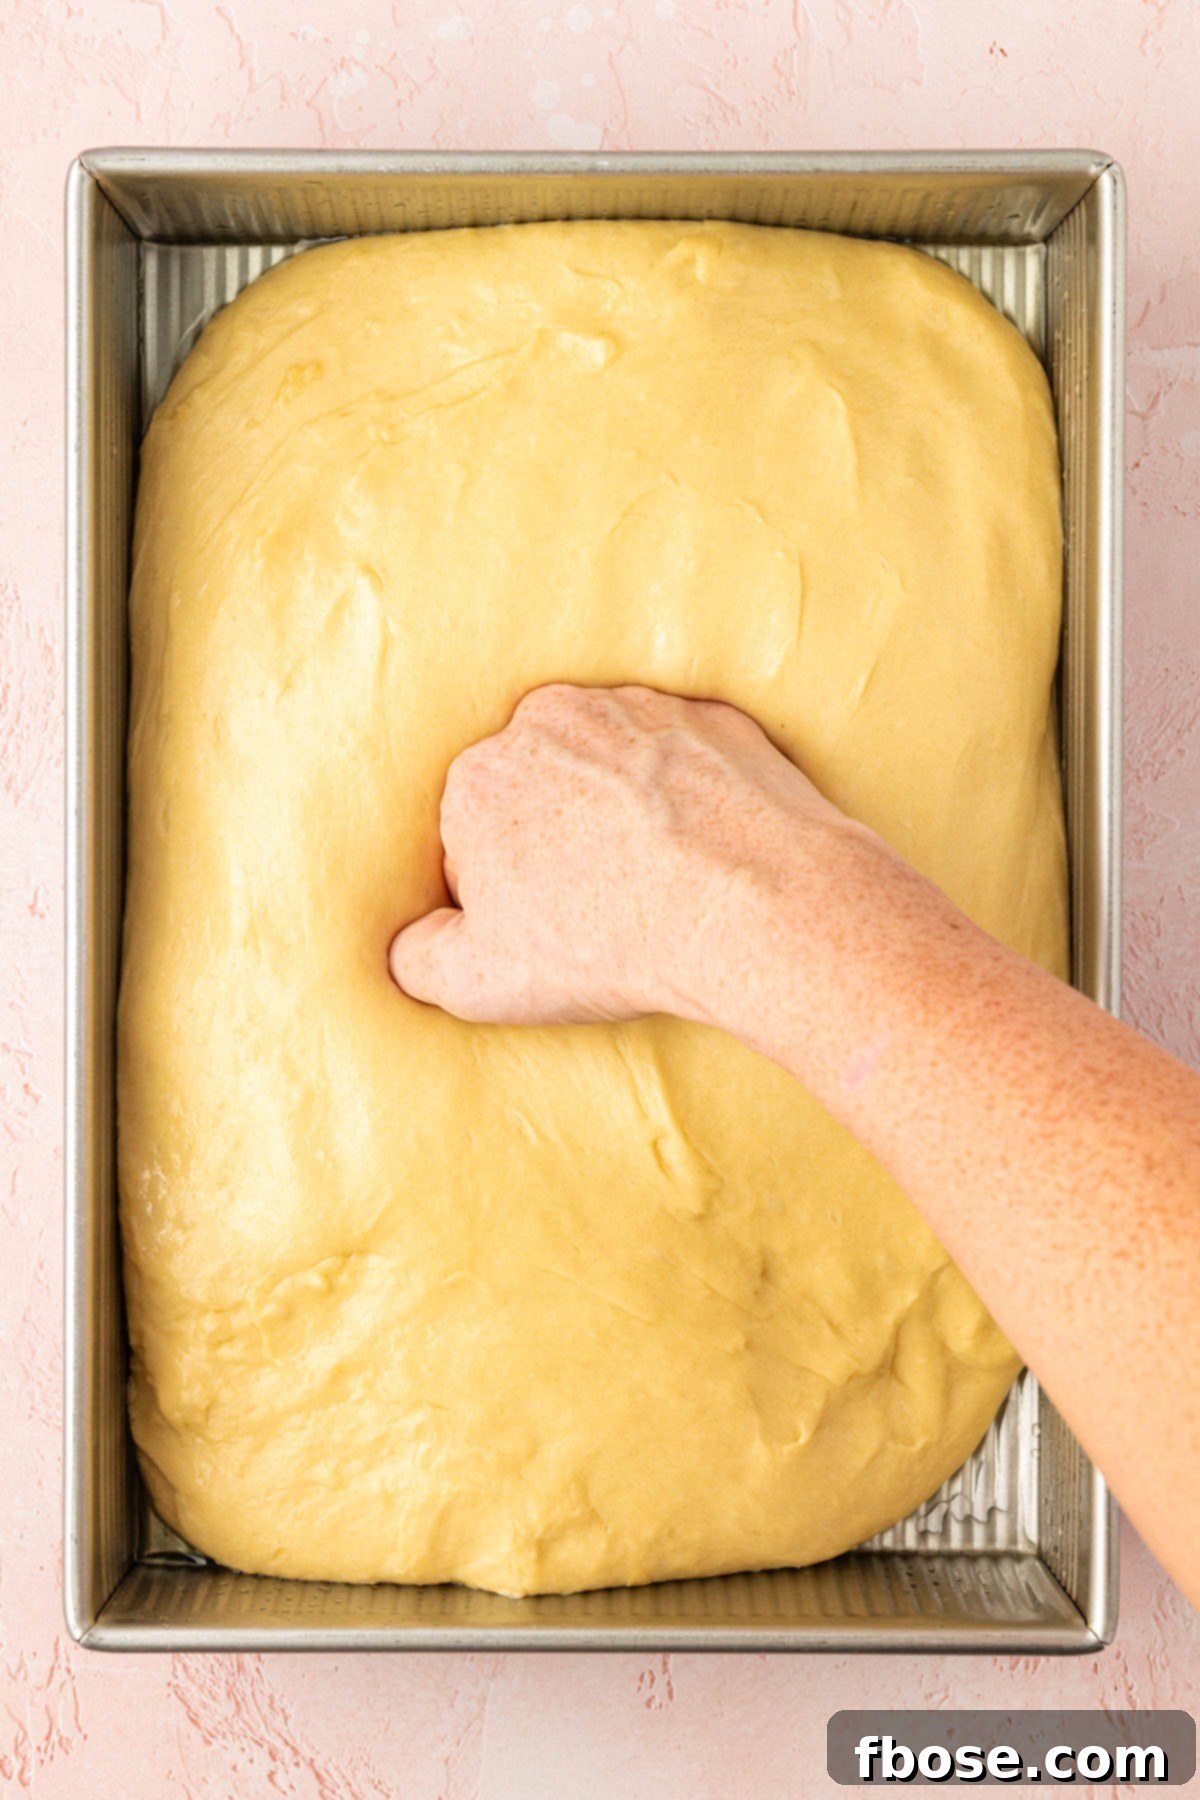
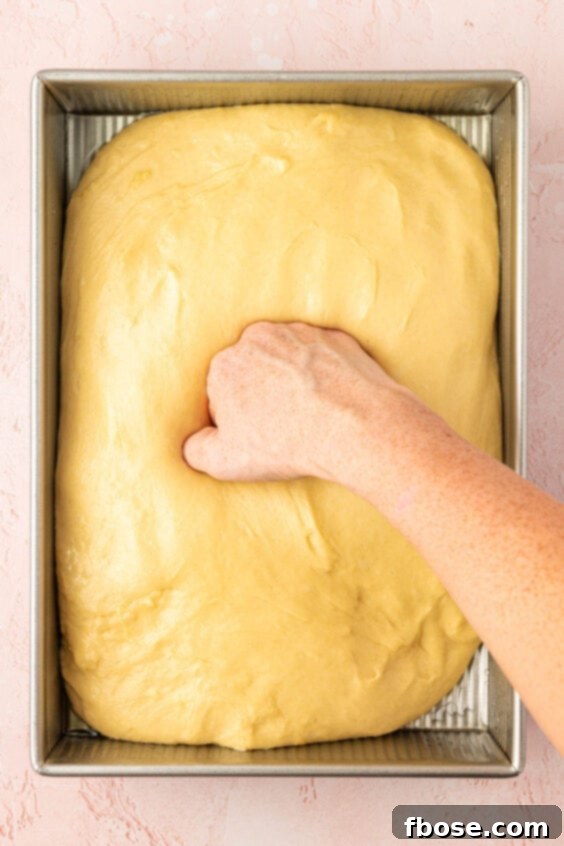
- Punch Down & Prepare for Rolling: Once the dough has doubled, gently punch it down in the center to release the air. Transfer the dough to a lightly floured surface or a pastry mat.
- Roll Out the Dough: Shape the dough into a rough rectangle, then roll it out to an approximate 16×18-inch rectangle. Precision isn’t crucial, but aim for even thickness. Tools like a pastry mat and a pastry wheel cutter can greatly assist in this process, ensuring clean edges and easy rolling.
- Prepare Baking Sheet: Line a large 12×17-inch rimmed baking pan with parchment paper. Set this aside for your shaped rolls.
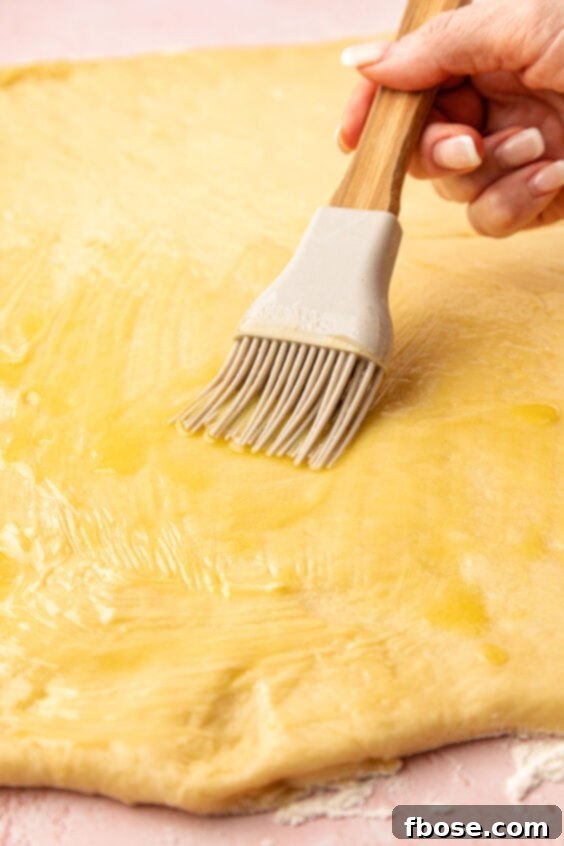
- Apply Butter for Filling: Partially melt ½ cup of salted butter in the microwave for about 15 seconds. Use a pastry brush to stir the butter until it forms a creamy, paste-like consistency. Brush this butter generously and evenly over the entire surface of the rolled-out dough. *Using partially melted butter is crucial; fully melted butter is too thin and won’t hold the filling as effectively.*
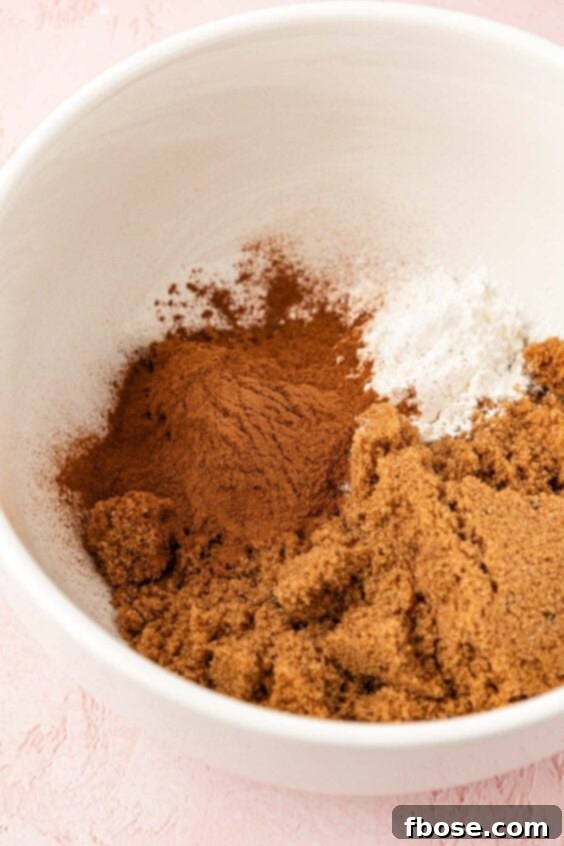
- Prepare Cinnamon Sugar Filling: In a medium bowl, combine the dark brown sugar, cornstarch, ground cinnamon, and salt. Mix thoroughly with a fork until all ingredients are well combined.
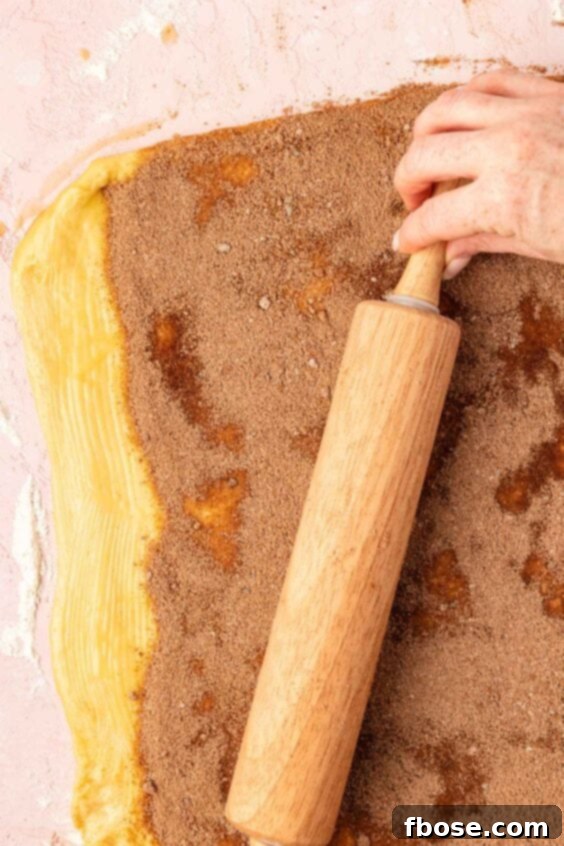
- Spread Filling & Press In: Sprinkle the cinnamon sugar mixture evenly over the butter-brushed dough, leaving a ½ to 1-inch border along one of the shorter ends (this will be the sealing edge). Use a rolling pin to gently roll over the cinnamon sugar, pressing it firmly into the dough. This ensures the filling stays put and doesn’t spill out during rolling.
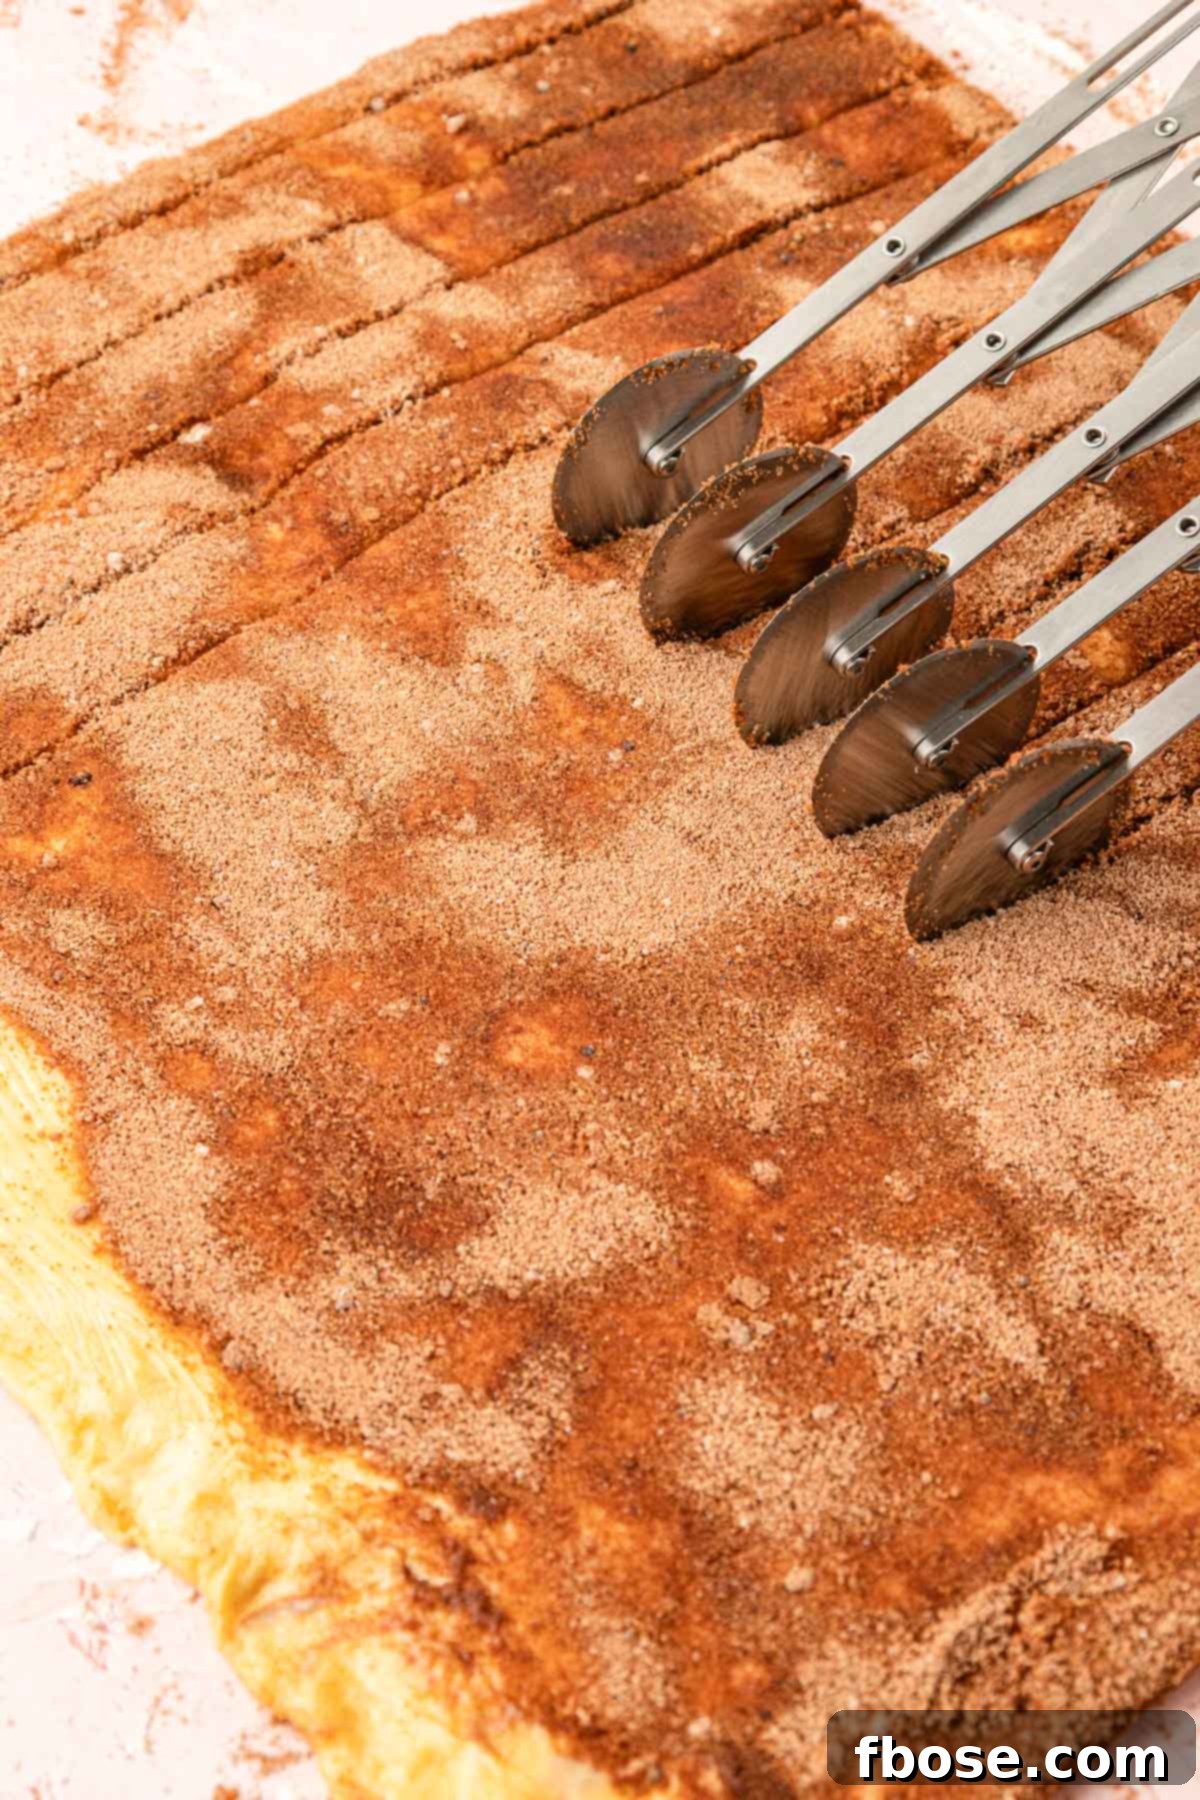
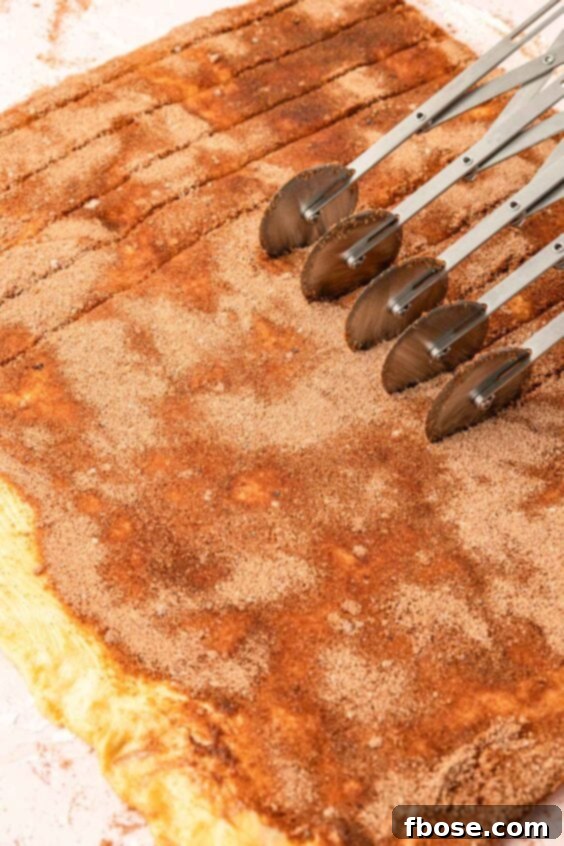
- Cut into Strips: Using a pizza cutter or a pastry wheel cutter, slice the dough into 12 strips, each approximately 1⅓-inch wide. Start cutting from the shorter (16-inch) side of the dough.
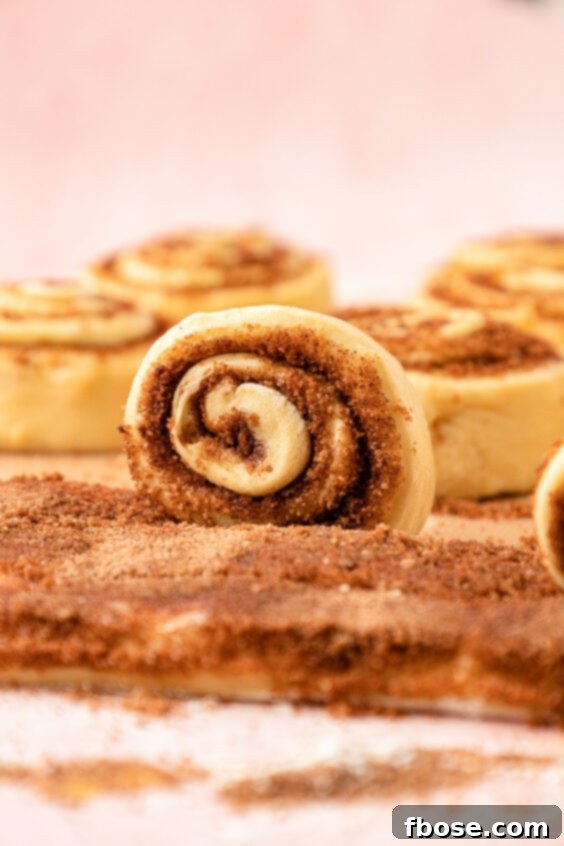
- Form Pinwheels: Carefully roll up each strip of dough into a tight pinwheel, starting from the end with the full sugar coating. Secure the roll by pressing the exposed, un-sugared buttered end against the outside of the pinwheel. If needed, you can brush a little extra butter on the outside to help it seal.
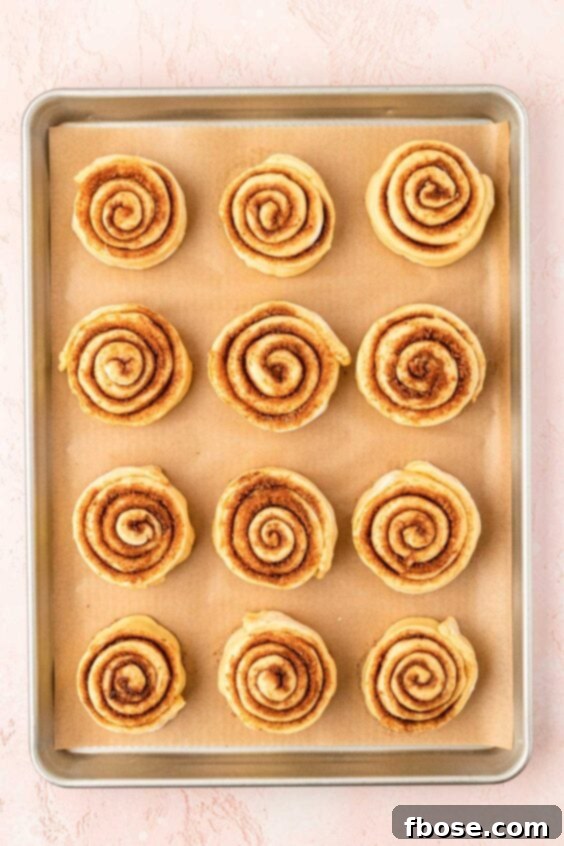
- Arrange on Baking Sheet: Place the formed cinnamon rolls on the parchment-lined baking pan, ensuring a small amount of space between each roll to allow for expansion during the second rise.
- Add Heavy Cream (Optional): Just before covering for the second rise, pour ¾ cup of heavy cream evenly over the tops of the cinnamon rolls (approximately 1 tablespoon per roll). This step is optional but highly recommended for achieving an extra gooey texture.
- Second Rise & Preheat Oven: Cover the rolls loosely with plastic wrap and allow them to rise for another 20 to 30 minutes. They won’t quite double in size this time. **Crucially, begin preheating your oven to 350°F (175°C) while the rolls undergo their second rise.** This synchronization ensures the oven is perfectly ready when the rolls are, preventing any over-proofing that could occur if they had to wait.
- Bake to Golden Perfection: Bake the cinnamon rolls on the **lowest rack** of your preheated oven for 18 to 22 minutes, or until they turn a beautiful golden brown on top. For precise doneness, an instant-read thermometer inserted into the center of a roll should read 190°F (88°C). Once baked, transfer the pan to a wire rack to cool slightly.
- Prepare Cream Cheese Icing: While the rolls cool, prepare the icing. In a medium bowl, cream together the softened cream cheese until smooth.
- Finish the Icing: Add the melted salted butter, powdered sugar, heavy cream, vanilla bean paste, and salt to the creamed cream cheese. Mix everything until the icing is completely smooth and free of lumps. *If you prefer a thinner icing, you can add a tiny bit more heavy cream, but remember the warmth of the rolls will help it melt and soak in beautifully.*
- Ice & Serve: Use a rubber spatula or a spoon to generously spread the smooth cream cheese icing over the warm cinnamon rolls. Don’t be shy – this is a substantial amount of icing, designed to absorb into the swirls of the rolls, contributing to their incredible gooeyness. Serve immediately and enjoy your perfectly homemade potato cinnamon rolls!
Pro Tips for Perfect Potato Cinnamon Rolls
- Potato Flakes over Baked Potatoes: While you might think fresh mashed potatoes would work, instant potato flakes are highly recommended. They are incredibly easy to use, ensuring more consistent results without introducing excess moisture that could alter the dough’s delicate balance. The processed starch in flakes is perfect for moisture retention.
- Rectangular Pan for Initial Proofing: Allowing your dough to undergo its initial rise in a rectangular 9×13-inch pan is a smart trick. This helps the dough naturally conform to a rectangular shape, making it significantly easier to roll out evenly later on, compared to trying to force a round ball of dough into a perfect rectangle.
- Icing Customization: If you’re not a fan of cream cheese frosting, you can easily adapt the recipe. Simply omit the cream cheese from the icing ingredients and adjust the heavy cream to achieve your desired consistency for a delicious vanilla icing without any other changes. This offers a versatile option for different preferences.
- Avoid Over-Proofing: Timing is key to flawless cinnamon rolls. Always begin preheating your oven as the rolls are undergoing their second rise. This ensures that the oven is hot and ready the moment your rolls are perfectly proofed, preventing them from over-proofing while waiting for the oven to heat up. Over-proofed rolls can sometimes collapse or bake unevenly.
- Utilize a Pastry Mat: For effortlessly rolling out your dough, a good pastry mat is invaluable. Its nonstick surface allows you to roll the dough without needing to add excessive flour, which can dry out your dough and make your rolls tough. It also often has measurements printed on it, helping you achieve the perfect rectangle.
- Invest in a Pastry Wheel Cutter: Achieving clean, uniform slices for your cinnamon roll strips is made easy with a pastry wheel cutter. It glides through the dough, making neat cuts that result in beautifully shaped pinwheels. If you don’t have a pastry cutter, a sharp pizza wheel cutter makes for an excellent substitute.
Storing Your Homemade Potato Cinnamon Rolls for Lasting Freshness
Due to the luscious cream cheese icing, these homemade potato cinnamon buns are best stored in an airtight container. Refrigerate them promptly, and they will maintain their deliciousness and soft texture for 3 to 4 days. When you’re ready to enjoy them warm again, simply pop an individual roll into the microwave for 15 to 20 seconds. The gentle warmth will soften the icing and refresh the dough, bringing back that freshly baked, gooey appeal. For longer storage without icing, you can freeze un-iced baked rolls for up to 2-3 months. Thaw, warm, and then apply fresh icing for the best experience.
Delightful Ways to Serve Your Amish Potato Cinnamon Rolls
These warm, tender Amish Potato Cinnamon Rolls are incredibly versatile and perfect for any occasion! Serve a fresh batch for a cozy breakfast, or share them with friends at a festive brunch gathering. If you’re hosting a morning meal, these sweet treats pair wonderfully alongside other delectable pastries or fluffy homemade muffins. For a balanced spread, consider complementing them with a savory breakfast dish like my hearty Sausage Breakfast Strata!
Beyond breakfast, don’t underestimate their potential as an exquisite dessert! Their sweet, spicy flavor profile and irresistible gooey texture effortlessly satisfy any post-dinner sweet tooth. Enhance the experience by pairing them with a comforting cup of your favorite coffee or tea, or keep it classic with a tall, refreshing glass of ice-cold milk. However you choose to serve them, these cinnamon rolls are guaranteed to be a crowd-pleaser.
Explore More Delicious Cinnamon Roll Recipes:
- Cinnamon Roll Casserole – An incredibly easy and delicious way to feed a crowd a comforting breakfast!
- Sourdough Cinnamon Rolls – Discover the depth of flavor with these tangy sourdough rolls, perfectly topped with cream cheese icing!
- Softest Cinnamon Rolls with Tangzhong – Experience the ultimate in fluffiness with this Asian-inspired tangzhong method for truly cloud-like cinnamon rolls!
- Chocolate Cinnamon Rolls – A delightful chocolaty twist on the beloved classic breakfast treat, perfect for chocolate lovers!
- Easy Overnight Cinnamon Rolls – Prepare these wonders the night before for a stress-free and delicious breakfast in the morning!
Did You Make This Recipe?
If you’ve tried this recipe, please leave a review in the comments below. We love hearing from you! Don’t forget to tag us – @sugarandsoulco – on Instagram and Pinterest with your photos, or join our Sugar & Soul Show-offs Community and share them there.

Amish Potato Cinnamon Rolls
This recipe for Homemade Cinnamon Rolls uses instant potato flakes for an ultra-soft texture you won’t be able to resist. Heavy cream is poured over them for ultimate gooeyness, and a thick cream cheese icing makes them absolutely over-the-top yummy!
Author: Rebecca Hubbell
Course: Breakfast
Cuisine: American
Prep Time: 45 minutes
Cook Time: 22 minutes
Proof Time: 2 hours 15 minutes
Total Time: 3 hours 22 minutes
Servings: 12 people
Print Recipe | Pin Recipe | Rate This Recipe
Ingredients
Dough
- 4¼ cups bread flour (553g, spooned and leveled, plus extra if the dough is sticky)
- ¾ cup instant mashed potato flakes (60g, plain variety)
- ¼ cup powdered milk (35g)
- ¼ cup granulated sugar (56g)
- 2¼ teaspoons instant yeast (one packet)
- 1 teaspoon bread salt or salt
- 1¾ cups whole milk (420ml, room temperature)
- 2 large eggs (room temperature)
- 2 additional large egg yolks (room temperature)
- 6 tablespoons salted butter (84g, melted)
- 1 tablespoon vegetable or canola oil (for coating the proofing pan)
Filling
- 1 cup dark brown sugar (215g, packed)
- ½ cup salted butter (113g, softened)
- 2 tablespoons corn starch
- 2 tablespoons ground cinnamon
- ¼ teaspoon salt
Topping
- ¾ cup heavy cream
Icing
- ¼ cup salted butter (melted)
- 4 ounces cream cheese (softened)
- 2 cups powdered sugar
- ½ cup heavy cream
- ½ tablespoon vanilla bean paste
- ⅛ teaspoon salt
Instructions
Dough Preparation
- In a large bowl or stand mixer fitted with a dough hook attachment, mix together 4¼ cups bread flour, ¾ cup instant mashed potato flakes, ¼ cup powdered milk, ¼ cup granulated sugar, 2¼ teaspoons instant yeast, and 1 teaspoon bread salt.

- Add in 1¾ cups whole milk, 2 large eggs, and 2 additional large egg yolks and mix for 15 seconds until just combined.
- Mix in the melted 6 tablespoons salted butter until thoroughly combined and the mixture resembles a sticky dough.
- Cover the dough and let it rest in the bowl for 20 minutes. This rest helps the flour fully hydrate.
- After resting, knead for about 8 minutes at medium-high speed (speed 6 on a stand mixer) until the dough becomes smooth and elastic. *Resist the urge to add additional flour until the very end of kneading.*
- When the dough is properly kneaded, it should feel tacky but not sticky, and be very pliable. If necessary, add additional flour 1 tablespoon at a time, mixing for about 30 seconds after each addition, until the desired consistency is reached.
- Brush 1 tablespoon vegetable or canola oil onto a 9×13-inch pan (or use a nonstick spray). Turn your dough out into the pan and rotate it so that it is oiled on all sides.
- Cover the pan of dough with cling wrap and allow it to rise in a warm area of your home until it has doubled in size. This typically takes 45 to 60 minutes in a warm environment or 75 to 90 minutes in cooler, air-conditioned conditions. *Note that the dough will expand outwards in the pan, helping it form a rectangular shape, which makes the next step easier.*
- Once the dough has doubled in size, gently punch it down in the center to release the air, then transfer it to a lightly floured surface or a pastry mat.
- Roll the dough out into an approximate 16×18-inch rectangle; it doesn’t have to be exact. A Pastry Mat and Pastry Wheel Cutter are highly recommended for precision and ease in rolling and cutting!
- Line a large 12×17-inch rimmed baking pan with parchment paper and set aside.
Filling & Shaping
- Partially melt ½ cup salted butter in the microwave for about 15 seconds. Then, use a pastry brush to stir the butter until it reaches a creamy, paste-like consistency. Brush this butter generously all over the surface of the rolled-out dough. *It’s crucial to use partially melted butter here as fully melted butter is too thin and won’t hold the filling in place effectively.*
- In a medium bowl, stir together 1 cup dark brown sugar, 2 tablespoons cornstarch, 2 tablespoons ground cinnamon, and ¼ teaspoon salt with a fork until thoroughly mixed.
- Sprinkle the cinnamon sugar mixture evenly over the buttered dough, leaving a ½ to 1-inch border at one of the shorter ends (this will be the sealing edge). Use a rolling pin to gently roll over and press the sugar mixture firmly into the dough.
- Use a pizza or pastry cutter to cut the dough into 12 strips, each about 1⅓-inch wide. Make the cuts starting from the shorter (16-inch) side of the dough.
- Carefully roll up each strip of dough to create a pinwheel, starting from the fully sugared end. Roll it fairly tightly, then secure the end by pressing the exposed, buttered edge without sugar onto the outside of the roll. *You can brush a tiny bit more butter onto the outside of the roll if needed to help secure the end.*
- Place the shaped cinnamon rolls on the parchment-lined baking pan, leaving a little space between each roll for expansion.
- Pour ¾ cup heavy cream over the top of the cinnamon rolls, distributing about 1 tablespoon over each roll, just before covering for their second rise. *(You can skip this step if desired, but it significantly enhances gooeyness).*
- Cover the rolls loosely with plastic wrap and allow them to rise for 20 to 30 minutes. They won’t double in size quite as much this time. **Crucially, preheat your oven to 350ºF (175°C) while the rolls undergo this second rise; this ensures the oven is ready immediately, preventing over-proofing.**
- Bake the rolls on the **lowest rack** of the oven for 18 to 22 minutes, or until they are beautifully golden brown. To confirm doneness, the center of the rolls should reach an internal temperature of 190°F (88°C) on an instant-read thermometer. Once baked, transfer the pan to a wire rack to cool slightly.

Icing Preparation
- Prepare the icing by creaming 4 ounces of softened cream cheese in a medium bowl until smooth and fluffy.
- Then, add the melted ¼ cup salted butter, 2 cups powdered sugar, ½ cup heavy cream, ½ tablespoon vanilla bean paste, and ⅛ teaspoon salt to the cream cheese mixture. Mix until the icing becomes completely smooth and luscious. *You can add a little extra heavy cream if you prefer a thinner consistency, but the warmth from the rolls will help it soften and soak in beautifully.*
- Use a rubber spatula or spoon to spread the generous layer of icing evenly over the warm rolls. This abundant amount of icing is designed to absorb wonderfully into the swirls, making them extra gooey and decadent.

Notes
- Keep a close eye on both the proofing and baking stages of these rolls. If they become over-proofed, they can puff up excessively and squeeze some of the heavy cream or butter out over the rim of the pan during baking.
Nutrition
Calories: 553 kcal | Carbohydrates: 72g | Protein: 9g | Fat: 26g | Saturated Fat: 16g | Polyunsaturated Fat: 1g | Monounsaturated Fat: 7g | Trans Fat: 1g | Cholesterol: 98mg | Sodium: 264mg | Potassium: 203mg | Fiber: 2g | Sugar: 36g | Vitamin A: 889IU | Vitamin C: 0.4mg | Calcium: 126mg | Iron: 1mg
Did You Make This Recipe?
Don’t forget to share it with me on Instagram @sugarandsoulco and follow on Tiktok @sugarandsoulco and Pinterest @sugarandsoulco for more!
Pin Recipe
Share Recipe