
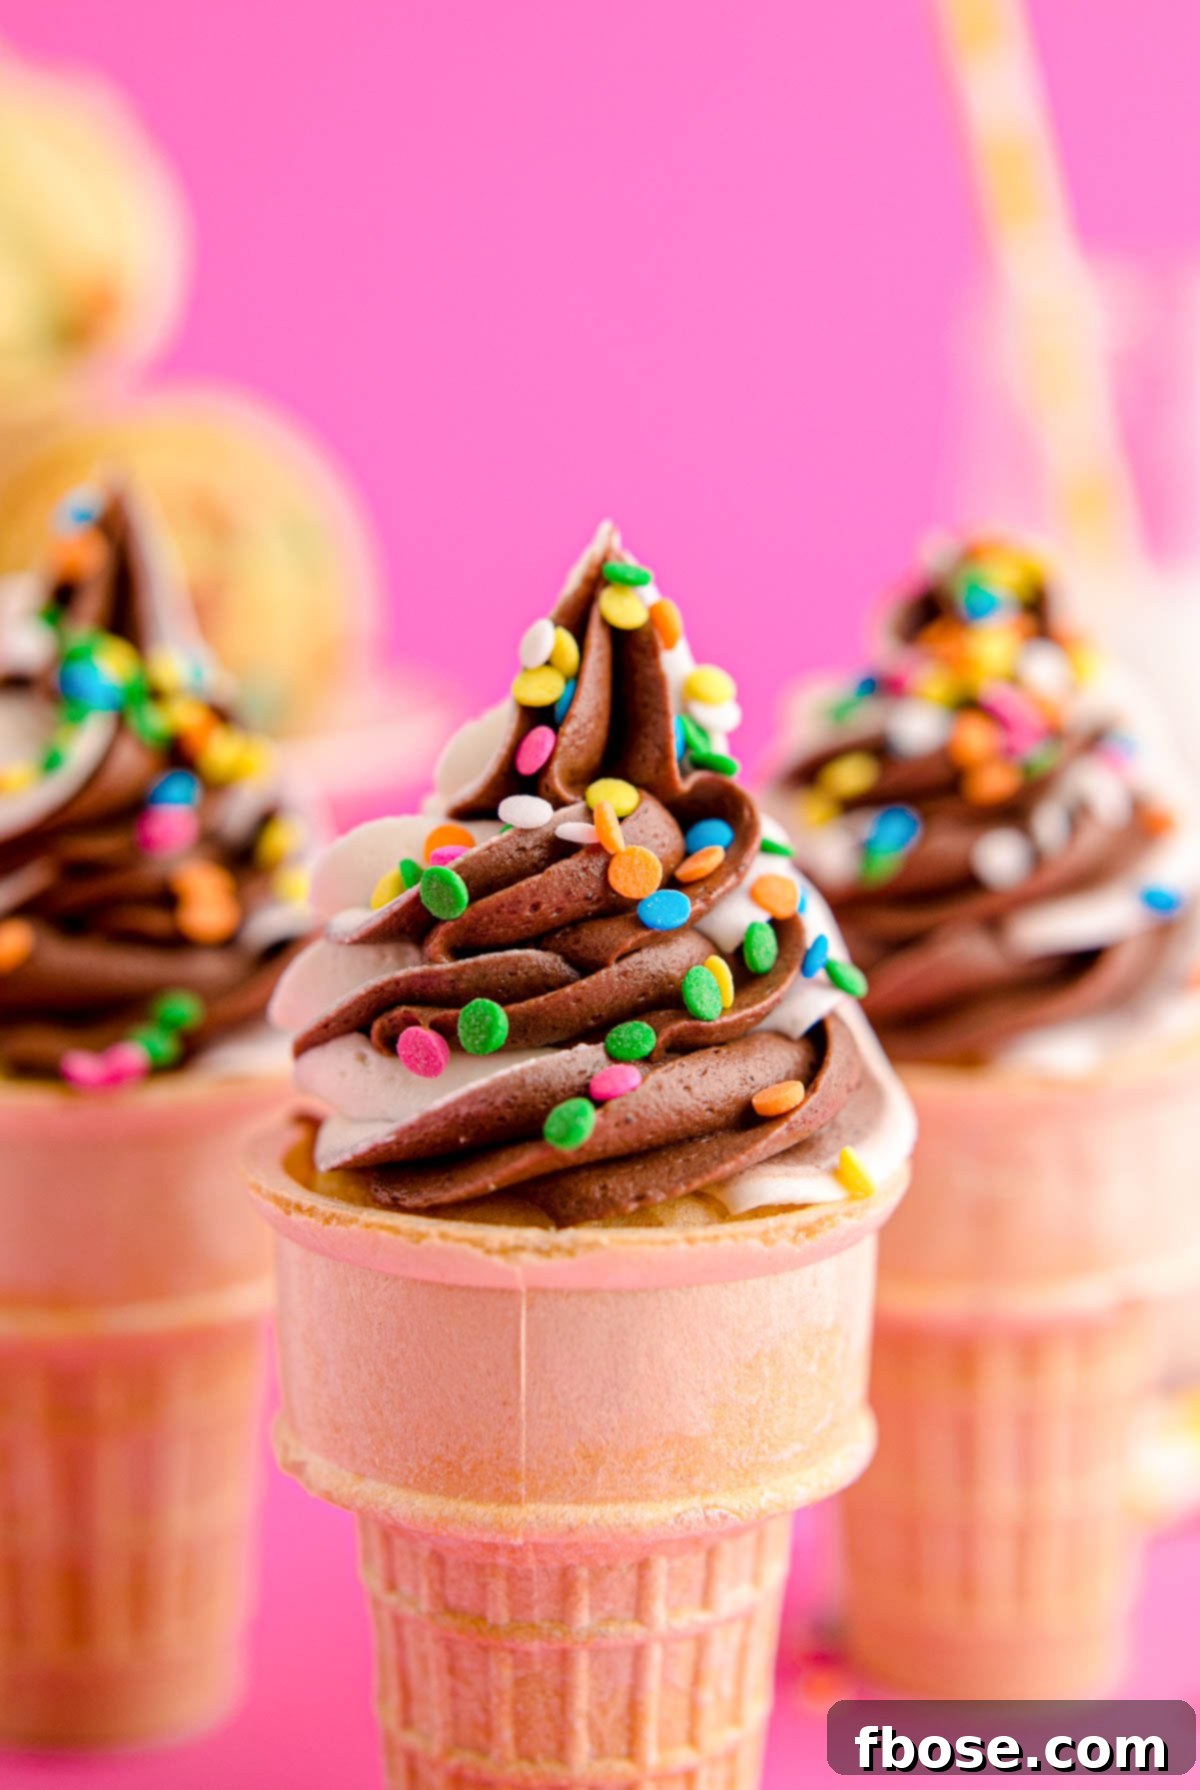
Welcome to the delightful world of Ice Cream Cone Cupcakes, a creative and incredibly fun dessert that brings together the best of two beloved treats! Imagine moist, fluffy cake baked right inside a crispy ice cream cone, generously topped with luscious, homemade buttercream frosting that mimics the look of a perfect soft-serve swirl. Finished with a shower of colorful sprinkles, these hand-held delights are guaranteed to be a sensational hit at any gathering, from kids’ birthday parties to summer barbecues and casual get-togethers. They’re so enchanting, even adults will be reaching for seconds!
If you love the magic of ice cream-inspired desserts, you’re in for a treat. Explore other equally delicious creations like our irresistible Brownie Sundae Cupcakes, which are decadently served with an actual scoop of ice cream, or indulge in the rich, creamy flavors of our Chocolate Milkshake Cupcakes. Each recipe promises a unique twist on classic favorites, perfect for satisfying any sweet tooth.
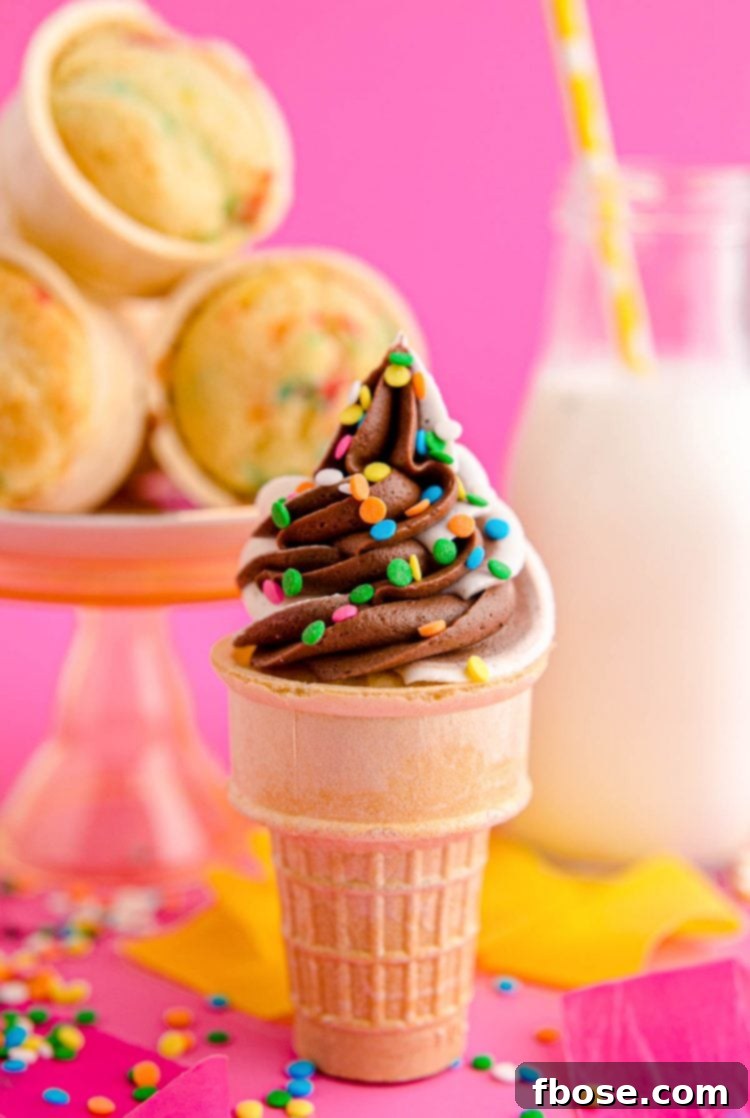
Are you on the hunt for a show-stopping dessert that doesn’t demand hours in the kitchen? Look no further! These Ice Cream Cone Cupcakes are your answer, combining the convenience of a boxed cake mix with the irresistible charm of a homemade buttercream frosting. This recipe is designed to be effortlessly simple yet yield an impressive result, making you the star of any party with minimal fuss.
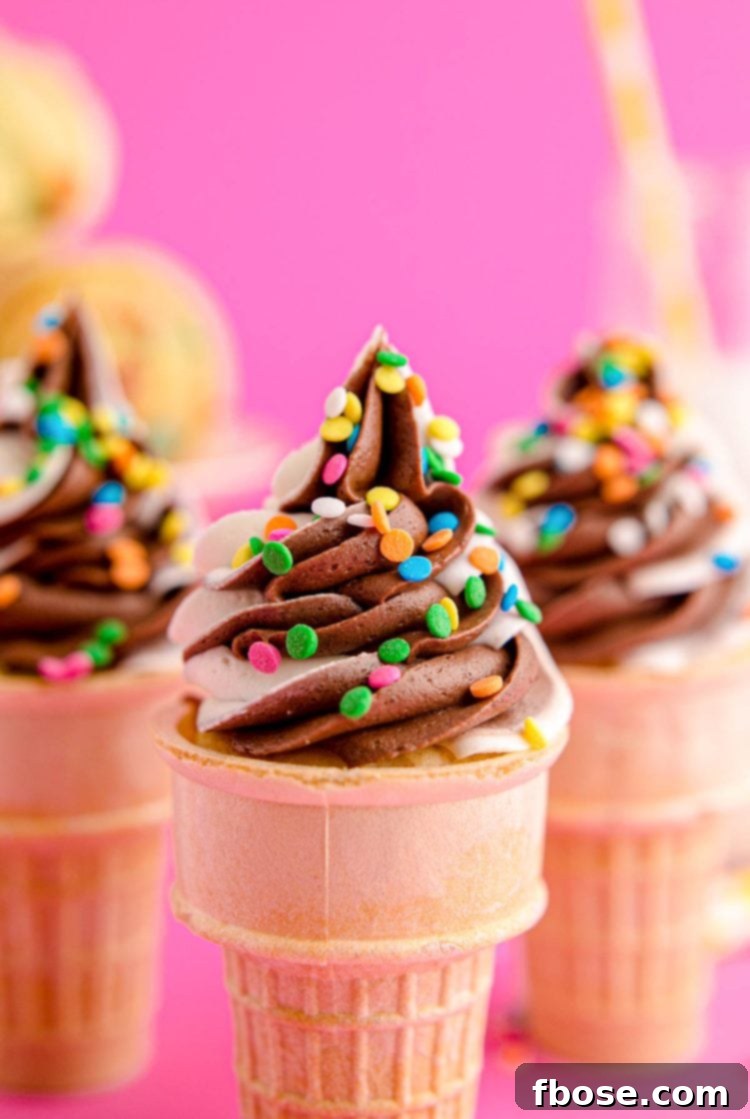
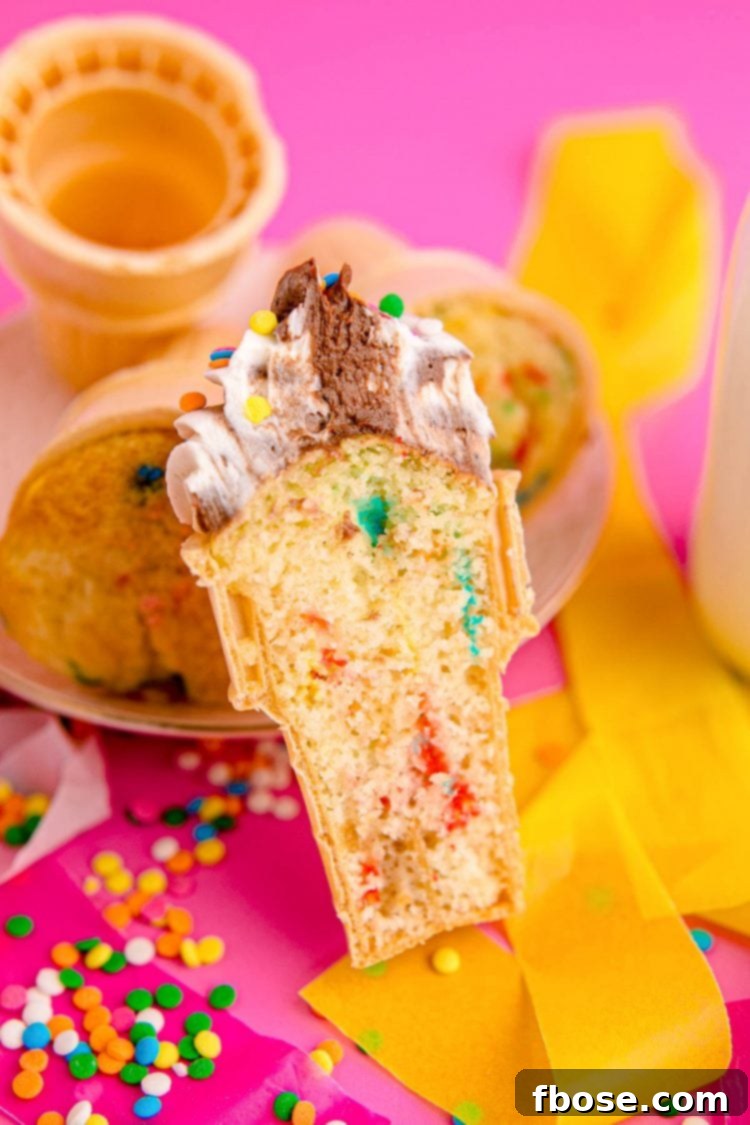
The beauty of these cupcakes lies in their clever presentation. Each sturdy flat-bottom ice cream cone cradles a perfectly baked, moist cake base. The crown jewel is the sweet, velvety buttercream, expertly piped to resemble a whimsical soft-serve ice cream cone. A final flourish of vibrant sprinkles adds that extra touch of joy and color, transforming a simple cupcake into an extraordinary, edible masterpiece. They’re not just desserts; they’re an experience, delightful to look at and even better to eat!
Why This Recipe Is a Must-Try!
Our Ice Cream Cone Cupcakes aren’t just delicious; they’re also incredibly practical and versatile. Here’s why this recipe will become a cherished favorite in your baking repertoire:
- Perfect for Any Crowd: This recipe graciously yields a generous two dozen cupcakes in ice cream cones, making it the ultimate crowd-pleaser. Whether you’re hosting a lively birthday party, a casual backyard BBQ, a festive holiday gathering, or any fun get-together, you’ll have more than enough to go around, ensuring everyone gets to enjoy this delightful treat.
- Excellent Make-Ahead Option: Event planning can be hectic, but these cupcakes help lighten the load! You can easily prepare them a day or two in advance, freeing up valuable time on the day of your event. This means less stress and more enjoyment for you, without compromising on freshness or flavor.
- Effortless with Boxed Cake Mix: Forget about pulling out countless ingredients and meticulously measuring everything from scratch. This recipe embraces the simplicity and convenience of a boxed cake mix. Just grab your favorite flavor from the grocery store, follow the package instructions for the cake batter, and you’re halfway to a fantastic dessert. It’s baking made easy and accessible!
- Endless Flavor Customization: The versatility of these cupcakes is one of their greatest strengths. While a classic funfetti cake is always a hit, feel free to unleash your creativity! Easily choose different cake mix flavors and pair them with complementary frostings to create unique and delicious combinations. Imagine a rich chocolate cake mix with vanilla buttercream, a vibrant strawberry cake with lemon frosting, or even a decadent red velvet cake topped with cream cheese frosting. The possibilities are truly endless, allowing you to tailor these treats to any taste or theme.
- Visually Stunning Presentation: These aren’t just any cupcakes; they are desserts that truly stand out! The unique presentation in ice cream cones, coupled with the artful swirl of frosting and colorful sprinkles, makes them incredibly appealing. They’re a feast for the eyes as much as they are for the palate, guaranteed to elicit “oohs” and “aahs” from guests of all ages.
- Kid-Friendly Fun: Not only do kids adore eating these, but they can also get involved in the making process! From stirring the cake batter (with supervision!) to adding the sprinkles, the hands-on fun adds another layer of enjoyment, making it a wonderful activity for budding young bakers.
Essential Ingredients for Your Ice Cream Cone Cupcakes
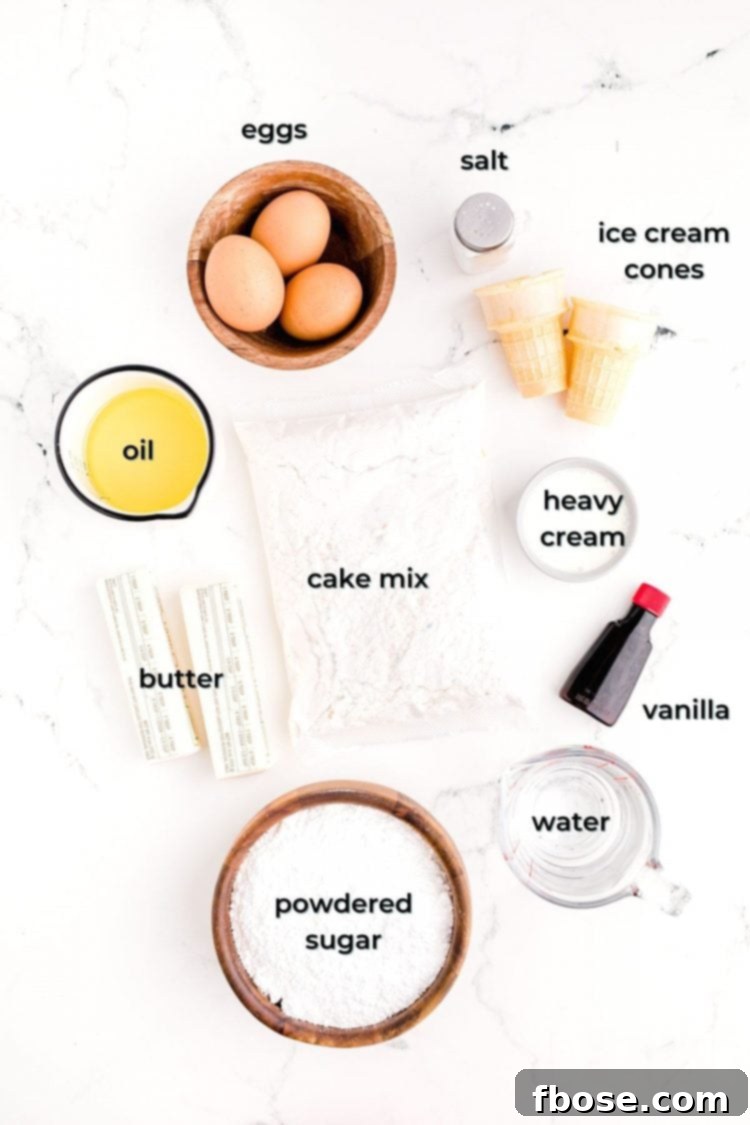
Crafting these delightful Cupcakes In A Cone is wonderfully straightforward, leaning into convenience without sacrificing flavor. We kick things off by utilizing a classic boxed funfetti cake mix, which brings a joyful burst of color and a reliably moist texture to your cupcakes. Simply follow the package instructions to prepare your cake batter, then carefully pour it into flat-bottom ice cream cones before baking to perfection.
It’s truly that easy! The most challenging decision might be choosing your frosting! Will you go for a rich, velvety chocolate buttercream, a light and fluffy vanilla buttercream, or perhaps an eye-catching twist of both? Each option promises to elevate these treats to dessert perfection.
For a dreamy vanilla buttercream, you’ll need just a few pantry staples: softened unsalted butter, fine powdered sugar, a touch of heavy cream, pure vanilla extract, and a pinch of salt to balance the sweetness. If your heart desires chocolate, simply incorporate unsweetened cocoa powder into your vanilla buttercream for a decadent twist. The beauty of homemade buttercream is its adaptability – you can adjust the consistency and sweetness to your preference, ensuring a perfectly piped swirl every time.
Don’t stop there! The topping possibilities are endless. Consider experimenting with other fantastic frosting recipes like a luscious Peanut Butter Cream Cheese Frosting, a bright and fruity Easy Strawberry Frosting, or even a warm and spicy Cinnamon Frosting. Once frosted, personalize each cone cake with a vibrant assortment of sprinkles, crunchy mini chocolate chips, or even a classic maraschino cherry on top for that authentic ice cream parlor look!
Simple Steps to Your Perfect Ice Cream Cone Cupcakes
Creating these charming Ice Cream Cone Cupcakes is a straightforward process that’s enjoyable for bakers of all skill levels. Follow these easy steps to bring your vision to life:
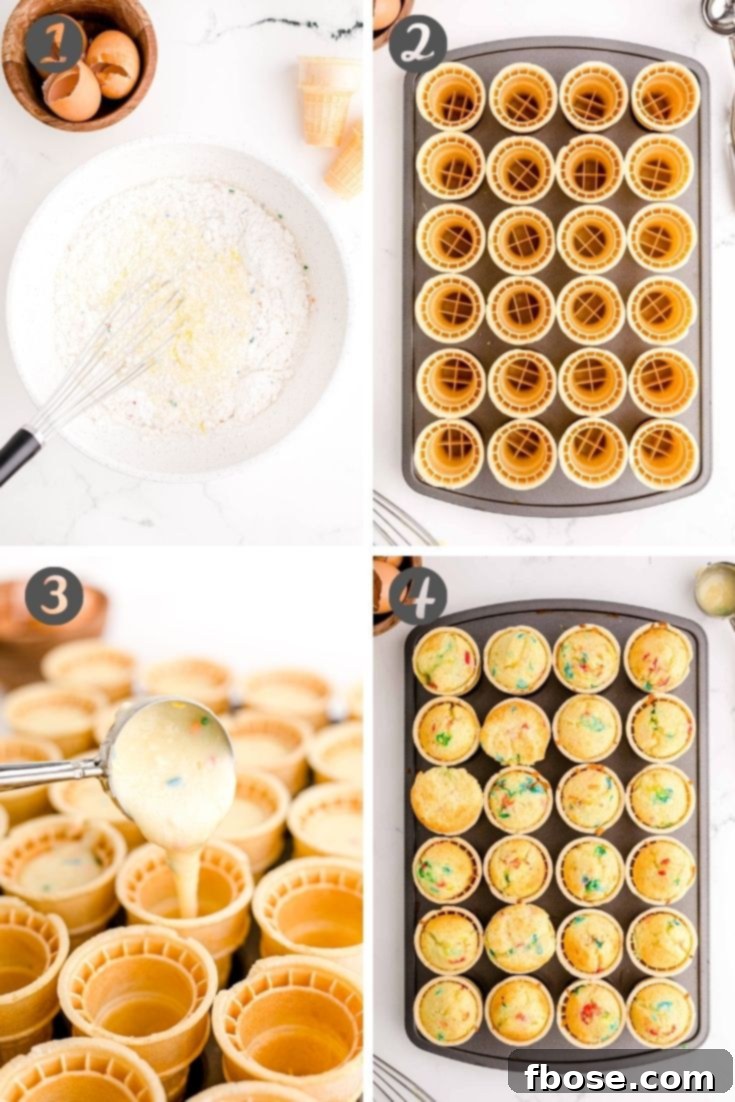
- Preheat and Prepare: Begin by preheating your oven to 350 degrees F (175 degrees C). Arrange your flat-bottom ice cream cones securely in each well of a mini muffin tin. This clever trick keeps the cones stable during baking, ensuring your cupcakes come out perfectly shaped.
- Mix the Batter: Prepare your chosen boxed cake mix according to the package instructions. Whether it’s funfetti, chocolate, or vanilla, simply follow the directions for a consistently delicious batter.
- Fill the Cones: Carefully spoon or use a small ice cream scoop to add cake batter into each ice cream cone. Fill them to just below the rim – approximately 3 tablespoons per cone is ideal. Avoid overfilling, as this can cause the batter to spill over during baking and result in soggy cone edges. Don’t worry if each cupcake bakes up slightly differently in shape; the frosting will beautifully unify their appearance!
- Bake to Perfection: Place the muffin tin with the filled cones into your preheated oven. Bake for approximately 23 to 25 minutes, or until a toothpick inserted into the center of a cupcake comes out clean. This indicates they are fully cooked. Once baked, remove them from the oven and allow them to cool completely on a wire rack for about 30 to 60 minutes. Cooling thoroughly is crucial before frosting to prevent the buttercream from melting.
Crafting the Iconic Twist Frosting
The iconic twist frosting is what truly transforms these cupcakes into their ice cream cone persona. Here’s how to create that perfect swirl of two-toned delight:
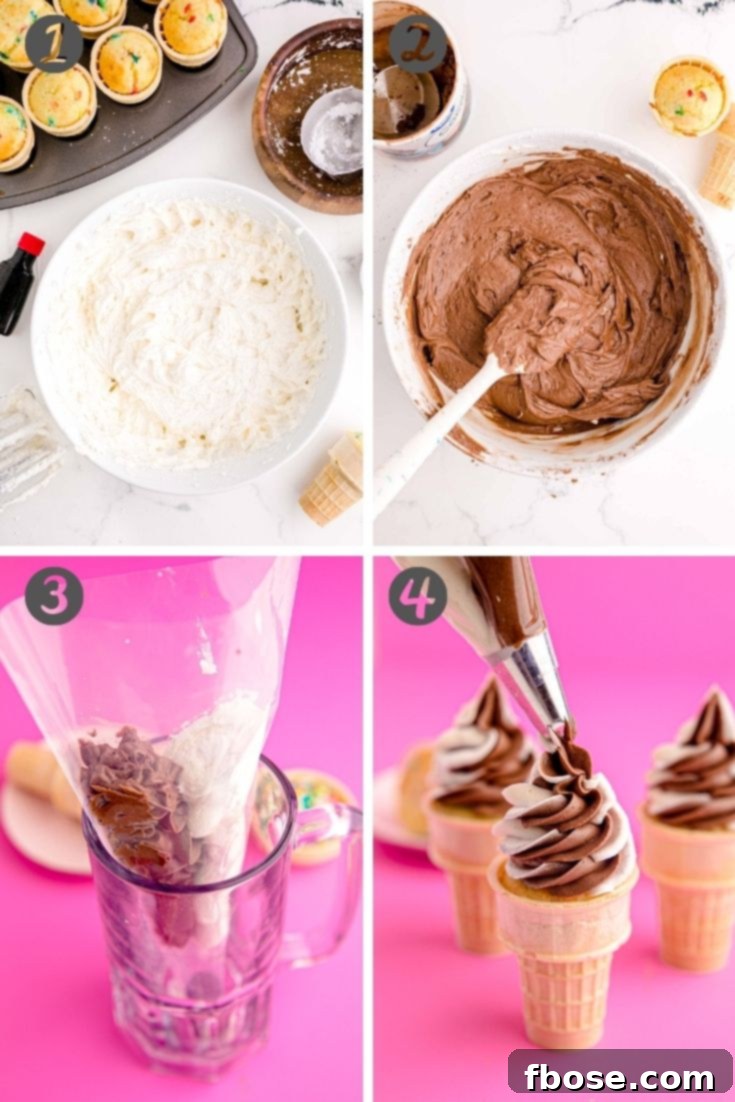
- Prepare Vanilla Buttercream: In a large mixing bowl or a stand mixer fitted with a paddle attachment, cream the softened unsalted butter on low speed until it’s light, pale, and smooth. Gradually add 3 cups of powdered sugar and 3 tablespoons of heavy cream, alternating between the two while mixing on low speed over the course of about 3 minutes. If the frosting is too stiff, add the remaining cream; if it’s too thin, incorporate the remaining powdered sugar until you reach a desired piping consistency. Stir in the vanilla extract and salt, then beat on medium-high speed for 2 to 3 minutes until the frosting becomes wonderfully light and fluffy.
- Create Chocolate Buttercream: Once your vanilla buttercream is ready, carefully remove about half of it from the mixing bowl and set it aside. To the remaining vanilla buttercream in the bowl, add ½ cup of unsweetened cocoa powder and 2 tablespoons of vanilla extract. Mix on low speed until the cocoa powder is fully incorporated and the chocolate frosting is smooth and well blended.
- Load the Pastry Bag: To achieve the beautiful twist effect, you have a couple of options. You can either carefully spoon both the vanilla and chocolate frostings side-by-side into a single large pastry bag fitted with a Wilton 2D tip, or you can place each frosting into separate smaller piping bags, then insert both smaller bags into a larger piping bag with the tip. This method ensures an even distribution of both colors for a striking swirl.
- Pipe and Garnish: Hold the pastry bag vertically over the center of a cooled cupcake and gently pipe the frosting in a circular motion, starting from the outside edge and spiraling upwards to create a classic soft-serve swirl. Alternatively, if piping isn’t your forte, you can simply use a knife or small offset spatula to spread a generous dollop of frosting onto each cupcake. For the grand finale, generously garnish your freshly frosted Ice Cream Cone Cupcakes with colorful sprinkles, chocolate shavings, or any other fun topping you desire!
Frequently Asked Questions About Ice Cream Cone Cupcakes
Here are some common questions and helpful tips to ensure your Ice Cream Cone Cupcakes are always a resounding success:
How To Store These Delicious Cupcakes
To keep your Ice Cream Cone Cupcakes at their best, store them uncovered at room temperature for up to 3 days. This method helps the cones maintain their crispiness. After 3 days, if you have any leftovers (which is unlikely!), transfer them to an airtight container and place them in the refrigerator for an additional 2 days. Be aware that the cones may soften slightly over time due to moisture, especially when refrigerated, but they will still be utterly delicious.
Do I Need to Secure the Cones Before Baking?
For most flat-bottom cones placed in a mini muffin tin, securing them isn’t strictly necessary if you handle the pan carefully. However, if your cones feel a bit wobbly or “tipsy,” a simple trick is to wrap a small piece of aluminum foil around the bottom of each cone. This will create a tighter, more secure fit within the muffin pan wells, preventing them from tipping over during baking. If you don’t have a mini muffin pan, you can use a regular cupcake pan and wrap foil around the base of each cone to hold them steady.
Can I Make a Smaller Batch, Like Just 12 Cones?
While you can certainly choose to bake fewer than 24 cones, it’s crucial not to overfill the cones you do use. Each cone should ideally be filled with about 3 tablespoons of batter, as directed in the recipe. Overfilling will cause the batter to overflow and bake improperly, resulting in soggy rims. If you only want to make 12 cupcakes, simply fill 12 cones with the recommended amount of batter. You will likely have leftover cake batter, which can be used to bake a few traditional cupcakes or mini cupcakes in a separate pan.
What’s the Best Way to Transport Ice Cream Cone Cupcakes?
Transporting these tall and whimsical treats can be tricky, but there’s a simple solution to keep them intact. The easiest method is to cut holes into the top of an empty cereal box (or any sturdy cardboard box) that are slightly larger than the circumference of your ice cream cones. Carefully place each cupcake into a hole, allowing the cone to sit securely. This prevents them from sliding around and keeps the frosting pristine. For smaller batches or when taking just a few to a friend, the individual compartments of an empty egg carton can also work surprisingly well!
Tips for Perfect Ice Cream Cone Cupcakes Every Time
Achieving bakery-worthy results with your Ice Cream Cone Cupcakes is easier than you think. Here are some extra tips to ensure your treats are always a success:
- Don’t Overmix the Batter: When preparing your boxed cake mix, mix only until the ingredients are just combined. Overmixing can lead to a tough, dense cake. A few small lumps are perfectly fine!
- Room Temperature Butter for Frosting: For the silkiest, most delicious buttercream, ensure your unsalted butter is at true room temperature. It should be soft enough to indent with your finger without melting. This allows it to cream beautifully, incorporating air for a light and fluffy texture.
- Sift Powdered Sugar: To avoid lumps in your buttercream, sift your powdered sugar before adding it to the butter. This small step makes a huge difference in achieving a smooth, professional-looking frosting.
- Experiment with Toppings: While sprinkles are classic, don’t hesitate to get creative! Crushed cookies, mini chocolate chips, chopped nuts, a drizzle of caramel or chocolate sauce, or even fresh fruit can elevate your cupcakes.
- Consider Mini Cones: For a bite-sized treat, you can use mini ice cream cones and adjust baking time accordingly (usually a few minutes less). This is perfect for parties with lots of other desserts.
- Personalize for Themes: Match your cake mix and frosting colors to your party theme! Use blue and white frosting for a “sky” theme, or red and green for holidays.
Variations to Explore
Unleash your inner pastry chef with these exciting variations for your Ice Cream Cone Cupcakes:
- Citrus Burst: Use a lemon or orange cake mix and top with a bright lemon or orange zest-infused buttercream.
- Tropical Paradise: A pineapple or coconut cake mix with a hint of lime in the frosting makes for a refreshing treat.
- Mocha Delight: Add a tablespoon of instant espresso powder to your chocolate cake mix and chocolate buttercream for a deep, rich mocha flavor.
- Spiced Fall Flavors: Opt for a spice cake mix and pair it with a cinnamon cream cheese frosting for a cozy autumn dessert.
- Marble Swirl: Divide your cake batter and tint half with food coloring or cocoa powder, then swirl them together lightly in the cones for a marbled effect.
Serving Suggestions for Maximum Impact
Make your Ice Cream Cone Cupcakes even more memorable with these serving ideas:
- Dessert Bar Centerpiece: Arrange them beautifully on a tiered cake stand or a decorative platter as the centerpiece of your dessert table.
- Individual Stands: Place each cupcake in a small clear plastic cup or a mini muffin liner to make them easier to pick up and protect the cone.
- Party Favors: Wrap individual cupcakes in clear cellophane bags with a ribbon for delightful take-home party favors.
- Pair with Beverages: Serve alongside glasses of milk, iced coffee, or even sparkling lemonade for a complete treat experience.
I absolutely adore how these Ice Cream Cone Cupcakes are not only incredibly fun and visually engaging but also remarkably easy to prepare, all while delivering a supremely satisfying dessert experience. They truly bridge the gap between simple home baking and impressive presentation. For more delightful dessert ideas, be sure to explore our collection of tried-and-true cupcake recipes that everyone will cherish!
- Strawberry Milkshake Cupcakes – Indulge in cupcakes featuring a delicate vanilla malt base, crowned with a luscious strawberry milk whipped cream frosting that evokes childhood nostalgia.
- Lemon Cupcakes with Strawberry Buttercream – Discover a harmonious blend of zesty citrus and sweet berries in these delightful cupcakes, a truly refreshing and irresistible treat.
- Harry Potter Butterbeer Cupcakes – Embark on a magical flavor journey with cupcakes bursting with enchanting notes of toffee, butterscotch, rich caramel, and creamy vanilla.
- Coffee Maple Bacon Cupcakes – Experience a unique fusion of flavors with maple-infused vanilla cupcakes, studded with crispy bacon pieces, and elegantly finished with a smooth coffee-flavored whipped cream.
- Chocolate Peanut Butter Cupcakes – Dive into the ultimate classic combination with rich, incredibly moist chocolate cupcakes, each hiding a delightful center filled with Reese’s Pieces candy.
Let’s Connect and Share Your Creations!
If you’ve tried this fantastic Ice Cream Cone Cupcake recipe, we would absolutely love to hear from you! Please share your thoughts and let us know how much you enjoyed them in the comments section below, and don’t forget to leave a star rating. Your feedback truly brightens our day!
And don’t be shy – make sure to tag us – @sugarandsoulco – on Instagram and Pinterest with your beautiful photos. You can also join our vibrant Sugar & Soul Show-offs Community on Facebook and share your creations there, where you can participate in our fun recipe challenges and connect with fellow baking enthusiasts!

Ice Cream Cone Cupcakes
Rebecca Hubbell
Dessert
American
35
25
30
1 30
Servings
24 people
Ingredients
Cupcakes
- 1 (15oz.) box funfetti cake mix + ingredients called for on box
- 24 ice cream cones flat bottoms
Vanilla Buttercream Recipe
- 1 cup unsalted butter softened
- 3-4 cups powdered sugar
- 3-4 tablespoons heavy cream
- 1 tablespoon vanilla extract
- ¼ teaspoon salt
Chocolate Buttercream (to be added to half of vanilla buttercream)
- ½ cup unsweetened cocoa powder
- 2 tablespoons vanilla extract
- Sprinkles optional
Instructions
-
Preheat the oven to 350°F and prepare the cake batter according to the directions on the back of the box.
-
Place a cone in each well of a 24-count mini cupcake pan and set aside.
-
Add 3 Tablespoons of cake batter into each of the cones, filling to just below the inside rim. You can spoon the batter in or use a small ice cream scoop to be more accurate. Do not overfill. If you do, the batter will spill over while cooking and make the rims of the cones soggy. Each cone may bake up a little differently in shape but they will look great as soon as you frost them!
-
Bake for 23 to 25 minutes or until a toothpick comes clean from the center of the cupcakes.
-
Allow them to cool completely, about 30 to 60 minutes.
-
Meanwhile, prepare the buttercream by creaming the butter in a large bowl or stand mixer fitted with a paddle attachment on low speed until pale and smooth.
-
Add in 3 cups of powdered sugar and 3 tablespoons heavy cream a little at a time, alternating between each, while mixing on low speed over the course of 3 minutes.
-
If your frosting needs a stiffer consistency, add the remaining sugar. If your frosting needs to be thinned out, add the remaining cream.
-
Add vanilla and salt and beat on medium-high speed for about 2 to 3 minutes until the frosting is light and fluffy.
-
If you want to make a twist frosting, remove half of the vanilla buttercream from the mixing bowl and set aside. To make the chocolate buttercream, add ½ cup of unsweetened cocoa powder and 2 tablespoons of vanilla extract to the remaining frosting and mix until incorporated.
-
Pipe the frosting into a swirl using a Wilton 2D tip and piping bag.
-
Add sprinkles on top for a fun garnish if desired!
Notes
- Storage Instructions: For optimal crispiness of the cones, store these uncovered at room temperature for up to 3 days. After this period, or if you prefer, place them in an airtight container and refrigerate for an additional 2 days. Please note that the cones will gradually soften over time.
- Does this work with different flavors of cake? Absolutely! Feel free to use your favorite cake mix flavor. Chocolate and red velvet are particularly amazing choices and will yield delicious results.
- Securing Tipsy Cones: While I found my cones stayed upright without an issue when the pan was moved carefully, if yours tend to wobble, you can wrap a small strip of aluminum foil around the bottom of each cone. This helps create a snugger fit in the mini muffin pan. If you don’t have a mini muffin pan, a regular cupcake pan with foil around the cone bases works perfectly.
- Making a Smaller Batch: If you only need or have 12 cones, simply fill them with the recommended 3 tablespoons of batter each. Do not overfill, as this will prevent proper baking. You will have leftover batter, which can be baked into regular or mini cupcakes.
- Transportation Methods: The easiest way to transport these delicate treats is to cut holes into an empty cereal box (or any sturdy cardboard box). Make the holes slightly larger than the cone’s circumference. For a few cupcakes, an egg carton, with the hole-side up, also works wonderfully.
- Advance Preparation: These cupcakes can be made ahead of time, but for the best texture and crispness, they are truly at their peak within a few days. Beyond that, the cones may start to become a bit soggy.
Nutrition
Per serving (approximately 1 cupcake):
Calories: 160kcal | Carbohydrates: 19g | Protein: 1g | Fat: 10g | Saturated Fat: 6g | Polyunsaturated Fat: 1g | Monounsaturated Fat: 3g | Trans Fat: 1g | Cholesterol: 25mg | Sodium: 38mg | Potassium: 37mg | Fiber: 1g | Sugar: 15g | Vitamin A: 291IU | Vitamin C: 1mg | Calcium: 8mg | Iron: 1mg
Did You Make This Recipe?
Don’t forget to share it with me on Instagram @sugarandsoulco and follow on Tiktok @sugarandsoulco and Pinterest @sugarandsoulco for more!
Pin Recipe
Share Recipe