
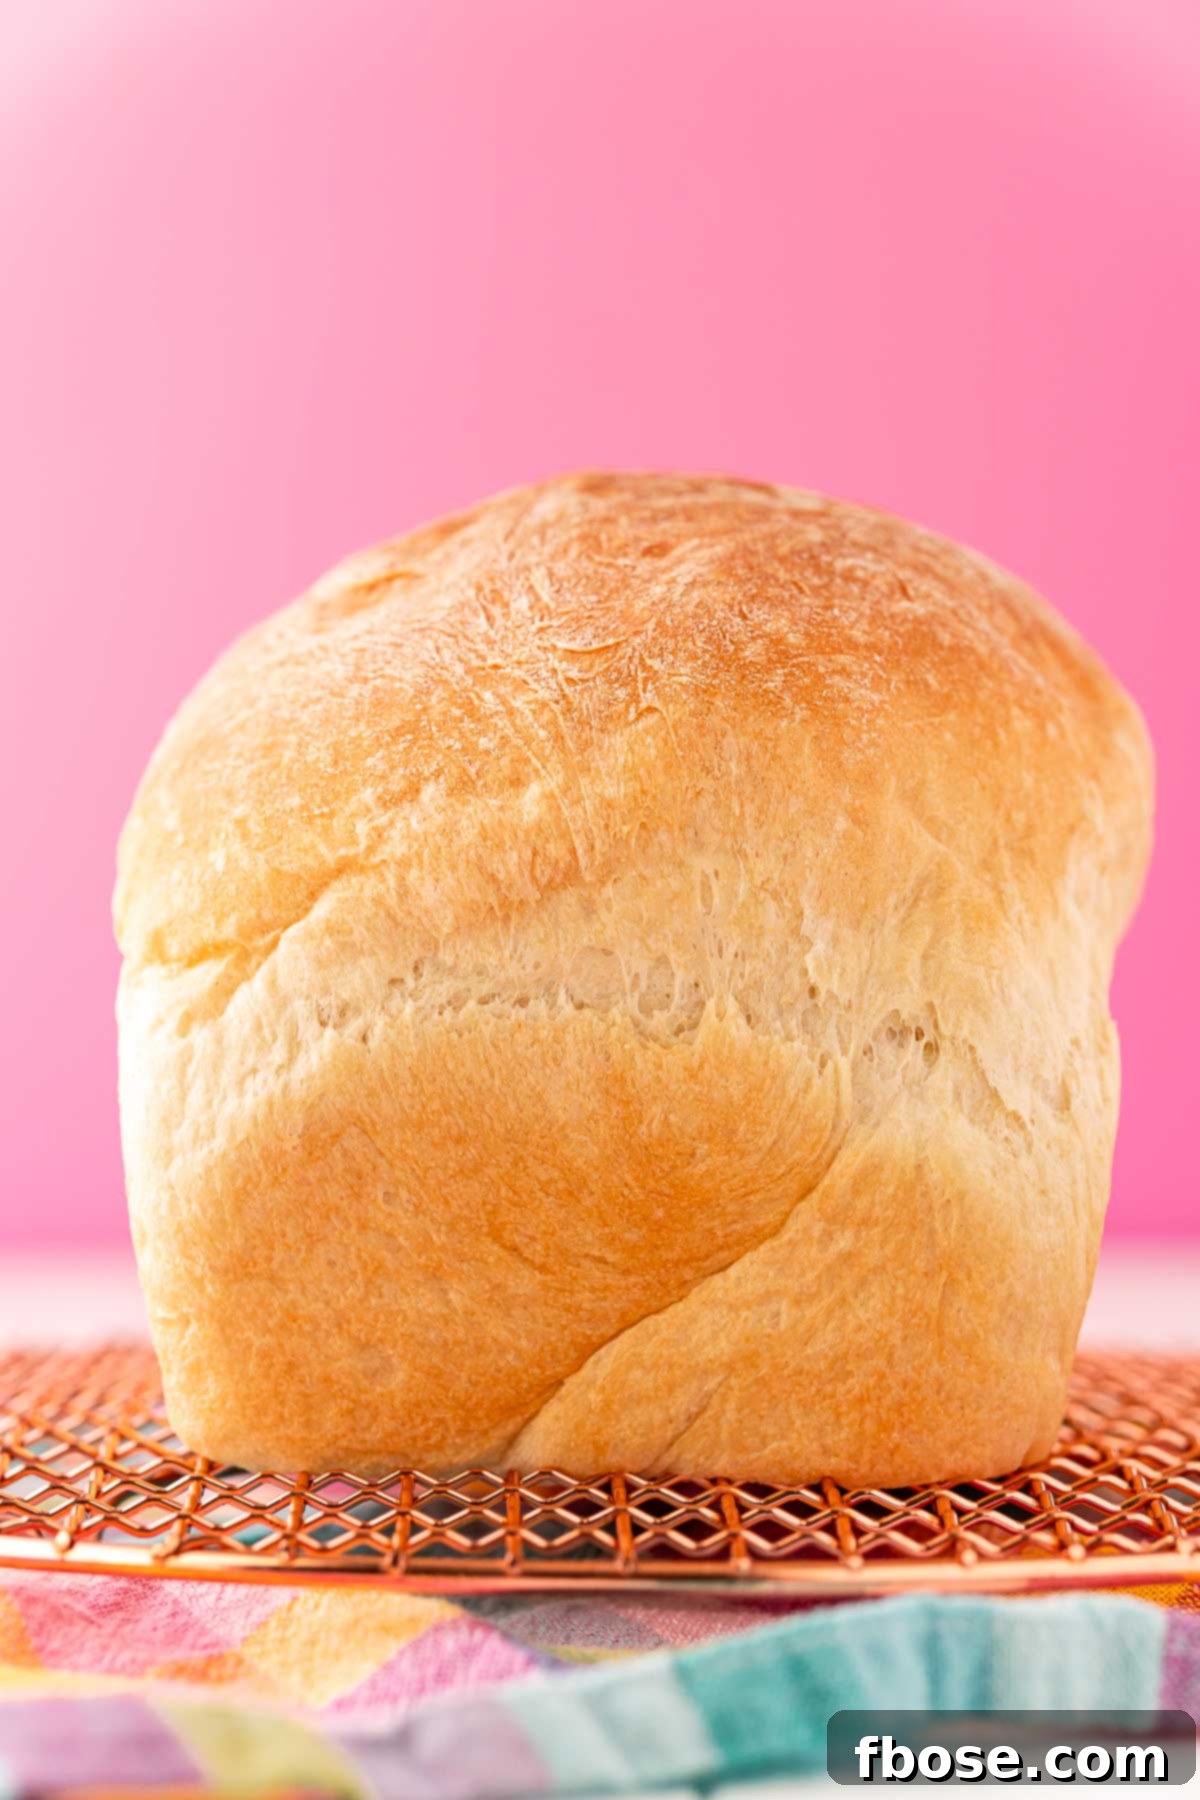
The Ultimate Guide to Easy Homemade White Bread: Fluffy, Tender & Versatile
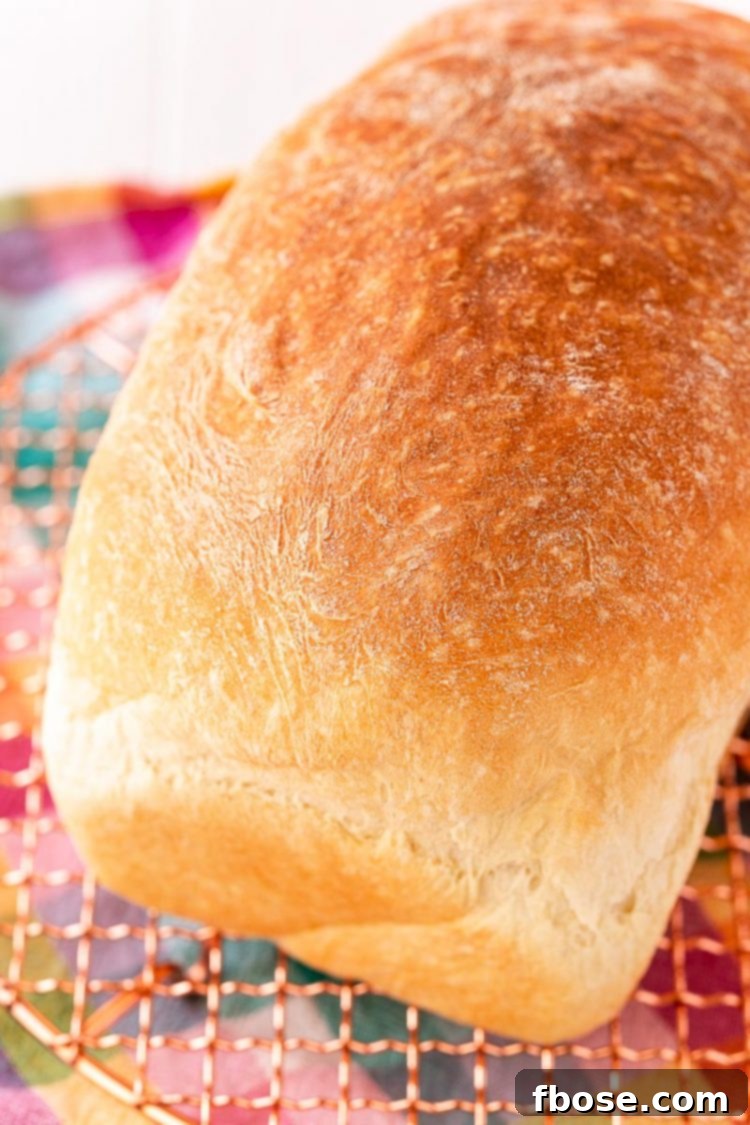
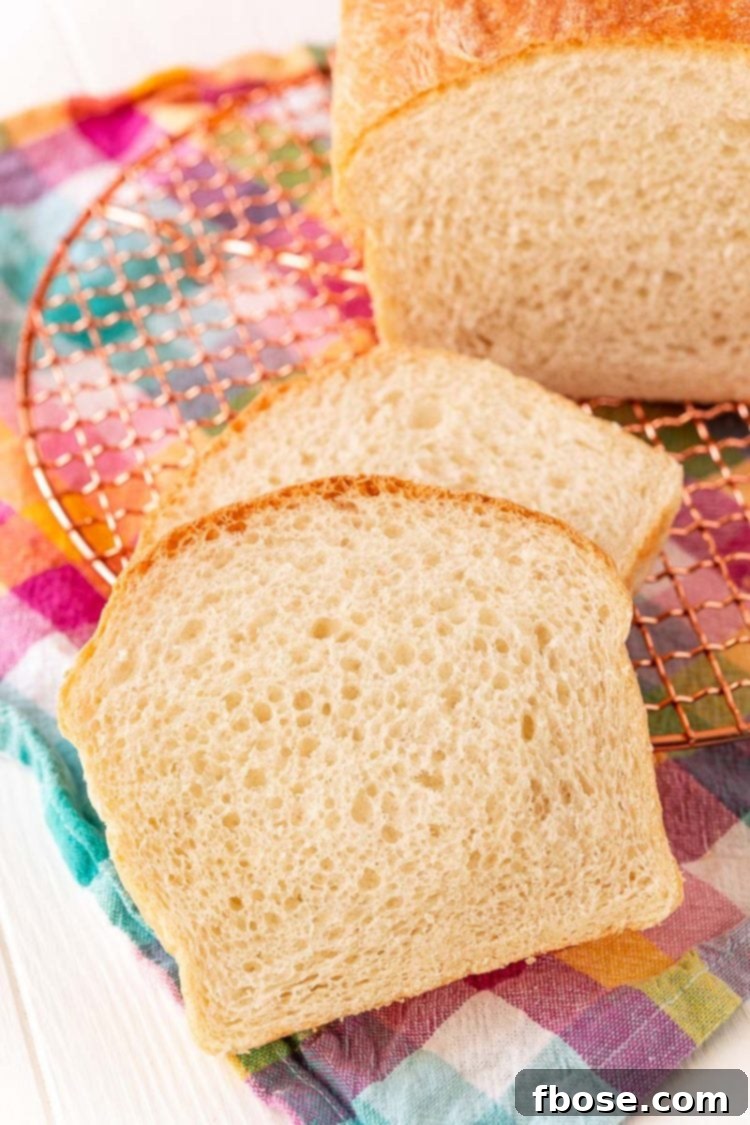
Embark on a delightful culinary journey with this incredibly simple homemade bread recipe. Forget any intimidation you might feel about baking from scratch; this guide is designed for success, offering clear, step-by-step instructions, insightful tips, and illustrative photos to help you create bakery-quality bread right in your own kitchen. The result? A magnificently fluffy, tender, and utterly delicious white bread, perfect for elevating your everyday sandwiches, transforming into gourmet French toast, or serving as a comforting side to any meal.
What makes this recipe truly special is its incredible versatility. With just one foundational dough, you can effortlessly transition from baking classic loaves to crafting soft dinner rolls or even decadent cinnamon buns! It’s a game-changer for home bakers looking to maximize their efforts and delight their families with a variety of fresh-baked goods. In fact, a version of this very dough forms the base for our beloved Cinnamon Swirl Bread, proving its adaptability and reliability.
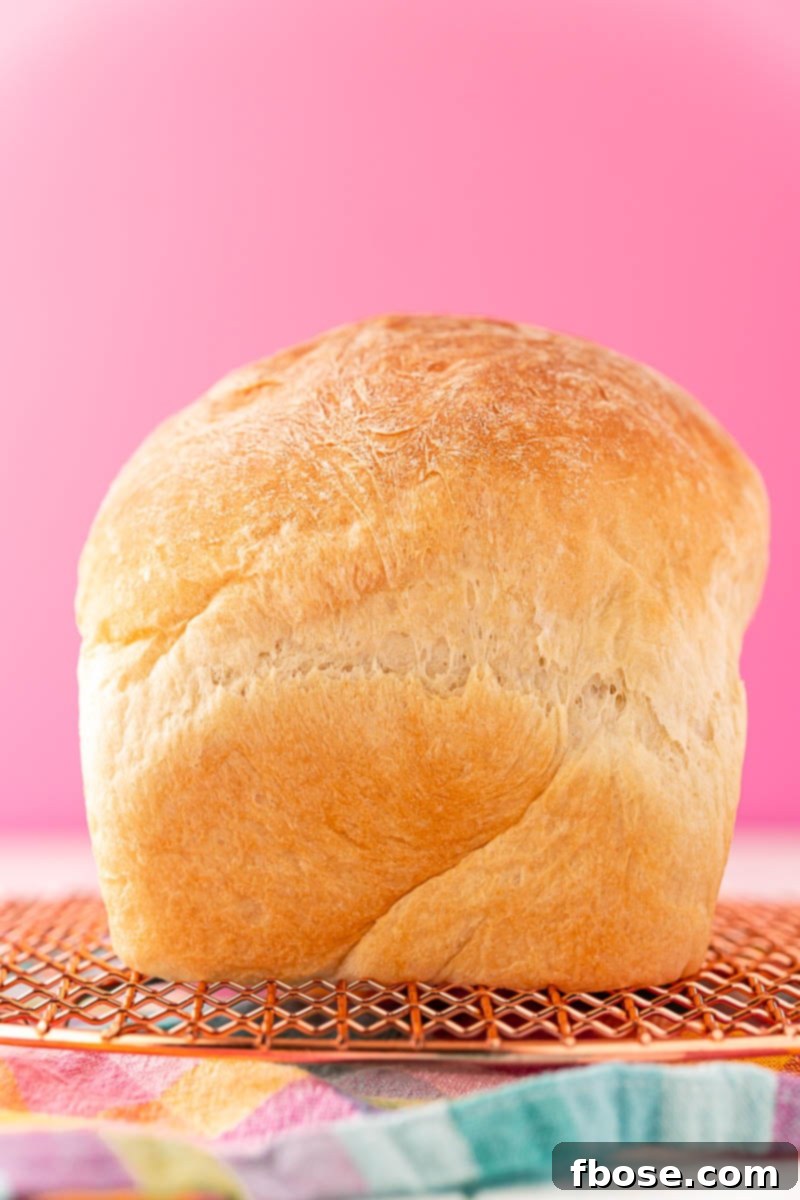
If the mere thought of baking your own bread feels daunting, I urge you to set those fears aside. This recipe is genuinely *easy*, designed for beginners and seasoned bakers alike. By following these straightforward steps, you’ll soon be enjoying the unparalleled aroma and taste of fresh bread, a reward that makes every moment in the kitchen worthwhile.
Essential Ingredients for Your Perfect Loaf
Crafting exceptional bread begins with understanding the role of each ingredient. Here’s a detailed look at what you’ll need and why each component is crucial:
- Yeast: The Life of Your Bread
You have two primary options here: instant yeast or active-dry yeast. For maximum convenience and a slightly faster process, instant yeast is highly recommended as it can be mixed directly with dry ingredients. If you opt for active-dry yeast, a simple activation step is required beforehand (see notes below for details). Ensuring your yeast is fresh and active is paramount for a proper rise.
- Flour: The Foundation of Texture
For the best possible results, I strongly advocate for bread flour. Its higher protein content leads to a stronger gluten structure, which translates to a superior rise and a wonderfully chewy yet tender crumb. During my recipe testing, bread flour consistently yielded a more desirable texture. However, if all-purpose flour is what you have on hand, it can certainly be used; just remember to add an additional 1/4 cup to achieve a similar consistency.
- Sugar: Fuel for Fermentation & Flavor
Beyond adding a hint of sweetness, sugar plays an absolutely critical role in this recipe. It serves as the primary food source for the yeast. As the yeast consumes the sugar, it produces carbon dioxide, which is what causes the dough to rise, creating those coveted airy pockets and a soft texture. It also contributes to the beautiful golden-brown crust and a subtle depth of flavor.
- Salt: Enhancing Taste & Controlling Yeast
Salt is not just for flavor; it’s a vital component in bread making. It balances the sweetness of the sugar, brings out the natural flavors of the flour, and helps to control the yeast’s activity. Without salt, bread can taste bland and the yeast might over-proof, leading to an undesirable texture.
- Water: Activating & Hydrating
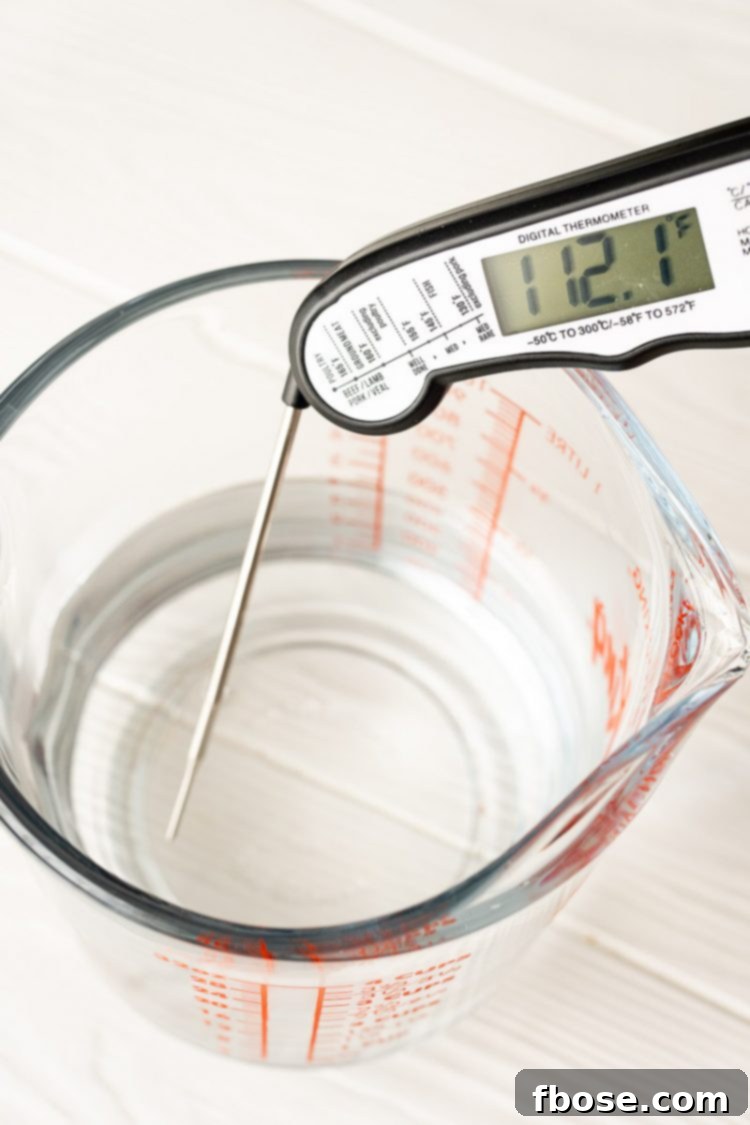
The temperature of your water is crucial for yeast activation. It needs to be warm enough to awaken the yeast but not so hot that it kills it. Aim for a temperature between 105°F (40°C) and 115°F (46°C). Water activates the yeast and hydrates the flour, allowing gluten to form. Too cold, and the yeast won’t activate; too hot, and it will be destroyed.
- Oil: For Suppleness & Shelf Life
Vegetable oil contributes significantly to the dough’s workability, making it smoother and easier to handle. It also improves the bread’s overall texture, resulting in a softer, more tender crumb. Additionally, oil helps to prolong the shelf life of your homemade loaf, keeping it fresh for longer.
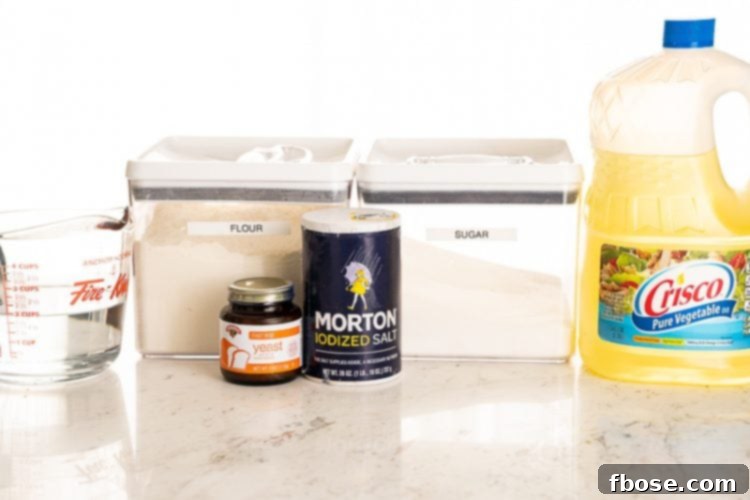
Step-by-Step: Crafting Your Homemade Loaf
Creating your own bread is a rewarding experience. Follow these detailed steps for a perfect loaf every time:
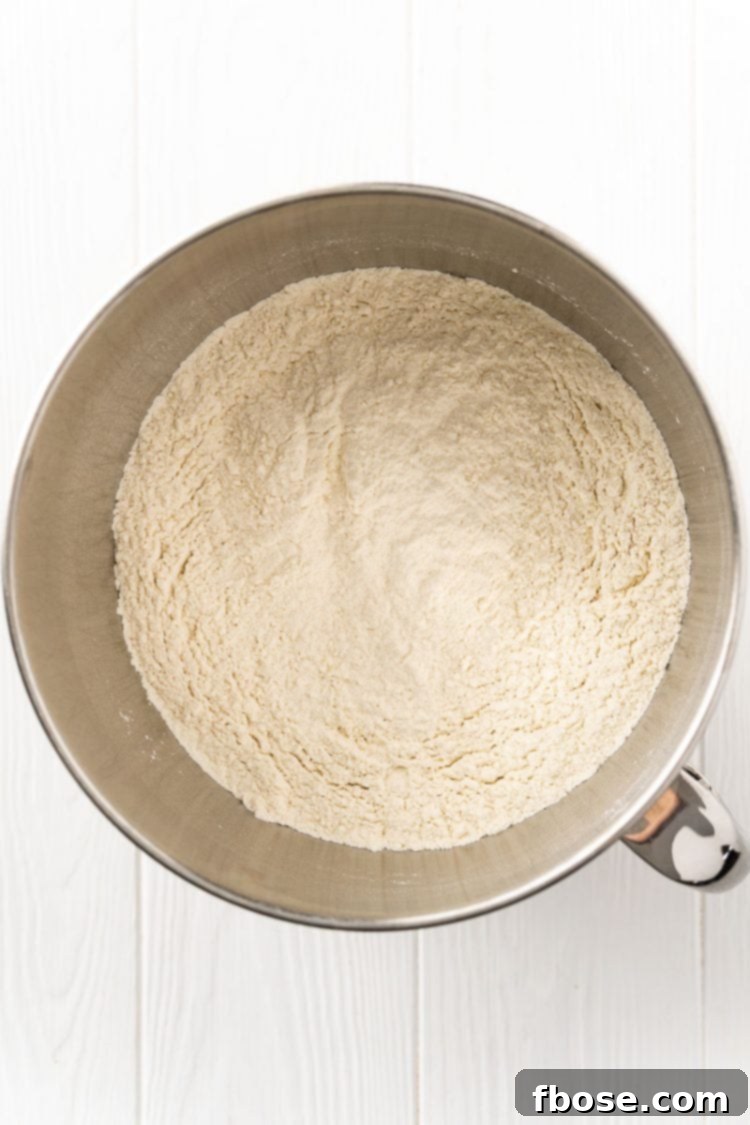
- Combine Dry Ingredients: Begin by combining your instant yeast (if using instant), bread flour, granulated sugar, and kosher salt in a large mixing bowl. For effortless and efficient mixing and kneading, I highly recommend using a stand mixer equipped with a dough hook attachment. However, don’t worry if you don’t have one; you can absolutely achieve fantastic results by mixing and kneading the dough by hand.
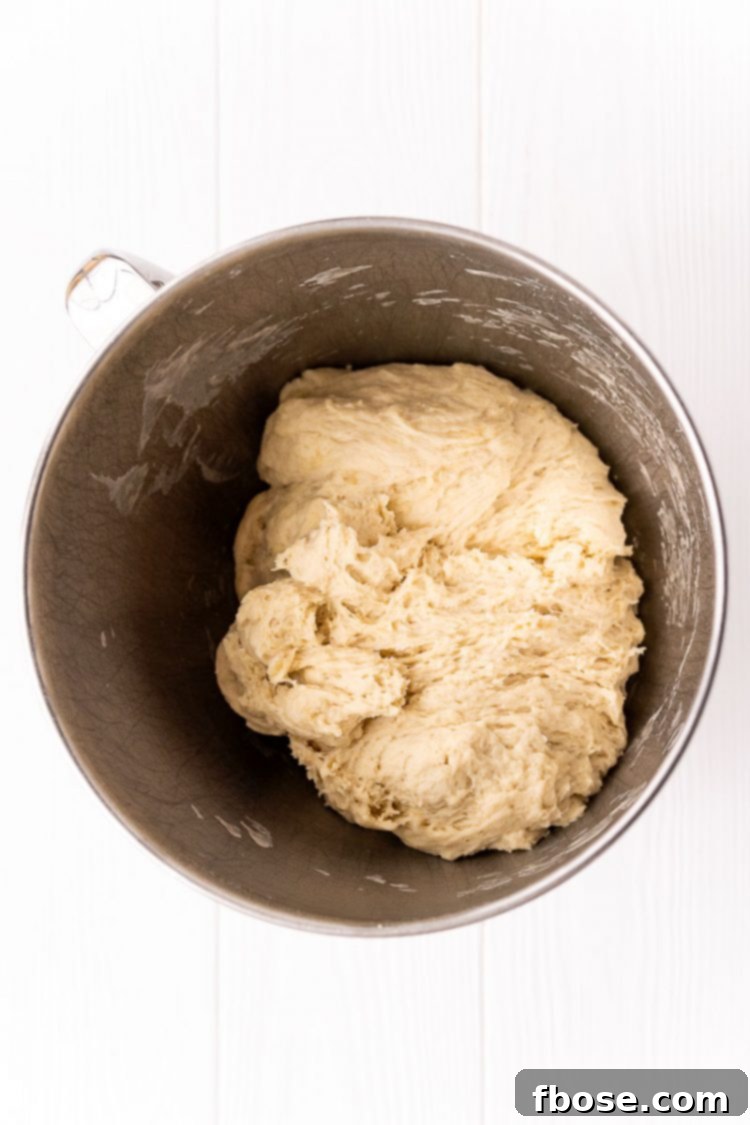
- Add Wet Ingredients & Mix: Ensure your warm water is between 105°F and 115°F (a digital thermometer is invaluable here for accuracy). Add the warm water and vegetable oil to your dry ingredients. Mix on medium speed with the dough hook for approximately 5 to 6 minutes. During this time, the dough will come together, initially sticking to the sides of the bowl before eventually pulling away cleanly.
- Kneading for Gluten Development: After 5 minutes, your dough should be thoroughly mixed and should have pulled completely away from the edges of the bowl, forming a smooth, cohesive ball, as demonstrated in the photo below. For an even stronger gluten structure, which is ideal if you plan to use this dough for something like pizza crust, you can continue mixing for an additional 1 to 2 minutes. This extended kneading helps to build the elasticity and chewiness.
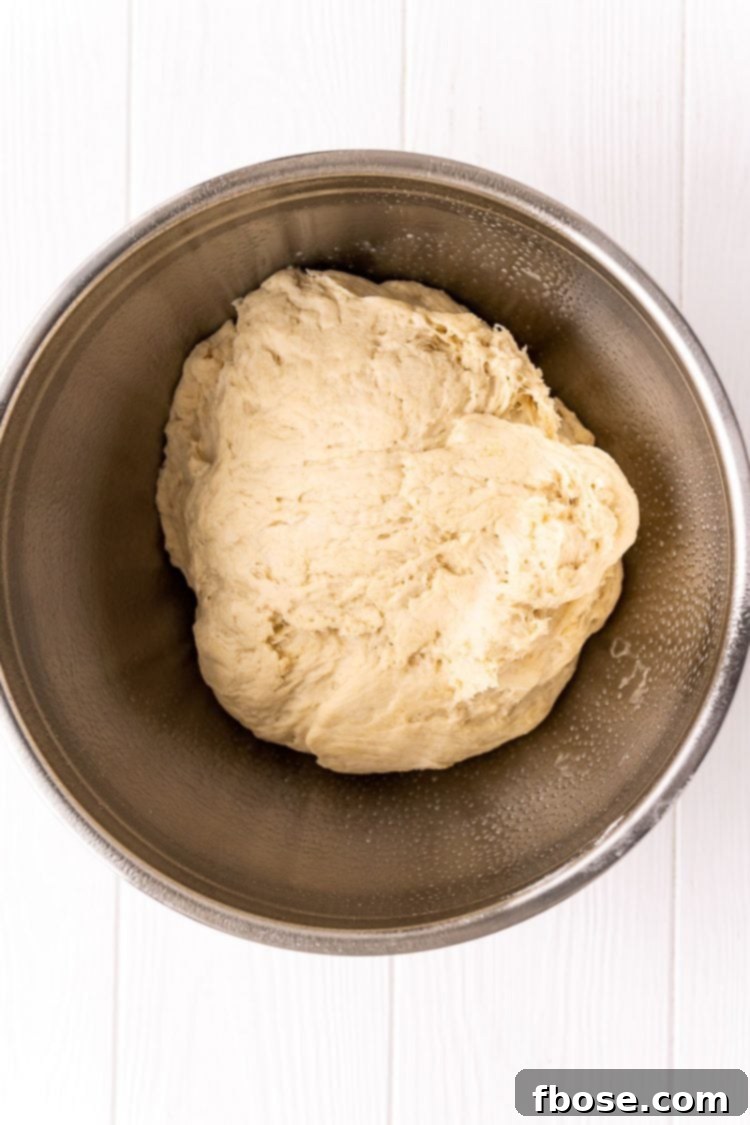
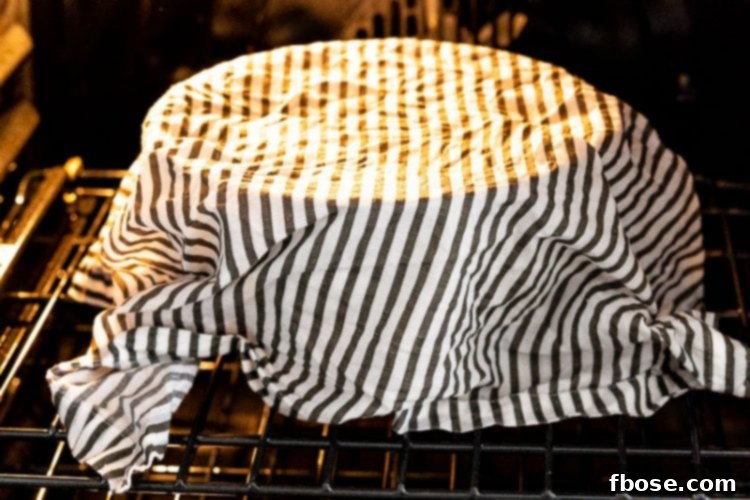
- First Rise (Proofing): Lightly grease a large glass or metal bowl with non-stick spray or a thin coat of vegetable oil. Transfer your kneaded dough into this bowl. I often use a 5-quart mixing bowl for this step to allow ample room for rising. Cover the bowl with a clean, damp (but not dripping wet) dishcloth. Place the bowl in a warm, draft-free area of your home to proof for 1 hour.
Pro Tip for Proofing: If your kitchen is cool, you can create a warm environment by turning your oven on for just 5 minutes, then turning it off before placing the covered bowl inside. Alternatively, place a baking dish filled with about 3 cups of boiling water on the rack below the dough bowl. Some modern ovens even feature a “Proof” setting, which is incredibly convenient.
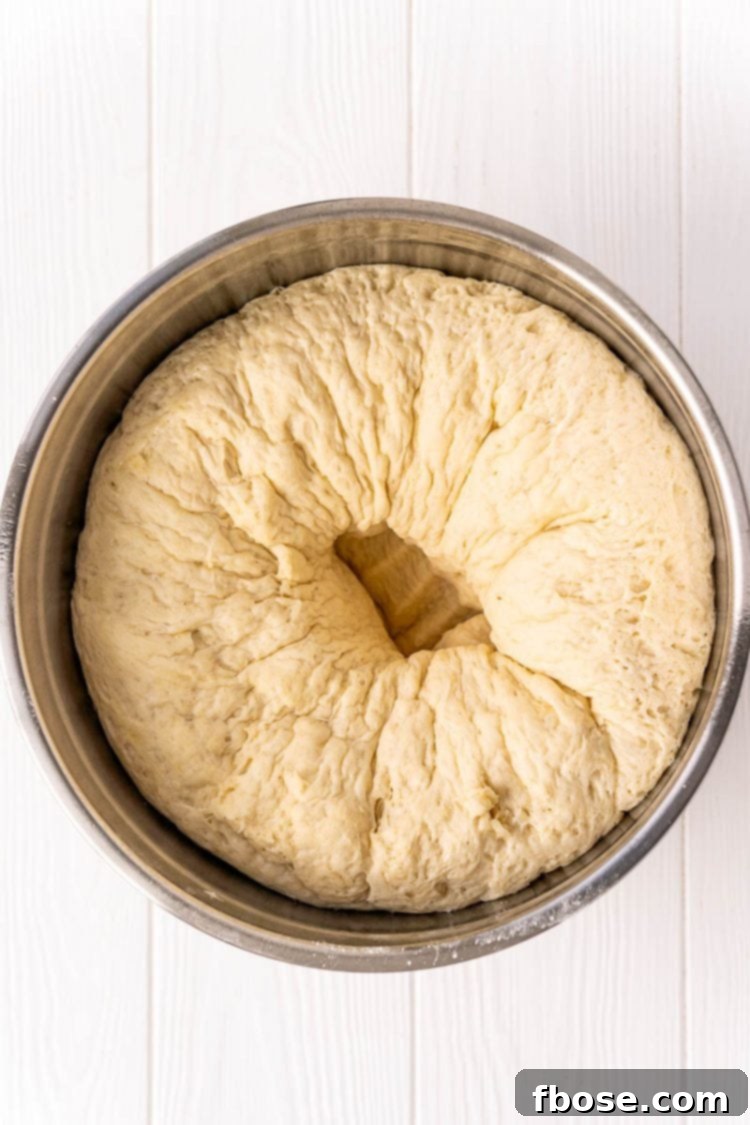
- Punch Down the Dough: After the first rise, the dough should have impressively doubled in size, often rising above the lip of the bowl. Gently remove the damp cloth and, using your fist, punch down the dough firmly in the center. This releases the excess air that accumulated during proofing, preparing the dough for its next stage.
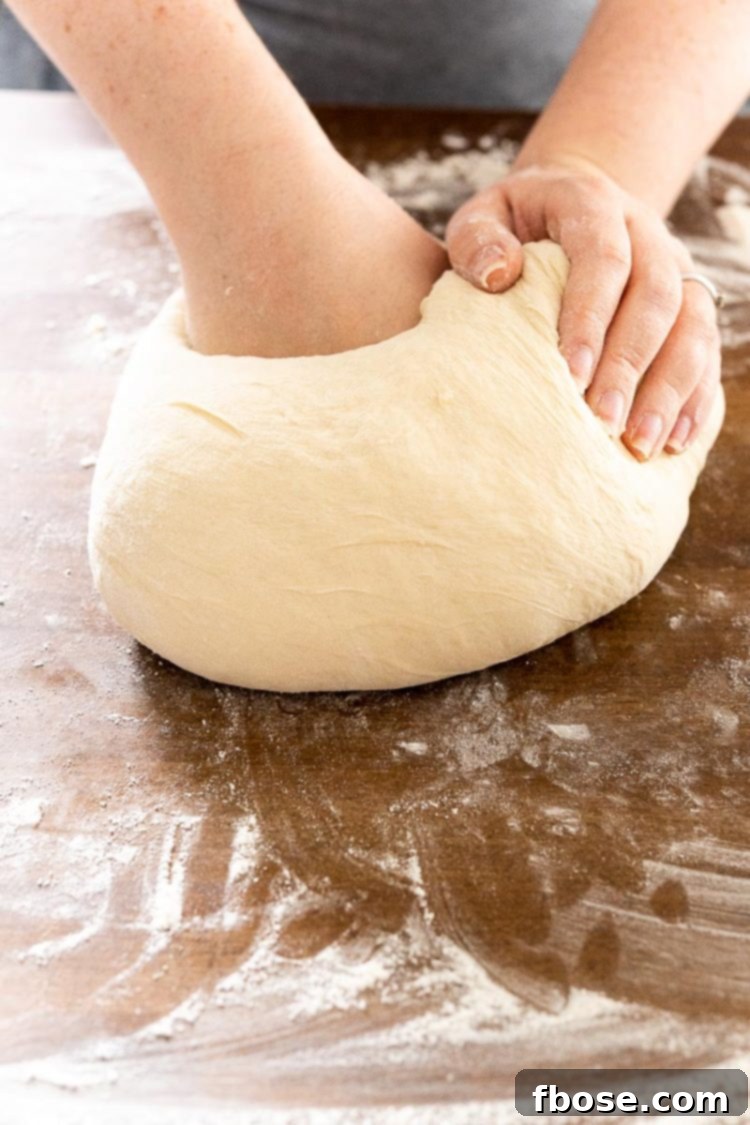
- Shape the Loaves: Transfer the punched-down dough to a lightly floured surface. Using a bench scraper makes dividing and handling the dough much easier. Divide the dough in half. Gently flatten each half to release any remaining large air bubbles. Knead each half for about 30 to 45 seconds, adding minimal flour as needed to prevent sticking without making the dough too stiff.
To shape your loaves, you can either pinch the edges of the dough into the middle, forming a tight ball, and then flip it seam-side down into your pan for a smooth, rounded top. Alternatively, use a floured rolling pin to roll the dough into a rectangular shape, then tightly roll it up into a log, similar to how you’d prepare cinnamon rolls (minus the cinnamon, of course!). Place each shaped loaf into a greased 9×5-inch loaf pan.
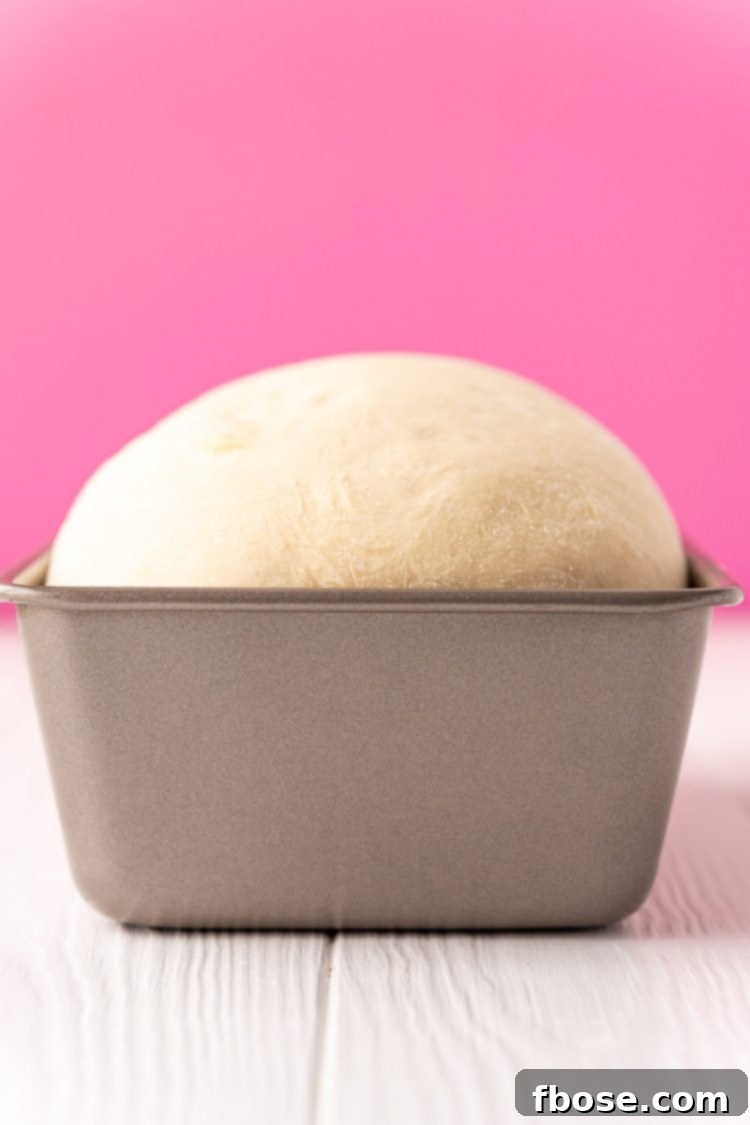
- Second Rise (Proofing in Pan): Return the loaf pans to your warm proofing area (re-warm the oven if using that method). Allow the loaves to proof for another 40 to 60 minutes, or until the dough has risen approximately 1 to 1.5 inches above the top edge of the loaf pan. This second rise is crucial for a light and airy finished bread.
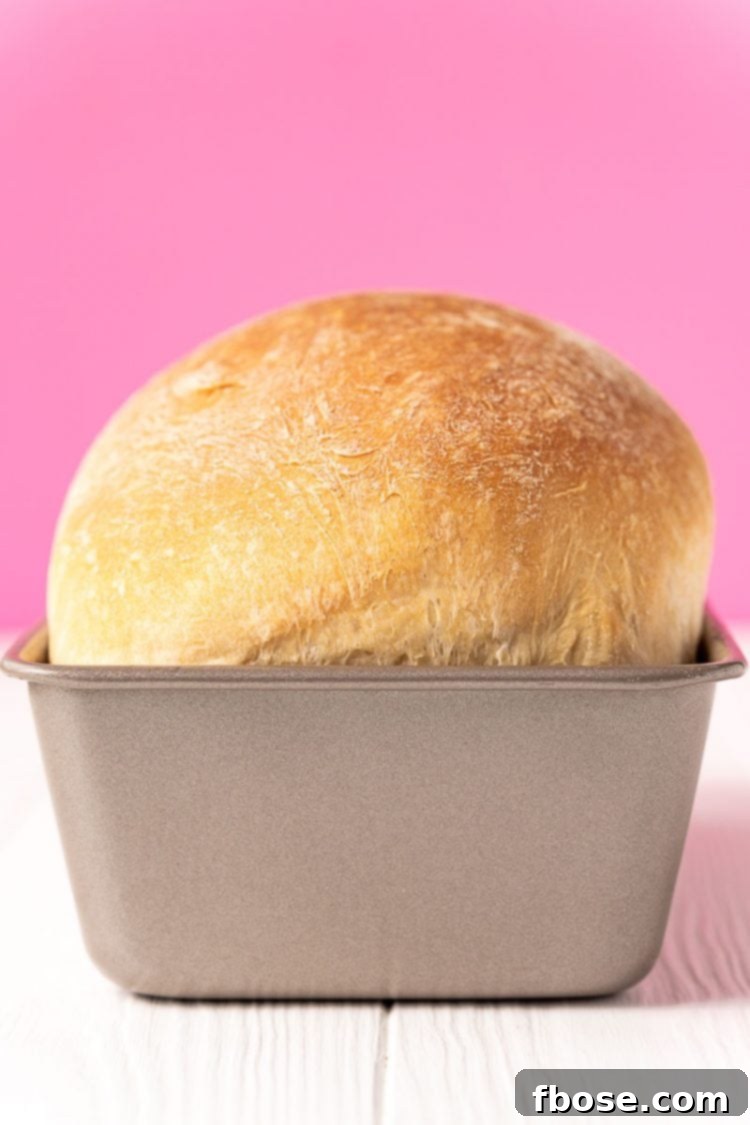
- Bake to Golden Perfection: Preheat your oven to 350°F (175°C). Bake the bread for about 35 minutes. As it bakes, the loaves will undergo a final significant rise, known as “oven spring,” and develop a beautiful, inviting golden-brown crust. To confirm doneness, you can check the internal temperature, which should be between 190°F and 200°F (88°C and 93°C). A simpler method is to gently tap the top of the loaf; a hollow sound indicates it’s baked through.
- Cool Completely: Once baked, immediately remove the loaves from their pans and transfer them to a wire cooling rack. Allowing the bread to cool completely on the rack is essential. If left in the pan, moisture can accumulate, making the bottom soggy. Slicing warm bread can also compromise its texture, leading to a gummy interior. Patience is key for the perfect slice!
Congratulations, you’ve just made bread! It wasn’t nearly as difficult as you might have imagined, right? Now that you’ve mastered this fundamental skill, you might be curious about how to best store your delicious creation. While homemade bread doesn’t contain the preservatives found in store-bought varieties, its flavor is infinitely superior! Enjoy it quickly for toast or sandwiches – we absolutely love pairing it with this delightful Cranberry Pecan Chicken Salad!
Storage & Freezing Tips:
- Shelf Life at Room Temperature: This fresh loaf will remain wonderfully flavorful for approximately 3 days when stored at room temperature. For optimal freshness, place it in a large, airtight Ziploc bag or wrap it tightly in plastic wrap once it has completely cooled.
- How to Freeze Homemade Bread: To extend its life even further, homemade bread freezes beautifully. Ensure the bread has cooled completely before placing it in a large freezer-safe bag. Squeeze out as much air as possible before sealing. Frozen bread can be stored for up to 3 months. Thaw at room temperature or gently warm slices in a toaster or oven.
Beyond Loaves: Versatile Dough Creations
One of the most exciting aspects of this homemade bread recipe is its incredible versatility. This single dough recipe can effortlessly be transformed into a variety of delicious baked goods without any modifications to the core dough itself. This means less work for you and more delightful treats for your family!
From just one batch of this fantastic dough, you can create any of the following wonderful combinations:
- 2 classic loaves of fluffy white bread.
- 24 soft and irresistible dinner rolls.
- 16 deliciously sweet cinnamon rolls.
- 1 loaf of bread and 8 accompanying cinnamon rolls.
- 1 loaf of bread and 12 perfect dinner rolls.
- 12 dinner rolls and 8 cinnamon rolls, offering a delightful mix for any occasion.
To Make Fluffy Dinner Rolls:
To convert this dough into exquisite dinner rolls, simply divide the entire batch of dough into two equal portions. Then, take each portion and divide it into smaller, equally sized pieces, aiming for about 1.8 to 2 ounces (approximately 50-57 grams) per roll. Pinch the edges of each dough piece into the center, then flip it over and gently swirl it around on a lightly floured surface to create a smooth, sealed bottom. Arrange these shaped rolls in a greased baking dish, leaving a little space between them. Allow them to proof in a warm place for 1 hour, then bake at 350°F (175°C) for 30 to 35 minutes, or until golden brown.
To Make Irresistible Cinnamon Rolls:
For a sweet treat, divide the dough in half. On a lightly floured surface, roll out one half of the dough into a large rectangular shape. Generously spread it with your favorite cinnamon roll filling – I recommend the filling recipe from my No-Yeast Cinnamon Roll Recipe for a perfect blend of sweetness and spice. Tightly roll up the dough from one long side, then slice it into individual rolls. Place these rolls in a greased 9×13-inch baking pan. Allow them to proof for 1 hour in a warm spot, then bake at 350°F (175°C) for 30 to 35 minutes. Once baked and slightly cooled, generously top with my luscious vanilla Icing Recipe!
Troubleshooting Common Bread Making Issues
Even with an easy recipe, minor hiccups can occur. Here are some common issues and how to resolve them:
- My Dough Isn’t Rising (or Rising Too Slowly):
- Yeast Issues: Your yeast might be expired, inactive, or killed by water that was too hot. Always check yeast expiration dates and ensure water temperature is within the 105-115°F range.
- Too Cold: If your proofing environment is too cold, the yeast will be sluggish. Use one of the warm proofing methods mentioned in the instructions.
- Too Much Flour: Adding too much flour can make the dough stiff, hindering its ability to rise. Aim for a slightly tacky, but not sticky, dough.
- Bread is Dense and Heavy:
- Insufficient Kneading: Gluten development is key for light bread. Ensure you knead for the full recommended time, allowing the gluten network to form.
- Under-Proofing: If the dough hasn’t risen enough during either the first or second proof, the final bread will be dense. Give it adequate time to double in size.
- Too Much Flour: Again, excess flour leads to heavy bread. Stick to the specified amount, adding extra only sparingly if the dough is too sticky.
- Bread Collapsed After Baking:
- Over-Proofing: If the dough rises too much, the gluten structure can weaken and collapse in the oven. Keep an eye on the dough and bake when it’s just about doubled in size.
- Hard or Dry Crust:
- Over-Baking: Ensure you’re not baking the bread for too long. Check for doneness at the 35-minute mark with the internal temperature or by tapping the top.
More Delicious Bread Recipes
If you’ve loved making this homemade white bread, you’re sure to enjoy exploring these other fantastic bread recipes:
- Ice Cream Bread
- Homemade Brioche
- Classic Yeast Rolls
- Starbucks-Inspired Banana Bread
- Delightful Zucchini Bread
Let’s Connect!
If you’ve tried this recipe, please let me know how you liked it in the comments below and leave a review. I love hearing from you!
Don’t forget to tag me – @sugarandsoulco – on Instagram and Pinterest with your photos or join our Sugar & Soul Show-offs Community and share them there, where you can join our recipe challenges!
Homemade Bread Recipe
Prep Time: 15 minutes
Cook Time: 35 minutes
Rising Time: 2 hours
Total Time: 2 hours 50 minutes
Servings: 2 loaves
Ingredients
- 1½ tablespoons instant yeast or active-dry yeast
- 5 cups bread flour (spooned and leveled)
- ¼ cup granulated sugar
- 1½ teaspoons kosher salt
- 2 cups warm water (between 105° and 115°F)
- ¼ cup vegetable oil
Instructions
- If using instant yeast, whisk together all dry ingredients (yeast, flour, sugar, salt) in a large mixing bowl or stand mixer fitted with a dough hook. If using active-dry yeast, see notes below for activation instructions.
- Add the warm water (ensuring it’s between 105° and 115°F) and vegetable oil to the dry ingredients. Beat on medium speed for 5 to 6 minutes. The dough should form a ball and pull away from the edges of the bowl as gluten develops.
- Transfer the dough to a large metal or glass bowl that has been lightly greased with cooking spray or oil. Cover with a clean, damp dishcloth or plastic wrap (sprayed with non-stick spray on the underside if using plastic to prevent sticking). Place in a warm area to proof for 1 hour, until the dough has doubled in size. See notes for proofing tips in a cooler environment.
- Once risen, gently punch down the dough in the center to release any excess air.
- Transfer the dough to a clean, lightly floured surface and divide it in half. Knead each half for 30 to 45 seconds, adding minimal flour as needed to prevent sticking. Shape each half into a loaf by pinching the edges into the middle and flipping it seam-side down, or by rolling it into a rectangle and then tightly rolling it into a log.
- Place each shaped loaf into a greased 9×5-inch loaf pan.
- Allow the loaves to proof for an additional 40 to 60 minutes, or until the dough has risen about 1 inch above the edge of the pan.
- Preheat oven to 350°F (175°C). Bake for about 35 minutes. The bread is done when the top is a nice golden brown and it sounds hollow when tapped, or when the internal temperature reaches 190°F to 200°F (88°C to 93°C).
- Once baked, immediately remove the loaves from the pans and transfer them to a wire rack to cool completely. Leaving them in the pans will cause them to become soggy.
- Allow the bread to cool fully before slicing for the best texture.
Video Guide
Watch the video below for a visual guide on how to make this easy homemade bread!

(Video content for Homemade Bread recipe)
Notes
- Flour Choice: This recipe has been tested with both all-purpose and bread flour. Bread flour consistently delivers superior rise and texture due to its higher protein content. If using all-purpose flour, add an additional 1/4 cup to the recipe to achieve a comparable dough consistency.
- Active-Dry Yeast Activation: If you are using active-dry yeast instead of instant yeast, you must activate it first. In a medium bowl, combine the warm water, yeast, and 1 tablespoon of the granulated sugar. Stir gently until the yeast appears to dissolve. Let this mixture sit for 5 to 10 minutes. It should become foamy and nearly double in volume, indicating active yeast. Then, add this activated mixture to your dry ingredients at the step where water would normally be introduced.
- Optimizing Proofing Environment: A warm, draft-free spot is crucial for dough to rise properly. If your home is cool, consider these tricks:
- Turn your oven on to its lowest setting (or 200°F/90°C) for about 5 minutes, then turn it off. Place your covered dough bowl inside the warmed, turned-off oven. Ensure to use a glass or metal bowl, and avoid plastic wrap for this method as it can melt.
- Alternatively, place the covered dough bowl in the oven, and on a rack below it, add a baking dish filled with about 3 cups of boiling water. The residual heat and steam will create an ideal proofing environment.
- Loaf Pan Size: Any standard loaf pan size between 8×4 inches and 10×5 inches will work perfectly for this recipe.
- Shelf Life: Once cooled completely, homemade bread lasts approximately 3 days at room temperature when stored in an airtight container or wrapped tightly in plastic wrap.
- Freezing Instructions: To freeze, ensure the bread is entirely cool. Place it in a large freezer-safe bag, pressing out as much air as possible before sealing. It can be frozen for up to 3 months.
- Dough Versatility: This single dough recipe is incredibly versatile and can be used to make not only two loaves of bread but also 24 dinner rolls or 16 cinnamon rolls. See the “Beyond Loaves: Versatile Dough Creations” section above for detailed instructions on how to adapt the dough for these delicious alternatives.
- Nutritional Information: The nutritional information provided is an estimate per loaf of bread and can vary based on specific ingredient brands and preparation methods.
Nutrition Information (Estimated per Loaf)
Carbohydrates: 253g |
Protein: 39g |
Fat: 33g |
Saturated Fat: 23g |
Sodium: 1764mg |
Potassium: 341mg |
Fiber: 8g |
Sugar: 26g |
Calcium: 54mg |
Iron: 3mg
Did You Make This Recipe?
Don’t forget to share it with me on Instagram @sugarandsoulco and follow on Tiktok @sugarandsoulco and Pinterest @sugarandsoulco for more!