
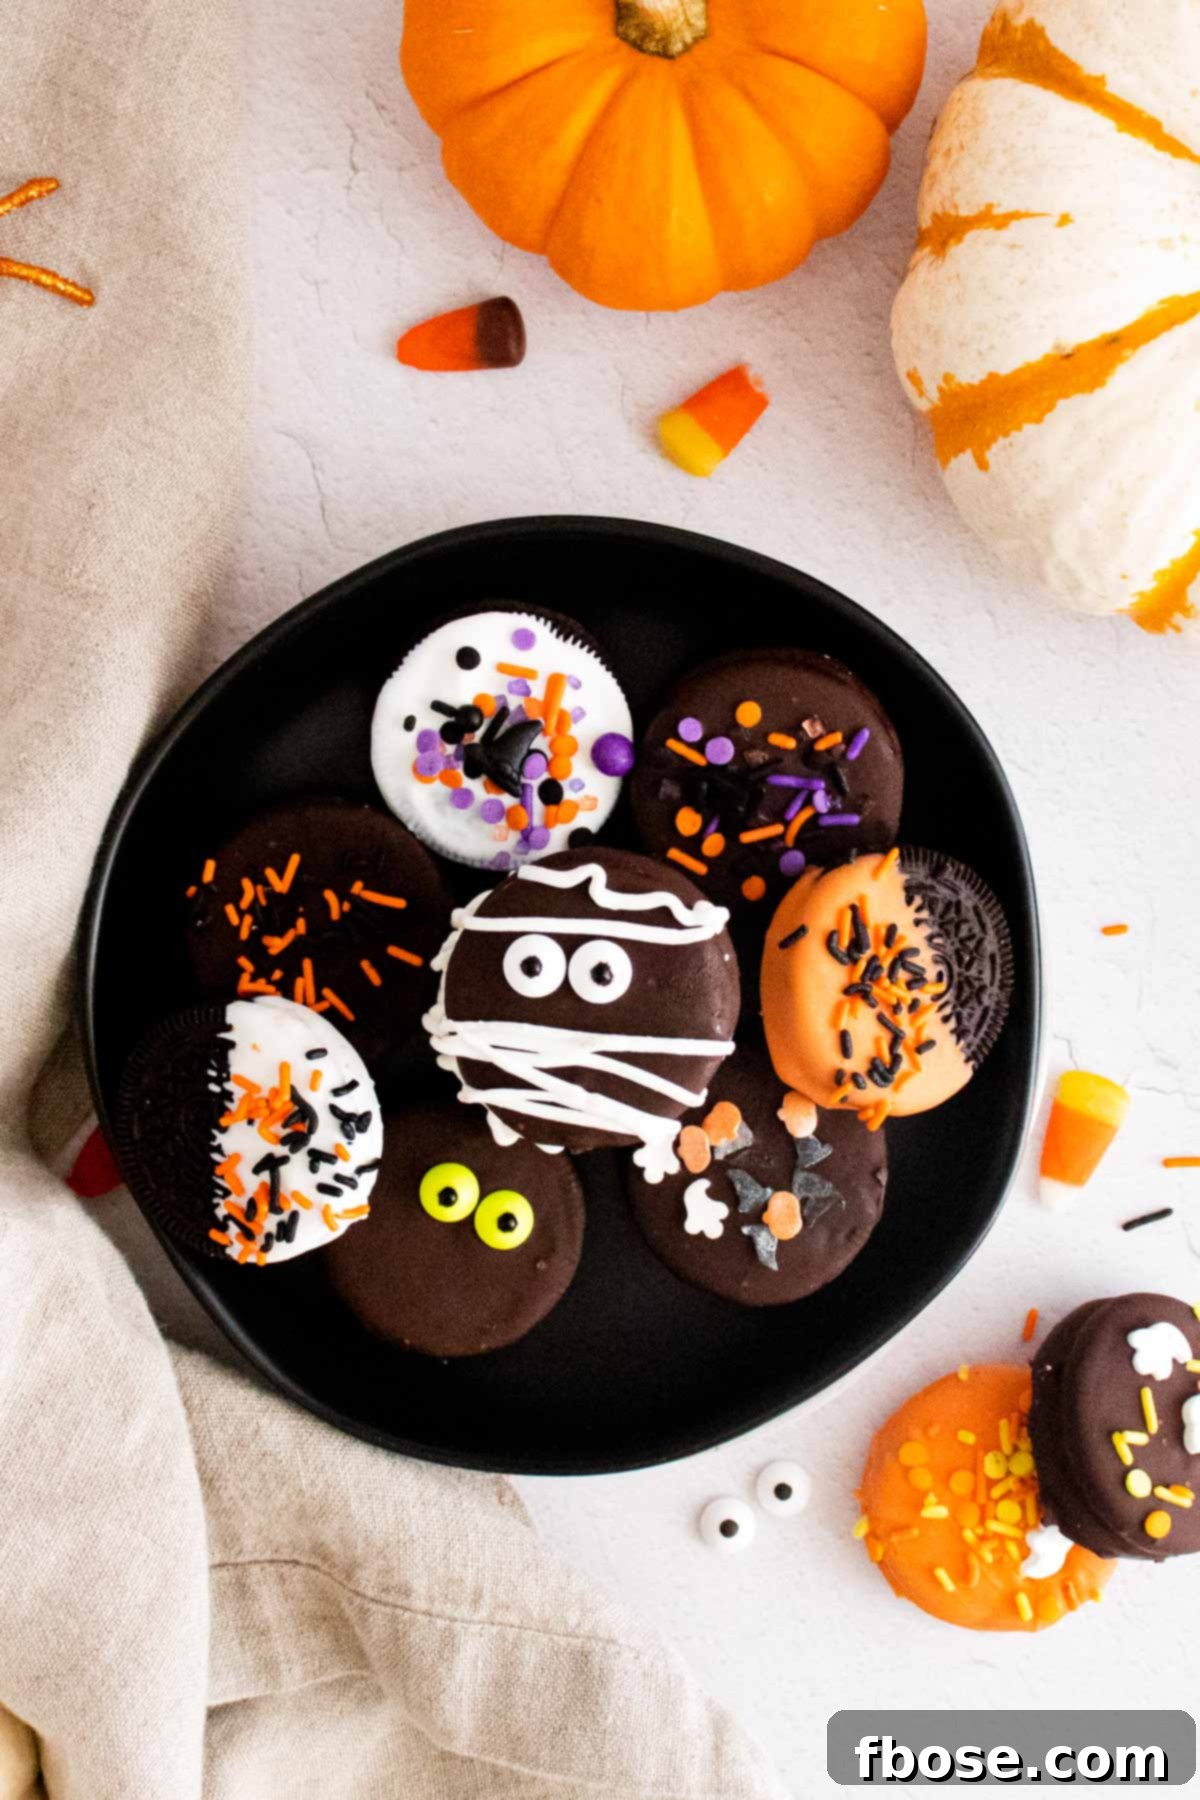
Spooky Sweetness: The Ultimate Guide to Halloween Chocolate Covered Oreos
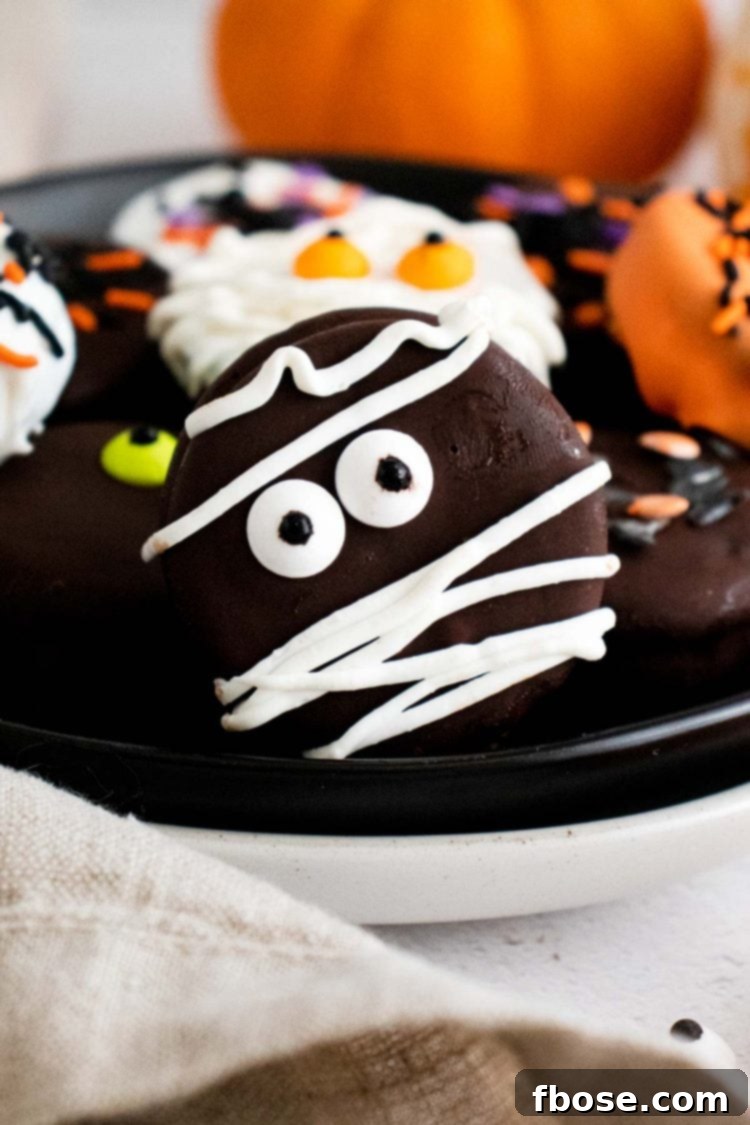
Halloween Chocolate Covered Oreos are the quintessential no-bake treat that effortlessly combines everyone’s favorite sandwich cookie with a festive, spooky twist! Perfect for parties, trick-or-treaters, or a cozy Halloween movie night, these delightful confections are crafted by dipping classic Oreos in rich, melted chocolate and adorning them with an array of Halloween sprinkles, whimsical candy eyeballs, and intricate chocolate swirls. They’re a simple yet incredibly impressive dessert that captures the spirit of the season in every bite.
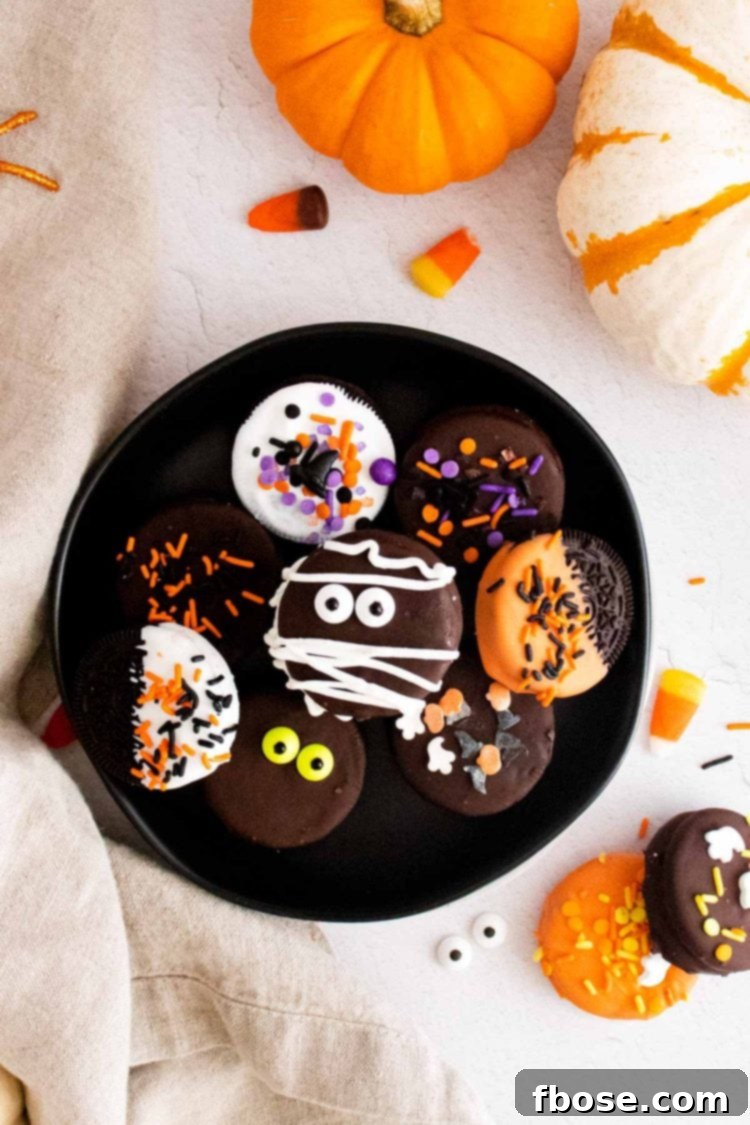
As an ardent fan of Oreo cookies, I find their versatility in sweet treats simply irresistible. There’s something inherently comforting and nostalgic about the classic chocolate sandwich cookie that makes it the perfect canvas for creative culinary adventures. When autumn arrives and the air turns crisp, bringing with it the excitement of Halloween, transforming these beloved cookies into festive, chocolate-covered masterpieces becomes an absolute must.
These Halloween Oreo cookies stand out for their incredible ease of preparation and the stunning results they yield. Not only do they look like they came straight from a gourmet bakery, but their taste is equally amazing. The satisfying crunch of the cookie, the smooth, rich chocolate coating, and the playful decorations create a sensory experience that’s sure to be a hit with both kids and adults.
This recipe is also a fantastic activity to enjoy with children. Little hands will delight in dipping the cookies and, more importantly, decorating them with vibrant sprinkles, googly candy eyeballs, and spooky chocolate drizzles. Imagine their excitement as they create edible monsters, ghosts, or pumpkins! Beyond standard decorations, you can encourage their creativity with edible glitter, gummy worms for a creepy-crawly effect, or even red icing “blood” for an extra eerie touch. The possibilities for customization are as limitless as your imagination!
While traditional trick-or-treating might look different some years, your family can still fully embrace the festive spirit. Plan an epic marathon of spooky Halloween movies and elevate the experience with a spread of scary good treats. These chocolate-covered Oreos are an ideal addition to any Halloween celebration, offering a personalized touch that store-bought candies simply can’t match.
To truly get in the spirit of the season and complement your chocolate-covered Oreos, be sure to explore more of my hauntingly delicious recipes. Try my Halloween Seven Layer Magic Bars for a chewy, layered delight, whip up a batch of festive Halloween Monster Cookies bursting with colorful candies, or serve a refreshing glass of Goosebumps Punch. Each of these recipes promises to add an extra layer of fun and flavor to your Halloween festivities.
Essential Ingredients for Spooky Oreos:
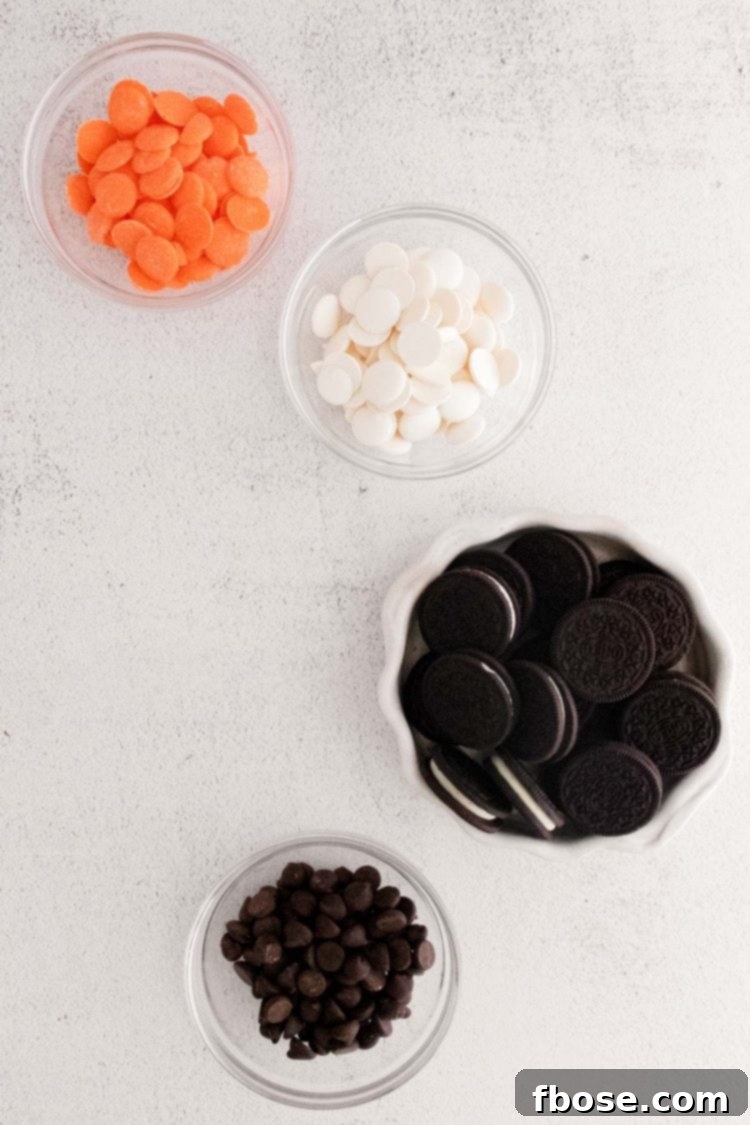
Crafting these delectable Halloween Oreos requires just a few simple ingredients, easily found at any grocery store. The beauty of this recipe lies in its minimal components and maximum impact!
- Oreos: The star of our show! While any variety of Oreo will work, consider opting for the limited-edition Halloween Oreos featuring festive orange creme filling. The vibrant color adds an extra touch of seasonal cheer even before dipping. Don’t hesitate to experiment with different flavors like Golden Oreos or Peanut Butter Oreos for unique taste combinations.
- Vegetable Shortening: This crucial ingredient, when melted with the chocolate, plays a vital role in achieving that perfectly smooth, glossy, and crisp outer shell. It helps to thin the chocolate slightly, making it easier to dip and ensuring a beautiful, even coating that hardens quickly. As an excellent alternative, you can also use refined coconut oil for a similar effect, which imparts no coconut flavor.
- Chocolate Chips: These are for melting and dipping, providing the rich, indulgent base for your cookies. The choice is yours – milk chocolate offers a classic sweet flavor, while semi-sweet provides a deeper cocoa note. White chocolate is fantastic for creating a vibrant contrast, especially when colored with food-safe dyes or used as a base for specific designs. Quality chocolate chips will yield the best melting consistency and flavor.
- Melting Wafers (White and Orange): These specialized candy melts are highly recommended for their ease of use and vibrant color. They melt smoothly and harden quickly, making them ideal for dipping and decorating. While they taste similar to white chocolate, their consistent texture and bright hues (especially the festive white and orange) are perfect for creating eye-catching, Halloween-themed designs when combined with traditional chocolate-dipped Oreos on a platter.
- Sprinkles & Candy Eyeballs: These are where the magic truly happens! A diverse collection of Halloween-themed sprinkles – think ghosts, bats, pumpkins, or classic black, orange, and purple jimmies – will transform your Oreos. Candy eyeballs instantly add personality and a fun, spooky character to your treats. Remember to add these decorations while the chocolate is still soft and wet, ensuring they adhere properly. Don’t hold back – go wild with your festive embellishments!
Crafting Your Spooky Treats: A Step-by-Step Guide
Making these delightful Halloween Oreos is incredibly straightforward, broken down into three simple and enjoyable steps. Even beginners will find success with this easy method!
- Melt the Chocolate: Begin by placing your chosen chocolate chips or candy melts into separate microwave-safe bowls. Add 1 tablespoon of vegetable shortening to each bowl (or ¾ tbsp of coconut oil if using that alternative). Microwave the chocolate and shortening mixture in 30-second intervals, stirring thoroughly after each interval. Continue this process until the chocolate is completely smooth and melted with no lumps remaining. Be careful not to overheat the chocolate, as this can cause it to seize. A silky, pourable consistency is what you’re looking for.
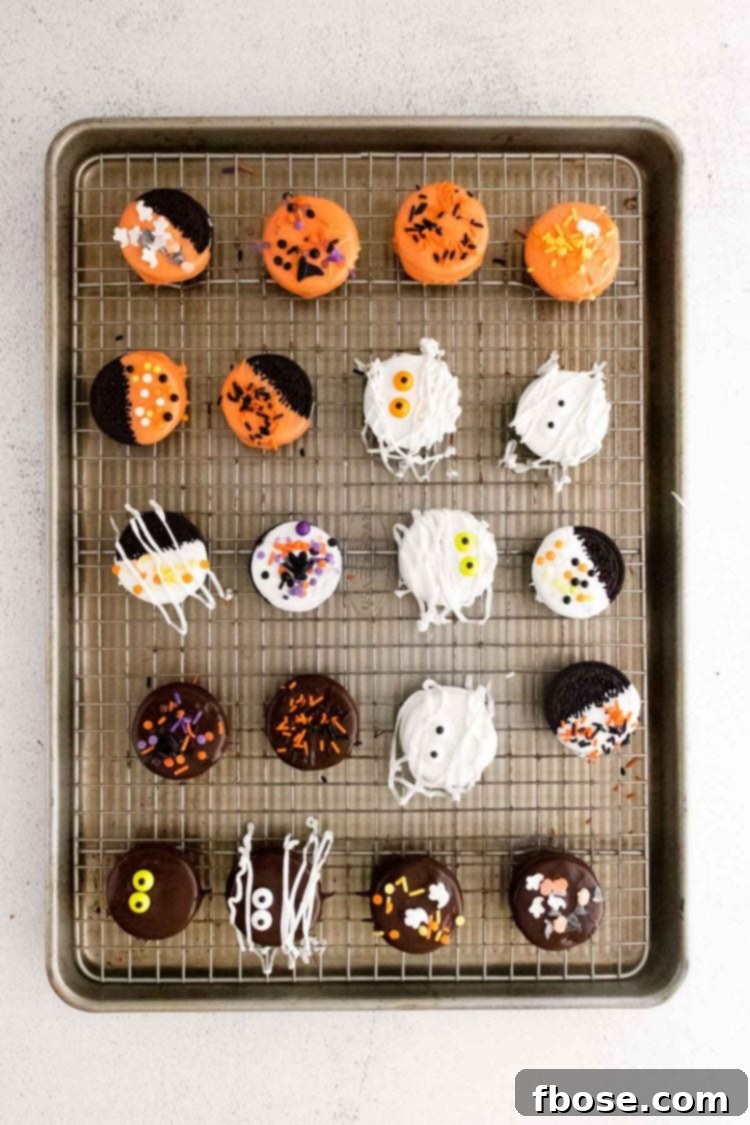
- Dip the Oreos: Once your chocolate is perfectly melted, it’s time for the fun part! Gently drop an Oreo cookie into the melted chocolate, ensuring it’s fully submerged. Use a fork or a specialized dipping tool to carefully flip the Oreo, ensuring it’s completely coated on all sides. Lift the cookie out of the chocolate with the fork, allowing any excess chocolate to drip back into the bowl. A gentle tap of the fork against the rim of the bowl can help remove any extra drips, ensuring a clean, even coating. Carefully transfer the chocolate-covered Oreo to a baking sheet lined with parchment paper or a silicone mat. This prevents sticking and makes for easy cleanup.
- Decorate with Flair: This is where your creativity shines! Immediately after dipping and while the chocolate is still soft and wet, adorn your Oreos with festive Halloween sprinkles, whimsical candy eyeballs, or artistic swirls of a different melted candy color. The key is to work quickly so your decorations adhere before the chocolate sets. Don’t be afraid to experiment with various designs – from simple sprinkle dustings to intricate patterns, anything goes when it comes to Halloween fun! Repeat these steps with the remaining Oreos, working in batches if you have multiple colors of chocolate to manage.
Pro Tips for Perfectly Spooky Chocolate Oreos
Achieving bakery-quality chocolate-covered Oreos is easier than you think with a few clever tips. Follow these suggestions to ensure your Halloween treats are not just delicious, but also visually stunning:
- Work in Batches: Especially when using multiple colors of chocolate or intricate decorations, it’s best to work in small batches. This ensures your chocolate stays warm and fluid for dipping, and gives you enough time to add sprinkles and other embellishments before the chocolate sets.
- The Right Tools Make a Difference: While a regular fork works well, a dedicated chocolate dipping tool can make the process even smoother. These tools often have spirals or prongs designed to hold the cookie securely and allow excess chocolate to drip off cleanly.
- Parchment Paper is Your Best Friend: Always line your baking sheets with parchment paper or a silicone baking mat. This crucial step prevents the chocolate-covered Oreos from sticking to the tray as they cool and harden, making for easy removal without damaging your beautiful creations.
- Chill Time is Key: After decorating, transfer your baking sheets of Oreos to the refrigerator. A chilling time of at least 20 minutes (or until completely firm) will rapidly set the chocolate, giving it that satisfying snap and preventing any smudges.
- Don’t Overheat the Chocolate: When melting chocolate, whether in the microwave or over a double boiler, always do so gently and slowly. Overheating can cause chocolate to seize, becoming thick and grainy, or even burn. If using a microwave, stick to short intervals and stir frequently.
- Consider a Double Boiler: For more precise temperature control, especially with larger quantities of chocolate, a double boiler is an excellent alternative to the microwave. Simply place a heat-safe bowl over a saucepan of simmering water (ensuring the bowl doesn’t touch the water) and stir until melted.
Frequently Asked Questions About Chocolate Covered Oreos:
New to making chocolate-covered Oreos? Here are some common questions and helpful answers to guide you:
How long do chocolate dipped Oreos last?
These delightful treats have a surprisingly long shelf life! When stored properly in an airtight container at cool room temperature (away from direct sunlight or heat sources), they can remain fresh and delicious for up to 2 weeks. This makes them perfect for preparing in advance for Halloween parties or as edible gifts.
Do they need to be refrigerated?
While refrigeration helps to set the chocolate quickly after dipping and decorating, it’s not strictly necessary for long-term storage. In fact, storing them in the refrigerator for extended periods can sometimes cause condensation to form on the chocolate, leading to a dull finish or “sugar bloom.” However, you absolutely want to keep them away from warm environments, such as near a hot stove, on a sunny windowsill, or in a very warm room, as this could cause the chocolate coating to soften or melt.
How do you make them without using a mold?
It’s incredibly easy! Our recipe demonstrates the simplest and most common method: simply dunk them directly into the melted chocolate. There’s no need for special molds. Once fully coated, you just let them set on parchment paper or a baking rack, and they’ll harden into beautifully shaped, freestanding treats.
Can I use regular chocolate bars instead of chips or wafers?
Yes, you can, but it requires a bit more care. Regular chocolate bars often contain less stabilizer than chips or wafers and can be more prone to seizing or becoming too thick when melted. For best results, chop the chocolate bar finely and melt it slowly. Using a small amount of vegetable shortening or coconut oil (as specified in the recipe) is even more critical when using chocolate bars to achieve a smooth, dippable consistency.
How do I prevent the chocolate from seizing?
Seizing occurs when a tiny bit of moisture (even steam!) gets into melted chocolate, turning it into a thick, grainy paste. To prevent this: 1) Ensure all your equipment (bowls, spatulas) is completely dry. 2) Melt chocolate slowly and gently. 3) If using a double boiler, make sure the bottom of your bowl doesn’t touch the simmering water, and no steam escapes into the chocolate. 4) If microwaving, stir diligently between short intervals.
Unleash Your Creativity: Substitutions & Variations
One of the most exciting aspects of making chocolate-covered Oreos is the endless possibilities for customization. Get creative with these substitutions and variations to make each batch uniquely yours!
- Coconut Oil for Vegetable Shortening: If you prefer to avoid vegetable shortening or simply have coconut oil on hand, it makes an excellent substitute. Melting refined coconut oil with your chocolate will also help create that desirable crisp, crunchy coating. For this recipe, you’ll need approximately ¾ tablespoon (or 2 ¼ teaspoons) of refined coconut oil for each ¾ cup batch of chocolate or candy melts. Ensure it’s refined coconut oil to avoid any coconut flavor.
- Experiment with Chocolate Types: Don’t limit yourself to just milk chocolate chips! Explore the rich depths of semi-sweet or dark chocolate chips for a more intense cocoa experience. Alternatively, use white chocolate chips as a base for vibrant coloring with gel food dyes, or as a contrasting drizzle over dark chocolate.
- Different Oreo Flavors: The world of Oreos is vast and delicious! Beyond the classic, try coating Golden Oreos for a vanilla-based treat, Chocolate Oreos for an extra chocolatey punch, or even Peanut Butter, Mint, or Birthday Cake Oreos for unique flavor combinations. Double Stuf or Mega Stuf Oreos also work wonderfully, offering a thicker, more satisfying cookie. A mixed platter featuring several different Oreo flavors and coatings will surely impress!
- Get Wild with Toppings: Sprinkles and candy eyeballs are just the beginning! Unleash your inner artist with a multitude of topping ideas. Consider intricate swirls of melted contrasting chocolate or colorful icing. Drizzle with creamy peanut butter or caramel for added richness. Crushed pretzels offer a delightful salty-sweet crunch, while mini marshmallows or toffee bits provide different textures. Gummy bugs, candy corn, chopped nuts, edible glitter, or even finely crushed candy canes (for a festive twist outside of Halloween) are all fantastic options. The only limit is your imagination!
- Colored Chocolate Drizzles: After your main chocolate layer sets, melt small amounts of contrasting colored candy melts (green for slime, purple for witchy vibes) and use a piping bag with a tiny hole or a fork to create intricate drizzles, spiderwebs, or abstract designs.
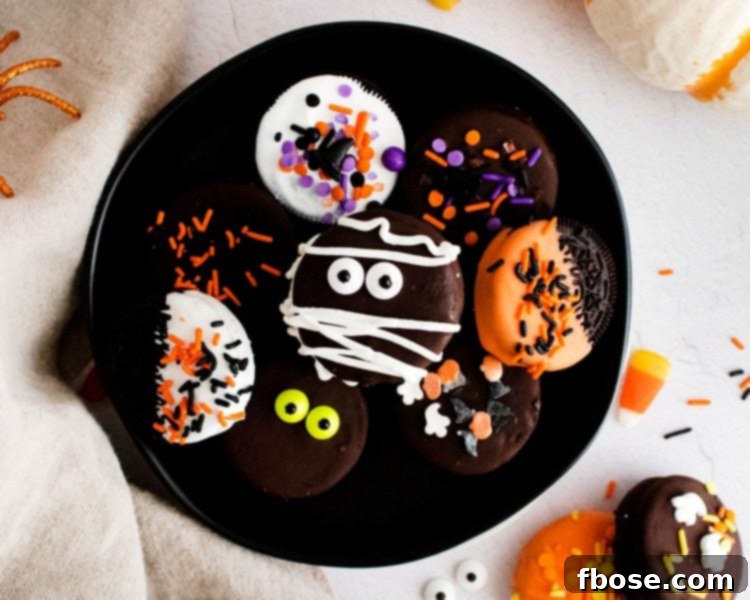
Serving and Gifting Your Halloween Masterpieces
Once your Halloween Chocolate Covered Oreos are set and ready, how you present them can be just as important as how they taste! Here are some ideas to showcase your spooky treats:
- Party Platters: Arrange your decorated Oreos artfully on a large platter alongside other Halloween goodies like candy corn, mini pumpkins, and gummy candies. Mix different colors and designs for a visually appealing spread.
- Individual Treats: For trick-or-treaters or party favors, place each Oreo in a small cellophane bag tied with an orange or black ribbon. This makes for a charming and hygienic presentation.
- Dessert Boards: Elevate your Halloween celebration by incorporating these Oreos into a larger dessert charcuterie board. Surround them with fruit, cheese, crackers, and other sweet and savory snacks for a truly impressive display.
- Gift Boxes: These make wonderful homemade gifts for friends, neighbors, or teachers. Pack a selection of different designs into a decorative box lined with tissue paper. They are thoughtful and delicious presents.
- Hot Cocoa Toppers: For an extra decadent touch, serve a few chocolate-covered Oreos alongside mugs of hot cocoa. They can be dipped into the warm drink or simply enjoyed as a side treat.
More Irresistible Oreo Creations:
If you’re an Oreo enthusiast like me, the fun doesn’t stop here! The humble Oreo cookie can be transformed into an astonishing array of desserts. Dive into these other fantastic Oreo recipes that are sure to satisfy any sweet craving:
- Peanut Butter Brownies – These brownies are not just tempting, they’re incredibly easy to make and pack a punch of peanut butter and chocolate goodness!
- Marshmallow Oreo Treats – Prepare for an addictively delicious experience with just three simple ingredients. These gooey, chewy delights are a guaranteed crowd-pleaser.
- Easy Oreo Poke Cake – Indulge in a cookie-studded chocolate cake, drenched in chocolate syrup, and crowned with a luscious cookies and cream frosting. Need I say more?
- The Croissookie – Supernatural fans, take note! You only need five ingredients to whip up Dean Winchester’s favorite treat. It’s a unique and surprisingly simple dessert mash-up.
- Oreo Pudding Cookies – Experience dense, chewy cookies bursting with rich cookies and cream flavor thanks to the addition of instant pudding mix. They are incredibly moist and satisfying.
Halloween Chocolate Covered Oreos
Pin It For Later
Click the button above to save this delicious recipe to your Pinterest board!
Let’s Connect!
If you’ve tried this recipe and loved it, please share your thoughts! Let me know how you liked it in the comments below and consider leaving a review. I always love hearing from you and seeing your delicious creations!
Don’t forget to tag me – @sugarandsoulco – on Instagram and Pinterest with your photos, or join our Sugar & Soul Show-offs Community on Facebook and share them there. We regularly host fun recipe challenges that you won’t want to miss!
Chocolate Covered Halloween Oreos
Rebecca Hubbell
Dessert
American
15
20
35
Servings
30
oreos
Ingredients
-
30
Oreos
-
3
tablespoons
vegetable shortening
divided -
¾
cup
chocolate chips
-
¾
cup
bright white chocolate melting wafers -
¾
cup
orange chocolate melting wafers -
Sprinkles
to decorate -
Candy eyes
to decorate
Instructions
-
In a small microwave-safe bowl, combine the chocolate chips with 1 tablespoon of vegetable shortening. Microwave on high for 30 seconds, stir and microwave for an additional 30 seconds. Stir again. By this point, your chocolate should be smooth and ready to dip.
-
Dip the Oreos one at a time into the chocolate, flipping it over to coat the entire Oreo evenly. Use a fork to remove the Oreo from the chocolate and tap the fork lightly on the edge of the bowl to allow any excess chocolate to drip off.
-
Place the chocolate covered Oreo on a parchment-lined baking sheet or a baking rack— this will keep it from sticking once the chocolate has cooled.
-
Decorate the Oreo with candy eyes or sprinkles, or a drizzle of white or orange chocolate. Make sure to add any decorations before the chocolate has hardened or they won’t stick.
-
Repeat with 9 additional Oreos.
-
Repeat the same melting process for the remaining two candy melts. Place the finished Oreos in the refrigerator and allow them to chill for at least 20 minutes. This will help set the chocolate.
-
Store in an airtight container in the fridge for up to 2 days.
Notes
- You can substitute white chocolate for the candy wafers in this recipe, although white chocolate is difficult to melt and can burn easily. Candy wafers are highly recommended for ease and vibrant color.
- Because candy wafers harden quickly, I recommend working with only one color of chocolate at a time to ensure easy dipping and decorating.
- Feel free to substitute any color of melting wafer you have on hand—green and purple would also be fantastic choices for a spooky Halloween palette!
- If you don’t have colored melting wafers, you can add ¼ teaspoon of gel food coloring for every ¾ cup of white melting wafers. It is crucial to use gel food coloring, as liquid food coloring can alter the consistency of the melting wafers and cause them to seize.
- You must use vegetable shortening in this recipe (or refined coconut oil). Vegetable oil and butter are not recommended substitutions as they do not provide the same smooth texture and quick-setting properties.
- Lastly, the exact sprinkles you use are entirely up to your preference and creativity! A mix of black, orange, white, and purple sprinkles typically creates a truly classic Halloween look. You can also often find themed sprinkles like pumpkins, ghosts, and witch hats at craft stores or specialty baking shops.
Nutrition
Calories:
115
kcal
|
Carbohydrates:
15
g
|
Protein:
1
g
|
Fat:
6
g
|
Saturated Fat:
3
g
|
Cholesterol:
1
mg
|
Sodium:
63
mg
|
Potassium:
26
mg
|
Fiber:
1
g
|
Sugar:
11
g
|
Vitamin A:
10
IU
|
Calcium:
8
mg
|
Iron:
1
mg
Did You Make This Recipe?
Don’t forget to share it with me on Instagram @sugarandsoulco and follow on Tiktok @sugarandsoulco and Pinterest @sugarandsoulco for more!
Pin Recipe
Share Recipe