

The Ultimate Homemade Chocolate Syrup: Rich, Easy, and Irresistibly Delicious
Prepare to say goodbye to those generic store-bought bottles forever! This Homemade Chocolate Syrup offers an unparalleled depth of rich, decadent chocolate flavor that simply cannot be replicated by mass-produced alternatives. With less than 20 minutes of active preparation, you can create a velvety smooth, intensely chocolatey syrup that will elevate your desserts and drinks to an entirely new level of deliciousness.
Imagine crafting the perfect dessert bar, brimming with homemade goodness. This luxurious chocolate syrup is the star, perfectly complemented by a sweet and fruity Easy Homemade Strawberry Sauce Topping, and a rich, sticky Slow Cooker Dulce de Leche Caramel Sauce. Together, they form an irresistible trio that transforms a simple scoop of vanilla ice cream into a gourmet experience. Whether it’s a special occasion or just a craving for something extraordinary, this homemade syrup promises to deliver.
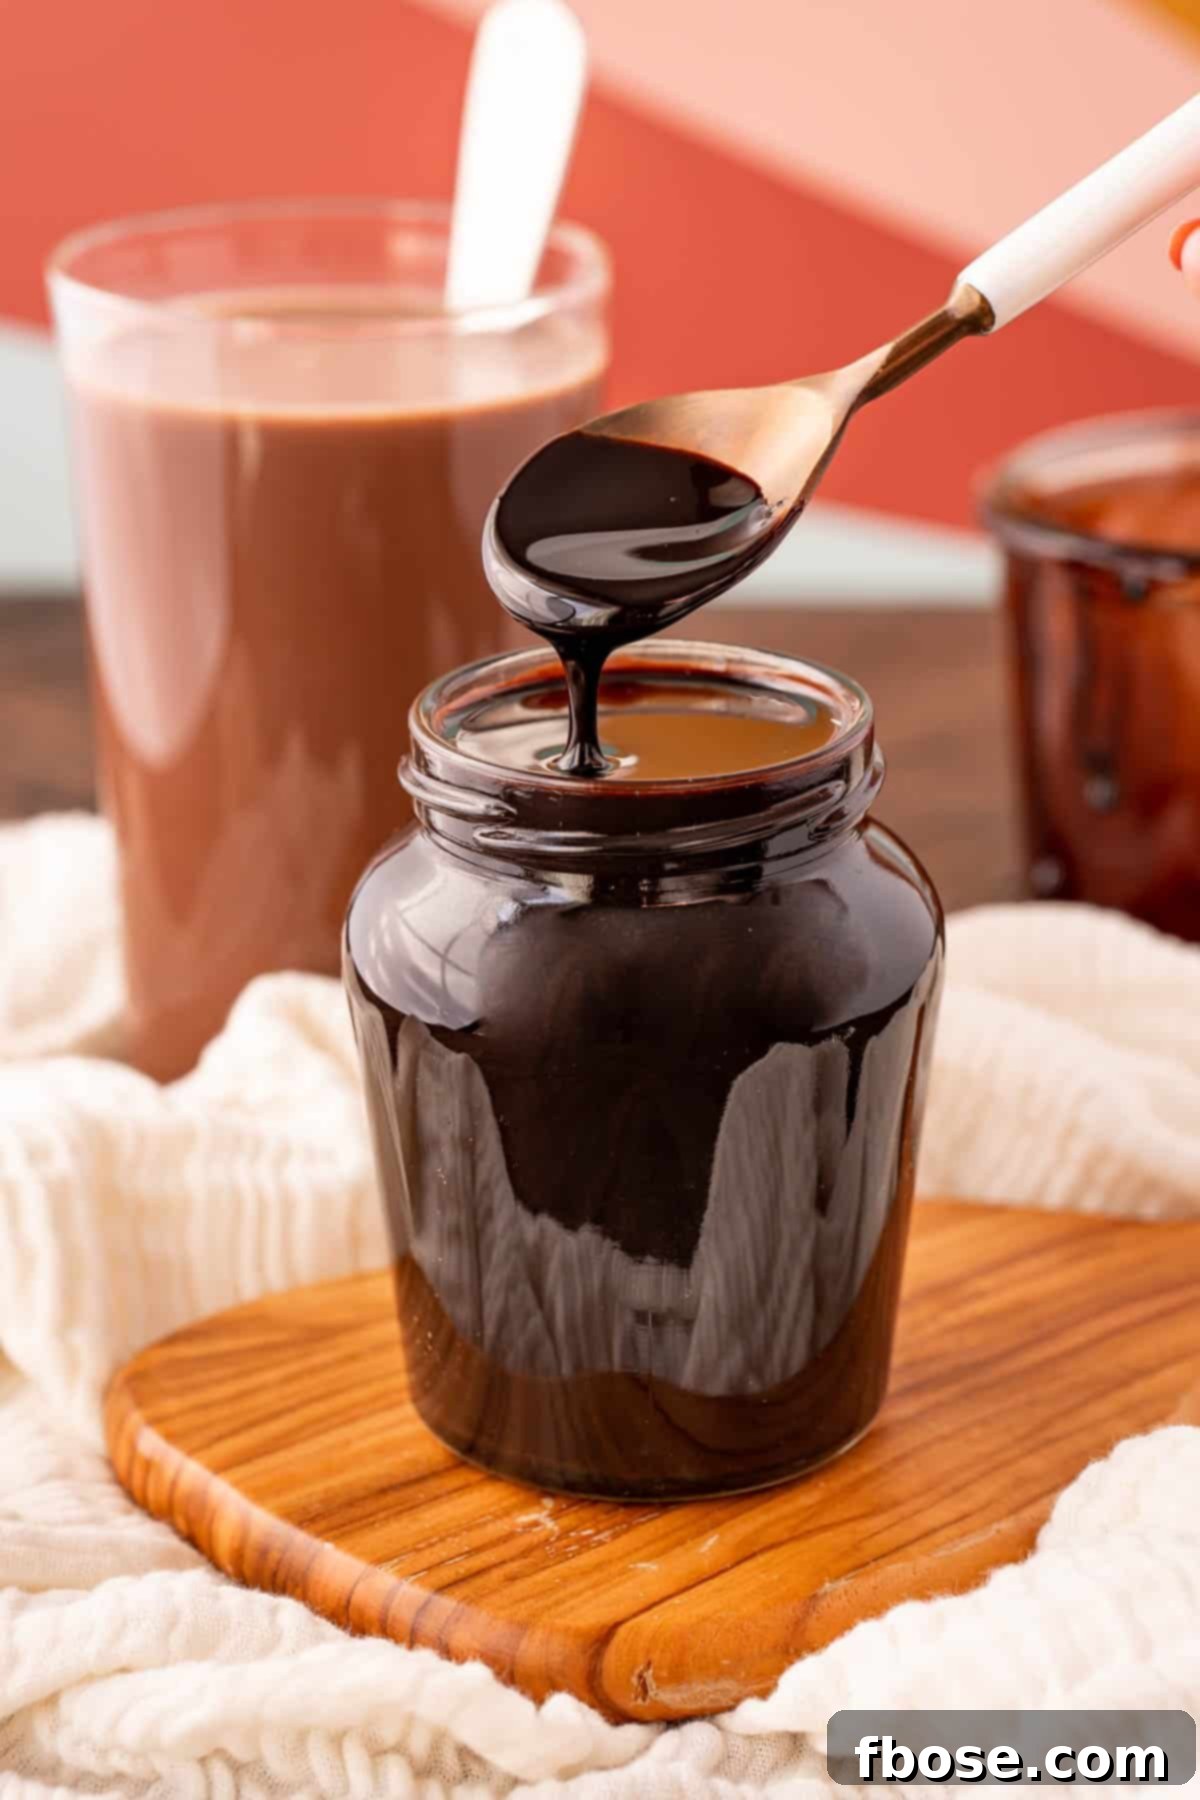
Why You Need This Homemade Chocolate Syrup in Your Life
Beyond its incredible flavor, making your own chocolate syrup offers a host of benefits that make it well worth the minimal effort. This isn’t just a recipe; it’s an upgrade to your entire dessert and beverage repertoire.
Unmatched Flavor & Quality
The primary reason to make your own chocolate syrup is, unequivocally, the taste. Store-bought syrups often rely on artificial flavors, high-fructose corn syrup, and preservatives that detract from the true essence of chocolate. Our homemade version uses real cocoa powder, pure vanilla extract, and a touch of salt to create a complex, deep, and authentic chocolate experience that artificial ingredients simply cannot mimic. Each spoonful is a testament to fresh, quality ingredients working in harmony.
Simplicity & Speed
Despite its gourmet taste, this chocolate syrup is remarkably simple to prepare. With less than 20 minutes of hands-on cooking time, you can go from zero to a batch of rich, glossy chocolate syrup. It’s an ideal project for a lazy afternoon or a quick indulgence when a chocolate craving strikes. The process is straightforward, making it accessible even for novice cooks.
Cost-Effective Indulgence
While the initial cost of ingredients might seem comparable to a high-end store-bought syrup, homemade usually proves to be more economical in the long run, especially when you consider the superior quality and the absence of undesirable additives. You’re getting a premium product at a fraction of the price of specialty brands, and you can make larger batches for less.
The Joy of Customization
One of the greatest advantages of making your own syrup is the ability to customize it to your exact preferences. Want it a little sweeter? A little less sweet? A hint of espresso? A touch of spice? When you’re the chef, you control the flavor profile. This allows for endless creative possibilities that cater to your unique taste buds, turning a basic syrup into your signature chocolate creation.
The Secret to Deep Chocolate Flavor: Dutch-Processed Cocoa Powder
Choosing the right cocoa powder is paramount to achieving the rich, deep chocolate flavor and beautiful color that distinguishes this homemade syrup. In the world of cocoa, there are two main types: natural and Dutch-processed.
For this particular homemade chocolate syrup recipe, I wholeheartedly recommend using **Dutch-processed cocoa powder**. This type of cocoa has been treated with an alkali solution, which neutralizes its natural acidity. This process results in several key benefits:
- **Mellow and Smooth Flavor:** Dutch-processed cocoa boasts a smoother, less acidic, and more mellow chocolate flavor compared to its natural counterpart. This contributes to a syrup that is rich and deeply satisfying without any harsh or bitter undertones.
- **Rich, Dark Color:** The alkalizing process also gives Dutch-processed cocoa a darker hue. This translates into a finished chocolate syrup with a gorgeous, deep brown color that looks as good as it tastes.
- **Enhanced Solubility:** Dutch-processed cocoa tends to mix more easily into liquids, helping to prevent lumps and ensuring a consistently smooth syrup.
In contrast, naturally processed cocoa powder is acidic, resulting in a sharper, sometimes fruitier, and more intense chocolate flavor. While delicious in baked goods that rely on baking soda (which needs acid to activate), it doesn’t provide the smooth, deep, and classic chocolate profile we’re aiming for in a syrup. Therefore, for the best possible taste and texture in your homemade chocolate syrup, always reach for Dutch-processed cocoa powder.

Essential Ingredients for the Perfect Syrup
Crafting this incredible chocolate syrup requires just a handful of pantry staples. Each ingredient plays a crucial role in developing the perfect flavor, texture, and consistency.
Water & Granulated Sugar: The Foundation
These two ingredients form the base of our syrup. Bringing water and sugar to a boil creates a simple syrup, which serves as the liquid vehicle for our chocolate. The sugar not only provides sweetness but also contributes to the syrup’s desired thickness and helps in its preservation.
Dutch-Processed Cocoa Powder: The Heart of Chocolate
As discussed, Dutch-processed cocoa is essential for its deep color and smooth, rich chocolate flavor. It’s the primary flavor agent, delivering that unmistakable chocolatey goodness we all crave.
Vanilla Extract: A Symphony of Aromas
Never skip the vanilla extract! A tablespoon of high-quality vanilla extract is not merely a background note; it’s a crucial flavor enhancer. Vanilla smooths out the rich intensity of the chocolate, adding a subtle warmth and complexity that rounds out the overall taste profile. It marries the flavors together beautifully, creating a more sophisticated and irresistible syrup.
Sea Salt: The Flavor Enhancer
Salt is a magical ingredient in sweet recipes. Just a pinch of sea salt (about ⅛ teaspoon) is enough to balance the sweetness of the syrup. It prevents the syrup from tasting cloyingly sweet and, more importantly, it actually amplifies and intensifies the chocolate flavor, making it taste richer and more profound. Think of it as a secret weapon for depth.
Light Corn Syrup: For Silky Smoothness
Adding a tablespoon of light corn syrup might seem unusual, but it serves a very important purpose. Corn syrup is an invert sugar, which means it helps prevent sugar crystallization. This is key to achieving a silky-smooth, glossy syrup that won’t become grainy over time. It also contributes to the desirable thick and pourable consistency without making it overly sticky or dense.
Mastering the Art of Homemade Chocolate Syrup: Tips for Success
While the recipe is simple, a few expert tips can ensure your homemade chocolate syrup turns out perfectly every time: lusciously smooth, wonderfully rich, and free of any imperfections.
Precise Whisking for Perfection
Once you’ve combined all the ingredients in the saucepan and reduced the heat, consistent whisking is your best friend. This is crucial for two main reasons:
- **Preventing Sticking and Burning:** The sugar and cocoa can easily settle at the bottom of the pot and burn if not stirred frequently. Whisking ensures even heat distribution and prevents scorching, which could impart an unpleasant flavor to your syrup.
- **Achieving Smoothness:** Continuous whisking helps to fully dissolve the sugar and integrate the cocoa powder without lumps, resulting in a uniformly smooth and glossy syrup.
Continue cooking and whisking for approximately 10 minutes. During this time, you’ll notice the syrup gradually thickening to a desirable consistency, perfect for drizzling or mixing.
The Importance of Straining
For the silkiest, most professional-grade chocolate syrup, straining is a non-negotiable step. After removing the syrup from the heat, carefully pour it through a fine-mesh sieve into a clean bowl or jar. This simple action will catch any minuscule lumps of undissolved cocoa powder or sugar crystals, ensuring your syrup is impeccably smooth and luxurious.
Patience is a Virtue: Cooling Your Syrup
It’s incredibly tempting to dive right into your freshly made, warm chocolate syrup. However, for the best results, patience is key. Allow the syrup to cool completely for at least 1 to 2 hours before using it. As it cools, the syrup will continue to thicken and its flavors will meld and deepen, achieving the ideal consistency and taste profile. Using it too soon might result in a thinner consistency than desired.
Achieving Your Desired Consistency
The beauty of homemade syrup is control. If you prefer a slightly thicker syrup, you can cook it for a few extra minutes (being careful not to burn it) or reduce the amount of water slightly in your next batch. For a thinner consistency, you can simply add a tiny splash more water during the cooking process until it reaches your preference. Remember, it will thicken significantly as it cools.
Elevating the Flavor: Optional Additions
While delicious as is, you can customize your syrup even further. Consider adding:
- **Espresso Powder:** A teaspoon of instant espresso powder can deepen the chocolate flavor without making it taste like coffee.
- **Chili Powder or Cayenne Pepper:** For a touch of heat, reminiscent of Mexican hot chocolate.
- **Peppermint Extract:** Perfect for a festive holiday twist.
- **Orange Zest:** A bright, citrusy note that pairs beautifully with chocolate.

Endless Delights: Creative Ways to Enjoy Your Chocolate Syrup
The versatility of this homemade chocolate syrup is truly endless. Once you have a batch ready, you’ll find countless excuses to drizzle, mix, and pour it over everything. Here are some of our favorite ways to enjoy this delicious chocolaty sauce:
The Ultimate Ice Cream Topping
This is arguably the most classic and satisfying way to use your homemade syrup. Create an epic ice cream topping bar with various toppings and let this rich chocolate syrup be the star. It’s fantastic over vanilla ice cream, or try it with mint, strawberry, or coffee-flavored ice cream for a delightful combination.
Transform Your Morning Routine
Who says chocolate is only for dessert? Elevate your breakfast or brunch by drizzling this sweet syrup over a tall stack of Homemade Buttermilk Pancakes or fluffy waffles. Add a dollop of Perfect Homemade Whipped Cream, and you’ve got a breakfast that feels like a special occasion.
Beyond Chocolate Milk: Coffee & Cocktails
- **Homemade Chocolate Milk:** Stir a generous amount of this syrup into your favorite milk (dairy, almond, oat – whatever you prefer!) for the best glass of ice-cold chocolate milk you’ve ever tasted. The superior flavor of homemade syrup makes a world of difference.
- **Gourmet Coffee Drinks:** Forget expensive coffee shop drinks! Add a swirl of this syrup to your morning latte, cappuccino, or iced coffee for an instant mocha delight.
- **Adult Beverages:** Get creative with cocktails! This syrup can be a fantastic addition to espresso martinis, chocolate martinis, or even a sophisticated boozy milkshake.
Decadent Dessert Drizzles
This syrup is a perfect finishing touch for a wide array of desserts:
- **Baked Goods:** Drizzle it over warm Classic Homemade Fudge Brownies, a freshly baked Bakery Style Chocolate Chip Cookie, or a big slice of Peanut Butter Pie.
- **Cakes & Cupcakes:** Use it as a glaze, a filling, or a beautiful topping for any chocolate-themed cake or cupcake.
- **Fruit:** A simple bowl of fresh berries (strawberries, raspberries) becomes an elegant dessert with a generous drizzle of warm chocolate syrup.
Thoughtful Homemade Gifts
Pour the finished homemade syrup into beautiful, fancy glass bottles or jars. Add a personalized tag, perhaps a festive holiday ribbon, and you have a wonderful, heartfelt gift for friends, family, or hostesses during the holiday season or any time of year. It’s a gift of delicious indulgence that shows you care.
Storage & Reheating: Keeping Your Syrup Fresh
Proper storage is essential to ensure your homemade chocolate syrup remains fresh and delicious for as long as possible. Fortunately, it’s quite simple.
Optimal Storage Practices
Store this homemade chocolate syrup in an airtight container or a tightly sealed jar in the refrigerator. The cold temperature helps to maintain its freshness and prevents spoilage. When stored correctly, the sauce is good to enjoy for up to 2 weeks. Always ensure the container is clean and dry before filling.
Enjoying Warm Chocolate Syrup
While delightful chilled, you can absolutely enjoy this syrup warm! If you prefer a warm, flowing consistency, simply portion out the amount of syrup you plan to use into a small, microwave-safe bowl. Heat it gently in the microwave in 15-second intervals, stirring in between, until it reaches your desired warmth and pourable consistency. Avoid heating the entire container of syrup multiple times, as this can affect its quality and shelf life. Only warm up what you intend to consume.
Homemade Chocolate Syrup vs. Store-Bought vs. Hot Fudge
Understanding the distinctions between various chocolate concoctions can help you appreciate the unique qualities of this homemade syrup.
Homemade Chocolate Syrup vs. Store-Bought
The most significant difference lies in the flavor profile. Store-bought syrups often contain artificial flavors, corn syrup, and preservatives, leading to a thinner consistency and a less authentic chocolate taste. Our homemade syrup, made with real cocoa, sugar, and vanilla, offers a purer, richer, and more natural chocolate experience. It’s also typically free of the additives found in commercial brands, giving you peace of mind about what you’re consuming.
Homemade Chocolate Syrup vs. Hot Fudge
While both are chocolate-based toppings, the primary difference between this homemade chocolate syrup and hot fudge is their consistency. Hot fudge typically has a much thicker, denser, and often glossier consistency, often due to the addition of butter, cream, or a higher proportion of fat, making it more akin to a melted chocolate dessert itself. When chilled, hot fudge becomes quite firm. This homemade chocolate syrup, by contrast, is designed to be thinner and more pourable, closer to the consistency of classic syrup. It’s perfect for swirling into milk, drizzling lightly over desserts, or mixing into beverages without becoming overly heavy. When chilled, it thickens but remains spoonable, rather than solidifying like hot fudge.

Let’s Connect!
If you’ve tried this delightful homemade chocolate syrup recipe, please let me know how you liked it in the comments below! I love hearing from you and seeing your creations.
Don’t forget to share your photos with me – @sugarandsoulco – on Instagram and Pinterest, or join our Sugar & Soul Show-offs Community and share them there!
This recipe was originally published in December 2013 and was thoughtfully updated in November 2022 with fresh photos and expanded content to provide you with the most comprehensive guide to making the best homemade chocolate syrup.
Chocolate Syrup
Author: Rebecca Hubbell
Course: Condiment
Cuisine: American
Prep Time: 5 minutes
Cook Time: 20 minutes
Total Time: 25 minutes
Servings: 2 cups
Print Recipe
Pin Recipe
Rate this Recipe
This Homemade Chocolate Syrup is overflowing with rich, delicious chocolaty flavor that you won’t get from the store-bought kind! Takes less than 20 minutes of hands-on time to cook it up!
Ingredients
- ¾ cup water
- 1½ cups granulated sugar
- ¾ cup Dutch-processed cocoa powder
- 1 tablespoon vanilla extract
- ⅛ teaspoon sea salt
- 1 tablespoon light corn syrup
Instructions
-
Combine water and sugar in a small saucepan and bring to a boil.¾ cup water, 1½ cups granulated sugar
-
Reduce heat to low and sift in the cocoa powder.¾ cup Dutch-processed cocoa powder
-
Then whisk in the vanilla, salt, and corn syrup.1 tablespoon vanilla extract, ⅛ teaspoon sea salt, 1 tablespoon light corn syrup
-
Continue to cook for about 10 minutes, whisking often, until it starts to thicken.
-
Remove from heat and strain through a fine mesh sieve to remove any clumps.
-
Let cool completely, about 1 to 2 hours, before using.
Notes
- Store in an airtight container in the refrigerator for up to 2 weeks.
- Nutritional information is an estimate per cup of syrup.
- Recipe from Alton Brown.
Nutrition
Did You Make This Recipe?
Don’t forget to share it with me on Instagram @sugarandsoulco and follow on Tiktok @sugarandsoulco and Pinterest @sugarandsoulco for more!
Rate this Recipe
Pin Recipe
Share Recipe