

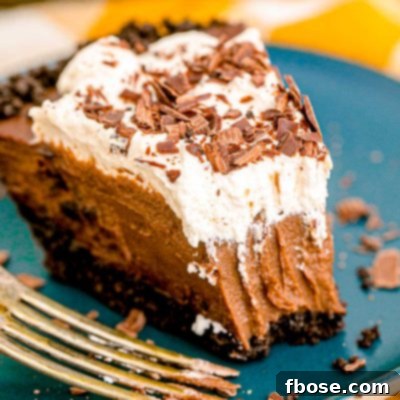
Indulge in pure chocolate bliss with this classic **Chocolate Cream Pie**! Featuring a perfectly crunchy Oreo cookie crust, a luxuriously rich and smooth chocolate custard filling, and crowned with a generous layer of light, fluffy homemade whipped cream, this dessert is an absolute showstopper. It’s the ultimate treat for any occasion, from festive holidays and lively picnics to casual family dinners and elegant parties.
For those who adore rich, chocolatey delights, this Chocolate Cream Pie is a must-try. If you’ve enjoyed the decadent layers of my Mississippi Mud Pie or the velvety texture of my French Silk Pie, you’ll fall head over heels for this recipe. Just like those favorites, this Chocolate Cream Pie is elegantly finished with billowy whipped cream and optional chocolate curls or crushed Oreos, making it a feast for both the eyes and the palate.
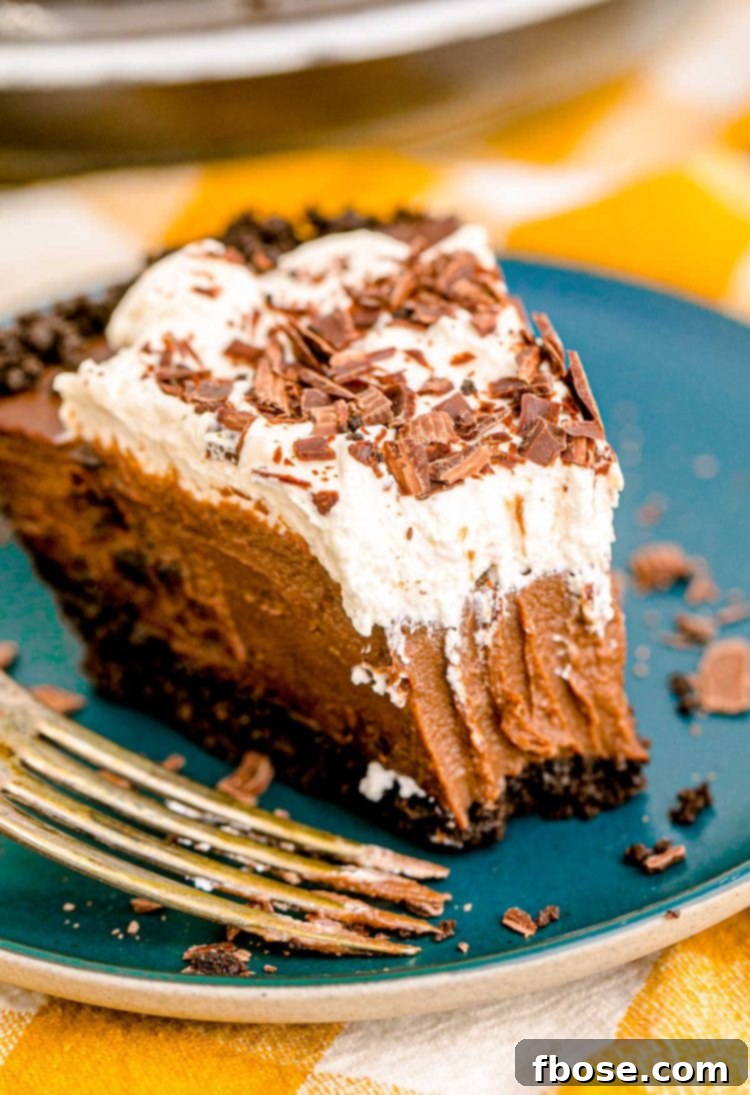
Are you searching for a dessert that’s guaranteed to impress with minimal effort? Your quest ends here with this unbelievably decadent Chocolate Cream Pie! This timeless dessert offers an irresistible combination of textures and flavors. A robust Oreo cookie crust provides the perfect dark chocolate base, while the luscious, intensely chocolatey custard filling delivers a smooth, melt-in-your-mouth experience. Topped with a cloud of homemade whipped cream, made with just four simple ingredients, every bite is a dream come true.
This versatile pie is ideal for a myriad of occasions. Imagine sharing it with your loved ones after a cozy dinner, bringing it as a crowd-pleasing addition to a holiday gathering, or simply savoring a chilled slice on a warm spring or summer afternoon. Its refreshing coolness and rich flavor make it a perfect dessert to cool down with. Once you experience your first taste, you’ll discover countless reasons to prepare this straightforward, yet exquisite, pie recipe again and again.
What makes this heavenly dessert even more appealing is its incredible ease of preparation. You can whip up this stunning pie in under 20 minutes of active prep time, using readily available ingredients. The magic happens primarily in your kitchen, followed by a blissful chilling period in the refrigerator that does most of the work for you. No oven required for the crust, making it an excellent “no-bake” option perfect for busy schedules or when you want to avoid heating up your kitchen.
The beauty of a no-bake pie like this Chocolate Cream Pie lies in its simplicity and the delightful balance of textures. The crisp, slightly salty Oreo crust perfectly contrasts the creamy, sweet custard. The homemade whipped cream adds an airy lightness, elevating the entire dessert. This isn’t just a dessert; it’s an experience, a delightful indulgence that brings joy to any moment. Its classic appeal ensures it remains a favorite across generations, a recipe you’ll want to pass down.

Essential Ingredients for Your Perfect Chocolate Cream Pie
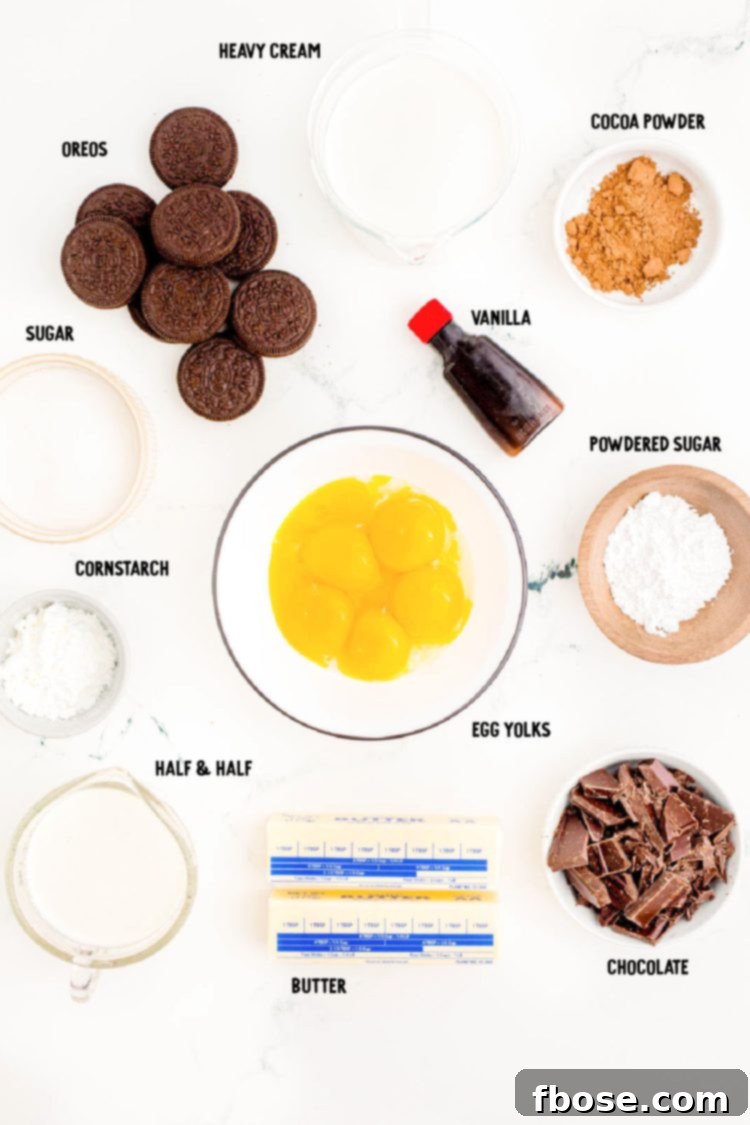
Crafting this sensational Chocolate Cream Pie recipe is a simple three-step process, each focusing on a distinct component: the crunchy Oreo cookie crust, the silky smooth chocolate pie filling, and the crowning glory of homemade whipped cream. Using high-quality ingredients ensures the best flavor and texture for your finished pie.
For the irresistible **Oreo Cookie Crust**, you’ll only need two ingredients: a generous amount of Oreo cookies and melted salted butter. I always recommend grabbing a family-size package of Oreos – you’ll have plenty for the crust and a few extra to snack on while you bake (or rather, no-bake!). The salted butter is key here, as it adds a subtle savory note that beautifully balances the sweetness of the Oreos, enhancing the overall depth of flavor in the crust.
While your crust is chilling to perfection in the refrigerator, you’ll prepare the decadent **Chocolate Filling**. This rich custard requires granulated sugar, cornstarch (a crucial thickening agent for that perfect consistency), high-quality cocoa powder for intense chocolate flavor, half and half for creamy richness, egg yolks (which provide structure and a luxurious smoothness to the custard), more salted butter for depth, premium semisweet chocolate (chopped, for a truly melty and smooth chocolate experience), and a touch of pure vanilla extract to round out the flavors. Each ingredient plays a vital role in creating the signature velvety texture and deep chocolate profile.
The Chocolate Cream Pie is then magnificently finished with a cloud of light, sweet, and unbelievably fluffy **Homemade Whipped Cream**. This component is surprisingly easy to make with just a few ingredients: cold heavy cream (ensure it’s very cold for optimal whipping), powdered sugar for delicate sweetness, vanilla extract for aroma, and a touch of cornstarch. The cornstarch acts as a stabilizer, helping the whipped cream hold its shape longer, especially important if the pie will be sitting out for a while or if you plan to enjoy leftovers.
To add that final professional touch and extra pizzazz, I love to garnish the pie with some extra crushed Oreos or elegant chocolate shavings. These toppings not only add visual appeal but also provide an extra layer of texture and flavor that complements the pie beautifully.
Step-by-Step Guide: Crafting Your No-Bake Chocolate Cream Pie
Creating this stunning no-bake chocolate pie is a straightforward process, making it accessible for bakers of all skill levels. Follow these detailed steps to achieve a perfectly decadent dessert.
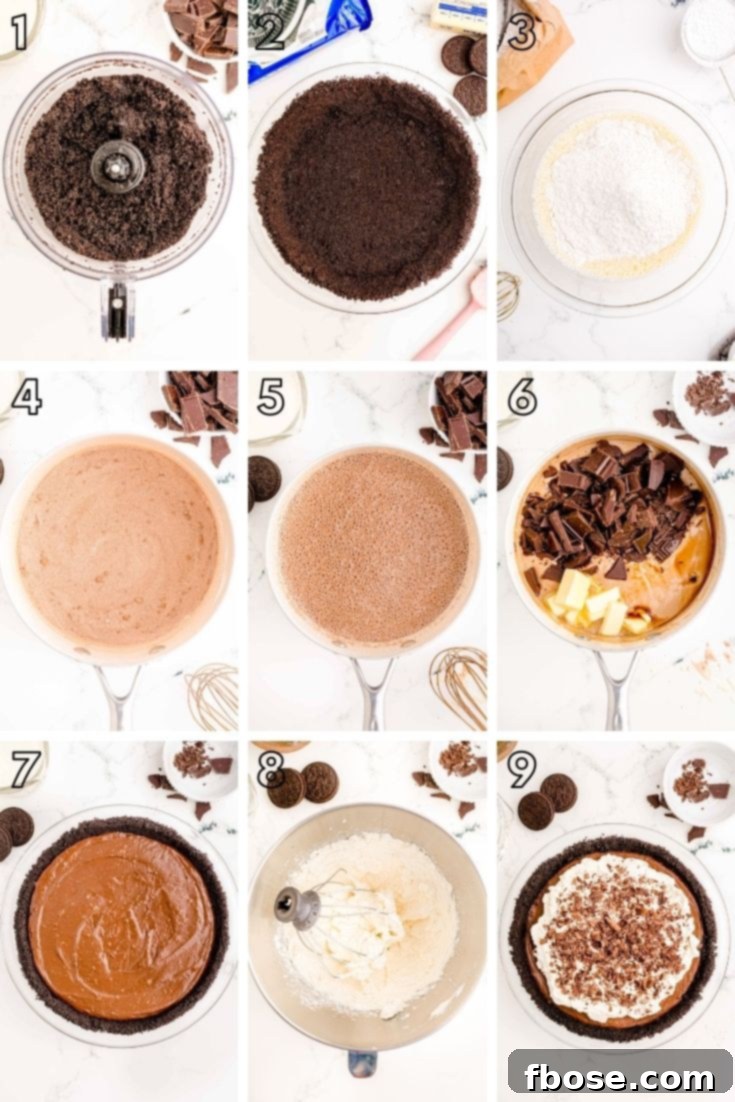
- Prepare the Oreo Crust: Begin by placing your Oreo cookies into a food processor. Pulse the cookies until they are finely ground into even crumbs. Next, melt the salted butter and add it to the cookie crumbs in the food processor. Pulse again until the butter is thoroughly incorporated, and the mixture resembles wet sand.
- Form the Crust: Transfer the buttery cookie crumbs into your chosen pie pan (a springform pan is ideal for easy slicing and presentation, or a standard 9-inch pie dish works perfectly). Press the mixture firmly and evenly across the bottom of the pan and slightly up the sides. You can use the bottom of a flat-bottomed glass or your fingers to achieve a compact and uniform crust. Once formed, place the crust in the refrigerator to chill while you prepare the filling. This cooling period helps the crust set and firm up.
- Start the Chocolate Filling: In a large, heavy-bottomed saucepan, combine the granulated sugar, cornstarch, and cocoa powder. Whisk these dry ingredients together thoroughly to ensure there are no lumps, which is crucial for a smooth filling.
- Combine Wet Ingredients: In a separate, medium-sized bowl, whisk together the half and half with the egg yolks until completely smooth and well combined. Gradually pour this wet mixture into the saucepan with the dry ingredients, whisking constantly as you add it. Continuous whisking at this stage prevents lumps and ensures a silky-smooth base for your custard.
- Cook the Custard: Place the saucepan over medium-high heat. Continue to whisk constantly, making sure to scrape the bottom and sides of the pan to prevent scorching. Heat the mixture until it begins to bubble gently. Once bubbling, reduce the heat to medium-low and simmer for about one minute, still whisking continuously, until the custard thickens noticeably. It should be thick enough to coat the back of a spoon.
- Finish the Filling: Immediately remove the saucepan from the heat. Stir in the pieces of salted butter, chopped semisweet chocolate, and vanilla extract. Continue stirring until all the butter and chocolate have melted completely and the filling is perfectly smooth and glossy. The residual heat from the custard will melt the chocolate beautifully.
- Chill the Pie: Pour the warm chocolate filling into your pre-chilled Oreo crust. Gently smooth the top with a spatula. Tightly cover the entire pie with plastic wrap, ensuring the plastic wrap touches the surface of the filling to prevent a skin from forming. Transfer the pie to the refrigerator and chill for at least 6 hours, or preferably overnight, to allow the custard to set completely and achieve its rich, firm texture.
- Prepare the Whipped Cream: While the pie is chilling (or closer to serving time), prepare the homemade whipped cream. Ensure your heavy cream is very cold, and for best results, chill your mixing bowl and whisk attachment for 10-15 minutes beforehand. In a cold standing mixer bowl (or using an electric hand mixer), beat the cold heavy cream with the powdered sugar and vanilla extract until soft peaks begin to form. Then, add the cornstarch and continue beating until stiff peaks are achieved. The cornstarch helps stabilize the whipped cream, preventing it from weeping.
- Assemble and Serve: Once the chocolate pie is thoroughly chilled and set, remove it from the refrigerator. Carefully spread the prepared homemade whipped cream over the top of the pie. If desired, garnish with extra crushed Oreos, chocolate shavings, or chocolate curls for an added touch of elegance and flavor. Slice and serve immediately, enjoying every decadent bite of this homemade masterpiece!
Frequently Asked Questions About Chocolate Cream Pie
Here are some common questions and helpful answers to ensure your Chocolate Cream Pie turns out perfectly every time.
How Do I Store This Oreo Pudding Pie?
To maintain its freshness and deliciousness, tightly cover the Chocolate Cream Pie with plastic wrap or aluminum foil. Store it in the refrigerator for up to 4 days. The tight covering helps prevent the crust from becoming soggy and keeps the custard and whipped cream fresh.
Does The Crust Need To Be Baked?
No, this Oreo cookie crust is designed to be a no-bake crust! It holds together beautifully without needing to go into the oven, thanks to the melted butter. However, if you prefer a slightly crisper crust or enjoy a baked flavor, you can certainly bake it. If you choose to bake, do so according to package directions for a store-bought crust or at 350°F (175°C) for about 8-10 minutes for a homemade one, then ensure it cools completely before adding the filling to prevent the custard from melting or separating.
Can I Use A Can Of Whipped Cream Instead Of Making Homemade Whipped Cream?
Absolutely! While homemade whipped cream is always recommended for the best flavor and texture, you can definitely use a store-bought alternative. A can of whipped cream or a container of frozen whipped topping, such as Cool Whip, will work just fine. Just make sure to apply it right before serving for the freshest look and texture, as canned whipped cream can deflate more quickly.
Is There Another Way To Make The Crust If I Don’t Have A Food Processor?
Yes, certainly! If you don’t have a food processor, you can still achieve perfectly crushed cookie crumbs. Simply place the Oreo cookies into a large, sturdy Ziploc bag. Seal the bag, removing as much air as possible, then use a rolling pin or another heavy object (like the bottom of a sturdy mug) to crush the cookies until they form fine crumbs. Once you have your crumbs, you can proceed to add the melted butter and mix until combined, either in the bag or in a bowl.
What Else Can I Make This Pie In Besides A Springform Pan?
This versatile recipe can be easily adapted to various baking dishes. While a springform pan is great for a clean presentation, you can also make this pie in a standard 9-inch pie dish. For individual servings, you could even press the crust into muffin tins or small ramekins to create mini chocolate cream pies, adjusting chilling times as needed.
Why Does The Homemade Whipped Cream Have Cornstarch In It?
The addition of cornstarch to the homemade whipped cream serves as a stabilizer. It helps the whipped cream maintain its fluffy peaks and prevents it from weeping or deflating, especially if the pie sits for a while or if there are leftovers. If you plan to serve and consume the pie immediately, and are not concerned about its longevity, you can certainly omit the cornstarch. However, for a more robust and lasting whipped cream, it’s a helpful addition.
Can I Use Milk In The Filling Instead Of Half and Half?
Yes, you can substitute milk for half and half in the filling, though it will result in a slightly less rich and creamy texture. If you choose to use milk, I recommend using whole milk for the best results. For a similar richness to half and half, you could use a combination: try 2 cups of whole milk and 1/2 cup of heavy cream, or even 2 1/4 cups of whole milk with 1/4 cup of light cream. If you don’t have any cream available, you can approximate the richness by combining 3 tablespoons of melted butter with enough milk to reach 2 1/2 cups total liquid.
Can I Freeze This Chocolate Custard Pie?
This chocolate custard pie actually freezes remarkably well, making it a great make-ahead option! I highly recommend freezing it *without* the whipped cream topping, as whipped cream can sometimes alter its texture when frozen and thawed. Once frozen solid, the pie can be stored for up to 3 months in an airtight container or tightly wrapped with several layers of plastic wrap and then foil. When you’re ready to enjoy it, simply transfer the frozen pie to the refrigerator overnight to allow it to thaw gradually. Once thawed, you can then prepare and add fresh whipped cream before serving for the best experience.
What’s The Difference Between This Chocolate Custard Pie And A Chocolate Pudding Pie?
The primary difference lies in their base. A traditional chocolate pudding pie typically uses an instant pudding mix as its foundation, offering a quick and easy approach. In contrast, this chocolate pie recipe features a rich, homemade custard base. This custard is made from scratch using classic ingredients like eggs (specifically egg yolks for richness), sugar, half and half, and cocoa powder. This method results in a significantly richer, smoother, and more nuanced flavor and a luxurious, dense texture that distinguishes it from a lighter, pudding-based pie.
Can I Use A Pre-Made Oreo Cookie Crust Instead Of Making My Own?
Absolutely! Using a pre-made Oreo cookie crust is a fantastic shortcut, especially if you’re short on time or simply prefer an even easier path to enjoying this delightful pie. Just ensure the pre-made crust is the correct size (usually 9 inches) and follow the remaining steps for the filling and topping. It’s a convenient option that doesn’t compromise too much on the overall deliciousness of the pie.
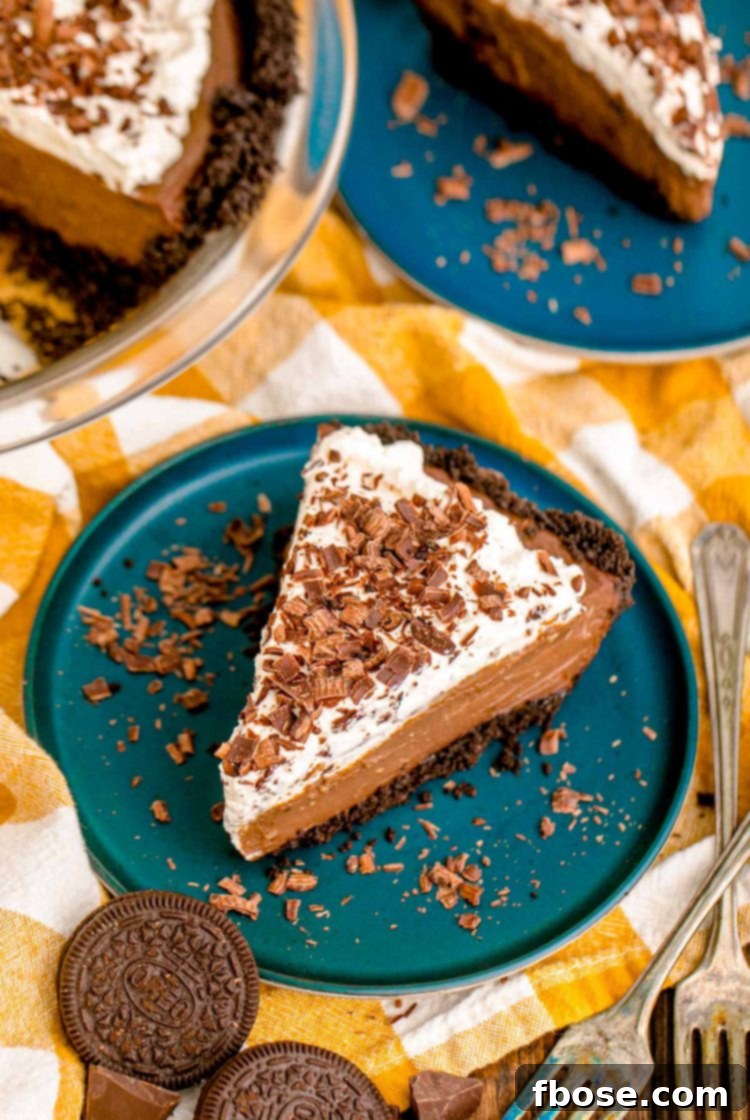
While this Homemade Chocolate Cream Pie is undeniably a holiday classic, its versatility and timeless appeal mean it should be savored and enjoyed year-round! Don’t limit your dessert adventures; explore a world of delicious pies by checking out more of my favorite pie recipes. Whether you crave fruit, nuts, or more chocolate, there’s a pie for every palate and occasion.
- Butterscotch Pie – A rich, silky, and utterly addictive pie made with simple pantry staples in a mere 15 minutes of prep time! Perfect for a quick yet indulgent dessert.
- Brownie Pie – Experience the best of both worlds with a gooey, homemade brownie baked within a delightful graham cracker crust, generously covered in sweet, tempting toppings.
- Chocolate Toll House Pie – Relive nostalgic flavors with this comforting pie that evokes classic chocolate chip cookies. It requires just 15 minutes of prep using easy-to-find ingredients.
- Peanut Butter Pie – An incredibly easy, no-bake recipe bursting with irresistible, creamy peanut butter flavor. A dream for any peanut butter enthusiast!
- The Best Homemade Apple Pie – A true classic, this pie is overflowing with a perfectly spiced, homemade apple filling nestled in a flaky, golden crust.
Let’s Connect and Share Your Creations!
If you’ve tried this incredible Chocolate Cream Pie recipe, I would absolutely love to hear about your experience! Please share your thoughts and leave a review in the comments section below. Your feedback and ratings mean the world to me!
Don’t forget to tag me – @sugarandsoulco – on Instagram and Pinterest with your beautiful photos of this pie. You can also join our vibrant Sugar & Soul Show-offs Community on Facebook and share your creations there, where you can also participate in our fun recipe challenges! I can’t wait to see your delicious results!
Chocolate Cream Pie
Equipment
-
Food processor
-
Springform pan
-
Whisk
-
Large, heavy saucepan
-
Large mixing bowl
-
Standing mixer or Electric mixer
Ingredients
Crust:
- 30 Oreo cookies
- 6 Tablespoons salted butter
Filling:
- ½ cup granulated sugar
- 2 Tablespoons cornstarch
- 1 Tablespoon cocoa powder
- 2½ cups half and half
- 6 large egg yolks
- 4 Tablespoons salted butter in pieces
- 8 ounces semisweet chocolate chopped
- 1 teaspoon vanilla extract
Whipped Cream:
- 1 cup heavy cream very cold
- 3 Tablespoons powdered sugar
- 1 teaspoon vanilla extract
- 1 Tablespoon cornstarch
- Optional Garnish: crushed oreos or chocolate shavings
Instructions
-
Place the Oreo cookies into your food processor and pulse until finely crumbly. Then, add the melted butter to the cookie crumbs and pulse again until the mixture is thoroughly combined and resembles wet sand.
-
Press this crumb mixture firmly into a springform pan, ensuring it covers the bottom evenly and extends slightly up the sides. You may use the bottom of a flat glass to compact the crumbs. Transfer the prepared crust to the fridge to chill while you prepare the chocolate pie filling.
-
To prepare the filling: In a heavy, large saucepan, whisk together the granulated sugar, cornstarch, and cocoa powder until well combined and free of lumps.
-
In a separate large mixing bowl, whisk together the half and half and the egg yolks until smooth. Gradually add this liquid mixture to the saucepan, whisking constantly to ensure a smooth consistency. Place the saucepan over medium-high heat. Whisk continuously as the mixture begins to bubble. Once bubbling, reduce the heat to medium and simmer for another minute, making sure to constantly scrape the bottom and sides of the pan to prevent scorching and ensure even thickening.
-
Remove the saucepan from the heat. Add the pieces of salted butter, chopped semisweet chocolate, and vanilla extract. Stir vigorously until all ingredients are completely melted and the filling is smooth and glossy.
-
Pour the warm chocolate filling into the chilled crust. Cover the surface of the pie tightly with plastic wrap (the plastic wrap should touch the filling to prevent a skin from forming), and then place the pie in the fridge for at least 6 hours, or ideally overnight, until thoroughly set.
-
While the pie is cooling and setting, you can prepare the homemade whipped cream. Place the very cold heavy cream into a cold standing mixer bowl (or use an electric hand mixer with a cold bowl). Add the powdered sugar and vanilla extract. Beat until soft peaks form. Then, add the cornstarch and continue beating until stiff peaks are achieved.
-
Once the pie is completely chilled and firm, top it generously with the prepared homemade whipped cream before serving.
Notes
- How Do I Store This Oreo Pudding Pie? Tightly cover the pie and place it in the refrigerator to enjoy for up to 4 days.
- Does The Crust Need To Be Baked? The crust actually holds together without being baked. However, if you prefer to bake it you can, just be sure it cools completely before adding the filling.
- Can I Use A Can Of Whipped Cream Instead Of Making Homemade Whipped Cream? Of course! Feel free to use a can or even a container of frozen whipped topping such as cool whip.
- Is There Another Way To Make The Crust If I Don’t Have A Food Processor? Yes, first place the cookies in a Ziploc bag. Then just crush them up with a rolling pin or something else that’s heavy. Once the cookies have turned to crumbs then you can add the melted butter.
- What Else Can I Make This Pie In Besides A Springform Pan? This recipe can also be easily made in a 9-inch pie dish.
- Why Does The Homemade Whipped Cream Have Cornstarch In It? The cornstarch helps to stabilize it, making it last longer. If you’re planning to eat the pie right away you can just leave the cornstarch out!
- Can I Use Milk In The Filling Instead Of Half and Half? Yes, you can. You could also use 2 cups of whole milk and 1/2 cup of heavy cream. Or you could use 2 1/4 cups of whole milk and 1/4 cup of light cream. If you don’t have any cream, you can use 3 tablespoons of melted butter. Then just add enough milk to get to 2 1/2 cups.
- Can I Freeze This Chocolate Custard Pie? This pie actually does freeze really well! I do however suggest freezing it without the whipped cream. Once frozen it can be stored for up to 3 months. When you’re ready to enjoy the pie just place it in the fridge overnight to allow it to thaw. Then top with whipped cream before serving!
- Can I Use A Pre-Made Oreo Cookie Crust Instead Of Making My Own? Of course! That’s certainly a great option if you’re crunched for time or just want an easier path to this pie recipe!
Nutrition
Did You Make This Recipe?
Don’t forget to share it with me on Instagram @sugarandsoulco and follow on Tiktok @sugarandsoulco and Pinterest @sugarandsoulco for more!
Pin Recipe
Share Recipe