
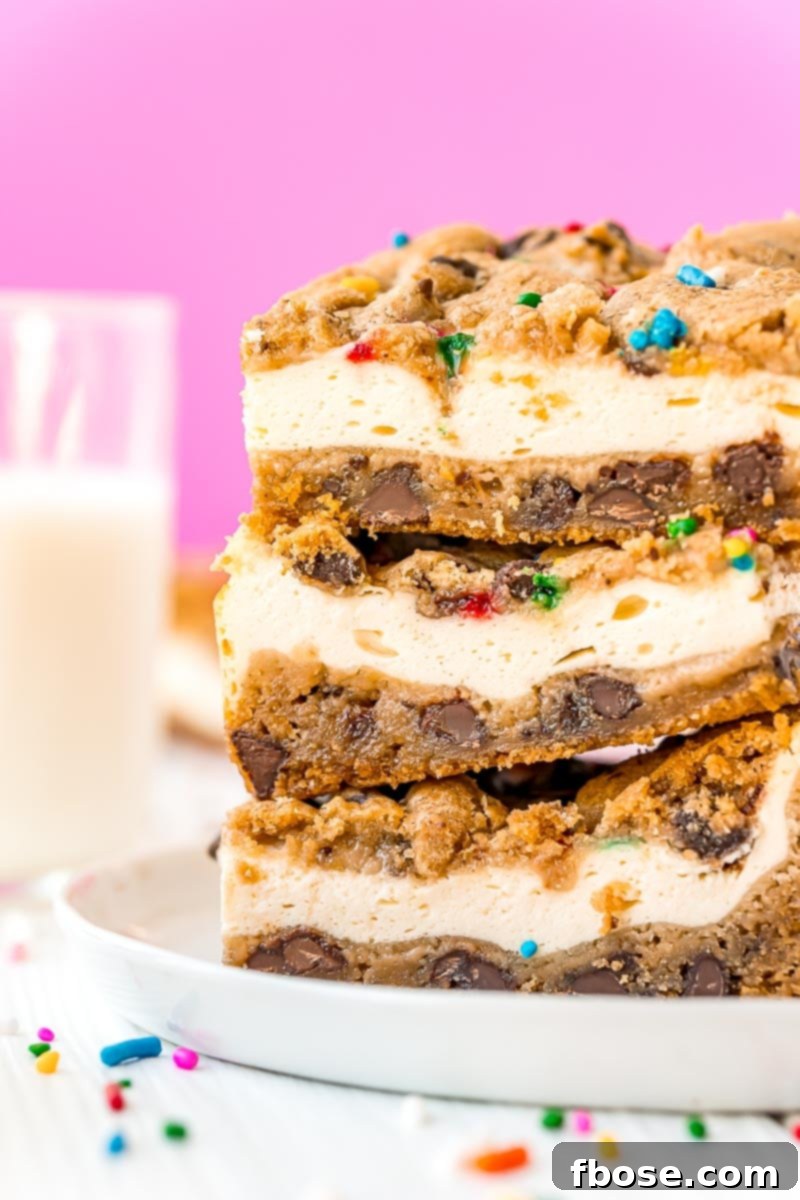
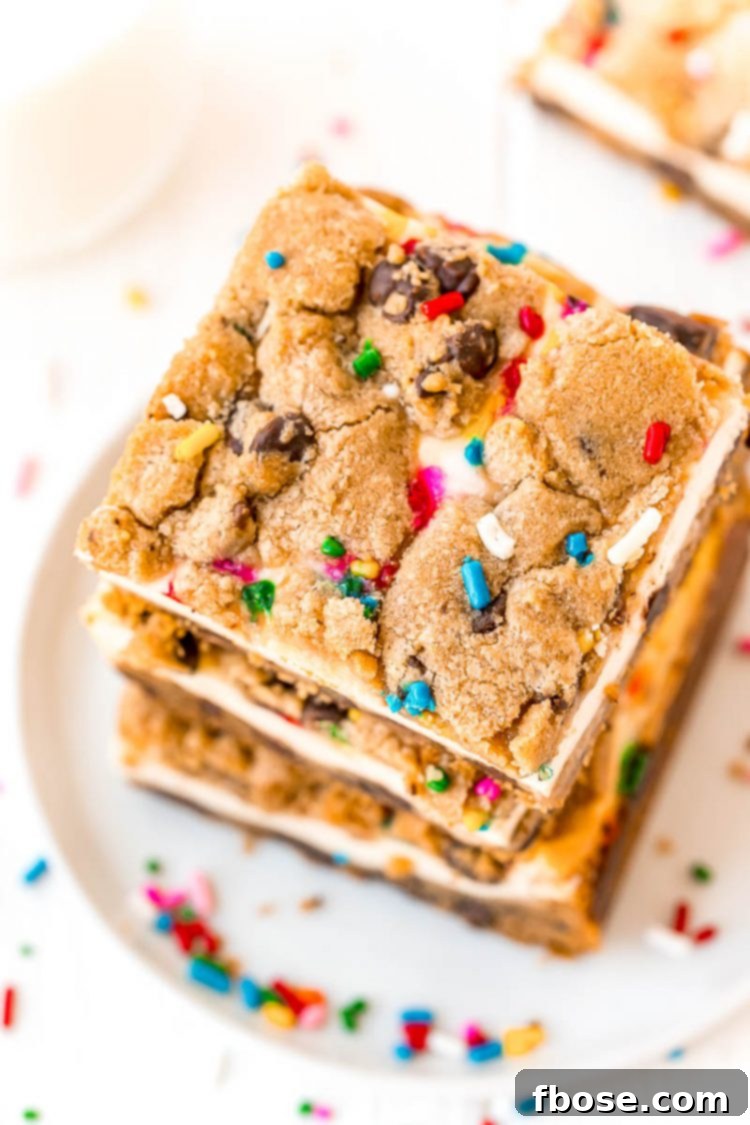
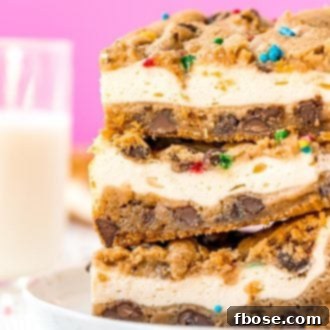
Welcome to the ultimate guide for creating irresistibly delicious **Chocolate Chip Cheesecake Bars**! Imagine the perfect harmony of a classic chocolate chip cookie and a rich, creamy cheesecake, all in one easy-to-make dessert. This recipe delivers exactly that: a luscious cream cheese filling nestled between two delightful layers of golden chocolate chip cookie. What makes it even better? You only need a handful of ingredients, and the secret to its effortless preparation lies in using refrigerated chocolate chip cookie dough. Say goodbye to complicated baking and hello to a simple, show-stopping treat that will have everyone asking for more.
Cheesecake bars are renowned for being an easy, crowd-pleasing dessert, perfect for any gathering or special occasion. If you’ve enjoyed our decadent Best Ever Blueberry Cheesecake Bars or the comforting Apple Cheesecake Bars with their buttery shortbread crust, you’re in for an equally delightful experience with this chocolate chip rendition. These bars are a sweet and creamy dream come true, offering a satisfying bite that beautifully combines the chewy texture of cookies with the smooth richness of cheesecake. It’s the ideal treat for anyone who loves indulging in Edible Cookie Dough or the dense, luxurious flavor of traditional New York Style Cheesecake.
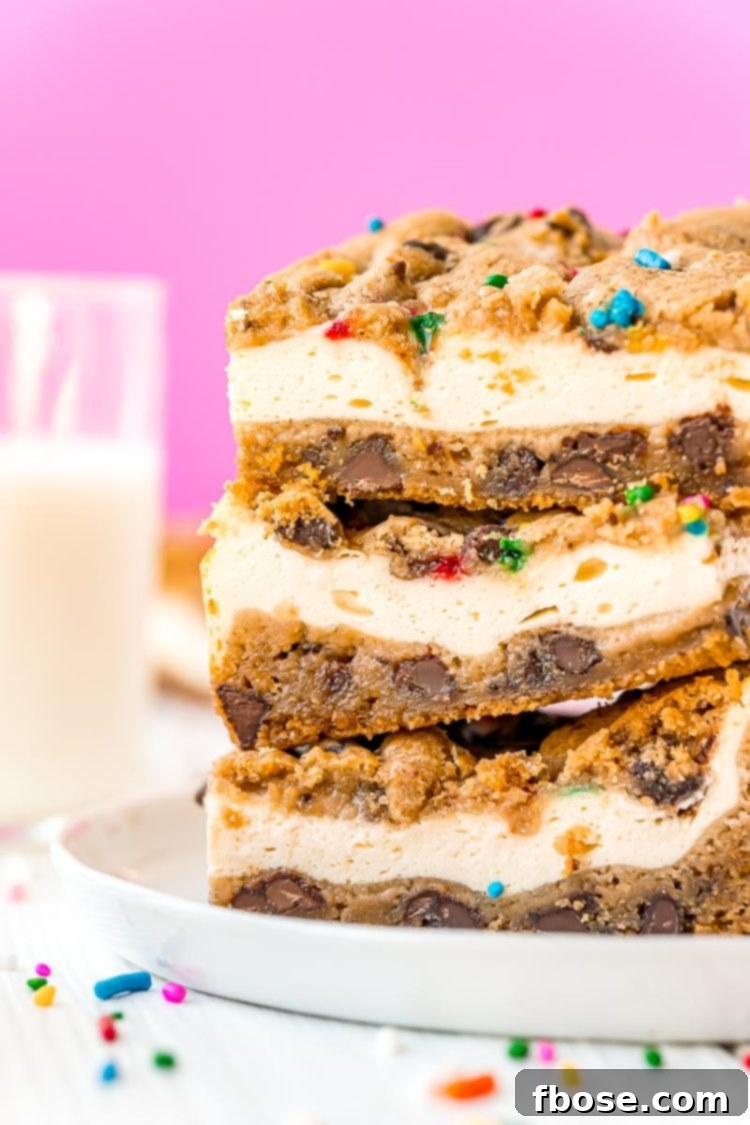
Why These Chocolate Chip Cheesecake Bars Are Your New Go-To Dessert
It’s no secret that crafting a perfect cheesecake from scratch can often be a daunting task, requiring precise temperatures, careful mixing, and a watchful eye to prevent cracks. But what if you could capture that same rich, luscious cheesecake flavor in a much simpler form? These Chocolate Chip Cookie Cheesecake Bars are the answer! They offer all the creamy indulgence you crave from a classic cheesecake, combined with the beloved texture and flavor of chocolate chip cookies, all while being incredibly straightforward to prepare. This recipe is designed to be foolproof, ensuring a stunning and delicious dessert every time, even for novice bakers.
The beauty of this recipe lies in its simplicity and the intelligent use of readily available ingredients. By leveraging refrigerated cookie dough, we eliminate the need for measuring flour, sugar, and butter for the crust, cutting down on prep time and guaranteeing a consistent base. The cheesecake layer itself is equally uncomplicated, requiring minimal mixing and basic pantry staples. This means less stress in the kitchen and more time enjoying your delectable creation with family and friends. Whether you’re hosting a party, bringing a treat to a potluck, or simply satisfying a sweet craving, these bars are a perfect choice.
The Brilliant Hack: Refrigerated Cookie Dough
Using pre-made cookie dough is truly the genius hack that makes these cheesecake bars ridiculously easy to put together. But what else can you do with this versatile ingredient? Glad you asked! Beyond these incredible cheesecake bars, refrigerated cookie dough opens up a world of quick dessert possibilities. From simple baked cookies and skillet desserts to cookie cups filled with ice cream or fruit, its convenience is unmatched. For this recipe, it transforms into the perfect soft, chewy base and a delightful crumble topping, saving you precious time and effort while delivering consistent, delicious results every single time. It’s an essential shortcut for any busy baker who refuses to compromise on taste.
You only need three additional ingredients – ones you probably already have in your kitchen – to create this easy, cheesecake-inspired dessert. This minimal ingredient list further emphasizes the simplicity and accessibility of this recipe. It’s about creating maximum flavor with minimum fuss, proving that you don’t need a complex ingredient list to achieve an extraordinary dessert.
Key Ingredients for Your Delightful Bars
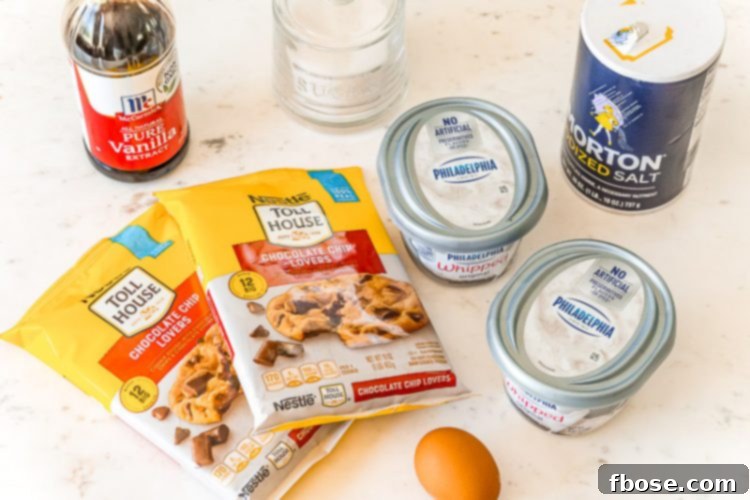
Crafting these delectable Chocolate Chip Cheesecake Bars requires a short and sweet list of ingredients. Each component plays a crucial role in achieving the perfect balance of flavors and textures that make this dessert so irresistible. Here’s a detailed look at what you’ll need:
Refrigerated Cookie Dough
This is the star of our “easy button” approach! We recommend using two (16 oz.) packages of ready-to-bake chocolate chip cookie dough. This brilliant shortcut not only saves you a significant amount of time and effort in the kitchen but also ensures a consistent and delicious cookie base and crumble topping. The convenience of pre-made dough means you can skip the measuring, mixing, and chilling associated with traditional cookie recipes, allowing you to get these bars into the oven faster. Look for your favorite brand of classic chocolate chip cookie dough for the best results. You will divide this dough, using half for the bottom crust and portions of the remaining half for the top crumble.
The Creamy Cheesecake Filling
The heart of these bars is the rich, smooth, and tangy cream cheese filling. This simple yet elegant mixture is what gives these bars their signature cheesecake character. You’ll need:
- 16 ounces whipped cream cheese: While traditional block cream cheese works, using whipped cream cheese can streamline the process even further. It’s already softened and airy, which makes it incredibly easy to mix into a smooth, lump-free filling without extensive beating. If you opt for block cream cheese, ensure it’s at room temperature for at least an hour before mixing to achieve that silky-smooth consistency. This step is crucial for a perfectly creamy filling.
- ¾ cup granulated sugar: Provides the essential sweetness to balance the tang of the cream cheese. Depending on your preference, you can adjust this amount slightly; reduce it to ½ cup for a less sweet filling or increase it to 1 cup for a sweeter treat.
- 1 large egg: The egg acts as a crucial binder, helping the cheesecake filling to set beautifully and maintain its shape during baking. It also contributes to the filling’s smooth, creamy texture and adds richness.
- 1 teaspoon vanilla extract: A touch of pure vanilla extract enhances all the flavors, adding warmth and a classic dessert aroma to the cheesecake layer.
- ½ teaspoon salt: Just a pinch of salt is vital for balancing the sweetness and brightening the overall flavor profile of the cheesecake filling. It prevents the dessert from tasting flat and brings out the best in the other ingredients.
This simple combination creates a cheesecake layer that is both luscious and sturdy, perfectly complementing the chewy cookie layers. The filling is then carefully sandwiched between the two cookie layers, creating a harmonious blend of textures and tastes.
Pro Tip: Ensure your cream cheese (if using block cream cheese) is at room temperature. This is key to achieving a perfectly smooth, lump-free cheesecake filling that mixes effortlessly with other ingredients. Cold cream cheese will result in a clumpy texture.
How to Make Chocolate Chip Cheesecake Bars: A Step-by-Step Guide
Creating these incredible Chocolate Chip Cheesecake Bars is a straightforward process, broken down into a few simple steps. Follow these instructions carefully to ensure a perfectly baked and delicious dessert:
- Prepare Your Pan: First, preheat your oven to 350°F (175°C). Line a 9×9-inch baking pan with parchment paper, leaving an overhang on two sides to easily lift the bars out later. This prevents sticking and makes for clean slicing.
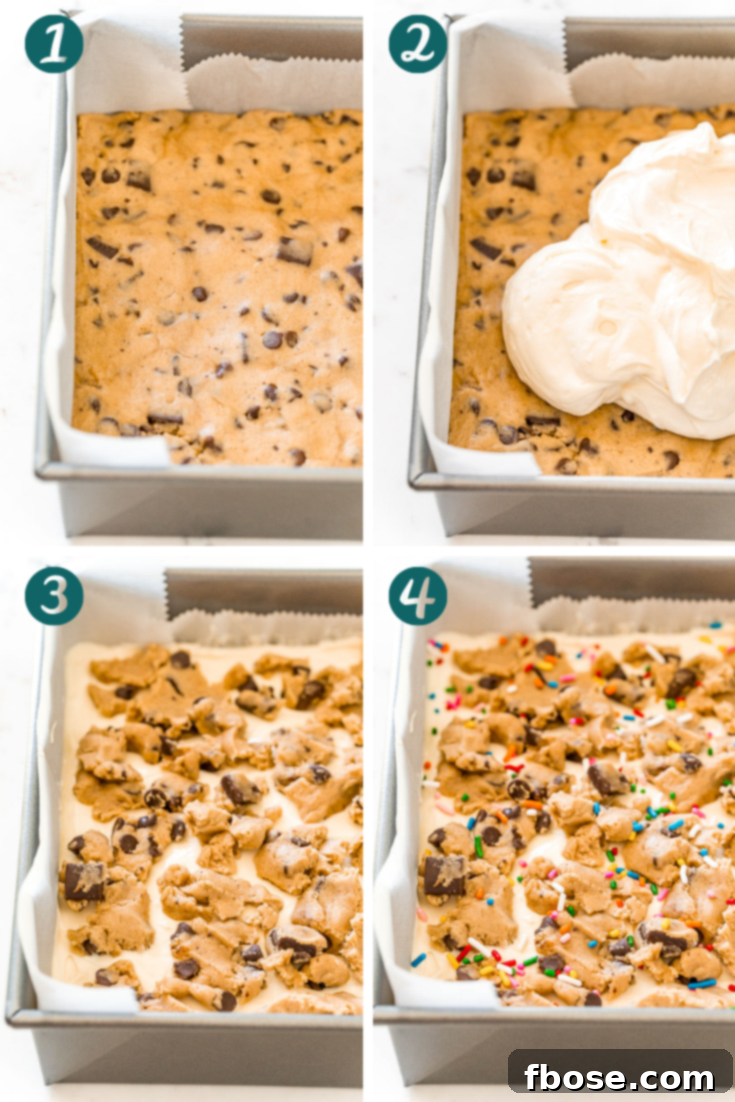
- Form the Bottom Cookie Layer: Take one full package of the refrigerated cookie dough (which is half of the total amount if using two 16oz packages). Press this half evenly onto the bottom of the prepared baking pan. You can use your fingers or a flat-bottomed glass to get an even, compact layer. Ensure it extends to all edges of the pan.
- Prepare the Cheesecake Filling: In a large mixing bowl, or the bowl of a stand mixer fitted with a paddle attachment, combine the room temperature whipped cream cheese (or softened block cream cheese), granulated sugar, large egg, vanilla extract, and salt. Beat these ingredients together on medium speed until the mixture is completely smooth and creamy, with no lumps. Be careful not to overmix, as this can introduce too much air, which might lead to cracks in your cheesecake later.
- Add the Cheesecake Layer: Carefully spread the prepared cream cheese mixture evenly over the top of the pressed chocolate chip cookie dough base. Use an offset spatula or the back of a spoon to create a smooth, consistent layer.
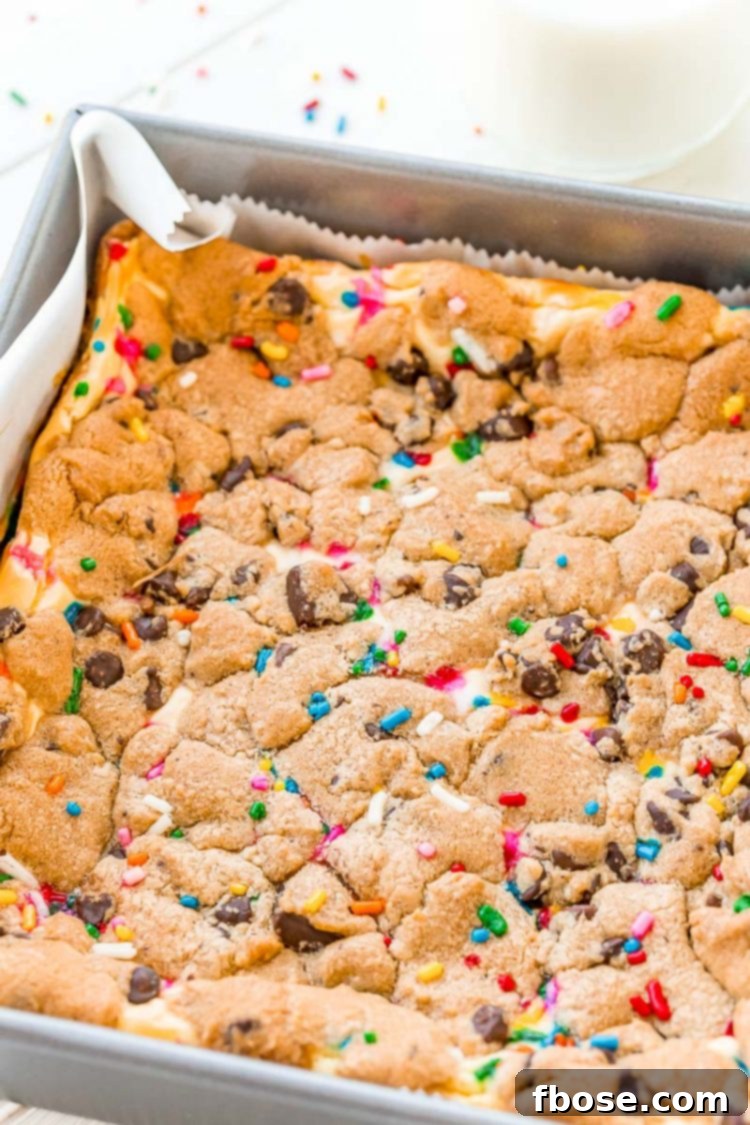
- Create the Cookie Crumble Topping: Take half of the remaining cookie dough (which is ¼ of the original total, or half of one 16oz package). Break this portion of cookie dough into small, irregular pieces using your fingers. Sprinkle these pieces randomly and evenly over the top of the cheesecake filling. This will bake into a delicious, slightly crunchy cookie crumble. If desired, you can also add extra sprinkles or mini chocolate chips over the top for an added visual appeal and burst of flavor. Note: You will have some cookie dough left over. Feel free to bake it as regular cookies or save it for another use; the full amount is too much for the topping.
- Bake to Perfection: Place the baking pan in the preheated oven and bake for 45 to 55 minutes. The bars are done when the top cookie layer is golden brown and the center of the cheesecake filling is only slightly jiggly when gently shaken. It will firm up completely as it cools.
- Cool and Chill: Once baked, remove the pan from the oven and transfer it to a wire rack. Allow the cheesecake bars to cool completely to room temperature, which typically takes about 30 minutes to an hour. This gradual cooling is essential. Once at room temperature, transfer the pan to the refrigerator and chill for at least 3 hours. Chilling allows the cheesecake to fully set, making it easier to slice and ensuring the best texture and flavor.
- Slice and Serve: Once thoroughly chilled, use the parchment paper overhang to lift the entire slab of cheesecake bars out of the pan. Place it on a cutting board and slice into 9 or 16 squares, depending on your desired serving size. Serve cold and enjoy!
How to Store Your Delicious Chocolate Chip Cheesecake Bars
Proper storage is key to keeping your Chocolate Chip Cheesecake Bars fresh and delicious. Once they have completely cooled and chilled, store them in an airtight container. This helps to prevent them from drying out and absorbing odors from the refrigerator. When stored correctly, these bars will maintain their quality and flavor for up to 3 days in the refrigerator. For longer storage, you can also freeze these bars. Wrap individual bars tightly in plastic wrap, then place them in a freezer-safe airtight container or bag. They can be frozen for up to 1-2 months. Thaw frozen bars in the refrigerator overnight before serving for the best texture.
How Do You Know When the Bars Are Done?
Knowing when your cheesecake bars are perfectly baked is crucial for that ideal creamy texture. After the baking time is complete (typically 45-55 minutes), the top layer of cookie dough should be a beautiful golden brown. The key indicator for the cheesecake filling is its movement: gently shake the pan. The center of the cheesecake should be only slightly jiggly, like a very firm Jell-O. The edges will appear set and firm. It might not look completely solid, but don’t worry – it will continue to set as it cools. Over-baking can lead to a dry or cracked cheesecake, so trust the jiggly center! After removing them from the oven, wait for them to cool completely at room temperature (about 30-60 minutes), then transfer them to the refrigerator to chill for at least three hours before slicing and serving. This extended chilling period is vital for the filling to fully set and achieve its perfect creamy consistency.
Expert Tips & Tricks for Perfect Cheesecake Bars
Achieving bakery-quality Chocolate Chip Cheesecake Bars is easy with these expert tips:
- Cooling is Crucial: Never put warm or hot cheesecake bars directly into the refrigerator. This rapid temperature change can cause condensation to form on the surface, making the top soggy and potentially leading to cracks in the cheesecake layer. Always allow them to cool completely to room temperature on a wire rack first.
- Room Temperature Cream Cheese: This tip is worth repeating! For the smoothest, lump-free cheesecake filling, ensure your block cream cheese is at room temperature. If you’re in a hurry, you can opt for whipped cream cheese, which is already soft and easy to blend, allowing you to skip the softening time.
- Prevent Sticky Dough: When pressing the cookie dough into the pan, especially for the bottom layer, your fingers can get sticky. Lightly coat your hands with a small amount of flour before flattening the dough. This will prevent sticking and make the process much easier and cleaner.
- Avoid Over-mixing the Filling: Once you’ve combined all the cheesecake filling ingredients, mix them until just smooth and creamy. Stop mixing as soon as the ingredients are incorporated and no lumps remain. Over-mixing introduces too much air into the batter, which can cause the cheesecake to puff up excessively in the oven and then fall, potentially leading to cracks.
- Even Cookie Layers: Strive for an even thickness with both the bottom cookie layer and the sprinkled top pieces. This ensures consistent baking and a balanced texture in every bite.
- Customize Your Topping: While sprinkles are a fun addition, feel free to get creative! You can add mini chocolate chips, chopped nuts, a drizzle of caramel, or even a sprinkle of sea salt to the top before baking for added flavor and texture.
- Parchment Paper Overhang: Don’t forget to leave an overhang of parchment paper on the sides of your pan. This creates “handles” that make it incredibly easy to lift the entire baked and chilled slab out of the pan before slicing, ensuring clean, perfect bars.
Explore More Easy Cheesecake Recipes
If you love the simplicity and deliciousness of these Chocolate Chip Cheesecake Bars, you’ll be thrilled to discover more of our favorite easy cheesecake creations:
- Cranberry Cheesecake Bars: Tart and creamy, these festive bars are perfect for the holidays or any time you need a burst of bright flavor.
- Apple Cheesecake Bars: A delightful fusion of classic cheesecake and warm apple pie, making for a truly mouthwatering dessert.
- Sopapilla Cheesecake: Experience a creamy, spiced filling sandwiched between two layers of golden pastry, beautifully topped with cinnamon and sugar for a truly unique treat.
- Triple Chocolate Cheesecake: For the ultimate chocolate lover, this deliciously rich and decadent cheesecake offers layers of intense chocolate flavor.
- White Chocolate Pumpkin Tart: A must-try for pumpkin enthusiasts, combining the warmth of pumpkin with the sweetness of white chocolate in a beautiful tart form.
Frequently Asked Questions About Chocolate Chip Cheesecake Bars
Can I use homemade cookie dough instead of refrigerated?
Absolutely! If you have a favorite chocolate chip cookie dough recipe, feel free to use it. Just make sure it’s a dough that bakes up relatively firm and can be pressed into a pan. You’ll need enough dough to create a bottom layer and a crumbly top layer, so about 32 ounces in total (equivalent to two 16oz packages).
How can I prevent my cheesecake from cracking?
Several factors help prevent cracks: ensure your cream cheese is at room temperature for a smooth batter, avoid over-mixing the cheesecake filling (just mix until smooth), and allow the bars to cool gradually. Don’t transfer them directly from a hot oven to a cold refrigerator. Let them cool completely at room temperature first, then chill.
Can I add other mix-ins to the cheesecake filling or topping?
Yes, get creative! You can fold in mini chocolate chips, a swirl of caramel sauce, or finely chopped nuts into the cheesecake filling. For the topping, consider adding chopped pecans, walnuts, or even a light sprinkle of coarse sea salt to enhance the chocolate flavor.
What kind of baking pan is best?
A light-colored metal 9×9-inch baking pan is ideal for even baking. Darker pans can sometimes cause the edges to cook faster. Always line your pan with parchment paper for easy removal.
Can I make these ahead of time?
Yes, these cheesecake bars are excellent for making ahead! They need a minimum of 3 hours to chill, but taste even better after chilling overnight. This makes them a perfect dessert to prepare the day before an event.
How do I get clean slices?
For super clean slices, make sure the bars are thoroughly chilled (at least 3 hours, preferably longer). Use a sharp, thin knife. For each slice, wipe the knife clean with a warm, damp cloth between cuts to prevent sticking and maintain sharp edges.
Chocolate Chip Cookie Cheesecake Bars
Author: Rebecca Hubbell
Course: Dessert
Cuisine: American
Servings: 9 people
Chocolate Chip Cheesecake Bars consist of a rich cream cheese filling sandwiched between two delicious chocolate chip cookie layers. Made with just a few simple ingredients, prep is a breeze thanks to refrigerated chocolate chip cookie dough!
Ingredients
- 2 (16oz.) packages ready-to-bake chocolate chip cookie dough, divided
- 16 ounces whipped cream cheese
- ¾ cup granulated sugar
- 1 large egg
- 1 teaspoon vanilla extract
- ½ teaspoon salt
Instructions
- Preheat the oven to 350°F and line a 9×9-inch baking pan with parchment paper.
- Press half of the cookie dough evenly into the bottom of the pan.
- In a large bowl or stand mixer fitted with a paddle attachment, beat together the cream cheese, sugar, egg, vanilla, and salt until smooth and creamy.
- Spread the cheesecake filling evenly over the top of the chocolate chip cookie dough.
- Pinch half of the remaining cookie dough into small pieces and sprinkle them over the top of the cheesecake filling. Sprinkle with additional sprinkles or mini chocolate chips, if desired. (You will have some cookie dough left over, which can be baked as regular cookies or discarded. The whole amount is too much for the topping.)
- Bake for 45 to 55 minutes until the top cookie layer is golden brown and the center of the cheesecake is only slightly jiggly.
- Transfer the cheesecake to a wire rack and allow it to cool completely to room temperature, then transfer to the refrigerator and chill for at least 3 hours.
Notes
- Sugar can be reduced to 1/2 cup or increased to 1 cup for a less or more sweet filling, respectively.
- Do not prebake the cookie dough.
- The cheesecake will sink slightly in the center after cooling, which is normal.
- Store in an airtight container in the refrigerator for up to 3 days.
Did You Make This Recipe?
Don’t forget to share your creations with me on Instagram @sugarandsoulco and follow on Tiktok @sugarandsoulco and Pinterest @sugarandsoulco for more delicious inspiration!
Let’s Connect!
If you’ve tried this recipe, please let me know how you liked it in the comments below and leave a review. I love hearing from you!
Don’t forget to tag me – @sugarandsoulco – on Instagram and Pinterest with your photos or join our Sugar & Soul Show-offs Community and share them there, where you can join our recipe challenges!