
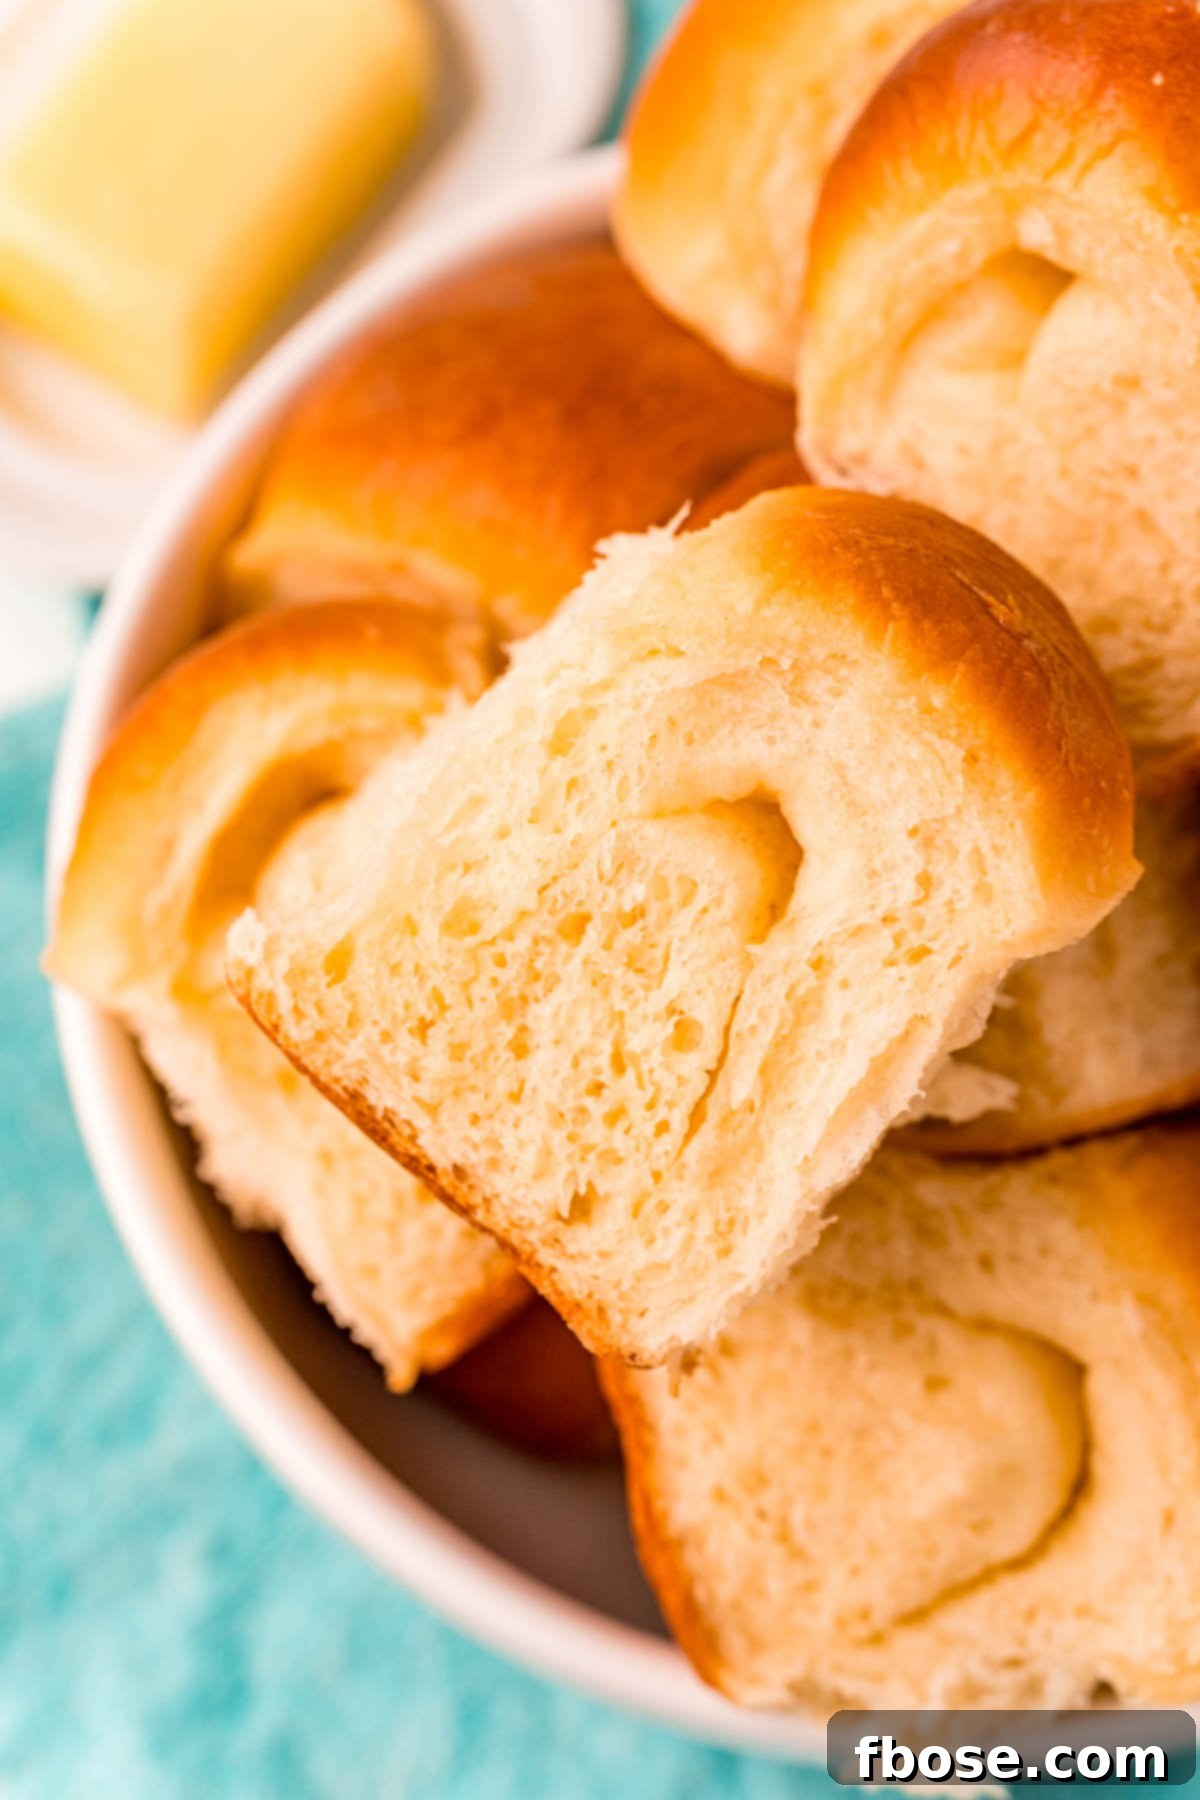
Parker House Rolls are more than just a dinner side; they are a culinary experience. These incredibly buttery and rich yeast rolls are renowned for their perfectly fluffy texture and distinctive pull-apart quality, making them an undeniable stand-out at any family dinner, holiday feast, or special gathering. Master this classic recipe and elevate your homemade bread game with these irresistible, golden-brown delights.
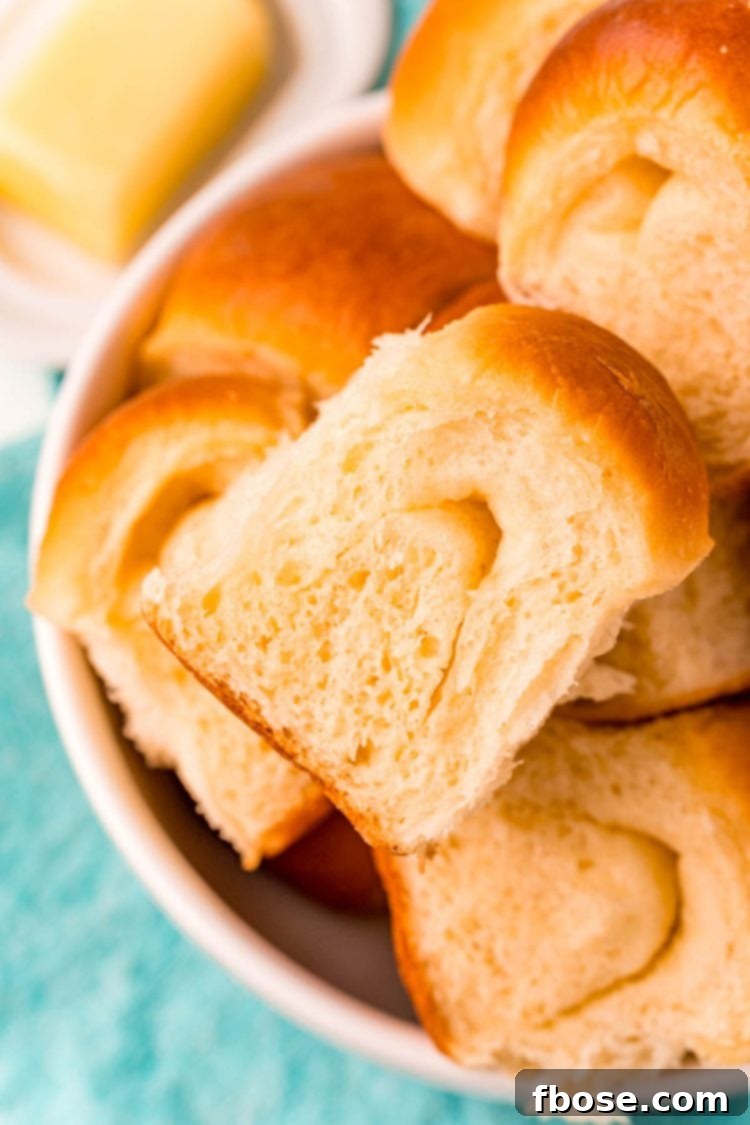
What sets Parker House Rolls apart is their unique folding technique, which results in layers of buttery goodness that effortlessly pull apart when served. This signature method not only creates a beautiful presentation but also contributes to their tender, airy crumb. Don’t let the idea of homemade yeast rolls intimidate you; this recipe breaks down the technique into simple, step-by-step instructions, ensuring a successful and delicious outcome for even novice bakers.
Why These Parker House Rolls Are a Must-Try
There are countless reasons why this Parker House Roll recipe has become a favorite among home bakers and food enthusiasts alike. From their incredible flavor to their surprisingly simple preparation, these rolls offer an unparalleled baking experience and a truly delightful end product.
- Simple, Wholesome Ingredients! You don’t need exotic components to create bakery-quality Parker House Rolls. This recipe relies on everyday pantry staples you likely already have on hand, proving that extraordinary flavor can come from simple, honest ingredients.
- Perfect for Any Gathering! Whether it’s a cozy weeknight dinner, a grand holiday celebration like Easter, Thanksgiving, or Christmas, or a potluck with friends, these rolls are a guaranteed crowd-pleaser. This recipe yields a generous two dozen rolls, ensuring there’s plenty to share (or to keep for yourself!).
- Irresistibly Delicious! Just one bite into these airy, melt-in-your-mouth rolls, and you’ll understand why they quickly become everyone’s favorite. The rich, buttery flavor combined with their light, fluffy texture is truly addictive, leaving a lasting impression on your taste buds.
- Effortlessly Homemade! The thought of baking yeast rolls from scratch might seem daunting, but this recipe makes it surprisingly easy and immensely rewarding. The fresh aroma of homemade bread filling your kitchen is an experience in itself, and the taste far surpasses anything you can buy from a store. It’s an easy project that’s truly worth every minute!
The Enduring Appeal of Parker House Rolls
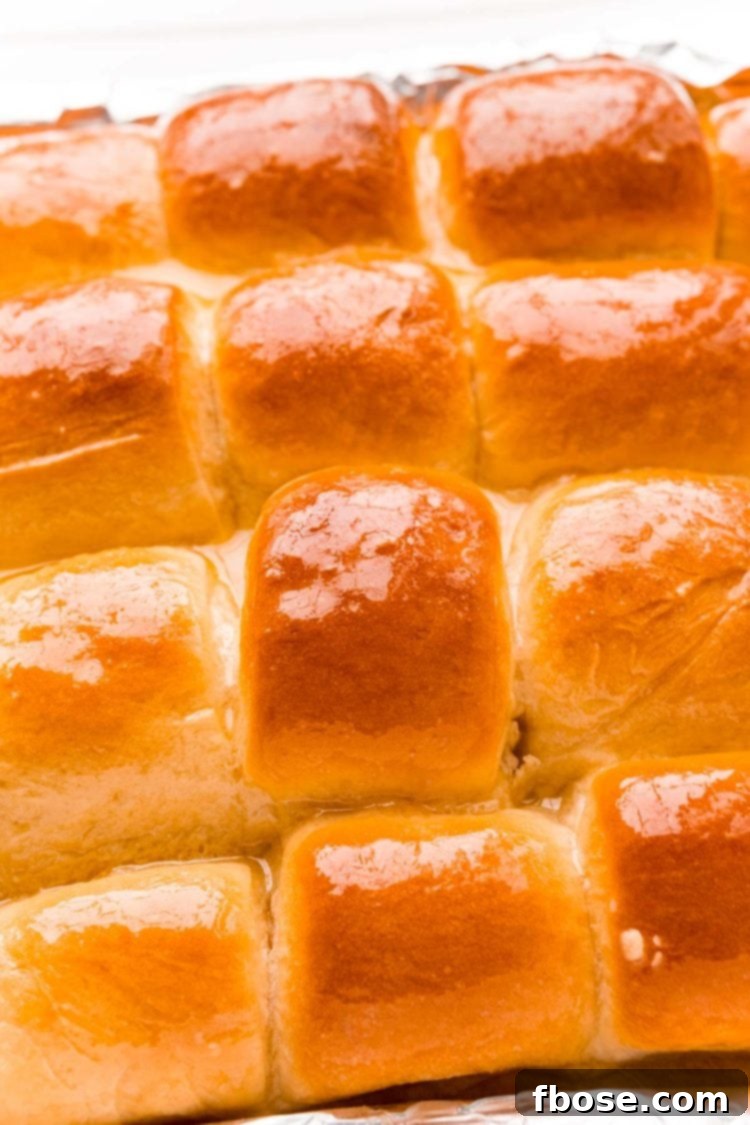
Parker House Rolls hold a special place in American culinary history, tracing their origins back to the Parker House Hotel in Boston in the 1870s. Legend has it that a disgruntled baker, frustrated with a customer, haphazardly threw dough into the oven, creating the now-iconic folded shape. Whether by accident or design, these rolls quickly gained popularity for their rich flavor and distinctive form. The deep indentation or crease in the middle of each roll allows them to be easily pulled apart into two halves, each side offering a soft, tender crumb. This unique characteristic, combined with their characteristic buttery sheen and fluffy interior, has cemented their status as a beloved classic. Often served with a simple brush of melted butter, Parker House Rolls are a comforting and elegant addition to any meal, embodying a tradition of hospitality and deliciousness that has spanned generations.
Essential Ingredients for Fluffy Parker House Rolls
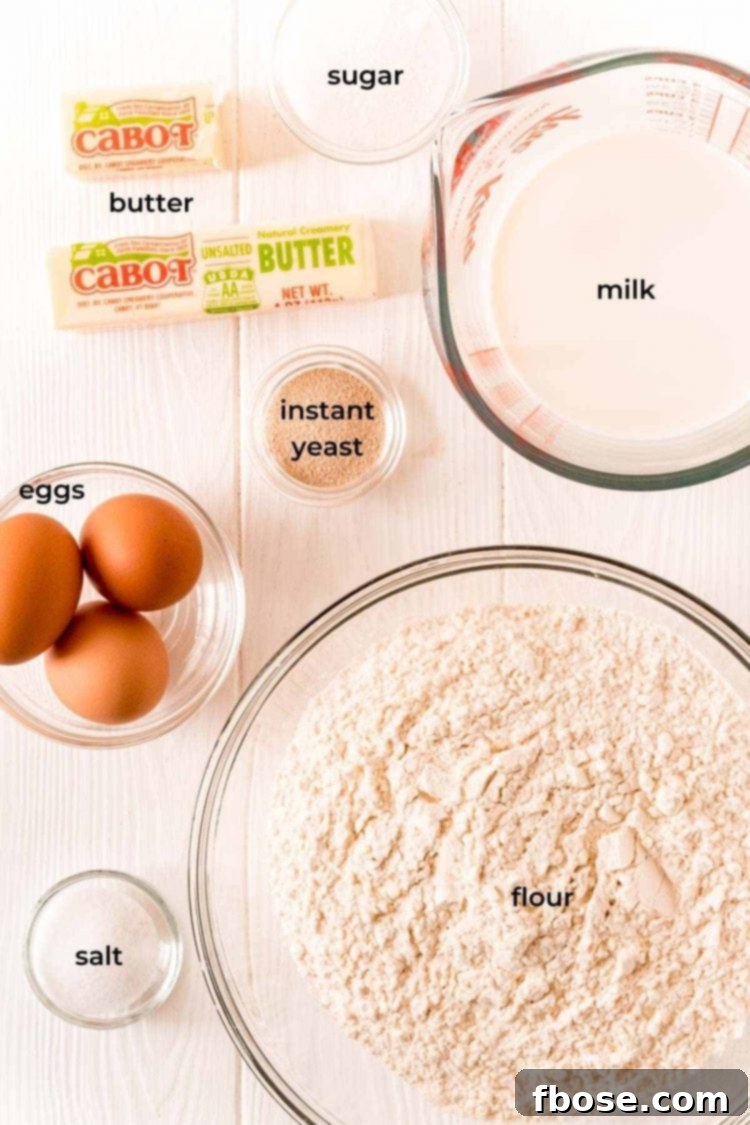
Crafting a batch of the best Parker House Rolls requires only seven fundamental ingredients. Each plays a critical role in achieving the perfect balance of flavor, texture, and rise. Here’s a closer look at what you’ll need:
- All-Purpose Flour: The backbone of our rolls, all-purpose flour provides the necessary structure. Its moderate gluten content is ideal for yeast breads, allowing the dough to develop elasticity and strength, which helps the rolls maintain their form as they rise and bake, creating that wonderfully fluffy interior.
- Instant Yeast: This is our primary leavening agent, responsible for the magical rise of the dough. Instant yeast can be added directly to the dry ingredients without prior activation, simplifying the baking process and ensuring your rolls become light and airy.
- Salt: Far from just a seasoning, salt is crucial for balancing and enhancing the overall flavor profile of the rolls. It also plays a vital role in controlling the yeast’s activity, preventing it from rising too quickly and ensuring a consistent texture.
- Eggs: Eggs contribute significantly to the rolls’ luxurious texture and rich flavor. They provide moisture, add richness, and help create that desirable light, fluffy, and tender crumb, making each bite incredibly satisfying.
- Whole Milk: Once gently warmed, whole milk serves as the liquid base that activates the instant yeast. The fats in whole milk also contribute to a richer flavor and a softer crumb compared to lower-fat milk alternatives.
- Unsalted Butter: Butter is the star ingredient that gives Parker House Rolls their signature richness and buttery flavor. Using unsalted butter allows you to have precise control over the overall saltiness of the recipe, ensuring a perfectly balanced taste. It also contributes to the tender texture and beautiful golden crust.
- Granulated Sugar: Sugar is more than just a sweetener; it’s essential food for the yeast. When combined with yeast, sugar helps produce carbon dioxide, which causes the dough to rise. It also contributes to the golden-brown color of the crust and a subtle sweetness that complements the rich butter flavor.
Mastering the Art of Parker House Roll Making: Step-by-Step
Follow these detailed instructions to create beautifully light and buttery Parker House Rolls that will impress everyone at your table.
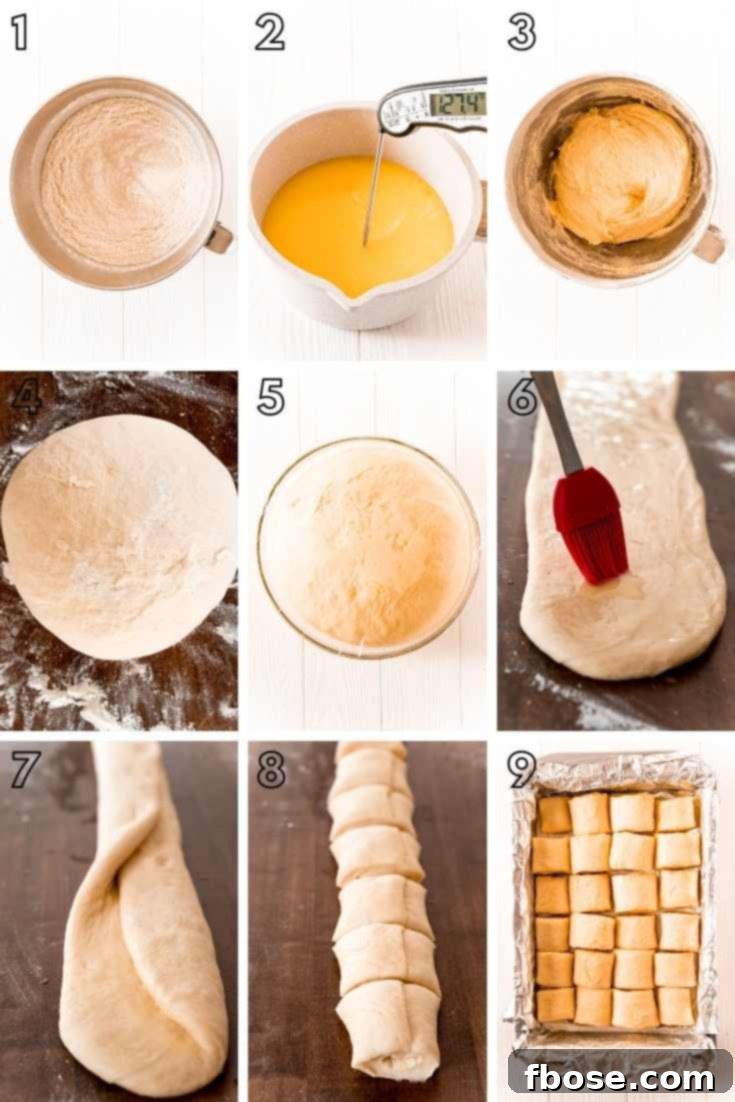
- Combine Dry Ingredients: In the large bowl of a stand mixer, fitted with a dough hook attachment, thoroughly mix together the all-purpose flour, instant yeast, and salt until well combined.
- Prepare Liquid Mixture: In a separate medium bowl, lightly beat the eggs and set them aside. In a medium saucepan, combine the whole milk, 9 tablespoons of the unsalted butter, and the granulated sugar. Cook this mixture over medium-low heat, stirring occasionally, until the butter is completely melted, the sugar has dissolved, and the mixture reaches a temperature between 125°F and 130°F. This precise temperature is crucial for activating the yeast without killing it.
- Form the Dough: With your stand mixer running on low speed, slowly and gradually pour the warm milk mixture into the dry ingredients in the mixer bowl. Once incorporated, add the beaten eggs. Continue mixing until no dry flour pockets remain, which usually takes about 1 to 2 minutes. Increase the mixer speed to medium and knead the dough for approximately 6 to 8 minutes. The goal is to achieve a dough that is smooth, elastic, and mostly pulls away from the sides of the bowl, though it may still be slightly sticky at the very bottom.
- Initial Hand Kneading and Shaping: Turn the freshly kneaded dough out onto a lightly floured clean surface. Knead it by hand for an additional 30 seconds to ensure a smooth, uniform texture. Then, gently form the dough into a tight, cohesive ball.
- First Proofing: Transfer the dough ball into a large, clean bowl that has been lightly greased with nonstick cooking spray. Lightly spray the top of the dough ball with nonstick spray as well to prevent it from drying out, then cover the bowl tightly with plastic wrap. Allow the dough to proof in a warm, draft-free place until it has visibly doubled in size. This process typically takes 60 to 90 minutes.
- Prepare Baking Pan: While the dough is proofing, prepare your baking pan. Line a 13×9-inch baking pan with two pieces of aluminum foil, ensuring they overlap and that the ends extend over the long edges of the pan to create convenient handles. Spray the foil lining generously with nonstick cooking spray; set the prepared pan aside.
- Shape the Rolls – The Signature Fold: Once the dough has doubled, gently turn it out onto a clean, lightly floured counter. Divide the dough ball evenly in half. Take one half and stretch it into a long roll, approximately 24 inches in length. Using a rolling pin, flatten this long roll into a strip about 5 inches wide. Then, brush the entire surface of the flattened dough with 1 tablespoon of melted butter.
- Fold and Seal: To create the classic Parker House fold, start at the top long edge of the buttered dough strip and fold a third of the dough down towards you. Then, take the bottom third of the dough and fold it over to meet the edge of the previous fold, effectively creating a three-layered strip. Roll the folded dough a couple of times with the rolling pin to gently seal the layers and reshape it into an even log.
- Cut and Arrange: Using a sharp knife, carefully trim off about 1 inch of dough from each end of the log and discard these trimmings. Then, cut the remaining log into 12 equal pieces. Arrange these individual rolls, seam side down, in the prepared 13×9-inch baking pan, creating three neat rows of four rolls each. Repeat steps 7, 8, and 9 with the remaining half of the dough.
- Second Proofing: Once all the rolls are arranged in the pan, cover the pan loosely with plastic wrap. Allow the rolls to proof in a warm place again until they have about doubled in size, which will take approximately 60 minutes. This second proofing ensures a light and airy final texture.
- Bake to Golden Perfection: While the rolls are undergoing their second proof, preheat your oven to 375°F (190°C). Once preheated and the rolls have proofed, place the pan in the oven. Bake the rolls for 30 to 35 minutes, or until they are beautifully golden brown on top and their internal temperature registers 200°F (93°C) when checked with a digital thermometer. For even browning, remember to rotate the pan halfway through the baking time.
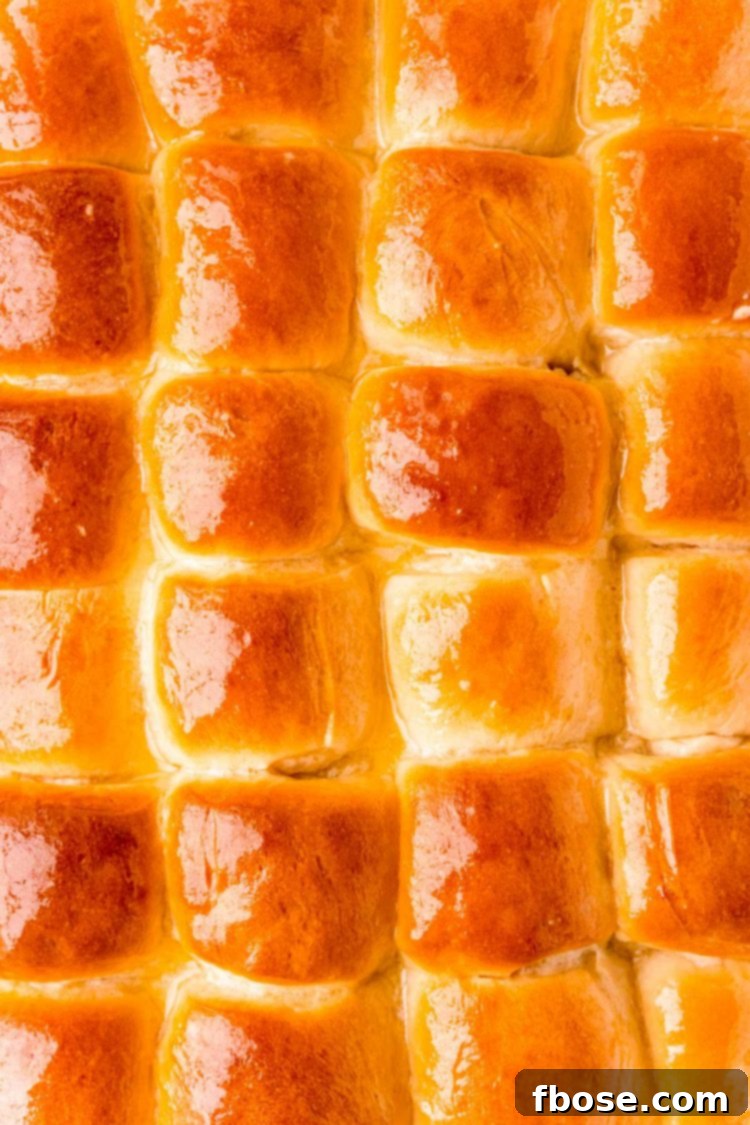
- Final Glaze: As soon as the rolls come out of the oven, use the foil handles to carefully transfer them to a wire rack. Immediately brush the tops of the warm rolls with the remaining tablespoon of melted butter. This adds an extra layer of rich flavor and a beautiful sheen. Serve warm and enjoy the soft, buttery goodness!
Tips for Perfect Dough Proofing
Proofing dough can seem a bit intimidating, but it’s a fundamental step that allows the yeast to work its magic, resulting in those wonderfully airy and fluffy Parker House Rolls we all adore. The key is providing a warm, draft-free environment. Here are several effective tips and tricks to ensure your dough proofs perfectly every time:
- Greased Bowl & Damp Cloth: The most common and reliable method involves placing the greased dough ball in a large, greased bowl. Cover the bowl with a clean, damp kitchen towel or plastic wrap. The dampness helps keep the dough from drying out while it rises. Place it on your kitchen counter in a spot away from open windows or air conditioning vents.
- Oven Proof Setting: Many modern ovens come equipped with a “proof” setting. If your oven has this feature, it’s the simplest way to create the ideal warm, humid environment for your dough to rise. Simply follow your oven’s instructions for this setting.
- DIY Warm Oven Method (Boiling Water): If you don’t have a proof setting, you can create a makeshift proofing box. Start with a cold oven. Place the bowl of dough, securely covered with plastic wrap, on the top rack. Then, place a pan of boiling water on the bottom rack. Close the oven door. The residual heat from the boiling water will gently warm the oven and create a humid atmosphere, perfect for dough rising.
- DIY Warm Oven Method (Preheat & Turn Off): Another oven trick is to preheat your oven to its lowest temperature (usually around 170-200°F) for just five minutes, then immediately turn it off. Place your oven-safe bowl of covered dough into the warm oven. The gentle, decreasing heat will encourage the dough to double in size without over-proofing.
- Crockpot Method: Your slow cooker can also double as a proofing chamber! Fill your crockpot halfway with water and set it to low heat. Place the lid upside down on top of the crockpot, then lay a clean dishtowel over the inverted lid. Finally, place your bowl of covered dough directly onto the dishtowel. The gentle, consistent warmth from the crockpot will help your dough rise beautifully.
Storing and Freezing Your Parker House Rolls
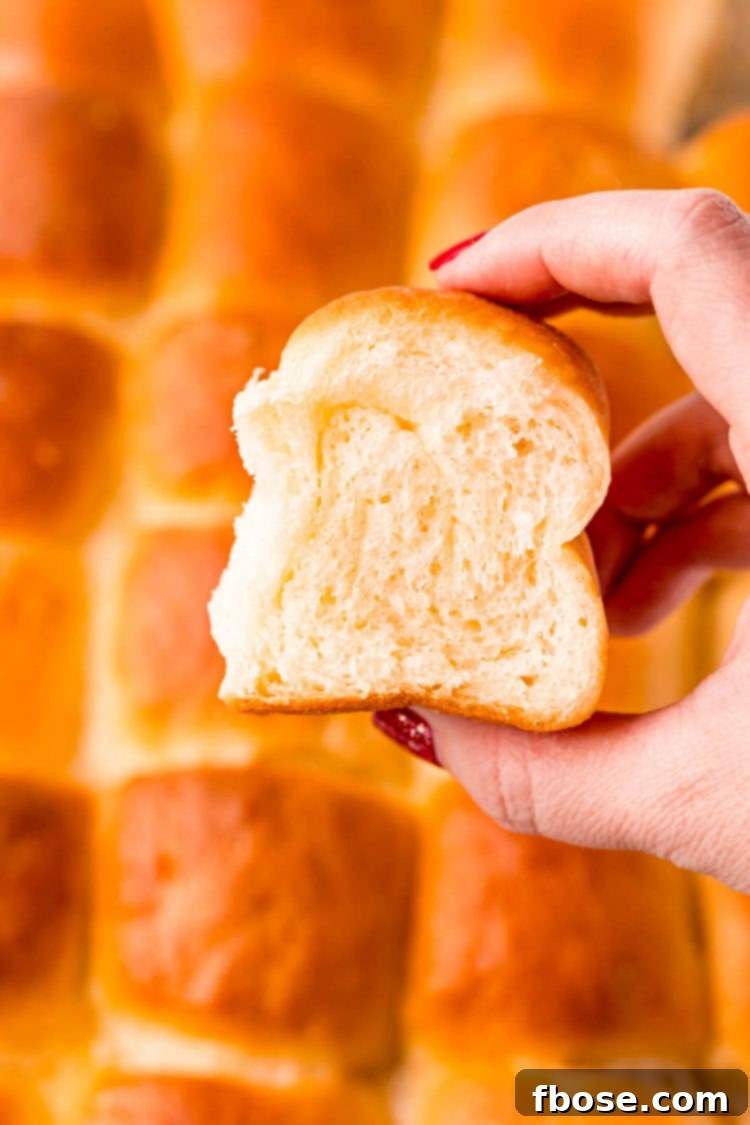
These delightful Parker House Rolls are undeniably at their best when served fresh, ideally within 24 hours of baking. Their buttery flavor and tender texture truly shine. However, if you find yourself with leftovers or wish to prepare a batch in advance, they store exceptionally well.
To store: Once completely cooled, place the rolls in an airtight container or a large resealable plastic bag at room temperature for up to 2-3 days. Reheat gently in a warm oven for a few minutes before serving to restore their freshness.
To freeze: For longer storage, Parker House Rolls freeze beautifully for up to 3 months. Once the rolls have completely cooled, wrap each roll tightly in plastic wrap to prevent freezer burn. Then, place the individually wrapped rolls into a heavy-duty freezer bag or an airtight freezer-safe container. Label with the date.
To thaw frozen rolls: When you’re ready to enjoy them, simply unwrap the desired number of rolls and let them thaw at room temperature for a few hours. For a quicker thaw and to restore that fresh-baked warmth, preheat your oven to 200°F (95°C). Unwrap the frozen rolls, place them on a baking sheet, and bake for about 15 minutes, or until heated through and soft.
Frequently Asked Questions About Parker House Rolls
Baking yeast rolls often brings up a few common questions. Here are some answers to help ensure your Parker House Rolls turn out perfect every time.
- Can I Use Dry Active Yeast Instead of Instant Yeast? Yes, you absolutely can! If you’re using dry active yeast, you’ll need 3½ teaspoons for this recipe. To activate it, warm ⅓ cup of the total milk to 110°F (43°C) and whisk in 1 teaspoon of sugar. Stir in the dry active yeast and let it sit for 10 to 20 minutes until it becomes foamy. This indicates the yeast is active. Adjust the remaining milk and sugar amounts in the main recipe accordingly. When using active dry yeast, the milk and butter mixture in step 3 only needs to be melted and warm, not necessarily 125-130°F, as the yeast activation happens separately. Keep in mind that using dry active yeast typically requires an additional 30 minutes of proofing time for each rise, adding roughly 1½ hours to the total prep time.
- How Can I Use This Recipe To Make Classic Dinner Rolls? The beauty of this dough is its versatility! If you prefer classic round dinner rolls over the signature folded Parker House style, simply follow the recipe as written. When it comes to shaping, instead of the folding technique, just portion the dough evenly and roll each piece into a smooth, tight ball. Arrange them in your prepared baking pan and proceed with the second proofing and baking instructions. For a dedicated classic yeast roll recipe, you might also enjoy our Yeast Rolls recipe.
- What is the ideal temperature for the milk mixture? As noted in the instructions, maintaining a temperature between 125°F and 130°F for the milk, butter, and sugar mixture is absolutely critical when using instant yeast directly in the dough. Too cold, and the yeast won’t activate properly, leading to dense rolls. Too hot, and you risk killing the yeast, which will also prevent the dough from rising. Using a kitchen thermometer is highly recommended for accuracy.
- Why didn’t my rolls rise? Several factors can cause dough not to rise. The most common issues include inactive yeast (either expired or killed by too-hot liquid), a cold environment for proofing, or insufficient kneading. Always check your yeast’s expiration date. Ensure your liquid mixture is within the specified temperature range. And remember, kneading helps develop gluten, which is essential for trapping the carbon dioxide produced by the yeast, allowing the dough to rise.
Delicious Pairings and More Bread Recipes
No matter the occasion or the main course, a delicious bread, roll, or biscuit always completes the meal. Parker House Rolls are incredibly versatile, pairing beautifully with a wide array of dishes. Imagine them alongside a succulent Maple Peach Glazed Spiral Ham, a tender Herb Roasted Turkey Breast, or simply as a comforting accompaniment to a hearty soup or stew. Their buttery richness makes them a perfect complement to savory gravies and spreads. Explore more of our beloved bread recipes to find the ideal match for your next family dinner:
- Perfect Yeast Rolls – These fluffy, pull-apart dinner rolls are incredibly buttery and tender, offering a delightful texture similar to Parker House Rolls but in a more traditional shape.
- Homemade Bread – Our ultimate step-by-step guide to making the best homemade white bread, complete with detailed photos and essential tips for baking success.
- Parmesan Garlic Bread – A quick and easy recipe loaded with fragrant herbs, rich butter, and savory Parmesan cheese, perfect for Italian-inspired meals.
- Homemade Brioche – Indulge in this rich, tender, and slightly sweet French bread, which can be easily formed into a beautiful loaf or individual rolls.
- Cheddar Drop Biscuits – Enjoy these savory, cheesy biscuits, made with a delicious blend of cheddar and Colby jack cheese, then generously topped with a flavorful garlic butter.
Connect with Us!
If you’ve tried this fantastic Parker House Rolls recipe, please let us know how you liked it! We love hearing from you, so leave a review and share your thoughts in the comments below.
Don’t forget to share your culinary creations with us on Instagram and Pinterest by tagging @sugarandsoulco. You can also join our Sugar & Soul Show-offs Community on Facebook and participate in our fun recipe challenges!
Parker House Rolls
Average Rating: 5 stars from 1 vote
Author: Rebecca Hubbell
Course: Side | Cuisine: American
Prep Time: 45 minutes | Cook Time: 35 minutes | Proofing Time: 2 hours 30 minutes | Total Time: 3 hours 50 minutes
Servings: 24 rolls
These rolls are buttery, rich, and fluffy. They are made with a unique folding technique that makes them easy to pull apart when eating! They are perfect for everyday meals and holidays, with search interest highest around Easter.
Ingredients
- 5 cups all-purpose flour
- 2¾ teaspoons instant yeast
- 2 teaspoons salt
- 3 large eggs
- 1¼ cups whole milk
- 12 tablespoons unsalted butter, divided
- 3 tablespoons sugar
Instructions
- In the bowl of a stand mixer fitted with a dough hook, mix together the flour, yeast, and salt.
- In a medium bowl, lightly beat the eggs; set aside.
- In a medium saucepan, combine the milk, 9 tablespoons of butter, and the sugar and cook over medium-low heat until the butter melts, the sugar dissolves, and the mixture reaches a temperature between 125 and 130°F.
- With the mixer running on low speed, slowly add milk mixture to bowl followed by the eggs and mix until no dry flour remains, about 1 to 2 minutes. Increase speed to medium and knead until dough is smooth, elastic, and mostly pulls away from the sides of the bowl, about 6 to 8 minutes. The dough will still stick to the bottom of the bowl.
- Turn the dough out onto a lightly floured surface and knead by hand for 30 seconds. Form dough into a tight ball and transfer to a large, greased bowl. Spray the top of the bread lightly with nonstick spray, then cover the bowl with plastic wrap and let proof in a warm place until doubled in size, 60 to 90 minutes.
- Line a 13×9-inch baking pan with two pieces of foil, overlapping foil and letting the ends hang over the long edges of the pan. Spray the foil with nonstick spray; set aside.
- Turn the ball of dough out onto a clean lightly floured counter and divide in half. Stretch each half into a 24-inch long roll and use a rolling pin to flatten it so it’s about 5 inches wide. Then brush the surface of the dough with 1 tablespoon of melted butter.
- Starting at the top long edge, fold a third of the dough down toward you. Then fold the bottom third of the dough over to meet the edge.
- Roll dough a couple of times to seal and reshape as necessary to form an even log.
- Using a sharp knife, trim 1 inch of dough off each end and discard, then cut dough into 12 equal pieces. Arrange rolls seam side down in the prepared pan in three rows of four. Repeat with the remaining half of the dough.
- Cover the pan with plastic wrap and let the rolls proof in a warm place until they are about double in size, about 60 minutes.
- Preheat the oven to 375°F and bake the rolls until browned and centers register 200°F, 30 to 35 minutes, rotating the pan halfway through.
- Transfer the rolls to a wire rack using the foil for handles. Brush with the remaining tablespoon of melted butter.
Recipe Notes
- Rolls are best served within 24 hours of baking. To freeze rolls, wrap in plastic wrap and place in a freezer bag and freeze for up to 3 months. To thaw, unwrap, and let thaw at room temperature. To thaw quickly, preheat the oven to 200°F, unwrap the rolls and place on a cookie sheet and bake for about 15 minutes.
- It’s VERY important that your milk mixture is between 125 and 130 degrees F because it needs to be hot enough to activate the yeast in the bowl.
- If you want, you can use an egg wash on top of the rolls for a deeper golden brown.
- You can use this dough to make classic dinner rolls by just making even portions of dough and shaping them into balls.
- Parchment paper may be used instead of foil.
- This recipe can use dry active yeast as well. You would need to use 3.5 teaspoons of dry active yeast and add it to ⅓ cup of the milk heated to 110 degrees F with a teaspoon of sugar. And let it activate for 10 to 20 minutes until foamy. The milk and sugar amounts will be reduced from the amounts in the ingredients, so you will still use the full amounts called for but they will be divided. The milk and butter mixture doesn’t need to be between 125 and 130 degrees in this case since you’re activating the yeast separately. It simply just needs to be melted and warm but not hot. Using dry active yeast will require up to an additional 30 minutes of proofing each time and will add about 1½ hours to the total prep time.
Nutrition Information (per roll)
- Calories: 171kcal
- Carbohydrates: 23g
- Protein: 4g
- Fat: 7g
- Saturated Fat: 4g
- Polyunsaturated Fat: 1g
- Monounsaturated Fat: 2g
- Trans Fat: 1g
- Cholesterol: 37mg
- Sodium: 209mg
- Potassium: 67mg
- Fiber: 1g
- Sugar: 2g
- Vitamin A: 225IU
- Vitamin C: 1mg
- Calcium: 24mg
- Iron: 1mg
Did You Make This Recipe?
Share your delicious creations with us on Instagram @sugarandsoulco and follow us on Tiktok @sugarandsoulco and Pinterest @sugarandsoulco for more amazing recipes!