
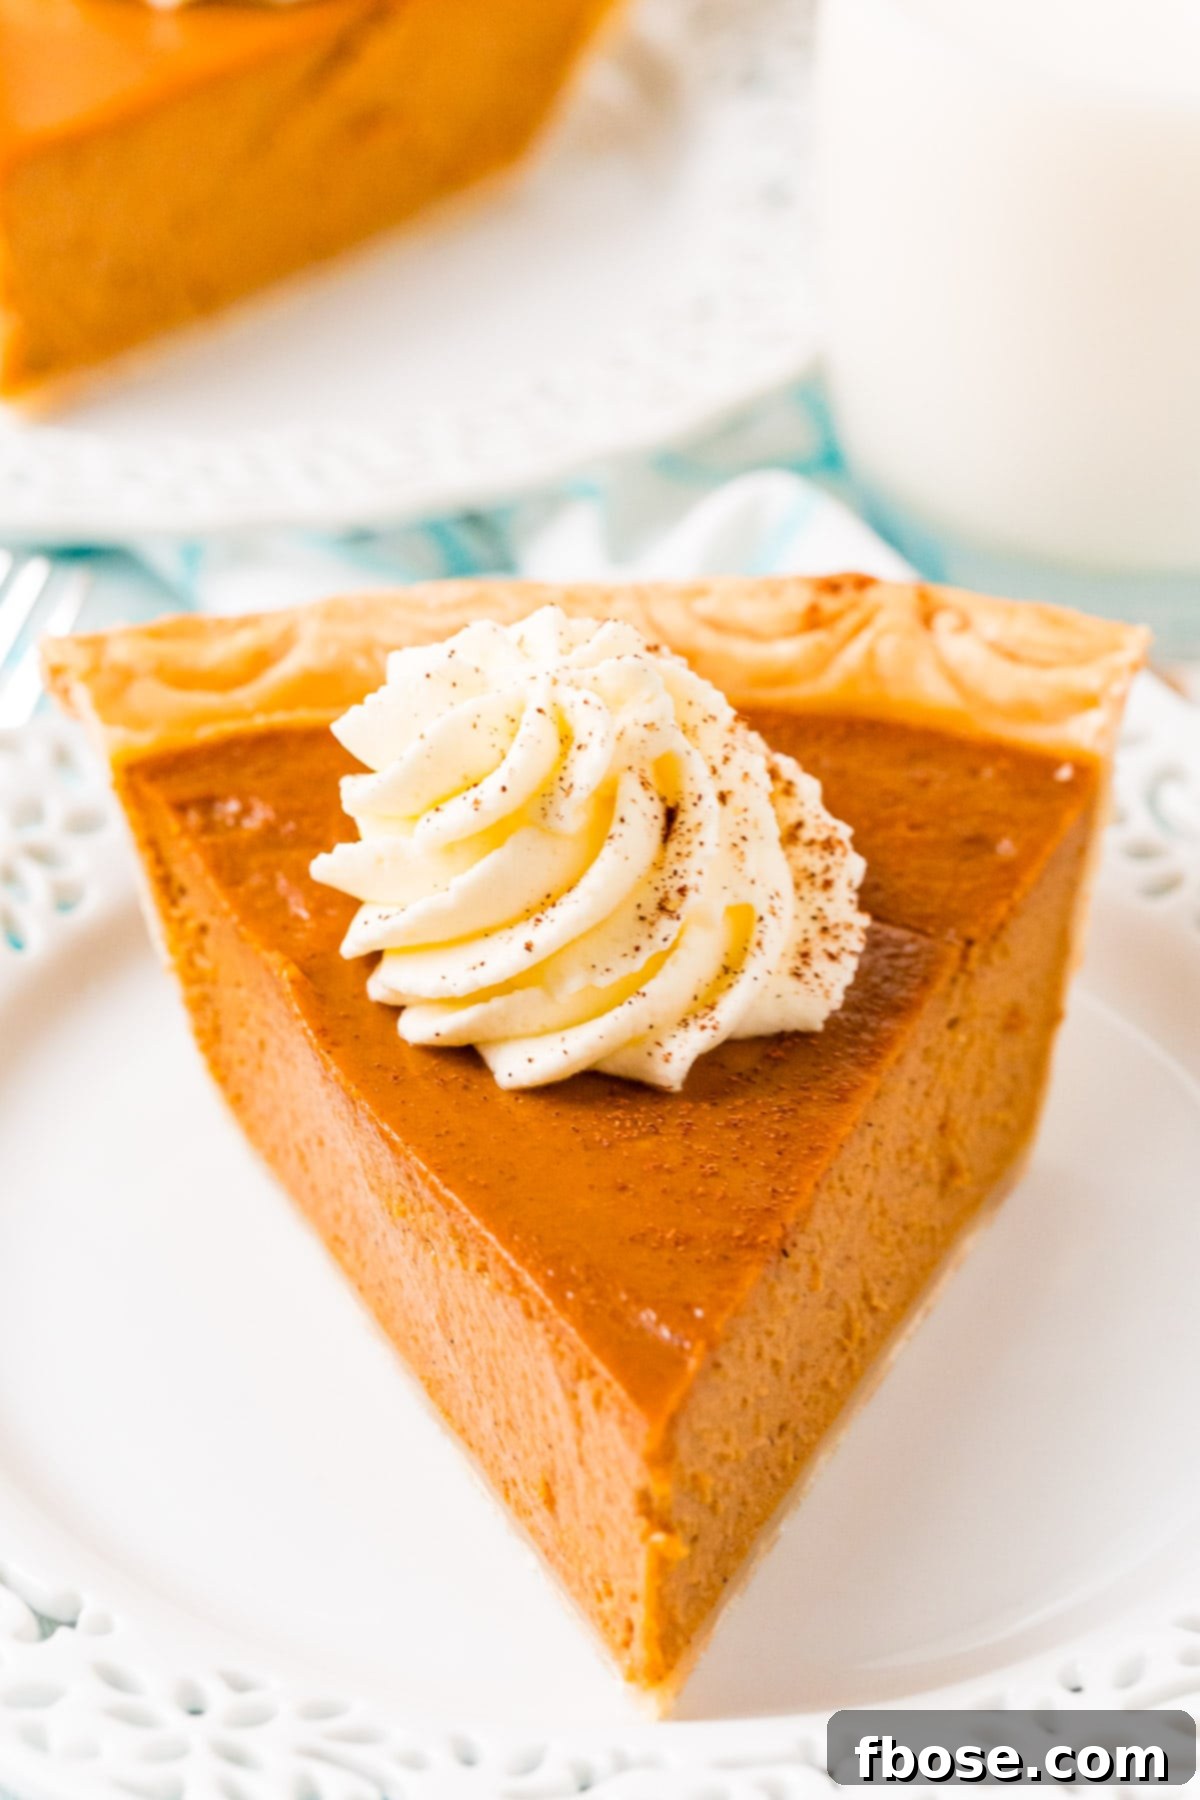
This Pumpkin Pie Recipe is perfect for fall and Thanksgiving! A smooth and creamy spiced pumpkin custard filling baked in a flaky pie crust.
Welcome to the ultimate guide for baking the most exquisite homemade pumpkin pie you’ve ever tasted! As the crisp autumn air arrives and holidays like Thanksgiving draw near, there’s no dessert more iconic and comforting than a perfectly baked pumpkin pie. This recipe goes beyond the traditional, incorporating two “secret” ingredients and a wealth of essential baking tips to help you achieve a truly exceptional pie – one that’s ultra-smooth, richly flavored, and boasts a wonderfully flaky crust. Even if you’re new to baking, by following these detailed instructions and expert advice, you’ll create a dessert that will impress everyone at your table.
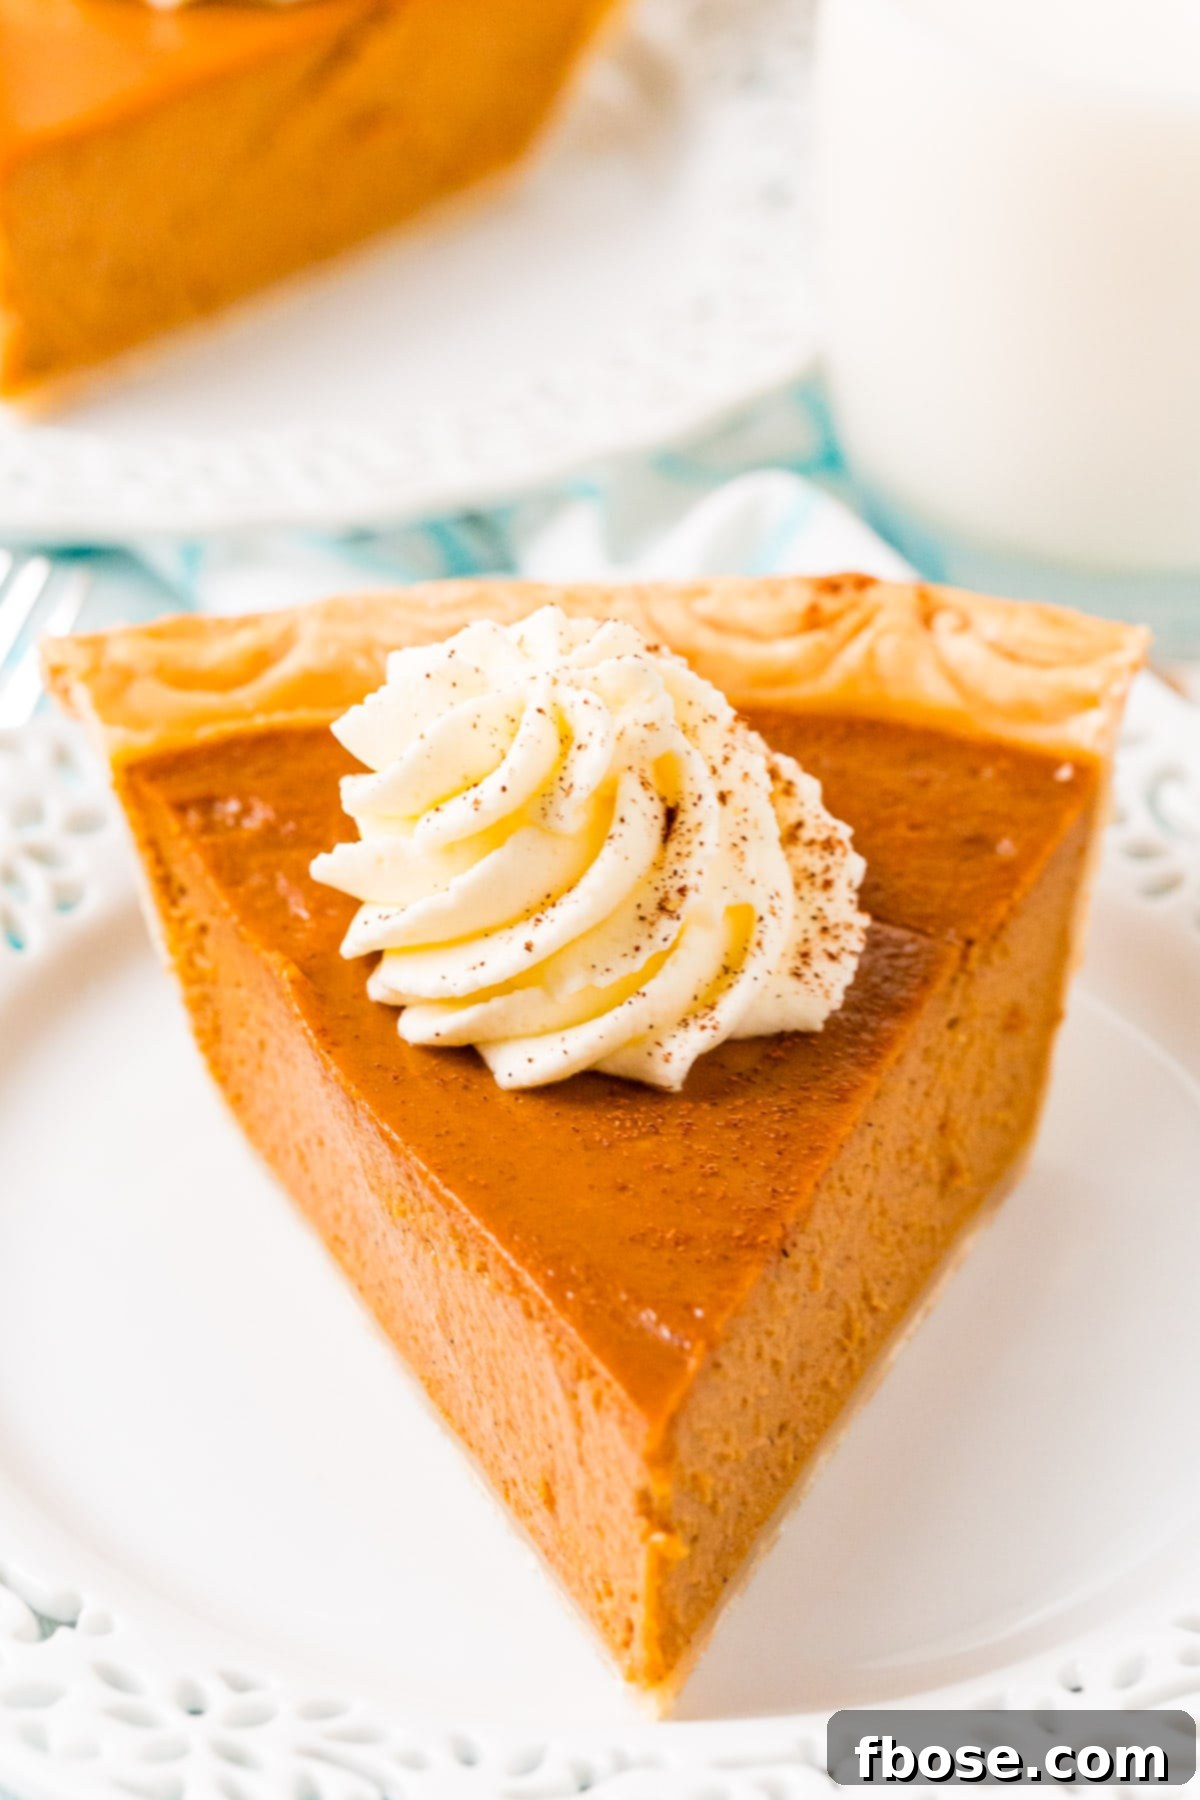
Many of us have enjoyed pumpkin pie countless times, but perhaps you’ve never ventured to make one from scratch. While this recipe involves a few distinct steps, the process is surprisingly straightforward, making it accessible for bakers of all skill levels. The result? A stunning, homemade pumpkin pie that will make you feel like a seasoned pastry chef. Just be sure to follow the recipe directions precisely and take advantage of the comprehensive baking tips provided below to ensure your pie is nothing short of perfection.
The Secret to an Unforgettable Pumpkin Pie: Enhanced Flavor & Texture
While this recipe remains true to the beloved classic pumpkin pie, it introduces two unexpected ingredients that elevate both the texture and the flavor profile, taking your autumn dessert to an entirely new level. These additions ensure a filling that is exceptionally smooth, creamy, and vibrantly spiced.
- Sour Cream: Instead of relying solely on evaporated milk, a judicious amount of sour cream is incorporated into the filling. This not only enhances the richness but also contributes to an incredibly silky-smooth custard texture that melts in your mouth. The slight tang from the sour cream beautifully balances the sweetness of the pumpkin and spices, creating a more complex and satisfying flavor. It adds a subtle creaminess without making the pie too heavy, ensuring a lighter, more refined experience.
- Black Pepper: Initially, adding black pepper to a sweet pie might seem unconventional, but it’s a stroke of culinary genius! A small dash of freshly ground black pepper doesn’t make the pie spicy in a hot sense, but rather amplifies and brightens the warm, earthy notes of the traditional pumpkin pie spices (cinnamon, nutmeg, ginger, cloves). It adds an undetectable yet crucial layer of depth, creating a more sophisticated and memorable flavor experience. This subtle peppery note enhances the aroma and helps the other spices truly pop, making the pie taste even more “pumpkin-y” and comforting. Trust us, you’ll wonder how you ever made pumpkin pie without it!
“This pie filling is simply the best! I love that dash of pepper along with using evaporated milk instead of condensed. This is my go to recipe!!”
– Gail
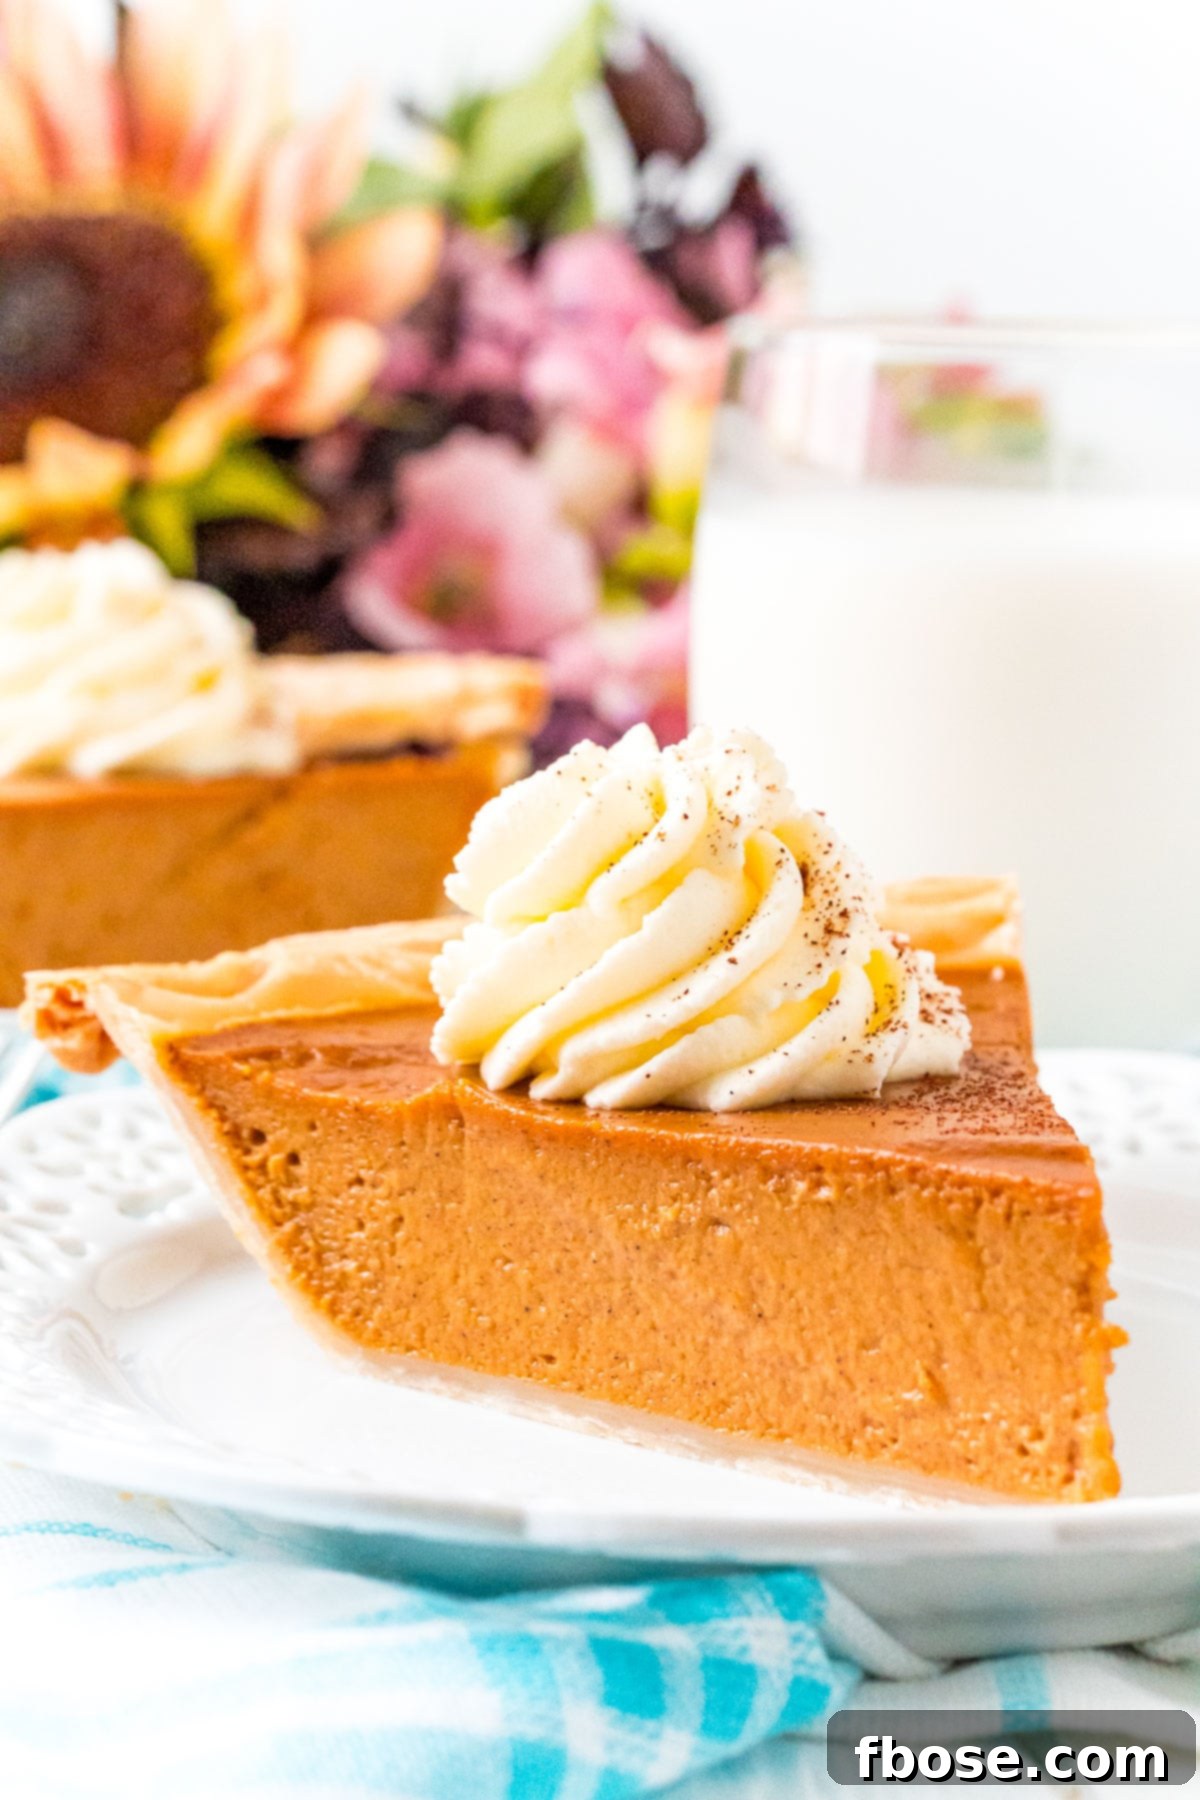
Crafting the Perfect Pumpkin Pie: A Step-by-Step Guide
This recipe is designed with efficiency in mind, assuming you have your pie crust ready to bake. Whether you prefer to prepare your favorite homemade pie crust in advance for that extra touch of love, or opt for a convenient, high-quality store-bought dough for ease, ensure it’s chilled and ready for the oven. A well-prepared crust is the foundation for an amazing pumpkin pie that will hold its shape and provide a delightful contrast to the creamy filling.
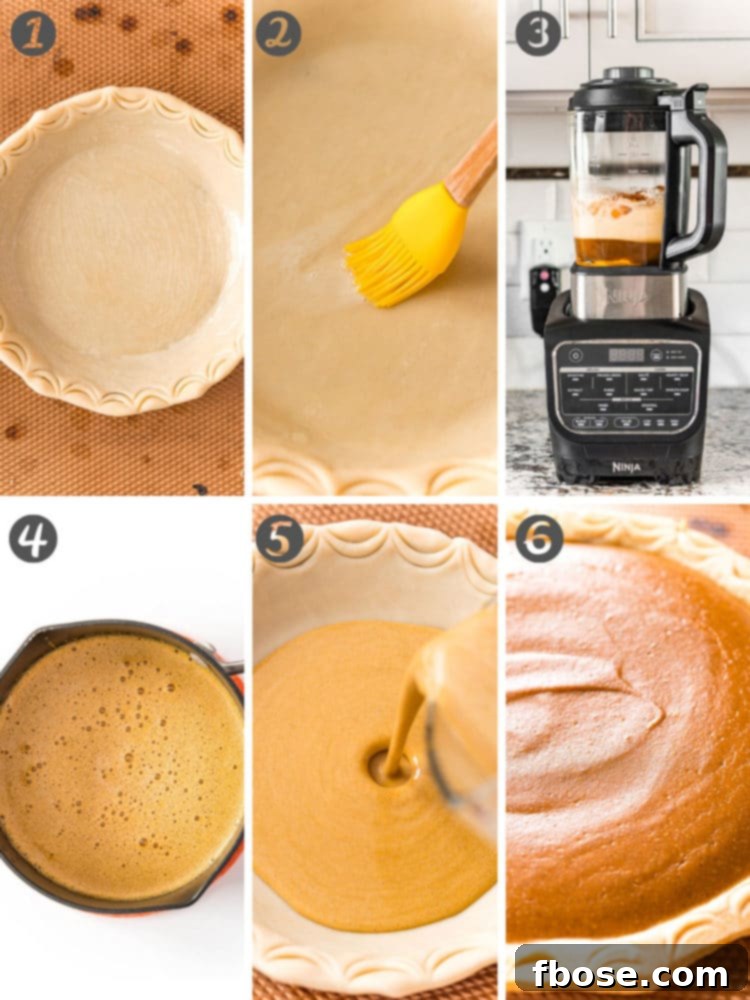
- Prepare Your Pie Crust: Begin by carefully placing your prepared pie dough into a standard 9-inch pie dish. Gently press the dough against the bottom and sides of the pan, ensuring there are no air bubbles and it fits evenly. Once positioned, trim any excess dough from the edges, leaving about a ½-inch overhang. You can then create decorative edges by crimping with your fingers, pressing with a fork, or using a specialized pie crust crimper. The goal is to ensure the crust is tightly sealed along the rim of the dish to prevent excessive shrinking during baking.
- Apply Egg Wash: In a small bowl, whisk together one large egg and one teaspoon of milk until well combined. This mixture forms our simple egg wash. Using a pastry brush, lightly and evenly coat the entire inner surface of the pie crust with the egg wash. This step is crucial for two reasons: it acts as a sealant, helping to prevent the crust from becoming soggy by creating a barrier against the moisture from the filling, and it contributes to a beautiful, golden-brown, slightly glossy finish on your baked crust. Discard any leftover egg wash and set the prepared pie crust aside while you prepare the filling.
- Blend the Silky Filling: In a high-speed blender, combine all the filling ingredients: the full can of pumpkin puree, all-purpose flour, evaporated milk, eggs, sour cream, dark brown sugar, vanilla extract, your chosen pumpkin pie spice, ground cinnamon, ground nutmeg, that secret dash of black pepper, and kosher salt. Blend for approximately 60 seconds, or until the mixture is perfectly smooth and completely uniform. This blending technique is key to achieving that signature ultra-creamy, lump-free texture and ensures all the aromatic spices are thoroughly integrated throughout the entire custard.
- Pre-cook for Richer Flavor: Pour the newly blended pumpkin filling into a medium saucepan. Cook the filling over medium-low heat for about 5 minutes, stirring frequently and consistently with a whisk or spatula to prevent scorching. This crucial step is often skipped in other recipes, but it works wonders! It allows the dark brown sugar to melt fully, deepens and “blooms” the flavors of the spices, and begins to gently set the custard. This process results in a pie with a richer color, a more profound and intensified taste, and helps to eliminate any potential raw pumpkin flavor.
- Fill and Protect: Carefully remove the preheated large baking sheet from the oven (it should be very hot). Place your prepared pie pan (containing the egg-washed crust) directly onto this hot baking sheet. This preheated sheet is absolutely vital for preventing a soggy bottom crust by providing immediate intense heat to the base. Next, gently pour the slightly warmed pumpkin filling into the raw pie crust, filling it almost to the top. To prevent the delicate edges of your beautiful pie crust from over-browning or burning during the extended baking time, apply a pie crust shield around the rim. This can be a reusable silicone shield or a homemade one fashioned from aluminum foil.
- Bake to Perfection: Carefully place the baking sheet with the pie back into the preheated oven. Bake at 425°F (220°C) for the initial 15 minutes. After this time, gently remove the pie crust shield (if using) and immediately REDUCE the oven temperature to 350°F (175°C). Continue baking for an additional 20 to 25 minutes, or until the pie reaches your desired doneness (see tip below). The initial high heat helps create a wonderfully flaky crust, while the reduced temperature ensures the delicate custard sets properly and evenly without overbaking or cracking. Once baked, remove the pie from the oven and allow it to cool completely at room temperature for a minimum of 3 to 4 hours. This extensive cooling period is absolutely essential for the filling to set fully, firming up to ensure clean, perfect slices. Serve your masterpiece at room temperature with a generous dollop of homemade whipped cream and a sprinkle of extra cinnamon or nutmeg for a delightful autumn treat.
Mastering the Art of Doneness: When Is Your Pumpkin Pie Truly Ready?
Knowing exactly when your pumpkin pie is perfectly baked is a skill that comes with practice, but there are reliable methods to guide you. Achieving the ideal doneness ensures a creamy, set filling without any cracks or rubbery texture, delivering that perfect luscious bite.
For those who value precision or are new to pie baking, a reliable Kitchen Thermometer is your best friend. Carefully insert it into the very center of the pie, ensuring it doesn’t touch the crust. When the thermometer reads 160°F (71°C), your pie is perfectly done. This internal temperature guarantees the eggs are fully cooked and the custard is set to a safe and delicious consistency.
If you prefer not to puncture your beautifully smooth pie, or don’t have a thermometer handy, the next best method is to use visual cues, often referred to as the “jiggle test”:
- The “Jiggle Test”: Gently but firmly shake the pie dish a little. The outer edges of the pie filling should appear set and slightly puffed, almost firm. However, the very center (about 1-2 inches in diameter) will still have a slight, delicate jiggle, similar to a firm custard or gelatin. It should not be liquidy or slosh around like raw batter. This delicate movement indicates that the center will finish setting during the cooling process.
- Crust Appearance: The crust should be beautifully golden brown and appear flaky, not pale or doughy.
Important Note on Cracking: If you notice the edges of your pie filling beginning to crack, remove it from the oven immediately. This is a tell-tale sign that the eggs in the custard have started to overcook and the pie is beyond its ideal baking point. While a cracked pie might not look as aesthetically perfect, don’t worry! As long as you allow it to cool completely for the recommended time (3-4 hours), the cracks will often settle and become less noticeable, and the pie will still taste absolutely delicious and have a wonderful, creamy texture. The key is to catch it early to prevent severe cracking and dryness.
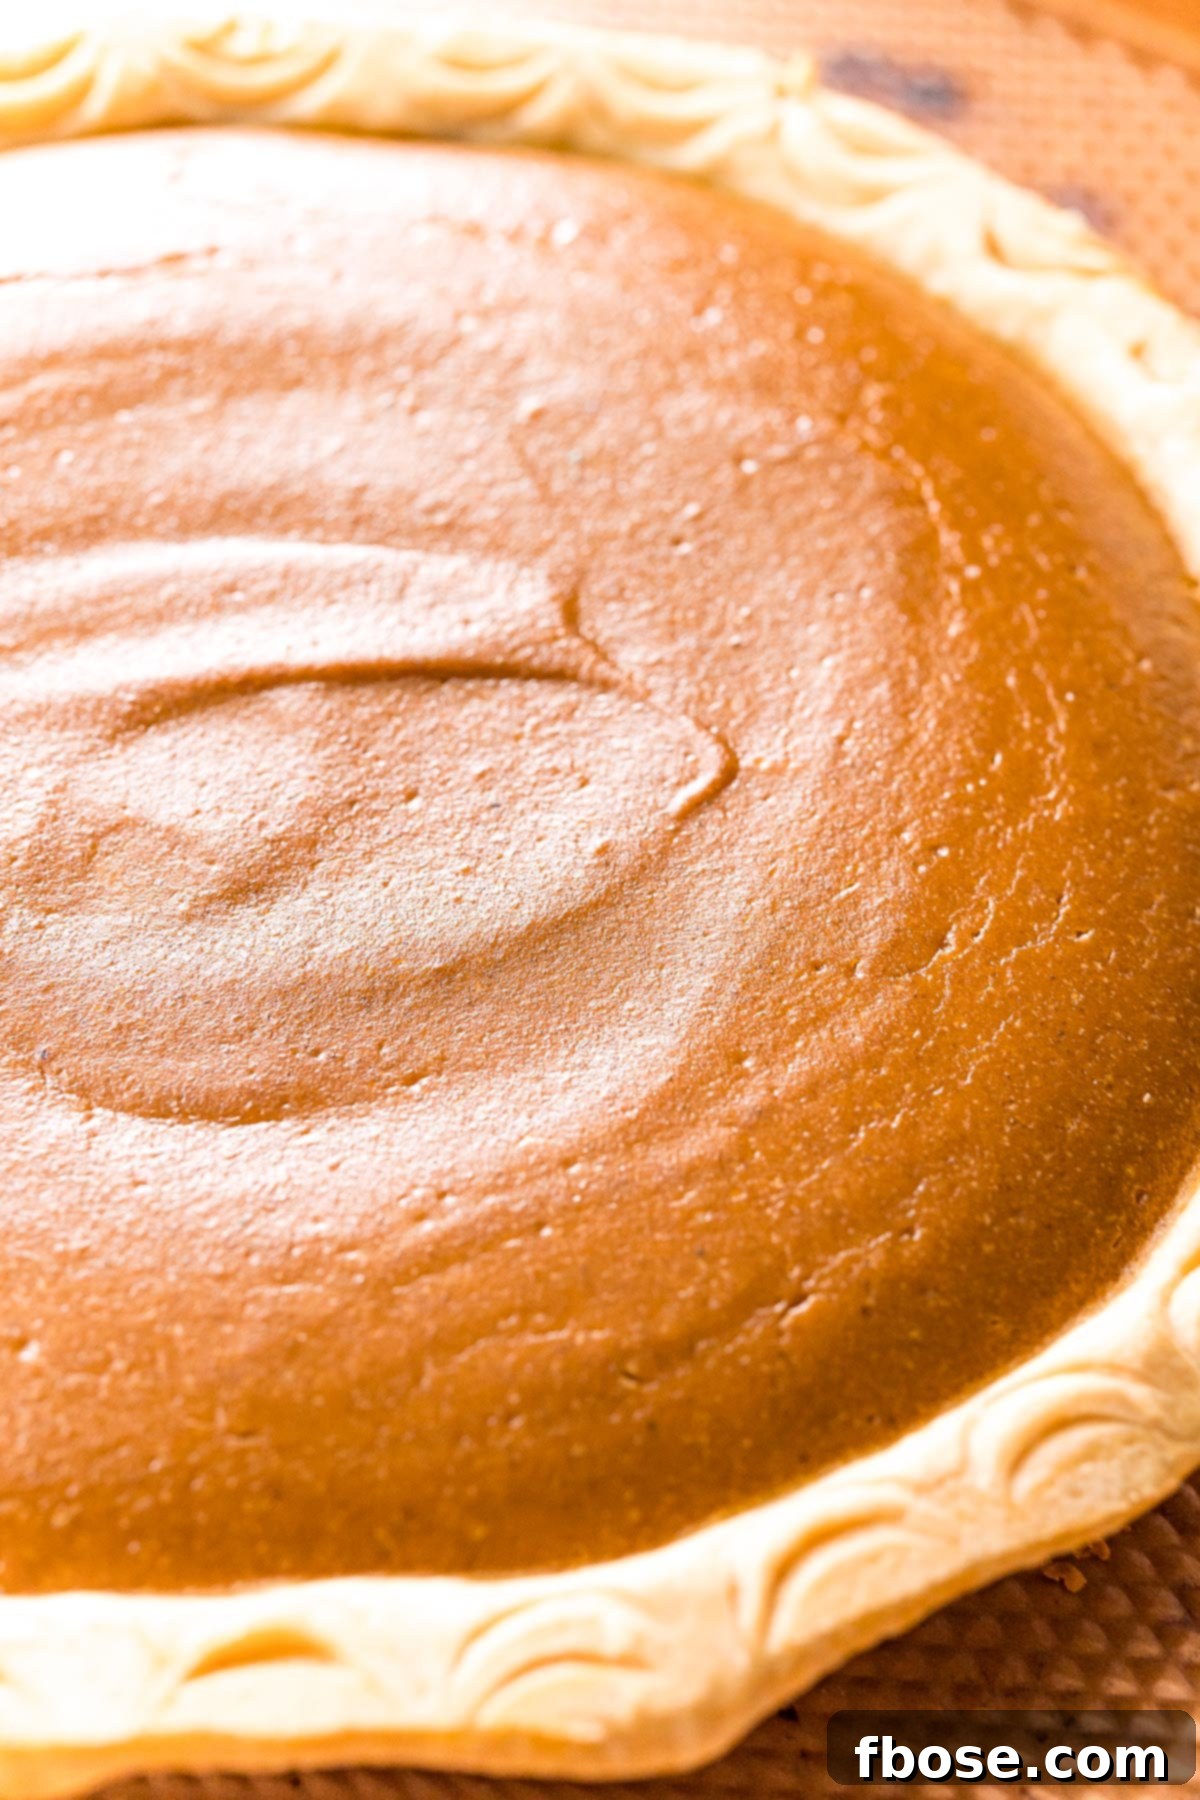
Refer to the photograph below for an ideal visual reference of a perfectly baked pumpkin pie, fresh out of the oven, demonstrating the subtle jiggle and set edges you should be looking for.
“This is the best pie recipe my husband and I have had. We have made it twice in a week we can’t get enough of it. Thanks for sharing your recipe.”
– Karrie Cruz
Expert Tips for Baking the Best Homemade Pumpkin Pie
Achieving pumpkin pie perfection involves a few key techniques and considerations that can significantly impact the final outcome. These baking tips are designed to help you avoid common pitfalls and ensure your pie turns out beautifully every time, with a crisp, golden crust and a luscious, smooth filling that everyone will rave about.
- Choosing the Right Pie Pan: This recipe is designed to generously fill a deep-dish 9-inch pie dish. A deep-dish pan provides ample room for the rich filling, resulting in a substantial and satisfying slice. If you opt for a standard pie tin, like the one often seen in these photos, you might have a small amount of leftover filling. Simply discard this excess, or for a delightful bonus treat, bake it in a small, greased ramekin for a mini pumpkin custard!
- Optimal Filling Thickness: Our recipe utilizes 2 tablespoons of all-purpose flour to achieve the perfect consistency for the filling. Flour acts as a gentle thickener, ensuring the custard sets beautifully without being overly dense or runny. It helps bind the ingredients and provides a stable structure. While some recipes call for cornstarch or tapioca as thickeners, I’ve found that these can sometimes lead to a slightly rubbery or gummy texture, which we want to carefully avoid for a truly smooth and melt-in-your-mouth pie.
- The Dual-Temperature Baking Method: You might wonder why we bake the pie at two different temperatures. The initial high heat (425°F or 220°C) is crucial for promoting a wonderfully flaky and golden-brown crust. At this elevated temperature, the fat in your pie dough quickly melts and produces steam, which effectively lifts and separates the layers of dough, creating that coveted light and airy flakiness. After the first 15 minutes, reducing the oven temperature to 350°F (175°C) is vital to prevent the crust from burning and allows the delicate custard filling to bake through gently and evenly, preventing cracks and ensuring a smooth, perfectly set interior. This method is the secret to a perfectly balanced pie.
- Essential Crust Protection: A pie crust shield is an invaluable tool for preventing the edges of your pie crust from over-browning or burning during the extended baking time. The pie edges tend to cook faster than the filling, making a shield essential. You can purchase a reusable silicone shield, which offers immense convenience and reliability, or fashion your own makeshift shield from strips of aluminum foil. While aluminum foil works in a pinch, the small investment in a good silicone shield is often worth it for the consistent, perfect results it provides every time, saving you the fuss of trying to get foil “just right.”
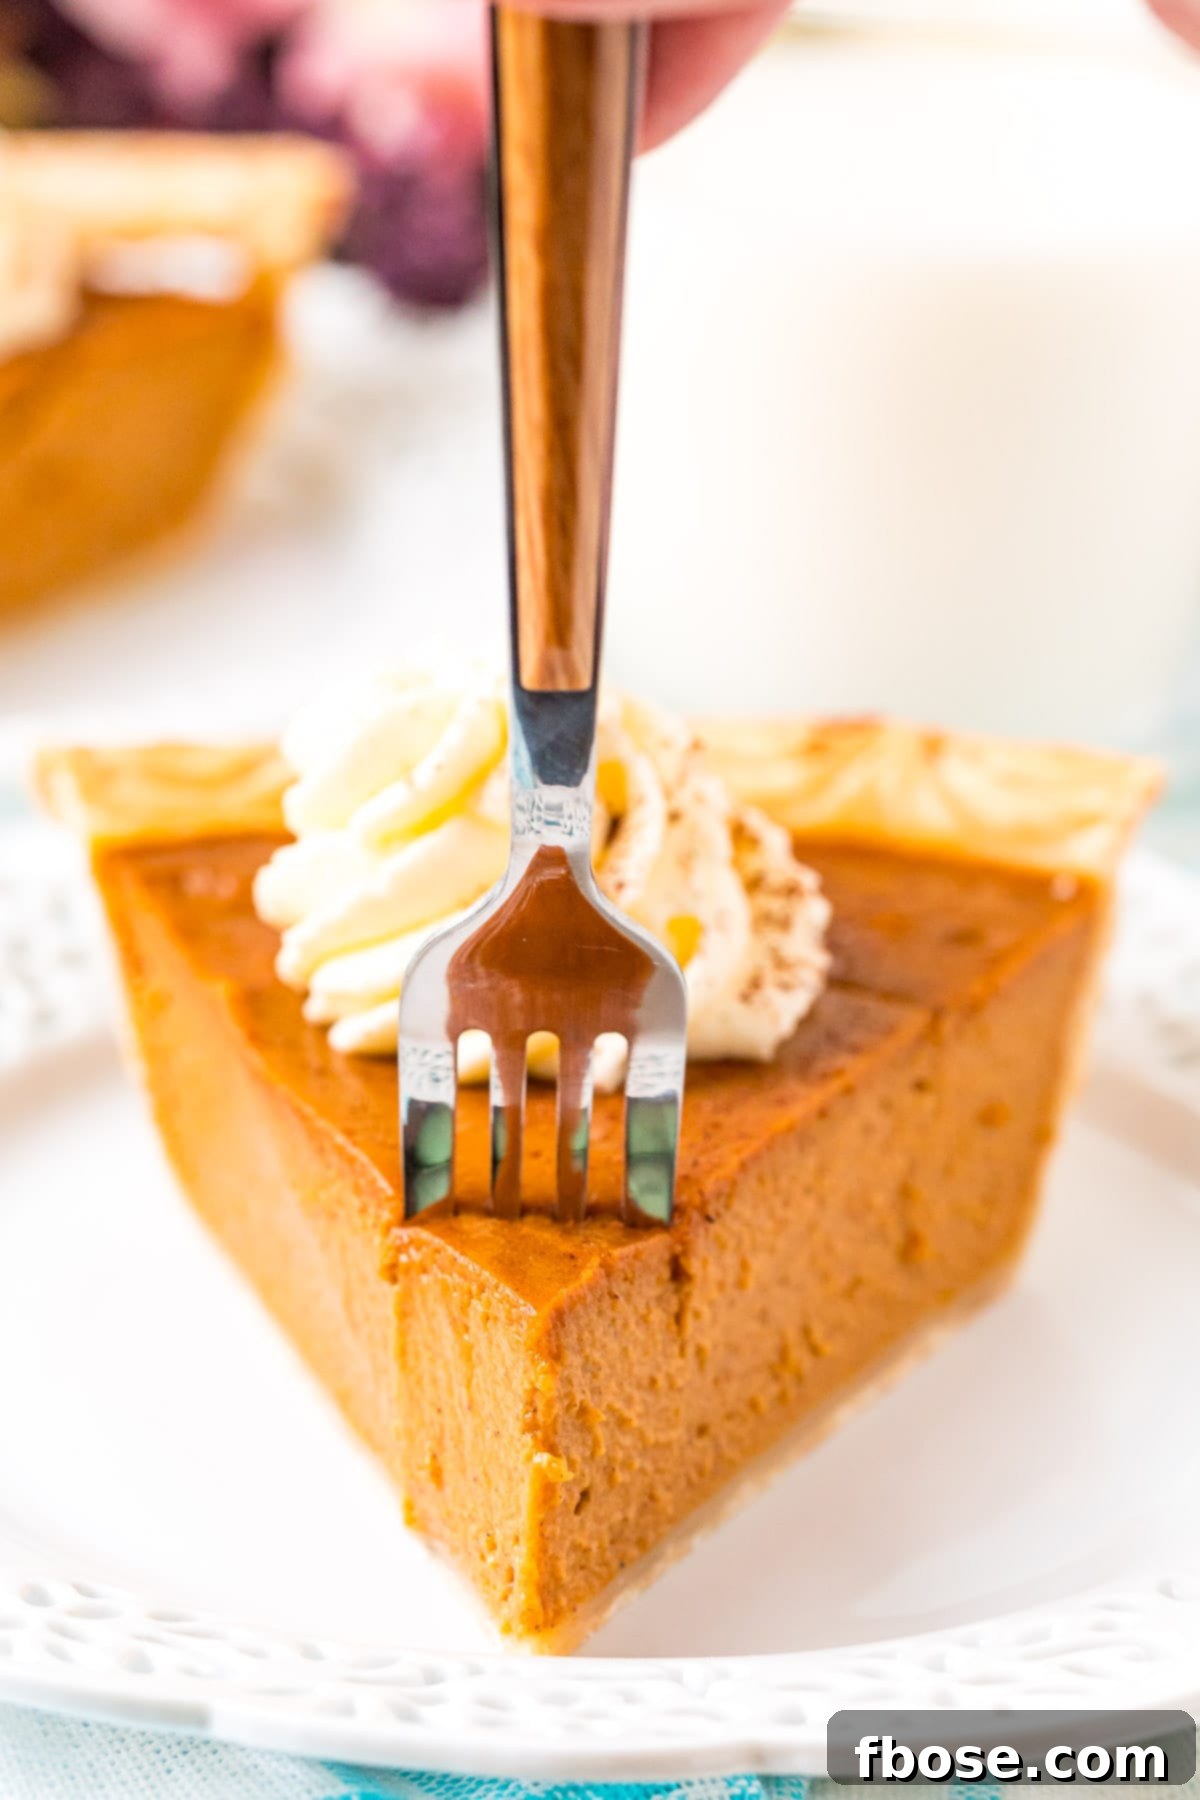
- The Importance of Cooling: This might be the most challenging part for eager bakers, but it’s absolutely vital: you MUST allow your pumpkin pie to cool completely for at least 3 to 4 hours at room temperature before attempting to slice it. During this critical cooling period, the hot custard filling continues to set, firm up, and fully stabilize its structure. Cutting into a warm pie will invariably result in a messy, unset filling that collapses upon serving. Patience here is key to achieving those clean, beautiful, firm slices perfect for presentation and enjoyment.
- Ingredient Temperature Matters: For the smoothest and most homogenous custard filling, ensure that your eggs and sour cream are at room temperature before you begin blending them with the other ingredients. Room temperature dairy and eggs emulsify (combine) far better with the other components, especially the pumpkin puree and sugars, resulting in a more uniform, velvety texture and preventing any curdling or graininess in the final custard.
- Choosing Your Pumpkin Puree: Always opt for 100% pure pumpkin puree, not pumpkin pie filling. Pumpkin pie filling already contains spices and sugar, which would throw off the flavor balance of this recipe. For the best and most consistent results, canned pumpkin puree often yields a superior pie to homemade. Brands like Libby’s and Farmer’s Market Organic are consistently excellent choices, offering a dense, flavorful puree that makes for a rich and vibrant custard. Store brands can vary significantly in quality, so sticking to known good brands is a safe bet.
The Blender Advantage: Why Blending Your Pie Filling is a Game-Changer
While some traditional recipes might suggest using a whisk or a hand mixer for your pumpkin pie filling, employing a blender offers distinct advantages that contribute significantly to a superior final product. There are three primary reasons why blending is the recommended method for achieving the perfect pumpkin pie custard: a truly smooth, stable, and impeccably flavored filling.
- Minimizing Aeration: Unlike vigorous whisking or using a stand mixer, a blender quickly and efficiently incorporates ingredients without introducing excessive air into the mixture. Excessive aeration, or whipping too much air into the eggs and other liquids, can lead to a “souffléed” effect in the oven. This causes the pie to puff up dramatically during baking due to expanding air bubbles, and then inevitably crack and sink as it cools. By minimizing air incorporation, you significantly reduce the risk of these structural issues, resulting in a stable, beautifully set custard with a perfectly smooth top.
- Achieving Ultra-Smoothness: A blender effortlessly breaks down any small lumps from the pumpkin puree or spices, and thoroughly emulsifies the liquids, creating an incredibly smooth and homogenous filling. This silky, velvety texture is a hallmark of a truly gourmet pumpkin pie, ensuring a luxurious mouthfeel with every single bite. There’s no comparison to the consistency achieved by a blender when aiming for that perfect, uniform custard.
- Optimal Spice Distribution: When spices are simply whisked in, they can sometimes clump together, or worse, separate and rise to the top of the filling during baking, creating an unevenly spiced pie with concentrated flavor in some areas and blandness in others. Blending ensures that all the aromatic spices – cinnamon, nutmeg, black pepper, and pumpkin pie spice – are thoroughly and evenly incorporated throughout the entire mixture. This guarantees every slice delivers a consistent, well-balanced burst of warm, inviting flavor, from the first bite to the last, without any unexpected textural variations.
The Secret to Deep Flavor: Pre-cooking Your Pumpkin Pie Filling
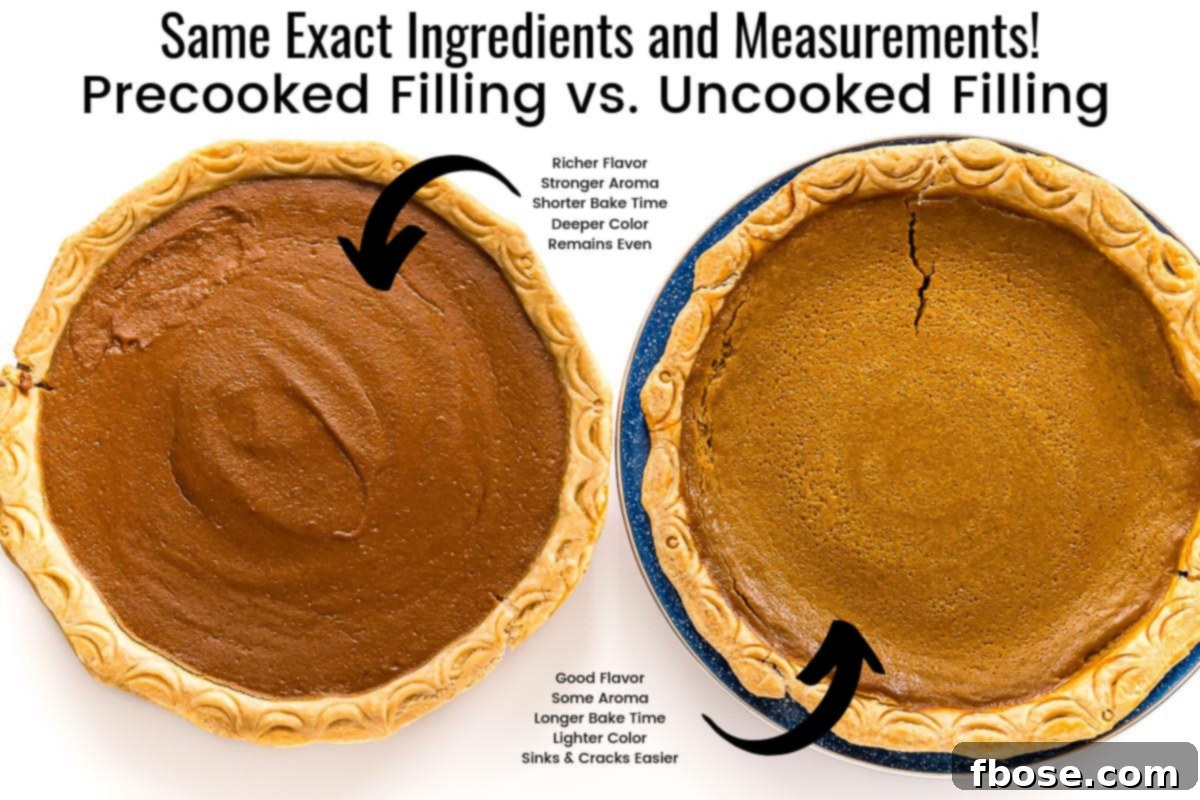
This might seem like an extra step that adds to your dishwashing load, but trust us, pre-cooking the pumpkin pie filling on the stovetop for a few minutes before baking makes a monumental difference in the final taste, aroma, and appearance of your pie. Observe the comparison in the photo below: which pie looks more appetizing? We’re confident you’ll choose the one with the richer, deeper color!
Both pies in the image were made using the exact same recipe and ingredients. The only differentiator? The filling for one was gently cooked on the stovetop for several minutes after blending, before being poured into the pie shell and baked. This simple, yet transformative, step offers several significant benefits that elevate your pumpkin pie from good to truly exceptional:
- Enhanced Flavor Infusion: Heating the filling allows the dark brown sugar to fully melt and caramelize slightly, deepening its inherent sweetness and adding complex molasses notes. More importantly, it gives all the dry spices (cinnamon, nutmeg, black pepper, pumpkin pie spice) time to “bloom” in the warm liquid. This blooming process intensifies their aromatic qualities and helps them infuse more thoroughly and evenly into the pumpkin puree, creating a much more complex, integrated, and intensely flavorful profile in the finished pie.
- Richer Color: The gentle cooking process helps to deepen the natural color of the pumpkin and the brown sugar, resulting in a pie that boasts a more appealing, vibrant amber or burnt orange hue, as beautifully demonstrated in the infographic below. This visual richness signals a depth of flavor that tantalizes before the first bite.
- Eliminating “Raw” Flavor: Sometimes, especially with certain pumpkin purees or if the pie is slightly undercooked, a subtle “raw” or slightly bland taste can linger. Pre-cooking helps to cook out any of these undesirable notes, ensuring a pure, well-developed, and pleasant pumpkin flavor that is truly the star of the show.
- Starting the Setting Process: The brief simmer on the stovetop also begins to thicken the filling slightly. This initial thickening helps to ensure a perfectly set custard in the oven and can even contribute to a slightly reduced overall baking time, making for a more efficient process.
Don’t skip this step! It’s a small effort that yields a dramatically more delicious, aromatically pleasing, and visually stunning pumpkin pie.
Troubleshooting: Why Did My Pumpkin Pie Puff Up (and Crack)?
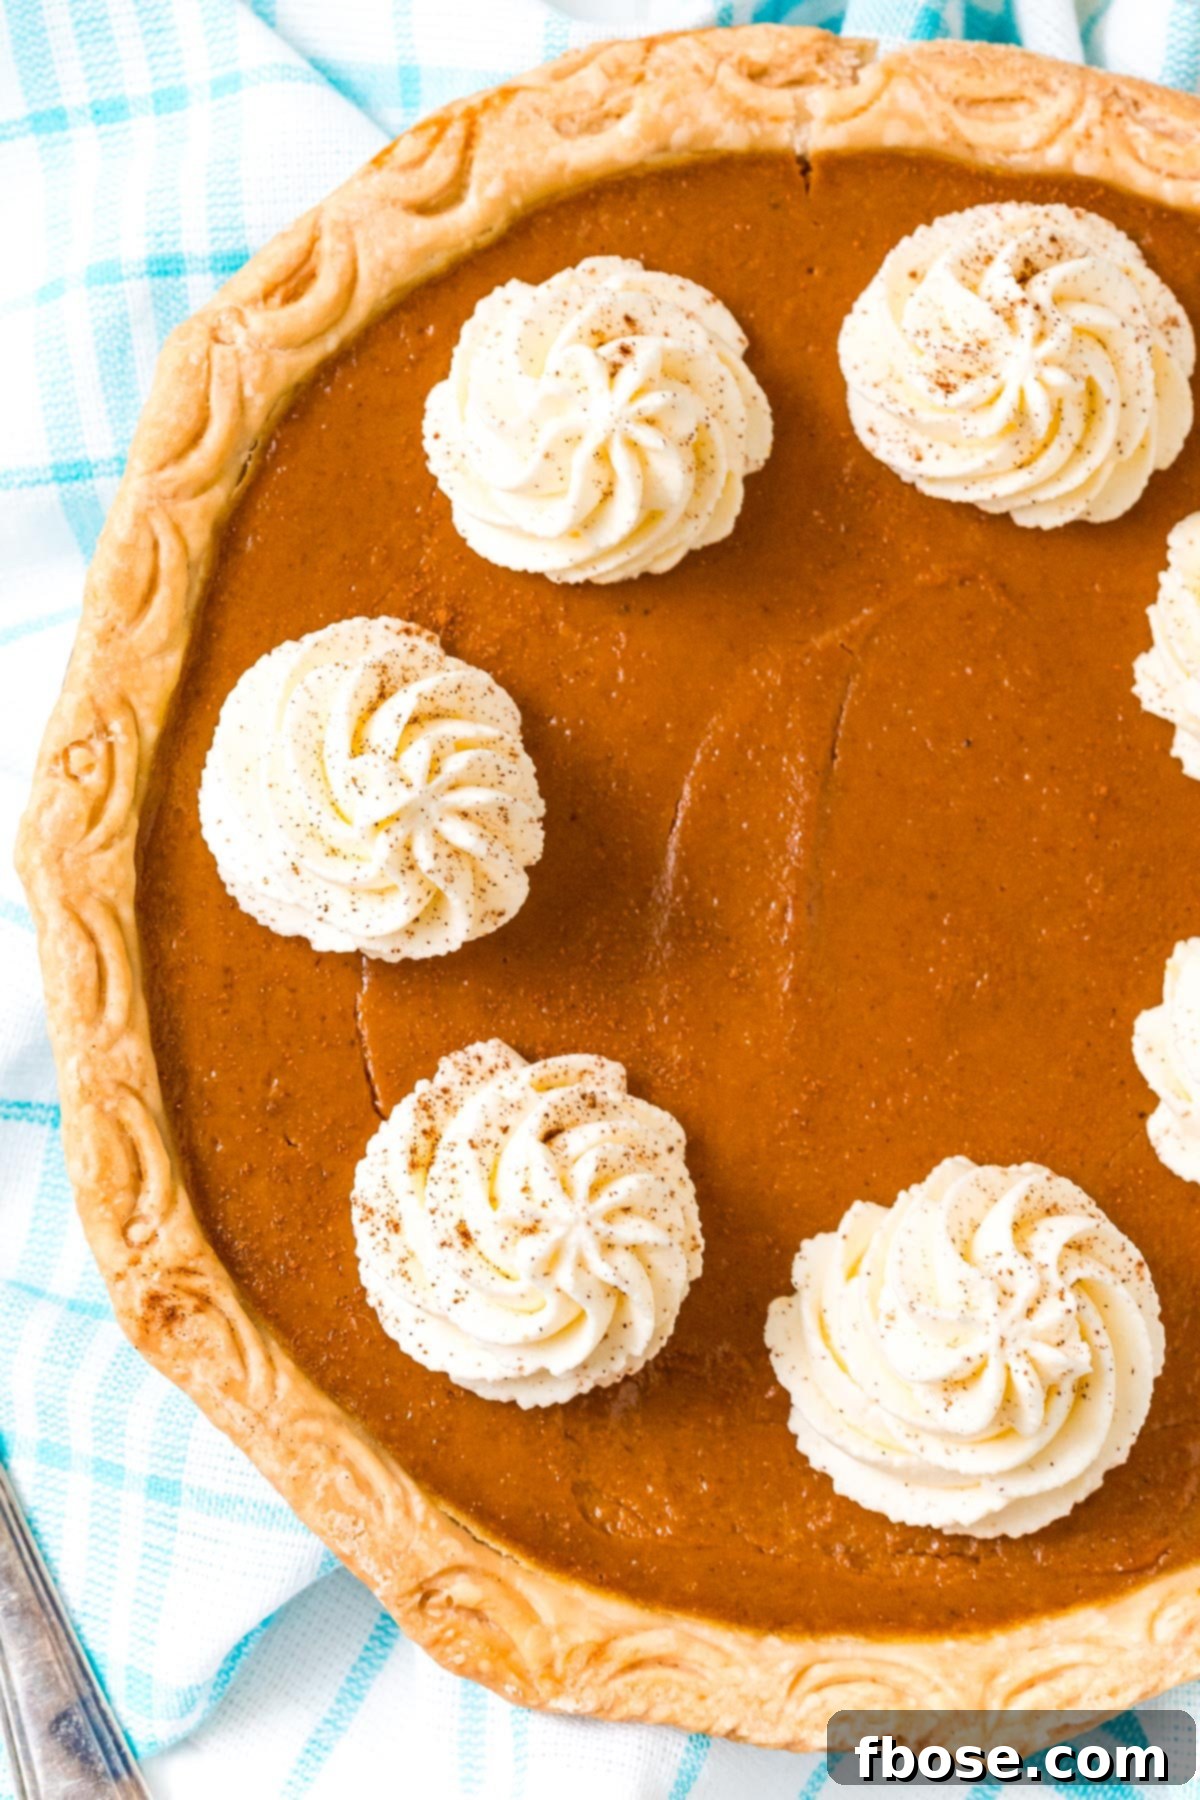
Observing your beautiful pumpkin pie puffing up significantly in the oven, only to deflate and potentially crack as it cools, can be disheartening. This common issue is usually attributable to one of a few factors related to how the custard bakes. Understanding these causes will help you prevent it in the future, ensuring a perfectly smooth and flat top that looks as good as it tastes.
- Overbaking: This is the most frequent culprit behind a puffed and cracked pie. When a pumpkin pie is overbaked, the eggs and proteins in the custard filling solidify too much and expel moisture. This excess expansion causes the filling to puff up excessively in the oven. As the pie cools and contracts, this overcooked structure collapses, inevitably leading to unsightly cracks across the surface. The pie is ideally done when the sides are set and slightly puffed, but the very center still retains a delicate, subtle jiggle, indicating that it will finish setting during the cooling process.
- Incorrect Oven Temperature: Baking the pie at too high a temperature for too long, or forgetting to reduce the heat after the initial 15 minutes as directed in our recipe, can also cause severe puffing. High heat forces the custard to set too quickly and aggressively from the outside in, often leading to the same overcooked, puffed, and subsequently cracked result. Adhering strictly to the two-temperature baking method (initial high heat, then reduced heat) is crucial for a gradual, even set.
- Excessive Aeration of Filling: If you prepared your filling using a hand mixer or a whisk instead of a blender, you might have incorporated too much air into the eggs and liquid ingredients. When baked, these trapped air bubbles expand dramatically, causing the entire custard to “soufflé” and puff up. As the pie cools, the trapped air escapes, leading to a sunken and cracked surface. This is precisely why our recipe emphasizes using a blender for a smoother, less aerated filling, which yields a much more stable and aesthetically pleasing result.
By carefully monitoring baking times, adhering to the specified temperatures, and utilizing the blender method for your filling, you can confidently achieve a perfectly smooth, uncracked pumpkin pie every time, ready to be the star of your dessert table.
Preventing the Dreaded Soggy Bottom: Ensuring a Crisp Pie Crust
A perfectly flaky, crisp crust is just as important as a smooth, creamy filling for an exceptional pumpkin pie. No one wants a soggy bottom! Many pumpkin pie recipes call for blind baking (pre-baking) the crust, but in this recipe, we employ alternative, highly effective methods to ensure a wonderfully crisp bottom without the extra step of blind baking. I find that blind baking can sometimes lead to an over-browned or even slightly dry crust by the time the delicate filling is fully set, creating an imbalance in textures.
Here’s how we keep the pie crust from getting soggy and achieve that delightful crispness that complements the rich filling beautifully:
- The Power of Egg Wash: Before pouring in the luscious filling, brush the entire inner surface of your prepared raw pie crust with a simple egg wash (egg beaten with a bit of milk). This step is more than just for appearance; it creates a protective barrier, essentially sealing the crust. This seal is critical because it prevents the moisture from the wet pumpkin filling from seeping into the raw dough during baking, which is the primary cause of a soggy bottom. It also adds a beautiful sheen and contributes to a lovely golden-brown color on the baked crust, enhancing its appeal and texture.
- Preheated Baking Sheet: This is a simple yet incredibly effective game-changer for preventing a soggy bottom! Always preheat the large baking sheet you intend to bake your pie on. Place the empty baking sheet in the oven while it’s preheating to the initial high temperature. When you transfer the pie to the oven, you’ll place the pie dish directly onto this intensely hot baking sheet. The immediate, intense heat from the preheated metal instantly begins to cook and crisp up the bottom of the pie crust. This rapid heat transfer ensures the crust sets quickly and thoroughly before it has a chance to absorb moisture from the filling, all without overcooking or burning the delicate top edges of your pie. This technique ensures a beautifully crisp and firm foundation for your creamy pumpkin custard.
By incorporating these two simple yet incredibly effective techniques, you can confidently achieve a pumpkin pie with a perfectly crisp, golden-brown crust that complements the creamy filling beautifully, enhancing the overall texture and enjoyment of this cherished classic dessert. Say goodbye to soggy bottoms and hello to pie perfection!
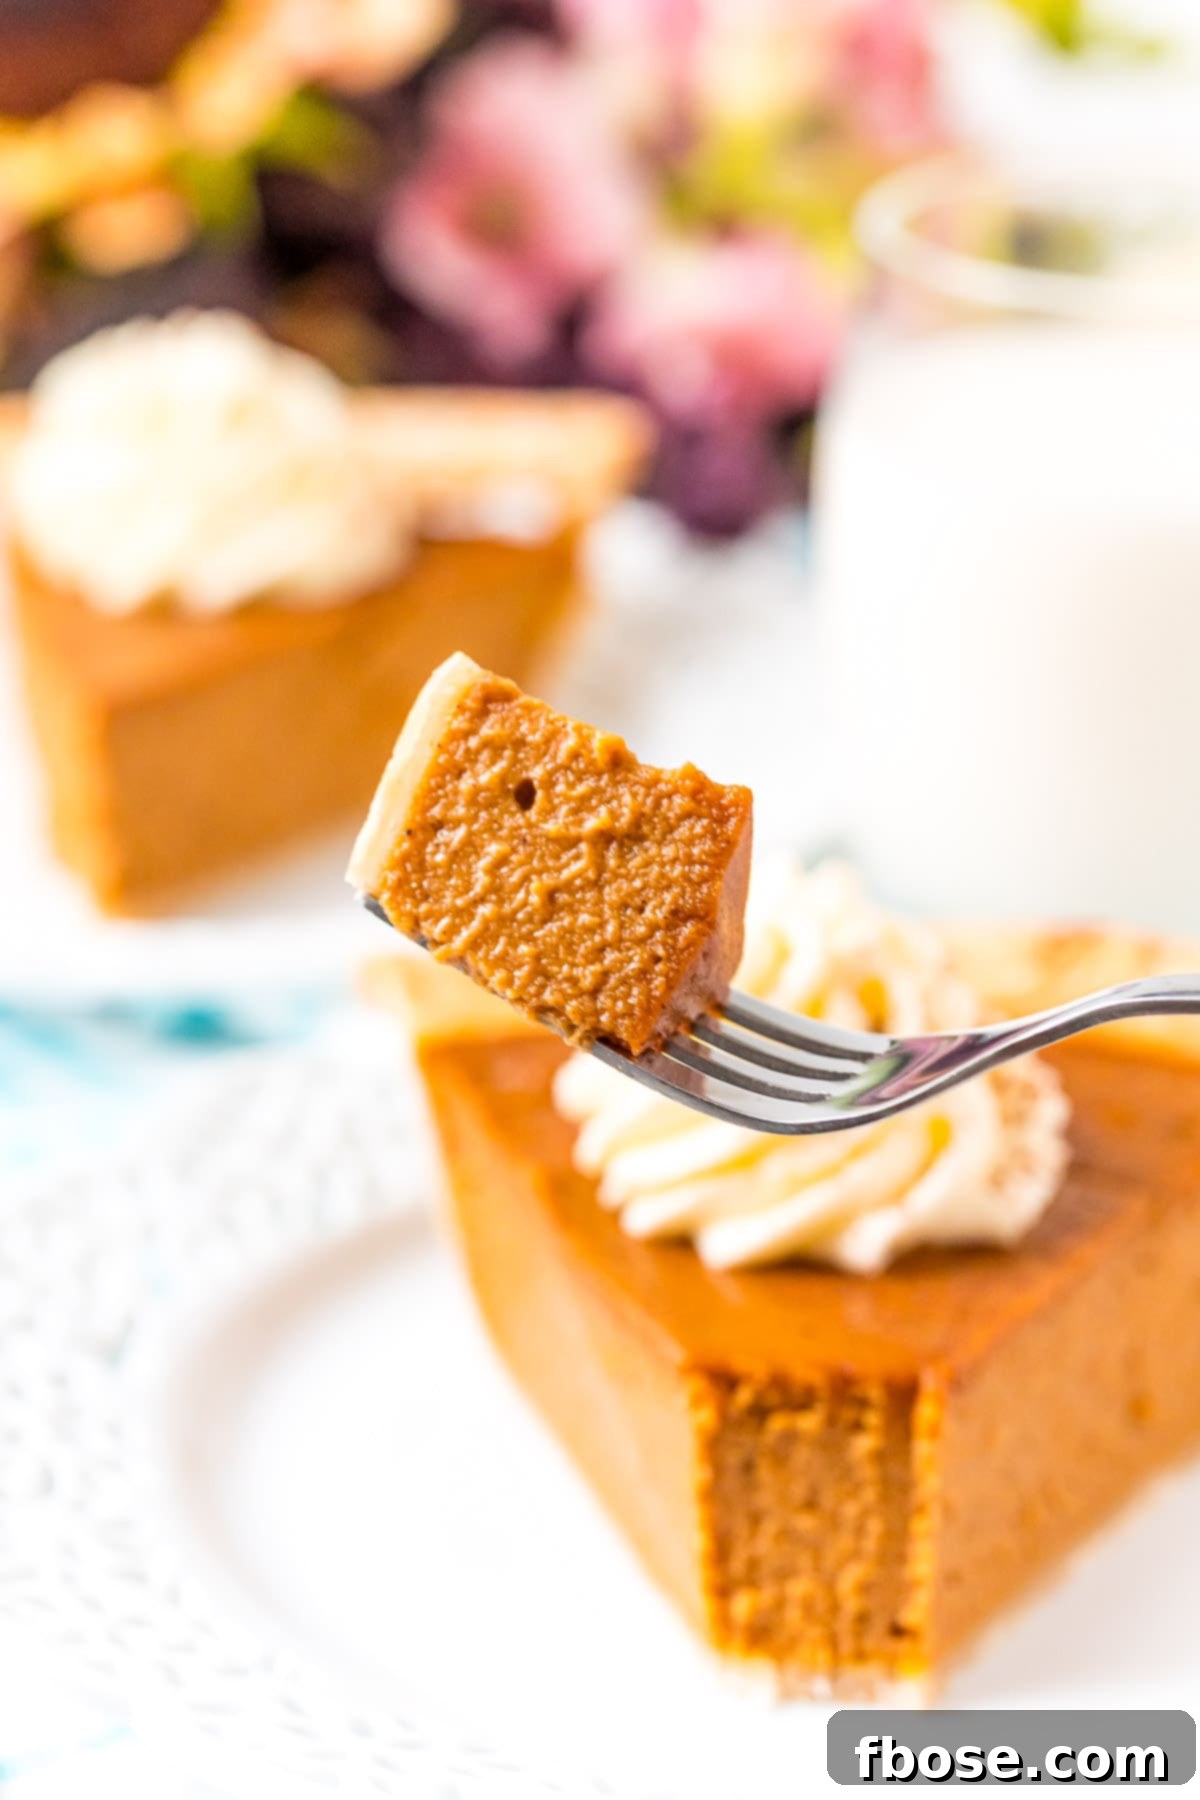
For many, the first luscious slice of pumpkin pie marks the true beginning of the fall season. This richly spiced, creamy custard pie, nestled in a flaky crust, is the epitome of comfort and tradition, bringing warmth and joy to any gathering. We believe this recipe, with its thoughtful techniques and secret ingredients, will become your new go-to for creating a truly unforgettable autumn dessert that will be requested year after year. Who’s with me? Let’s make some pie!
Serving and Storing Your Pumpkin Pie
Once your homemade pumpkin pie has cooled to perfection and fully set, it’s ready to be enjoyed! For the best experience and to truly appreciate its complex flavors and creamy texture, serve individual slices at room temperature. A generous dollop of freshly whipped cream is the classic accompaniment, but you can also elevate it with a sprinkle of extra cinnamon, a dusting of freshly grated nutmeg, or a decadent drizzle of homemade caramel sauce. The creamy filling and flaky crust are a match made in culinary heaven!
Storage Instructions:
- Room Temperature: Due to its dairy and egg content, pumpkin pie should not be left at room temperature for more than 2 hours after baking and cooling. While it’s best consumed the day it’s made for peak freshness, any remaining pie should be promptly refrigerated.
- Refrigeration: For longer storage, cover the cooled pie loosely with plastic wrap or aluminum foil to prevent it from drying out or absorbing refrigerator odors. It will keep beautifully in the refrigerator for up to 3-4 days. For optimal flavor and texture, allow individual slices to come to room temperature for about 15-20 minutes before serving.
- Freezing: Uncut pumpkin pie can be frozen for up to 1 month, making it a fantastic make-ahead option for busy holidays. Ensure the pie is completely cooled. Wrap it tightly in several layers of plastic wrap, then an outer layer of heavy-duty aluminum foil to prevent freezer burn. Thaw the frozen pie overnight in the refrigerator before unwrapping and serving.
Explore More Delicious Pie Recipes
If you’ve fallen in love with pie baking, or simply enjoy a comforting slice of homemade goodness, explore these other delightful pie recipes from our collection:
- Pecan Pie – A rich, nutty, and wonderfully sweet classic with a gooey filling, perfect for any holiday spread or special occasion.
- Dutch Apple Pie – My personal favorite among apple pies, featuring a delightful, buttery crumb topping over tender, spiced apples. It’s comfort in every bite!
- French Silk Pie – Indulgently silky and decadently chocolatey, this no-bake pie is a chocolate lover’s dream dessert, boasting a smooth, rich mousse-like filling.
- Berry Pie – A vibrant and refreshing pie bursting with a delicious medley of four different seasonal berries, offering a perfect balance of sweet and tart.
- Air Fryer Pumpkin Pie – An innovative solution for smaller gatherings or when traditional oven space is limited. This recipe offers the same great pumpkin pie taste with less fuss, baked conveniently in your air fryer!
Connect With Us!
If you’ve tried this exceptional pumpkin pie recipe, we’d absolutely love to hear from you! Please share your thoughts, feedback, and any glowing reviews in the comments section below. Your insights and experiences are invaluable to our baking community, and we cherish every comment!
Don’t forget to tag us – @sugarandsoulco – on Instagram and Pinterest with your beautiful photos of this pie or join our Sugar & Soul Show-offs Community on Facebook to share your culinary creations and participate in our exciting recipe challenges! We can’t wait to see your masterpieces and connect with fellow baking enthusiasts!
Pumpkin Pie
4.94 from 32 votes
Author: Rebecca Hubbell
Course: Dessert
Cuisine: American
Prep Time: 10 minutes
Cook Time: 45 minutes
Cooling Time: 4 hours
Total Time: 4 hours 55 minutes
This Pumpkin Pie Recipe is perfect for fall and Thanksgiving! A smooth and creamy spiced pumpkin custard filling baked in a flaky pie crust.
Servings: 8 people
Print Recipe
Pin Recipe
Rate this Recipe
Equipment
- Blender
- 9-inch Pie Dish (deep-dish recommended)
- Medium Saucepan
- Large Baking Sheet
- Pastry Brush
- Pie Crust Shield (optional but recommended)
- Kitchen Thermometer (optional)
Ingredients
Crust
- 1 Single Layer Pie Crust
- 1 large egg
- 1 teaspoon milk
Filling
- 15 ounces canned pumpkin puree
- ½ cup sour cream
- 8 ounces evaporated milk
- 1 cup dark brown sugar
- 2 tablespoons all-purpose flour
- 1 teaspoon vanilla extract
- 3 large eggs
- 1 teaspoon ground cinnamon
- 1 teaspoon pumpkin pie spice
- ¼ teaspoon ground nutmeg
- ⅛ teaspoon ground black pepper
- ½ teaspoon kosher salt
Instructions
Crust Preparation
- Preheat your oven to 425°F (220°C). Place a large baking sheet into the oven while it preheats. This crucial step helps prevent a soggy bottom crust.
- Carefully place your chosen pie crust dough into a 9-inch pie dish. Ensure it fits snugly against the bottom and sides.
- Trim any excess dough, leaving about a ½-inch overhang. Crimp the edges decoratively with your fingers or a fork, ensuring a tight seal around the rim.
- In a small bowl, beat together 1 large egg and 1 teaspoon of milk to create an egg wash. Use a pastry brush to lightly coat the entire surface of the pie crust. Discard any remaining egg wash. Set the crust aside.
Filling Preparation & Baking
- Add all filling ingredients (canned pumpkin puree, sour cream, evaporated milk, dark brown sugar, all-purpose flour, vanilla extract, 3 large eggs, ground cinnamon, pumpkin pie spice, ground nutmeg, ground black pepper, and kosher salt) to a blender. Pulse for 60 seconds until the mixture is completely smooth and well combined.
- Pour the blended filling into a medium saucepan. Cook over medium-low heat for about 5 minutes, stirring frequently with a whisk or spatula. This step deepens the flavor and color of the filling.
- Carefully remove the hot baking sheet from the oven. Place the prepared pie pan (with the egg-washed crust) onto the baking sheet. Pour the pre-cooked filling into the pie crust. To prevent the crust edges from burning, place a pie crust shield around the rim.
- Bake the pie for 15 minutes at 425°F (220°C). Then, gently remove the pie crust shield and REDUCE the oven temperature to 350°F (175°C). Continue baking for an additional 20 to 25 minutes, or until the edges are set and the center has a slight jiggle.
- Once cooked, remove the pie from the oven and allow it to cool completely at room temperature for approximately 3 to 4 hours. This extensive cooling time is essential for the filling to fully set, ensuring clean, perfect slices.
- Serve your perfectly baked pumpkin pie at room temperature, garnished with fresh whipped cream and a sprinkle of cinnamon. Leftover pie should be stored covered in the refrigerator for up to 4 days.
Notes
- For the crust, you can use your favorite homemade traditional pie crust recipe or a quality premade, store-bought dough.
- Always use 100% pure canned pumpkin puree, not pumpkin pie filling. Quality brands like Libby’s or Farmer’s Market Organic are recommended for their consistent texture and flavor. Homemade pumpkin puree can sometimes be too watery or fibrous.
- If dark brown sugar is unavailable, light brown sugar can be used as a substitute, though it may result in a slightly less rich flavor.
- Preheating the baking sheet directly helps to crisp up the bottom of the pie crust, effectively preventing sogginess.
- This recipe yields enough filling for a deep-dish 9-inch pie dish. If using a standard pie tin, you may have a small amount of leftover filling; simply discard it.
- Blending the filling minimizes aeration compared to whisking, which reduces the risk of the pie puffing up and cracking during baking. It also ensures an ultra-smooth filling and perfectly distributed spices.
- Pre-cooking the filling on the stovetop is a small step that significantly enhances the pie’s flavor and color. It helps melt the brown sugar, infuses the spices more deeply, and eliminates any lingering “raw” pumpkin taste.
- The two-temperature baking method ensures a flaky crust (initial high heat) and a gently set custard (reduced heat), preventing burning and cracking.
- To check for doneness, an inserted kitchen thermometer should read 160°F (71°C) in the center. Alternatively, the pie is ready when the edges are set and slightly puffed, but the center still has a slight, delicate jiggle. Remove immediately if the edges begin to crack, indicating overcooking.
- Nutritional information provided is an estimate for the filling only and does not include the pie crust or whipped cream, as these components can vary significantly based on your choices.
Nutrition
Calories: 231kcal | Carbohydrates: 37g | Protein: 6g | Fat: 8g | Saturated Fat: 4g | Cholesterol: 98mg | Sodium: 229mg | Potassium: 283mg | Fiber: 2g | Sugar: 32g | Vitamin A: 8558IU | Vitamin C: 3mg | Calcium: 143mg | Iron: 2mg
Did You Make This Recipe?
Don’t forget to share it with us on Instagram @sugarandsoulco and follow us on Tiktok @sugarandsoulco and Pinterest @sugarandsoulco for more delightful recipes and baking inspiration!
Pin Recipe
Share Recipe