

Forget ordinary store-bought chocolates! This Valentine’s Day, or any special occasion, elevate your gifting and indulgence with the truly exceptional: homemade Chocolate Truffles. Rich, deeply decadent, and crafted with love, these gourmet delights are incredibly easy to make with just 4 simple ingredients. Even if you’re a beginner in the kitchen, our straightforward, step-by-step instructions will guide you to perfection. Prepare to impress your loved ones (or simply treat yourself) with a confection that far surpasses anything you can buy.
For those who love to explore the world of truffles, don’t miss our other irresistible recipes like Easy Oreo Chocolate Truffles and Cookie Dough Truffles! Each recipe yields a generous batch, perfect for sharing the joy with all your friends and family.
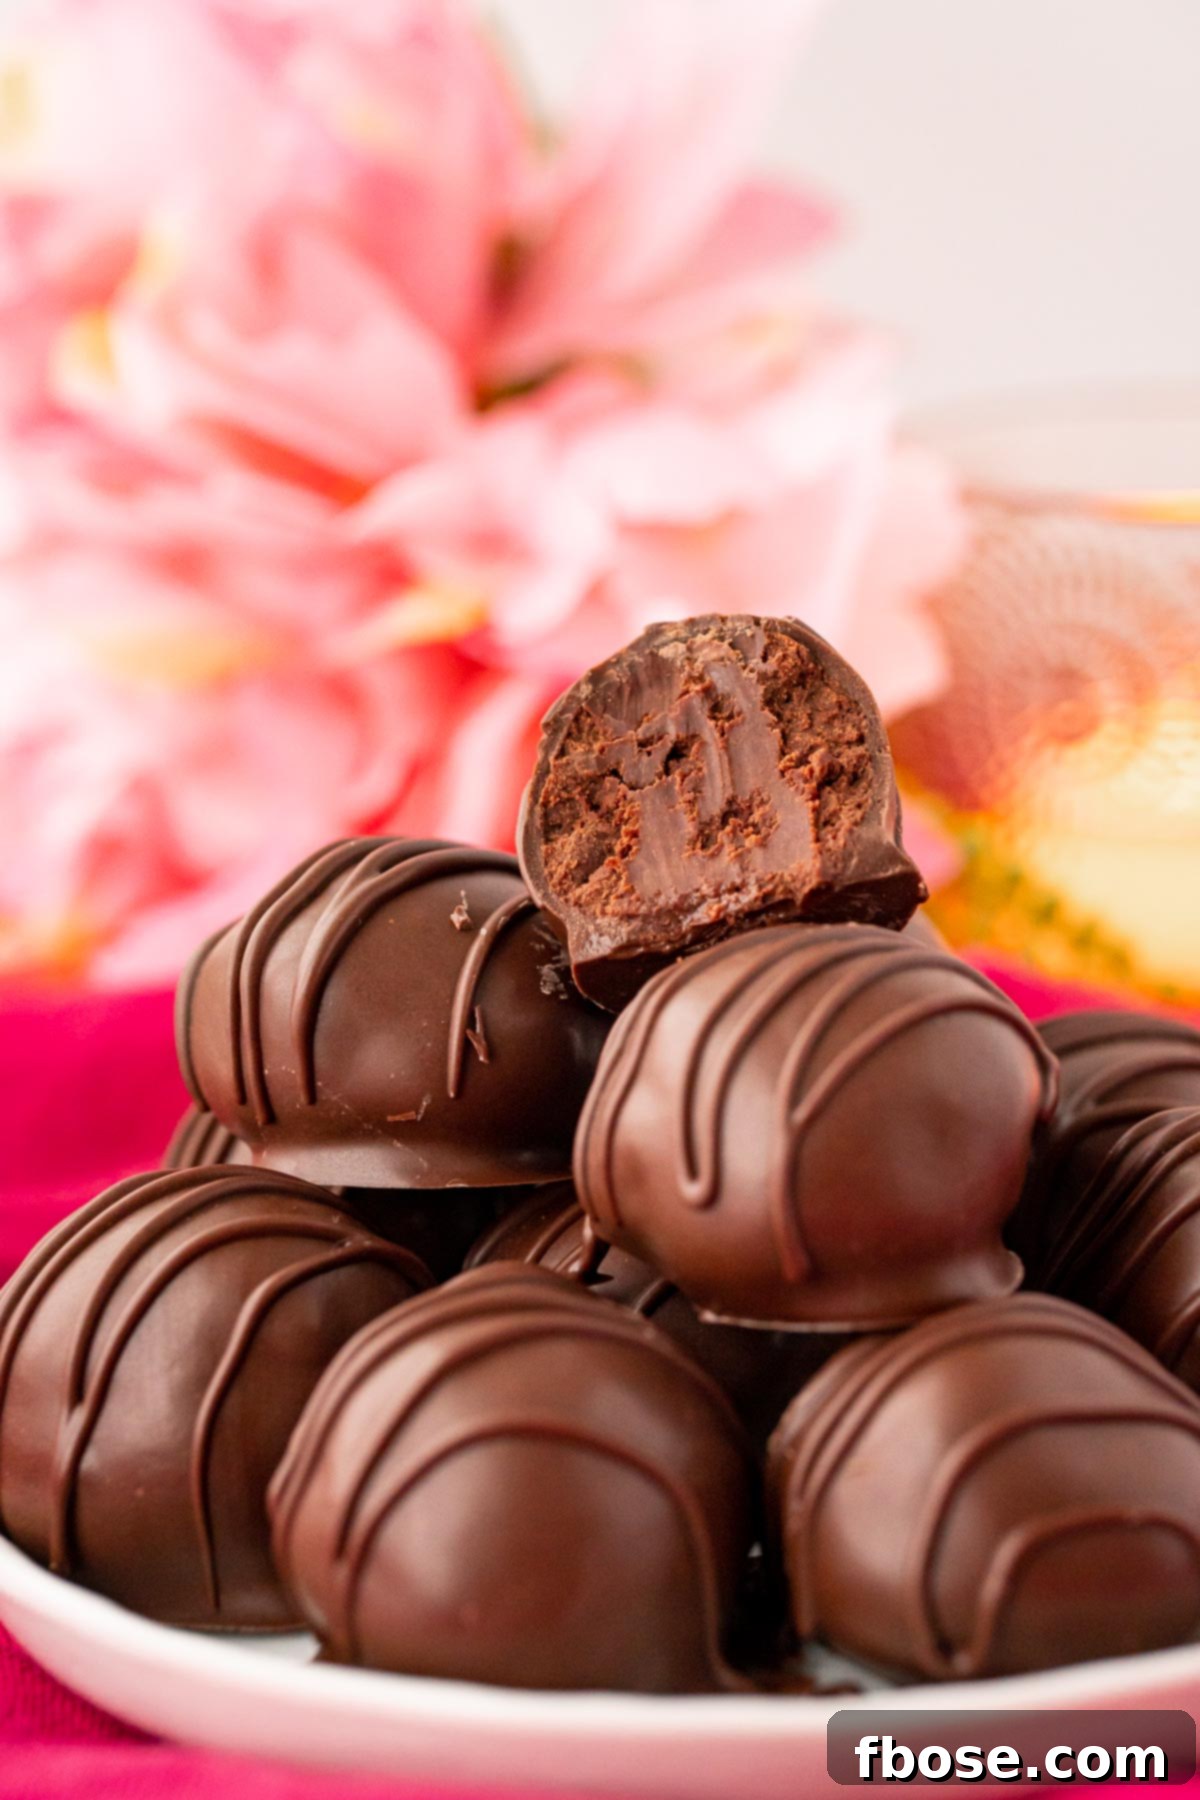
The Ultimate Homemade Chocolate Truffles Recipe
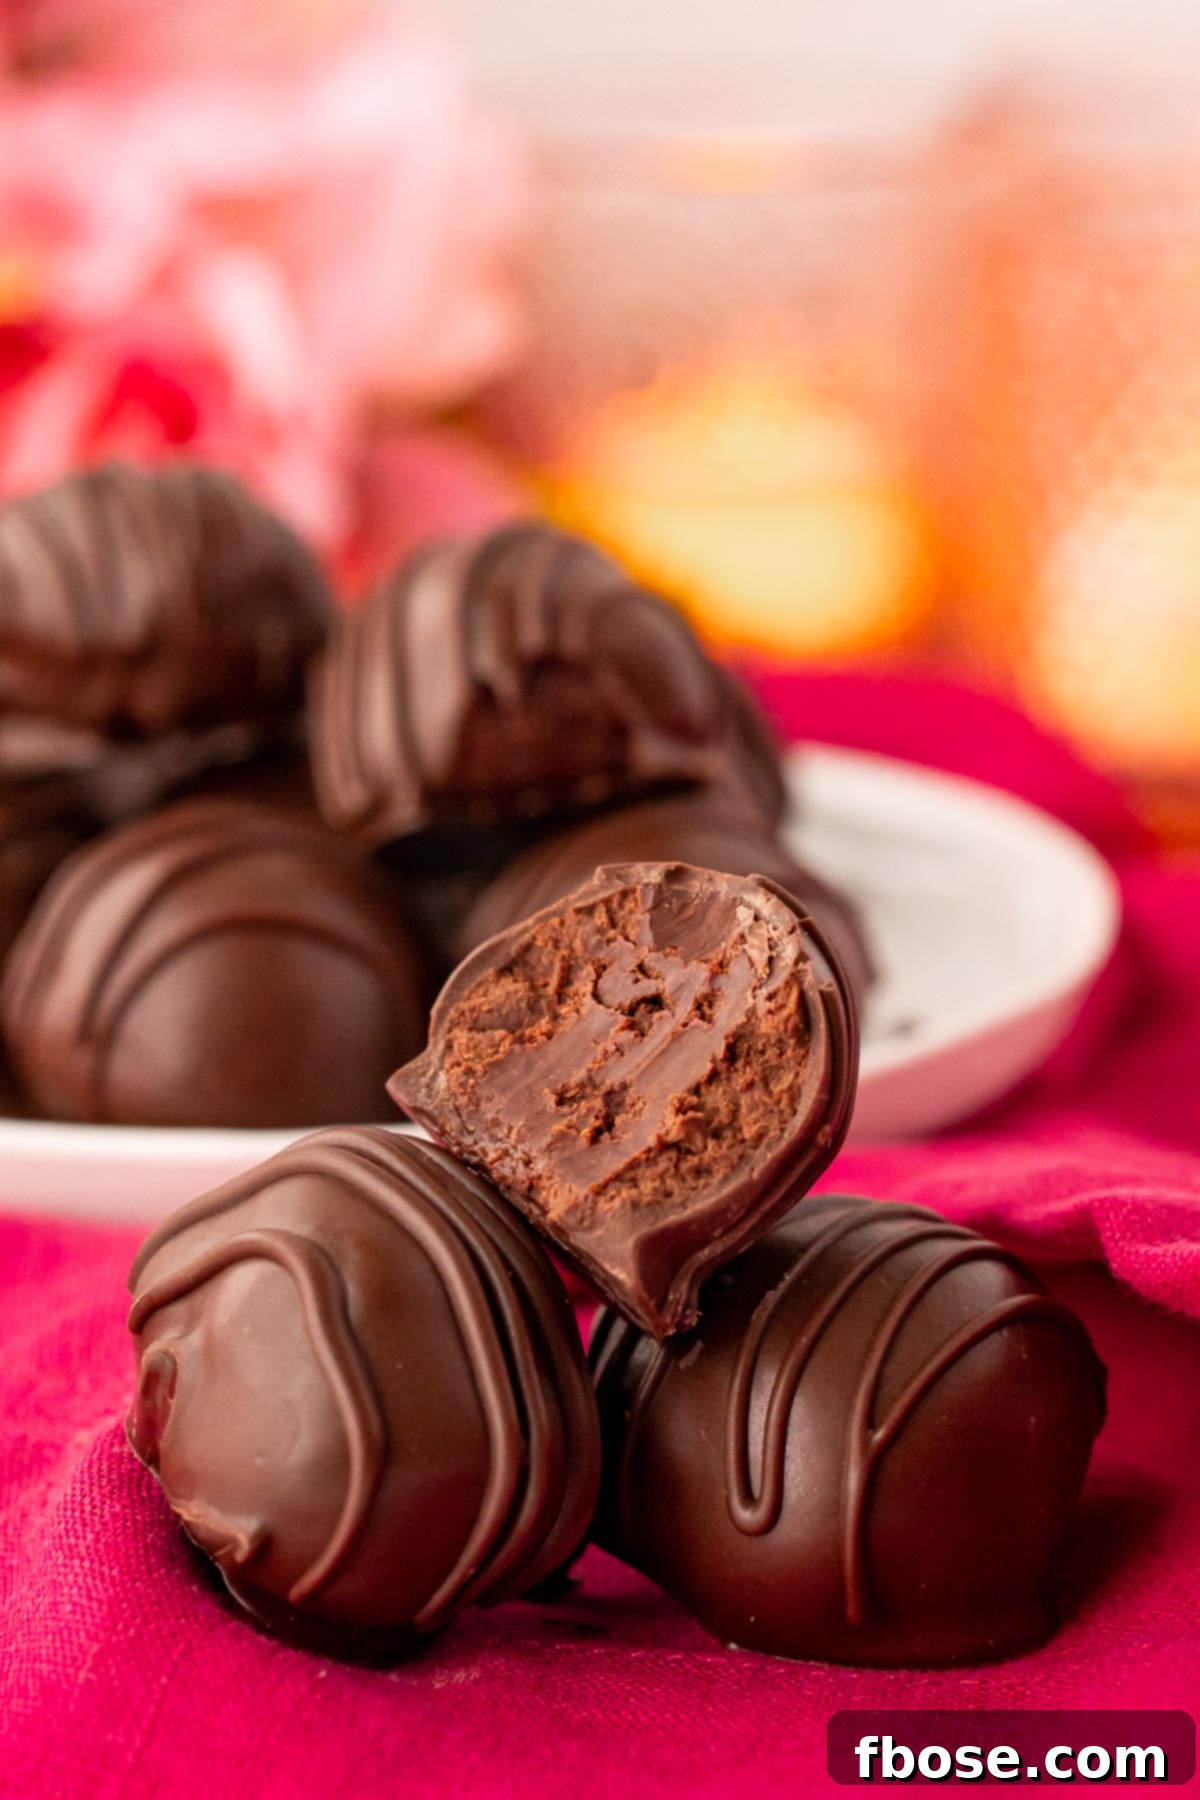
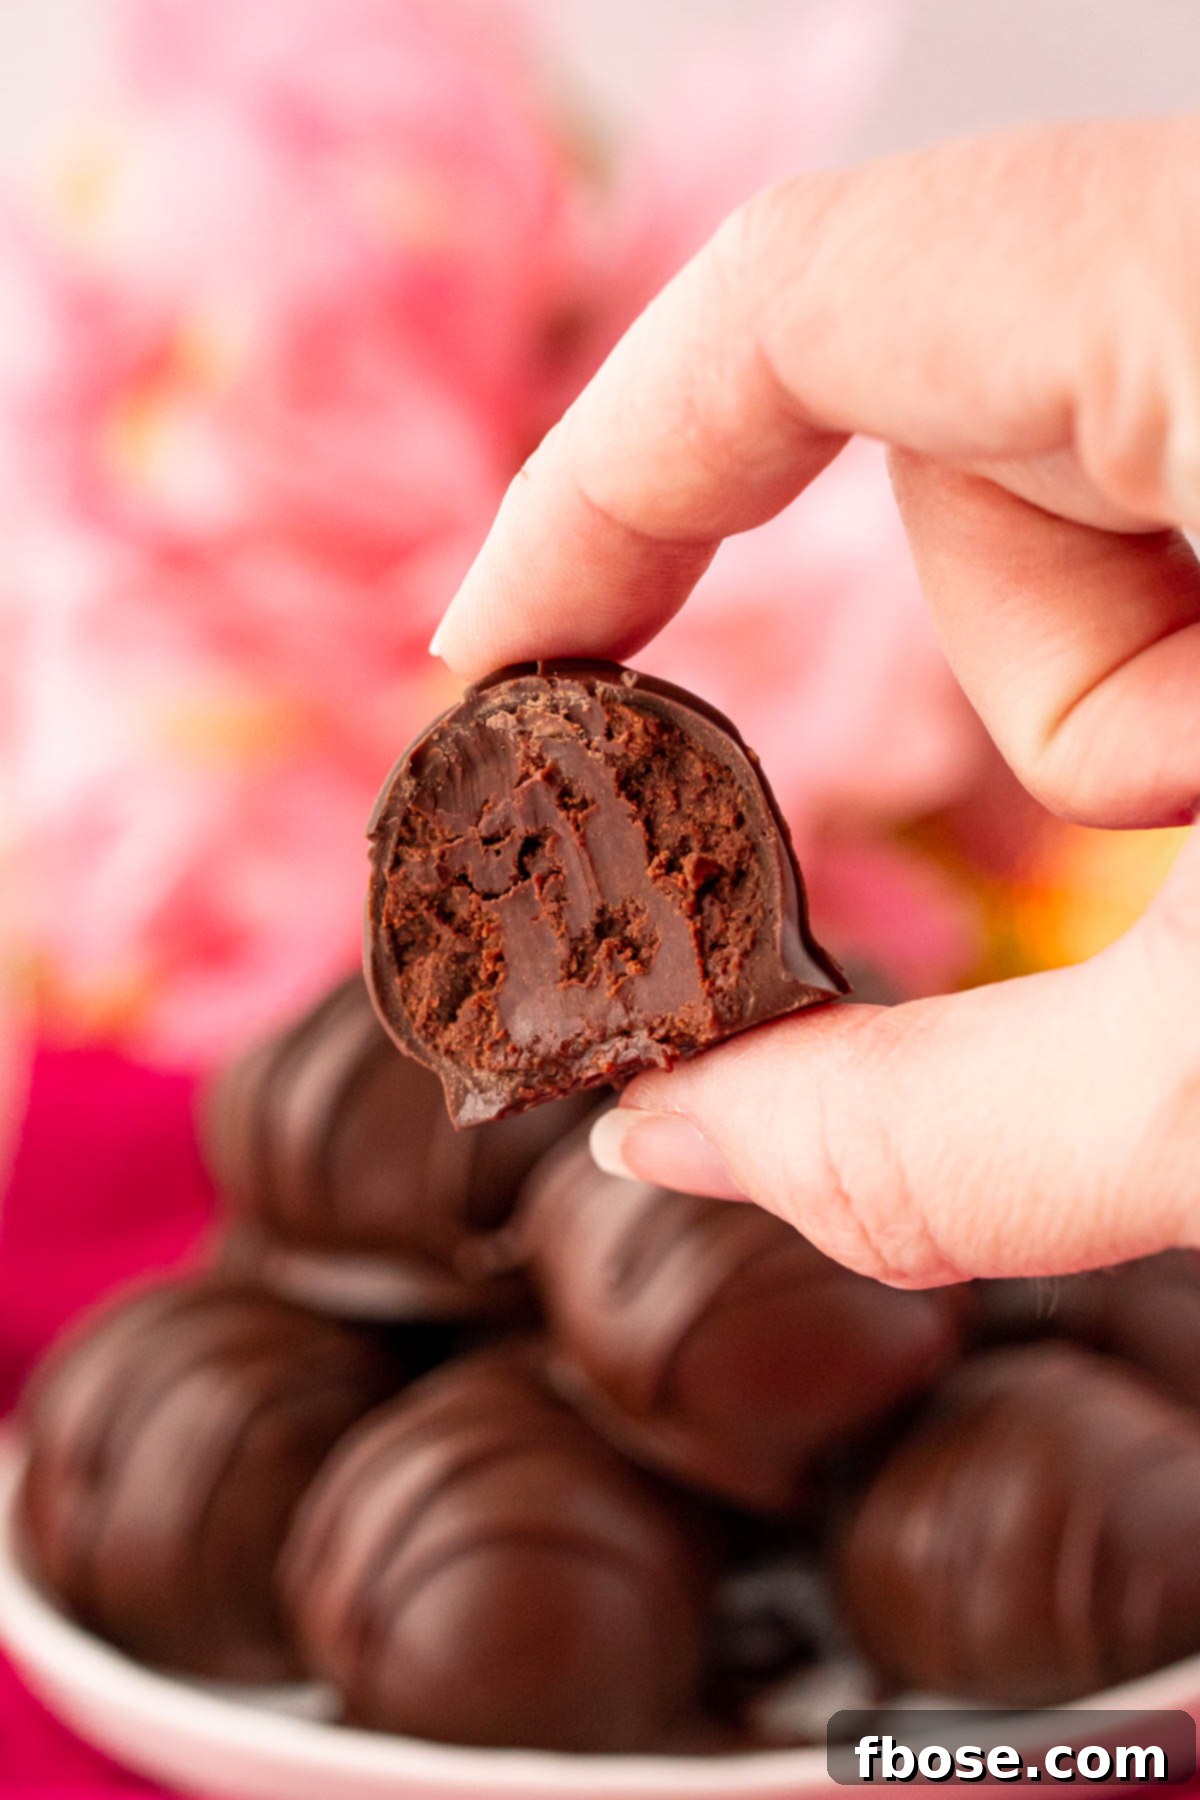
Seeking to add a touch of sweetness and sophistication to your next celebration or holiday gathering? Look no further than these exquisite homemade Chocolate Truffles. Each bite offers a luxuriously smooth, intensely rich chocolate ganache filling, encased in a crisp, decadent chocolate shell. They are an absolute dream for any chocolate enthusiast, delivering an unparalleled depth of flavor and texture that is genuinely addictive.
These elegant chocolate treats are not just for grand occasions; they make an ideal surprise for your Valentine or a thoughtful gesture for any special person in your life. The secret ingredient in homemade truffles is the love and care that goes into their creation, transforming simple ingredients into a gourmet experience that far outshines any expensive, mass-produced box of chocolates. Crafting these truffles allows you to infuse each piece with personal warmth, making them an unforgettable gift.
What Exactly Is a Chocolate Truffle? Unveiling the Decadent Core
At its heart, a chocolate truffle is a luxurious confection consisting of a rich chocolate ganache center, meticulously rolled into a spherical shape, and then coated in a layer of melted chocolate, cocoa powder, nuts, or other delightful toppings. The name “truffle” is derived from its striking resemblance to the edible fungi of the same name, particularly the dark, earthy varieties. While the concept might sound complex, the process for creating these delicate morsels is surprisingly simple, primarily relying on the harmonious blend of chocolate and cream to form the velvety ganache.
Historically, French confectioner Louis Dufour is credited with inventing the chocolate truffle in Chambéry, France, in December 1895. When he ran out of chocolate, he improvised by mixing fresh cream, vanilla, and cocoa powder, then dipped the balls into melted chocolate. The result was an instant hit, quickly gaining popularity for its exquisite taste and elegant presentation. Today, truffles come in countless variations, but the classic ganache-filled, chocolate-coated version remains a timeless favorite, revered for its smooth texture and intense chocolate flavor.
Why You’ll Fall in Love with Making Homemade Truffles!
- Effortlessly Elegant with Minimal Ingredients: You’ll be amazed that such a sophisticated dessert can be created using just four basic ingredients. This simplicity makes them accessible to everyone, from seasoned bakers to kitchen novices, proving that gourmet taste doesn’t require a long list of obscure items.
- Surprisingly Simple to Prepare: Don’t let their extravagant appearance intimidate you! The process is incredibly straightforward: melt, chill, roll, and dip. Each step is designed for ease, ensuring a stress-free baking experience with spectacular results. It’s a fantastic project for a relaxing afternoon.
- The Perfect Edible Gift: Homemade truffles are more than just a dessert; they are a heartfelt expression. Package them beautifully for Valentine’s Day, include them in your festive holiday treat tins, or surprise a host with a box of these delightful confections. A gift made with your own hands carries an extra layer of thoughtfulness and appreciation.
- Infinitely Customizable and Fun to Decorate: This is where your creativity can truly shine! These versatile truffles can be dressed up for any occasion or holiday. Imagine vibrant red, pink, and heart-shaped sprinkles for Valentine’s Day, lively greens for St. Patrick’s Day, or patriotic red, white, and blue for the Fourth of July. The possibilities are endless—consider chopped nuts, shredded coconut, finely crushed cookies, or a delicate chocolate drizzle to make each truffle unique.
- Superior Taste and Texture: Unlike many store-bought options that can be overly sweet or waxy, homemade truffles boast an incredibly fresh, rich, and balanced chocolate flavor with a smooth, melt-in-your-mouth texture. You control the quality of ingredients, ensuring a truly premium taste.
- A Therapeutic and Rewarding Baking Experience: The process of melting, mixing, chilling, and shaping these truffles can be incredibly relaxing and meditative. There’s immense satisfaction in creating something so beautiful and delicious from scratch, especially when you see the joy on the faces of those who taste them.
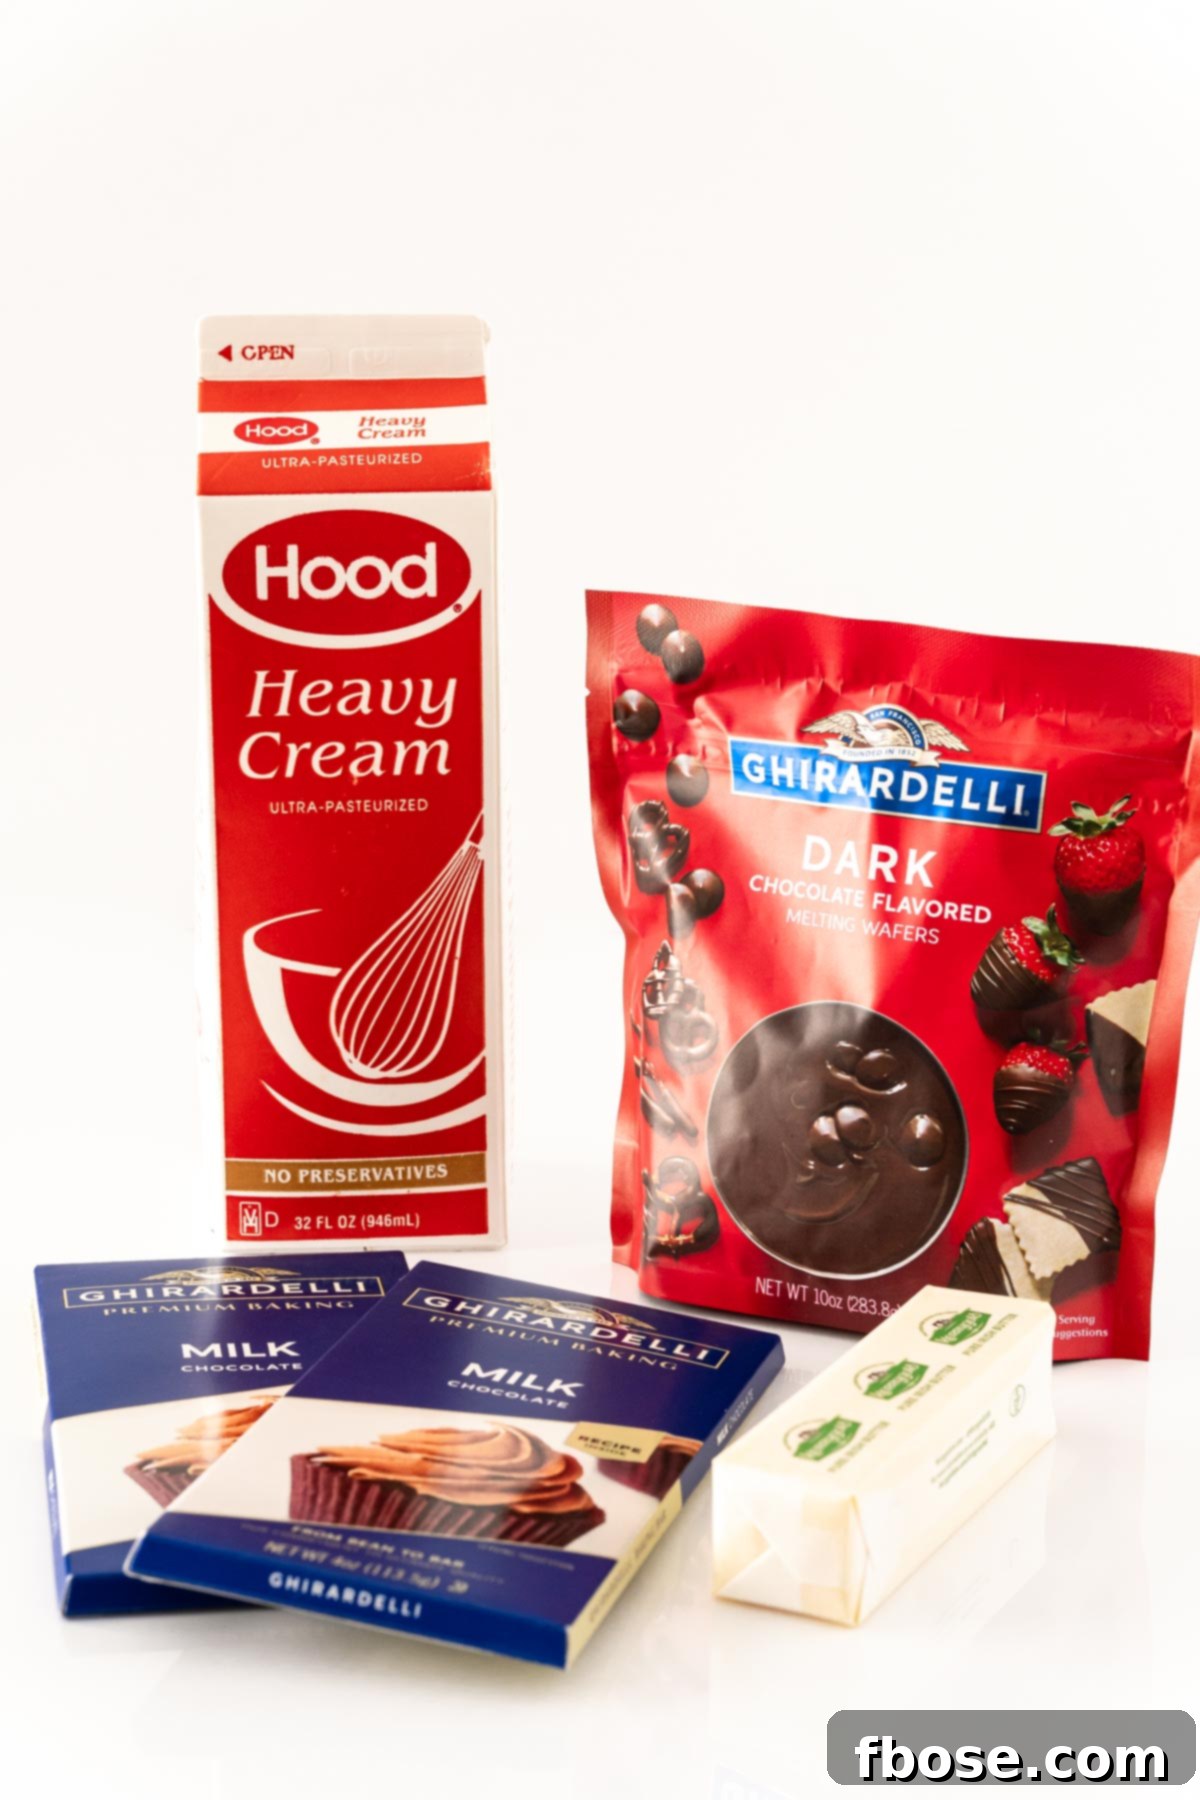
Essential Ingredients for Our Simple Truffle Recipe
Crafting these luxurious chocolate truffles requires only a handful of high-quality ingredients. Each component plays a crucial role in achieving the rich flavor and melt-in-your-mouth texture that defines a perfect truffle. Gather these four pantry staples, and you’ll be well on your way to creating an unforgettable dessert:
- Quality Baking Chocolate: The foundation of your truffle’s flavor.
- Salted Butter: Adds richness and a subtle savory note that enhances the chocolate.
- Heavy Cream: Essential for creating the smooth, luscious ganache.
- Chocolate Melting Wafers: For a beautiful, glossy, and easy-to-work-with coating.
Ready to immerse yourself in the delightful process of making these homemade truffles? Let’s delve into the details of each ingredient to ensure you achieve the best possible results. To begin, you’ll need baking chocolate, which should be broken into cubes to facilitate even melting in a saucepan.
When selecting your baking chocolate for this recipe, you have the flexibility to choose between milk chocolate for a sweeter, creamier truffle, semi-sweet chocolate for a balanced flavor, or dark chocolate for a more intense and sophisticated profile. The quality of your chocolate directly impacts the final taste, so opt for the best you can afford. However, please note that this recipe has not been tested with white chocolate, as its fat content and melting properties can differ significantly from dark or milk varieties.
Once your cubed chocolate has melted into a smooth, glistening liquid, the salted butter and heavy cream are carefully stirred in. This critical step forms the rich ganache, which will become the decadent heart of your chocolate truffles. The butter adds a luxurious creaminess and depth, while the heavy cream emulsifies with the chocolate to create that signature smooth and melt-in-your-mouth texture.
After the sweet mixture is thoroughly combined and has thickened through a chilling process, it’s ready to be rolled into individual truffle balls. These perfectly shaped centers are then dipped into a bath of melted chocolate melting wafers. These wafers are specifically designed for easy melting and provide a smooth, professional-looking finish without the need for complex tempering. Finally, unleash your creativity! You can finish your truffles with a sprinkle of colorful decorations, a delicate chocolate drizzle, a dusting of cocoa powder, or any crushed toppings like nuts or cookie crumbs for added texture and visual appeal.
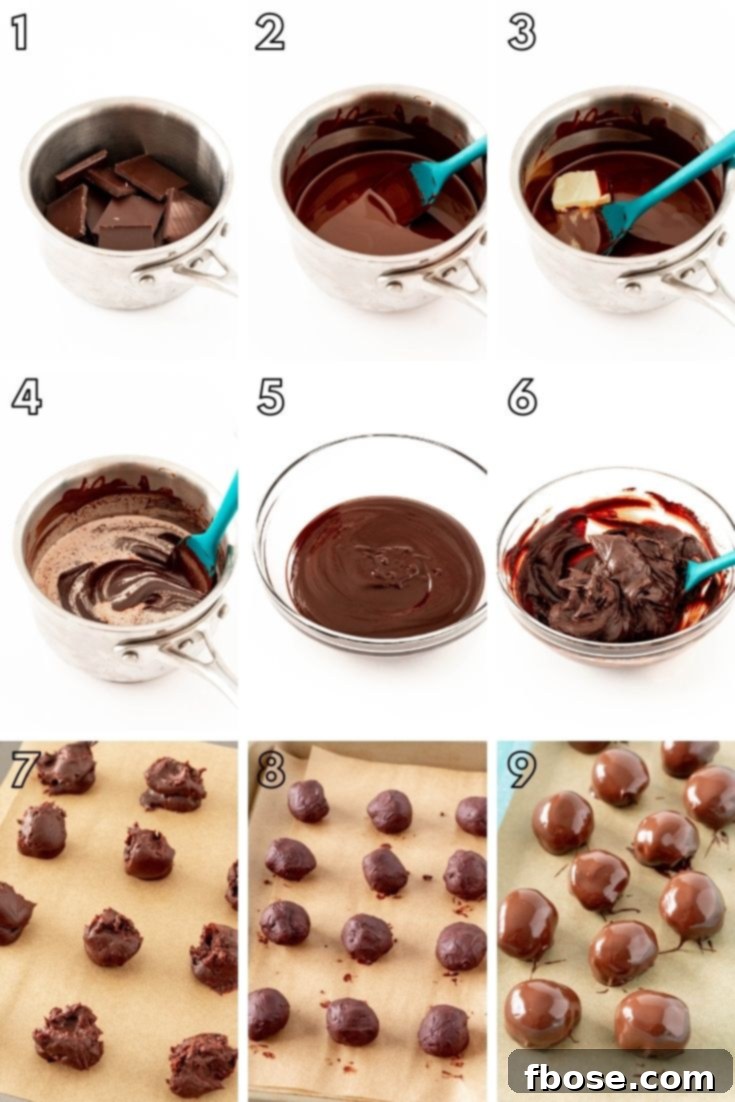
Mastering the Art: How to Make Decadent Chocolate Truffles
Creating these luscious homemade chocolate truffles is a rewarding process that’s simpler than you might imagine. Follow these detailed steps to ensure your truffles turn out perfectly rich, smooth, and utterly delicious every time.
- Prepare Your Chocolate Base: Begin by breaking your baking chocolate into uniform cubes. Place these chocolate cubes into a small, heavy-bottomed saucepan. This ensures even heat distribution and prevents scorching.
- Gently Melt the Chocolate: Melt the baking chocolate over very low heat. It’s crucial to stir constantly and gently as the chocolate melts to prevent it from burning or seizing. Alternatively, for a more controlled melt, you can use a double boiler: place the saucepan over a pot of simmering water, ensuring the bottom of the saucepan does not touch the water. Stir until the chocolate is completely smooth and free of lumps.
- Incorporate the Butter: Once the chocolate is fully melted and smooth, add the salted butter to the saucepan. Continue to stir until the butter has completely melted and is fully combined with the chocolate, creating a rich, glossy mixture. Remove the saucepan from the heat at this point.
- Add the Heavy Cream: Pour in the heavy cream and stir meticulously until it is thoroughly incorporated into the chocolate and butter mixture. Continue stirring until the mixture transforms back into a beautiful, rich, uniform chocolate color and a smooth, thick consistency. This is your luscious chocolate ganache.
- Initial Chilling Phase: Carefully transfer the warm chocolate ganache mixture from the saucepan into a small, clean bowl. Place the bowl in the refrigerator for an initial chilling period of 15 to 30 minutes. During this time, it’s important to stir the mixture frequently (every 5 minutes or so). The goal is for the chocolate to thicken significantly but not become completely solid. You want it to reach a consistency where it can hold its shape when scooped, yet still be pliable enough to roll.
- Portion and First Chill: Line a small baking sheet with parchment paper or wax paper. Using a small cookie scoop (about 1 tablespoon in size) or simply a tablespoon, portion out rounded balls of the thickened truffle filling onto the prepared baking sheet. Once all portions are on the sheet, transfer the entire baking sheet back to the refrigerator to chill for an additional 10 minutes. This helps them firm up slightly before rolling.
- Roll into Perfect Spheres: After the second chilling, remove the baking sheet from the refrigerator. Gently roll each portion of filling between your palms to create smooth, uniform balls. Working quickly is key, as the warmth of your hands can soften the chocolate. If they become too soft, return them to the fridge for a few minutes. Place the rolled truffles back onto the parchment-lined baking sheet and return them to the refrigerator for a final chill of at least 15 minutes. This ensures they are firm enough for dipping.
- Prepare the Chocolate Coating: While your truffles are undergoing their final chill, prepare your chocolate melting wafers. Place them in a wide-mouthed glass or microwave-safe bowl. Melt the wafers in the microwave in 30-second intervals, stirring thoroughly after each interval, until the chocolate is completely smooth and liquid. Alternatively, you can use a double boiler for melting.
- Dip and Decorate: Once the truffle balls are perfectly chilled and firm, use a fork or a specialized dipping tool to gently submerge each truffle into the melted chocolate wafers. Allow any excess chocolate to drip off before carefully placing the dipped truffle back onto a clean piece of wax or parchment paper. If you wish to add sprinkles or other decorations, do so immediately after dipping, while the chocolate coating is still wet. Allow the chocolate coating to harden completely at room temperature or in the refrigerator before serving. For a decorative drizzle, let the dipped truffles set for a few minutes, then drizzle with any leftover melted chocolate once it begins to thicken slightly.
Storing Your Homemade Chocolate Truffles for Lasting Freshness
Proper storage is key to enjoying your delicious homemade chocolate truffles for as long as possible. Once the chocolate coating has fully set, carefully transfer the truffles to an airtight container. Store them in the refrigerator, where they will maintain their exquisite taste and texture for up to two weeks. For even longer enjoyment, these delightful confections can be stored in the freezer for up to four months. When freezing, arrange the truffles in a single layer on a baking sheet to freeze solid first, then transfer them to an airtight freezer-safe container, separating layers with parchment paper to prevent sticking. Thaw frozen truffles in the refrigerator for a few hours before serving to restore their perfect texture.
Frequently Asked Questions About Our Easy Chocolate Truffles Recipe
To maintain their freshness and texture, place your homemade truffles in an airtight container and store them in the refrigerator. They will stay fresh and delicious for up to two weeks. For extended storage, you can freeze them for up to 4 months. Just be sure to thaw them in the refrigerator before serving.
Absolutely! If you prefer a coating of cocoa powder, chopped nuts, shredded coconut, or sprinkles directly onto the ganache, simply roll the chocolate filling into balls and then immediately roll them in your desired topping. There’s no need for the final 15-minute chilling period before coating when opting for this method.
Yes, for an even deeper and more complex chocolate flavor, you can add 1/4 teaspoon of espresso powder to the truffle ganache mixture. The coffee notes will enhance the chocolate without making the truffles taste like coffee.
Don’t worry, this is a common occurrence and easily fixable! Simply microwave the mixture at 30-second intervals, stirring well after each, until it softens back to a pliable consistency. Once softened, you will need to restart the chilling and stirring process from the beginning to ensure it sets properly again.
While it’s possible, it is not recommended. Salted butter adds a crucial subtle depth and balances the sweetness of the chocolate, preventing the truffles from tasting bland. If you only have unsalted butter, you could add a tiny pinch of fine sea salt (about 1/8 teaspoon) along with it.
While chocolate melting wafers are recommended for their ease of use and smooth finish, you can use tempered chocolate (couverture chocolate) for dipping. Tempering ensures a shiny, snap-able coating that resists melting at room temperature. However, tempering is a more advanced technique.
Working with chilled ganache is key. If your hands are warm, you can periodically rinse them in cold water and dry them thoroughly. You can also lightly dust your hands with cocoa powder, which helps prevent sticking and adds to the flavor.
Delightful Pairings: What to Serve with Homemade Truffles
These luxurious Chocolate Truffles are truly a stand-alone masterpiece, but they also make an exceptional addition to a grand dessert platter, perfect for sharing with friends and family. Their intense chocolate flavor and rich texture make them versatile for pairing with a variety of beverages and other sweet treats. Consider serving them with a robust espresso, a glass of dry red wine, or a festive sparkling wine to complement their decadence. For a truly indulgent experience, offer them alongside:
- Peanut Butter Buckeye Balls – An incredibly easy recipe that yields just under three dozen bite-sized peanut butter and chocolate treats, using only 5 ingredients!
- Gingerbread Truffles with White Chocolate – Prep this sweetly spiced, festive truffle recipe in a mere 30 minutes for a delightful holiday twist!
- Mint Cookie Truffles – A refreshing combination where thin mint cookies blend with cream cheese before being dipped in melted Andes mints for a cool, creamy finish!
- Nutter Butter Peanut Butter Balls – A nutty, no-bake dessert that celebrates the irresistible flavor of Nutter Butter cookies, coated in chocolate!
- Muddy Buddy Balls – All the beloved flavors and textures of Puppy Chow, rolled into convenient balls and then dipped into melted chocolate for an extra layer of indulgence!
Connect with Us!
If you’ve tried this incredible homemade chocolate truffle recipe, we’d love to hear your thoughts! Please share how much you enjoyed it in the comments below and consider leaving a review. Your feedback is invaluable to us!
Don’t forget to tag us – @sugarandsoulco – on Instagram and Pinterest with your beautiful photos of these truffles. You can also join our Sugar & Soul Show-offs Community on Facebook and share your creations there, where you can also participate in our exciting recipe challenges!
Homemade Chocolate Truffles (Classic Recipe)
Pin Recipe
Rate This Recipe
Chocolate Truffles are rich, decadent dessert bites that prep in only 30 minutes using just 4 ingredients! Perfect for Valentine’s Day, holidays, or even as a weekend pick-me-up!
Ingredients
- 7 ounces baking chocolate broken into cubes
- 2 tablespoons salted butter
- ⅓ cup heavy cream
- 10 ounces chocolate melting wafers
Instructions
- In a small saucepan over low heat, melt the chocolate cubes, stirring constantly so the chocolate doesn’t burn. Alternately you can use a double boiler for more gentle melting.
- Once melted, add in the butter and stir until completely melted and combined. Remove from heat.
- Stir in the heavy cream until fully incorporated and the mixture returns to a rich, uniform chocolate color and smooth consistency.
- Transfer the chocolate mixture to a small bowl. Place it in the refrigerator for 15 to 30 minutes, stirring every 5 minutes, until thickened but not solid. The chocolate should be able to hold its shape when scooped.
- Line a small baking sheet with parchment or wax paper. Use a small cookie scoop or tablespoon to drop balls of the mixture onto the pan. Chill in the refrigerator for an additional 10 minutes.
- Remove from the refrigerator and roll the chocolate portions between your palms to create smooth, even balls. Place them back on the baking sheet and chill for an additional 15 minutes.
- Meanwhile, melt the chocolate wafers in a wide-mouthed glass or microwave-safe bowl in the microwave at 30-second intervals, stirring between each one, until smooth.
- Use a fork or dipping tool to dip the chilled truffle balls in the melted chocolate. Allow any excess chocolate to drip off, then place them on a clean piece of wax or parchment paper.
- Top with sprinkles or other desired decorations immediately before the chocolate sets. Alternatively, drizzle with leftover chocolate once it begins to thicken. Allow the chocolate coating to harden completely before serving.
Notes
- The timing for making truffles is crucial. Ensure you have about an hour or more to dedicate, as the truffle mixture can become too hard to work with if left too long.
- If your truffle mixture does get too hard in the refrigerator, you can gently reheat it in the microwave at 30-second intervals until softened. However, you will then need to repeat the chilling and stirring process from the beginning.
- Working with the truffle mixture can be a bit messy. Don’t hesitate to rinse your hands with cold water and dry them well if they get too warm or sticky during rolling.
- If you prefer to roll your truffles in toppings like cocoa powder or crushed nuts instead of dipping them in melted chocolate, do this immediately after rolling the ganache into balls. The final 15-minute chill before coating is not necessary in this case.
- This recipe works well with milk, semi-sweet, or dark baking chocolate. White chocolate has not been tested and may require different adjustments due to its unique properties.
- Store finished truffles in an airtight container in the refrigerator for up to two weeks.
- For longer storage, freeze truffles for up to 4 months. Thaw in the refrigerator before enjoying.
- Using salted butter is highly recommended as it enhances the chocolate flavor and prevents the truffles from tasting bland.
- For an intensified chocolate flavor, add 1/4 teaspoon of espresso powder to the truffle mixture during step 3 or 4.
Nutrition Information
Calories: 242 kcal | Carbohydrates: 19g | Protein: 3g | Fat: 21g | Saturated Fat: 13g | Polyunsaturated Fat: 1g | Monounsaturated Fat: 7g | Trans Fat: 1g | Cholesterol: 14mg | Sodium: 27mg | Potassium: 211mg | Fiber: 4g | Sugar: 12g | Vitamin A: 155IU | Vitamin C: 1mg | Calcium: 27mg | Iron: 4mg
Did You Make This Recipe?
Don’t forget to share your delicious creations with us on Instagram @sugarandsoulco and follow us on Tiktok @sugarandsoulco and Pinterest @sugarandsoulco for more irresistible recipes!
Pin Recipe
Share Recipe