
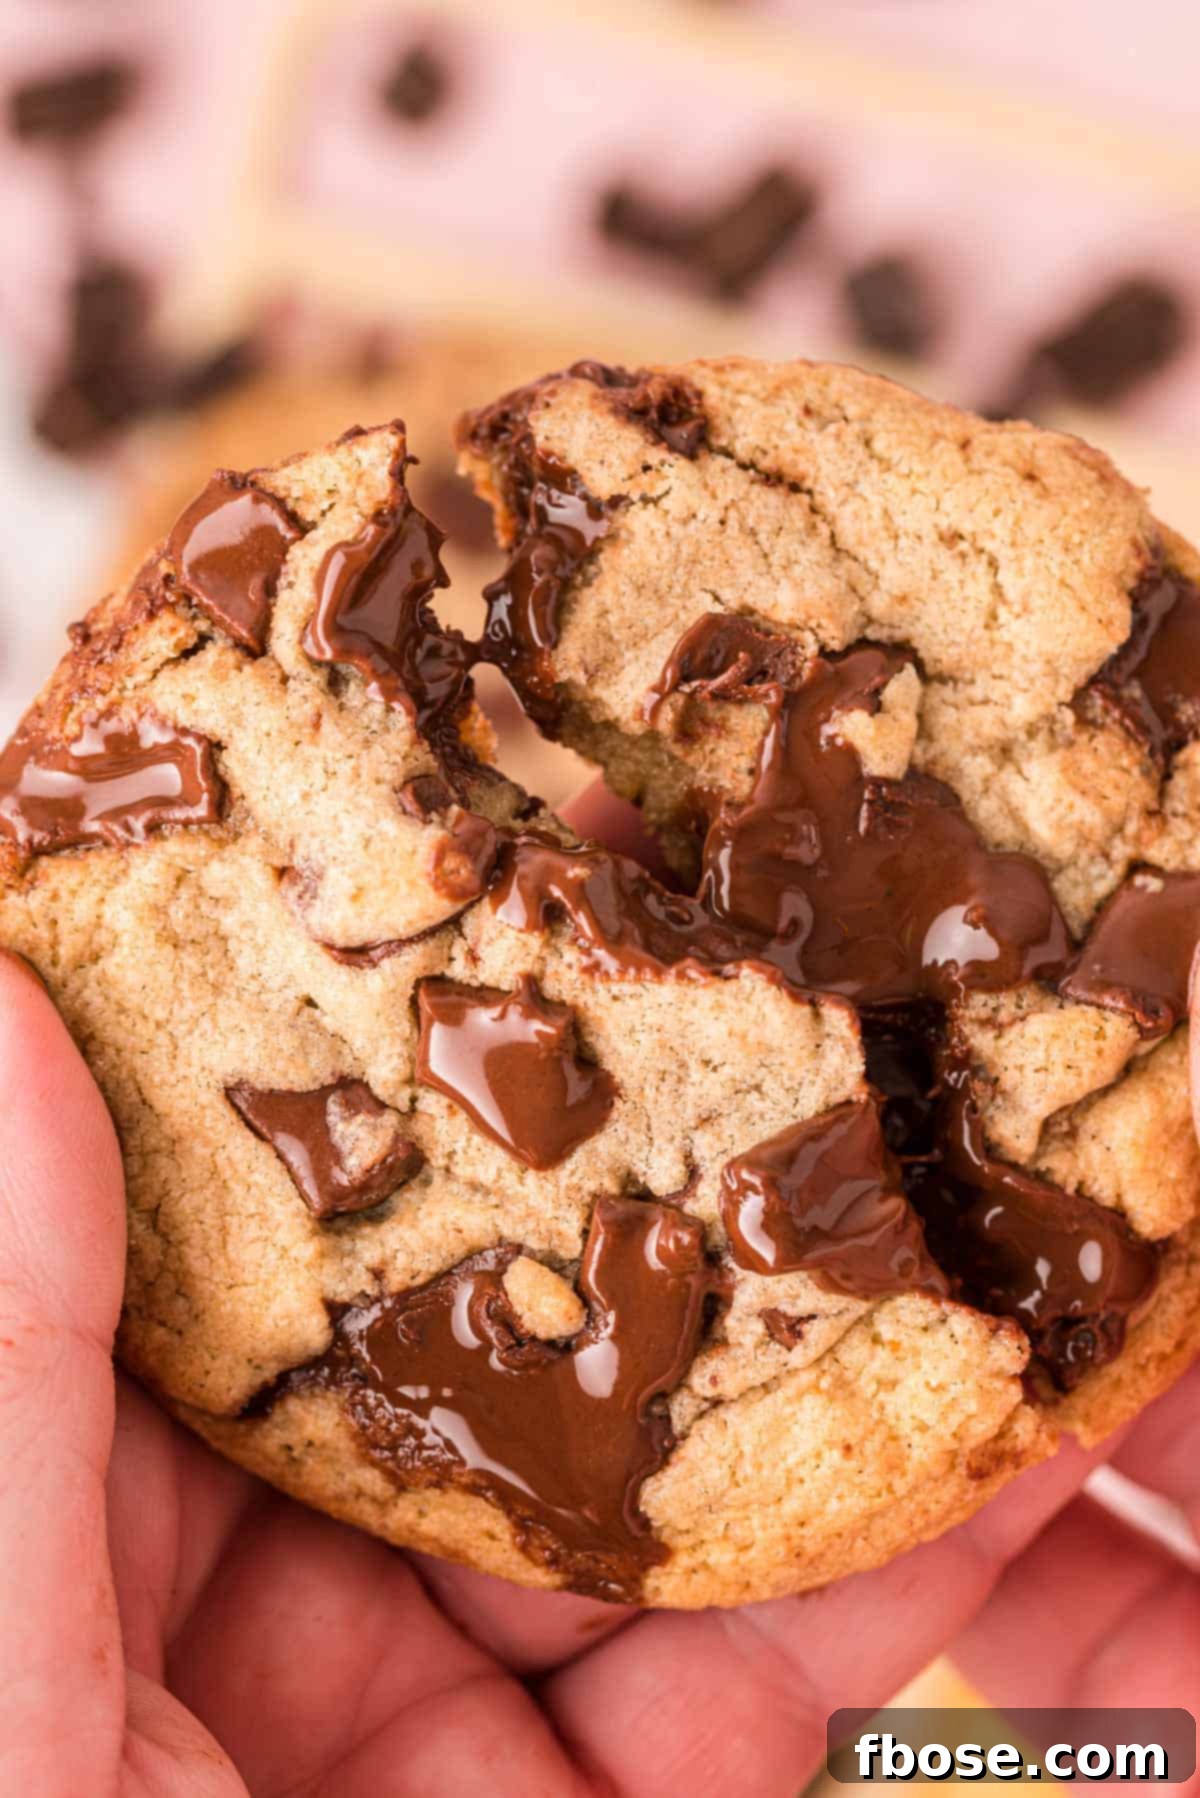
These homemade Brown Butter Chocolate Chip Cookies are a sweet, chewy indulgence with an extraordinary deep, nutty, and distinctly chocolaty flavor, all thanks to the magical touch of brown butter. For an extra touch of elegance and decadence, consider dipping them in melted chocolate!
If you’re eager to explore more delightful cookies enhanced by the richness of brown butter, be sure to check out these equally tempting Pecan Chocolate Chip Cookies and the sophisticated Bourbon Toffee Brown Butter Chocolate Chip Cookies!
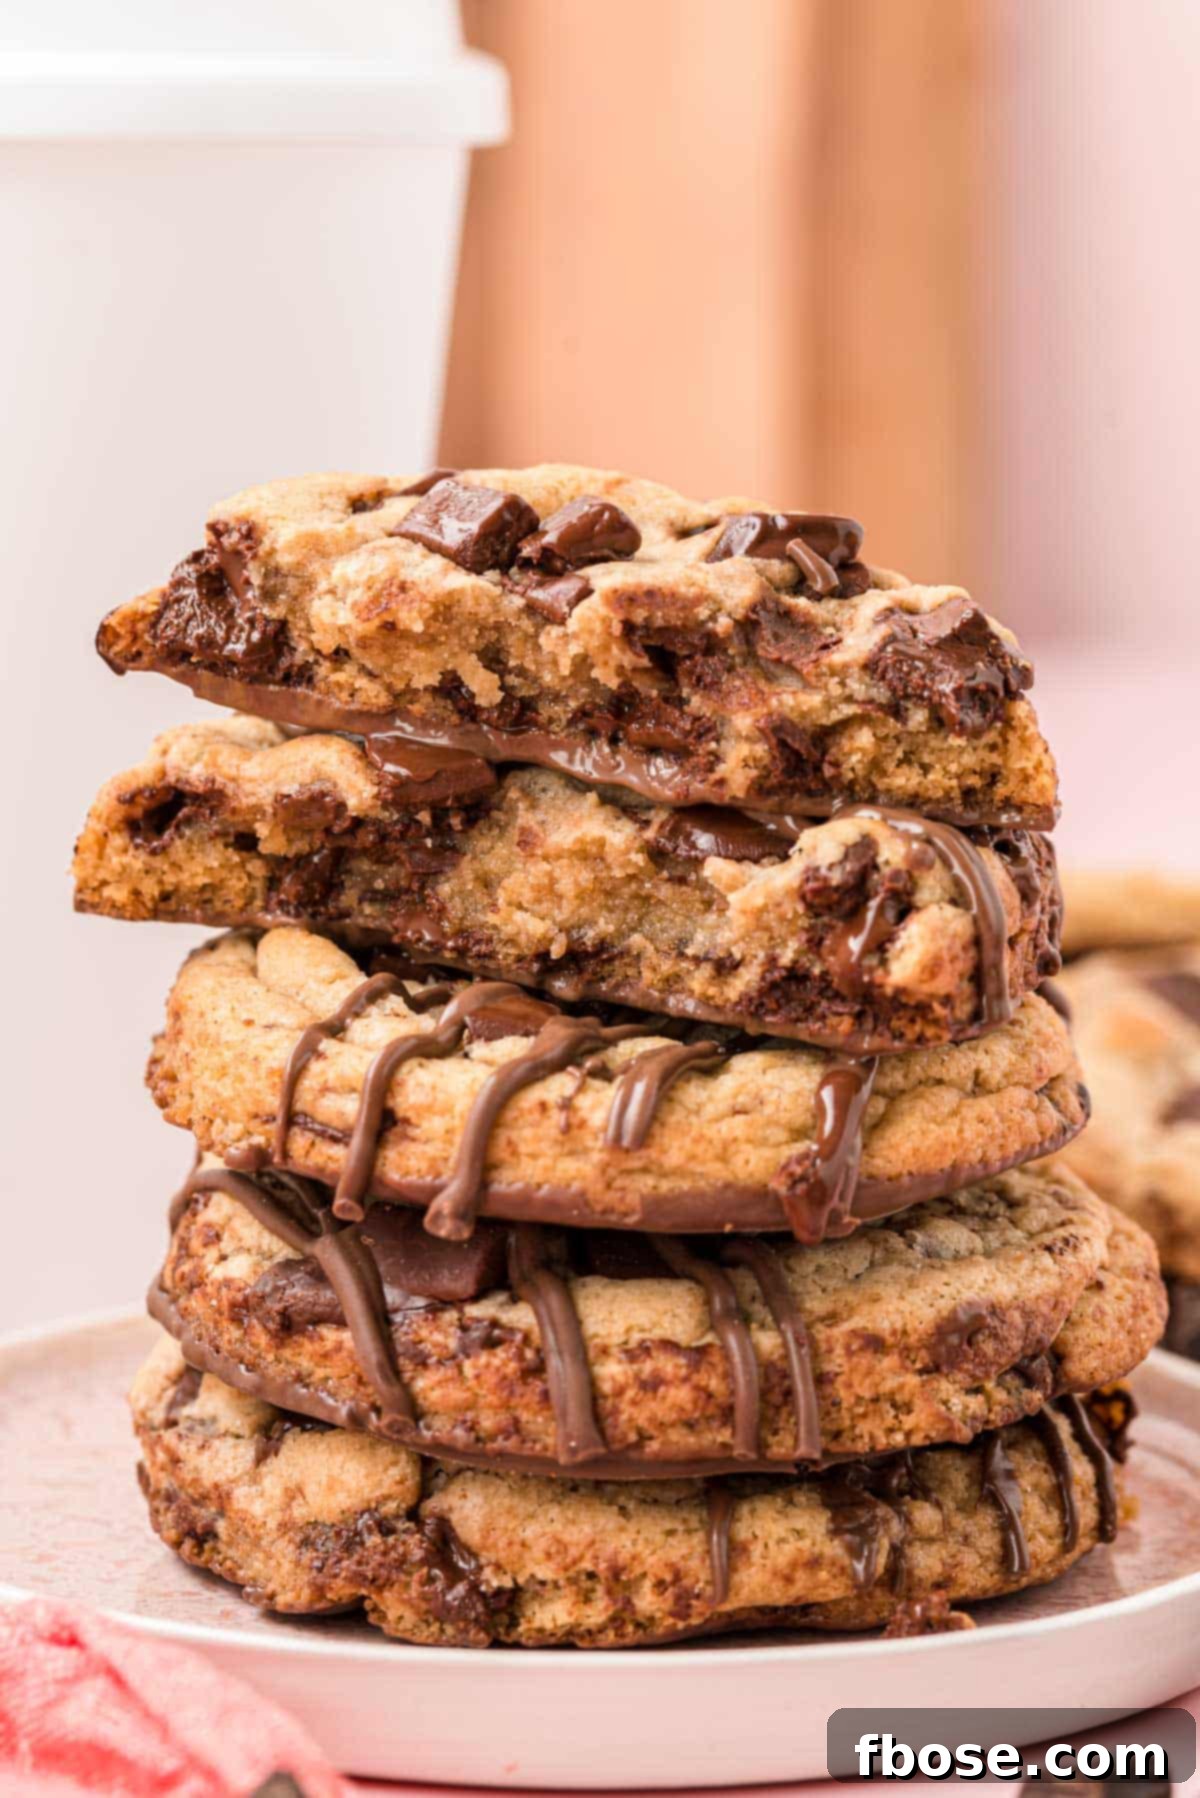
Prepare yourself for a baking revelation, because this recipe for Brown Butter Chocolate Chip Cookies is destined to become your new kitchen obsession. From the very first crumb, you’ll understand why these aren’t just ordinary cookies; they are an elevated experience, embodying everything you adore and anticipate in a classic treat, but with an irresistible depth that truly sets them apart. Imagine cookies that are grand in size, perfectly sweet, astonishingly soft, and wonderfully chewy, each bite delivering a symphony of flavors and textures.
One of the most appealing aspects of this recipe is its surprising simplicity. Despite the gourmet results, you’ll find that transforming basic pantry staples into these spectacular cookies takes just about 30 minutes of active preparation. The key lies in the thoughtful combination of everyday ingredients with the rich, complex notes of browned butter and an generous scattering of high-quality chocolate. Before you know it, the intoxicating aroma of warm, nutty, chocolate-laden cookies will waft through your home, signaling that your first batch is perfectly baked and ready to be savored.
Unveiling the Perfection of Brown Butter Chocolate Chip Cookies
These cookies are more than just a dessert; they are a testament to how a single ingredient can completely transform a beloved classic. Every aspect, from the careful choice of chocolate to the innovative baking techniques, is designed to create a cookie that is profoundly flavorful and exquisitely textured. Let’s dive deeper into what makes these Brown Butter Chocolate Chip Cookies truly special and why they deserve a permanent spot in your recipe collection.
A Deep Dive into Flavor: The Transformative Power of Brown Butter
At the heart of these cookies’ incredible taste lies the rich, deep-flavored brown butter. This culinary technique involves gently cooking unsalted butter past its melting point, allowing its milk solids to toast to a beautiful amber hue. During this process, the butter develops complex, nutty, and slightly caramel notes that infuse the entire cookie dough with an unparalleled richness. This isn’t just a subtle difference; it’s a profound flavor enhancement that transforms a standard chocolate chip cookie into something extraordinary and gourmet.
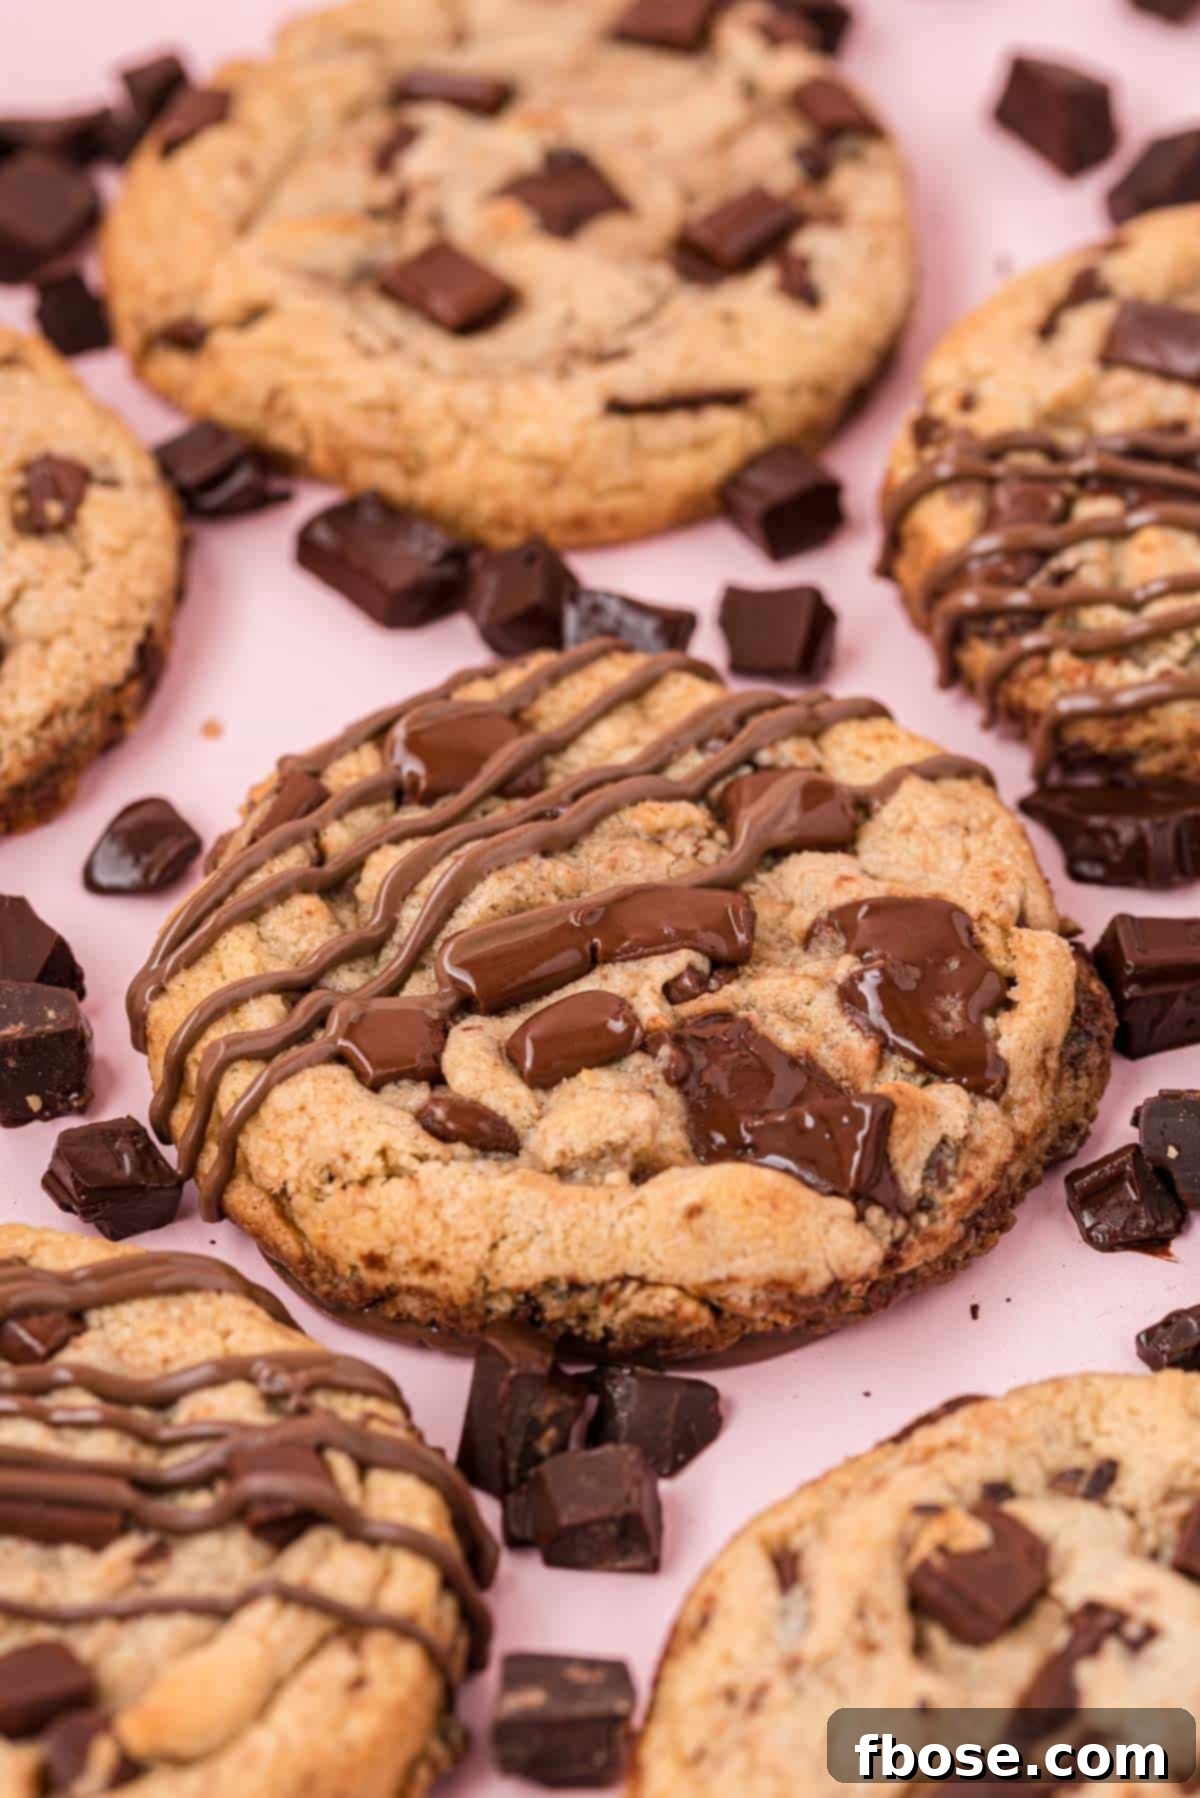
But the flavor journey doesn’t end with brown butter. This recipe thoughtfully incorporates two complementary types of chocolate: bittersweet and semi-sweet. Crucially, we recommend using chopped chocolate from quality bars rather than standard chocolate chips. Why? Because chopped chocolate, with its irregular shapes and sizes, melts more beautifully and integrates seamlessly into the dough. The smaller flecks distribute throughout, providing a consistent chocolate presence, while the larger chunks create luxurious, molten pools of rich, dark chocolate after baking. This interplay of chocolate varieties and textures ensures an exciting and diverse chocolate experience in every single, satisfying bite.
The Art of Texture: A Harmony of Crisp and Chewy
Prepare your palate for a textural delight that will leave you yearning for more. The journey begins with the cookie’s exterior – a beautiful golden-brown crust that offers a delicate, satisfying crispness. This initial crackle gives way to the true star: an interior that is unbelievably buttery, profoundly soft, and addictively chewy. This exquisite contrast between the lightly firm exterior and the yielding, tender center is the hallmark of a truly great cookie. The moment you bite through that perfectly baked outer layer to reach the gooey, chocolate-filled core, you’ll understand why this combination of textures is utterly irresistible and will have you instinctively reaching for another cookie.

Decoding the Magic: How to Perfectly Brown Butter
The secret to the profound flavor of these cookies lies in a technique that sounds fancy but is remarkably easy to master: browning butter. If you’ve never attempted it before, don’t be intimidated. This simple step elevates the butter’s flavor profile from plain and creamy to deeply nutty, toasted, and subtly caramel-like, creating a foundation of taste that transforms your cookies. All you need for this culinary alchemy is the specified amount of unsalted butter, a light-colored skillet (which helps you monitor the color change), and a whisk.
While you can find comprehensive guides on browning butter, the core process is straightforward. Begin by melting your butter over medium heat. As it melts, it will sizzle and foam. Continue cooking, stirring frequently with your whisk, and observe the changes closely. The foam will eventually subside slightly, and you’ll start to see small, golden-brown bits forming at the bottom of the pan. Simultaneously, a distinct, rich, nutty aroma—often reminiscent of toasted hazelnuts or butterscotch—will emerge. This is your critical indicator! The moment those brown bits appear and the inviting nutty scent fills your kitchen, immediately remove the skillet from the heat. It’s important not to let it go too far, as butter can burn very quickly from this stage. Stirring in the remaining cold butter helps to stop the cooking process and prevent over-browning. This perfectly browned butter is the essence of these extraordinary cookies.
For first-time brown butter enthusiasts, any initial apprehension will vanish with your first bite. The learning curve is minimal, and the reward is immense. Mastering this simple technique will not only unlock the incredible flavor of these Brown Butter Chocolate Chip Cookies but also open up a world of culinary possibilities for other baked goods and savory dishes. It’s a small investment of effort for an immeasurable return in flavor.
Achieving Perfection: Essential Baking Tips for the Best Brown Butter Chocolate Chip Cookies
Crafting the perfect batch of Brown Butter Chocolate Chip Cookies requires more than just following the ingredient list; it involves understanding and applying a few key baking techniques. These expert tips are designed to ensure your cookies achieve that coveted balance of tender chewiness, rich flavor, and beautiful appearance every single time. Pay close attention to these crucial steps, and you’ll be baking like a pro.
- The Crucial Interval Mixing Technique: Unlike many standard cookie recipes, this one utilizes an “interval mixing” process, and it’s absolutely non-negotiable for success. After combining the browned butter, sugars, and eggs, you’ll mix for 30 seconds, then allow the dough to rest for 3 minutes, repeating this cycle two more times. This unique method allows the residual heat from the melted butter to fully dissolve the sugars, creating a smooth and luscious mixture. More importantly, it helps to build a strong emulsion with the eggs, which is the scientific secret behind these cookies’ incredibly tender crumb and signature chewy texture. Do not skip this step!
- The Strategic Two Baking Sheet Rotation: For consistently perfect cookies, we highly recommend using two baking sheets and rotating them between batches. Dropping freshly scooped cookie dough onto a baking sheet that is still hot from the previous batch can cause the butter in the dough to melt too rapidly before the structure sets. This often leads to cookies spreading excessively and becoming thin or flat. By using cool baking sheets for each new batch, you ensure that the cookies maintain their ideal shape, thickness, and structure, baking evenly and beautifully every time.
- Tailoring Your Cookie Size: This recipe is designed to produce generously sized cookies, typically measuring about 4 to 5 inches across when a large (¼ cup-sized) cookie scoop is used. If you prefer smaller cookies for bite-sized treats or portion control, simply use a medium cookie scoop. When baking smaller cookies, be sure to reduce the baking time to approximately 7 to 9 minutes, keeping a close eye on them to prevent overbaking.
- The Precise Butter Browning Ratio: A vital detail in this recipe is that not all of the butter is browned. The recipe calls for 14 tablespoons of butter in total, but only 10 tablespoons are subjected to the browning process. The remaining 4 tablespoons are melted into the hot brown butter off the heat. This specific ratio is fundamental to achieving the correct dough consistency and the perfect balance of nutty flavor and chewiness in the final cookie. Browning all 14 tablespoons would concentrate the flavor too much and could lead to a drier, denser cookie, so adhering to this precise division is key.
- Embrace the Soft Dough Consistency: After mixing all the ingredients, you will notice that the cookie dough is remarkably soft – almost unexpectedly so. This is completely normal and, in fact, desirable for this particular recipe! Resist any urge to chill the dough, as it is entirely unnecessary. The unique composition of the dough and the interval mixing process are engineered to produce perfect cookies without any chilling time, ensuring they bake up soft, chewy, and flavorful as intended.
- The Importance of Rotating While Baking: To guarantee an even bake and uniform golden-brown edges across all your cookies, remember to rotate the baking sheet halfway through the cooking time. Most home ovens have hot spots, meaning certain areas bake faster or more intensely than others. Rotating the tray ensures that every cookie receives consistent heat exposure, preventing some from becoming overly dark while others are still pale. This simple step makes a significant difference in the final appearance and texture of your entire batch.
A Secret Touch: My husband insists on a sprinkle of flaky sea salt just before these cookies go into the oven. This small addition doesn’t just add a touch of sophistication; it wonderfully amplifies the deep chocolate and nutty brown butter flavors, creating an unforgettable sweet and savory balance that elevates the entire cookie!

The Ultimate Indulgence: Adding Extra Chocolate Finishes
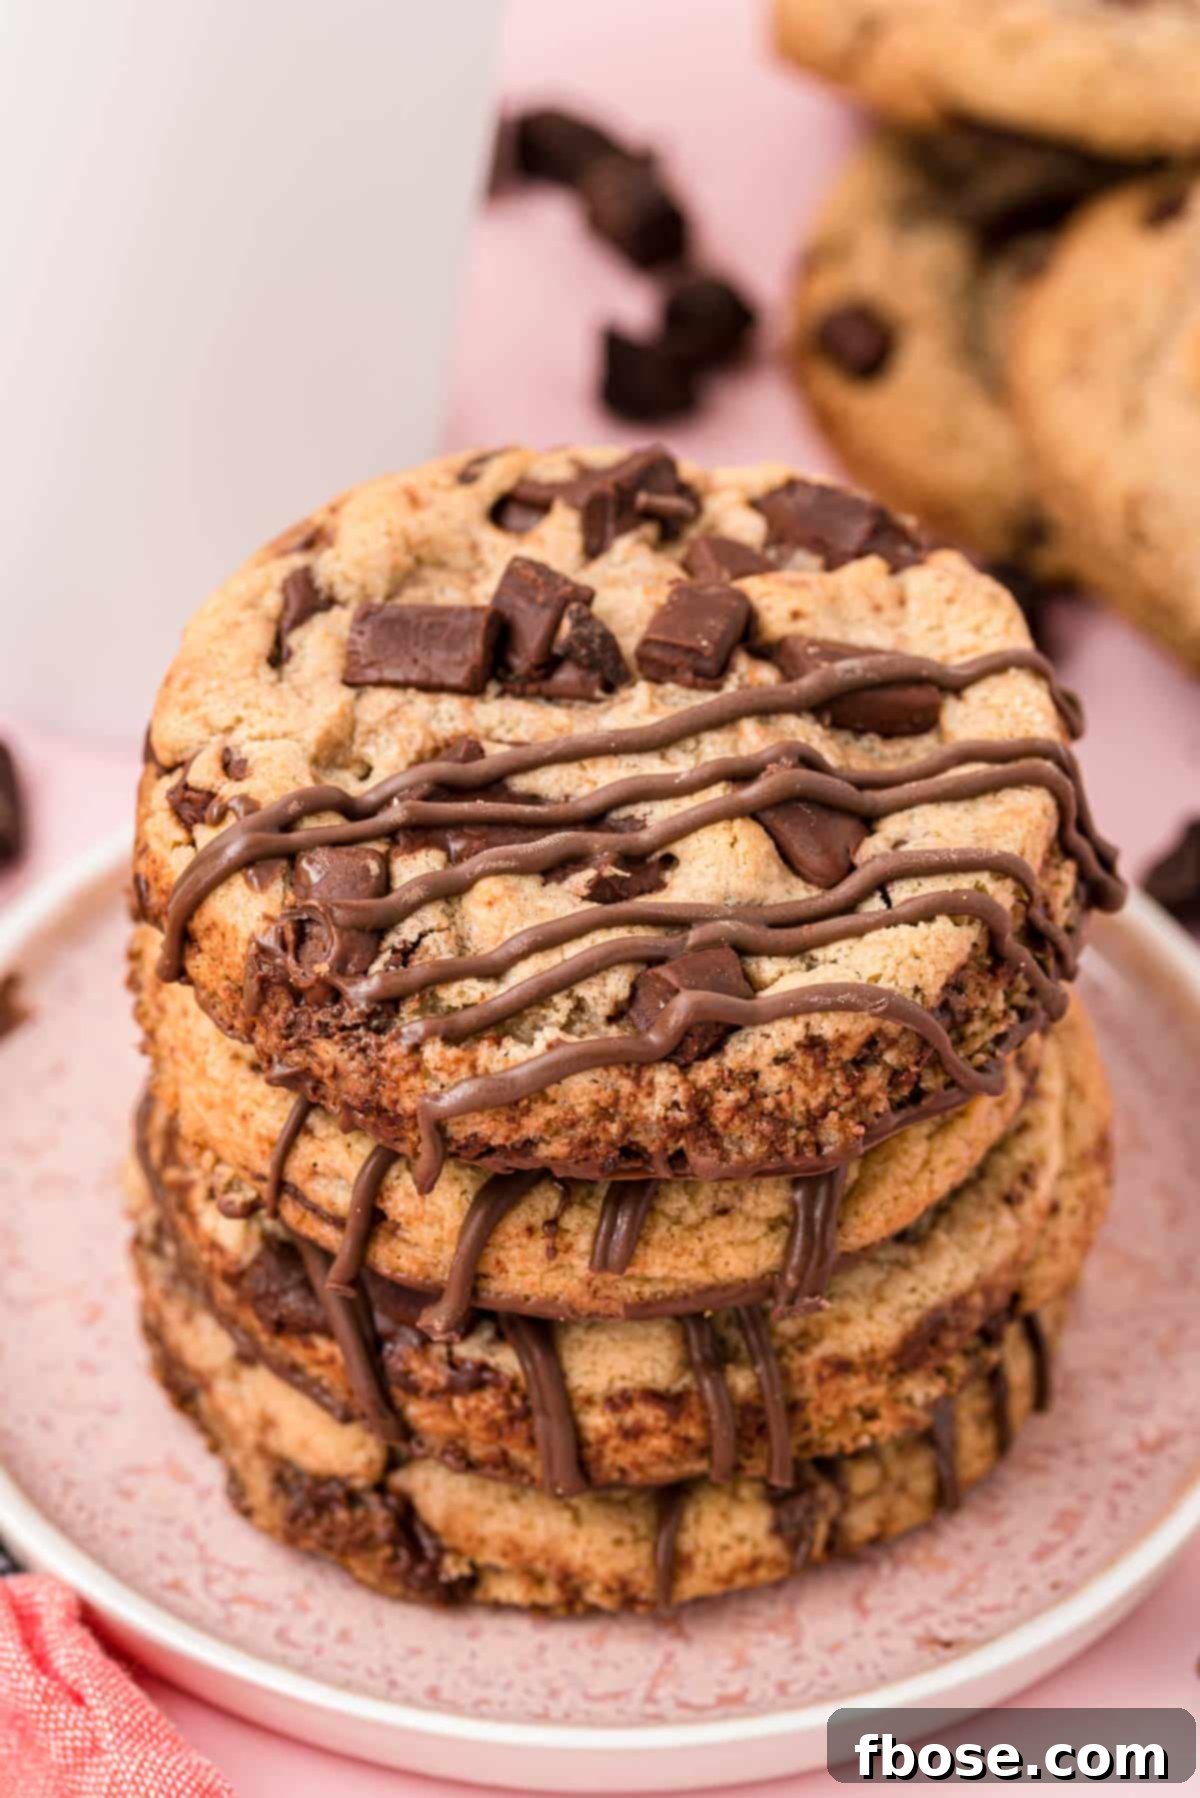
For those who believe there’s no such thing as too much chocolate, this optional step is a must-try for your Brown Butter Chocolate Chip Cookies! As a self-proclaimed chocolate lover, I almost always embrace this opportunity to enhance the chocolate experience further. It’s a simple way to add an extra layer of decadence and a beautiful, professional finish to your homemade treats, making them even more special for any occasion.
Once your freshly baked cookies have cooled completely to room temperature – this is crucial to ensure the chocolate sets properly – you can begin this delightful embellishment. Start by melting your chosen chocolate (chocolate melting wafers are excellent for a smooth, glossy finish) in a microwave-safe bowl, stirring at 30-second intervals until perfectly smooth. Then, transfer the melted chocolate into a shallow dish or plate with a slight lip, making it easier to dip the cookies.
Carefully take each cooled cookie and dip its bottom into the melted chocolate, allowing any excess to drip off gently. Place the chocolate-dipped cookies onto a baking sheet lined with parchment paper. If you’re feeling extra creative, you can then take a spoon or a fork and artistically drizzle more melted chocolate over the tops of the cookies, creating beautiful patterns. This extra step, while entirely optional, transforms an already magnificent cookie into a truly show-stopping dessert that’s sure to impress any guest or satisfy the deepest chocolate cravings.

These Brown Butter Chocolate Chip Cookies are undeniably a cherished favorite in our home, captivating hearts and taste buds with their rich, nutty depth. While these hold a special place, it’s rare for us to encounter any chocolate chip cookies that we don’t absolutely adore! Our repertoire spans from the magnificent Double Chocolate Chip Pudding Cookies, offering intense chocolate flavor and a soft, cake-like texture, to the comforting and wholesome Oatmeal Chocolate Chip Cookies. We even venture into sophisticated territory with the aromatic Espresso Chocolate Chip Cookies, where the coffee notes perfectly complement the chocolate. Currently, we’re completely smitten with the delightfully unique Oreo Pumpkin Chocolate Chip Cookies, proving there’s always room for a new cookie obsession on our list!
Frequently Asked Questions About Brown Butter Chocolate Chip Cookies
How Should I Store These Brown Butter Chocolate Chip Cookies for Maximum Freshness?
To ensure your delicious cookies retain their perfect chewy texture and rich flavor, store them in an airtight container at room temperature. When stored properly, they will remain wonderfully fresh and enjoyable for up to 3 days. For longer storage options, consider freezing the baked cookies or the dough, as detailed below.
Can I Incorporate Nuts into This Cookie Recipe?
Absolutely! These Brown Butter Chocolate Chip Cookies are an excellent canvas for customization. Feel free to add any chopped nuts you prefer, such as walnuts, pecans, or even macadamia nuts. Simply fold them into the cookie dough along with the chocolate chips during the final mixing stage for an added layer of flavor and delightful crunch.
Does This Cookie Dough Freeze Well for Future Baking?
Yes, this cookie dough freezes exceptionally well, making it a fantastic option for meal prepping or having freshly baked cookies on demand! Here’s a simple guide to freezing your cookie dough:
- Portion the Dough: Use a large cookie scoop (approximately ¼ cup size) to portion out individual cookie dough balls.
- Flash-Freeze: Place the dough balls onto a baking sheet lined with parchment paper, ensuring they are not touching. Transfer the baking sheet to the freezer for at least one hour, or until the dough balls are solid. This flash-freezing step prevents them from sticking together.
- Store in Freezer Bag: Once frozen solid, transfer the cookie dough balls into a freezer-safe Ziploc bag. Squeeze out as much excess air as possible before sealing the bag.
- Long-Term Storage: Store the bag of frozen cookie dough back in the freezer for up to 3 months.
- Baking from Frozen: When you’re ready to bake, simply place the frozen cookie dough balls directly onto a prepared baking sheet and bake as instructed. You’ll just need to add an extra minute or two to the original baking time. No thawing required!
Can I Use Salted Butter in Place of Unsalted Butter in This Recipe?
While unsalted butter is generally recommended in baking for precise control over the salt content, you can certainly use salted butter if it’s what you have available. If you choose to use salted butter, the key is to adjust the recipe by omitting the additional 1 teaspoon of salt that is called for in the dry ingredients. This will help maintain the intended flavor balance and prevent your cookies from becoming overly salty.
What Type of Chocolate is Best for These Cookies?
For the most exquisite flavor and texture, this recipe highly recommends using a combination of chopped bittersweet and semi-sweet chocolate from quality bars. Chopping the chocolate yourself creates varying sizes of chocolate pieces, which melt beautifully into luxurious pools and delightful flecks throughout the cookie. While standard chocolate chips can be used as a substitute, they are designed to hold their shape during baking, so the melted chocolate experience may be less pronounced.
Why is Milk Powder Included in the Ingredients List?
Milk powder is a fantastic, lesser-known ingredient often used by professional bakers to enhance the overall flavor and texture of cookies. In this recipe, it plays a dual role: it helps to deepen the nutty, caramelized notes of the brown butter and contributes significantly to achieving that desirable chewy texture. It adds a subtle richness that beautifully complements the chocolate. While you can omit it if you don’t have any on hand, including it will undoubtedly elevate your cookies to a gourmet level.
Let’s Connect and Share Your Baking Success!
If you’ve embarked on the delicious journey of making this Brown Butter Chocolate Chip Cookies recipe, I would absolutely love to hear about your experience! Please share your thoughts and how much you enjoyed them in the comments section below, and don’t forget to leave a star rating. Your feedback is truly invaluable and brings so much joy to my day!
Show off your beautiful creations! Make sure to tag me – @sugarandsoulco – on Instagram and Pinterest with your photos. You can also join our warm and welcoming Sugar & Soul Show-offs Community on Facebook, where you can connect with other baking enthusiasts and participate in our fun recipe challenges! Happy baking, and I can’t wait to see what you create!

Rated 5 out of 5 stars by 6 users.
Brown Butter Chocolate Chip Cookies
Author: Rebecca Hubbell
Course: Dessert
Cuisine: American
Prep Time: 30 minutes
Cook Time: 10 minutes
Total Time: 40 minutes
Servings: 13 cookies
Pin Recipe
Rate This Recipe
Share Recipe
These homemade Brown Butter Chocolate Chip Cookies are a sweet chewy treat with a deep, nutty, and chocolaty flavor thanks to the brown butter. Dip them in chocolate for an extra fancy finish!
Ingredients
- 14 tablespoons unsalted butter, sliced into tablespoons and divided
- 1¾ cup all-purpose flour
- 2 tablespoons milk powder
- 1 teaspoon salt
- ½ teaspoon baking soda
- ¾ cup light brown sugar, packed
- ½ cup granulated sugar
- 2 teaspoons vanilla extract
- 1 large egg, room temperature
- 1 large egg yolk, room temperature
- 6 ounces bittersweet chocolate, chopped
- 4 ounces semi-sweet chocolate, chopped
- 2 cups chocolate melting wafers (optional, for dipping/drizzling)
Instructions
- Preheat oven to 375°F (190°C). Line a baking sheet with parchment paper and set aside. For best results, use two baking sheets and rotate them between batches to prevent the dough from spreading too much on a hot sheet.
- Remove the 14 tablespoons of unsalted butter from the refrigerator about 15 minutes before you begin, allowing it to soften slightly to room temperature.
- In a medium bowl, whisk together the 1¾ cup all-purpose flour, 2 tablespoons milk powder, 1 teaspoon salt, and ½ teaspoon baking soda. Set this dry mixture aside.
- To brown the butter: Place 10 tablespoons of butter into a light-colored skillet (this helps you see the color change). Cook over medium heat until melted. Continue cooking, stirring frequently, for 2 to 3 minutes until brown bits begin to form at the bottom of the pan, the butter becomes foamy on top, and it emits a rich, nutty aroma. Immediately remove the skillet from the heat and stir in the remaining 4 tablespoons of butter until it is fully melted. Transfer this combined butter mixture to a large heat-safe bowl or the bowl of a stand mixer fitted with a whisk attachment.
- Add the ¾ cup packed light brown sugar, ½ cup granulated sugar, and 2 teaspoons vanilla extract to the browned butter mixture. Mix well to thoroughly combine all ingredients.
- Incorporate the 1 large egg and 1 large egg yolk into the mixture and whisk vigorously for 30 seconds. Allow the batter to rest for 3 minutes, then whisk again for another 30 seconds. Repeat this resting and whisking cycle two more times (for a total of 3 cycles of whisking and 3 cycles of resting). The batter should become noticeably smooth, thick, and shiny, resembling a luscious caramel sauce. This interval mixing is crucial for the cookies’ texture.
- Switch to a rubber spatula or a paddle attachment for your stand mixer. Gradually mix the dry ingredients into the wet ingredients until just combined, about 1 minute. Be careful not to overmix. The dough will be very soft, which is normal for this recipe; there is no need to chill it.
- Gently fold in most of the chopped 6 ounces bittersweet chocolate and 4 ounces semi-sweet chocolate, reserving a small amount to sprinkle on top of the cookies before baking for a more appealing finish.
- Using a large (¼ cup sized) cookie scoop, portion out the dough. Drop the dough balls onto the prepared baking sheet, ensuring they are spaced about 3 inches apart to allow for spreading. Sprinkle the tops of the scooped dough with the reserved chopped chocolate and gently press it into the surface.
- Bake for 8 to 10 minutes at 375°F (190°C), rotating the baking sheet halfway through to ensure even baking. The cookies are done when they appear slightly cracked on top and have a light golden-brown color around the edges, but still look soft in the center. Remove from the oven and let them cool on the baking sheet for 3 minutes before carefully transferring them to a wire rack to cool completely.
- Optional Chocolate Dip & Drizzle: Once the cookies are entirely cool. Melt the 2 cups chocolate melting wafers in a microwave-safe bowl at 30-second intervals, stirring between each one until fully melted. Transfer the melted chocolate to a plate with a lip. Dip the bottom of the cookies in the chocolate and place on a parchment-lined baking sheet to set. Drizzle with extra chocolate if desired.
Recipe Notes
- This recipe is adapted from Cook’s Illustrated, known for its meticulously tested recipes.
- Important Butter Note: Do not brown all 14 tablespoons of butter. It is crucial that only 10 tablespoons are browned, and the remaining 4 tablespoons are simply melted into the hot brown butter. Browning all of it will significantly alter the recipe’s intended balance and the final cookie texture.
- Slicing the butter into tablespoons before melting ensures a faster and more even browning process.
- This recipe yields large cookies, approximately 4 to 5 inches in diameter. If you prefer smaller cookies, use a medium cookie scoop and reduce the baking time to 7 to 9 minutes, watching closely.
- We specifically call for chopped chocolate (bittersweet and semi-sweet) over standard chocolate chips. Chopped chocolate melts more fluidly, creating desirable flecks and luxurious pools of chocolate throughout the cookie. However, good quality chocolate chips can be used as a substitute if necessary.
- The nutritional information provided is an estimate and does not include the optional chocolate melting wafers used for dipping/drizzling.
- Store these delectable cookies in an airtight container at room temperature. They are best enjoyed within 3 days to savor their freshness and chewiness.
- Adding Nuts: Yes, absolutely! Feel free to fold in any chopped nuts you love – pecans, walnuts, or macadamias would be delicious additions to these Brown Butter Chocolate Chip Cookies.
- Freezing Cookie Dough: This dough freezes beautifully! Portion the dough into balls, flash-freeze them on a baking sheet for an hour, then transfer to a freezer-safe bag. They can be stored for up to 3 months. Bake from frozen, adding an extra 1-2 minutes to the bake time.
- Using Salted Butter: If you opt to use salted butter instead of unsalted, simply omit the 1 teaspoon of salt from the dry ingredients to prevent the cookies from becoming too salty.
- Milk Powder: The milk powder enhances flavor and texture, contributing to a chewier cookie. It can be omitted if unavailable, but for the best results, it’s recommended.
Nutrition Information (Estimated, per cookie)
- Calories: 389 kcal
- Carbohydrates: 45g
- Protein: 4g
- Fat: 22g
- Saturated Fat: 13g
- Polyunsaturated Fat: 1g
- Monounsaturated Fat: 6g
- Trans Fat: 1g
- Cholesterol: 62mg
- Sodium: 238mg
- Potassium: 176mg
- Fiber: 2g
- Sugar: 28g
- Vitamin A: 439 IU
- Vitamin C: 0.03 mg
- Calcium: 37mg
- Iron: 2mg
Did You Make This Recipe?
Don’t forget to share it with me on Instagram @sugarandsoulco and follow on Tiktok @sugarandsoulco and Pinterest @sugarandsoulco for more!
Pin Recipe
Share Recipe