

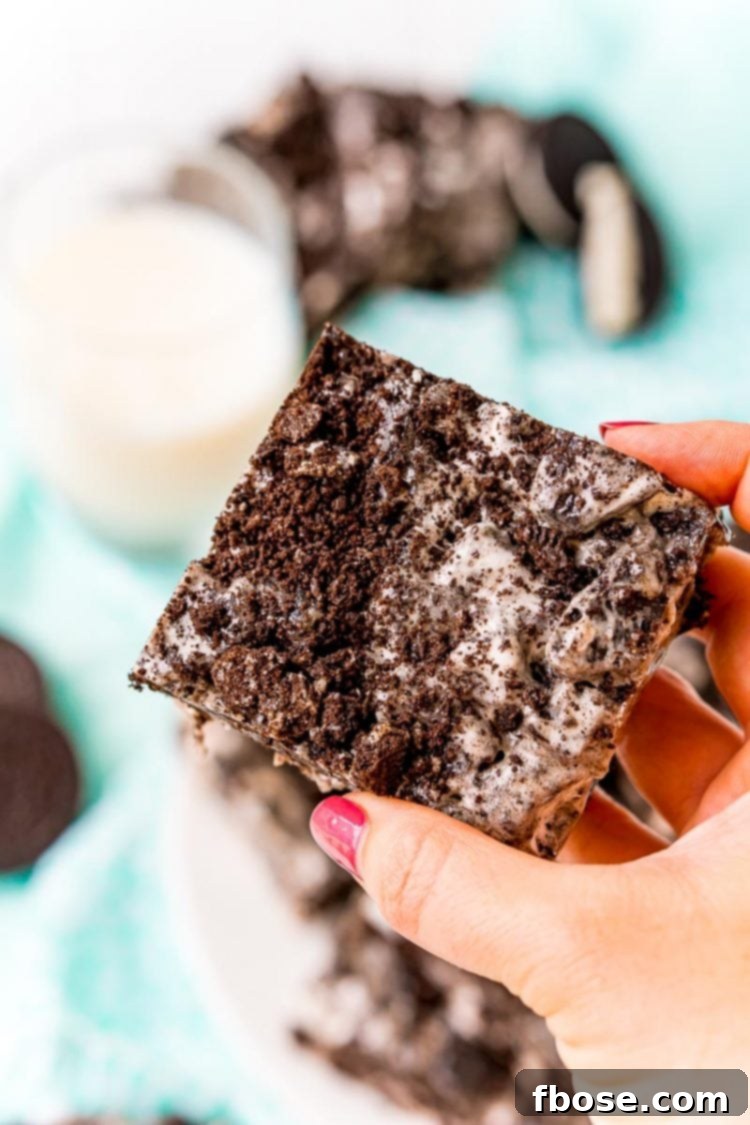
Super easy recipe – These Marshmallow Oreo Treats are a gooey, chocolaty, no-bake treat made with just 3-ingredients! This dessert has tons of sweet marshmallows and cookies ‘n cream flavor!
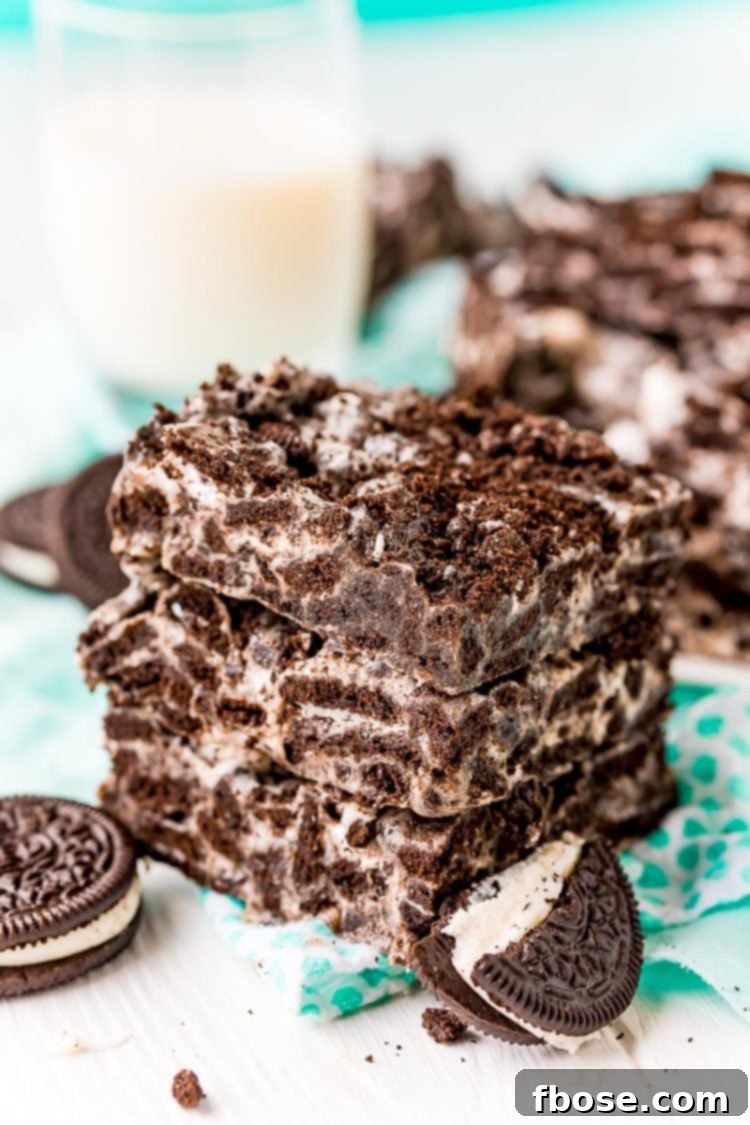
Prepare to delight your taste buds with an incredibly simple yet utterly irresistible dessert: Marshmallow Oreo Treats! This isn’t just another no-bake recipe; it’s a celebration of two beloved classics coming together in a symphony of gooey marshmallows and rich, crunchy Oreo cookies. Perfect for any occasion, from casual family gatherings to special events, these treats are guaranteed to be a crowd-pleaser and disappear faster than you can say “cookies ‘n cream.” What makes them even better? They require minimal effort and just three essential ingredients, making them the ultimate solution for those sudden sweet cravings or when you need a quick, impressive dessert without the fuss of baking. Get ready to create a dessert that’s as fun to make as it is to eat!
Why You’ll Absolutely Love These Marshmallow Oreo Treats
Beyond their delightful taste, there are so many reasons why these Marshmallow Oreo Treats will become a staple in your recipe repertoire. Firstly, the sheer simplicity is unmatched. With only three ingredients and a mere 10 minutes of active prep time, you can whip up a batch of these delectable squares without breaking a sweat. This makes them an ideal choice for busy parents, budding young chefs, or anyone looking for a stress-free dessert option. Secondly, the “no-bake” factor is a huge bonus, especially during warmer months when turning on the oven is the last thing you want to do. Enjoy a cool, sweet treat that doesn’t heat up your kitchen!
Furthermore, these treats are incredibly versatile. They’re perfect for school lunchboxes, potlucks, birthday parties, or simply as a comforting snack with a cup of coffee or a glass of milk. Their gooey texture, combined with the satisfying crunch of crushed Oreos, creates a sensory experience that appeals to all ages. Plus, the recipe is easily scalable, allowing you to make a small batch for a personal indulgence or a large quantity to feed a crowd. It’s a dessert that brings joy with every bite and offers endless possibilities for customization, ensuring it never gets boring.
The Simple Ingredients for Ultimate Indulgence
The magic of these Marshmallow Oreo Treats lies in their straightforward ingredient list. You’ll be amazed at how such a small number of components can create such an impactful and delicious dessert. Each ingredient plays a crucial role in delivering that signature gooey, chocolaty, and cookie ‘n cream flavor profile, making this no-bake wonder a true delight.
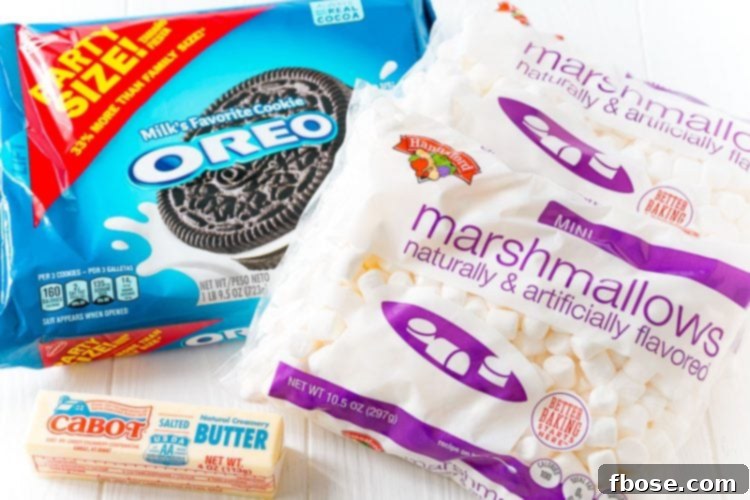
- Butter: This forms the essential base of our treats. Not only does butter contribute a rich, creamy flavor, but it also acts as a crucial binder when melted with marshmallows. For optimal results, we highly recommend using salted butter. The subtle saltiness helps to perfectly balance the intense sweetness of the marshmallows and Oreos, enhancing the overall flavor complexity and preventing the treat from being overwhelmingly sweet. If you only have unsalted butter on hand, simply add a small pinch of salt (about 1/4 teaspoon) to the mixture along with the butter to achieve a similar taste balance.
- Marshmallows: The star of the gooey show! Once melted, marshmallows transform into a wonderfully sticky, pliable substance that effortlessly binds all the crushed Oreo pieces together. They are responsible for the delightful chewy and gooey texture that makes these treats so incredibly addictive. While mini marshmallows melt faster and more evenly, you can certainly use larger marshmallows cut into smaller pieces. Just ensure they are fresh for the best gooey consistency; stale marshmallows can lead to a tougher, less desirable final product.
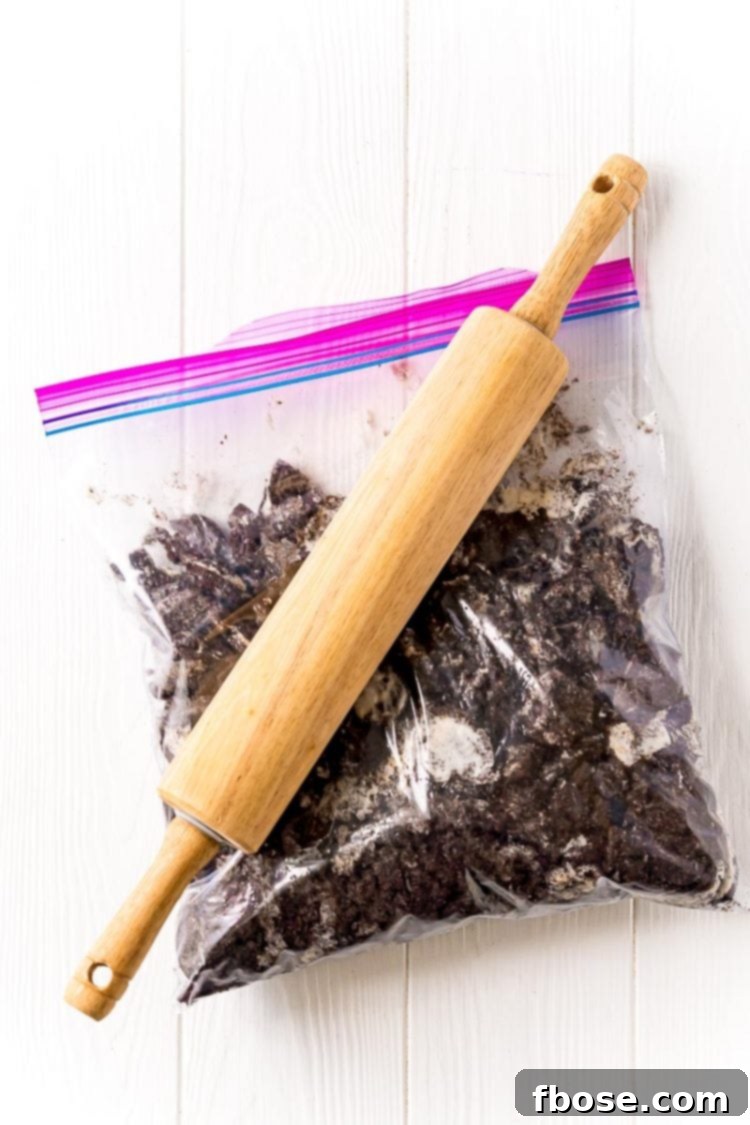
- Oreos: The heart and soul of this decadent dessert! Oreos bring their iconic chocolate cookie flavor and creamy filling, creating the beloved “cookies ‘n cream” essence that defines these treats. Their crunchy texture provides a fantastic contrast to the soft, chewy marshmallow base, making every bite a textural delight. Don’t be afraid to get creative here! While classic Oreos are fantastic, you can experiment with different flavors like Golden Oreos for a vanilla twist, Mint Oreos for a refreshing zing, Peanut Butter Oreos for a nutty depth, or even seasonal varieties to add a unique twist to your treats. Crushing them can be done easily in a food processor or by placing them in a sturdy Ziploc bag and using a rolling pin.
Crafting Your No-Bake Masterpiece: Step-by-Step Instructions
One of the most appealing aspects of these Marshmallow Oreo Treats is how quickly they come together. With only about 10 minutes of active preparation, you’ll have them ready to cool, making them an ideal last-minute dessert or a fun project with the kids. Follow these simple steps for perfectly gooey and delicious results:
- Preparation is Key (Mise en Place): As with most no-bake treats that involve melting ingredients on the stovetop, speed is important once you start combining. To ensure a smooth process, measure out all your ingredients beforehand and have them within easy reach. Crush your Oreos to your desired consistency – some prefer fine crumbs for a uniform texture, while others enjoy larger chunks for more textural interest. A food processor works quickly for fine crumbs, or you can place them in a sturdy Ziploc bag and crush them with a rolling pin. Don’t forget to prepare your baking pan! Line a 9×13-inch pan with parchment paper, leaving an overhang on the sides for easy removal, and lightly grease the parchment paper to prevent the sticky mixture from adhering.
- Melt Together Slowly: In a large, heavy-bottomed pot or Dutch oven, melt the butter over low heat. Once the butter has mostly melted, add approximately 8 cups of your mini marshmallows (reserving the remaining for later) to the pot. Continue to melt them over low heat, stirring constantly with a spatula or wooden spoon, until the mixture is completely smooth and cohesive. It’s crucial to keep the heat low to prevent the marshmallows from becoming too hard, grainy, or caramelizing, which can lead to tough treats. Patience in this step ensures a wonderfully gooey foundation.
- Mix in the Crunch: As soon as the butter and marshmallows are perfectly melted and smooth, remove the pot from the heat immediately. This step is important to prevent overcooking the marshmallow mixture. Quickly add in the crushed Oreos and the remaining 2 cups of mini marshmallows. Stir vigorously until all the Oreos are evenly coated with the melted marshmallow mixture and the reserved marshmallows are just beginning to soften, creating delightful pockets of chewiness throughout the treat. For an extra aesthetic touch, you can reserve a couple of tablespoons of crushed Oreos to sprinkle over the top once the mixture is in the pan.
- Shape and Set Gently: Transfer the warm, sticky mixture into your prepared baking pan. Now, it’s time to gently press the mixture into an even layer across the bottom of the pan. To prevent sticking, lightly grease your hands with a bit of butter or cooking spray, or use another sheet of parchment paper to press down on the mixture. Remember to press gently but firmly to ensure an even layer; avoid pressing too hard, as this can compress the treats too much and make them dense and tough instead of wonderfully gooey and chewy.
- Cool to Perfection: The hardest part of this recipe is waiting! Allow the treats to cool undisturbed at room temperature for at least 1 hour. This cooling time is essential for them to set properly, making them easier to slice into neat squares and achieving the perfect chewy, yet firm texture. Rushing this step will result in messy slices and treats that fall apart. For quicker setting, especially on warm days or if you’re in a hurry, you can place the pan in the refrigerator for about 30-45 minutes. Avoid over-chilling, as it can make them excessively firm. Once fully set, use the parchment paper overhang to lift the entire slab out of the pan, place it on a cutting board, and slice into your desired serving sizes using a sharp, greased knife.
Creative Variations & Customizations
While the classic Marshmallow Oreo Treat is perfect as is, part of the fun of this recipe is its adaptability. Feel free to unleash your creativity and tailor these treats to your personal preferences, seasonal themes, or whatever ingredients you have on hand:
- Oreo Flavor Swaps: Don’t limit yourself to original Oreos! For a delightful change, try Golden Oreos for a vanilla-based treat, Mint Oreos for a refreshing chocolate-mint twist, Peanut Butter Oreos for a nutty flavor, or even seasonal flavors like Pumpkin Spice or Red Velvet for festive occasions and holiday celebrations.
- Delicious Add-ins: After removing the mixture from the heat but before pressing it into the pan, stir in a handful of your favorite extras. Consider incorporating mini chocolate chips (dark, milk, or white), chopped white chocolate chunks, colorful sprinkles for a pop of fun, chopped nuts (like walnuts, pecans, or almonds) for added crunch, or even a swirl of creamy peanut butter or rich caramel sauce for an extra layer of flavor and decadence.
- Drizzle and Decorate: Once the treats have cooled and set, elevate their appearance and flavor with a simple drizzle. Melt some white chocolate, dark chocolate, or caramel and drizzle it artistically over the top. A light sprinkle of flaky sea salt can also beautifully complement the sweetness and enhance the chocolate notes.
- Fun Shapes: Instead of cutting into traditional squares, use festive cookie cutters to create fun shapes like stars, hearts, circles, or even seasonal designs. This is especially great for themed parties, holiday gifts, or just to make snack time more exciting. Just make sure the treats are fully set before attempting to cut intricate shapes to ensure clean edges.
- Individual Servings: For easy portion control and a charming presentation, press the mixture into a mini muffin tin lined with paper liners instead of a large baking pan. This creates perfect bite-sized treats ideal for parties or a quick indulgence.
Pro Tips for Perfect Marshmallow Oreo Treats
Achieving that ideal gooey texture and rich flavor is easy with a few simple tricks. Keep these pro tips in mind as you prepare your batch of Marshmallow Oreo Treats to ensure every single bite is nothing short of perfection:
- Fresh Marshmallows are Best: Always use fresh, soft marshmallows. Older, harder marshmallows can be more difficult to melt smoothly and may result in a tougher, less pleasant, or slightly grainy texture in your final treat. Check the expiration date!
- Low Heat is Your Friend: When melting the butter and marshmallows, maintain a consistently low heat and stir continuously. High heat can cause the marshmallows to caramelize too quickly or even burn, leading to a hard, brittle, or overly sugary texture instead of a soft, gooey one. Patience in this step is truly invaluable and pays off with superior results.
- Don’t Over-Press: While you want to ensure the mixture is evenly distributed in the pan, resist the urge to press it down too firmly. Over-compacting the mixture can squeeze out the desirable air pockets, making your treats dense, hard, and less enjoyable. A gentle, even press using greased hands or parchment paper is all that’s needed to achieve that perfect chewy and light texture.
- Prep Everything Ahead: These treats come together remarkably quickly, so having all your ingredients measured, Oreos crushed, and baking pan lined and lightly greased before you even start melting is absolutely crucial. This “mise en place” approach ensures you can move swiftly and efficiently, especially once the marshmallows are melted and cooling time becomes a factor.
- Give Them Ample Time to Cool: Allowing at least an hour for cooling at room temperature is essential for the treats to set properly. Rushing this step will make them difficult to cut cleanly, potentially causing them to fall apart or stick to the knife. If you’re genuinely short on time, a brief stint in the refrigerator (30-45 minutes) can speed up the process, but avoid over-chilling as it can make them excessively firm.
- Salted Butter for Balance: As mentioned in the ingredients section, using salted butter truly enhances the overall flavor profile by providing a subtle counterpoint to the intense sweetness of the marshmallows and Oreos. If you’re using unsalted butter, remember to add a pinch of salt to the melting mixture – it makes a noticeable difference!
- Grease Your Tools: Always lightly grease any tools that will come into contact with the sticky marshmallow mixture, such as your spatula, spoon, or even your hands, to prevent frustrating sticking.
Frequently Asked Questions
Here are answers to some common questions about making and enjoying your Marshmallow Oreo Treats:
How Long Do Marshmallow Oreo Treats Last and How Should I Store Them?
When stored properly in an airtight container at room temperature, these delightful treats will stay fresh and deliciously gooey for up to 5 days. To maintain their ideal texture, avoid refrigerating them unless you prefer a firmer treat, as refrigeration can sometimes make them too hard. For longer storage, you can also freeze them! Simply wrap individual treats tightly in plastic wrap, then place them in a freezer-safe bag or container. They will keep well in the freezer for up to 6 months. Thaw them at room temperature for about an hour before enjoying for the best results.
How Should I Serve These Treats?
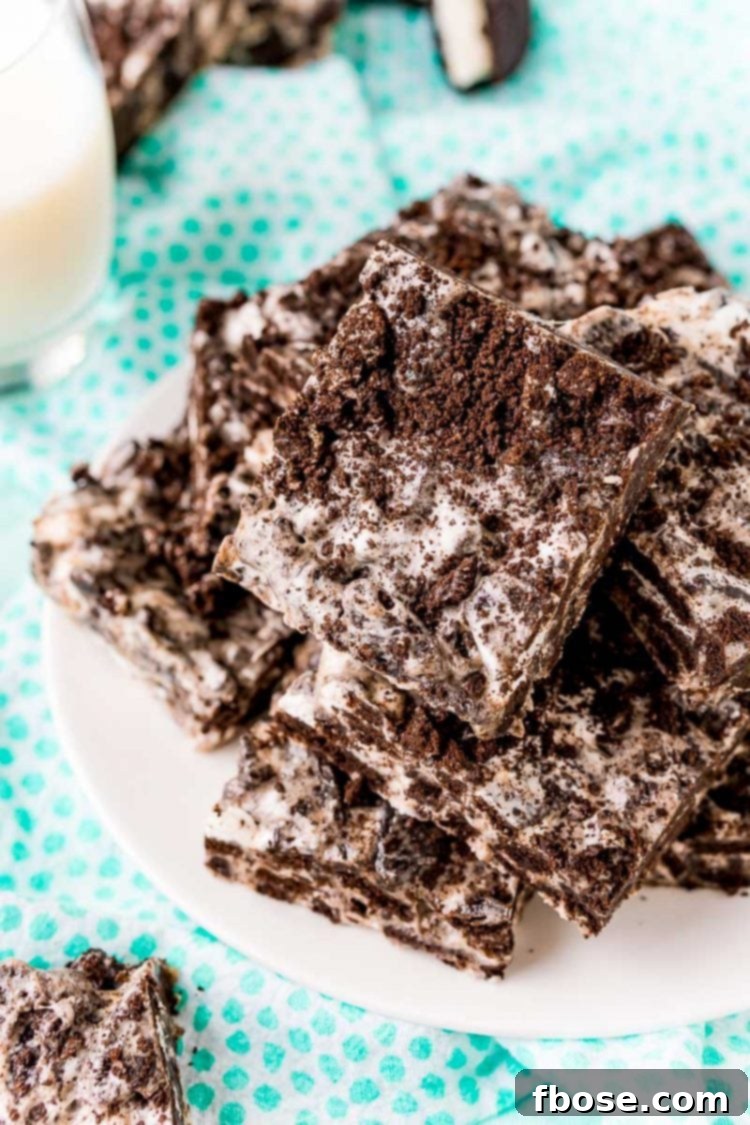
Enjoy Marshmallow Oreo Treats just as you would a classic Rice Krispies Treat! They are perfect on their own as a sweet snack, a quick dessert, or a delightful addition to a lunchbox. However, because they are made with rich Oreos, they are exceptionally delicious when dipped in a cold glass of milk, amplifying that iconic cookies ‘n cream experience. They also make a fantastic addition to dessert platters, bake sales, holiday cookie exchanges, or served with a scoop of vanilla ice cream. Consider serving them slightly warmed (a few seconds in the microwave) for an even gooier texture, or chilled if you prefer a firmer, more substantial bite.
Can I Make Marshmallow Oreo Treats Vegan?
While many Oreo varieties are surprisingly vegan-friendly, the traditional butter and marshmallows used in this recipe are not, as they typically contain dairy and gelatin, respectively. This particular recipe has not been specifically tested with vegan butter or marshmallow substitutes. However, if you wish to try a vegan version, you would need to source plant-based butter alternatives and vegan marshmallows (often made with ingredients like agar-agar or tapioca syrup instead of gelatin). Be aware that the texture and melting properties of vegan marshmallows can differ from conventional ones, so results may vary in terms of gooeyness and setting time.
Why Are My Oreo Treats Hard Instead of Gooey?
Several factors can lead to hard Marshmallow Oreo Treats instead of soft and gooey ones, which is a common concern. The most frequent reasons are either cooking the marshmallow mixture over too high a heat, which can cause the sugars to crystallize and harden, or pressing the mixture into the pan too hard. Over-pressing compacts the treats and squeezes out the desirable airiness, making them dense and tough. To avoid this, ensure you melt the marshmallows over consistently low heat, stirring frequently, and press the mixture gently but evenly into the prepared pan. Also, make sure to use fresh marshmallows, as stale ones can contribute to a harder texture.
Can I Use Other Types of Cookies Instead of Oreos?
Absolutely! While Oreos provide a unique and beloved flavor and texture, this recipe is quite adaptable to other types of cookies. You can certainly experiment with similar ratios using other crushed cookies like classic graham crackers for a s’mores-like twist, vanilla Nilla Wafers for a milder flavor, crunchy chocolate chip cookies, or even shortbread cookies. Each different cookie will impart its own distinct flavor profile, allowing you to create your own signature no-bake cookie treat. The key is to maintain a similar crumb texture (or a mix of crumbs and chunks) to ensure it binds well with the marshmallow mixture and holds its shape.
More Irresistible No-Bake Desserts
If you love the simplicity and deliciousness of these Marshmallow Oreo Treats, you’ll be thrilled to discover a world of other no-bake delights. These recipes are perfect for satisfying your sweet tooth without ever having to turn on the oven, making them ideal for any time of year. Explore some of our other favorite easy-to-make treats that promise maximum flavor with minimal effort:
- Golden Grahams S’mores Bars: A delightful and nostalgic treat that perfectly combines the crunchy texture of Golden Grahams cereal with gooey marshmallows and rich chocolate, reminiscent of a campfire classic.
- Cocoa Pebbles Treats: A chocolate lover’s dream come true, these crispy, incredibly chocolatey squares are super easy and fun to make, offering a playful take on a classic cereal treat.
- Fruity Pebbles Treats: Bursting with vibrant colors and a delightful fruity flavor, these treats are a playful and visually appealing dessert that children and adults alike will adore.
- Classic No-Bake Cookies: A timeless favorite, these chewy and satisfying cookies are traditionally made with oats, rich peanut butter, and cocoa – a comforting treat that requires absolutely no baking.
Pin This Recipe for Later!
Loved this recipe? Don’t lose it! Click the button below to save these delicious Marshmallow Oreo Treats to your favorite Pinterest board so you can easily find it whenever a craving strikes!
Pin It Now!
Rated 5 out of 5 stars from 17 votes
Marshmallow Oreo Treats
Rebecca Hubbell
Dessert
American
5 minutes
5 minutes
1 hour
1 hour 10 minutes
20 people
Ingredients
- 9 cups Oreos crushed
- 8 tablespoons salted butter
- 10 cups mini marshmallows divided
Instructions
-
Line a 9×13-inch baking pan with parchment paper and set aside.
-
Add Oreos to a large Ziploc bag and use a rolling pin to crush them, set aside.
-
In a large pot, melt the butter and 8 cups of the marshmallows over low heat until smooth.
-
Remove from heat and add the crushed Oreos and the remaining marshmallows to the pot and stir until evenly coated.
-
Transfer the mixture to the baking dish and use greased hands or another sheet of parchment paper to gently press the mixture into the pan. Don’t press too hard or the treats will be tough.
-
Allow them to sit at room temperature for at least 1 hour before slicing.
Notes
- Storage: Keep in an airtight container at room temperature for up to 5 days, or freeze for up to 6 months.
- Serving Suggestion: Delicious on their own, or dipped in milk for an enhanced experience.
- Vegan Adaptability: Not tested with vegan substitutes, as traditional butter and marshmallows are not vegan.
- Troubleshooting Hard Treats: Often caused by high heat during melting or over-pressing into the pan.
Nutrition Information (per serving)
Calories: 457kcal | Carbohydrates: 71g | Protein: 5g | Fat: 19g | Saturated Fat: 7g | Polyunsaturated Fat: 3g | Monounsaturated Fat: 7g | Trans Fat: 1g | Cholesterol: 12mg | Sodium: 391mg | Potassium: 157mg | Fiber: 2g | Sugar: 44g | Vitamin A: 141IU | Calcium: 18mg | Iron: 6mg
Did You Make This Recipe?
Don’t forget to share it with me on Instagram @sugarandsoulco and follow on Tiktok @sugarandsoulco and Pinterest @sugarandsoulco for more!
Pin Recipe
Let’s Connect!
If you’ve tried this recipe, please let me know how you liked it in the comments below and leave a review. I love hearing from you!
Don’t forget to tag me – @sugarandsoulco – on Instagram and Pinterest with your photos or join our Sugar & Soul Show-offs Community and share them there, where you can join our recipe challenges!