
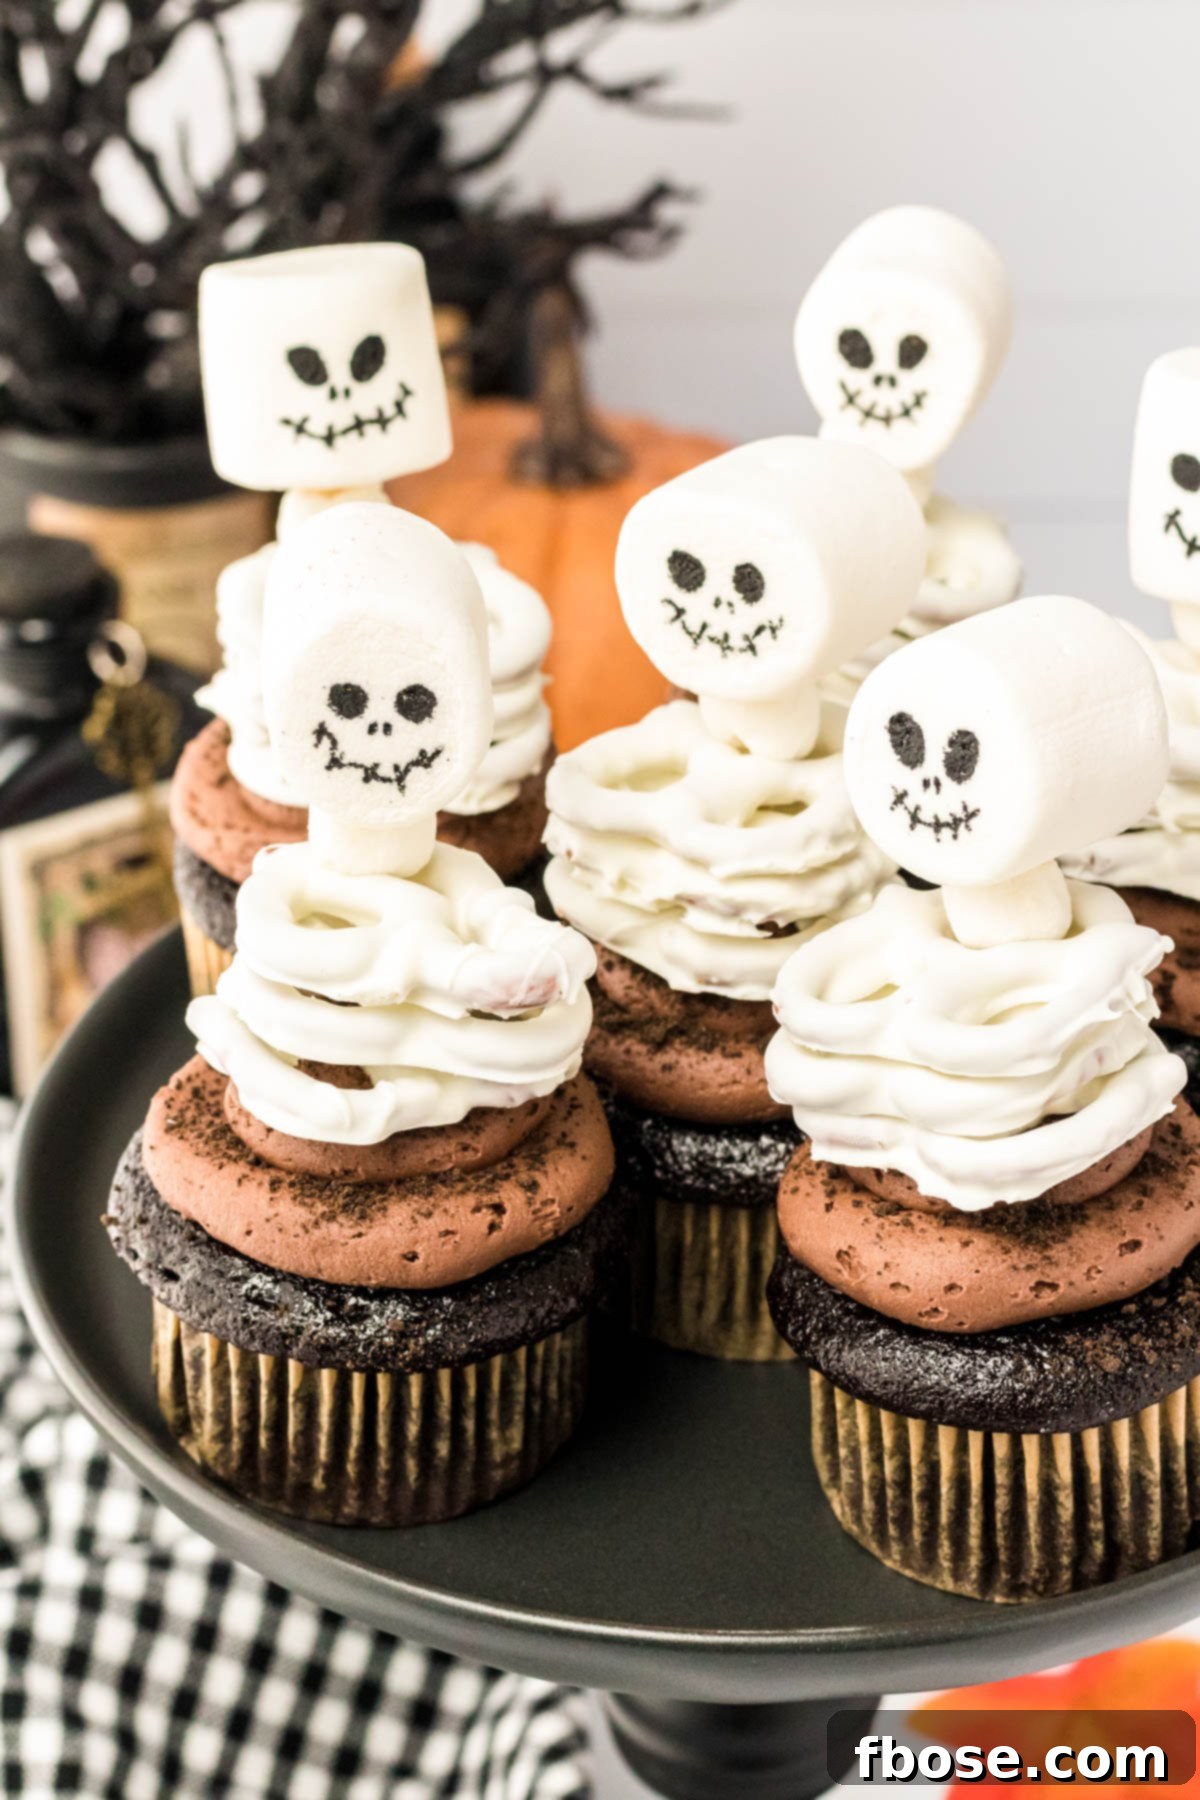
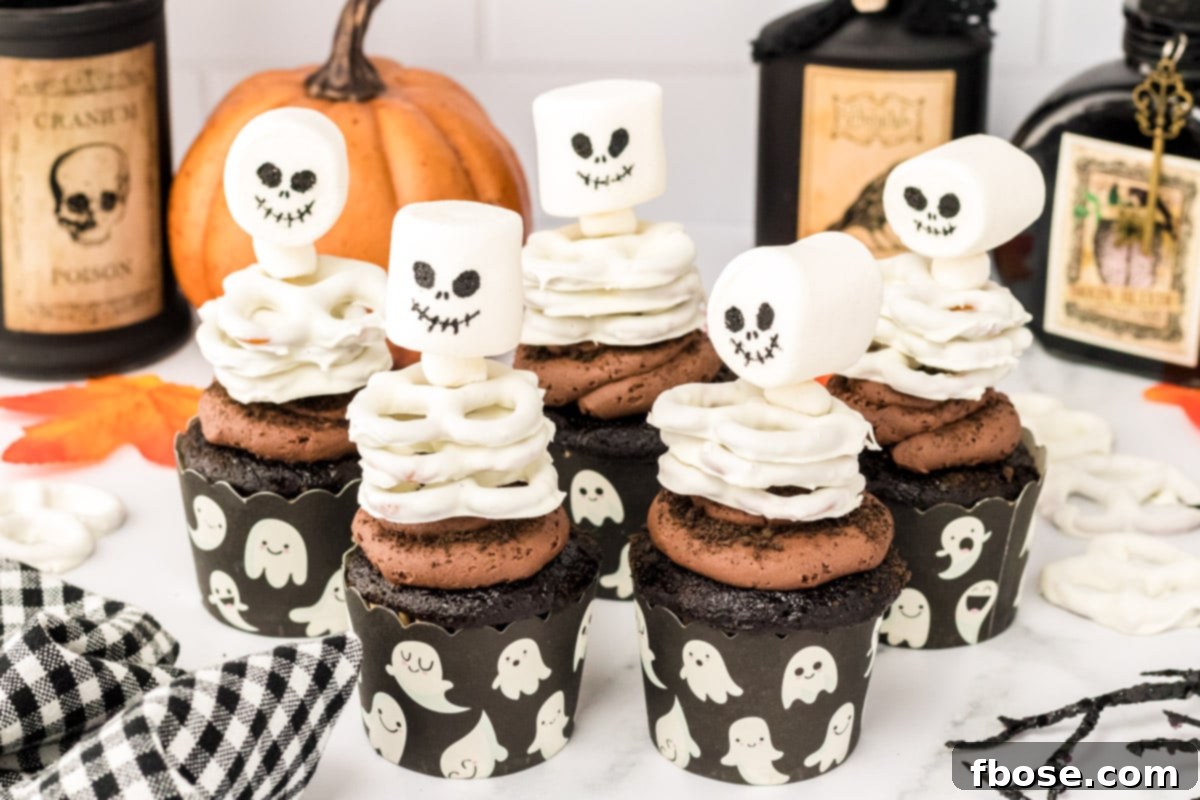
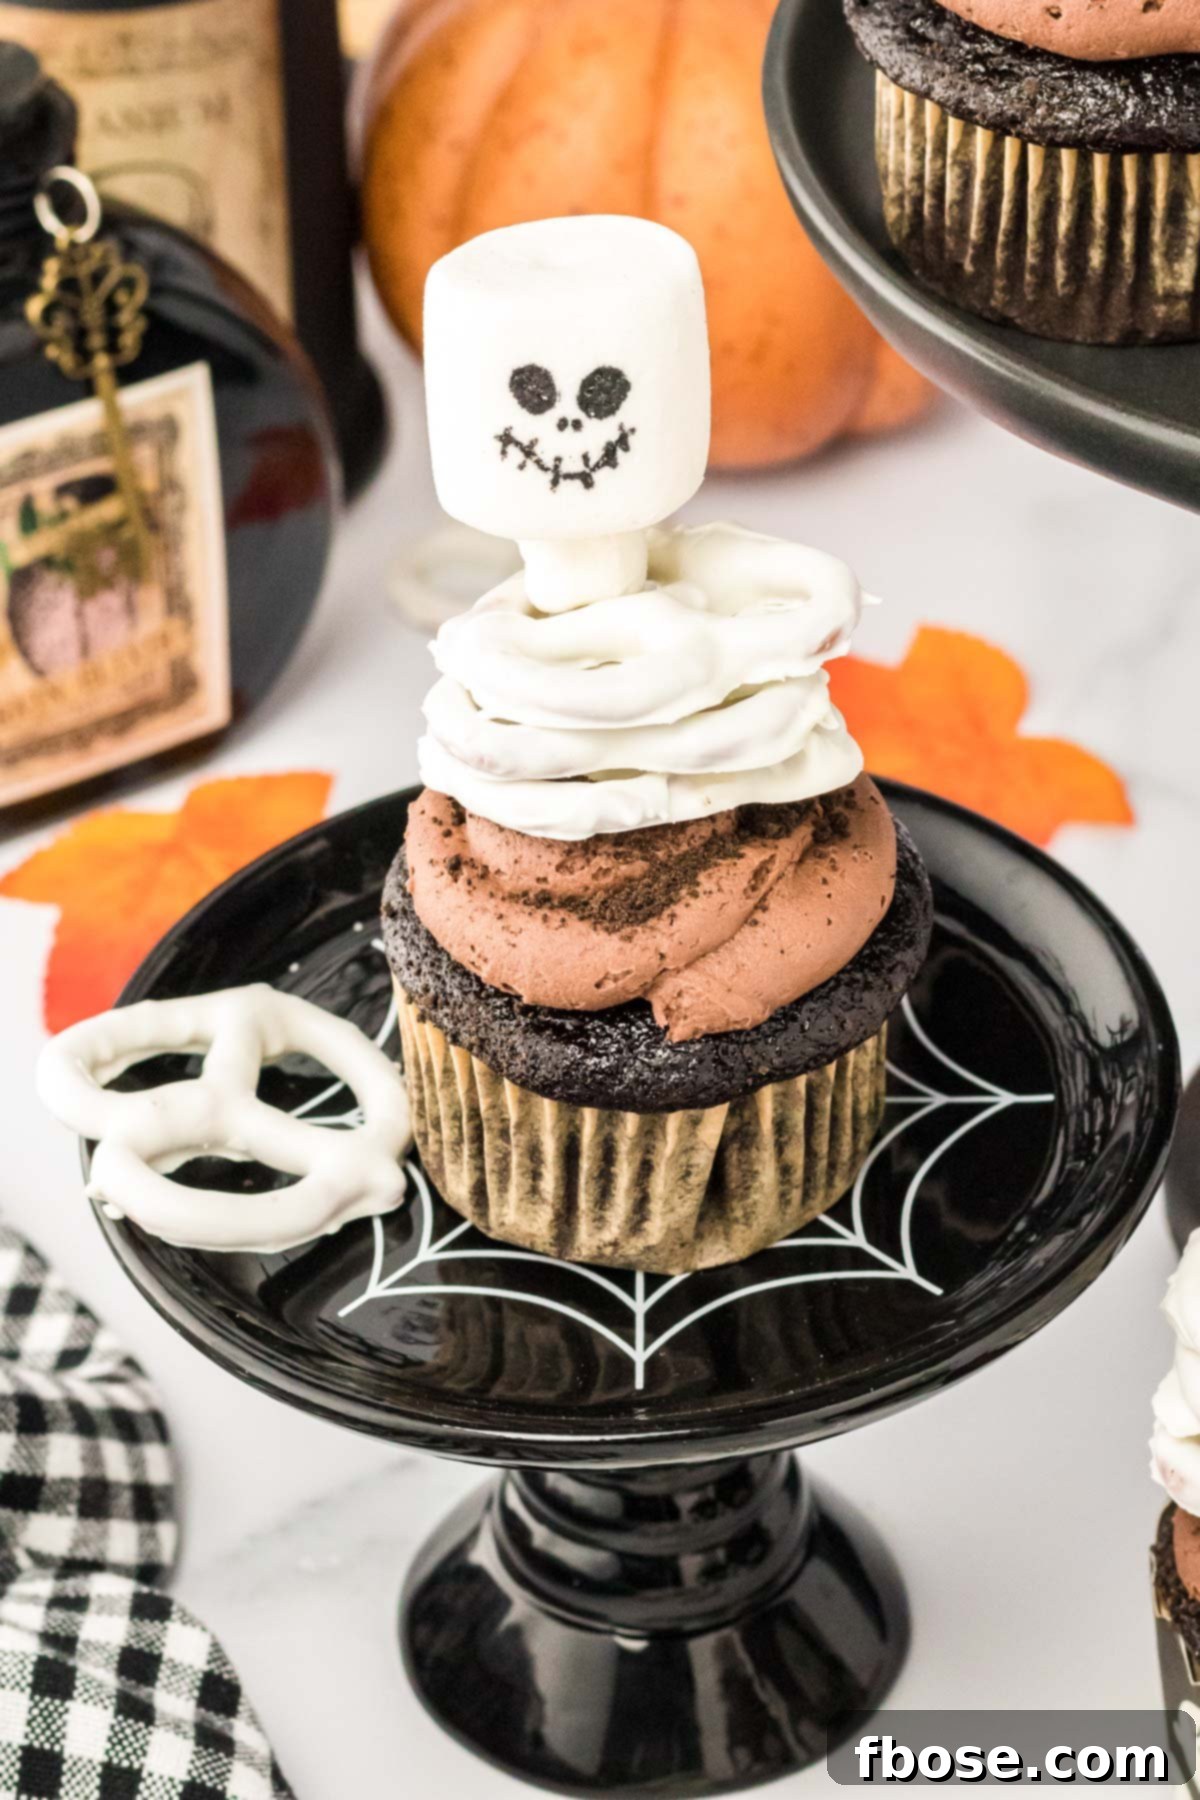
Prepare to enchant your guests and elevate your Halloween celebrations with these incredibly fun and utterly delicious Halloween Skeleton Cupcakes! Imagine serving up individual masterpieces, each a rich, homemade chocolate cupcake, adorned with playful white chocolate-covered pretzel bones and fluffy marshmallow skull heads. These aren’t just treats; they’re edible decorations that promise to be the star of any spooky gathering, delivering both visual delight and a decadent chocolate experience that will leave everyone craving more.
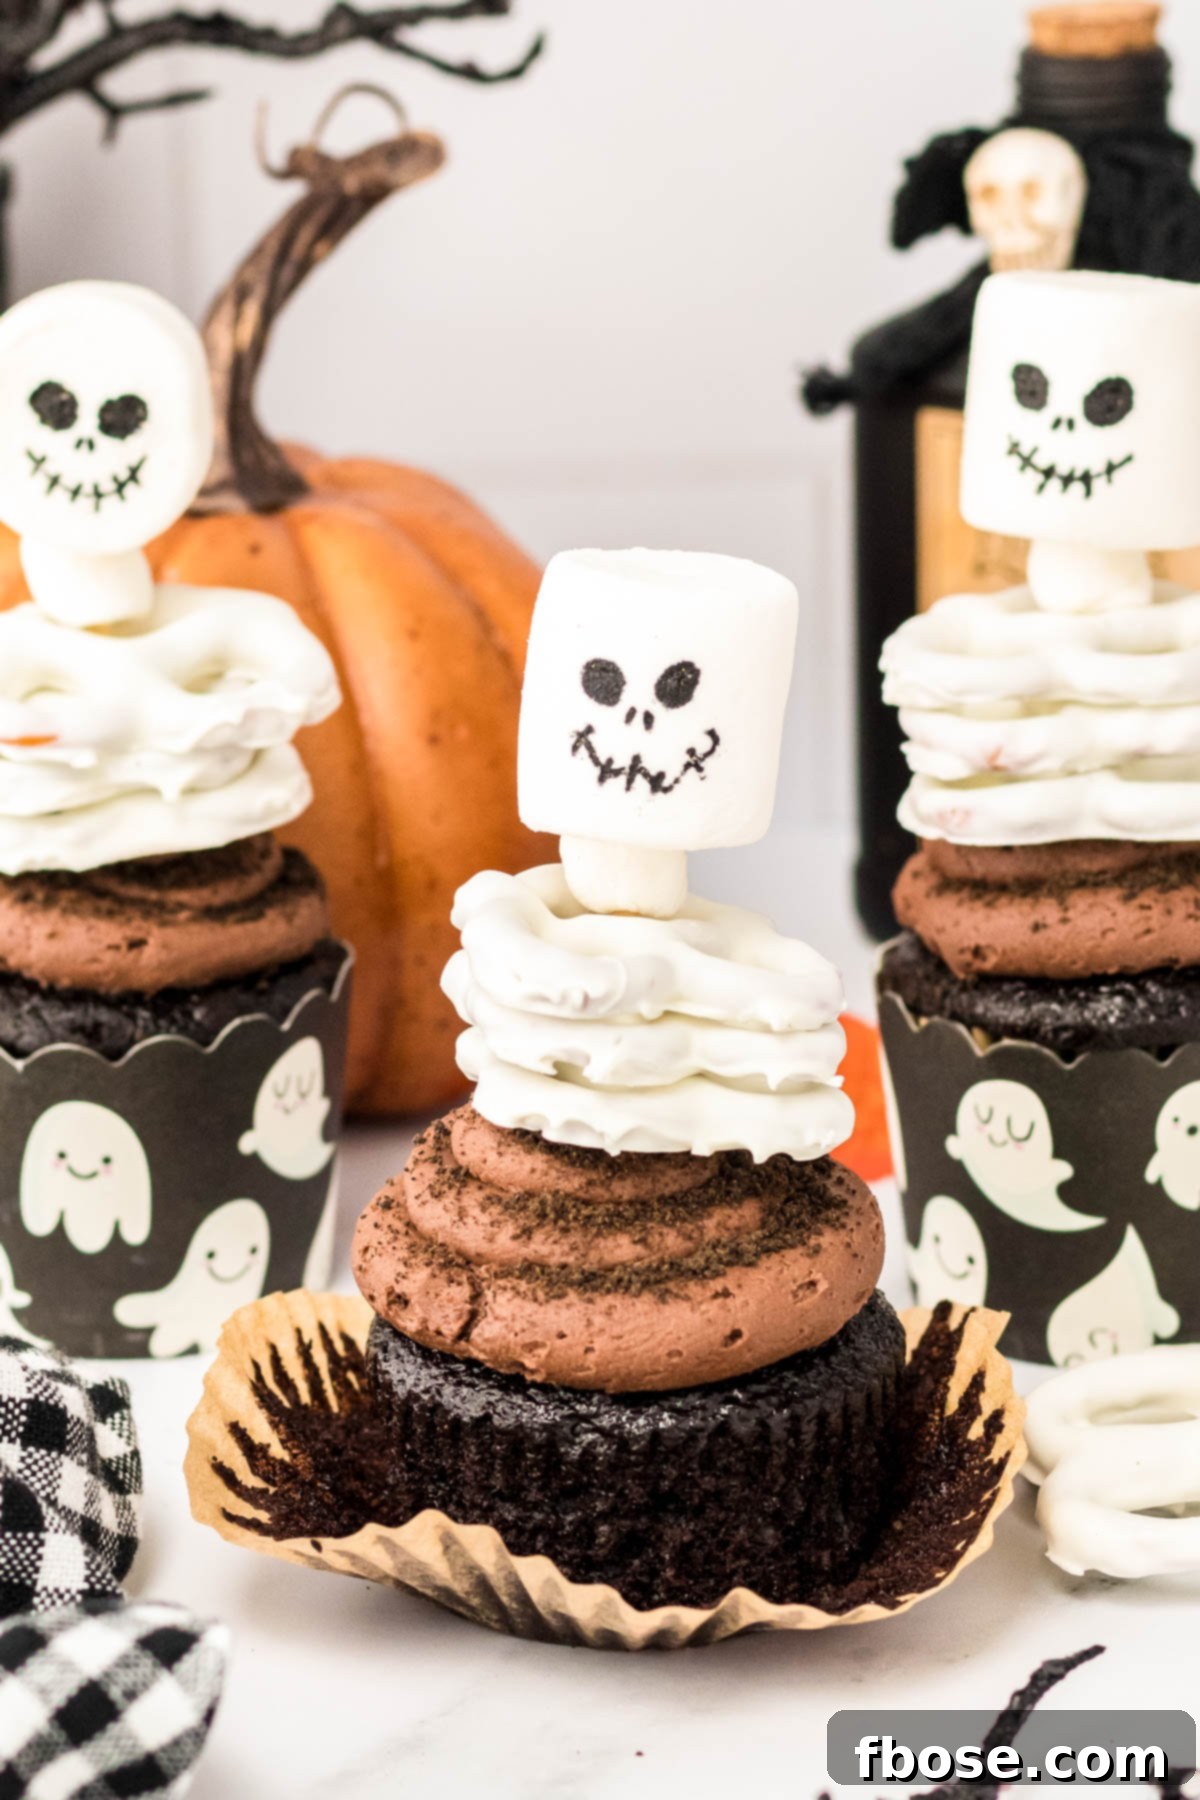
Spooky & Sweet: Why Skeleton Cupcakes are Your Ultimate Halloween Party Treat!
As October approaches and the air fills with anticipation for all things spooky and sweet, it’s time to finalize your Halloween treat menu. These charming Halloween Skeleton Cupcakes are undoubtedly a top contender, guaranteed to earn the coveted first spot on your list of must-make delights! They strike the perfect balance between eerie and adorable, delivering a deliciously rich flavor profile that appeals to all ages. What makes them even better is the enjoyable process of creating them; they’re simple enough that even younger family members can get involved in the decorating, turning baking into a fun, collaborative Halloween activity.
Whether you’re hosting a grand Halloween party filled with ghoulish games, setting up a festive harvest gathering, or simply looking for a fun, seasonal activity to enjoy with your family leading up to October 31st, these cupcakes are exceptionally versatile. They’re more than just a dessert; they’re an experience, designed to bring smiles and a touch of spooky charm to any occasion. You might even find yourself making them multiple times throughout the month!
When I first envisioned this recipe, my goal wasn’t merely to craft a Halloween cupcake that looked appropriately festive. I wanted to create something truly exceptional, a treat that tasted as sensational as it looked. My vision was to replicate the kind of show-stopping cupcakes you’d find in a high-end bakery – a perfect fusion of festive aesthetic and indulgent flavor. This way, both children and adults, with their varying preferences for sweetness and sophistication, would genuinely adore them. I’m thrilled to report that this Halloween Cupcake Recipe surpassed all my expectations, delivering a truly decadent and delightfully spooky experience for everyone.
Pin This Recipe For Later
Rebecca’s Recipe Review: A Deep Dive into Flavor & Fun
Taste: To achieve a truly rich and profound chocolate flavor in the cupcakes, I made a deliberate choice to incorporate prepared hot coffee into the batter. This isn’t just a random addition; the coffee acts as a flavor enhancer, intensifying the cocoa notes without imparting any discernible coffee taste. The result is a deeply satisfying, robust chocolate experience. The edible decorations further elevate the taste profile: the sweet white chocolate coating on the pretzels perfectly complements the rich cupcake, while the slight saltiness from the pretzels themselves creates an addictive sweet-and-salty contrast. The fluffy marshmallows add a final touch of sugary goodness, making each bite a symphony of delightful flavors.
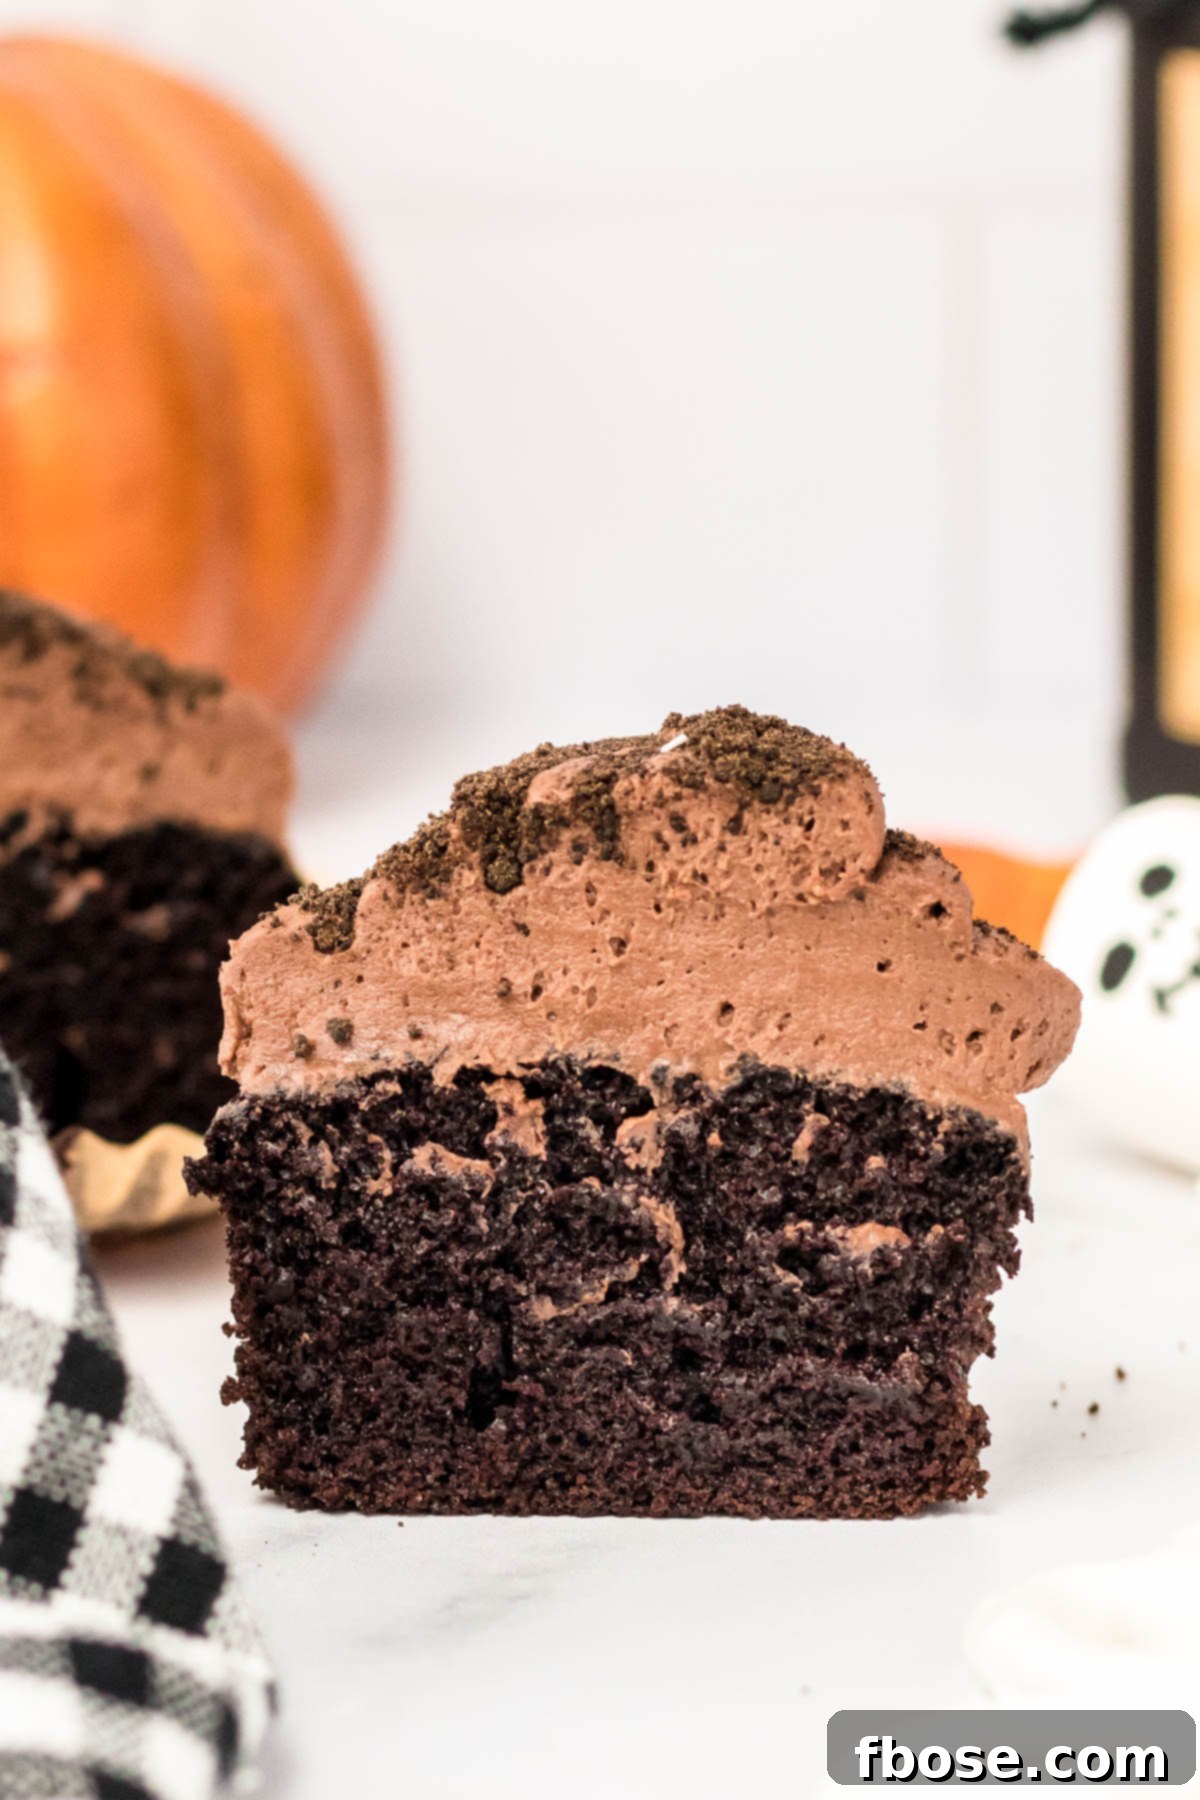
Texture: These cupcakes offer a wonderful medley of textures that keep every bite interesting. The foundation is a wonderfully tender and moist cupcake, a hallmark of well-baked homemade treats. This soft base is then crowned with a smooth, luxurious chocolate frosting, which melts delightfully in your mouth. The textural journey continues with the crisp crunch of the white chocolate-covered pretzels, providing a satisfying snap. Finally, the soft, sticky marshmallows add a chewy, airy element, bringing all these different components together for an unforgettable experience.
Ease: 5/10 – While not a no-bake recipe, these cupcakes are surprisingly manageable. The baking process for the cupcakes themselves is straightforward, and the decoration, while requiring a few steps, is more fun than it is complicated. It’s a fantastic project for a leisurely afternoon, especially if you have little helpers!
Pros: One of the significant advantages of this recipe is its reliance on readily available pantry staples. You won’t need to hunt for exotic ingredients, which means you can dedicate your time and energy to the creative decorating process. Most of the “fancy” elements are simply the edible skeleton parts, which are easy to source and assemble, making gourmet-looking treats accessible to the home baker.
Cons: The most time-consuming aspect of this recipe lies in crafting the intricate skeleton parts. Dipping each pretzel and meticulously drawing faces on marshmallows does add a bit of extra time to the overall preparation. However, this is also where the fun truly begins, especially when involving children, making it a worthwhile investment for such a unique and memorable Halloween treat.
Would I Make This Again? Absolutely, without a doubt! Our household adores festive cupcakes, and these delightful skeleton creations hit all the right notes. Their captivating appearance and exquisite taste make them an annual tradition we eagerly anticipate, proving that sometimes, a little extra effort yields truly spectacular results.
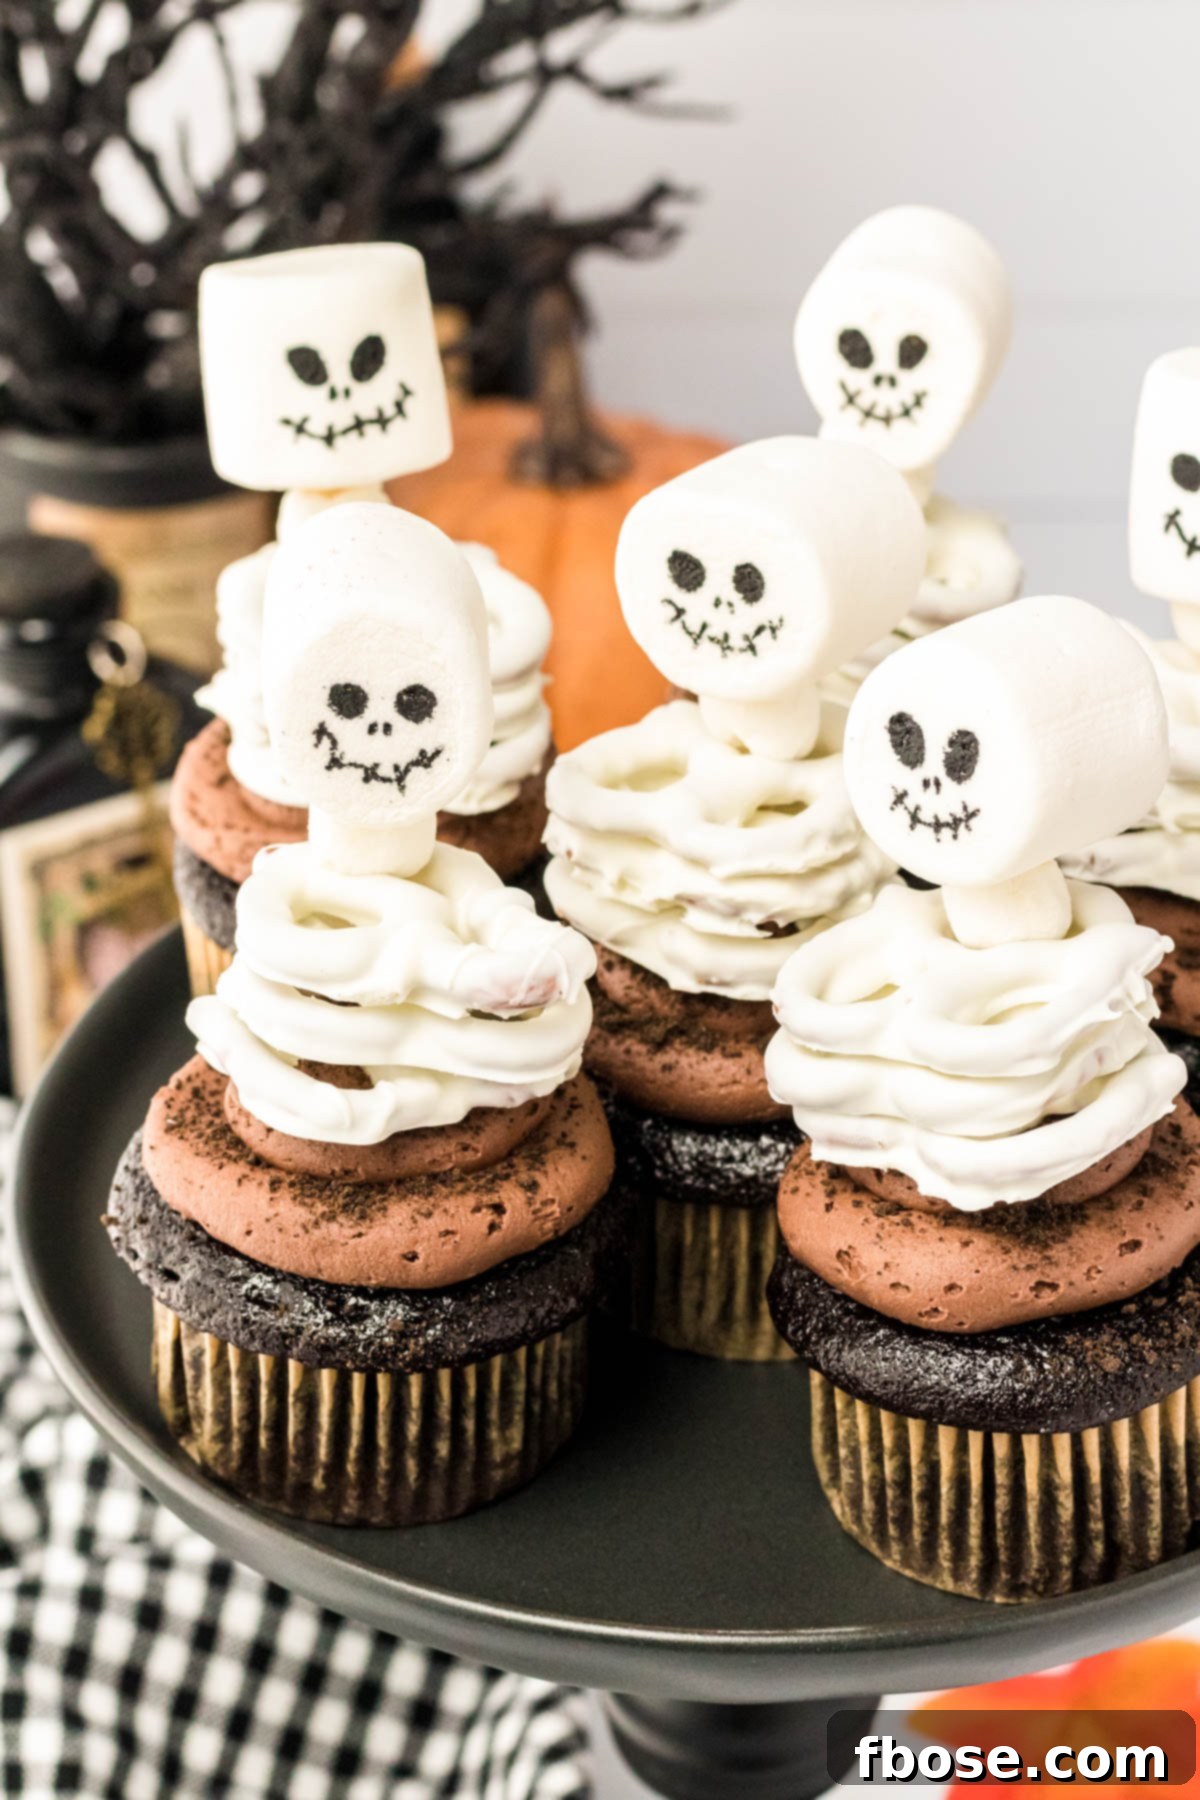
Essential Ingredients for Your Spooky Halloween Skeleton Cupcakes
Crafting these enchanting Halloween Skeleton Cupcakes begins with a selection of high-quality ingredients, most of which you likely already have in your pantry. We aim for a balance of rich flavor in the cupcake base and fun, edible components for the skeleton decorations. Here’s a detailed look at what you’ll need:
- All-Purpose Flour: The structural backbone of our tender cupcakes. Ensures a light yet stable crumb.
- Granulated Sugar: Provides sweetness and helps create that desirable moist texture.
- Unsweetened Cocoa Powder: The key to our deeply rich, chocolatey flavor. Opt for a good quality cocoa for the best results.
- Baking Soda & Baking Powder: These leavening agents work in harmony to give our cupcakes their perfect rise and airy texture.
- Salt: A pinch of salt enhances all the other flavors, particularly the chocolate, bringing out its full potential.
- Large Eggs (Room Temperature): Eggs bind the ingredients, add richness, and contribute to the cupcake’s structure. Room temperature eggs emulsify better, leading to a smoother batter.
- Buttermilk (Room Temperature): The secret to incredibly moist and tender chocolate cupcakes. Its acidity reacts with the leavening agents for an extra fluffy crumb.
- Prepared Hot Coffee: Don’t skip this! Hot coffee deepens the chocolate flavor without making the cupcakes taste like coffee. It’s a fantastic secret ingredient for any chocolate cake.
- Vegetable Oil: Adds moisture and helps keep the cupcakes tender for days.
- Vanilla Extract: A touch of vanilla complements the chocolate beautifully, adding depth to the overall flavor.
- Chocolate Frosting: This is where you have flexibility! You can use your favorite homemade chocolate buttercream for a truly decadent experience, a luscious chocolate cream cheese frosting for a tangy twist, or for ultimate convenience, a can of quality store-bought frosting works perfectly well.
- Chocolate Cookie Crumbs: These are sprinkled over the frosting to create the “dirt” effect for our graveyard scene. Crushed Oreos are a fantastic choice!
- Classic Style Pretzels: The foundation for our skeleton’s bones. Small, traditional twists work best for dipping.
- White Chocolate Melting Wafers: Essential for coating our pretzels and creating sturdy, edible bones. They melt smoothly and set firmly.
- Large Marshmallows: These will form the adorable, slightly spooky heads of our skeletons.
- Small Marshmallows: Used for the “neck” part of the skeleton, helping to position the head correctly.
- Black Food-Grade Edible Marker: For drawing those charmingly eerie skeleton faces. A must-have for the finishing touches!
With these ingredients at hand, you’re well on your way to creating a batch of Halloween Skeleton Cupcakes that are as delightful to look at as they are to eat!
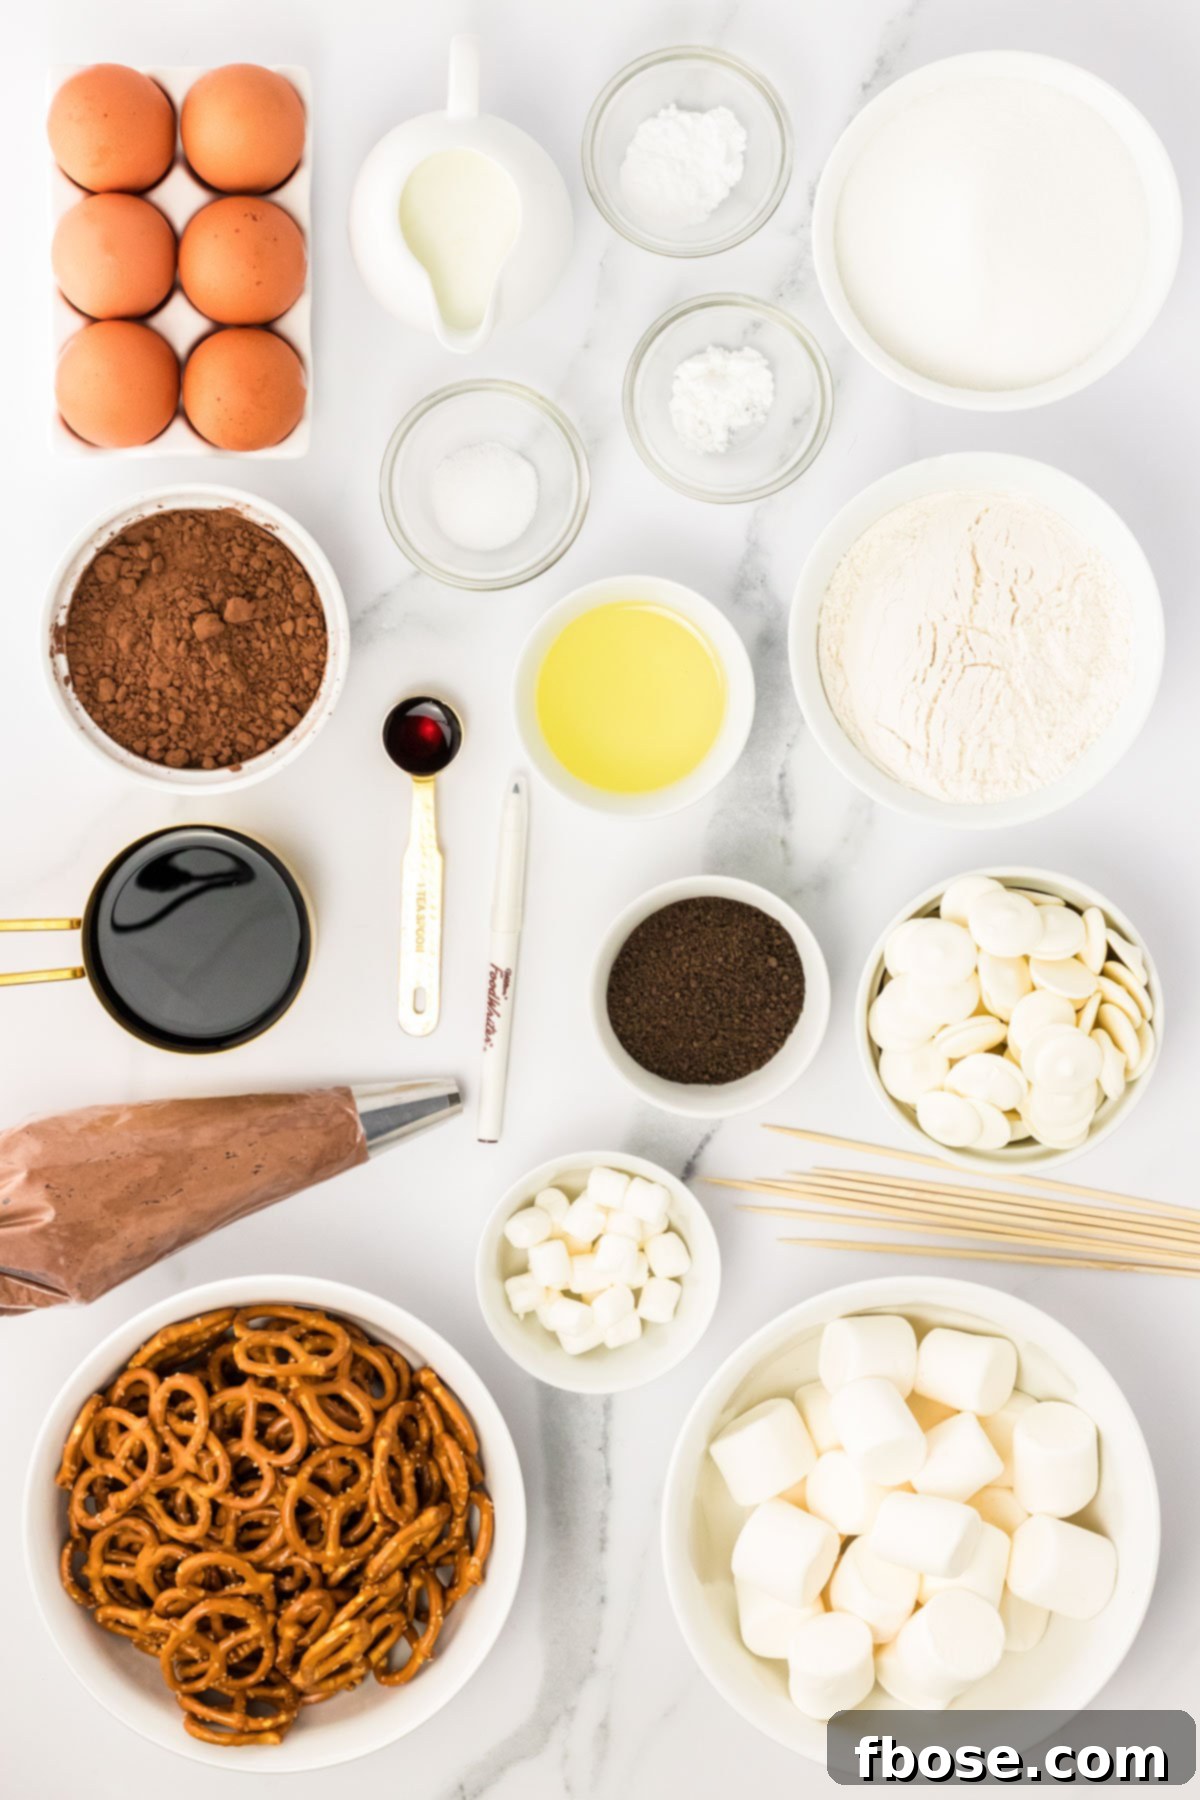
Baking the Perfect Chocolate Base: How To Make Halloween Skeleton Cupcakes
Creating the foundation for our spooky delights starts with baking moist, flavorful chocolate cupcakes. Follow these steps carefully to ensure a perfect base:
- Prepare Your Baking Station: Begin by preheating your oven to 325°F (160°C). This ensures the oven is at the correct temperature for even baking. Line a 24-cup muffin tin with paper cupcake liners. It’s always a good idea to have your liners ready before mixing the batter.
- Combine Dry Ingredients: In a large mixing bowl, or the bowl of a stand mixer fitted with the paddle attachment, combine all the dry ingredients: all-purpose flour, granulated sugar, unsweetened cocoa powder, baking soda, baking powder, and salt. Mix these on low speed for about 1 minute, just until they are thoroughly combined and there are no visible lumps. This initial whisking helps distribute the leavening agents evenly.
- Incorporate Wet Ingredients: To the dry mixture, add the wet ingredients: the large eggs, buttermilk, hot prepared coffee, vegetable oil, and vanilla extract. Beat the mixture on medium speed. Continue mixing until the batter is completely smooth, luscious, and free of any flour streaks. The hot coffee will help bloom the cocoa, enhancing the chocolate flavor significantly.
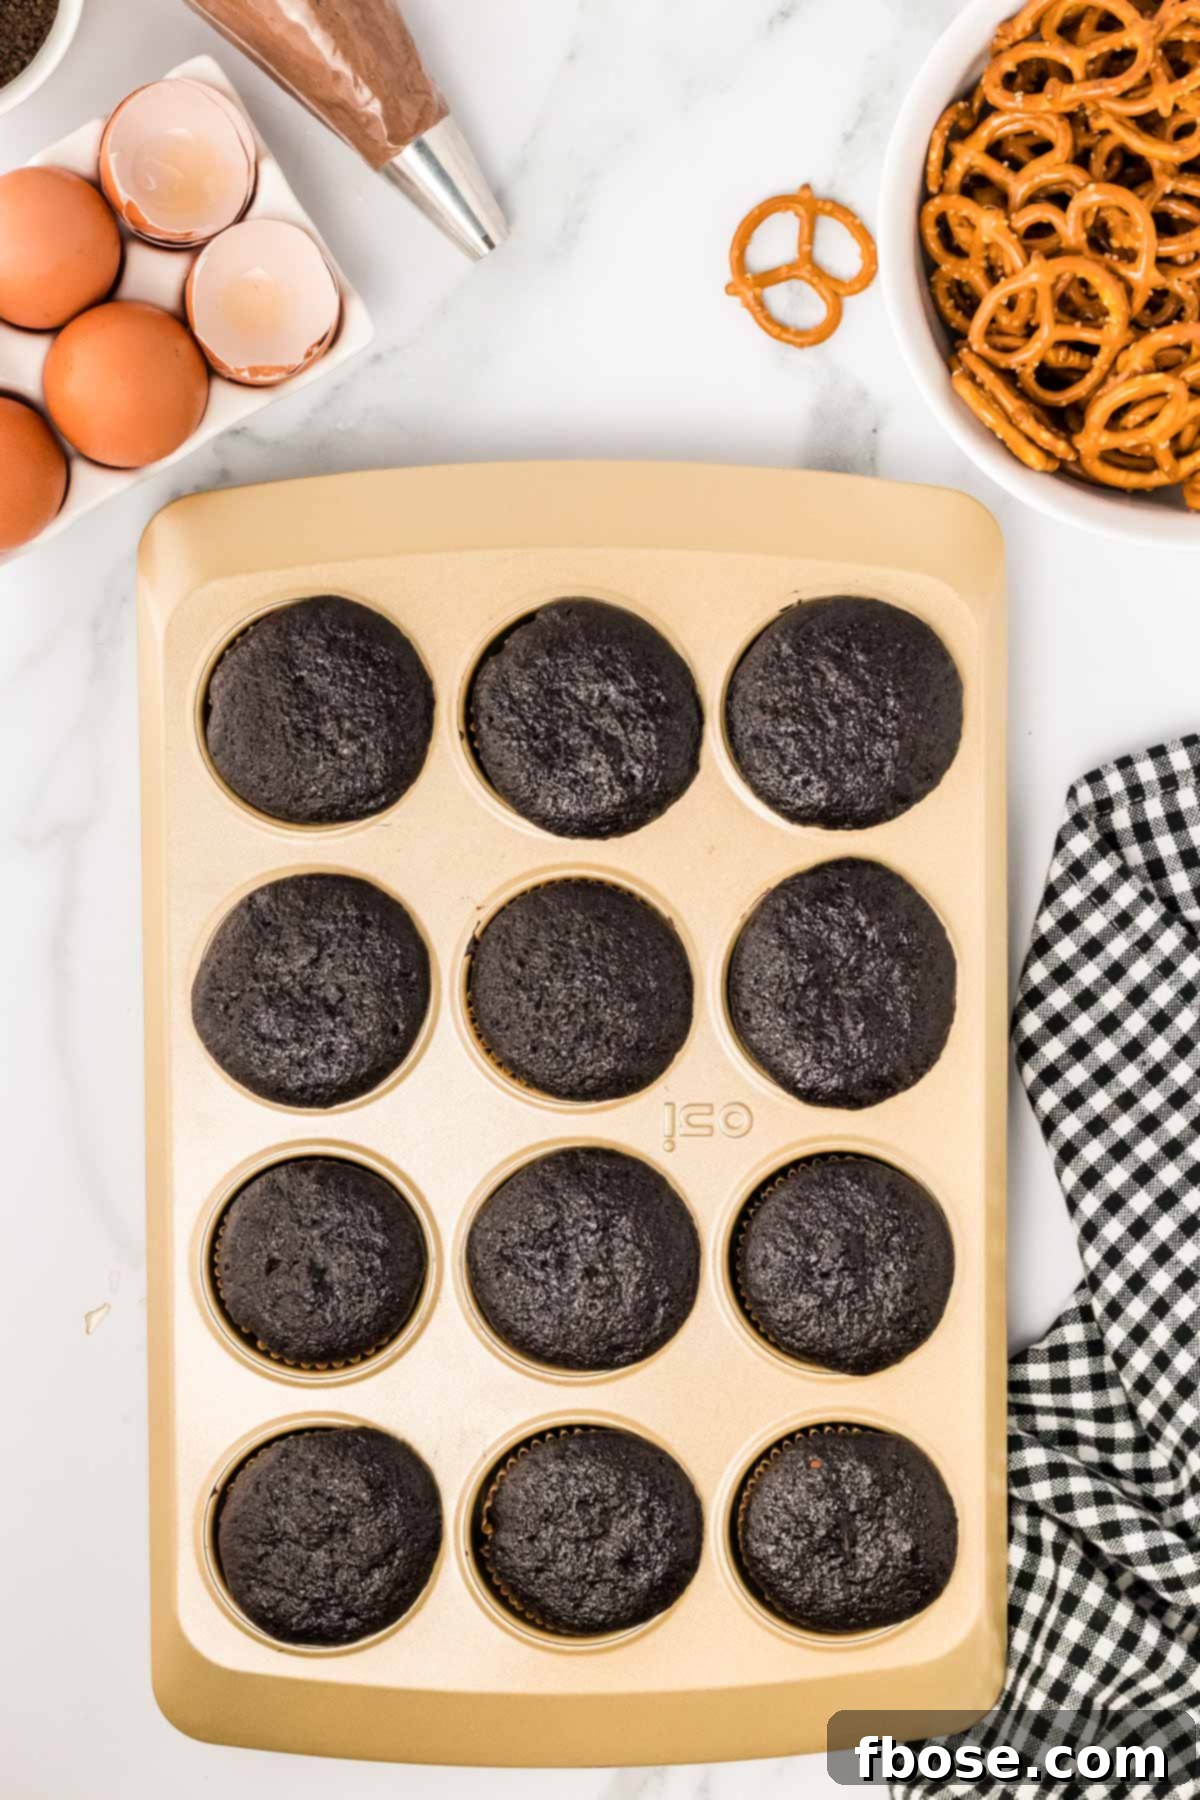
- Fill and Bake: Carefully spoon or pour the smooth batter into each prepared cupcake liner. Fill each liner approximately two-thirds to three-quarters full. This amount ensures the cupcakes rise beautifully without overflowing, yielding around 24 perfect cupcakes.
- Bake to Perfection: Transfer the muffin tin to your preheated oven. Bake for approximately 18 to 20 minutes. To test for doneness, insert a toothpick or a cake tester into the center of a cupcake; it should come out clean, or with just a few moist crumbs clinging to it. The cupcakes should also spring back gently when lightly pressed.
- Cool Completely: Once baked, remove the cupcakes from the oven and let them cool in the muffin pan for about 5 minutes. This allows them to firm up slightly. Then, gently transfer them to a wire rack to cool completely. It’s crucial that the cupcakes are entirely cool before frosting and decorating, otherwise, your frosting will melt and slide off.
Bringing Your Skeletons to Life: How To Assemble Spooky Cupcakes
The real magic happens during the assembly, where simple ingredients transform into charmingly spooky skeleton figures. This is the most creative and fun part of the process!
- Prepare Your Edible Bones: While your freshly baked cupcakes are cooling, it’s the perfect time to get started on the skeleton decorations. Begin by melting your white chocolate wafers. Place them in a small, microwave-safe bowl and heat in 30-second intervals, stirring thoroughly after each interval, until the chocolate is completely smooth and fluid. This typically takes about 2-3 minutes.
- Dip the Pretzels: Using a fork or a specialized candy dipper, carefully dip each classic pretzel into the melted white chocolate. Ensure the pretzels are fully coated. Lift them out, allowing any excess chocolate to drip off for a clean finish. Transfer the coated pretzels onto a sheet of parchment paper or wax paper. Allow them to set completely at room temperature or chill them briefly in the refrigerator to speed up the process. You’ll need about 3 pretzels per cupcake for the ribcage.
- Create the Marshmallow Skulls: Take your large marshmallows, which will serve as the skeleton heads. Using a black food-grade edible marker, meticulously draw a spooky or friendly skeleton face on one side or the top of each large marshmallow. You can draw hollow eyes, a triangular nose, and a stitched mouth for a classic skeleton look.
- Assemble the Marshmallow Spine: Now, for the “neck” and head assembly. Thread one small marshmallow onto a wooden skewer, pushing it down just enough to create a base. Then, carefully place a large, drawn-on marshmallow on top of the small one. Gently push the skewer into the large marshmallow, but be cautious not to poke it completely through. Aim for about three-quarters of the way through, securing the head without piercing the top.
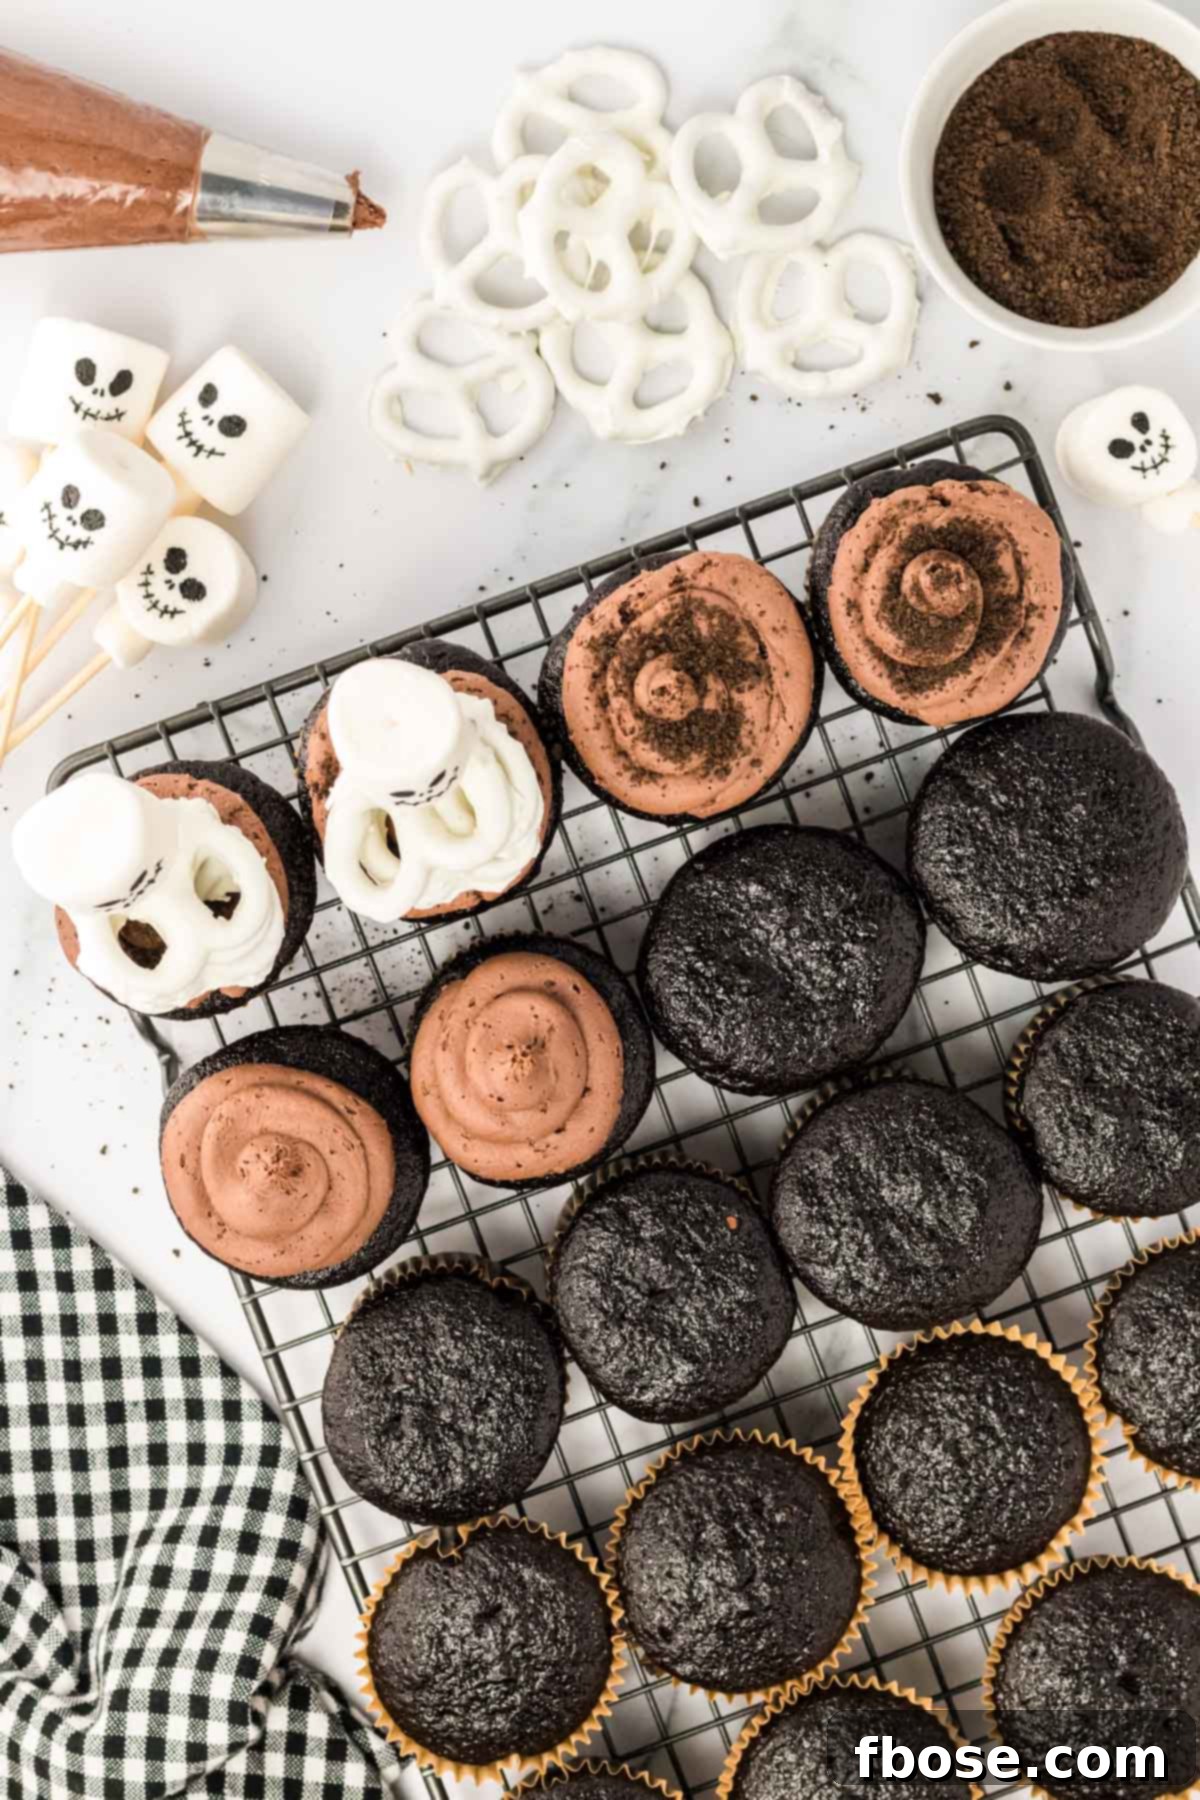
- Frost the Cupcakes: Once your cupcakes are completely cooled, it’s time to add the frosting. Prepare your chocolate frosting according to your chosen recipe (homemade or store-bought). You can pipe it onto the cupcakes using a piping bag with your favorite tip for an elegant swirl, or simply spread it generously with a butter knife or small offset spatula. Aim for a generous layer as this will be our “ground.”
- Add the Graveyard Effect: After frosting, sprinkle a generous amount of chocolate cookie crumbs over the icing. This delightful addition creates the illusion of dirt or freshly tilled ground, perfect for our skeletons to emerge from. Press them gently into the frosting to ensure they adhere.
- Construct the Ribcage: Take three of your white chocolate-dipped pretzels. Stack them carefully on top of each other, creating a bone-like structure that mimics a ribcage. Now, thread the skewer (with the marshmallows already on it) through an opening in the stacked pretzels. This ingenious step gives your skeleton its distinct ribcage.
- Final Placement & Enjoyment: Gently insert the bottom of each assembled skeleton skewer into the center of each frosted cupcake. Position them upright, ensuring they are stable. And there you have it! Your delightful and spooky Halloween Skeleton Cupcakes are ready to be admired and, most importantly, enjoyed by all your eager guests.
Rebecca’s Expert Baking Tips for Spooktacular Success
Achieving bakery-quality results at home is easier than you think with these helpful tips:
- Frosting Convenience: While homemade chocolate frosting is divine, don’t hesitate to use store-bought frosting for a quick and easy solution. Two standard tubs of your favorite chocolate frosting should be sufficient for a batch of 24 cupcakes. This significantly cuts down on preparation time without sacrificing flavor, especially if you opt for a high-quality brand.
- Pretzel Shortcut: If dipping pretzels feels like an extra step you’d rather skip, look for pre-made white chocolate-covered pretzels. Brands like “White Chocolate Flips” offer a fantastic shortcut. Just make sure they are intact and suitable for threading onto skewers to form the skeleton ribs.
- Edible Marker Choice: For drawing the intricate skeleton faces on your marshmallows, I highly recommend using a Wilton Food Safe Writer in Black. These markers are designed for edible surfaces, provide a crisp line, and are readily available at most craft or baking supply stores. They make the decorating process incredibly simple and precise.
- Effortless Icing Techniques: The easiest way to achieve beautifully frosted cupcakes is by using a piping bag. If you’re new to piping, a simple round tip or star tip works wonders. For those without piping bags, a butter knife, a small offset spatula, or even a sandwich spreader can help you create a smooth, even layer of frosting. Don’t worry about perfection; rustic charm adds to the homemade appeal!
- DIY Piping Bag: No piping bag on hand? No problem! Simply transfer your frosting into a sturdy Ziploc bag. Push the frosting towards one corner, snip off a small piece of that corner with scissors, and voilà – you have an instant piping bag. For more control, you can even gently push a piping tip through the hole before filling the bag, securing it with tape if needed.
- Transform into a Cake: If cupcakes aren’t your preference, this recipe can easily be adapted into a show-stopping Halloween cake! Simply pour the cupcake batter into a greased 9×13-inch cake pan. For easy release, I swear by a homemade pan release like cake goop. Bake the cake until a toothpick inserted into the center comes out clean or with a few soft crumbs, then cool completely before frosting and arranging your skeleton decorations. This creates an impressive centerpiece for any party.
Creative Swaps & Spooky Variations for Your Skeleton Cupcakes
One of the joys of baking is the freedom to customize. Here are some fantastic substitutions and variations to make these Halloween Skeleton Cupcakes uniquely yours:
- Buttermilk Alternatives: If you find yourself without store-bought buttermilk, don’t fret! A homemade buttermilk substitute is incredibly easy to whip up. All you need are two simple ingredients – milk and a splash of lemon juice or vinegar – and about ten minutes for it to curdle. This ensures your cupcakes maintain their signature moist and tender crumb.
- Chocolate Cookie Options: While crushed-up Oreos are my go-to for their classic flavor and dark “dirt” appearance, feel free to experiment with your favorite chocolate cookies. You could also use crushed chocolate graham crackers for a slightly different texture and taste, or even chocolate wafer cookies.
- White Chocolate Swaps: For coating the pretzels, white chocolate melting wafers are ideal for their smooth melt and firm set. However, white candy melts or almond bark are excellent alternatives. These are designed to melt easily and harden quickly, making them perfect for dipping.
- Edible Marker Creativity: If a black food-grade edible marker isn’t readily available, there are other creative options. You can use a toothpick dipped in a small amount of black food coloring gel (just be careful, as gel can be runnier). Alternatively, you could use a small brush and edible black paint, though this might require a steadier hand.
- Skewer Flexibility: The length of your skewers is quite flexible; just about any length will work. You might need to cut longer skewers down to size using kitchen shears to ensure they fit proportionately with your cupcakes. Lollipop sticks are also a fantastic alternative to skewers, offering a slightly less sharp option, which can be great if young children are helping with assembly. However, the sharp end of traditional skewers does undeniably make threading the marshmallows and pretzels much easier.
- Decorate with Sprinkles: Add a festive touch by sprinkling some Halloween-themed sprinkles (ghosts, bats, pumpkins) onto the chocolate cookie crumb “dirt” for extra flair and color.
- Colored Skeletons: Feeling adventurous? Try coloring your white chocolate with oil-based food coloring before dipping the pretzels. Imagine green or orange skeleton bones for a fun, vibrant twist!
- Different Frosting Flavors: While chocolate frosting complements the skeleton theme perfectly, don’t be afraid to experiment with other flavors like vanilla buttercream or even a contrasting orange-colored frosting for an added pop of Halloween color.
Storing Your Spooky Delights: How To Store Halloween Skeleton Cupcakes
Proper storage ensures your Halloween Skeleton Cupcakes remain fresh and delicious for as long as possible, allowing you to enjoy them long after the party is over.
To store assembled Halloween Skeleton Cupcakes, place them carefully in a tall, airtight container. The “tall” aspect is important to prevent the marshmallow skeletons from getting squashed or damaged. Keep this container at room temperature, away from direct sunlight or heat, where they will remain fresh and delightful for up to 3 days. The frosting and cake base will stay moist, and the pretzel bones will retain their crispness.
For longer storage, or if you prefer to prepare components in advance, you can make the homemade chocolate cupcakes ahead of time and freeze them. Once the cupcakes are baked and completely cooled, frost them as usual (or you can freeze them unfrosted). Then, transfer the frosted (or unfrosted) cupcakes to an airtight container. Arrange them in a single layer if possible, or place parchment paper between layers to prevent sticking. Store these cupcakes in the freezer for up to 2 months. This method is ideal for the cake and frosting.
However, it’s important to note that while the cupcakes and frosting freeze well, the marshmallows, particularly those with edible marker faces, do not fare as well in the freezer. The edible marker tends to bleed and run when the marshmallows thaw, compromising their spooky appearance. Therefore, I highly recommend assembling the marshmallow and pretzel skeletons fresh on the day you plan to serve the cupcakes.
When you’re ready to enjoy your frozen cupcakes, simply remove them from the freezer and thaw them at room temperature for a few hours. Once fully thawed, you can then proceed with assembling the fresh skeleton elements using your chocolate-covered pretzels and marshmallows, ensuring a perfect presentation every time.
More Spooky & Sweet Halloween Recipes:
If you’re planning an epic Halloween feast or just love to bake for the season, check out these other fantastic recipes:
- Black Cat Cupcakes – Rich, chocolaty cupcakes whimsically decorated with an adorable edible cat face! Perfect for feline lovers.
- Easy Halloween Dirt Cake – A no-bake, festive dessert that’s incredibly simple to make and always a crowd-pleaser, complete with gummy worms!
- Mummy Cupcakes – An incredibly easy Halloween treat that comes together quickly, featuring adorable edible mummy wraps.
- Halloween Cookies & Cream Cookie Bars – Loaded with crushed Oreos and festive M&Ms, these bars are a delightful mix of chewy and crunchy textures.
- Witch Cupcakes – Fun and colorful cupcakes that offer a fantastic opportunity for kids to get creative with decorating, featuring a melted witch hat.
Did You Make This Recipe?
If you’ve tried this recipe, please leave a review in the comments below. I love hearing from you! Don’t forget to tag me – @sugarandsoulco – on Instagram and Pinterest with your photos, or join our Sugar & Soul Show-offs Community and share them there.
TikTok
Halloween Skeleton Cupcakes
Equipment
- Cupcake pan
- 24 Cupcake liners
- Large mixing bowl or stand mixer
- 24 wooden skewers
- Small microwave-safe bowl
- Fork or candy dipper
- Parchment paper
Ingredients
- 1½ cups all-purpose flour (200g)
- 1½ cups granulated sugar (295g)
- ¾ cup unsweetened cocoa powder (80g)
- 1½ teaspoons baking soda
- ¾ teaspoon baking powder
- ¾ teaspoon salt
- 2 large eggs, room temperature
- ¾ cup buttermilk, room temperature
- ¾ cup prepared hot coffee
- ¼ cup vegetable oil
- 1 teaspoon vanilla extract
- 12 ounces white chocolate melting wafers (340g)
- 72 tiny twist pretzels
- Black food-grade edible marker
- 24 large marshmallows (147g)
- 24 small marshmallows (14g)
- 1 batch Chocolate Cream Cheese Frosting (about 4 cups)
- ⅓ cup chocolate cookie crumbs (47g)
Instructions
-
Preheat the oven to 325°F (160°C) and line the cupcake pan with cupcake liners. Set aside.
-
In a large bowl or stand mixer, whisk together the 1½ cups all-purpose flour, 1½ cups granulated sugar, ¾ cup unsweetened cocoa powder, 1½ teaspoons baking soda, ¾ teaspoon baking powder, and ¾ teaspoon salt on low speed until fully combined, about 1 minute.
-
Add in 2 large eggs, ¾ cup buttermilk, ¾ cup prepared hot coffee, ¼ cup vegetable oil, and 1 teaspoon vanilla extract. Beat at medium speed until the mixture is smooth.
-
Fill each cupcake liner about ¾ of the way full. You should be able to get 24 cupcakes.
-
Bake for 18 to 20 minutes or until a toothpick or cake tester inserted into the center comes out clean and the cupcakes spring back slightly when pressed. Cool in the pan for 5 minutes before moving the cupcakes to a cooling rack to cool completely.
-
While the cupcakes cool, prepare the skeletons by adding 12 ounces white chocolate melting wafers to a small microwave-safe bowl. Melt at 30-second intervals, stirring between each one, until the chocolate is smooth, about 5 minutes.
-
Using a fork or a candy dipper, dip the 72 tiny twist pretzels into the white chocolate, completely covering them. Allow the excess chocolate to drip off the pretzel before transferring it to a sheet of parchment paper to set completely.
-
Using the black food-grade edible marker, draw a skeleton face on the side or top of each of the 24 large marshmallows. Take one of the 24 small marshmallows and thread it onto the skewer, leaving enough room to place the large marshmallow on top. You don’t want to poke the skewer through the larger marshmallow; you’ll want to go about three-quarters of the way through.
-
Prepare the chocolate frosting according to recipe directions. I recommend my 1 batch Chocolate Cream Cheese Frosting, but any chocolate frosting will work.
-
Once the cupcakes are cooled and the white chocolate has set, it’s time to assemble your cupcakes. Pipe the chocolate frosting on the tops of the cupcakes. Sprinkle the ⅓ cup chocolate cookie crumbs over top. This gives the illusion of dirt or the ground. Stack three of the chocolate pretzels on top of each other and thread the skewer through an opening of the pretzels. This will give the “ribs” to our skeleton. Top each cupcake with the skeleton skewers.
Notes
- Nutritional information is an estimate that does not include frosting.
- Two tubs of store-bought frosting may be used in place of homemade for convenience.
- White Chocolate Flips pretzels (pre-made) may be used instead of making them at home to save time.
- Store leftovers, covered, in a tall airtight container on the counter for up to 3 days.
- You can freeze the baked cupcakes and the icing separately for up to 2 months. However, I wouldn’t suggest freezing the marshmallows, especially after drawing faces on them, as the edible marker will run when thawing. Freeze frosted cupcakes in an airtight container, then add fresh marshmallow skeletons after thawing.
- The pretzels must be intact to thread through the skewers for the skeleton ribcage.
- I used a Wilton Food Safe Writer in Black for the marshmallow faces due to its precision and food-safe nature.
Nutrition
Carbohydrates: 35g |
Protein: 3g |
Fat: 3g |
Saturated Fat: 2g |
Polyunsaturated Fat: 0.3g |
Monounsaturated Fat: 1g |
Trans Fat: 0.003g |
Cholesterol: 15mg |
Sodium: 214mg |
Potassium: 90mg |
Fiber: 1g |
Sugar: 22g |
Vitamin A: 35IU |
Vitamin C: 0.1mg |
Calcium: 23mg |
Iron: 1mg
Did You Make This Recipe?
Don’t forget to share it with me on Instagram @sugarandsoulco and follow on Tiktok @sugarandsoulco and Pinterest @sugarandsoulco for more!
Pin Recipe
Share Recipe