

Juicy Chicken 101 isn’t just a recipe; it’s a culinary revelation. This perfectly seasoned, incredibly easy-to-make dish consistently delivers BIG flavor and flawlessly cooked chicken breasts every single time. Whether you’re planning a weeknight dinner, prepping meals for the busy week ahead, or looking for a versatile protein to elevate your salads, this recipe is your new go-to. Best of all, it requires less than 30 minutes from start to finish, making it ideal for even the busiest schedules.
For more delicious chicken ideas, explore other crowd-pleasing favorites like our buttery Homemade Shake and Bake Chicken!
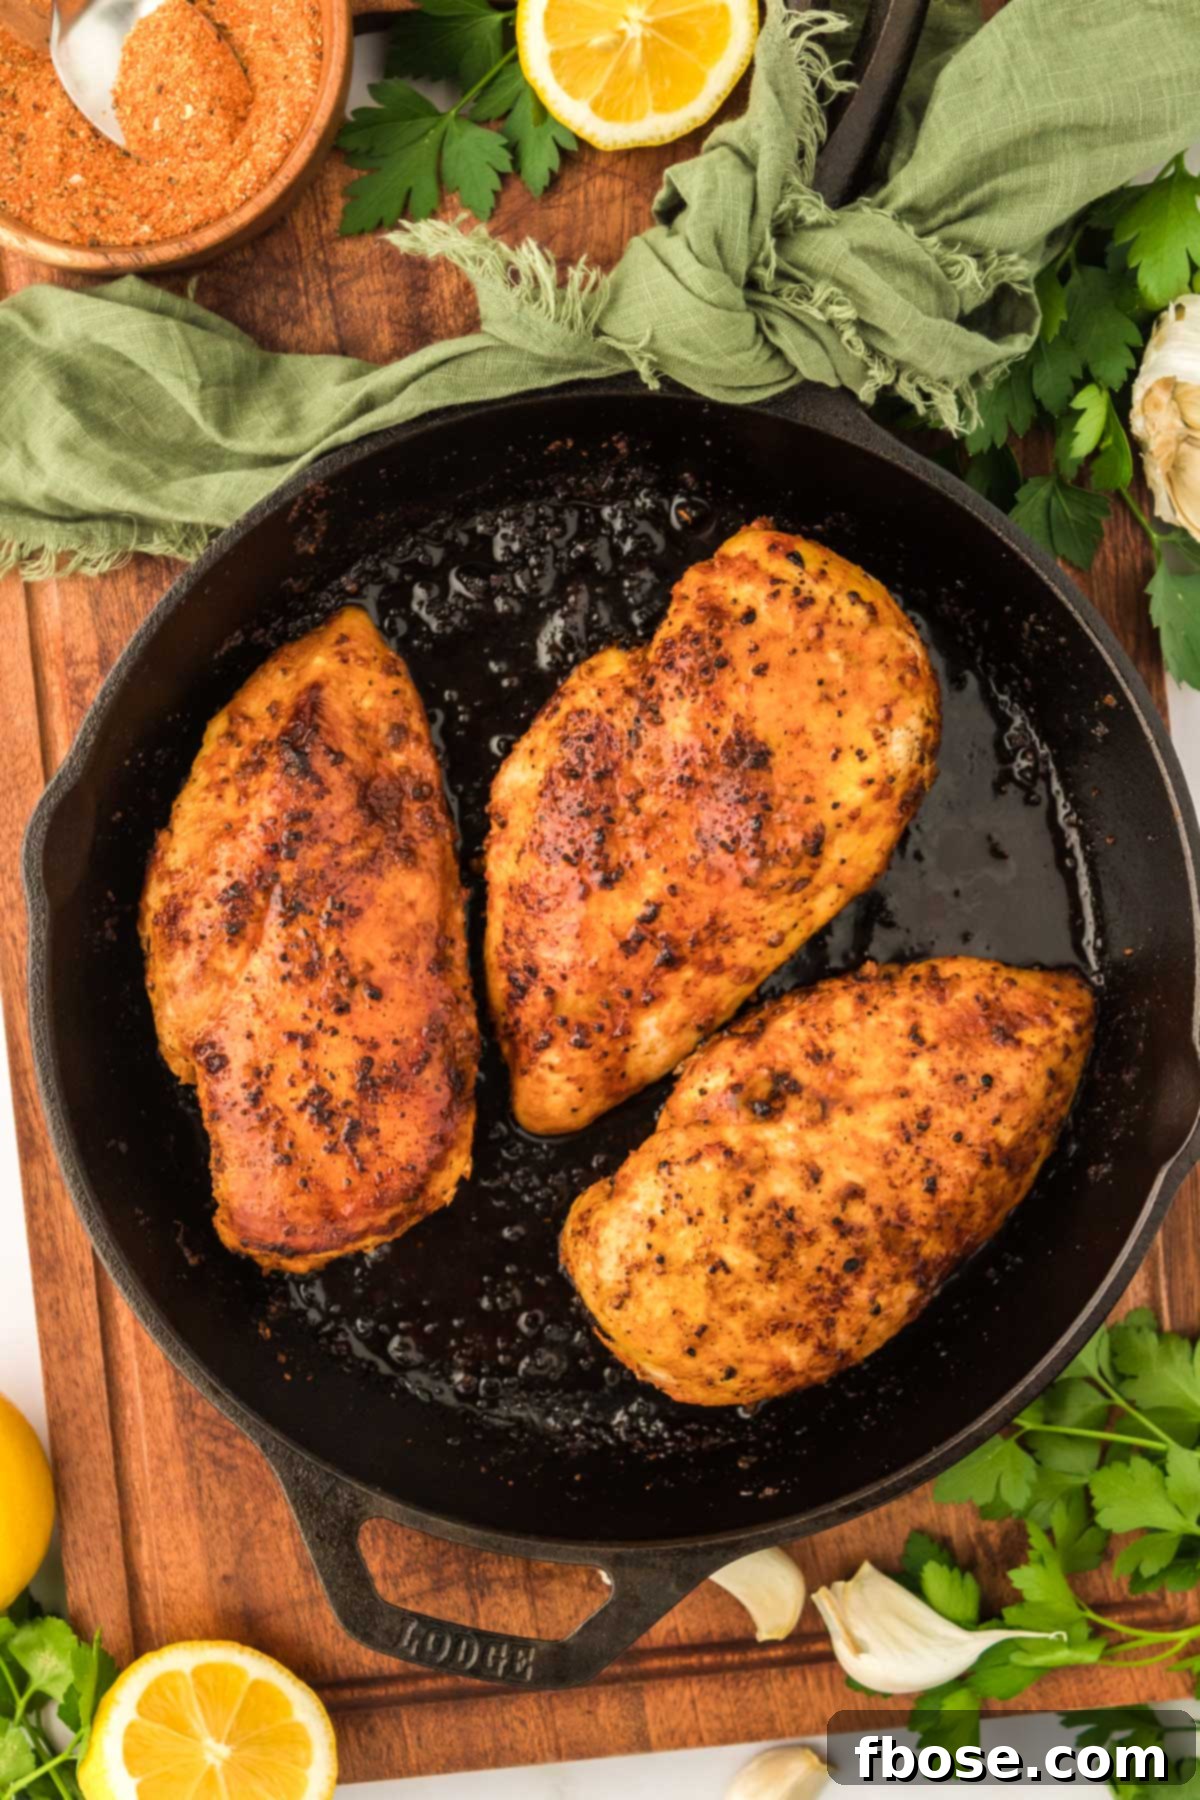
Juicy Chicken 101: The Ultimate Chicken Breast Recipe You’ll Ever Need!
Prepare to say “WOW!” just like my family did when they first tried this sensational Juicy Chicken 101 recipe! Ever since I stumbled upon the viral TikTok video for Juicy Chicken 101 last year, it has become a non-negotiable staple in our kitchen. I find myself making it at least twice a week, and for good reason!
Who can resist a recipe that guarantees perfectly juicy and utterly delicious chicken in under 30 minutes? Not only is it incredibly quick and easy to prepare, but its remarkable versatility also means it fits seamlessly into any meal plan. We love serving it straight out of the skillet with simple side dishes, or prepping it in advance to effortlessly toss onto vibrant salads, flavorful rice bowls, or even into wraps for a quick lunch. The possibilities are truly endless, making it a favorite for busy weeknights and meal prep alike.
The original inspiration for this fantastic dish comes from the talented @Sammypur on TikTok. When I first encountered the recipe, its simplicity was almost disarming. Could something so straightforward really be *that* good? My friends, I can wholeheartedly confirm: it is THAT good! The technique is revolutionary for anyone who’s struggled to cook moist chicken breasts, transforming them from often-dry protein into a succulent, flavorful centerpiece.
Unlocking the Secrets of Juicy Chicken 101: Taste and Texture Perfected
Discover what makes this chicken recipe truly stand out:
Taste: Each bite of this chicken is an explosion of perfectly balanced, seasoned flavor. We’re talking about a symphony of aromatic spices including savory garlic salt, rich paprika, zesty lemon pepper seasoning, and pungent garlic powder. These ingredients meld together to create a deep, enticing flavor profile that’s both comforting and exciting. The seasoning penetrates the meat, ensuring every morsel is infused with deliciousness, making bland chicken a thing of the past.
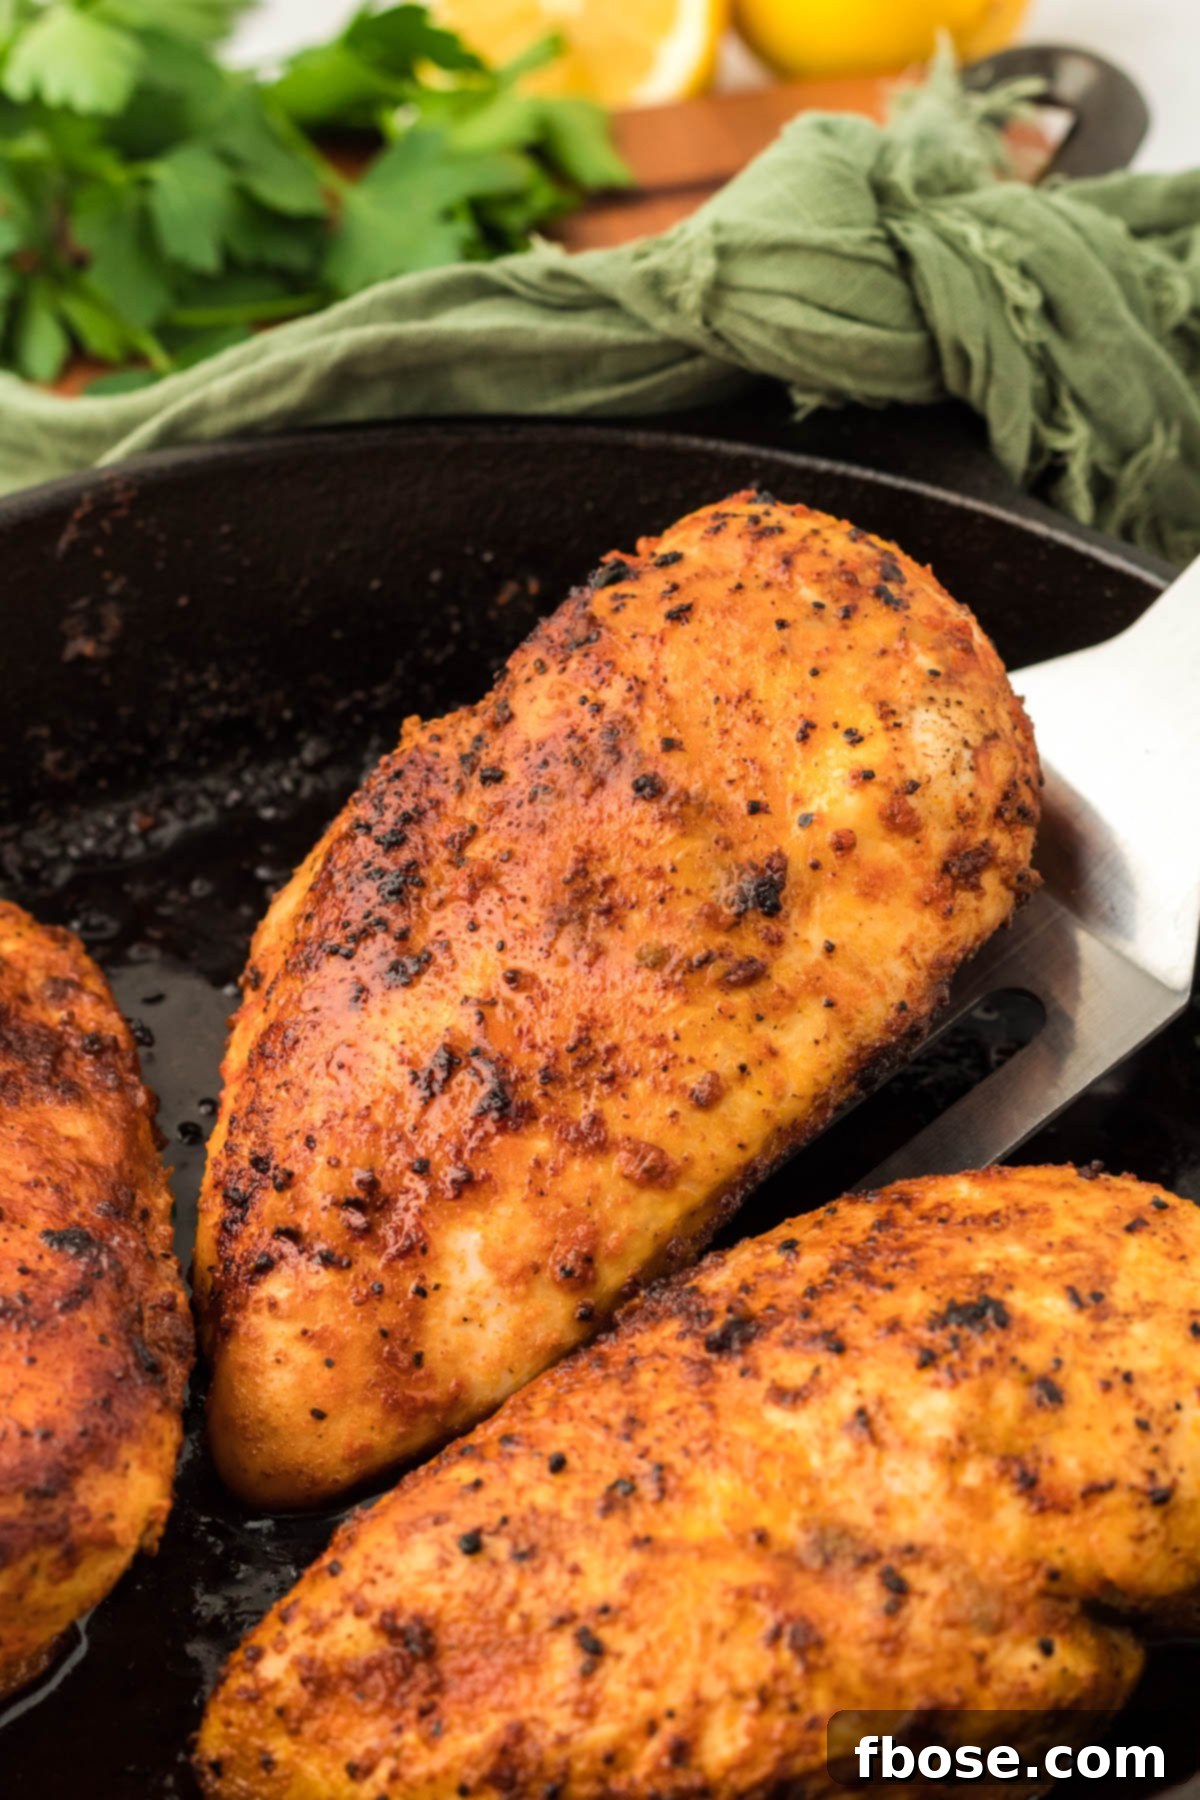
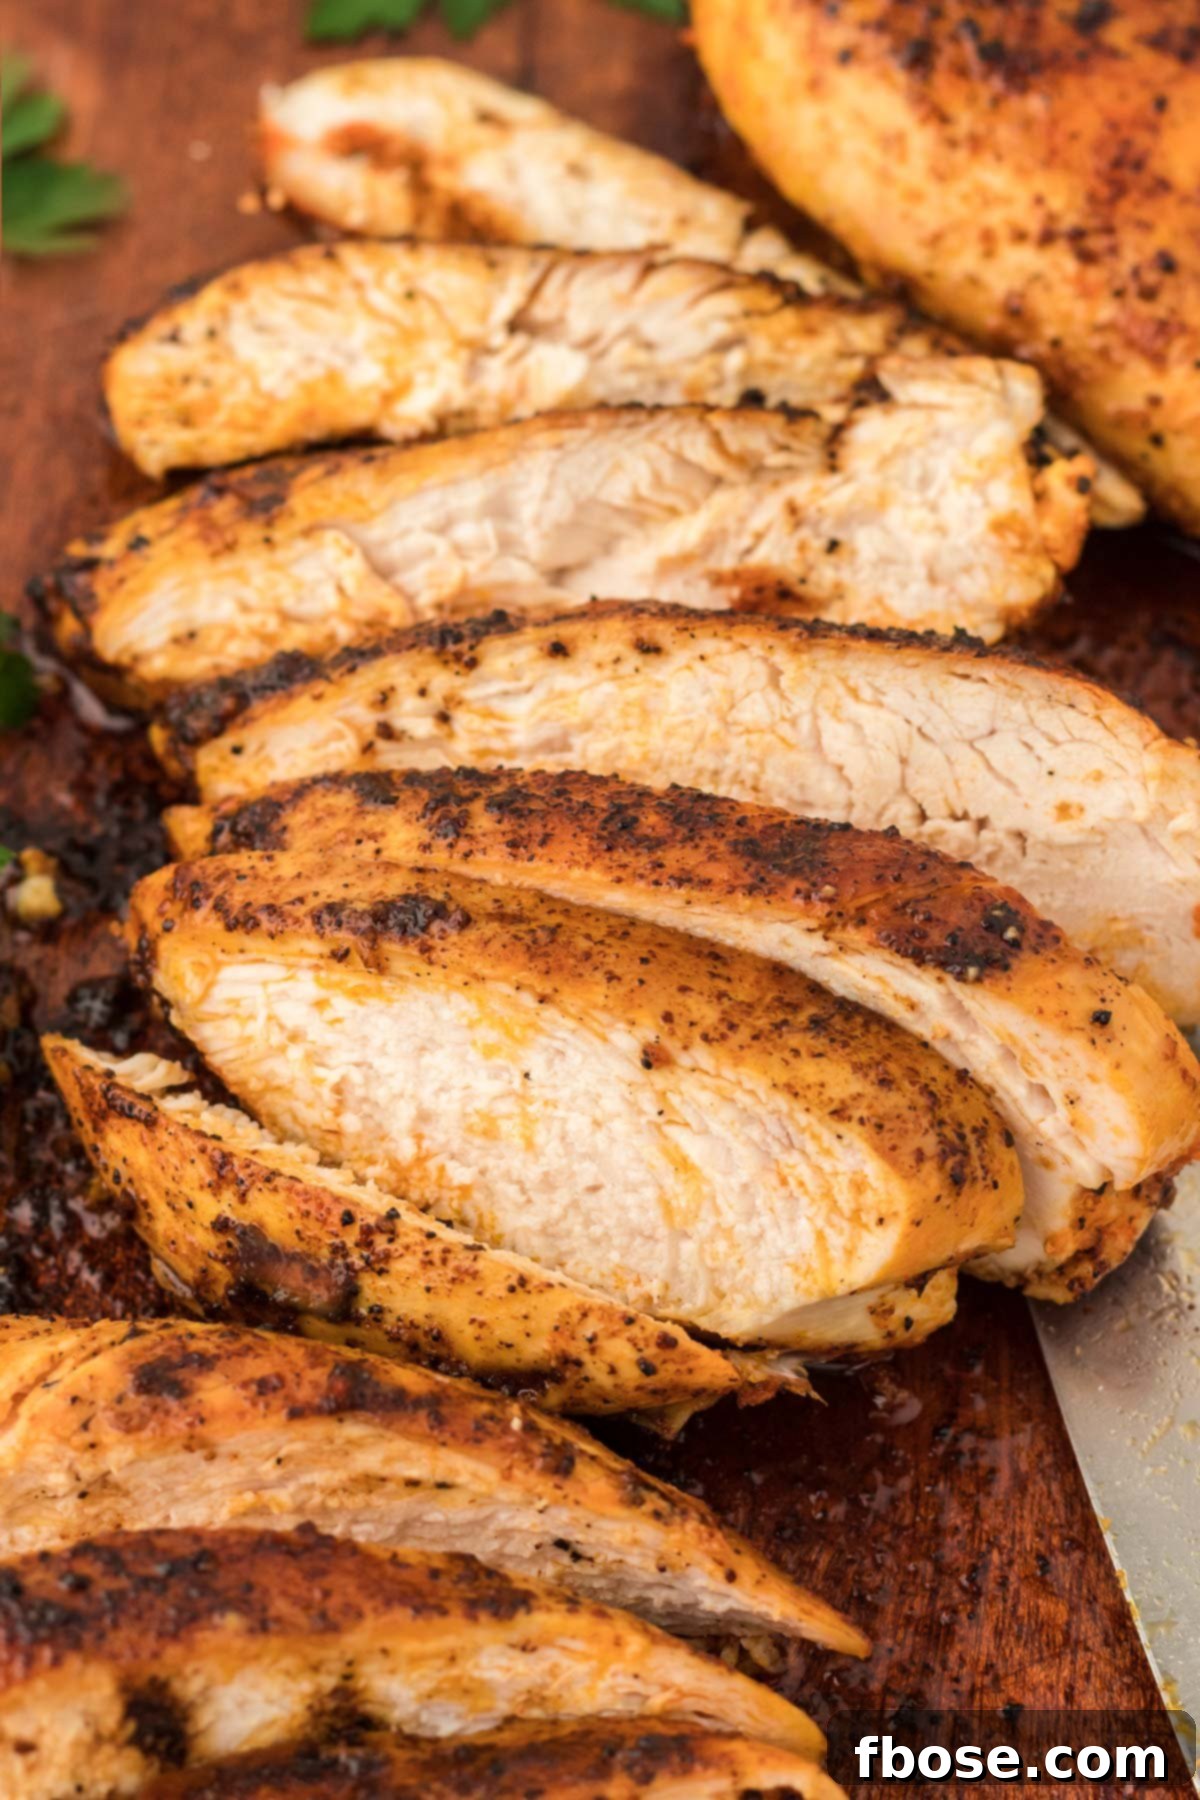
Texture: Prepare for a delightful contrast of textures. The exterior of the chicken boasts a beautiful, golden-brown crust achieved through expert searing. This satisfying crust gives way to an interior that is nothing short of perfection – moist, tender, and incredibly juicy. This isn’t just “not dry” chicken; it’s genuinely succulent chicken that practically melts in your mouth. This consistent, mouthwatering texture is what will have you, like me, adding this recipe to your weekly rotation.
The Culinary Magic Behind Unbelievably Juicy Chicken Breasts
The true genius behind Juicy Chicken 101 lies in its simple yet highly effective cooking method. Don’t let the term “secret” intimidate you; this technique is incredibly easy to master. Seriously, anyone, regardless of their cooking experience, can achieve phenomenal results with this chicken recipe!
The magic begins with searing the chicken breasts. This crucial initial step, performed in an oven-proof skillet over medium-high heat for approximately 4 to 5 minutes per side, is what creates that irresistible, deeply browned crust. This searing process isn’t just for color and flavor (hello, Maillard reaction!); it’s also key to locking in the natural moisture and rich seasoning of the chicken. By creating a barrier on the outside, it traps all the delicious juices within, ensuring the chicken remains incredibly moist as it finishes cooking in the oven.
After the initial sear, the chicken immediately transfers to the oven. This two-stage cooking ensures the chicken is cooked through without overcooking the exterior or drying out the interior. The high heat of the sear forms the crust and seals in flavor, while the oven provides a gentler, more even heat to finish the cooking process, allowing the internal temperature to reach perfection without compromising juiciness.
Since the succulent results are primarily dictated by this ingenious cooking method, you have immense freedom to customize the flavoring. While the recipe provides an excellent foundational seasoning blend, I personally love to be generous with my spices, often using much more than the suggested amounts to create a bolder, more vibrant taste. I encourage you to start with the recommended base, but then feel empowered to adjust and add more as you desire. Don’t hesitate to pile on the paprika for a deeper, appealing reddish hue and an even richer flavor profile.
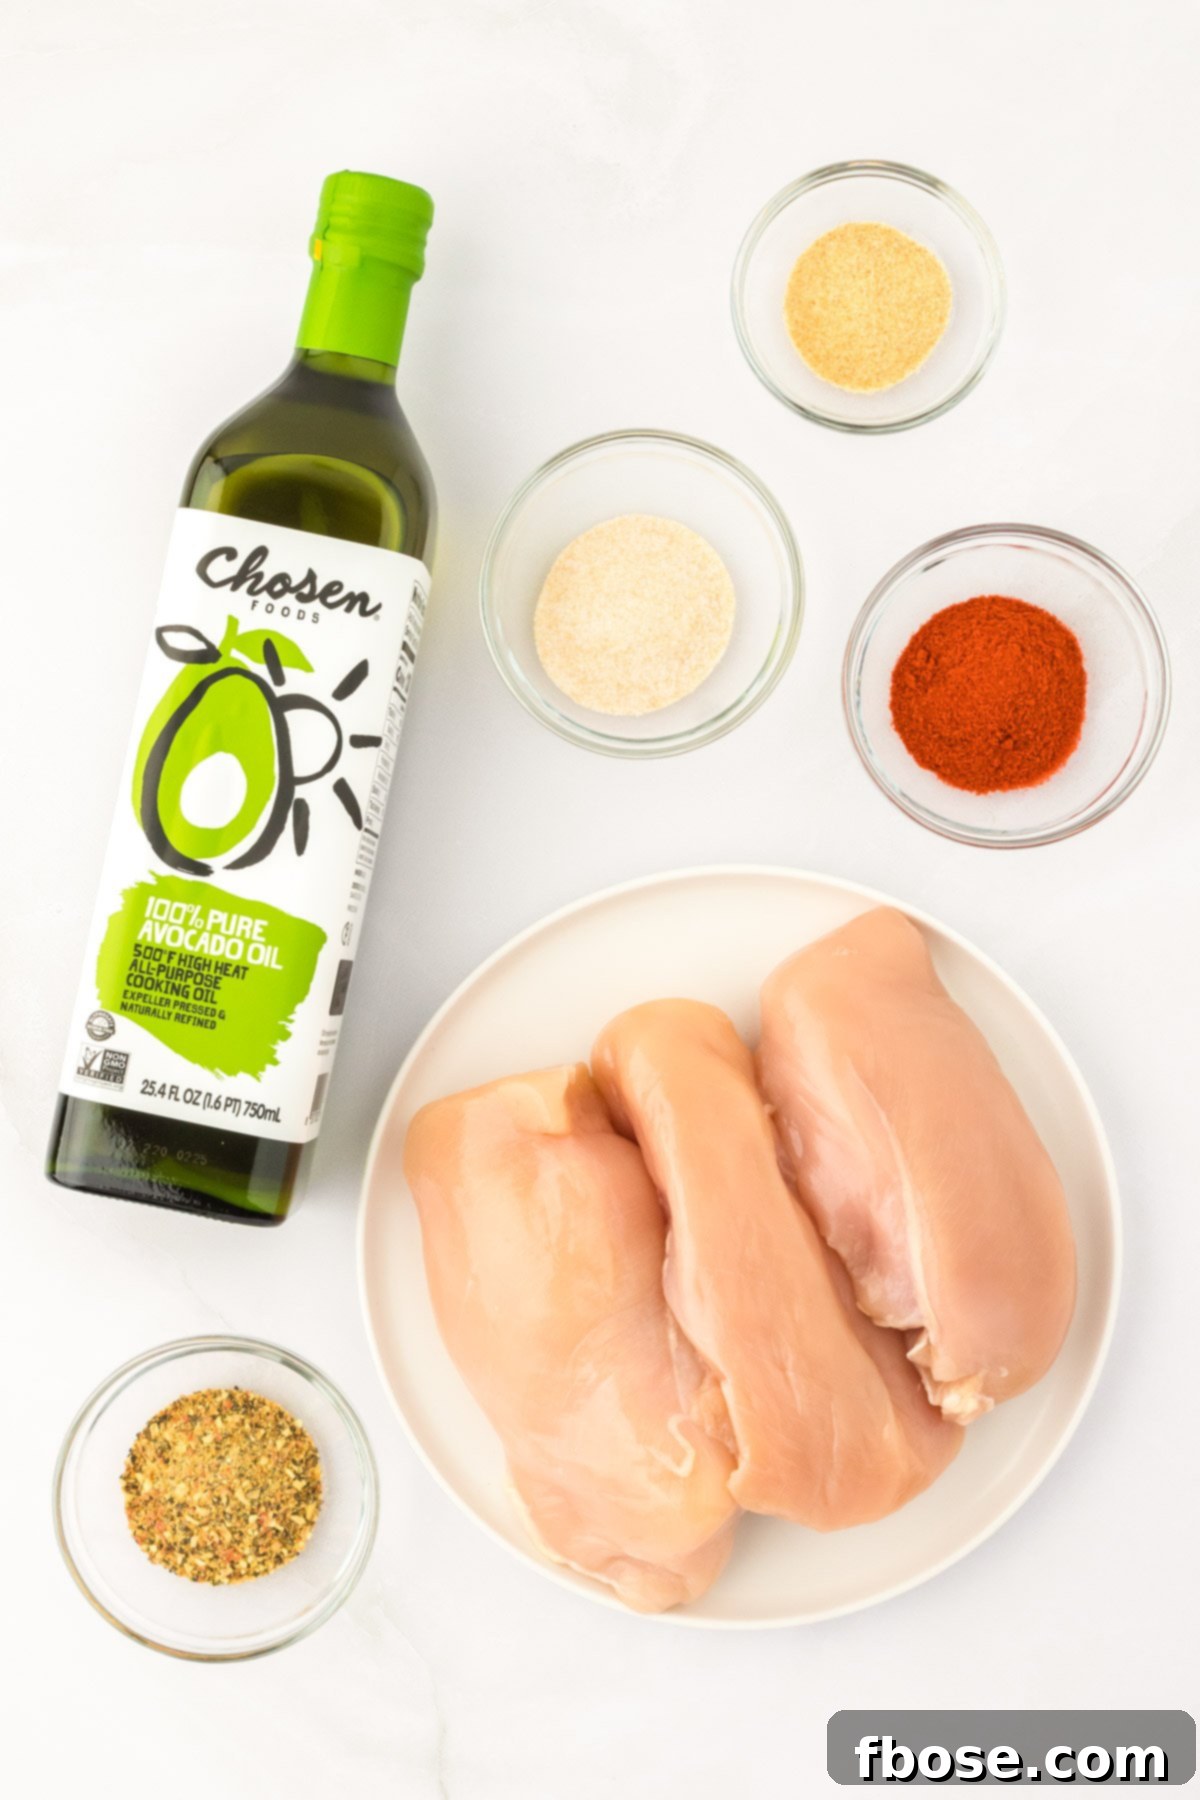
Essential Ingredients for Juicy Chicken 101
Gather these simple ingredients to create your next favorite meal:
- Boneless, skinless chicken breasts (fresh and high-quality for best results)
- Garlic salt (a fantastic flavor base)
- Paprika (adds depth of flavor and beautiful color)
- Lemon pepper seasoning (for a bright, zesty kick)
- Garlic powder (enhances the garlic flavor without adding moisture)
- Avocado oil (ideal for high-heat searing)
Step-by-Step Guide: Crafting Your Perfect Juicy Chicken 101
Follow these straightforward steps to achieve perfectly juicy chicken every time:
- **Preheat Oven:** Begin by preheating your oven to 400°F (200°C). This ensures the oven is at the correct temperature for immediate transfer, preventing any delay that could affect the chicken’s juiciness.
- **Prepare Chicken:** Thoroughly pat the boneless, skinless chicken breasts dry with paper towels. Removing excess moisture is crucial for achieving that desirable golden-brown crust during searing. In a small bowl, combine the garlic salt, paprika, lemon pepper seasoning, and garlic powder. Generously rub this spice mixture all over both sides of the chicken cutlets. Don’t be shy – a good coating of seasoning equals maximum flavor!
- **Sear on Stovetop:** Add 2 tablespoons of avocado oil to a large, oven-proof skillet (a cast iron skillet works wonderfully here) and heat it over medium-high heat until shimmering. Carefully place the seasoned chicken breasts into the hot skillet. Sear one side for 4 to 5 minutes, allowing a beautiful, deep brown crust to form. This initial sear is vital for flavor and moisture retention.
- **Finish in Oven:** Once the first side is perfectly seared, flip the chicken breasts to the unseared side. Immediately transfer the entire skillet directly into the preheated oven. There’s no need to sear the second side on the stovetop; the hot pan will continue to sear it in the oven, preventing overcooking.
- **Bake to Perfection:** Bake the chicken for 13 to 15 minutes, or until an internal temperature of 165°F (74°C) is reached when measured with a meat thermometer inserted into the thickest part of the breast. Cooking times may vary slightly depending on the thickness of your chicken breasts.
- **Rest Before Serving:** Once cooked, remove the skillet from the oven and let the chicken rest in the pan for a few minutes before slicing and serving. This resting period is crucial; it allows the juices to redistribute throughout the meat, resulting in incredibly moist and tender chicken.
Expert Tips for Your Juiciest Chicken
- **Achieve Even Thickness:** For the most consistent cooking results, try to select a package of chicken breasts that are similar in size. If your breasts vary significantly in thickness, use a kitchen mallet to gently pound the thicker parts until they are uniform. This ensures all pieces cook evenly at the same rate, preventing some from drying out while others are still cooking.
- **Master the Searing Technique:** The searing step is critical, but remember the golden rule: only sear *one side* of the chicken breasts on the stovetop. The moment you flip the chicken, immediately transfer the pan to the hot oven. The residual heat in the skillet will continue to sear the second side in the oven, developing a beautiful crust without overcooking. Searing both sides extensively on the stovetop before oven transfer will almost certainly lead to dry, tough chicken.
- **Confirm Internal Temperature:** Chicken breasts come in various sizes and thicknesses, so relying solely on cook time can be unreliable. Always use a reliable kitchen thermometer (this is an affiliate link to our favorite one) to check for doneness. Insert the thermometer into the thickest part of the largest breast. When it reads 165°F (74°C), your juicy chicken is perfectly cooked and safe to eat.
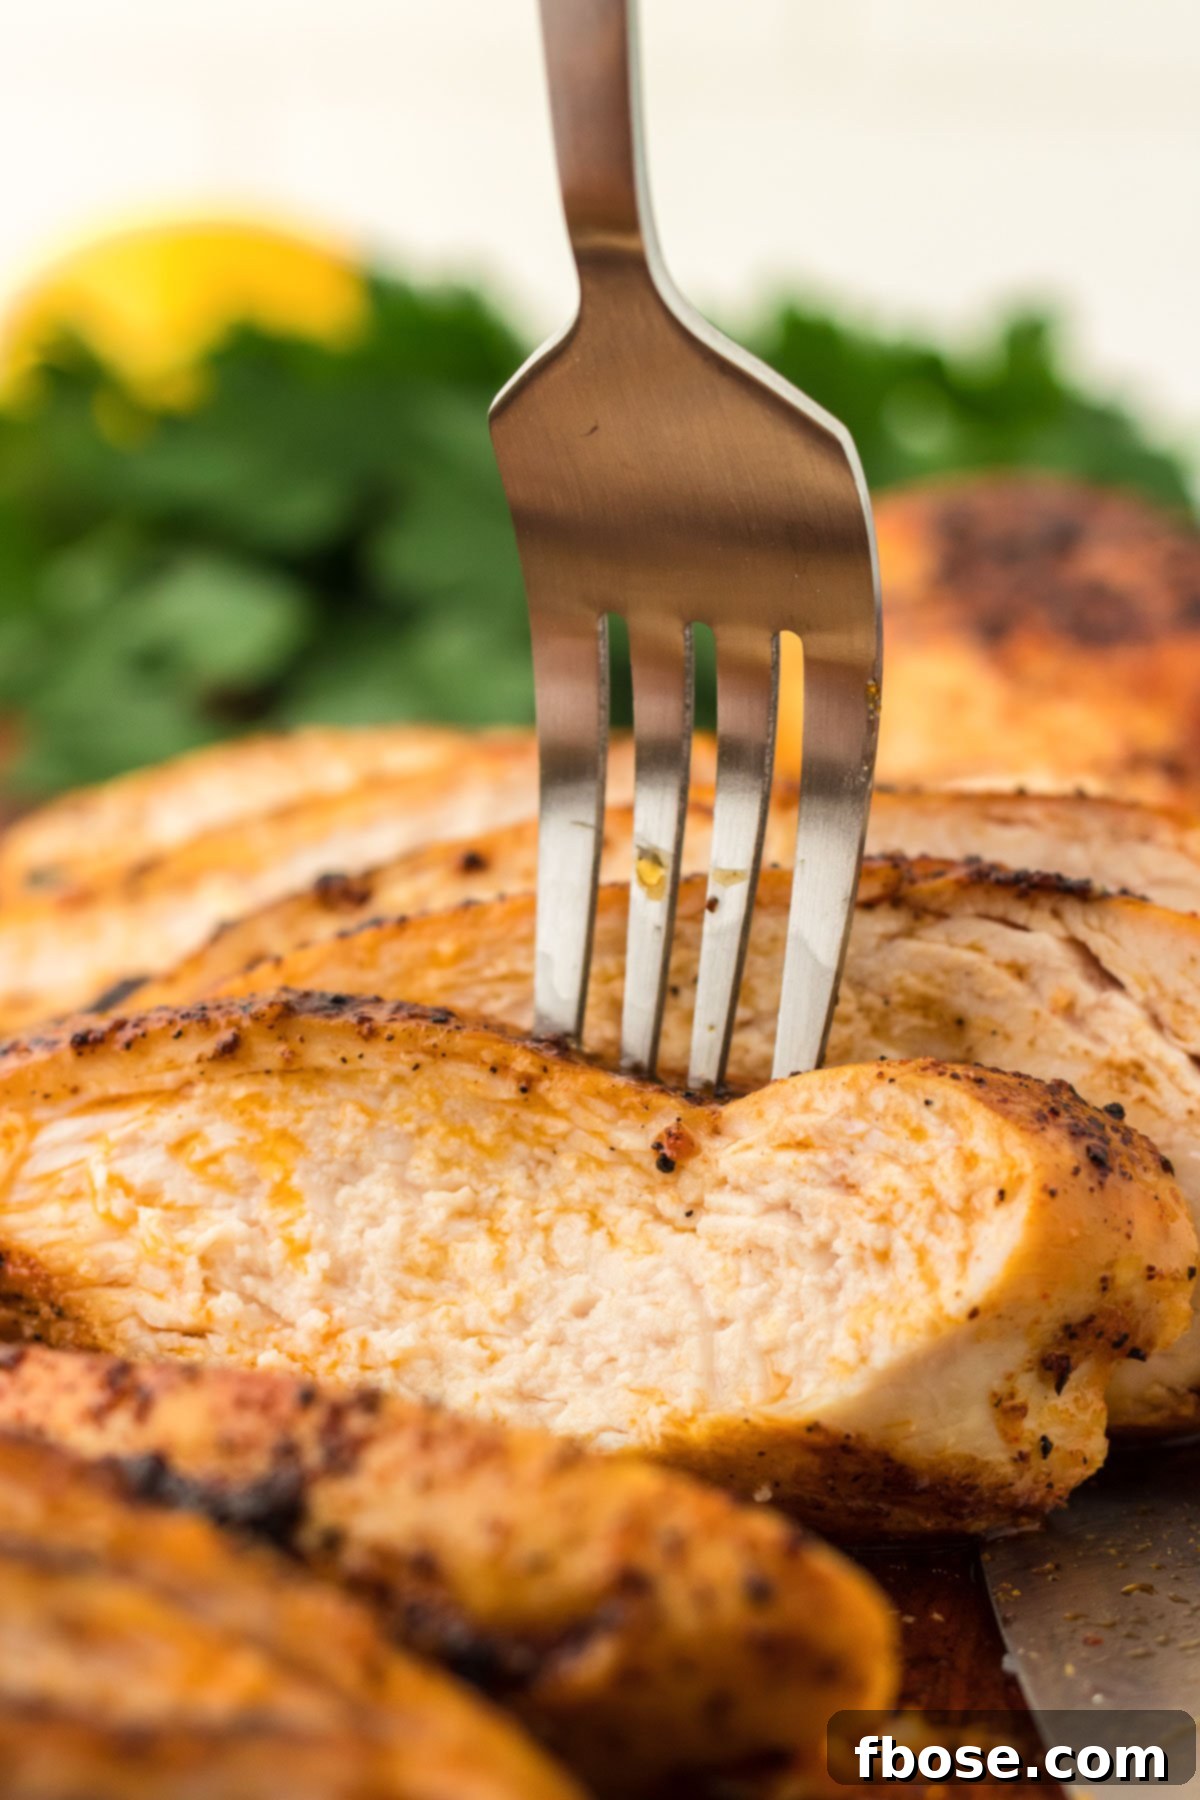
- **The Power of Resting:** It’s tempting to slice into that delicious chicken right away, but resist the urge! Allowing the chicken to rest for at least 5-10 minutes on the pan after cooking is a non-negotiable step for maximum juiciness. During this time, the muscle fibers relax, allowing the internal juices that have been pushed to the center to redistribute back throughout the meat. This results in incredibly moist, tender, and flavorful chicken every single time.
Creative Ways to Serve Your Versatile Juicy Chicken 101
Honestly, I often struggle not to simply devour this chicken all by itself straight out of the pan – it’s that good, which is why it’s a twice-a-week staple in our home! But beyond enjoying it on its own, its robust flavor and tender texture make it incredibly adaptable to a myriad of meals.
Most often, we serve Juicy Chicken 101 with classic sides like steamed green beans, roasted broccoli, creamy mashed potatoes, or fluffy rice. It pairs beautifully with virtually any vegetable or grain, making it an ideal choice for a balanced family dinner.
Its versatility shines even further when integrated into other dishes. We frequently use leftovers (if there are any!) to create delicious lunchtime wraps, packed with fresh greens and a zesty dressing. It’s also fantastic for meal prep, easily diced and added to weekly salad bowls or grain bowls for quick, healthy meals throughout the week. My kids absolutely adore it shredded and tucked into cheesy quesadillas, and it makes a surprisingly delicious, protein-packed topping for homemade pizzas. Think outside the box: try it in pasta dishes, sandwiches, tacos, or even as part of a comforting chicken and vegetable soup. Truly, anything you can imagine, this flavorful chicken will likely complement perfectly!
Chicken is a consistent go-to protein for our dinner time recipes, and this Juicy Chicken 101 is a testament to its delicious potential! If you’re looking for other chicken-centered meals that are guaranteed to satisfy hungry bellies and delight taste buds, be sure to check out our crispy Panko Breaded Chicken and the incredibly flavorful Grilled Huli Huli Chicken! Both offer unique flavors and textures that make weeknight meals exciting.
And for those nights when you’re craving restaurant-quality flavor but prefer to cook at home, try recreating some beloved dishes using your trusty package of chicken. This comforting UNO Rattlesnake Pasta or Applebee’s fan-favorite Fiesta Lime Chicken are fantastic copycat recipes that will certainly hit the spot and add variety to your meal rotation!
Storage Instructions for Your Juicy Chicken
To keep your Juicy Chicken fresh and delicious, allow it to cool completely before transferring it to an airtight container. Store it in the refrigerator, and you can enjoy the fantastic leftovers for up to 4 days. This makes it perfect for meal prepping!
Juicy Chicken 101 FAQs: Your Questions Answered
For optimal seasoning adhesion, try lightly rubbing the chicken breasts with a small amount of avocado oil before applying your spice mixture. The oil acts as a binder, helping the seasonings cling more effectively to the meat, ensuring maximum flavor in every bite. Even with this, you should still add oil to your pan for searing.
While olive oil can be used, avocado oil is highly recommended for this recipe due to its high smoke point, which is crucial for high-heat searing without burning. Olive oil, especially extra virgin, has a lower smoke point and may not perform as well under the medium-high heat required for searing. However, if olive oil is the only option you have on hand, it can be used in a pinch, just watch the heat carefully.
If your chicken breasts are particularly thick, consider pounding them to a more uniform thickness (about 1 inch) using a meat mallet or the bottom of a heavy pan. This ensures more even cooking and helps prevent the outside from drying out before the inside is cooked through. If you prefer not to pound them, simply adjust the baking time in the oven; thicker breasts may require a few extra minutes to reach 165°F (74°C) internal temperature.
Let’s Connect and Share Your Culinary Creations!
If you’ve tried this incredible Juicy Chicken 101 recipe, I would absolutely love to hear about your experience! Please let me know how you liked it in the comments below and don’t forget to leave a review. Your feedback and ratings are incredibly valuable and help other home cooks discover this amazing dish!
And of course, don’t forget to tag me – @sugarandsoulco – on Instagram and Pinterest with your beautiful photos of this juicy chicken. You can also join our vibrant Sugar & Soul Show-offs Community on Facebook and share them there, where you can connect with fellow food enthusiasts and even participate in our exciting recipe challenges! Happy cooking!
Juicy Chicken 101
Rebecca Hubbell
Dinner
American
5 minutes
25 minutes
30 minutes
Servings
4 people
Ingredients
- 1 pound boneless skinless chicken breasts about 2 breasts
- 1 teaspoon garlic salt sea salt or seasoned salt may also be used
- 1 teaspoon paprika
- 1 teaspoon lemon pepper seasoning
- ½ teaspoon garlic powder
- 2 tablespoons avocado oil
Instructions
-
Preheat the oven to 400°F.
-
Pat 1 pound boneless skinless chicken breasts dry with a paper towel. Combine 1 teaspoon garlic salt, 1 teaspoon paprika, 1 teaspoon lemon pepper seasoning, and ½ teaspoon garlic powder in a small prep bowl and then rub the seasoning mixture all over the chicken cutlets. Make sure to generously season the chicken, feel free to add more seasoning if desired.
-
Add 2 tablespoons avocado oil to a large oven-proof skillet (such as cast iron) and heat over medium-high heat. Add the chicken and sear one side for 4 to 5 minutes to get a nice crust before flipping the breasts and immediately transferring the pan to the oven to finish cooking.
-
Bake for 13 to 15 minutes or until the internal temperature reaches 165°F. The cook time may vary depending on the thickness of the breast.
-
Allow the chicken to rest for a few minutes before serving.
Notes
- Feel free to pound the breasts out for a more even cook.
- If desired, you can rub the chicken with avocado oil before seasoning, but you should still add some to the pan for searing.
- Using avocado oil is important because it’s meant for high heat, but olive oil is not.
- You want to transfer the pan immediately to the oven after flipping the breast because the pan will continue to sear the second side in the oven. You do not need to sear it on the stovetop, or it will overcook and dry out.
- If making with chicken cutlets, which we often do, you only need to sear for 3 to 4 minutes, then flip and bake for about 10 minutes. They will cook faster since they are thinner.
Nutrition
|
Carbohydrates: 1g
|
Protein: 24g
|
Fat: 10g
|
Saturated Fat: 1g
|
Polyunsaturated Fat: 1g
|
Monounsaturated Fat: 6g
|
Trans Fat: 0.01g
|
Cholesterol: 73mg
|
Sodium: 714mg
|
Potassium: 442mg
|
Fiber: 0.3g
|
Sugar: 0.1g
|
Vitamin A: 283IU
|
Vitamin C: 1mg
|
Calcium: 10mg
|
Iron: 1mg
Did You Make This Recipe?
Don’t forget to share it with me on Instagram @sugarandsoulco and follow on Tiktok @sugarandsoulco and Pinterest @sugarandsoulco for more delicious inspiration!
Pin Recipe
Share Recipe