

Discover the ultimate crowd-pleasing appetizer or weeknight dinner with these Irresistible Easy Taco Sliders! A brilliant alternative to traditional tacos, they are effortlessly simple to prepare, packed with incredible flavor, and even offer a fantastic way to utilize leftover taco meat. Get ready for a delicious twist on a classic favorite that will have everyone asking for more.
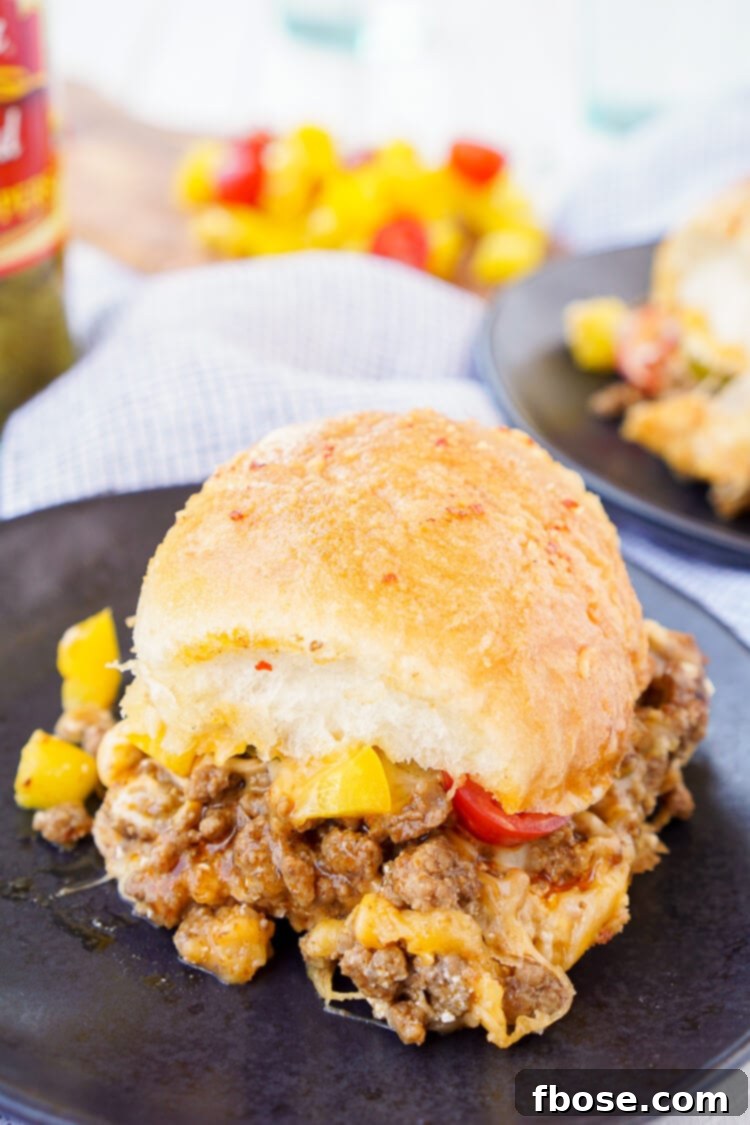
Easy Taco Sliders: Your New Go-To Recipe for Fun & Flavor!
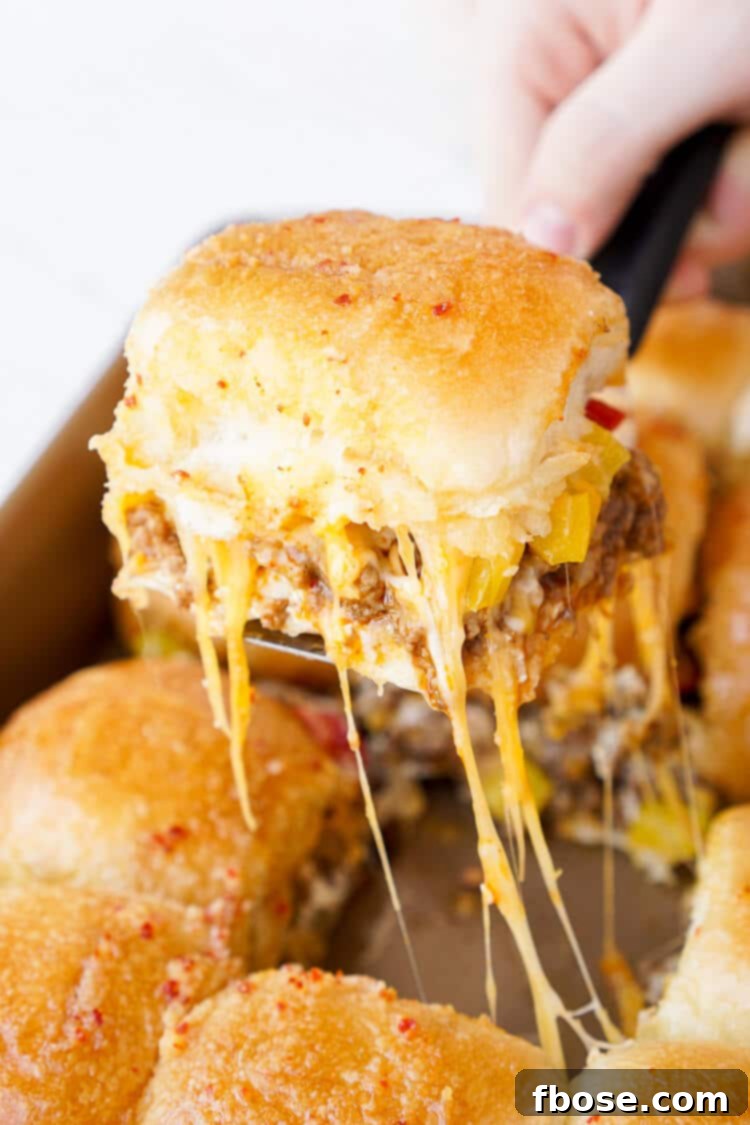
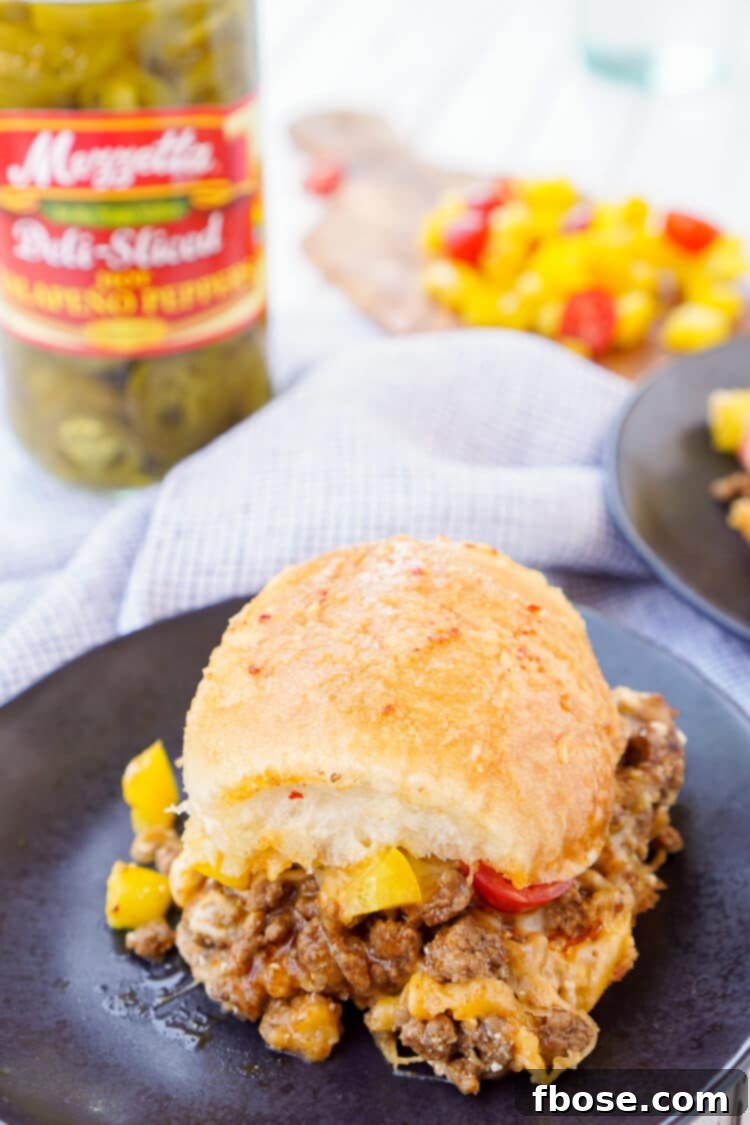
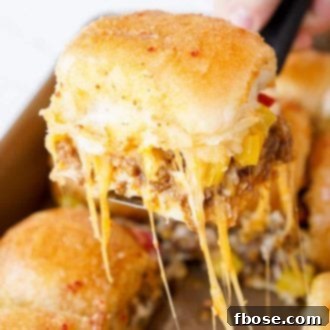
Imagine your favorite taco fillings – savory seasoned meat, gooey melted cheese, vibrant peppers, and fresh tomatoes – all nestled between soft, fluffy dinner rolls, then brushed with a garlic-butter topping and baked until golden. That, my friends, is the magic of these Easy Taco Sliders. When you pull them apart, the sight of that perfectly melted cheese stretching between each slider is pure culinary bliss! These aren’t just an alternative to traditional tacos; they’re an *upgrade* in convenience and comfort.
This recipe brings together the best of both worlds: the beloved flavors of tacos and the handheld, crowd-friendly nature of sliders. It’s a fun, comforting dish that’s incredibly versatile. Whether you’re planning a lively summer get-together, hosting a spirited game day party, or simply need a quick and satisfying weeknight meal for the family, these taco sliders fit the bill perfectly. Prepare to be showered with compliments and requests for the recipe, as your whole family will be absolutely begging for seconds!
The beauty of sliders lies in their simplicity and the ease with which they can be customized. Unlike individual tacos that can sometimes be messy to assemble and eat, these sliders are a grab-and-go delight. They bake together in one pan, allowing all the flavors to meld beautifully and the cheese to become perfectly gooey, creating a truly harmonious bite in every single serving. This makes them ideal for entertaining, as your guests can easily pick up a slider without the worry of fillings spilling out. Plus, they scale up effortlessly for larger gatherings, making party prep a breeze for any host looking for impressive yet simple dishes.
Why These Easy Taco Sliders Will Be Your Next Obsession
- Effortlessly Delicious: With minimal prep and a straightforward baking process, these sliders are designed for maximum flavor with minimum fuss. You’ll be amazed at how quickly such a delicious meal comes together.
- Crowd-Pleasing Powerhouse: Whether it’s kids or adults, everyone adores the familiar, comforting taste of tacos transformed into a fun, shareable slider format. They disappear fast at any gathering, making them a surefire hit for potlucks, parties, and family dinners.
- Weeknight Wonder: Short on time? These sliders can be prepped in advance and baked in about 10 minutes, making them a fantastic option for busy weeknights when you need a quick, satisfying, and flavorful meal.
- Leftover Lifesaver: Got some leftover taco meat from last night’s dinner? This recipe is your perfect solution, transforming it into a brand new, exciting meal that feels entirely fresh and innovative.
- Customization King: From mild to wild, you can tailor the spice level and add your favorite taco toppings directly into the sliders. The possibilities are truly endless, allowing you to cater to everyone’s preferences.
- Less Mess, More Fun: Forget the crumbling taco shells and overflowing fillings. These sliders keep everything neatly contained within soft bread, making them much cleaner and easier to eat, especially for little hands.
Ingredients You’ll Need for These Flavorful Taco Sliders
Creating these incredible taco sliders requires a handful of simple, readily available ingredients. The beauty lies in their combination, creating a symphony of flavors that mimic your favorite taco experience in a delightful new form. Here’s a closer look at what makes these sliders shine:
- Dinner Rolls (connected): The foundation of our sliders! Hawaiian sweet rolls are a popular choice for their slight sweetness which complements the savory taco filling, but any soft, connected dinner rolls will work beautifully. Keeping them connected allows for easy assembly and ensures everything bakes together perfectly, forming a cohesive slab of deliciousness.
- Sour Cream: Provides a creamy, tangy layer that adds moisture and a delicious contrast to the seasoned taco meat. It acts as a cooling counterpoint to any spice.
- Taco Meat: This is where the core taco flavor comes from. You can use ground beef, ground turkey, or even a plant-based alternative, seasoned with your favorite taco seasoning blend. This recipe is a fantastic way to use up any leftover taco meat you might have on hand!
- Shredded Taco Cheese: A blend of cheeses (often cheddar, Monterey Jack, and Colby) that melts wonderfully and delivers that classic cheesy taco goodness. Dividing it ensures a cheesy layer both under and over the fillings, maximizing that irresistible pull-apart appeal.
- Yellow Bell Pepper (diced): Adds a touch of sweet crunch and vibrant color. Feel free to substitute with red or green bell pepper, or a colorful mix to enhance the visual appeal and flavor complexity.
- Sliced Grape Tomatoes: Burst with fresh, juicy flavor. Halved cherry tomatoes or finely diced regular tomatoes also work well, providing a fresh acidity that cuts through the richness.
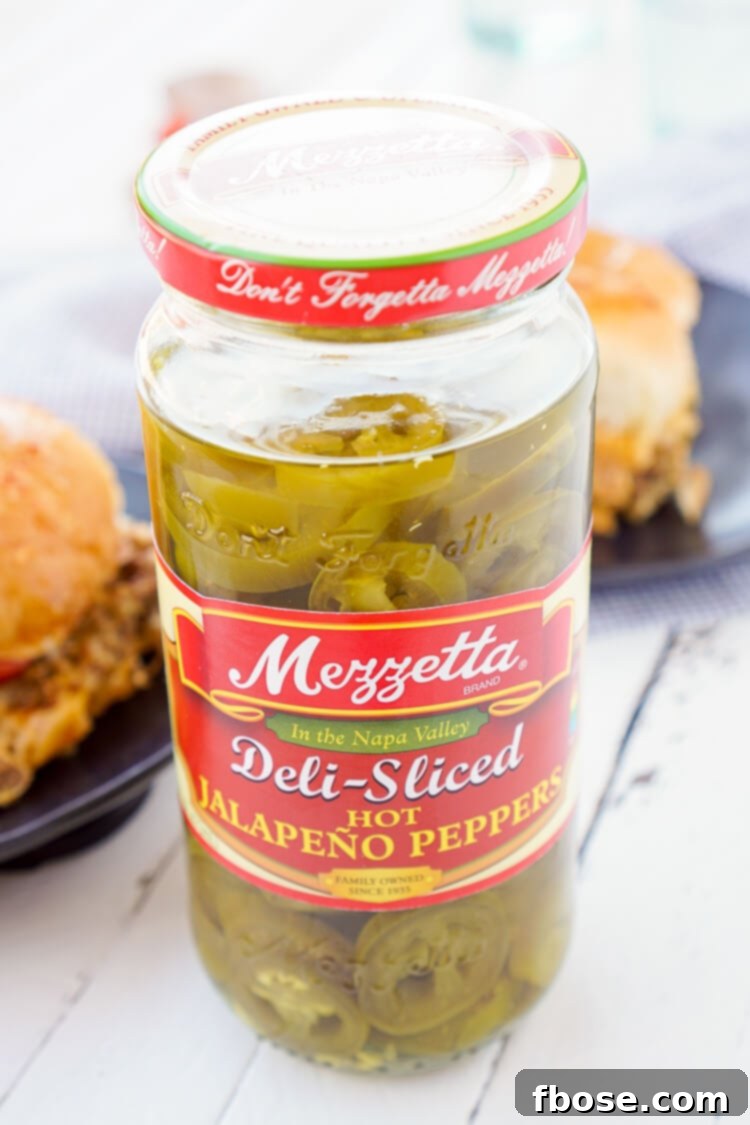
- Mezzetta Deli Sliced Hot Jalapeño Peppers: Now, I don’t know about you, but I always enjoy a little heat on my tacos! Live dangerously, am I right? And since I have this terribly painful habit of rubbing my eyes after cutting fresh jalapeños, I try to sub out fresh pepper for jarred pepper when I can and when it works for the recipe. These pickled jalapeños offer a fantastic kick without the fuss, and their tangy brine adds another layer of flavor. Of course, if you prefer fresh, go for it – just be careful with those eyes and make sure to deseed them for a milder heat!
- Butter (melted): The secret to that irresistible golden, slightly crispy top and bottom crust. It not only adds rich flavor but also helps in achieving that perfect texture contrast.
- Onion Powder & Garlic Powder: These pantry staples infuse the butter topping with aromatic depth, making every bite incredibly flavorful and enhancing the overall savory profile of the sliders.
- Crushed Red Pepper: Adds another layer of subtle heat to the butter topping, complementing the jalapeños without overwhelming the dish. Adjust to your preferred spice level, or omit for a milder version. It’s a great way to fine-tune the heat exactly to your liking.
Mastering Your Taco Sliders: Step-by-Step Instructions
These Easy Taco Sliders are super tasty and, with a little prep work ahead of time, you can have these babies ready in about 30 minutes from start to finish! Want to see just how easy these sliders are to make for your next event or weeknight dinner? Check out the video below for a visual guide!
Video Instructions
Detailed Instructions:
- Preheat Oven: Begin by preheating your oven to 350 degrees Fahrenheit (175 degrees Celsius). This ensures your oven is at the correct temperature for even baking, leading to perfectly golden and melted sliders.
- Prepare Baking Pan: Lightly spray a 9 x 13-inch baking pan with cooking spray. This prevents the rolls from sticking to the bottom and makes cleanup much easier once the sliders are devoured.
- Slice Rolls: Carefully slice the entire slab of dinner rolls horizontally, as you would a burger bun, creating a distinct top and bottom half. Place the bottom half of the rolls evenly in the prepared baking pan. Set the top half aside for later assembly.
- Layer Sour Cream and Taco Meat: Generously spread the sour cream over the bottom half of the rolls, ensuring an even coating on each roll. Next, evenly distribute your prepared taco meat over the sour cream layer, creating a savory foundation.
- Add Cheese and Vegetables: Sprinkle 1 cup of the shredded taco cheese evenly over the taco meat. Then, uniformly distribute the diced bell peppers and sliced grape tomatoes over this cheese layer. Finally, cover all of this with the remaining 1 cup of shredded cheese. This method ensures a double dose of cheesy goodness!
- Assemble and Apply Butter Topping: Carefully place the top halves of the rolls back over the fillings in the pan, aligning them with the bottom halves. In a small bowl, thoroughly stir together the melted butter, onion powder, garlic powder, and crushed red pepper until well combined. Pour this savory butter mixture evenly over the tops of the assembled rolls. Ensure each roll gets a good coating for that irresistible golden crust and enhanced flavor.
- Bake to Perfection: Cover the baking pan loosely with aluminum foil. This step helps the flavors meld and the butter soak into the rolls. Let it set for 10 minutes, then bake for 10 minutes with the foil on. After 10 minutes, remove the foil and continue baking for another 5-10 minutes, or until the cheese is bubbly and beautifully melted, and the tops of the rolls are golden brown and slightly crispy.
- Serve Warm: Once baked, remove from the oven and let cool for a few minutes. This allows the hot cheese to set slightly, making it much easier to slice and separate them into individual portions without all the delicious fillings spilling out. Serve warm and enjoy!
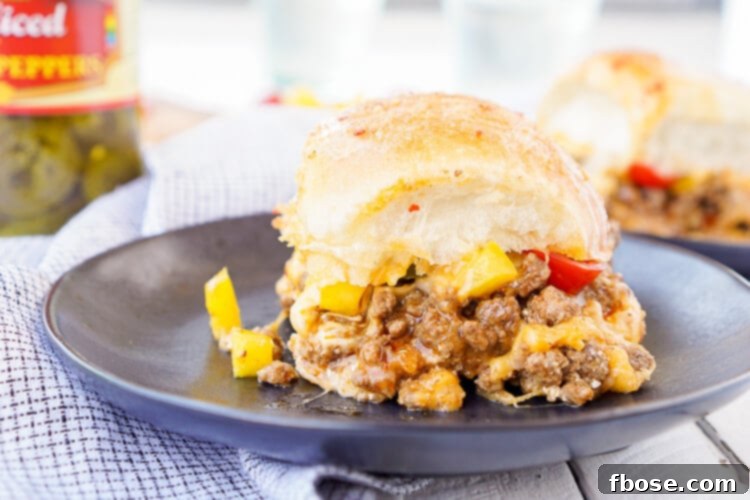
Pro Tips for the Best Easy Taco Sliders
Achieving taco slider perfection is all about a few key techniques. Follow these pro tips to ensure your sliders are a resounding success every single time, delighting everyone who tries them:
- Choose the Right Rolls: While any connected dinner rolls work, Hawaiian sweet rolls add a subtle sweetness that beautifully complements the savory taco filling. Their soft texture is also ideal for soaking up the buttery topping, resulting in a perfectly balanced bite.
- Don’t Skimp on the Butter Topping: I love the way the butter allows the bottoms of these Easy Taco Sliders to crisp up, so it supports all the goodness on top of it, while the top half of the rolls stay soft and flavorful. This butter mixture is crucial for both flavor and texture, creating a beautiful golden-brown crust and a fragrant aroma.
- Evenly Spread Fillings: Ensure your sour cream, taco meat, cheese, and vegetables are spread as evenly as possible across the rolls. This guarantees that every single slider has a balanced and satisfying bite of all the delicious components.
- Prevent Soggy Bottoms: To avoid a soggy bottom layer, ensure your taco meat is well-drained of any excess fat. Baking uncovered for the last few minutes also helps the bottom of the rolls crisp up nicely, preventing them from becoming mushy from the filling’s moisture.
- Customize Your Spice: If you’re sensitive to heat, feel free to reduce or entirely omit the crushed red pepper in the butter topping. For those who crave more heat, add an extra pinch of cayenne pepper or a few more sliced jalapeños to the filling.
- Rest Before Slicing: Letting the sliders cool for a few minutes after baking allows the cheese to set slightly. This seemingly small step makes it much easier to slice and separate them into individual portions without the fillings oozing out, ensuring neat and delicious servings.
Endless Customization: Make Your Taco Sliders Unique!
One of the best things about tacos, and by extension, these taco sliders, is the endless array of possibilities for customization! You can make your taco meat however you usually would and can add any extra toppings you want to the mix. Here are some ideas to inspire your culinary creativity and make these sliders truly your own:
Meat Variations:
- Chicken Taco Sliders: Shredded cooked chicken, seasoned with taco seasoning, makes a fantastic lighter alternative. You can use rotisserie chicken for an even quicker prep!
- Ground Turkey Sliders: A leaner option for the taco meat, seasoned similarly to ground beef, offering a healthier twist without sacrificing flavor.
- Vegetarian Taco Sliders: Use seasoned black beans, refried beans, a vibrant mix of corn and bell peppers, or a plant-based ground “meat” alternative for a delicious meat-free version that everyone can enjoy.
Cheese Choices:
- Beyond the standard taco cheese blend, consider using Pepper Jack for an extra spicy kick, Monterey Jack for a milder, creamier melt, or even a blend of mozzarella and cheddar for a different texture. A sprinkle of Cotija cheese after baking can add a salty, authentic Mexican flavor.
Additional Toppings & Mix-ins:
- Onions: Finely diced red or white onion can be mixed in with the meat for a sharper bite or sprinkled on top for fresh crunch after baking.
- Black Olives: Sliced black olives add a distinct briny, savory note that many taco enthusiasts love.
- Corn: Canned or frozen (thawed) corn kernels add natural sweetness and a lovely texture contrast.
- Avocado or Guacamole: Add slices of fresh avocado or a dollop of homemade guacamole *after* baking for a creamy, rich finish and a burst of freshness.
- Cilantro: Fresh chopped cilantro sprinkled generously on top provides a vibrant burst of herbaceous freshness that brightens the entire dish.
- Pico de Gallo or Salsa: Serve a fresh salsa or pico de gallo on the side for dipping, allowing guests to add extra zing to each bite.
- Refried Beans: A thin layer of refried beans can be spread on the bottom rolls along with the sour cream for added richness and an authentic depth of flavor.
Perfect Pairings and Serving Suggestions
These Easy Taco Sliders are satisfying enough to be a meal on their own, especially with their hearty fillings and flavorful topping. However, if you’re looking to round out your spread or create a full-fledged Mexican-inspired feast, here are some fantastic serving suggestions that will complement your sliders beautifully:
- Classic Sides: Serve your sliders alongside traditional Mexican favorites like fluffy Mexican rice, creamy refried beans, or a simple green salad with a zesty lime vinaigrette to add a refreshing balance.
- Dipping Sauces: Elevate the experience by offering a variety of dipping sauces. Bowls of homemade guacamole, your favorite salsa (whether mild or spicy), extra sour cream, or even a creamy cilantro-lime dressing will allow everyone to customize their flavor experience.
- Fresh Garnishes: A sprinkle of fresh chopped cilantro, a squeeze of fresh lime juice, or a dash of your favorite hot sauce can brighten up each slider and add an extra layer of flavor right before serving.
- Complementary Appetizers: If serving as part of a larger party spread, consider pairing these taco sliders with other crowd-pleasing bites. Think Taco Pizza, savory Pizza Sliders, or a hearty Taco Grilled Cheese for a diverse range of flavors and textures, ensuring there’s something delicious for everyone.
Make-Ahead & Storage Instructions
One of the many benefits of these Easy Taco Sliders is their flexibility when it comes to preparation and storage. You can do a fair amount of prep work in advance, making mealtime or party day even less stressful and more enjoyable.
- Make-Ahead Taco Meat: The taco meat can be prepared a day or two in advance. Cook it as usual, let it cool completely, then store it in an airtight container in the refrigerator. When you’re ready to assemble the sliders, simply reheat the meat gently before layering it onto the rolls. This step significantly cuts down on active prep time.
- Assembling in Advance: You can assemble the sliders up to a few hours before baking. Prepare them up to the point of pouring the butter mixture over the tops. Cover the pan tightly with plastic wrap and refrigerate. When ready to bake, remove from the fridge 15-20 minutes before baking to allow them to come closer to room temperature, then proceed with the butter topping and baking instructions. Note: The rolls might absorb a bit more moisture if assembled too far in advance, but they will still be absolutely delicious.
- Storing Leftovers: If you happen to have any leftover taco sliders (which is rare, as they tend to disappear quickly!), they can be stored in an airtight container in the refrigerator for up to 2-3 days. Make sure they are completely cool before storing to prevent condensation.
- Reheating: For best results, reheat leftover sliders in the oven at 300°F (150°C) for 10-15 minutes, or until warmed through and the cheese is melted and bubbly again. You can also use an air fryer for a wonderfully crispy reheat. While microwaving is an option for speed, it may make the rolls soft rather than crispy.
- Using Leftover Taco Meat: This recipe is fantastic for using up leftover taco meat from a previous meal! If you’re adapting it for a smaller amount of leftover meat, consider cutting the recipe in half for 6 sliders, or simply adjust the meat and cheese quantities to fit the number of rolls you have.
Frequently Asked Questions About Taco Sliders
- What kind of rolls are best for sliders?
- Hawaiian sweet rolls are a favorite due to their slight sweetness and soft texture, which wonderfully complements the savory taco filling. However, any soft, connected dinner rolls (like brioche slider buns or classic white dinner rolls) will work well and yield delicious results.
- Can I make these taco sliders vegetarian?
- Absolutely! To make them vegetarian, simply replace the taco meat with seasoned black beans, refried beans, a vibrant mix of corn and bell peppers, or a plant-based ground “meat” alternative. Adjust seasoning as needed to ensure maximum flavor.
- How do I prevent the sliders from getting soggy?
- To prevent sogginess, ensure your taco meat is not excessively greasy; always drain any excess fat after cooking. Additionally, baking uncovered for the last few minutes helps to toast the rolls slightly and prevents them from becoming mushy from the filling’s moisture.
- Can I freeze taco sliders?
- While you can certainly freeze cooked taco meat separately, freezing assembled and baked sliders is generally not recommended. The rolls can become mushy upon thawing and reheating, affecting the texture. It’s best to enjoy them fresh or reheated from the refrigerator.
- What are some good toppings for taco sliders?
- Beyond what’s included in the recipe, consider adding fresh avocado slices, a dollop of homemade guacamole, a sprinkle of fresh cilantro, finely diced red onion, or a drizzle of your favorite hot sauce for an extra burst of flavor. Serving pico de gallo or salsa on the side is also a fantastic idea for dipping.
Easy Taco Sliders Recipe Card
These Easy Taco Sliders are a great alternative to traditional tacos! They’re simple to make and loaded with flavor, a sure crowd-pleaser and a great use for leftover taco meat too!
Ingredients
- 12 dinner rolls (connected)
- 1 cup sour cream
- 1 lb taco meat (prepared)
- 2 cups shredded taco cheese (divided)
- 1/2 cup yellow bell pepper (diced)
- 1/2 cup sliced grape tomatoes
- 1/4 cup Mezzetta Deli Sliced Hot Jalapeño Peppers (or fresh, deseeded and diced)
- 1/2 cup (1 stick) butter, melted
- 1 tsp onion powder
- 1 tsp garlic powder
- 1/2 tsp crushed red pepper (optional, for extra heat)
Instructions
- Preheat oven to 350 degrees F (175°C).
- Spray a 9 x 13-inch pan with cooking spray.
- Slice the entire slab of rolls horizontally, creating a top and bottom half. Place the bottom half in the pan and set the top half aside.
- Spread sour cream evenly over the bottoms of the rolls, then evenly spread the prepared taco meat on top of the sour cream.
- Sprinkle 1 cup of the shredded cheese over the taco meat. Evenly distribute the diced peppers and sliced tomatoes on the cheese, then cover with the remaining 1 cup of cheese.
- Place the top halves of the rolls back on. In a small bowl, stir together the melted butter, onion powder, garlic powder, and crushed red pepper. Pour this mixture evenly over the tops of the rolls.
- Cover the pan loosely with aluminum foil. Let set for 10 minutes, then bake for 10 minutes. Remove the foil and bake for another 5-10 minutes, or until the cheese is bubbly and the tops are golden brown.
- Remove from oven, let cool for a few minutes, then slice and serve warm.
Notes
Nutrition Facts (per slider)
Did You Make This Easy Taco Sliders Recipe?
We’d love to see your delicious creations! Don’t forget to share them with us on Instagram @sugarandsoulco and follow us on Tiktok @sugarandsoulco and Pinterest @sugarandsoulco for even more inspiring recipes and culinary adventures!
Pin This Recipe
Share on Facebook
Connect With Us!
We love building a community around delicious food! Join our fun little group on Facebook where you can share your favorite recipes, ask questions, and stay up-to-date with all the new culinary adventures from Sugar & Soul. It’s the perfect place to ensure you never miss a new recipe! You can request to join HERE.
Also, make sure to follow us on Instagram and tag #sugarandsoulco so we can see all the wonderful dishes YOU create from our site! For exclusive content and to receive our latest recipes directly in your inbox, don’t forget to Subscribe to our Newsletter today!