
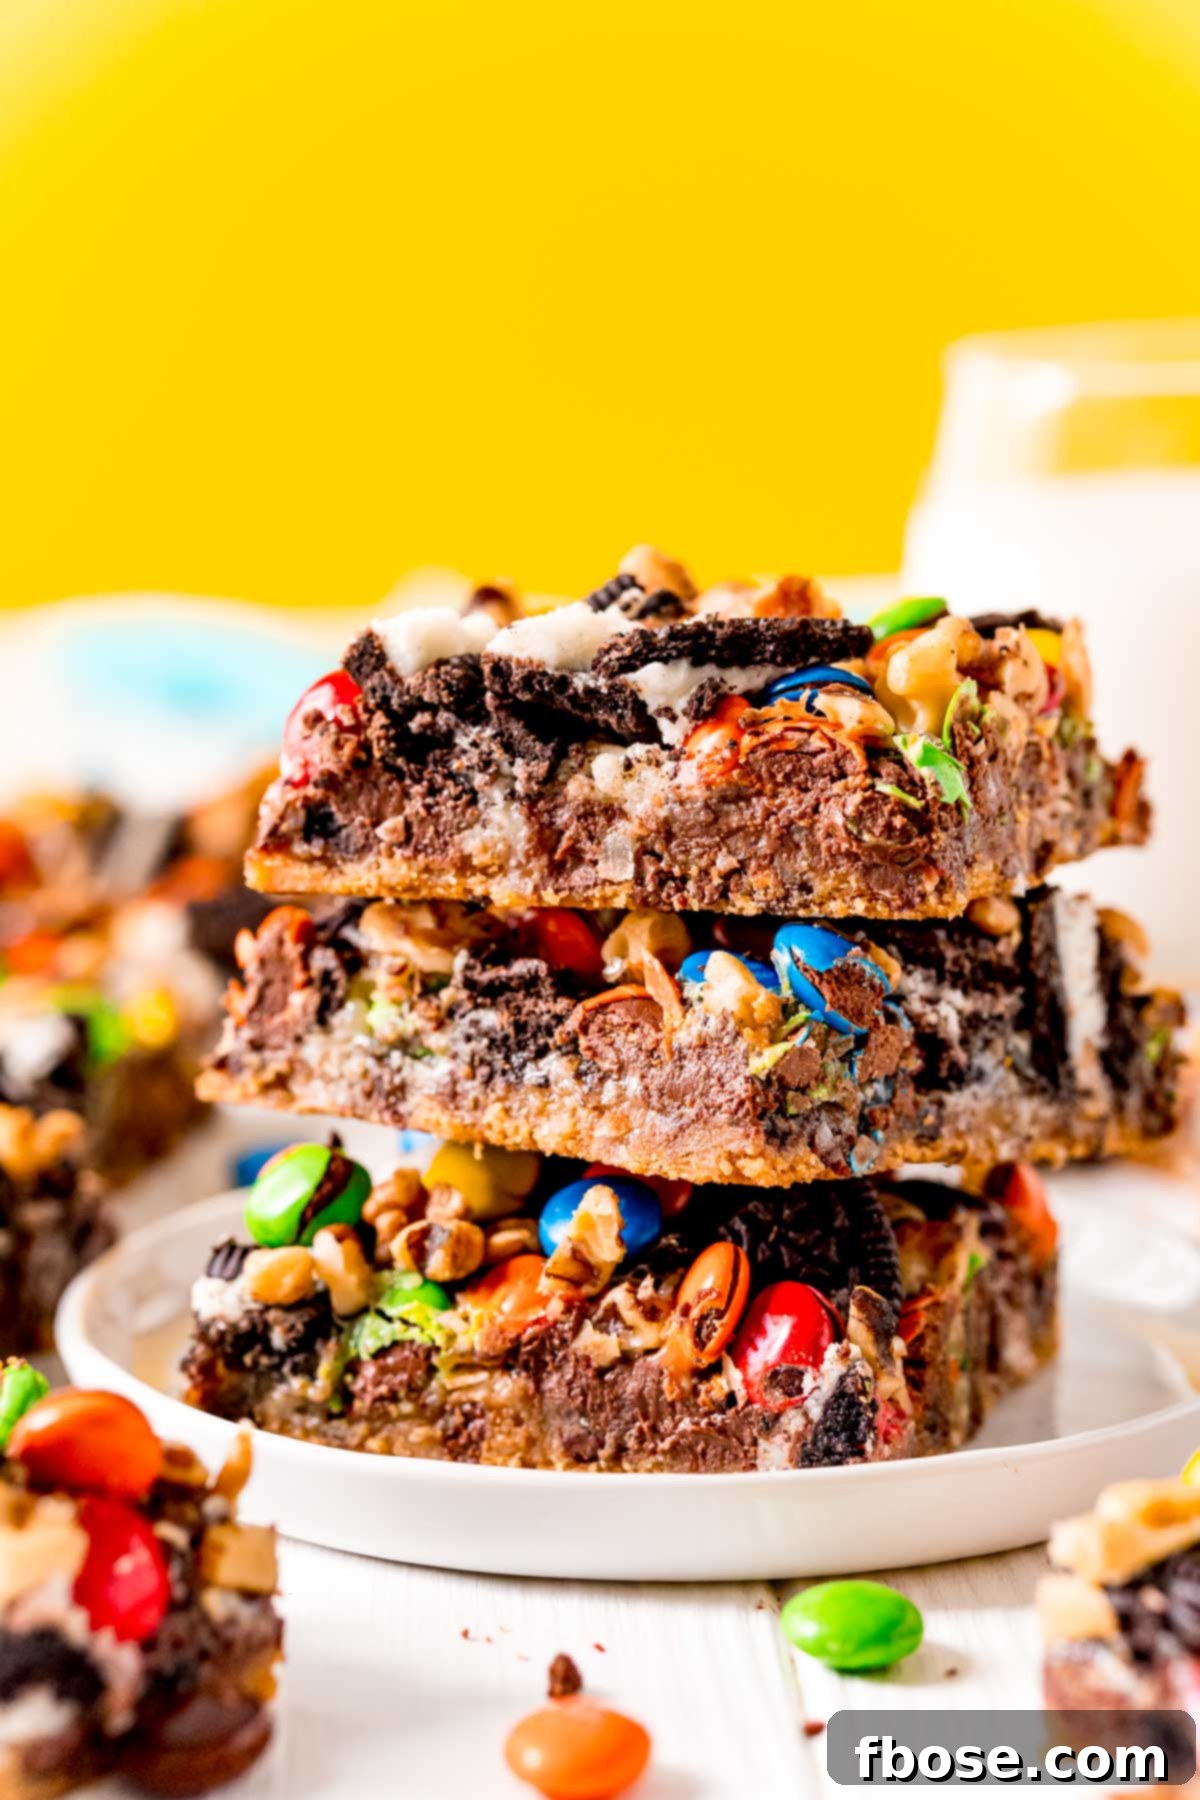
Welcome to the magical world of **Oreo Magic Bars** – a truly irresistible dessert that promises layers of delightful flavors and textures in every bite! This incredible recipe starts with a simple refrigerated cookie dough base, which is then generously loaded with a medley of crushed Oreo cookies, rich chocolate chunks, shredded coconut, crunchy nuts, and colorful M&M’s. The result is a profoundly decadent, incredibly tasty, and surprisingly easy dessert that’s perfect for any occasion. If you’re searching for a treat that brings pure joy and disappears in an instant, you’ve found your next go-to recipe.
For those who appreciate the convenience of layered bar desserts, these Oreo Magic Bars are a must-try. They embody everything you could want in a sweet treat: a satisfying crunch, a harmonious blend of flavors, and an abundance of chocolaty goodness that will make your taste buds sing. Whether you’re preparing them for a casual family gathering, a festive party, or simply to satisfy a serious sweet craving, these bars are guaranteed to be a hit. Don’t be surprised if your friends and family ask for the recipe – and perhaps even for a second batch! You might even want to double the recipe from the start; one batch for sharing and one for keeping at home to enjoy later. You’ll thank yourself for planning ahead when you return with an empty dish!
If you’re a fan of layered bar recipes, be sure to explore other favorites like the sweet and gooey **Hello Dolly Bars (7 Layer Cookie Bars)** or the truly rich and luxurious **Billionaire Bars**. Each offers a unique spin on the beloved layered dessert concept, but these Oreo Magic Bars hold a special place for their signature cookie and candy combination.

Why You’ll Adore These Oreo Magic Bars
There are countless reasons why these **Oreo Magic Bars** have become a favorite in so many kitchens. Beyond their undeniable deliciousness, they offer a perfect blend of simplicity and indulgence that makes them truly special. Here’s what makes this recipe stand out:
- Effortless Preparation with Simple Ingredients: Forget complicated baking projects! This recipe champions convenience by utilizing readily available, store-bought ingredients like refrigerated cookie dough. This means less time prepping and more time enjoying your delicious creation. It’s the perfect solution when you crave a homemade treat without the fuss of baking from scratch.
- The Ultimate Sweet Tooth Fix: Designed to satisfy even the most intense sweet cravings, these bars are a symphony of sugary delights. From the iconic crunch of Oreo cookies to the smooth melting chocolate, the tropical hint of shredded coconut, the earthy notes of walnuts, and the candy-coated joy of M&M’s, every single component works together to create an explosion of flavor that hits all the right notes for any dessert lover.
- Endless Customization Possibilities: The beauty of magic bars lies in their adaptability. This recipe serves as a fantastic foundation, but don’t hesitate to make it your own! Feel free to swap out the cookies, candies, or nuts with your family’s preferred varieties. Whether it’s different chocolate chips, other crunchy cookies, or various types of nuts, the possibilities for creating unique flavor combinations are truly endless, making these bars perfect for personalized treats.
- Perfect for Sharing and Celebrations: These Oreo Magic Bars are natural crowd-pleasers. Their visually appealing layers and decadent taste make them ideal for any social gathering. Whether you’re bringing them to a potluck, a school event, a birthday party, or simply sharing them with loved ones at home, expect nothing but rave reviews. They are a guaranteed hit that will have everyone asking for your secret recipe!
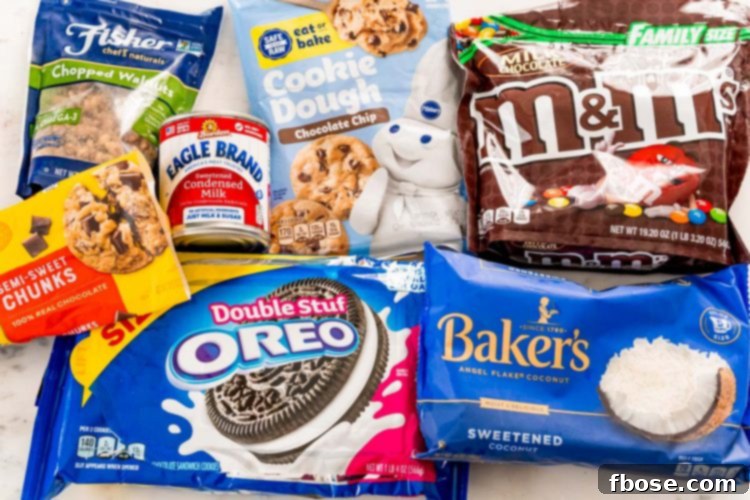
Key Ingredients for Your Oreo Magic Bars
Crafting these irresistibly chewy and sweet **seven-layer Oreo Magic Bars** relies on a selection of straightforward ingredients, each playing a crucial role in building the layers of flavor and texture. Here’s a closer look at what you’ll need and why each component is so important:
- Ready-To-Bake Refrigerated Chocolate Chip Cookies: This ingenious shortcut forms the delicious, soft, and sturdy foundation of your bars. Using pre-made cookie dough not only saves valuable time but also ensures a consistently perfect base that holds all the decadent layers together. You can, of course, use homemade chocolate chip cookie dough if you prefer, but the refrigerated variety makes this recipe incredibly quick and easy.
- Oreo Cookies: No “Oreo Magic Bars” would be complete without these iconic sandwich cookies! When chopped and scattered throughout the layers, Oreos provide an incredible textural contrast with their signature crunchy cookie and creamy filling. They infuse every bite with that distinct, beloved chocolate and cream flavor that makes these bars truly magical.
- Chocolate Chunks: Elevate the chocolate experience with generous chocolate chunks. Unlike chips, chunks often melt into more luxurious puddles of chocolate, creating pockets of intense cocoa flavor. You can choose your favorite type – milk chocolate for a sweeter profile, dark chocolate for a richer, more intense flavor, or even white chocolate for a creamy contrast. The choice is yours to perfectly match your sweet tooth!
- Shredded Coconut: This delightful addition contributes a subtle chewiness and a hint of tropical sweetness. The coconut perfectly balances the richness of the chocolate and cookies, adding another dimension of flavor that is both comforting and exotic. Sweetened shredded coconut is typically preferred for this recipe to enhance the overall sweetness.
- Sweetened Condensed Milk: The “magic” ingredient in any magic bar! When poured over the layers and baked, sweetened condensed milk transforms into a gooey, caramel-like binder. It moistens the bars, ensuring every bite is wonderfully chewy and incredibly rich, creating that signature sticky, luscious texture that defines this dessert.
- Chopped Walnuts: For a delightful counterpoint to all the sweetness, chopped walnuts are essential. Their earthy, slightly bitter, and buttery flavor, along with their satisfying crunch, cuts through the richness and adds a sophisticated depth. If walnuts aren’t your preference, pecans or almonds would also make excellent substitutes.
- M&M’s Candies: These colorful, candy-coated chocolates are more than just a pretty topping. They add an extra pop of chocolate flavor, a satisfying candy shell crunch, and a vibrant burst of color that makes these bars even more appealing, especially for parties and celebrations. They’re everyone’s favorite addictive candy for a reason!
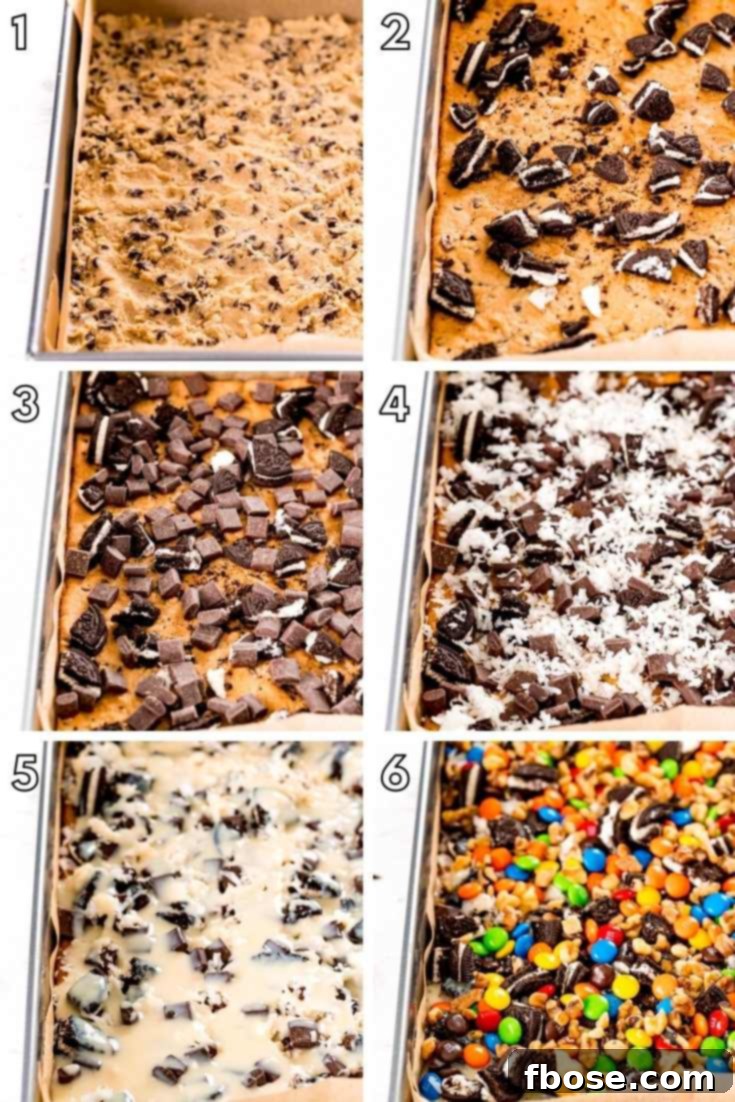
How to Make Irresistible Oreo Magic Bars
Creating these delightful **Oreo Magic Bars** is a straightforward process, combining simple layering with a touch of baking magic. Follow these detailed steps to achieve perfect, gooey, and flavorful bars every time:
- Prepare Your Oven and Baking Pan: Begin by preheating your oven to 350 degrees F (175 degrees C). This ensures the oven is at the correct temperature for even baking. Next, prepare a 9×13-inch baking pan by lining it completely with parchment paper. Leave an overhang on the sides – this will create “handles” that make it incredibly easy to lift the entire batch of cooled bars out of the pan for neat slicing.
- Lay the Cookie Dough Base: Take your ready-to-bake chocolate chip cookie dough and press it evenly into the bottom of the prepared pan. Aim for a consistent thickness across the entire surface to ensure the base bakes uniformly. Once pressed, bake this cookie dough layer in the preheated oven for about 15 minutes. This pre-baking step creates a firm foundation for your magic bars and prevents the base from becoming soggy.
- First Layer of Goodness: After the cookie dough has baked for 15 minutes, remove the pan from the oven. While it’s still warm, generously sprinkle half of your chopped Oreos over the cookie layer. Follow with all the chocolate chunks and then all the shredded coconut. Distribute these ingredients as evenly as possible to ensure every bite of the finished bar gets a taste of each component.
- Pour the Sweetened Condensed Milk: Now for the magical binder! Carefully and slowly pour the can of sweetened condensed milk over the layers you just sprinkled. Try to distribute it as evenly as you can across the entire surface. Don’t worry if it doesn’t completely cover every bit of the dry ingredients; the heat of the oven will help it spread and seep into all the crevices, creating that signature gooey texture.
- Add the Final Layers: With the condensed milk in place, it’s time for the grand finale of toppings. Sprinkle the remaining half of the chopped Oreos over the condensed milk. Then, add the chopped walnuts, spreading them out evenly. Finally, scatter the colorful M&M’s across the top. These layers will beautifully meld together during the final bake.
- The Second Bake: Return the pan to the oven and bake for an additional 25 to 30 minutes. Keep a close eye on the bars during this stage. You’ll know they’re perfectly done when the sweetened condensed milk begins to turn a beautiful caramel color and the edges of the bars are golden brown and slightly firm. The centers might still seem a little soft, but they will set as they cool.
- Cooling is Key: Once baked, remove the pan from the oven. This is perhaps the most crucial step for perfectly structured magic bars! Allow the bars to cool completely in the pan for at least 2 hours, or even longer, at room temperature. Rushing this step will result in messy, crumbly bars. As they cool, the condensed milk and other ingredients will set, making them easy to slice cleanly.
- Slice and Serve: Once fully cooled and set, use the parchment paper overhang to carefully lift the entire slab of bars out of the pan and onto a cutting board. Using a sharp knife, slice them into individual bars of your desired size. Serve immediately and watch them disappear!
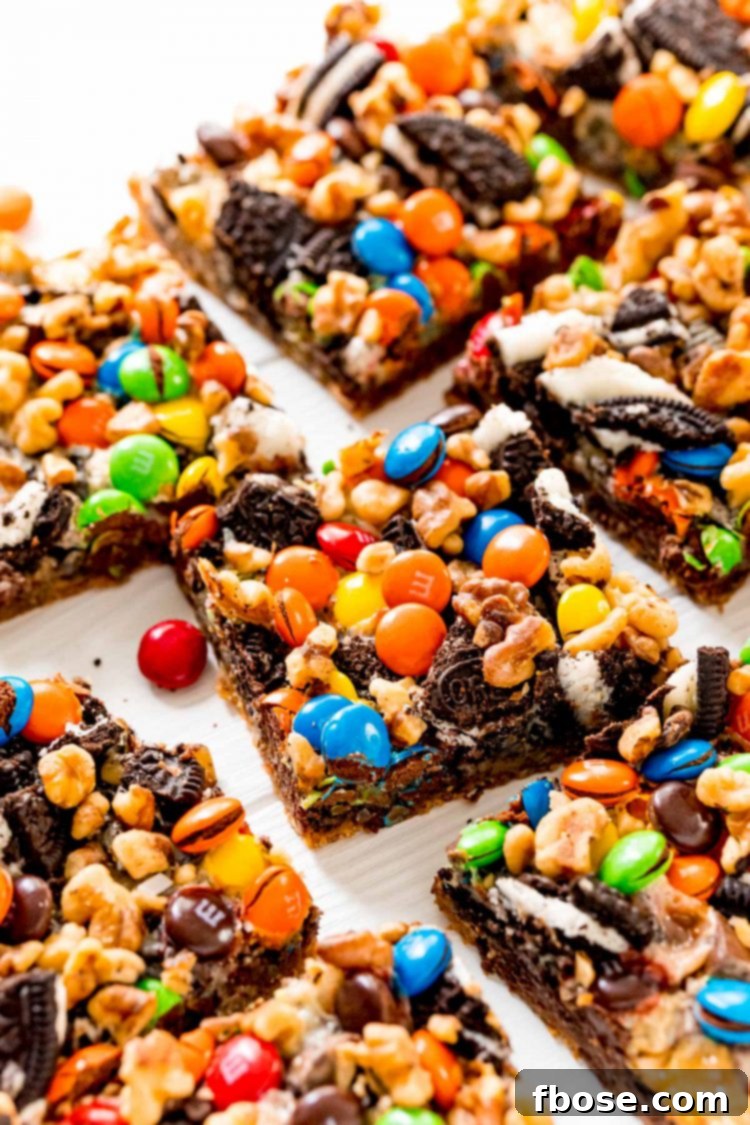
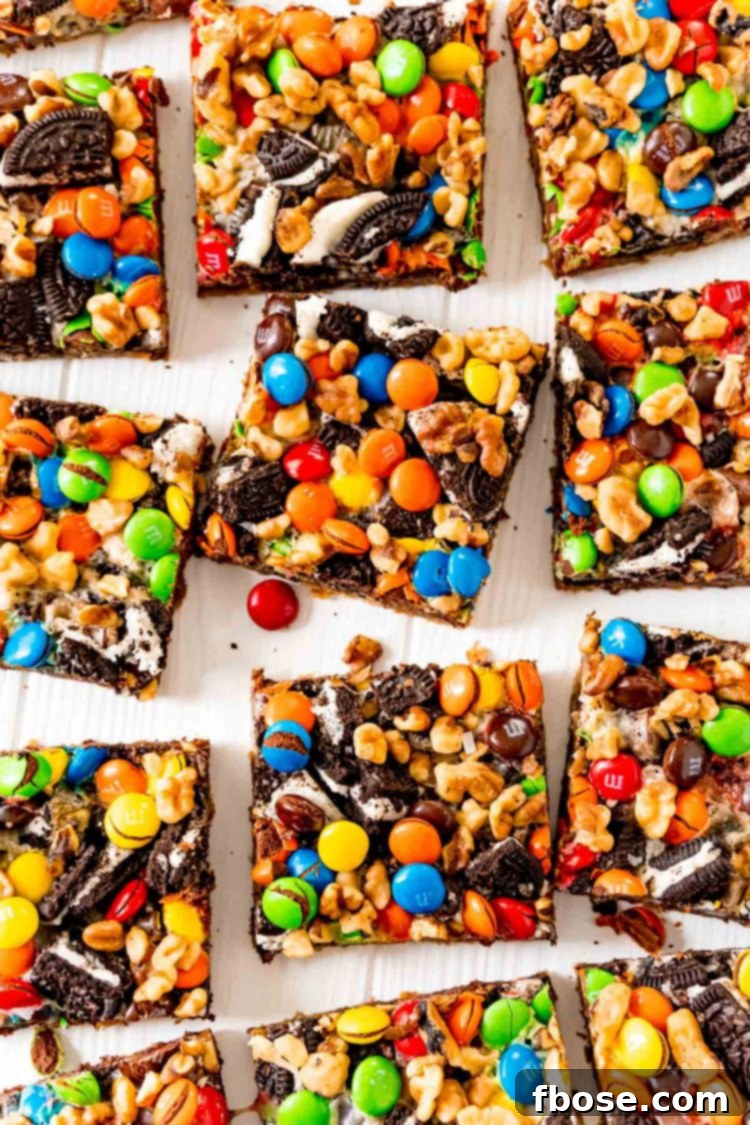
I absolutely love bringing these **Oreo Magic Bars** to share with friends and family. They’re a guaranteed hit at birthday parties, baby showers, holiday gatherings, or really any occasion that calls for an excuse to indulge in a rich, thick, and satisfying dessert! Their impressive layers and irresistible flavor always garner compliments. If you’re looking for more fantastic bar recipes to expand your baking repertoire, here are some other delicious options that I think you’ll truly enjoy:
- Chocolate Chip Cookie Bars: These thick, sweet, and wonderfully chewy bars are generously loaded with classic chocolate chips – a beloved treat in an easy-to-share format.
- Lemon Bars: A bright and zesty delight, these bars are filled with a delicious tart lemon taste, making them the perfect refreshing treat for spring and summer gatherings.
- Peanut Butter S’mores Bars: Capture the essence of a campfire favorite in an easy-to-make dessert using graham crackers, peanut butter cookies, gooey marshmallows, rich chocolate, and a touch of candy.
- Key Lime Bars: Get your citrus fix with these easy, mouthwatering bars featuring a vibrant and tangy layer of key lime, perfect for a sunny day.
- Golden Grahams S’mores Bars: This fantastic no-bake treat effortlessly combines your favorite breakfast cereal with fluffy marshmallows and decadent chocolate for a quick and fun dessert.
Connect With Us!
If you’ve tried this delightful **Oreo Magic Bars** recipe, we’d love to hear from you! Please let us know how you liked it by leaving a comment and a review below. Your feedback means the world to us!
And don’t forget to tag us – @sugarandsoulco – on Instagram and Pinterest with your beautiful photos. You can also join our Sugar & Soul Show-offs Community on Facebook and share your creations there, where you can also participate in our fun recipe challenges!
Chocolate Chip Cookie Oreo Magic Bars
Ingredients
- 16 ounces Ready to Bake refrigerated chocolate chip cookies
- 16 Oreos chopped and divided
- 1 cup chocolate chunks
- ½ cup shredded coconut
- 14 ounces sweetened condensed milk
- ½ cup chopped walnuts
- 1 cup M&M’s
Instructions
-
Preheat the oven to 350°F and line a 9×13-inch baking pan with parchment paper.
-
Press the chocolate chip cookie dough evenly into the bottom of the pan and bake for 15 minutes.
-
After baking, sprinkle half of the Oreos, all of the chocolate chunks, and coconut over the top of the cookie layer.
-
Pour the sweetened condensed milk over the top and covering as evenly as possible, but it doesn’t need to fully cover.
-
Layer with the remaining Oreos, walnuts, and M&M’s.
-
Bake for an additional 25 to 30 miutes. The condensed milk will begin to have a caramel color when it’s done.
-
Remove from the oven allow the bars to cool in the pan for at least 2 hours before removing and slicing.
-
If you made these 7 Layer Cookie Bars, I’d love for you to leave a review and rating to let others know how you liked the recipe!
Notes
- These bars can be kept at room temperature for up to 4 days.
- To Freeze: Store in an airtight container or freezer bag, they should keep in the freezer for about 3 months.
- Substitutions & Variations:
- Try experimenting with different kinds of candies, chocolate chips, cookies, and toppings to make your own layers! Some suggestions:
- Candy layer: Crushed Butterfinger, Kit Kats, Heath Bars, Reese’s Cups
- Cookie layer: Crumbled Biscoff cookies, graham crackers, Golden Oreos, Chips Ahoy
- Chocolate chip layer: Dark, milk, or white chocolate chips, peanut butter, or caramel chips. You can also sprinkle the chocolate chips on top after baking so they don’t completely melt.
- Other add-ins: Crushed pretzels, chopped nuts, and flaked coconut.
- Try experimenting with different kinds of candies, chocolate chips, cookies, and toppings to make your own layers! Some suggestions:
Nutrition
Did You Make This Recipe?
Don’t forget to share it with me on Instagram @sugarandsoulco and follow on Tiktok @sugarandsoulco and Pinterest @sugarandsoulco for more!
Pin Recipe
Share Recipe
Adapted from Pillsbury.