

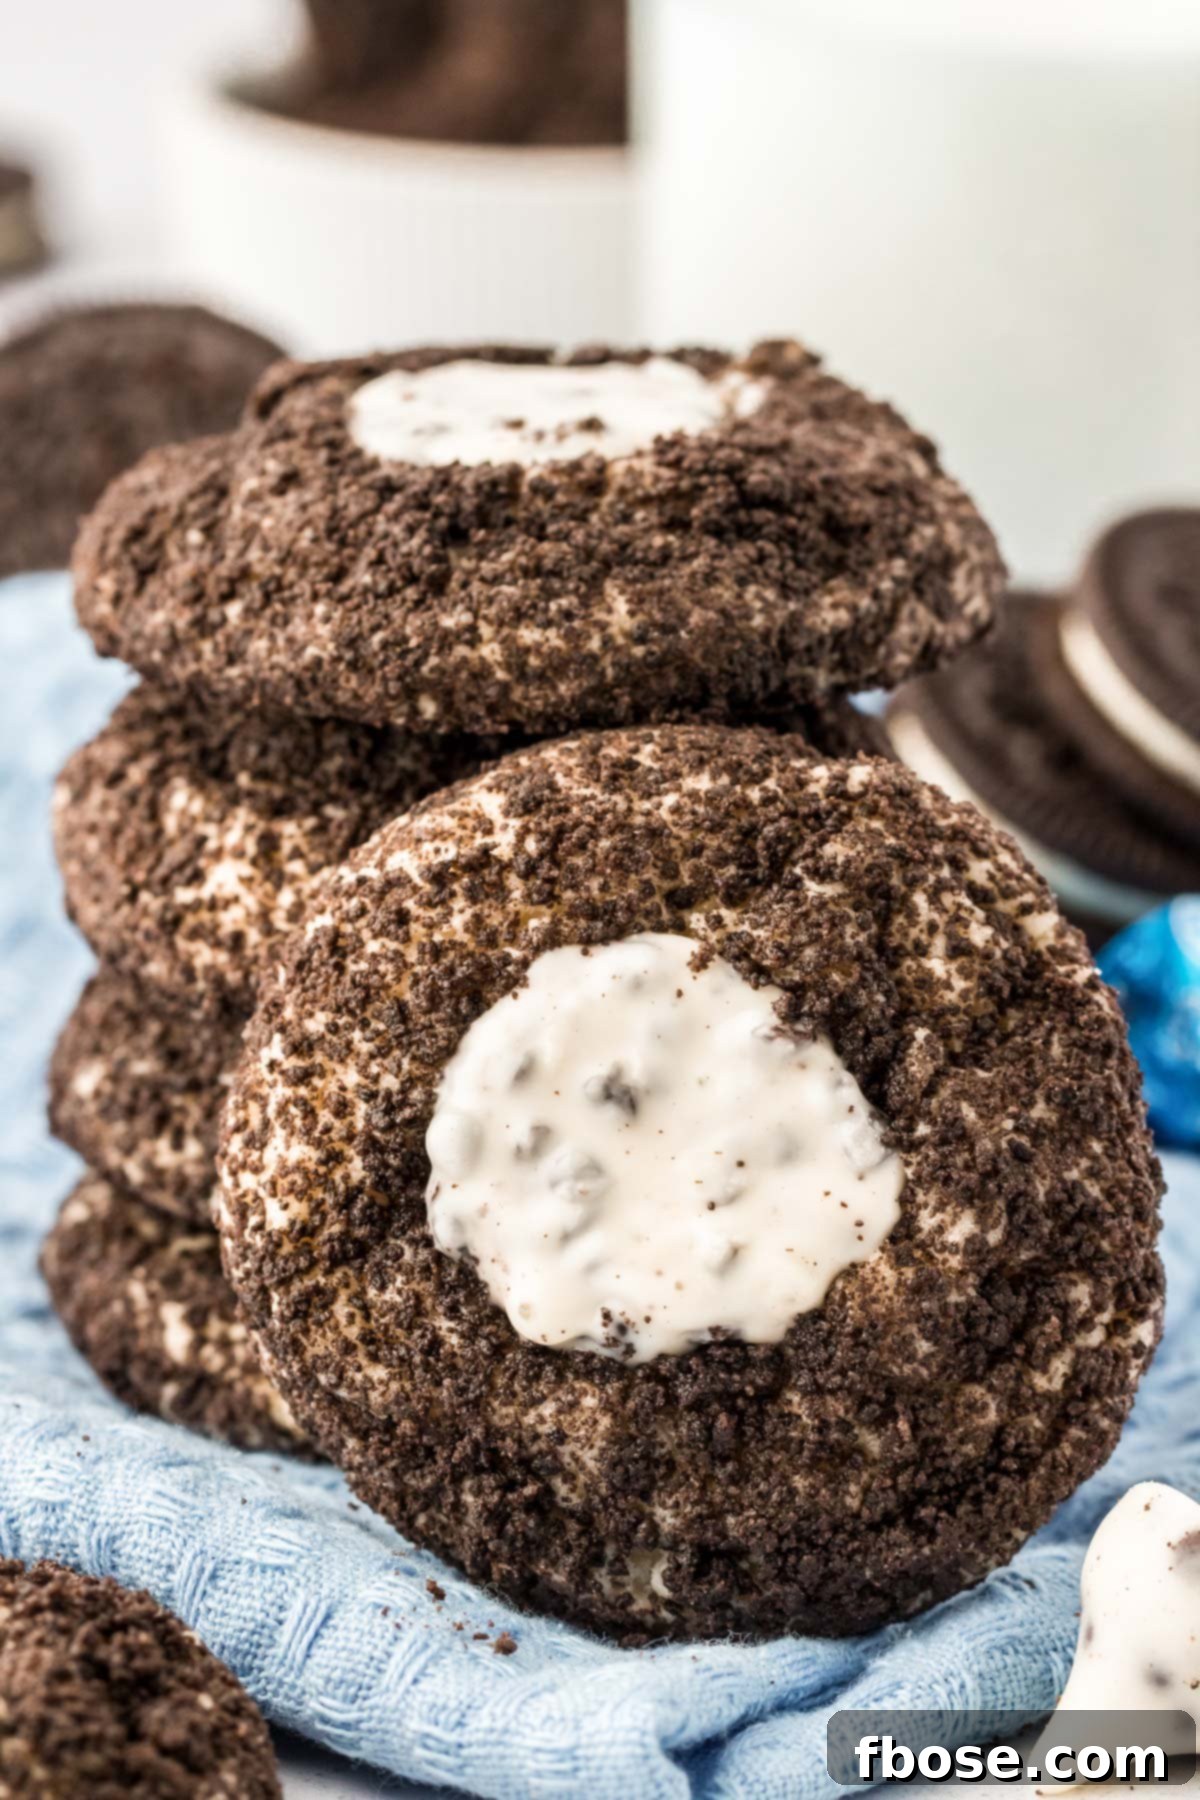
Welcome to the ultimate guide for creating the most delightful and effortlessly delicious treat: **Cookies and Cream Thumbprint Cookies**! Imagine a symphony of textures and flavors – a chewy, sweet sugar cookie base, enveloped in crunchy Oreo crumbs, and topped with a creamy, melting Hershey’s Cookies ‘n’ Creme Kiss. This recipe takes convenience to a whole new level by using store-bought sugar cookie dough, making it accessible for bakers of all skill levels, yet delivering a homemade taste that will impress everyone.
If you’re searching for an easy cookie recipe that promises maximum flavor with minimal fuss, you’ve found your match. These Oreo Thumbprint Cookies aren’t just cookies; they’re an experience, a celebration of the universally adored cookies and cream flavor. Each bite offers a satisfying crunch from the crushed Double Stuf Oreos, followed by the soft chewiness of the cookie, culminating in a luscious, sweet center. It’s truly a double cookie delight that will quickly become a favorite in your baking repertoire.
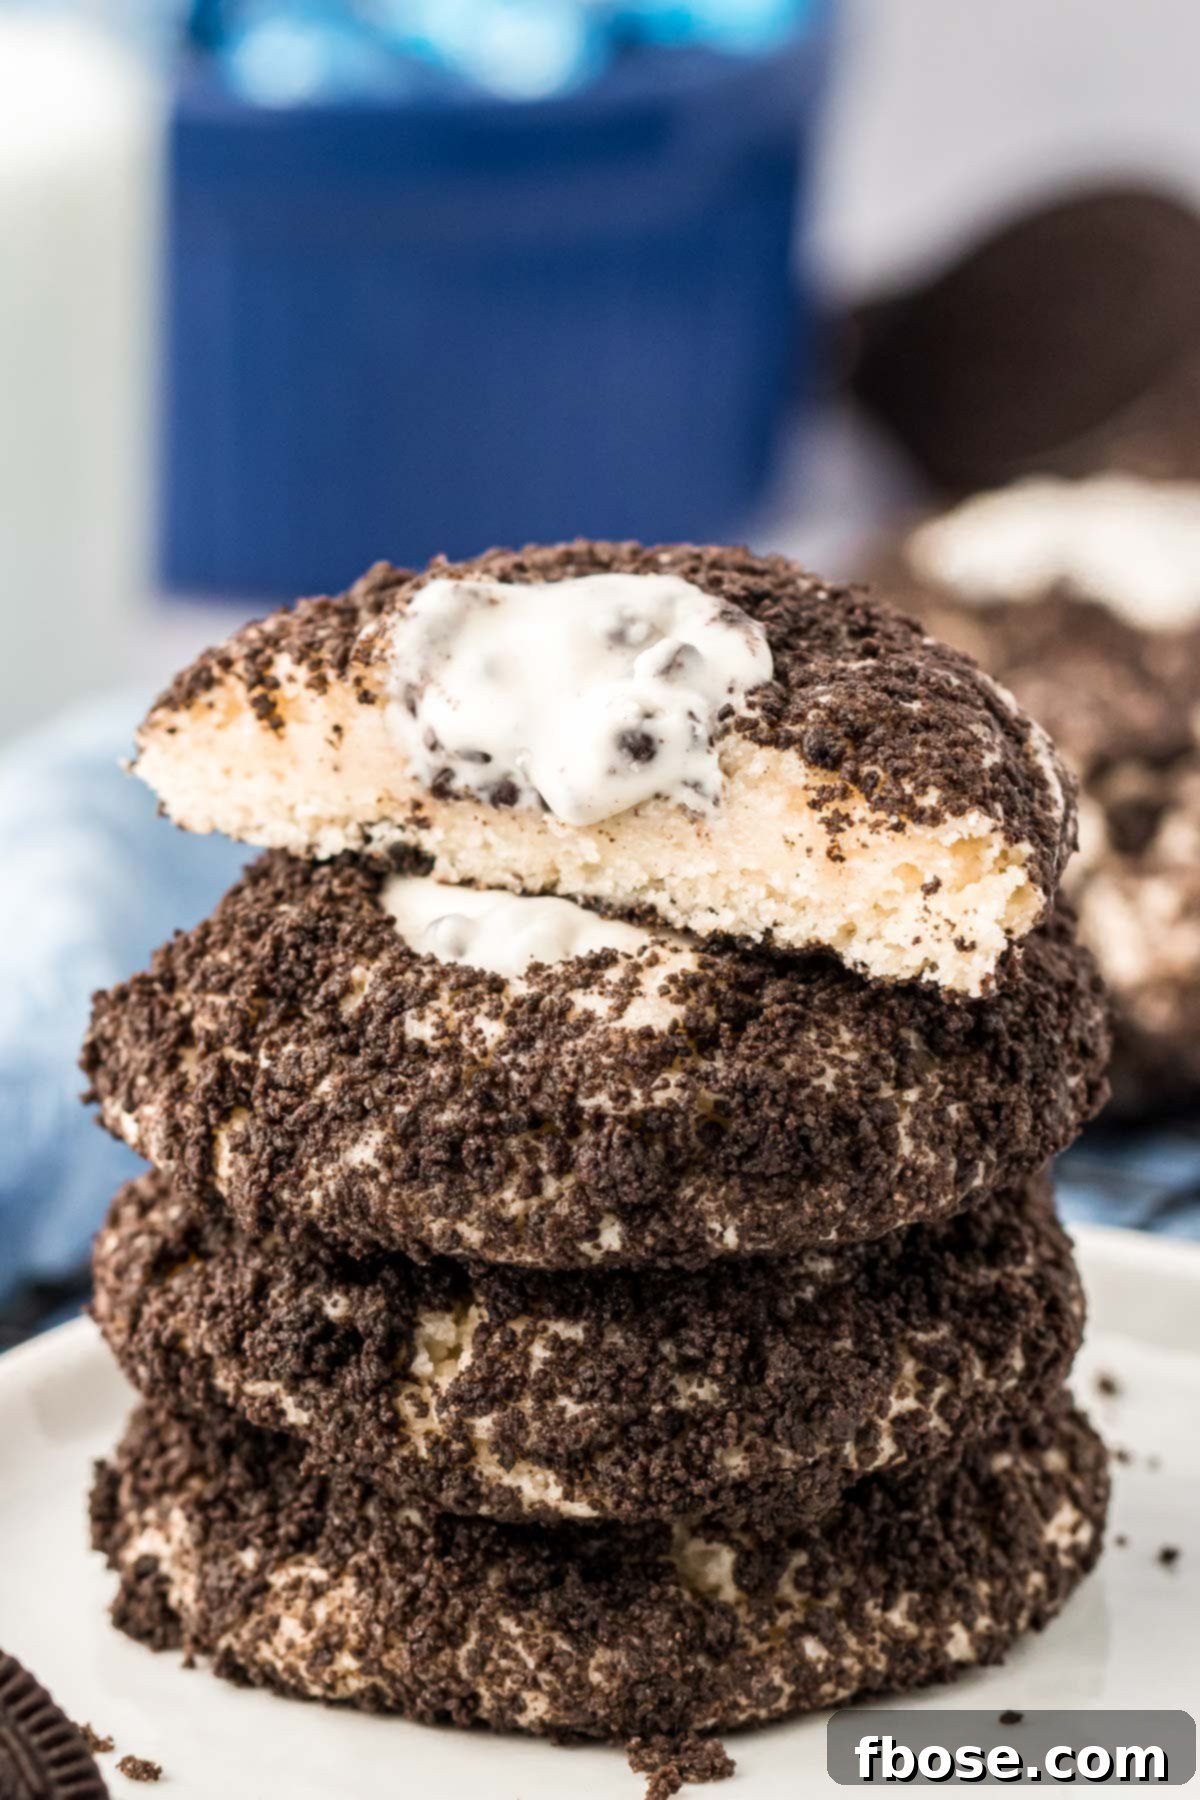
What Exactly Are Thumbprint Cookies?
Thumbprint cookies are a beloved classic in the cookie world, known for their distinctive indentation on top, traditionally made with a baker’s thumb (hence the name!). These charming cookies typically feature a tender, buttery shortbread or a sweet sugar cookie base. The beauty of a thumbprint cookie lies in its versatility; the small well created in the center can be filled with an array of delicious additions such as fruit jams, rich preserves, decadent chocolates, or, as in this spectacular recipe, a delightful Hershey’s Kiss. Beyond the filling, thumbprint cookies often get a flavorful boost from being rolled in granulated sugar, finely crushed nuts, or even shredded coconut before baking, adding an extra layer of texture and taste.
Our Cookies and Cream Thumbprint Cookies take this classic concept and infuse it with an irresistible modern twist. Instead of traditional coatings, we roll our cookie dough in finely crushed Double Stuf Oreos, ensuring every edge boasts that iconic chocolatey crunch. The center, instead of jam, holds a perfectly melted Cookies ‘n’ Creme Hershey’s Kiss, cementing its status as the ultimate cookies and cream dessert. While these Oreo Thumbprint Cookies are a personal favorite, the world of thumbprint cookies is vast and wonderful! For other mouthwatering variations, you might also enjoy exploring options like S’mores Thumbprint Cookies for a campfire-inspired treat, or rich and nutty Turtle Thumbprint Cookies.
Pin This Recipe For Later
Why You’ll Fall in Love with These Oreo Thumbprint Cookies
These **Cookies and Cream Thumbprint Cookies** are more than just a sweet treat; they’re an experience. Here’s why this recipe will earn a permanent spot in your rotation:
Irresistible Flavor Profile: A Dream for Cookies and Cream Lovers
Prepare your taste buds for an explosion of sweet, creamy, and chocolatey goodness! Each cookie is generously loaded with the distinct, sweet flavor of Oreos, perfectly complemented by a luscious cookies and cream center. The combination of a soft sugar cookie, crunchy Oreo crumbs, and a melty Hershey’s Kiss creates a harmonious blend that’s truly addictive. It’s a nostalgic flavor that everyone adores, made even better in a perfectly portioned cookie.
Texture Perfection: Chewy, Crunchy, and Melty Bliss
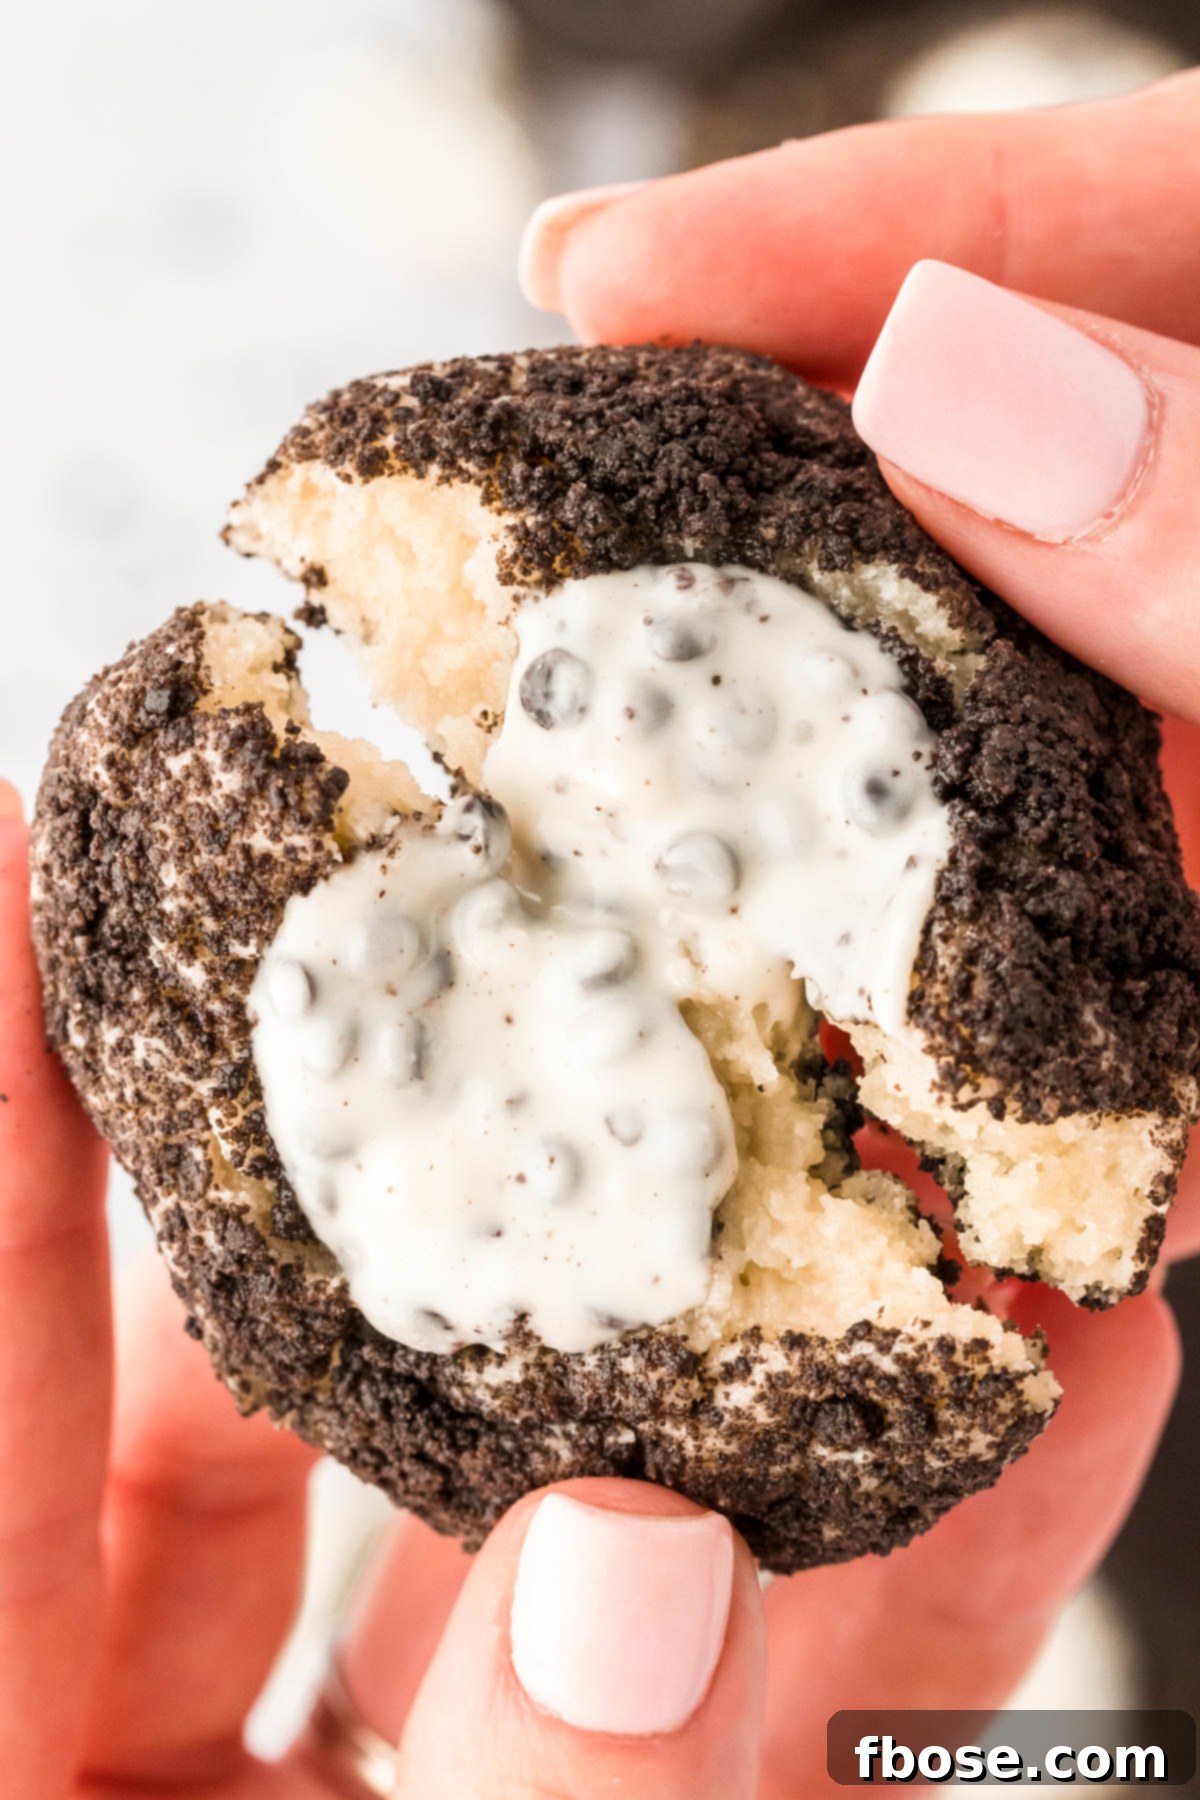
The magic of these cookies lies in their dynamic texture. You’ll savor a deliciously chewy cookie base, providing a satisfying bite. This is beautifully contrasted by the delightful crunch of the Oreo crumb coating, adding an exciting textural element. And when these cookies are enjoyed warm, the Hershey’s Kiss in the center melts into a gooey, rich pool of chocolatey cream, creating an absolutely divine sensation. The warm, melty chocolate combined with the chewy-crunchy cookie is pure bliss!
Unbeatable Ease: A Simple 3/10 on the Effort Scale
One of the biggest advantages of this recipe is its incredible simplicity, scoring an impressive 3 out of 10 for ease. The secret? A foundation of readily available store-bought refrigerated sugar cookie dough. This brilliant shortcut eliminates the need for extensive measuring, mixing, and chilling, allowing you to whip up a batch of these glorious Oreo Thumbprint Cookies in no time at all. It’s the perfect solution for impromptu cravings, last-minute gatherings, or when you simply want a fantastic dessert without the fuss.
A Note on Freshness: Best Enjoyed Promptly
While these cookies are fantastic at any time, they truly shine when enjoyed fresh. The best experience comes when the cookies are soft and the Oreo crust maintains its satisfying crunch. Over time, the natural moisture from the cookie dough will gradually soften the Oreo crumbs, leading to a less crispy coating. However, this simply means you have an excellent excuse to devour them warm from the oven or within the first day!
Would I Make This Again? An Enthusiastic YES!
Absolutely! This is not just an easy cookie recipe; it’s a go-to sweet treat that we find ourselves making often. Its straightforward process and incredible flavor make it a reliable choice whenever a delicious homemade cookie is desired. Don’t hesitate to add these to your baking rotation!
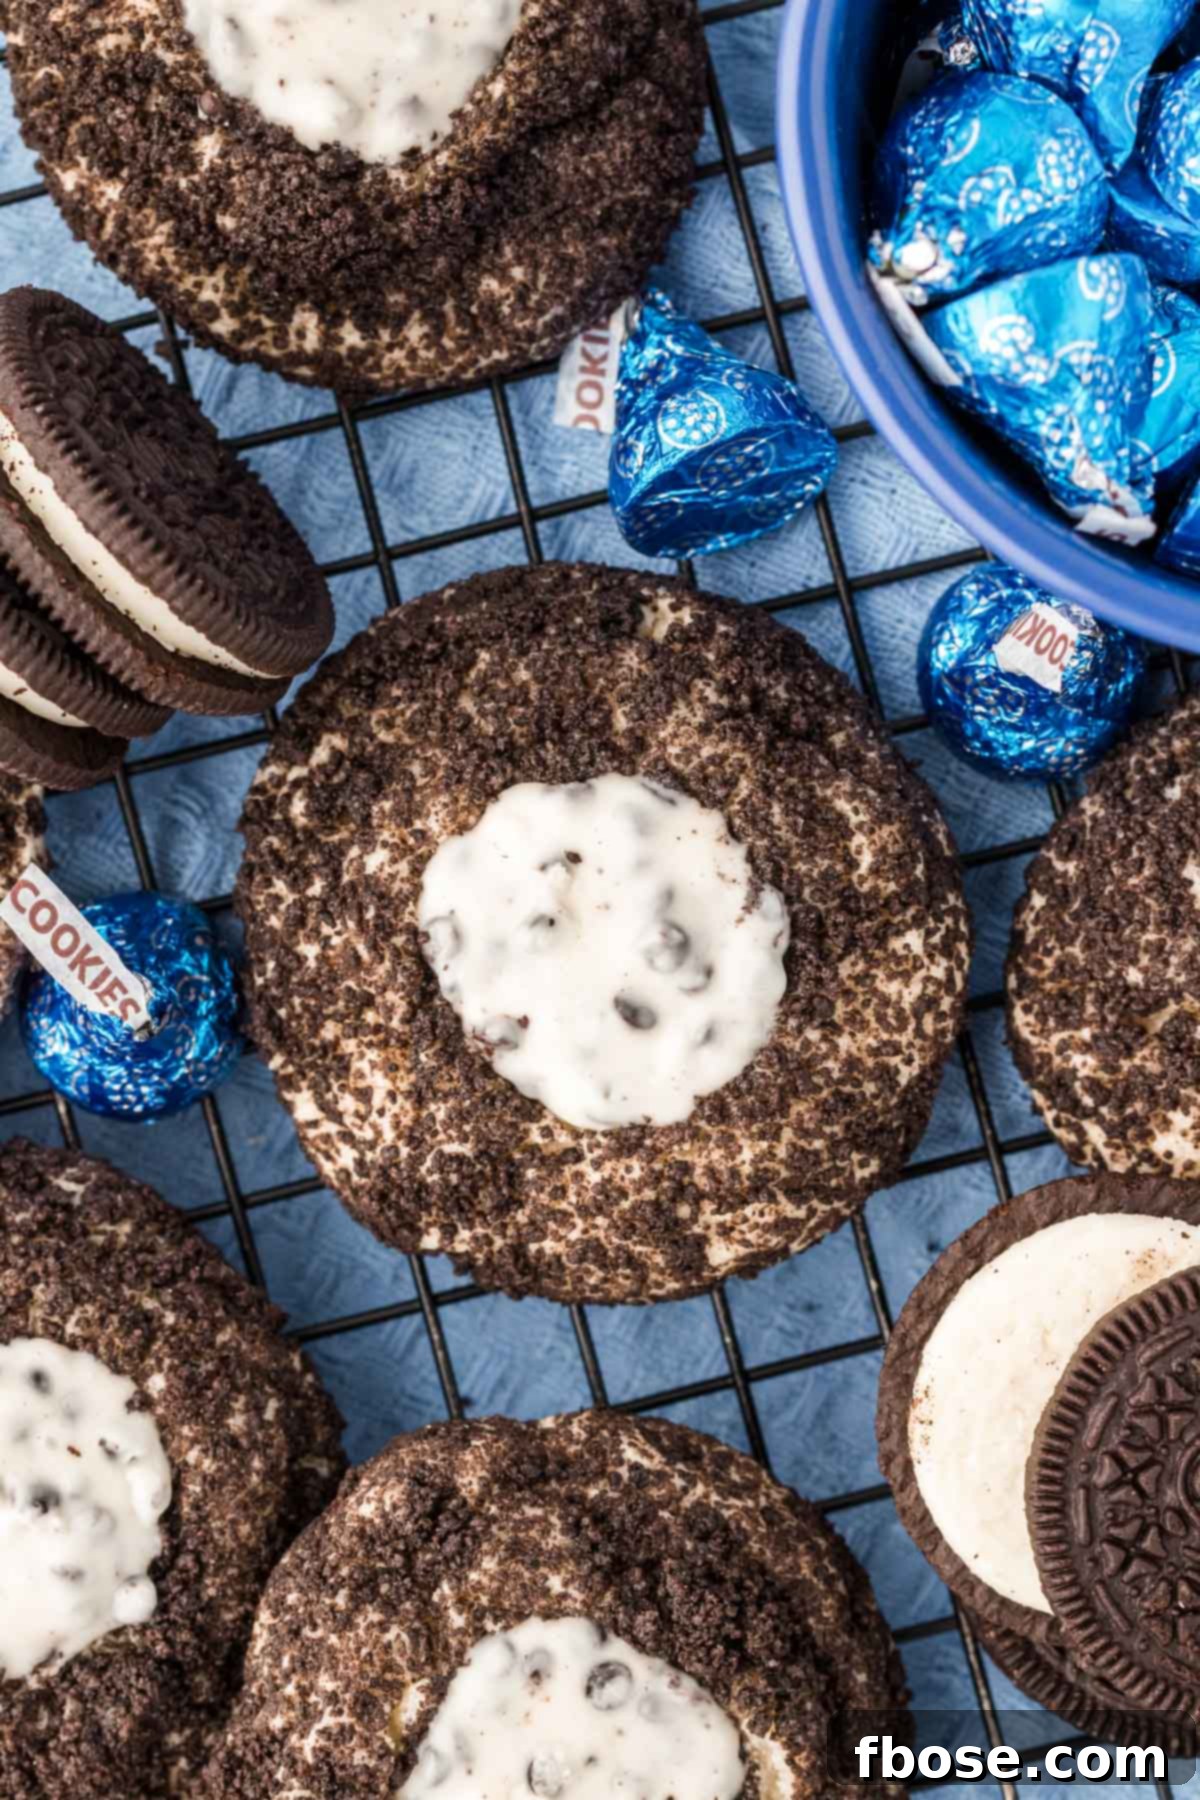
Essential Ingredients for Your Oreo Thumbprint Cookies
Crafting these delectable Cookies and Cream Thumbprint Cookies requires just a handful of simple ingredients, many of which you likely already have or can easily find at any grocery store. The beauty of this recipe lies in its clever shortcuts that don’t compromise on flavor or texture. Here’s what you’ll need to create this amazing treat:
- Double Stuf Oreos: These are the stars of our crumb coating! Using Double Stuf Oreos not only ensures a richer chocolate flavor but also contributes more of that creamy filling, which subtly enhances the texture of the crushed crumbs. We’ll be crushing these into fine crumbs to perfectly coat our cookie dough balls.
- One Package of Refrigerated Sugar Cookie Dough: This is our fantastic time-saving secret! Opting for pre-made dough eliminates several steps, allowing you to get to the baking faster without sacrificing that classic sugar cookie taste. It’s the ideal base for a quick yet impressive cookie.
- Whipped Cream Cheese: This ingredient is key to elevating the texture of our store-bought cookie dough. Whipped cream cheese adds an incredible tenderness and a delightful, subtle tang to the cookies, making them extra soft and wonderfully chewy. It also helps to bind the dough and adds a richness that you wouldn’t get from plain cookie dough.
- All-Purpose Flour: A small amount of all-purpose flour is added to help balance the moisture from the cream cheese and ensure the cookie dough maintains the perfect consistency for rolling and baking. It prevents the cookies from spreading too much and gives them a desirable chew.
- Cookies and Cream Hershey Kisses: The ultimate finishing touch! These iconic white chocolate Kisses, speckled with cookie bits, melt beautifully into the warm cookie indentations, delivering a burst of creamy, chocolatey goodness and completing the authentic cookies and cream experience.
With these few items, you’re well on your way to baking a batch of irresistible Oreo Thumbprint Cookies!
Get Creative: Substitutions & Variations for Your Thumbprint Cookies
While the classic Cookies and Cream Thumbprint Cookie is undeniably delicious, this recipe also offers fantastic flexibility for customization. Feel free to get creative and tailor these treats to your preferences or whatever ingredients you have on hand. Here are some exciting substitutions and variations to inspire your baking:
- Rich Chocolate Cookie Base: For the ultimate chocolate lover, transform these into a chocolate cookie variation. Simply omit the all-purpose flour called for in the recipe and instead, incorporate 1/3 cup of unsweetened cocoa powder into your dough. This simple swap will give you a deeper, richer chocolate flavor that pairs wonderfully with the Oreo crumbs and Hershey’s Kiss. For an even more decadent touch, consider adding a pinch of espresso powder to the cocoa for depth.
- Amp Up the Oreo Flavor: If you’re a true Oreo enthusiast, you can easily intensify the cookies and cream experience. Beyond rolling the cookies in crushed Oreos, try crushing a few additional Double Stuf Oreos and gently folding the crumbs directly into the cookie dough mixture. This will infuse every bite with extra chocolatey crunch, creating a more pronounced Oreo flavor throughout the cookie base. Just be sure to still reserve enough crumbs for the exterior coating!
- Explore Different Hershey Kisses: Don’t limit yourself to just Cookies and Cream Hershey Kisses! While they perfectly complement the theme, other Hershey Kiss flavors can create equally delightful variations. Experiment with classic milk chocolate kisses for a more traditional chocolate cookie experience, or use Hershey’s Hugs, which offer a lovely white chocolate swirl. Since the cookies themselves are coated in Oreos, you’ll still get plenty of the signature cookies and cream flavor, allowing the alternate Kiss to add a new dimension of taste and visual appeal.
- Decadent Drizzle Topping: For an extra touch of gourmet elegance and flavor, consider adding a drizzle. Melt a Hershey’s Cookies and Cream bar (or white chocolate, or even dark chocolate for contrast) in the microwave until it’s smooth and fluid. Then, use a spoon or a piping bag with a fine tip to artfully drizzle the melted chocolate over the cooled, finished cookies. This not only adds a beautiful decorative element but also enhances the overall flavor and sweetness, making each cookie feel even more special.
These variations allow you to put your unique spin on this already fantastic recipe, making it perfect for any occasion or craving!
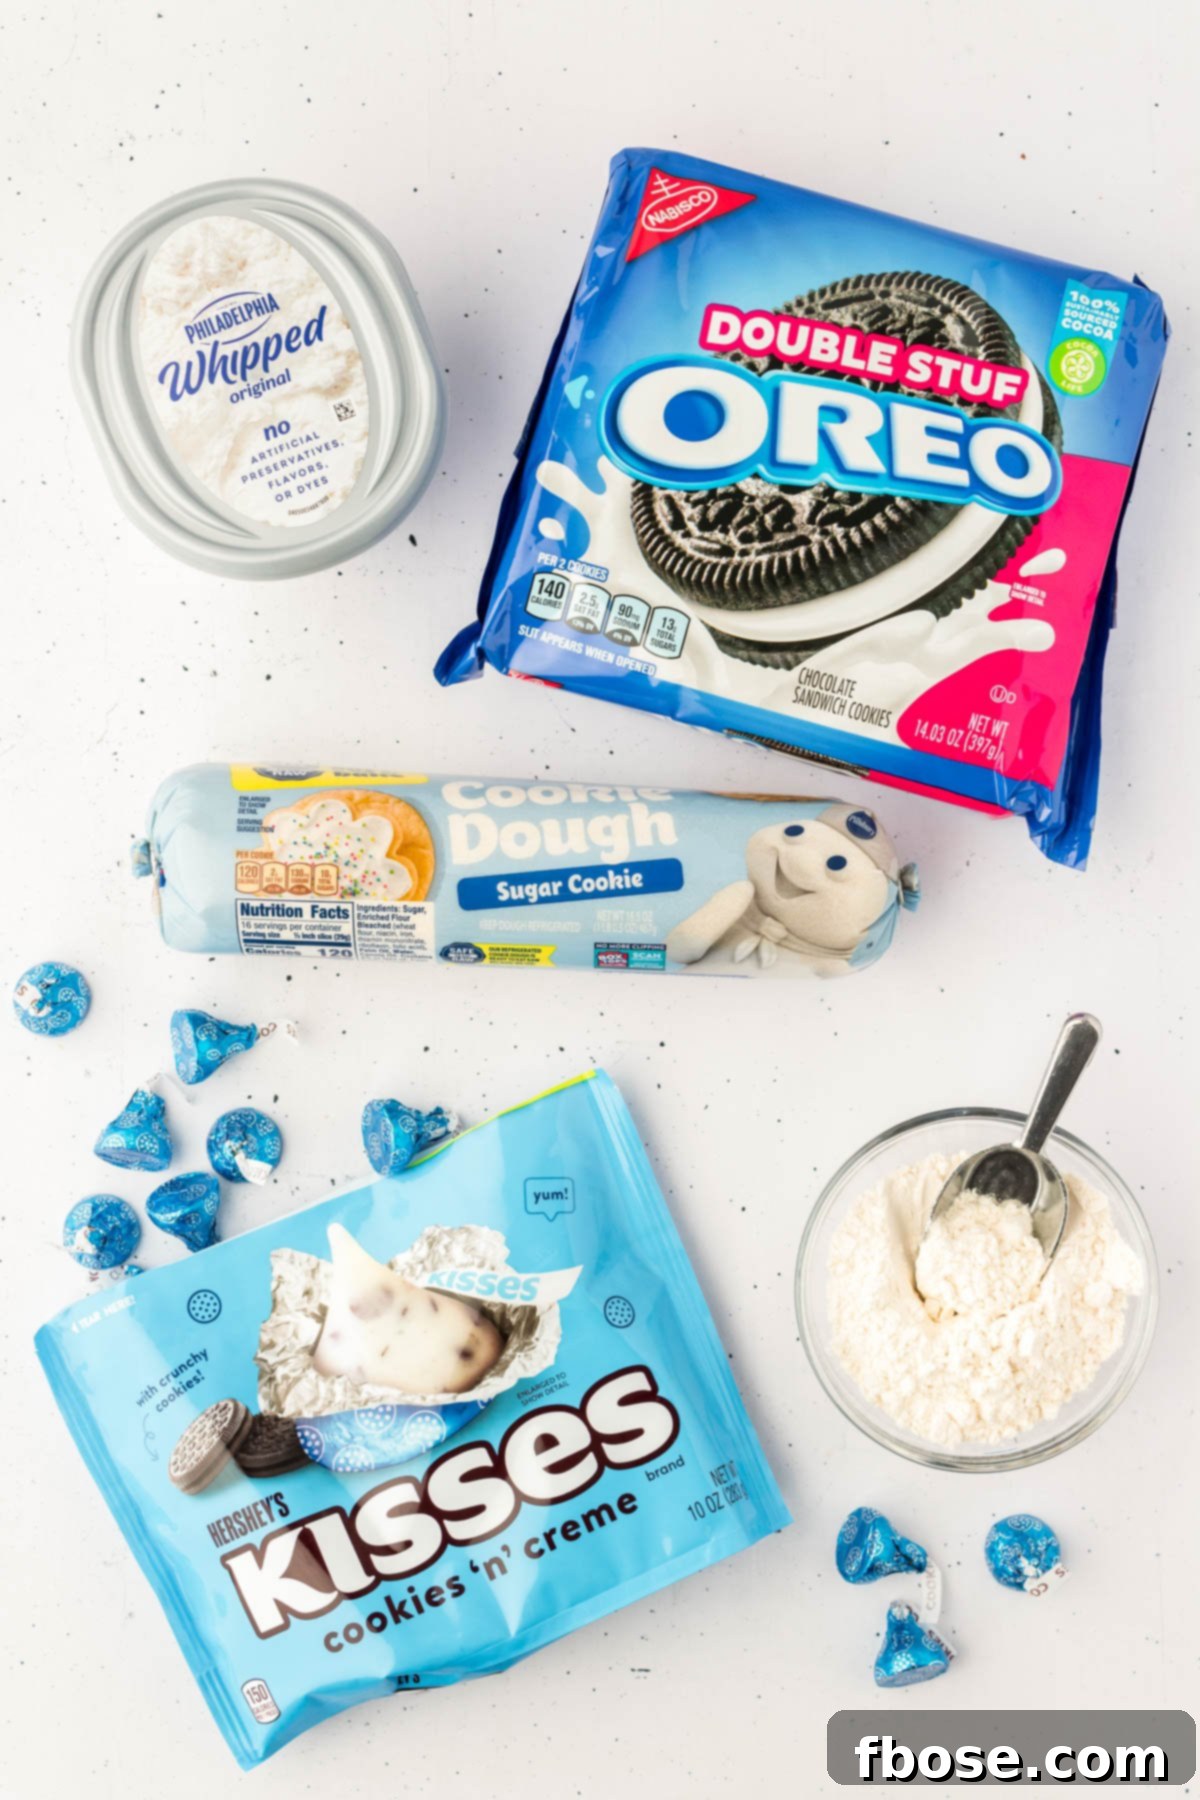
Step-by-Step: Crafting Your Cookies and Cream Thumbprint Cookies
Creating these delightful Oreo Thumbprint Cookies is a straightforward and enjoyable process, even for beginner bakers. With the convenience of store-bought cookie dough, you’ll have these impressive treats ready in no time. Follow these simple steps for perfectly baked cookies:
- Prepare Your Baking Station: Start by preheating your oven to 350°F (175°C). While the oven heats, line two large baking sheets with parchment paper. This prevents sticking and makes cleanup a breeze. Set these prepared sheets aside, ready for your cookie dough.
- Create the Oreo Crumb Coating: Take your Double Stuf Oreos and place them into the bowl of a food processor. Pulse the Oreos until they form fine, even crumbs. You want them to be consistently fine, without large chunks, for a smooth coating. Once crushed, transfer these Oreo crumbs into a medium-sized shallow bowl and set it aside. This bowl will be used for rolling the cookie dough.
- Prepare the Cookie Dough: In a large mixing bowl or the bowl of a stand mixer fitted with the paddle attachment, combine the entire package of refrigerated sugar cookie dough with the softened whipped cream cheese and the all-purpose flour. Beat these ingredients together on medium speed until they are thoroughly combined and form a uniform dough. During this process, be sure to stop occasionally and scrape down the sides of the bowl with a spatula to ensure all ingredients are fully incorporated. This step enhances the texture of the store-bought dough, making it chewier and more flavorful.
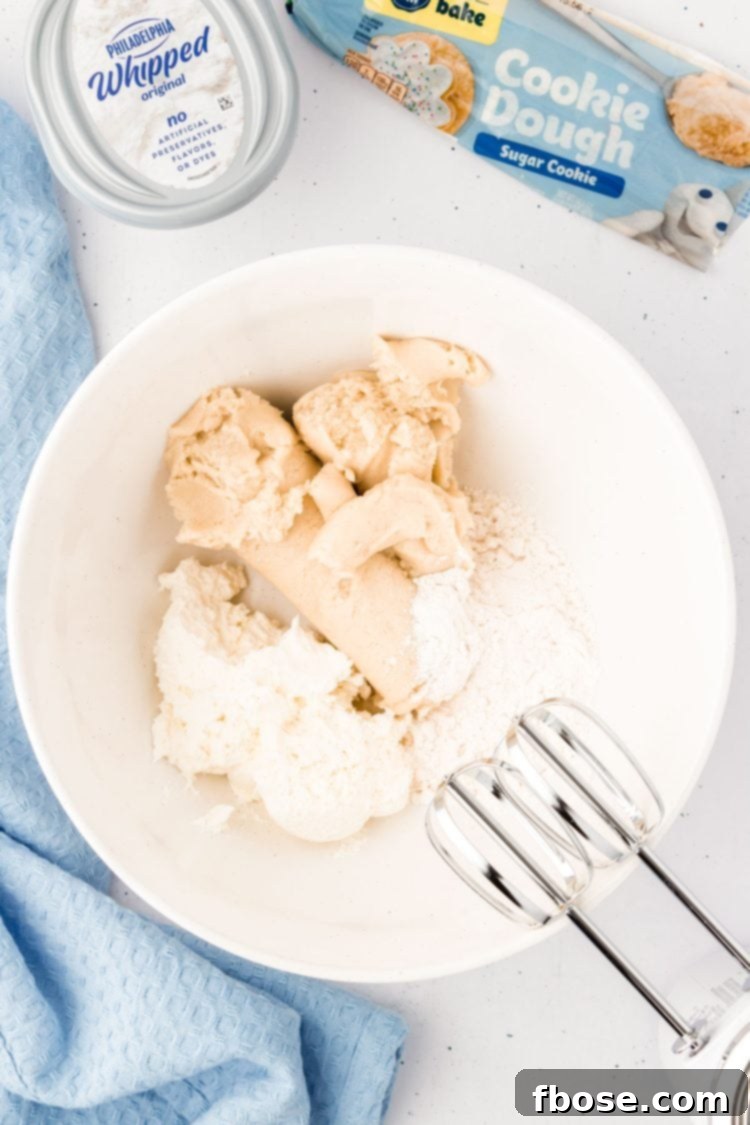
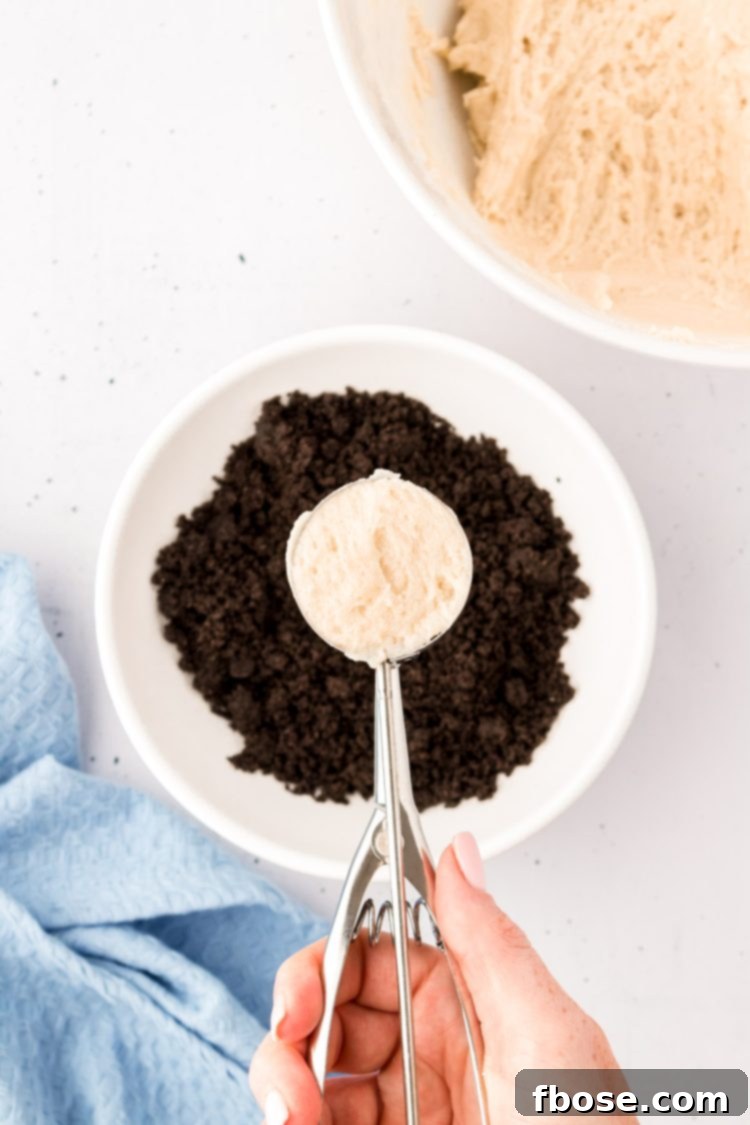
4. Portion and Shape the Dough: Use a small cookie scoop (approximately 4 teaspoons, or about 2 tablespoons for a larger cookie, though we prefer the smaller size for a balanced ratio of dough to chocolate) to portion out the cookie dough. Press the scoop against the sides of the bowl to level off each portion, ensuring uniform cookie sizes. This consistency helps them bake evenly.
5. Coat in Oreo Crumbs: Take each ball of portioned cookie dough and drop it into the bowl of crushed Oreo crumbs. Gently roll the dough ball around until it is completely and evenly coated with the crumbs. Ensure a generous layer for maximum flavor and crunch. The crumbs should adhere well to the slightly sticky dough.
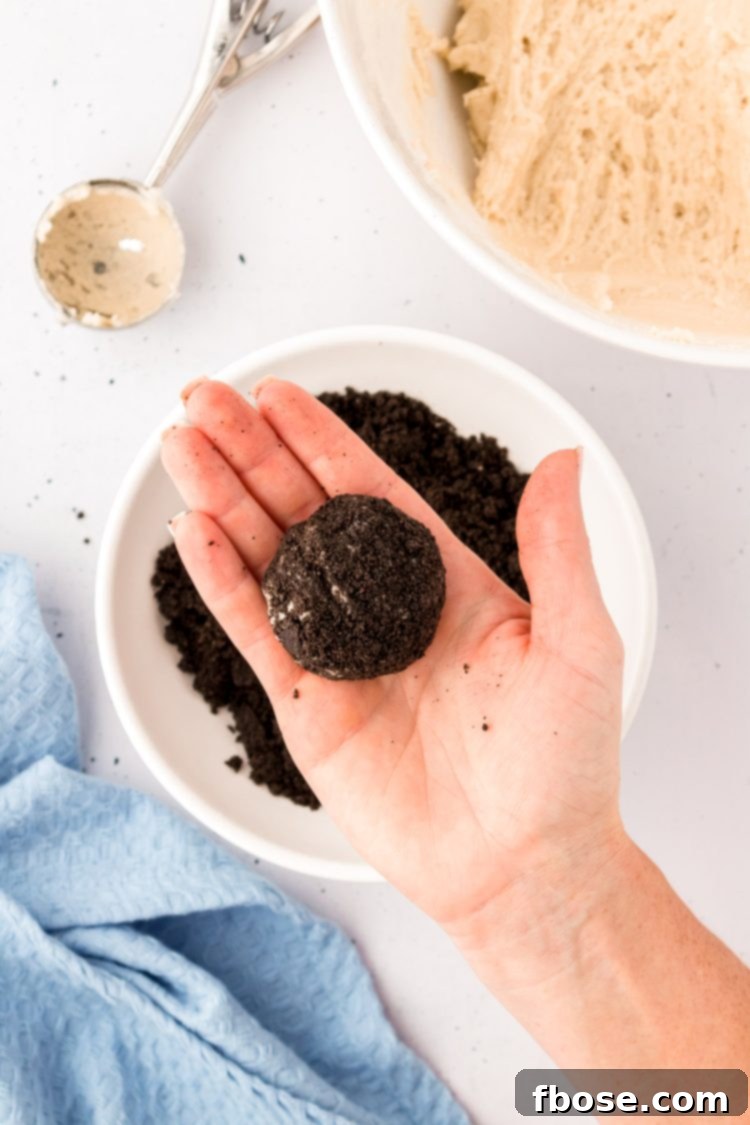
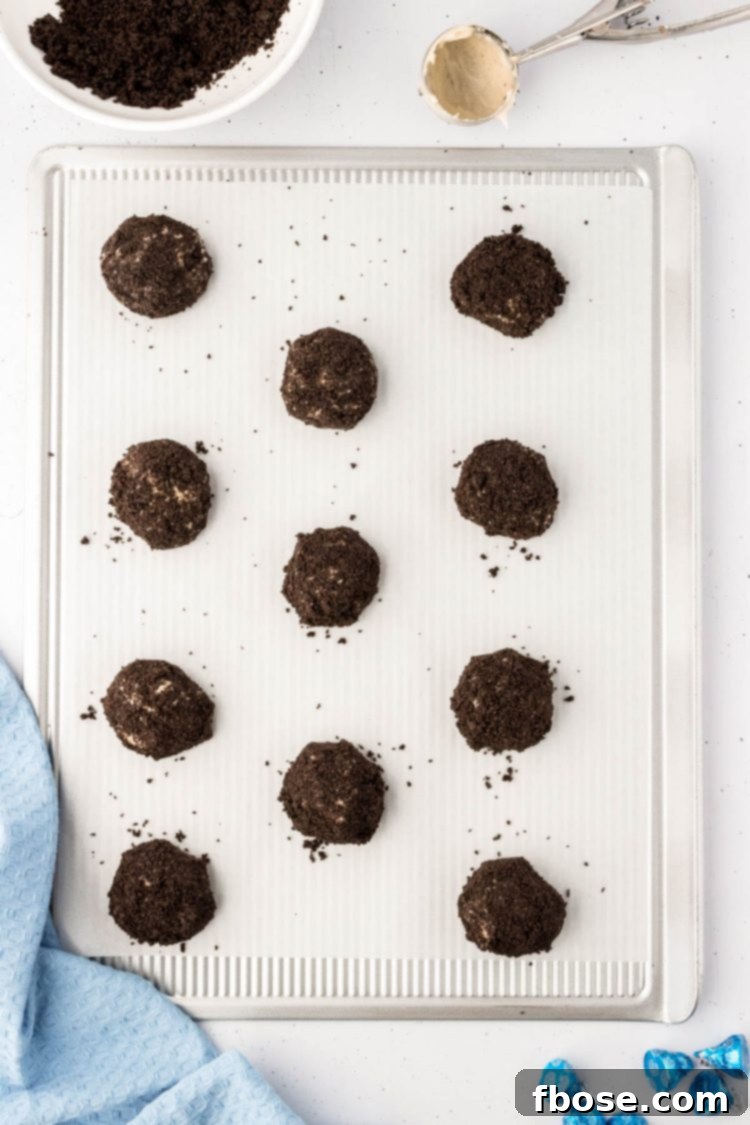
6. Arrange and Bake: Place the Oreo-covered cookie balls onto your prepared baking sheets, spacing them about 2 inches apart to allow for proper airflow and slight spreading during baking. Aim for approximately 12 cookies per baking sheet. Bake for 10 to 12 minutes, or until the edges are lightly golden and the centers are set but still soft. Avoid overbaking to maintain a chewy texture.
7. Initial Cooling: Once baked, remove the Cookies and Cream Thumbprint Cookies from the oven and allow them to cool on the baking sheets for about 5 minutes. This crucial step allows them to firm up slightly before you handle them, preventing breakage and preparing them for the next step.
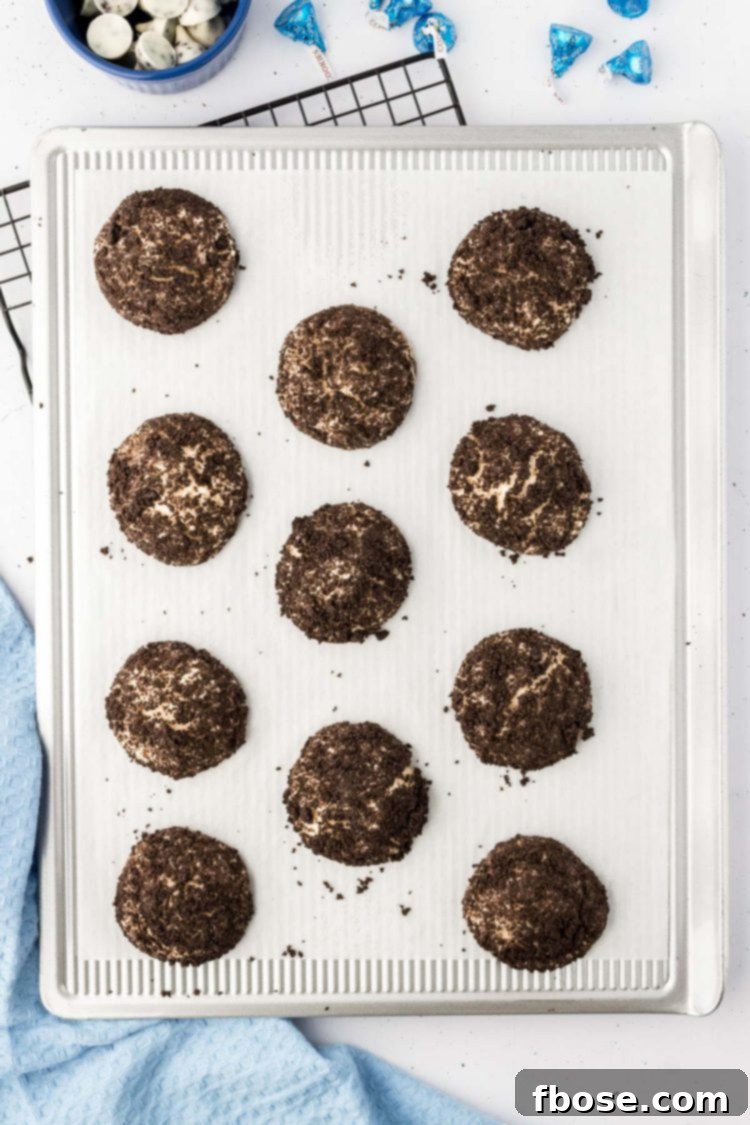
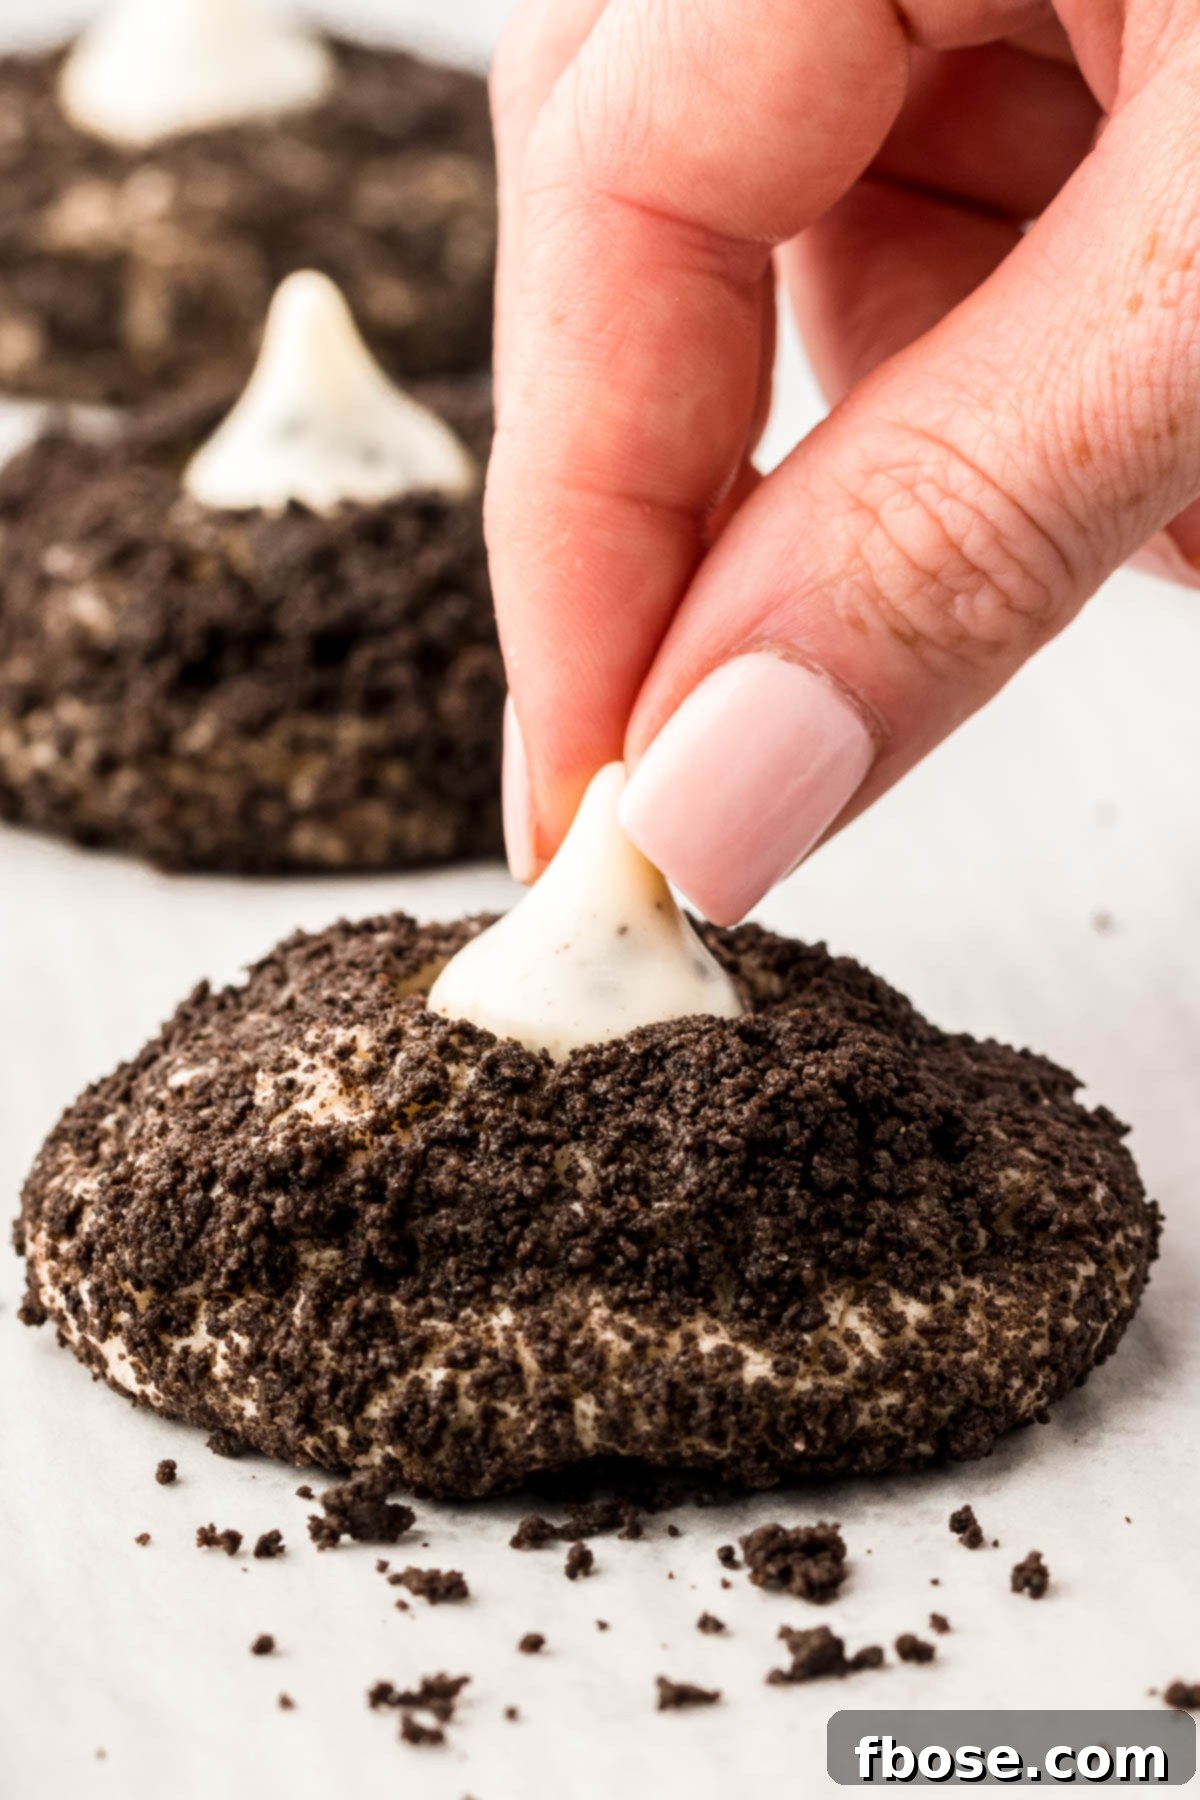
8. Add the Hershey Kisses: While the cookies are still warm and on the baking sheet, unwrap your Cookies and Cream Hershey Kisses. Gently but firmly press one Kiss into the top center of each cookie. The warmth of the cookie will slightly melt the chocolate, creating a perfect indentation that securely cradles the Kiss. Allow the cookies to sit for another 5 minutes on the pan after adding the Kisses.
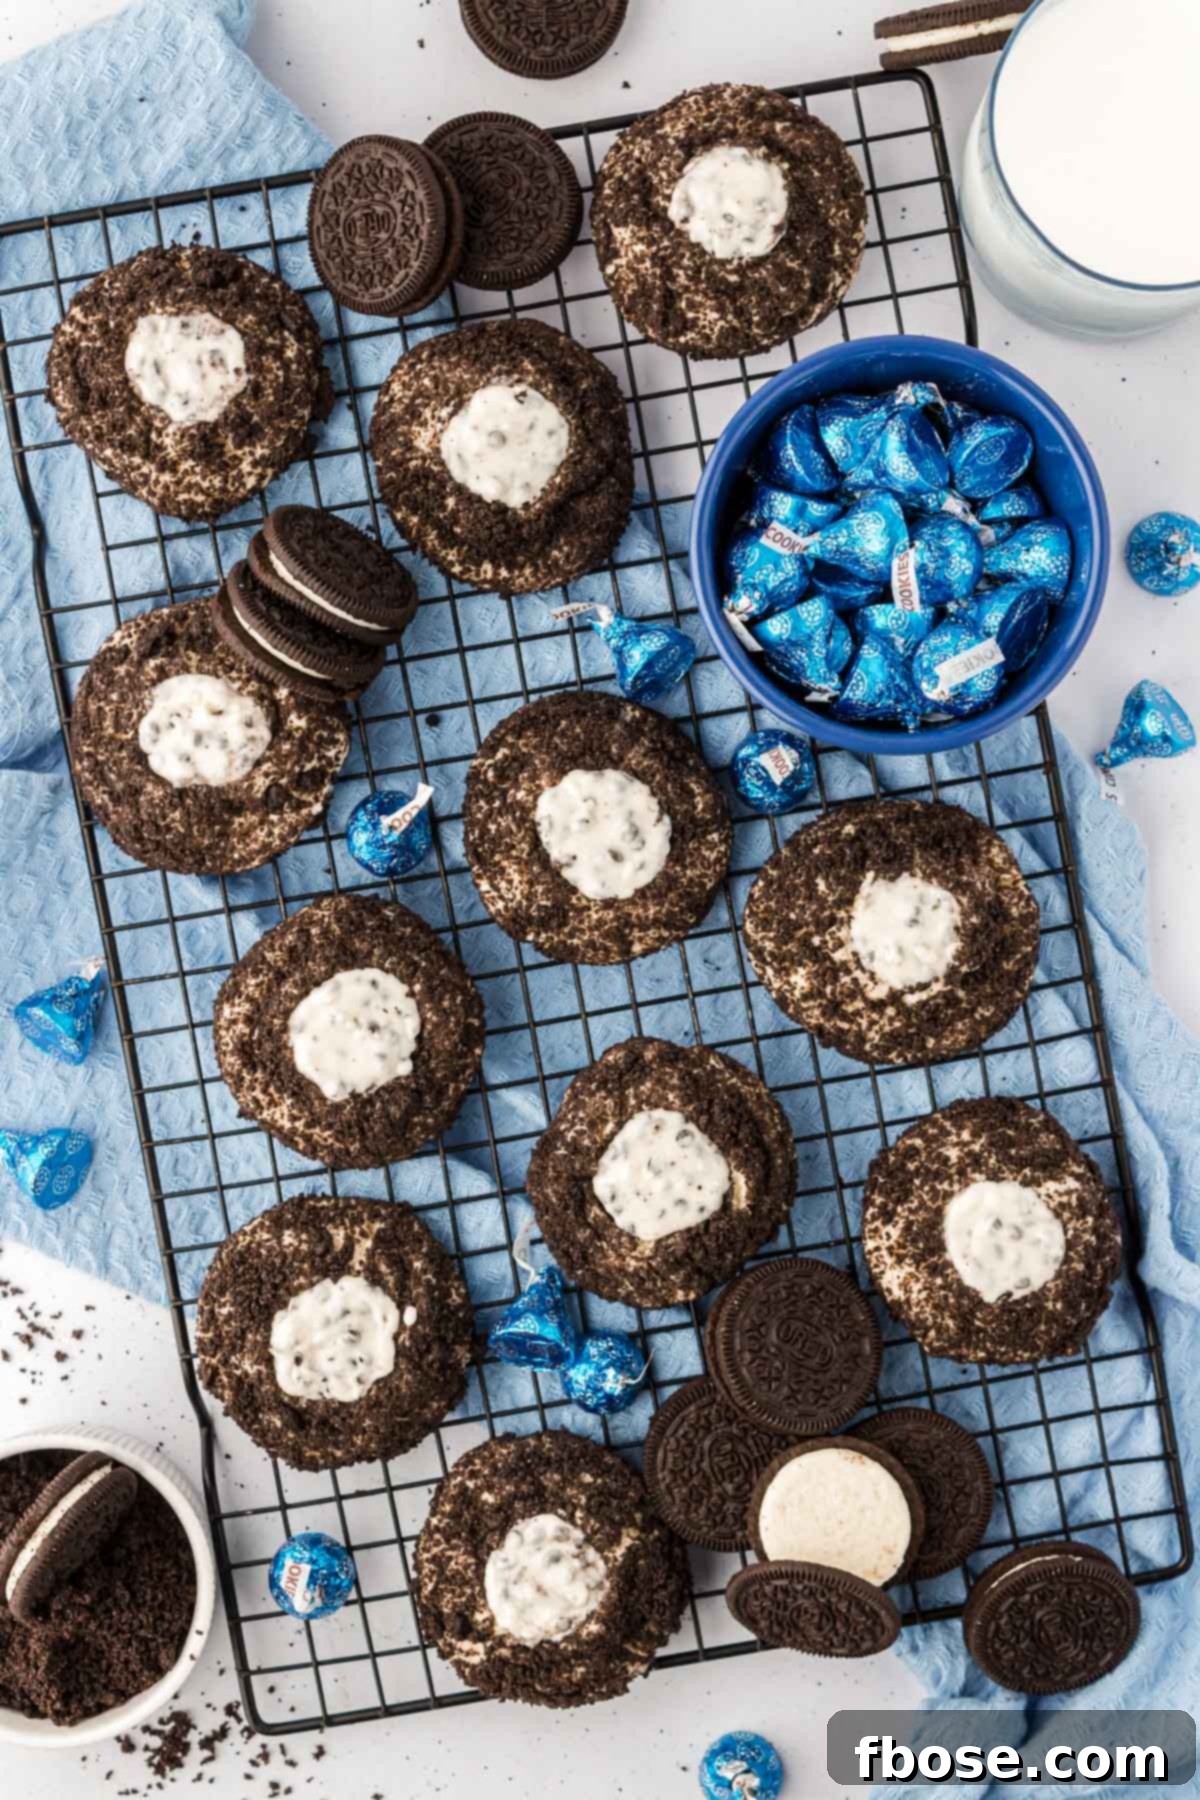
9. Final Cool Down and Shaping: After the Kisses have had a chance to soften, you have a choice: you can use a toothpick to gently swirl the melted Kiss, creating a beautiful “puddle” effect for a more artistic look, or simply allow the Kiss to reharden on its own, maintaining its classic shape. Afterward, transfer the cookies to a wire rack to cool completely to room temperature. This final cooling step ensures the cookies set properly and the Kisses achieve their desired consistency.
Expert Baking Tips for Perfect Oreo Thumbprint Cookies
Achieving the perfect Cookies and Cream Thumbprint Cookies is simple with a few insider tips. These insights will help you create a batch that’s not only delicious but also consistently beautiful:
- The Cream Cheese Advantage: For the absolute best results, always opt for whipped cream cheese. Its lighter consistency contributes to a remarkably soft and chewy cookie, making the overall texture superior. However, if whipped cream cheese isn’t available, regular block cream cheese can be used in a pinch; just ensure it’s softened to room temperature for easier mixing and a smoother dough.
- Oreo Options: While Double Stuf Oreos are specified for their enhanced creaminess and flavor contribution, don’t hesitate to use regular Oreos if that’s what you have. The cookies will still be incredibly delicious, delivering that beloved cookies and cream taste. The Double Stuf simply adds a slightly richer and sweeter note to the final product.
- Baking Surface Smarts: Parchment paper is excellent for non-stick baking and easy cleanup. However, if you prefer using a silicone baking mat, that works too! Just be mindful that silicone mats can sometimes conduct heat more efficiently, potentially causing cookies to bake a bit faster. Keep a close eye on your cookies when using silicone to prevent overbaking and ensure they remain perfectly tender.
- No Food Processor? No Problem!: If a food processor isn’t part of your kitchen arsenal, you can still achieve perfectly crushed Oreo crumbs. Simply place the Double Stuf Oreos into a sturdy Ziploc bag. Squeeze out as much excess air as possible and seal it tightly. Then, grab a rolling pin (or even a heavy can) and roll it firmly and repeatedly over the bag until the cookies are reduced to fine, consistent crumbs.
- Mixing Made Easy: A stand mixer truly simplifies the process of combining the dough ingredients, especially since the addition of cream cheese makes the dough a bit thicker. The power of a stand mixer ensures a smooth, well-incorporated dough. If you don’t have one, an electric hand mixer is a great alternative. For those who prefer a more hands-on approach, you can certainly mix the dough by hand using a sturdy spoon or spatula, just be prepared for a bit more arm work!
- Indentation Perfection, Naturally: You might be tempted to create an indentation in the cookie dough balls before baking, but it’s completely unnecessary for this recipe. The warmth of the freshly baked cookies is your ally here! As you gently press the Hershey’s Kiss into the warm cookie, it will naturally create a perfect indent that hugs and holds the Kiss securely in place. This method saves you a step and ensures a snug fit for your chocolate center.
By following these tips, your Cookies and Cream Thumbprint Cookies will turn out beautifully every single time, ready to delight anyone who tastes them!
Serving Your Delectable Cookies and Cream Thumbprint Cookies
These Oreo Thumbprint Cookies are a true crowd-pleaser and can be enjoyed in a variety of ways. For the ultimate sensory experience, these cookies are **best enjoyed the same day they are made.** This is when their delicate balance of textures is at its peak: the cookie base is wonderfully soft and chewy, and the Oreo crumb crust still boasts a delightful, satisfying crunch. Over time, the moisture from the cookie can cause the Oreo crumbs to soften, transforming the crunchy exterior into a softer coating. While still delicious, the fresh crunch is truly special.
Serve them up as a decadent after-dinner treat with a glass of cold milk or a warm cup of coffee. Their charming appearance and irresistible flavor make them perfect for bringing to parties, potlucks, or family gatherings – they’re guaranteed to disappear fast! You can also bake a batch simply to add some spontaneous joy to your kids’ day, or as a thoughtful homemade gift for friends and neighbors. Arrange them on a pretty platter for an elegant presentation, or stack them in a cookie jar for easy access to a sweet escape.
Storing Your Oreo Thumbprint Cookies for Freshness
To ensure your Oreo Thumbprint Cookies remain as fresh and delicious as possible, proper storage is key. After they have completely cooled to room temperature, transfer these delightful cookies to an airtight container. Alternatively, you can place them in a large Ziploc bag, making sure to gently squeeze out any excess air before sealing. Store them at room temperature, where they will maintain their optimal taste and texture for up to 2 days. While they are still enjoyable beyond this time, the Oreo crumb coating may soften slightly, losing some of its initial crunch. For longer storage, you can freeze the baked cookies in an airtight container for up to 2-3 months. Thaw at room temperature when ready to enjoy.
Discover More Easy Cookie Recipes
If you’ve enjoyed the simplicity and deliciousness of these Cookies and Cream Thumbprint Cookies, you’ll love exploring other hassle-free cookie recipes from our collection. Perfect for any occasion or craving, these recipes are designed to bring joy to your kitchen:
- Chocolate Peanut Butter No Bake Cookies – The timeless, irresistible classic that requires no oven!
- Andes Mint Cookies – Indulge in perfectly melted, minty centers, a true delight for mint chocolate lovers.
- Circus Animal Cookies – A fun and vibrant 4-ingredient recipe packed with delightful circus animal cookies!
- Cherry Cheesecake Cookies – Made with cleverly doctored-up refrigerated cookie dough for a quick cheesecake-inspired treat!
- No Bake Avalanche Cookies – Experience pure peanut buttery, marshmallowy, and chocolatey goodness without turning on the oven!
Did You Make This Recipe?
If you’ve tried this recipe, please leave a review in the comments below. We love hearing from you! Don’t forget to tag us – @sugarandsoulco – on Instagram and Pinterest with your photos, or join our Sugar & Soul Show-offs Community and share them there.
★
★
★
★
Oreo Thumbprint Cookies
Servings 24 cookies
Ingredients
- 9 Double Stuf Oreos
- 1 (16 oz.) package refrigerated sugar cookie dough
- 4 ounces whipped cream cheese
- ⅓ cup all-purpose flour
- 24 Cookies and Cream Hershey Kisses
Instructions
-
Preheat the oven to 350°F, line two large baking sheets with parchment paper, and set aside.
-
Add 9 Double Stuf Oreos to a food processor and pulse until fine crumbs form. Add to a medium bowl and set aside.
-
In a large bowl or stand mixer, beat together 1 (16 oz.) package refrigerated sugar cookie dough, 4 ounces whipped cream cheese, and ⅓ cup all-purpose flour until combined, Scraping down the sides of the bowl as needed.
-
Use a small cookie scoop (4 teaspoons) to portion out the dough, pressing the scoop against the sides of the bowl to level it off.
-
Drop the ball of cookie dough in the Oreo crumbs and roll until coated.
-
Place the cookies about 2 inches apart on the prepared baking sheets – about 12 cookies per baking sheet.
-
Bake for 10 to 12 minutes.
-
Let the cookies cool for 5 minutes on the pan.
-
Unwrap the 24 Cookies and Cream Hershey Kisses, then gently press one into each cookie on the pan and let sit for another 5 minutes before transferring to a wire rack. The kisses should appear glossy, which means the heat from the cookies has softened them all the way through.
-
You can swirl the melted kiss so it looks like a puddle or let it reharden into a kiss shape.
Notes
- These are best enjoyed the same day when the cookies are soft, and the Oreo crust still has crunch. Over time, the moisture from the cookies will soften the Oreo crumbs, and they will get soft.
Nutrition
Did You Make This Recipe?
Don’t forget to share it with me on Instagram @sugarandsoulco and follow on Tiktok @sugarandsoulco and Pinterest @sugarandsoulco for more!
Ⓟ Pin Recipe
Ⓕ Share Recipe