

Indulge your sweet tooth in the ultimate no-bake delight: these sensational Rice Krispie Peanut Butter Balls! This treat is not just incredibly fun to prepare but even more satisfying to devour. Featuring a straightforward recipe that requires absolutely no baking, these delectable Peanut Butter Balls stand out as the perfect choice for a quick, delightful, and fuss-free homemade dessert. They’re a fantastic option when you crave something sweet and satisfying without turning on the oven.
Imagine a culinary masterpiece where the satisfying crunch of crispy rice cereal flawlessly merges with the smooth, rich creaminess of peanut butter. Now, envision this delightful core enveloped in a generous, decadent coating of luscious chocolate. Each bite is a symphony for your senses – a harmonious blend of textures and flavors that will dance on your taste buds, leaving you craving more. These treats offer the perfect balance of salty and sweet, making them an instant crowd-pleaser for any occasion.
If you’re a fan of effortless, no-bake recipes, you’ll be thrilled to discover other quick delights like our Easy No-Bake Pretzel Cookies or our divine No-Bake Chocolate Pie! Both of these incredibly tasty desserts require minimal effort, taking just about 15 minutes of hands-on preparation time to bring to life. They’re ideal for when you need a speedy dessert solution that doesn’t compromise on flavor or appeal.

Irresistible Rice Krispie Peanut Butter Balls: The Ultimate No-Bake Treat
Rice Krispie Peanut Butter Balls are more than just a dessert; they’re a handheld sensation that consistently disappears faster than you can say “delicious!” This popularity is no surprise, as they offer the best of both worlds, ingeniously combining the beloved crispy texture of classic Rice Krispie treats with the rich, melt-in-your-mouth flavor of traditional peanut butter balls. The result is a uniquely satisfying bite-sized creation that captivates with its dynamic textures and perfectly balanced flavors.
What truly sets these treats apart is their incredible convenience. They are quick enough to whip up on short notice, making them my absolute favorite dessert to bring to any gathering or potluck. Their ease also means I can indulge my cravings for a salty-sweet snack anytime, without committing to hours in the kitchen. Whether it’s a spontaneous craving or a planned event, these Rice Krispie Peanut Butter Balls deliver maximum delight with minimum effort, proving that the most delicious desserts don’t always require an oven.
Why You’ll Fall in Love with Crispy Peanut Butter Balls
These delightful treats aren’t just easy to make; they are a truly irresistible experience designed to satisfy every craving. Here’s why these Crispy Peanut Butter Balls will quickly become your new favorite:
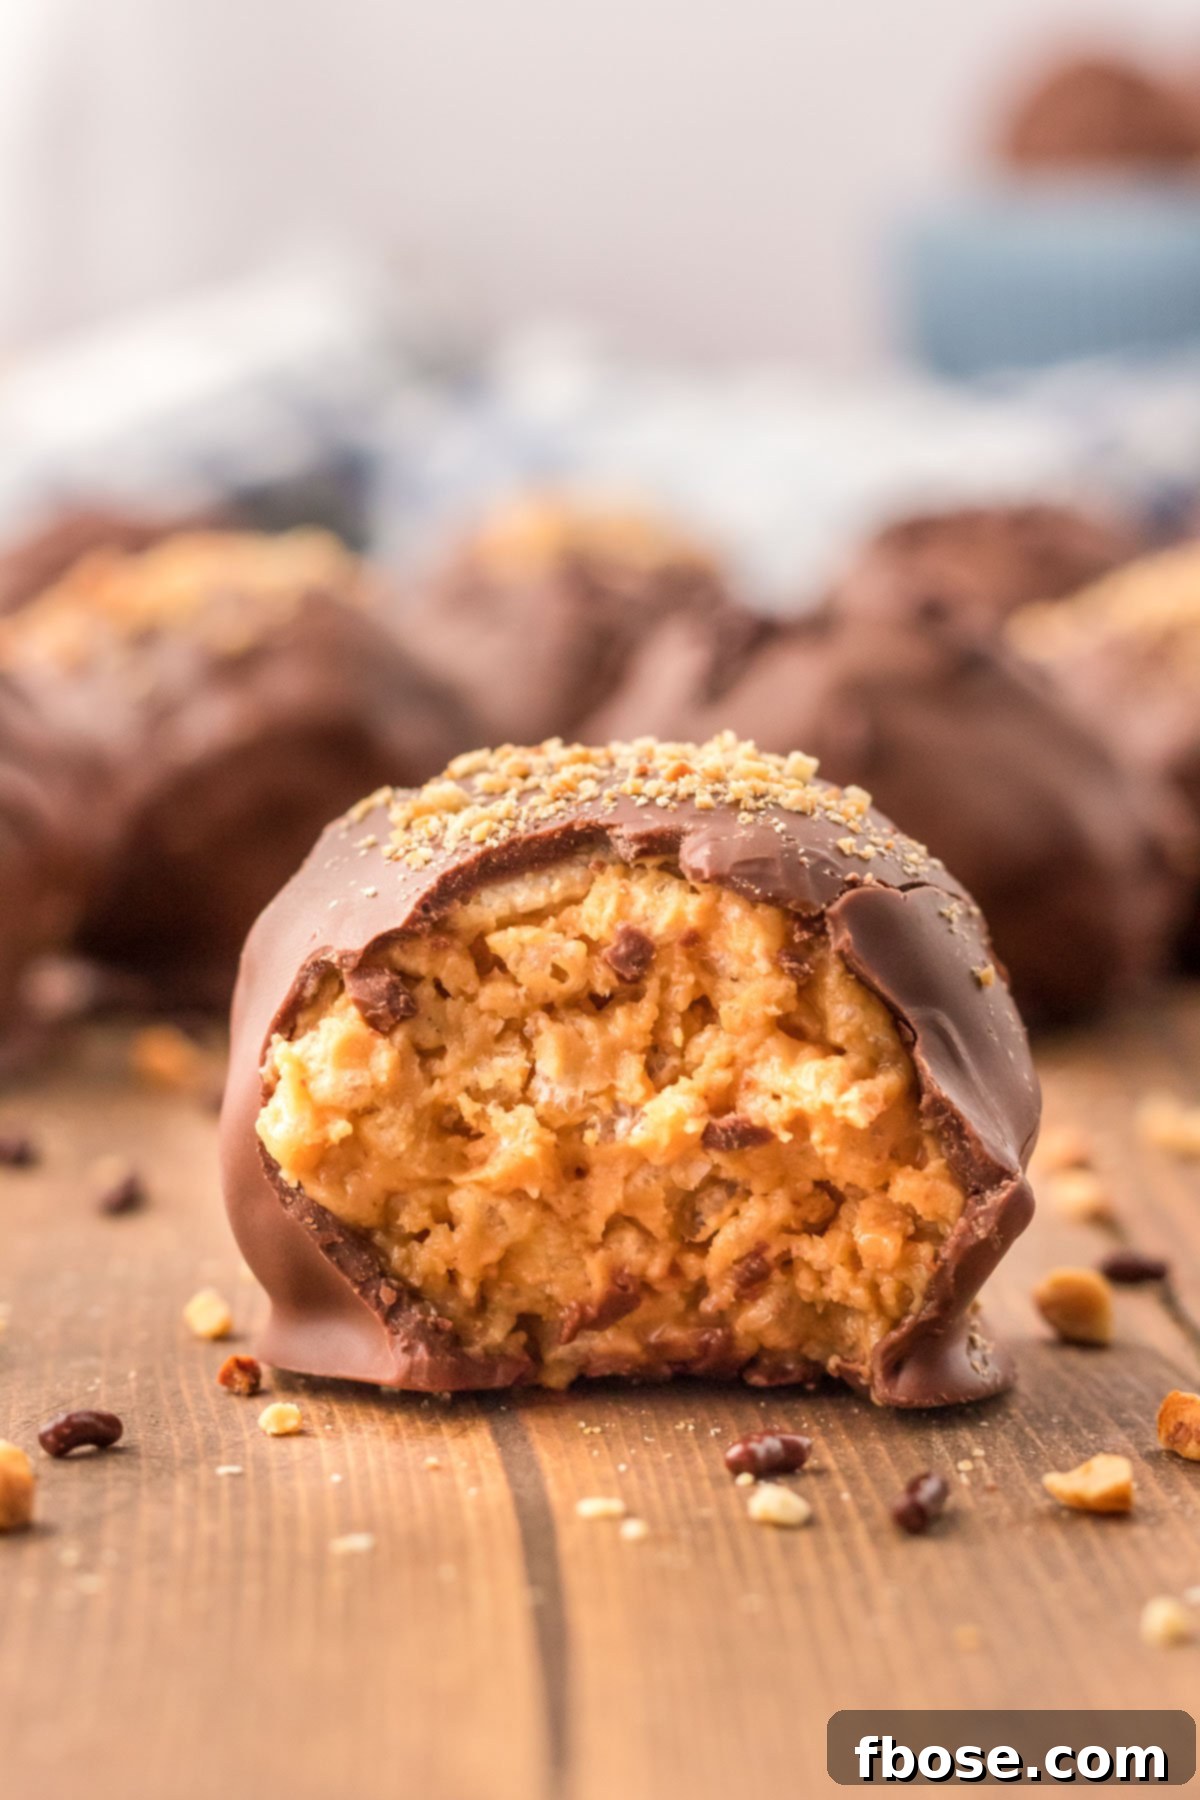
Unforgettable Taste: Each pop-in-your-mouth bite of these no-bake peanut butter balls delivers one of the most beloved dessert combinations: chocolate and peanut butter! The moment the rich, slightly bitter or creamy sweet chocolate coating meets the salty, sweet peanut butter filling, your taste buds will be instantly reminded of your favorite peanut butter cups, but with an exciting, homemade twist. The hint of vanilla extract subtly enhances both the peanut butter and chocolate, creating a deep, complex flavor profile that’s simply divine.
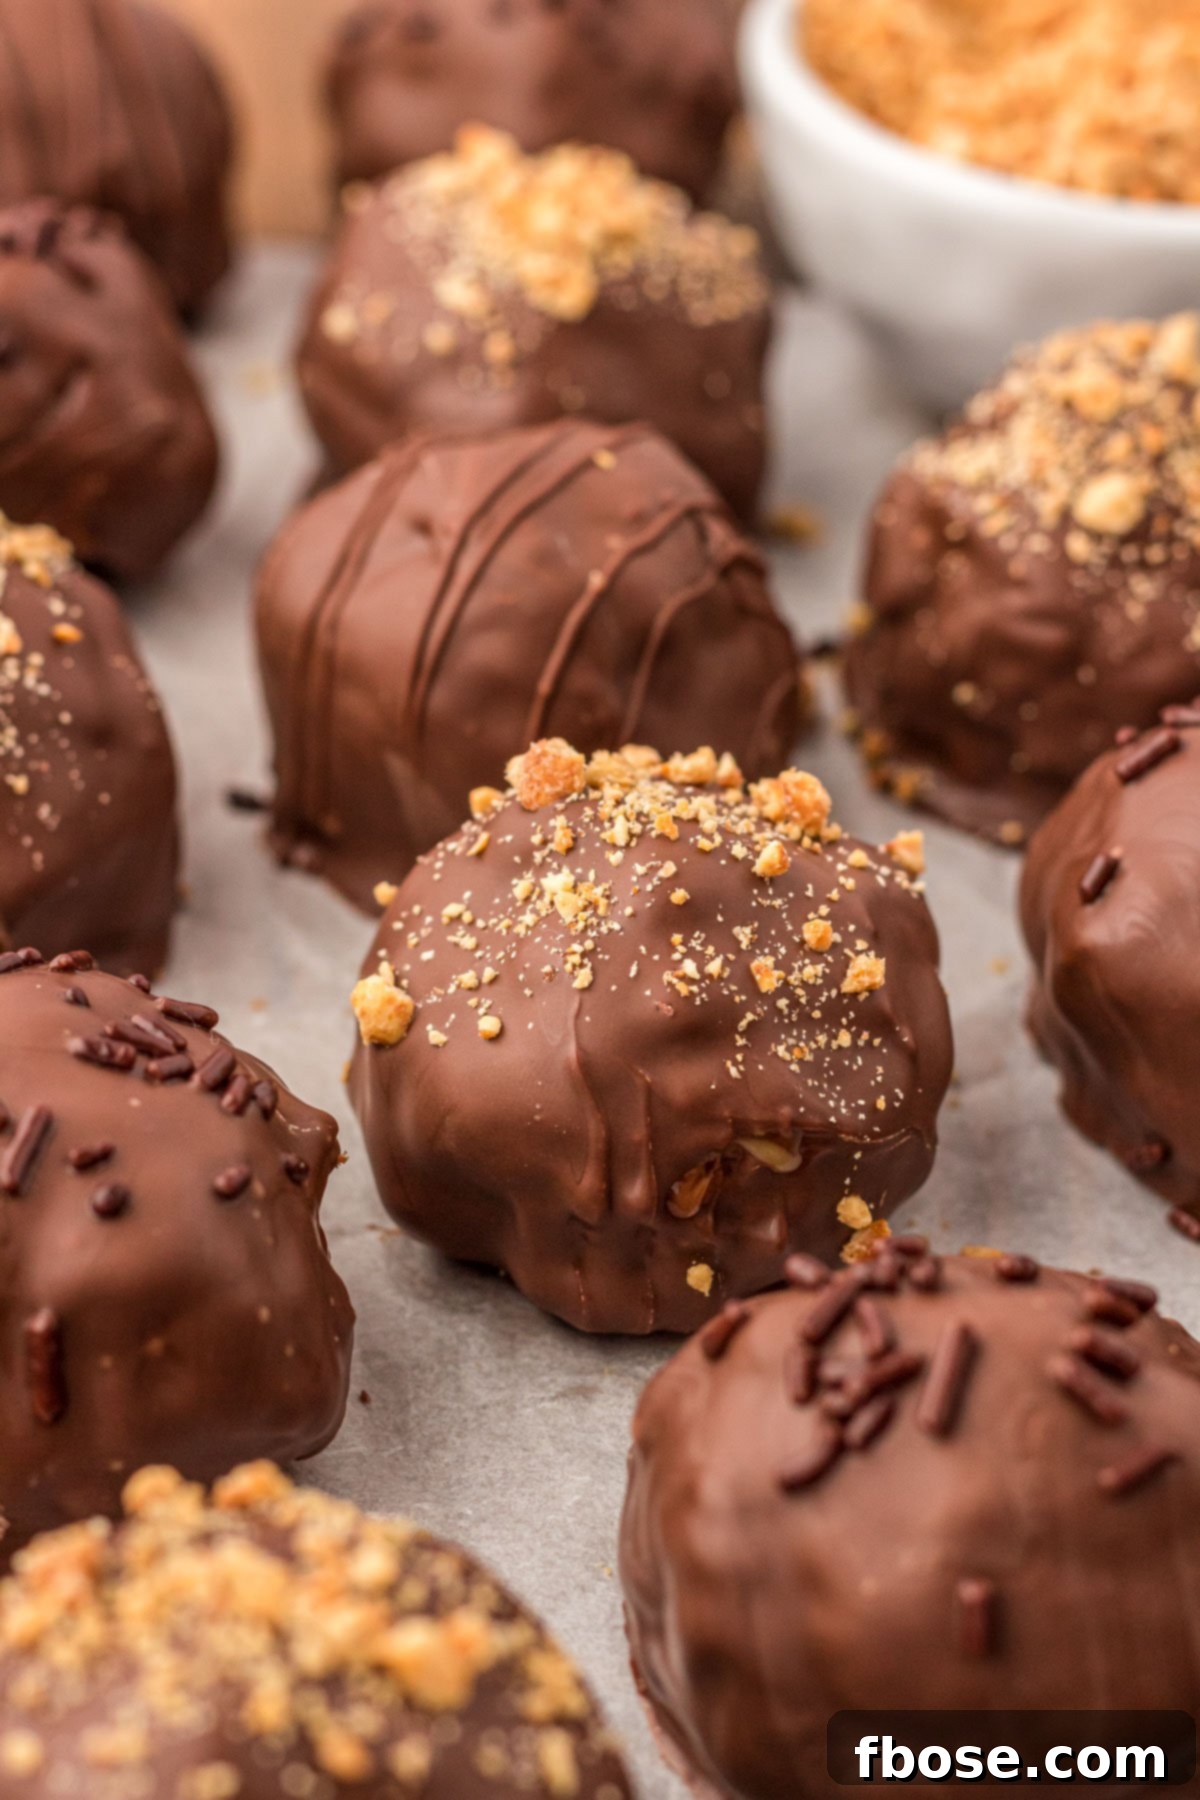
Dynamic Texture: Prepare for a textural adventure! The filling in these dessert balls is wonderfully loaded with a deliciously crunchy texture from the scattered Rice Krispies cereal, perfectly contrasting with the underlying creaminess of the peanut butter. It’s a sublime combination that provides a satisfying bite every single time. This delightful, crispy-creamy core is then encased in a smooth, glossy chocolate shell that melts beautifully in your mouth. To elevate the experience even further, these balls are often topped with a playful sprinkle of chocolate jimmies or finely chopped peanuts, adding another layer of visual appeal and textural intrigue.
Effortless No-Bake Convenience: In today’s fast-paced world, finding a dessert that doesn’t demand hours of baking is a true blessing. These peanut butter balls are entirely no-bake, meaning you save time, keep your kitchen cool, and avoid the complexities often associated with oven-baked goods. They’re perfect for novice cooks, busy parents, or anyone looking for a quick yet impressive dessert. The simple preparation allows you to enjoy homemade goodness without the usual fuss, making them ideal for last-minute cravings or unexpected guests.
Versatile & Customizable: Whether you’re preparing for a holiday feast, a casual potluck, a birthday party, or just a cozy night in, these peanut butter balls fit every scenario. Their bite-sized format makes them excellent for serving on platters, and their inherent deliciousness guarantees they’ll be a hit. Beyond their natural appeal, they are incredibly versatile for customization. You can easily change the chocolate type, add different toppings, or even incorporate various extracts to create unique flavor profiles, making them adaptable to any season or celebration.
Essential Ingredients for Peanut Butter Rice Krispie Balls
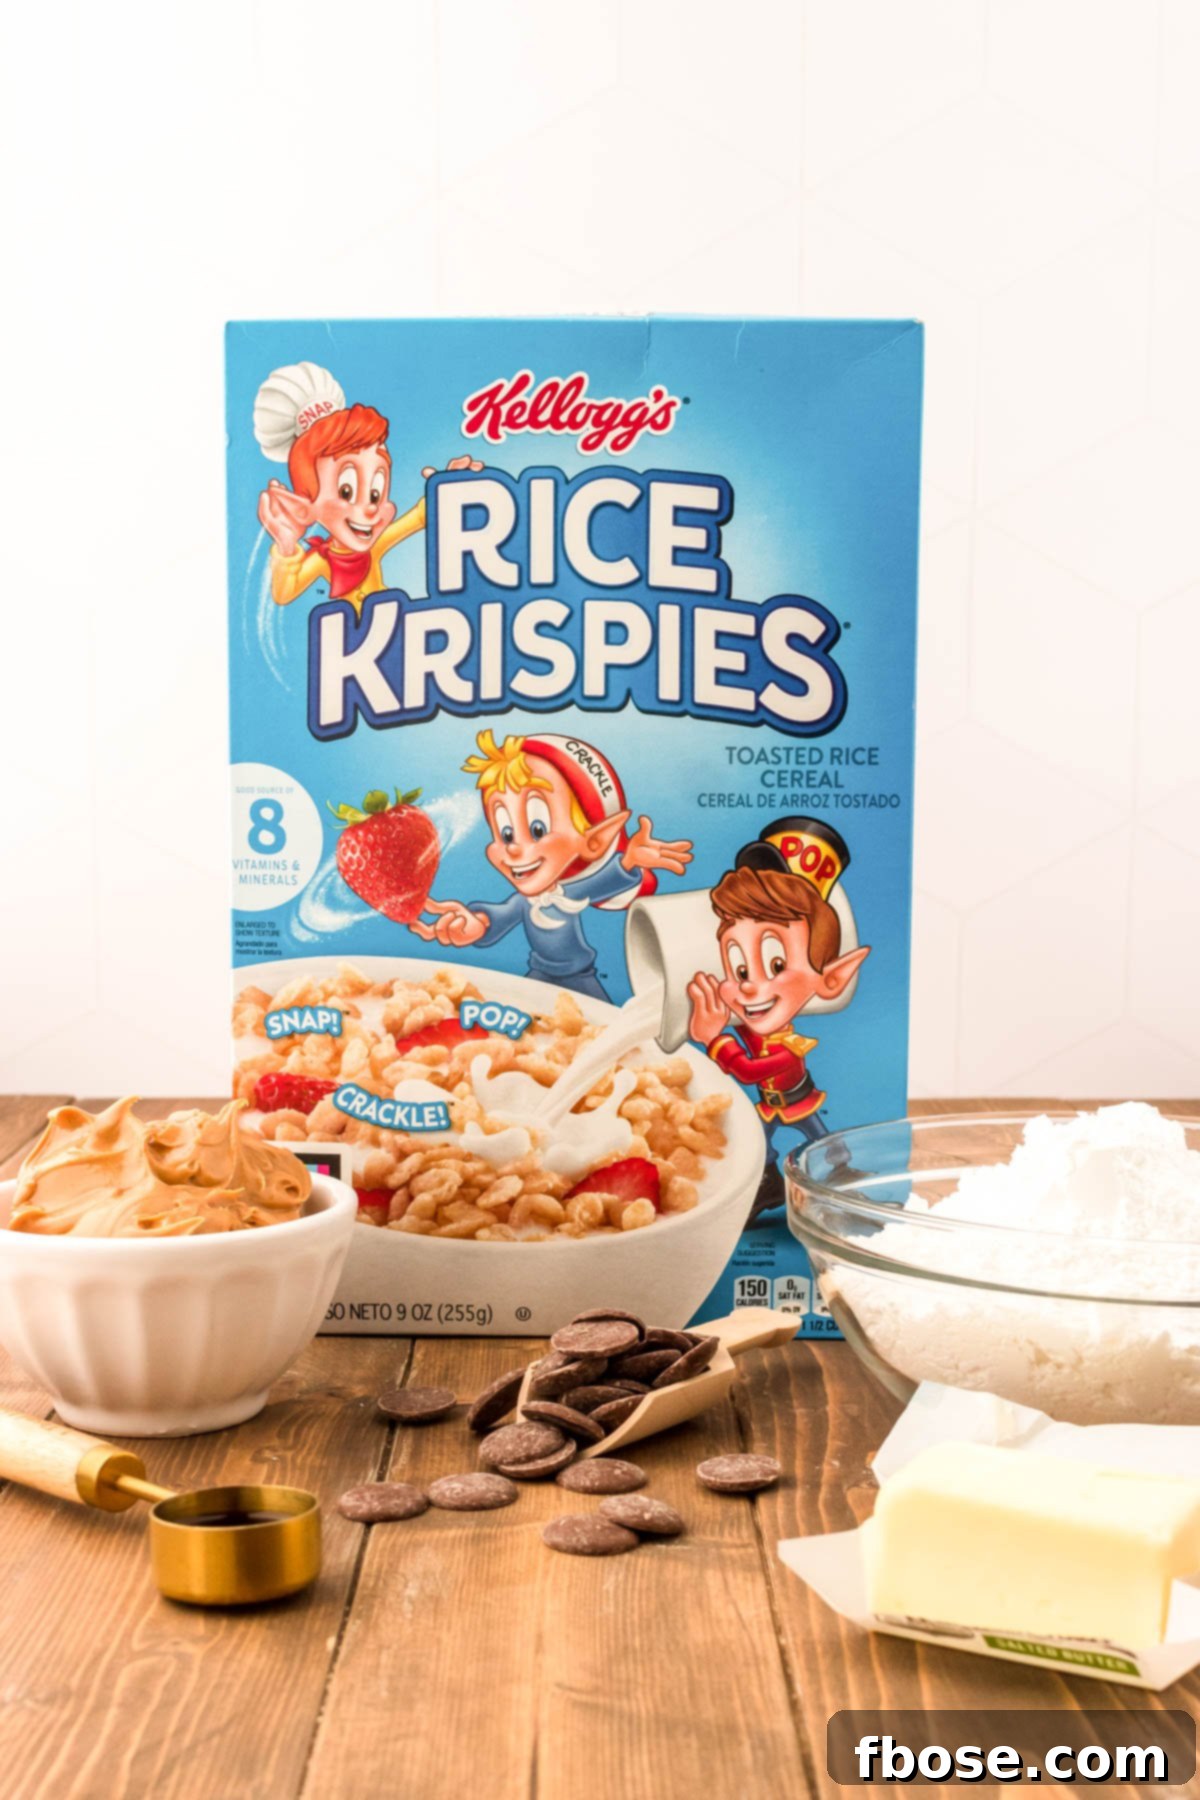
Creating these delightful no-bake treats requires just a handful of common pantry staples. Gather these six simple ingredients to embark on your delicious journey:
- Peanut Butter: You can choose creamy for a smoother texture or crunchy for an extra layer of nutty crispness.
- Salted Butter: Ensure it’s softened to room temperature for easier mixing and a consistently smooth batter.
- Vanilla Extract: A touch of pure vanilla enhances the overall flavor profile, adding warmth and depth to both the peanut butter and chocolate.
- Powdered Sugar: Also known as confectioners’ sugar, this fine powder ensures a smooth, non-gritty filling texture. Sifting is highly recommended.
- Rice Krispies Cereal: The star of the show, providing that signature crispy crunch that makes these balls so unique and addictive.
- Chocolate Melting Wafers: These are ideal for dipping as they melt smoothly and harden beautifully, providing a professional-looking, crack-free coating. High-quality brands like Ghirardelli are excellent choices.
Expert Tips for Crafting Perfect Rice Krispie Peanut Butter Balls
Achieving perfectly delicious and beautifully coated Rice Krispie Peanut Butter Balls is simple with a few insider tips. Follow these guidelines to ensure your treats are a resounding success:
- Choose Your Peanut Butter Wisely: The type of peanut butter you select can significantly impact the texture. For a classic, creamy interior with just the cereal crunch, use creamy peanut butter. If you desire an even more pronounced texture and nutty bite, crunchy peanut butter is an excellent choice. However, it’s crucial to avoid using all-natural peanut butter for this recipe. Its runnier, oil-separated consistency will prevent the balls from firming up properly and holding their shape, leading to a sticky, unmanageable mixture. Stick to conventional creamy or crunchy varieties for the best results.
- Ensure Butter is Softened: For a smooth, lump-free peanut butter mixture, make sure your salted butter is genuinely softened to room temperature. This allows it to cream effortlessly with the peanut butter and vanilla, creating a homogenous base that is easy to work with.
- Sift Your Powdered Sugar: Powdered sugar often contains small clumps, which can lead to a grainy texture in your peanut butter filling. Sifting it before adding ensures a silky-smooth, consistent mixture that is a pleasure to eat.
- Uniform Portioning is Key: For visually appealing and evenly sized dessert truffles, I highly recommend using a medium cookie scoop (about 1.5 tablespoons). This ensures each ball is roughly the same size, promoting consistent coating and a professional look when arranged on a platter.
- Parchment Paper is Your Best Friend: When working with sticky mixtures and melted chocolate, parchment paper or wax paper is indispensable. Line your baking sheets with it before forming the balls and after dipping them in chocolate. This prevents sticking, makes cleanup a breeze, and allows the chocolate to set without adhering to the surface.
- Mastering the Chocolate Melt: Melting chocolate can be tricky. Use a microwave-safe bowl and melt the chocolate melting wafers in short 30-second intervals, stirring thoroughly after each interval. This prevents scorching and ensures a smooth, fluid consistency. Be extremely careful not to overheat the chocolate, as it can “seize” (become thick, grainy, and unusable) if it gets too hot or comes into contact with even a tiny drop of water. Alternatively, a double boiler method offers a gentler, more controlled melt. If using semi-sweet chocolate chips instead of wafers, add a teaspoon of shortening or coconut oil to achieve a smoother, thinner consistency ideal for dipping.
- Efficient Dipping Technique: For a clean and even chocolate coating, use a fork or a specialized chocolate dipping tool. Gently drop a peanut butter ball into the melted chocolate, submerge it, then lift it out, allowing any excess chocolate to drip back into the bowl. Lightly tap the fork against the side of the bowl to encourage drips before transferring the coated ball back to the parchment-lined baking sheet.
- Dress Them Up Creatively: These peanut butter balls are a blank canvas for decoration! After dipping, get creative with toppings. A simple drizzle of contrasting melted chocolate (white or dark), a sprinkle of sea salt to enhance the flavors, crushed peanuts for added texture, or festive sprinkles for holidays like Easter, Thanksgiving, or Christmas can elevate their appearance. Consider using colored candy melts for a vibrant holiday display!
- Optimal Chilling for Setting: While the chocolate will eventually harden at room temperature, chilling the dipped balls in the refrigerator for about 10-15 minutes will speed up the setting process considerably. However, avoid chilling the peanut butter balls for too long *before* dipping, as a significant temperature difference between a very cold ball and warm chocolate can sometimes cause the chocolate coating to crack. A brief chill after dipping is perfect.
Step-by-Step Guide: How to Make Chocolate Peanut Butter Balls with Rice Krispies
Creating these delightful no-bake treats is a breeze! Follow these detailed steps for perfect results:
Step 1: Combine the Creamy Base. In a large mixing bowl, beat together the peanut butter (your choice of creamy or crunchy), the softened salted butter, and the vanilla extract. Mix on medium speed until all ingredients are thoroughly combined and the mixture is smooth and homogenous. This creates the rich, flavorful foundation for your peanut butter balls.
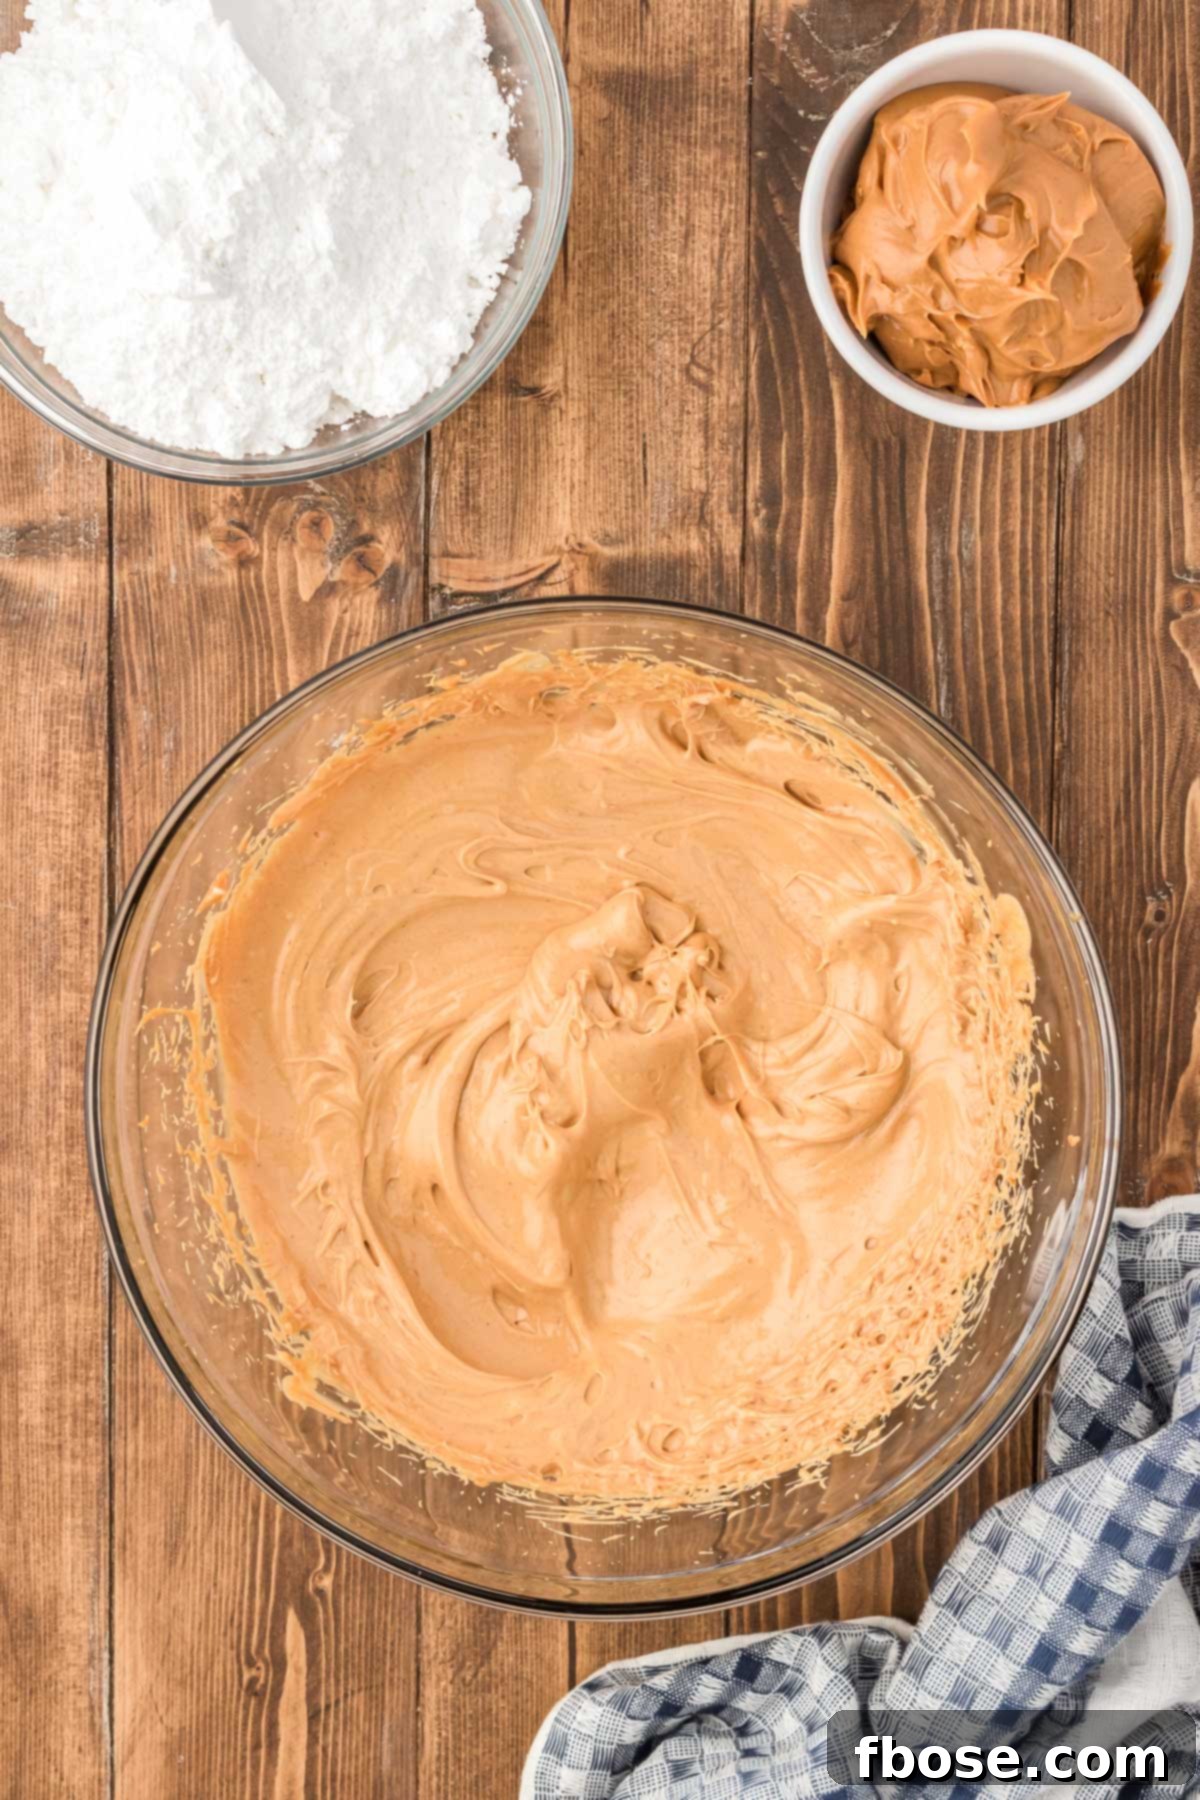
Step 2: Incorporate the Sweetness. Gradually add the powdered sugar to the peanut butter mixture. It’s best to add it about ½ cup at a time, beating well between each addition. This method prevents the sugar from flying out of the bowl and ensures a smooth, lump-free consistency. Continue beating until the mixture is thick, smooth, and evenly sweet. If your powdered sugar is clumpy, sifting it beforehand will yield the best texture.
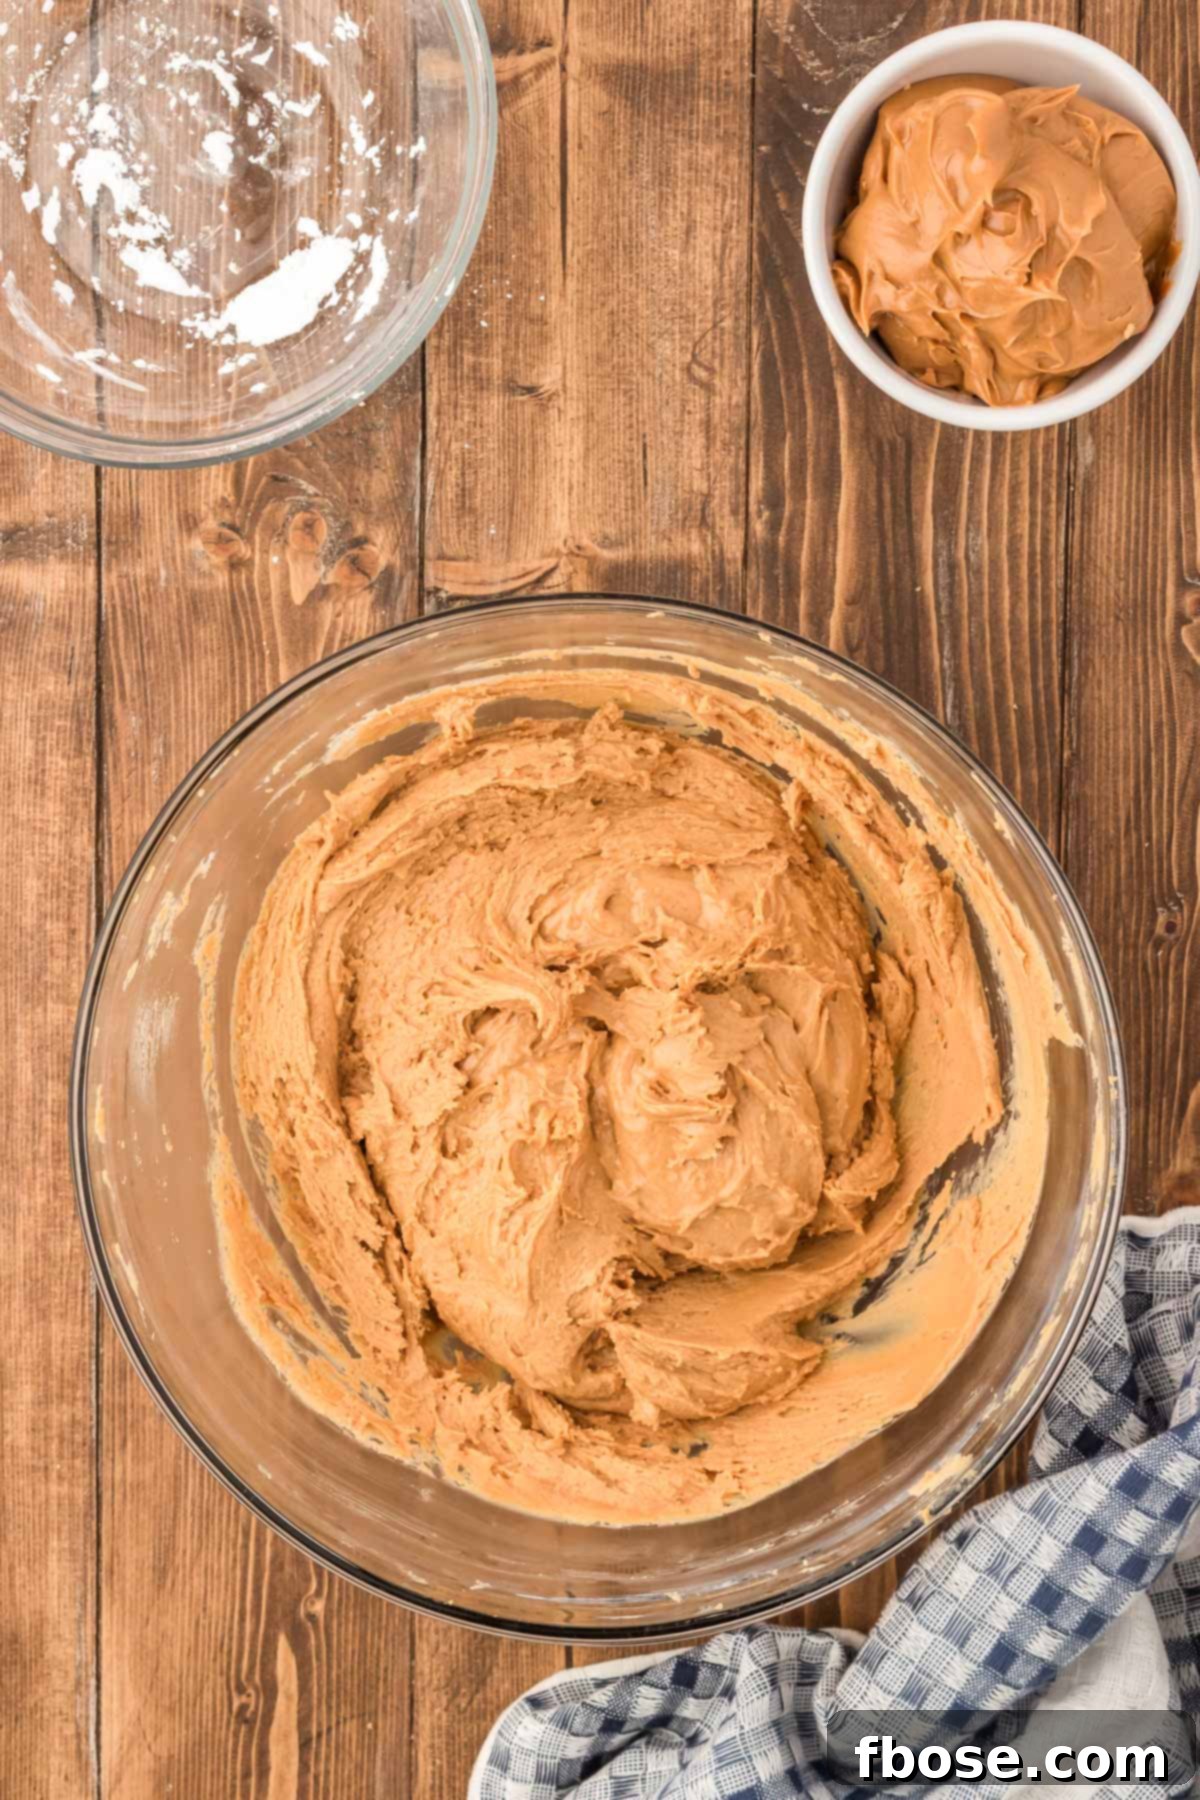
Step 3: Add the Signature Crunch. Gently fold in the Rice Krispies cereal using a spatula or spoon. Mix just until the cereal is evenly distributed throughout the peanut butter mixture. Be careful not to overmix, as this can crush the cereal and reduce its desired crispness. The goal is to retain those delightful airy pockets of crunch.
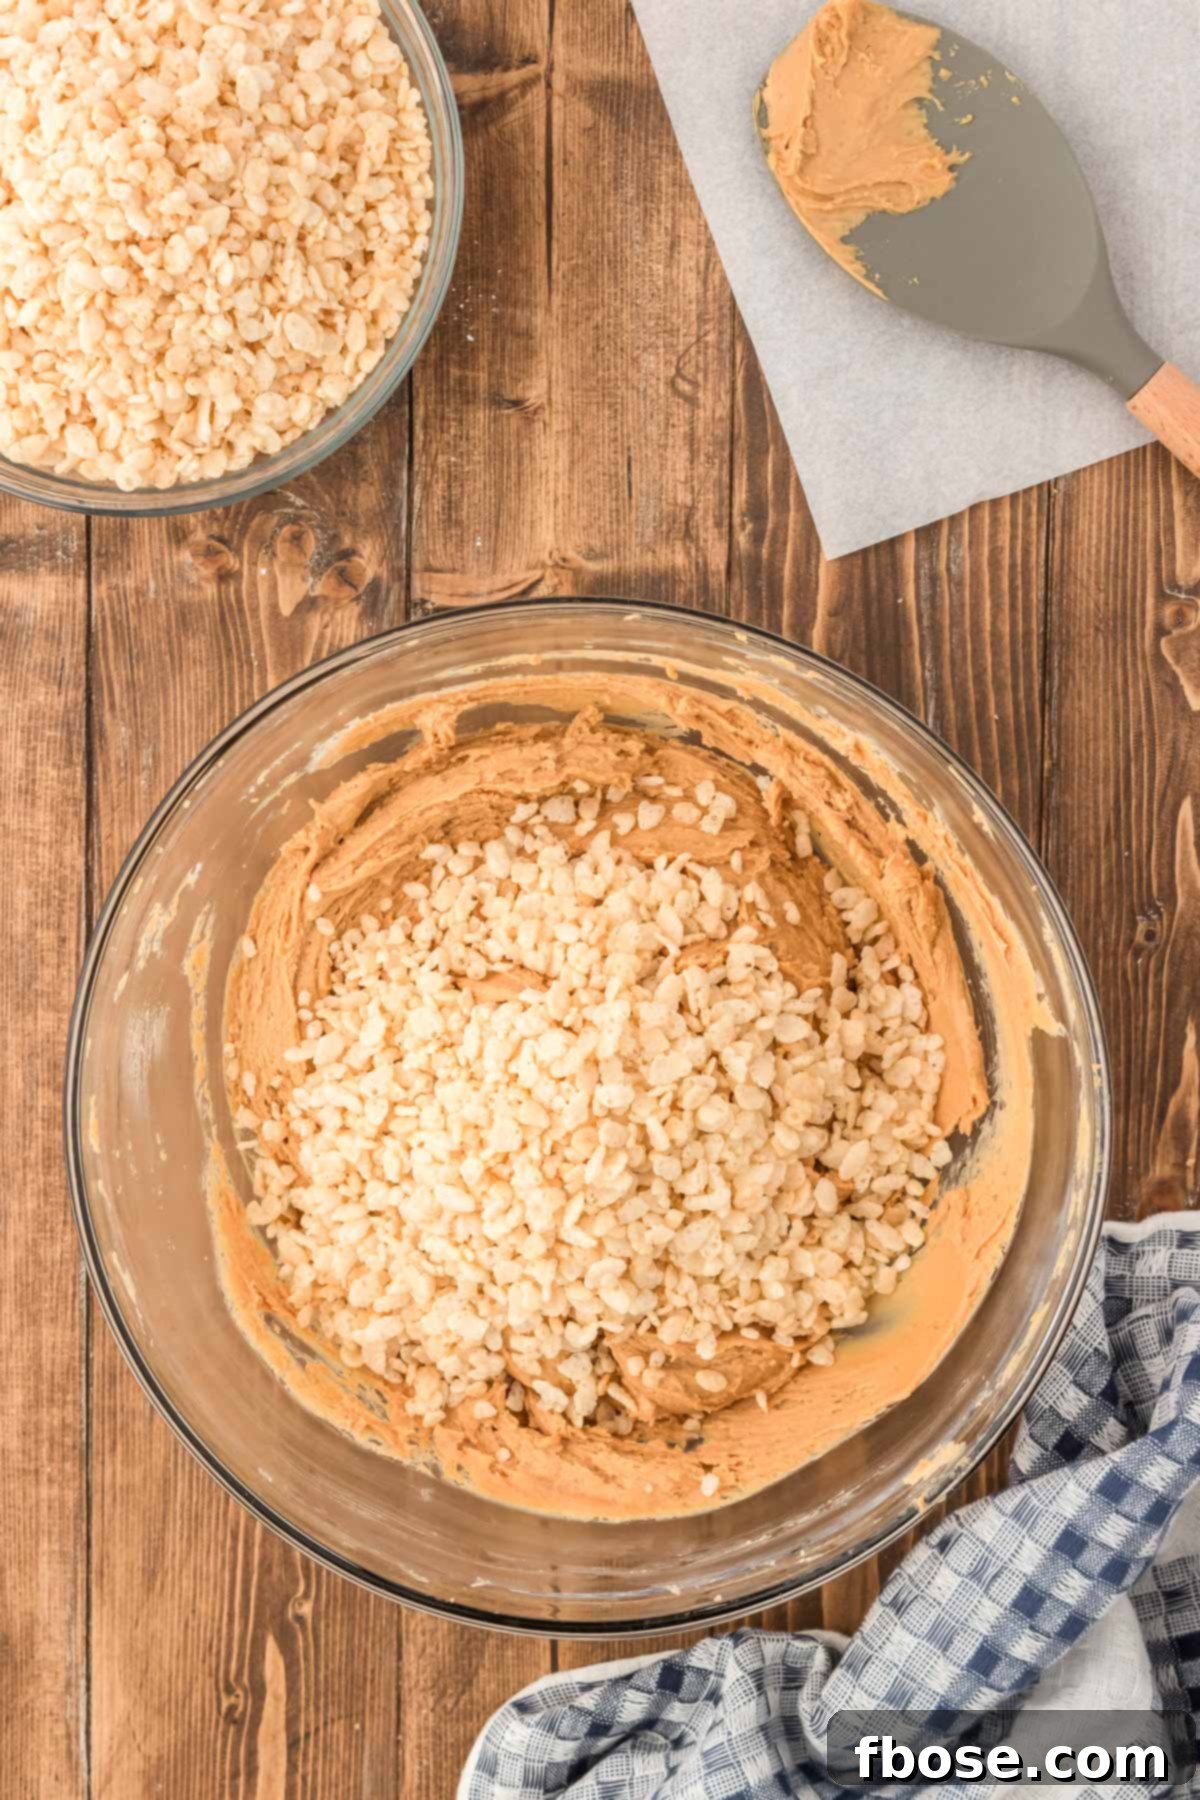
Step 4: Scoop and Roll. Using a medium cookie scoop (approximately 1.5 tablespoons), portion out the mixture onto a baking sheet lined with parchment paper. Once scooped, gently roll each portion between your palms to form smooth, uniform balls. This step helps to compact the mixture and gives your treats a professional appearance.
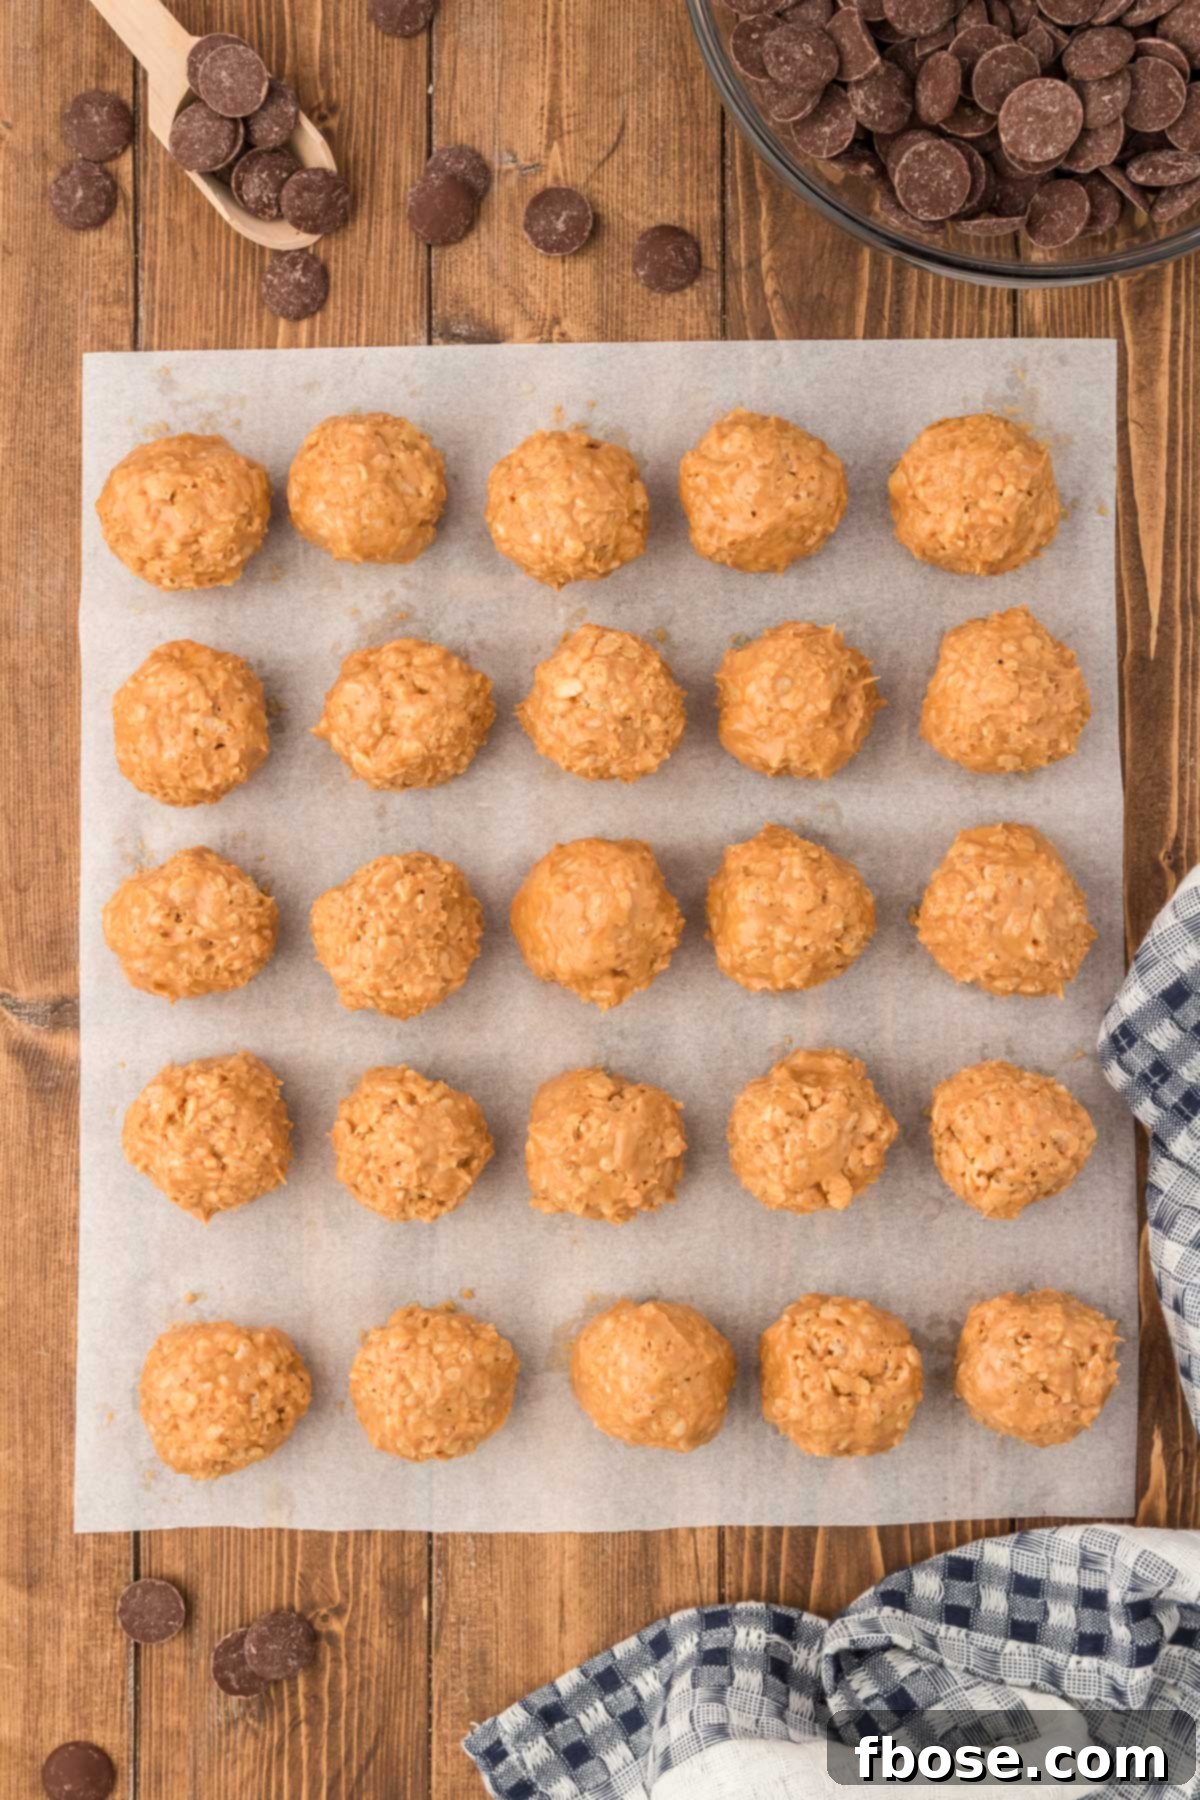
Step 5: Prepare the Chocolate Coating. Place your chocolate melting wafers into a deep, wide-mouth cup or bowl. This shape is ideal for easy dipping. Melt the chocolate in the microwave in 30-second intervals, stirring thoroughly after each interval, until the chocolate is completely smooth and fluid. Be vigilant to avoid overheating, which can cause the chocolate to seize.
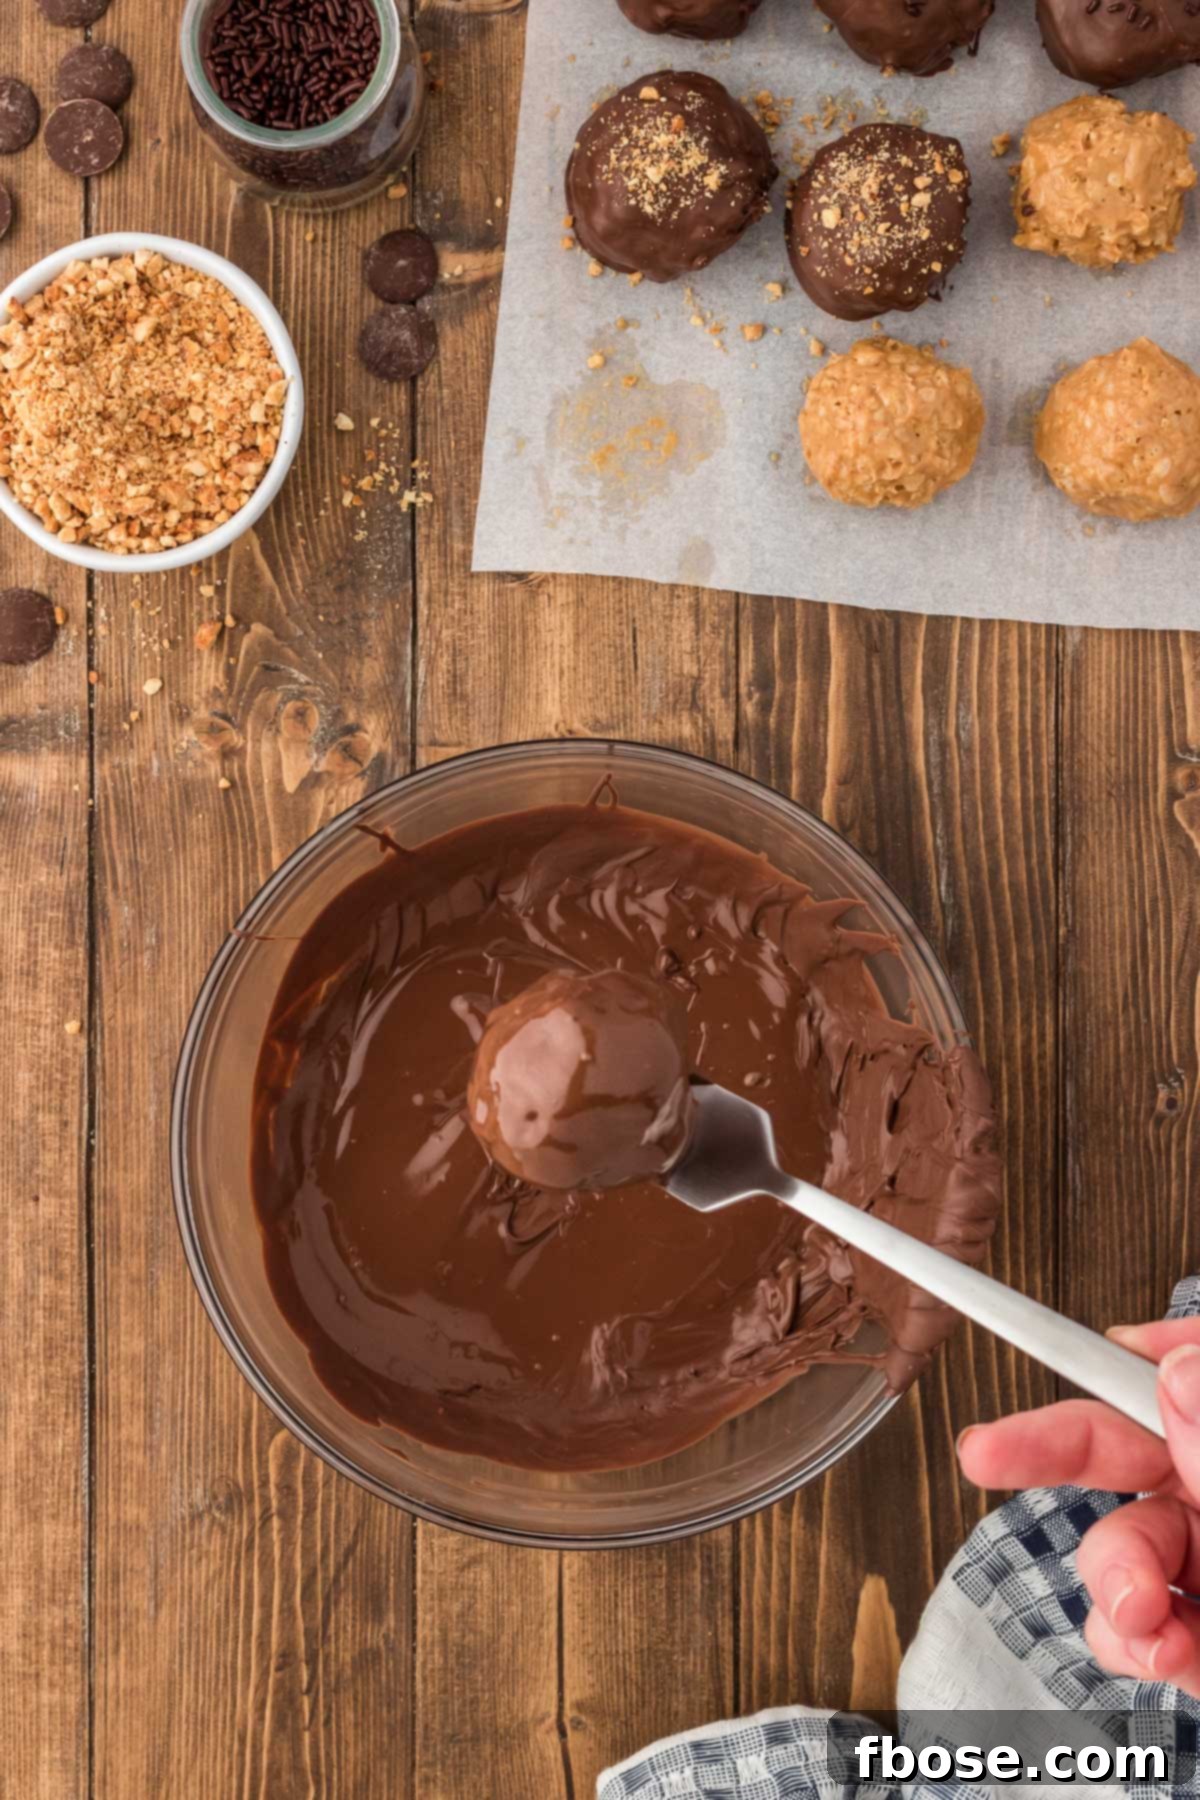
Step 6: Dip and Set. Using a fork or a dipping tool, carefully dip each peanut butter ball into the melted chocolate, ensuring it’s fully coated. Lift the ball, gently tapping the fork against the rim of the bowl to allow any excess chocolate to drip off. Place the dipped balls back onto the parchment-lined baking sheet. If the chocolate starts to cool and thicken during dipping, simply reheat it in the microwave for a few seconds, stirring well, to restore its fluidity.
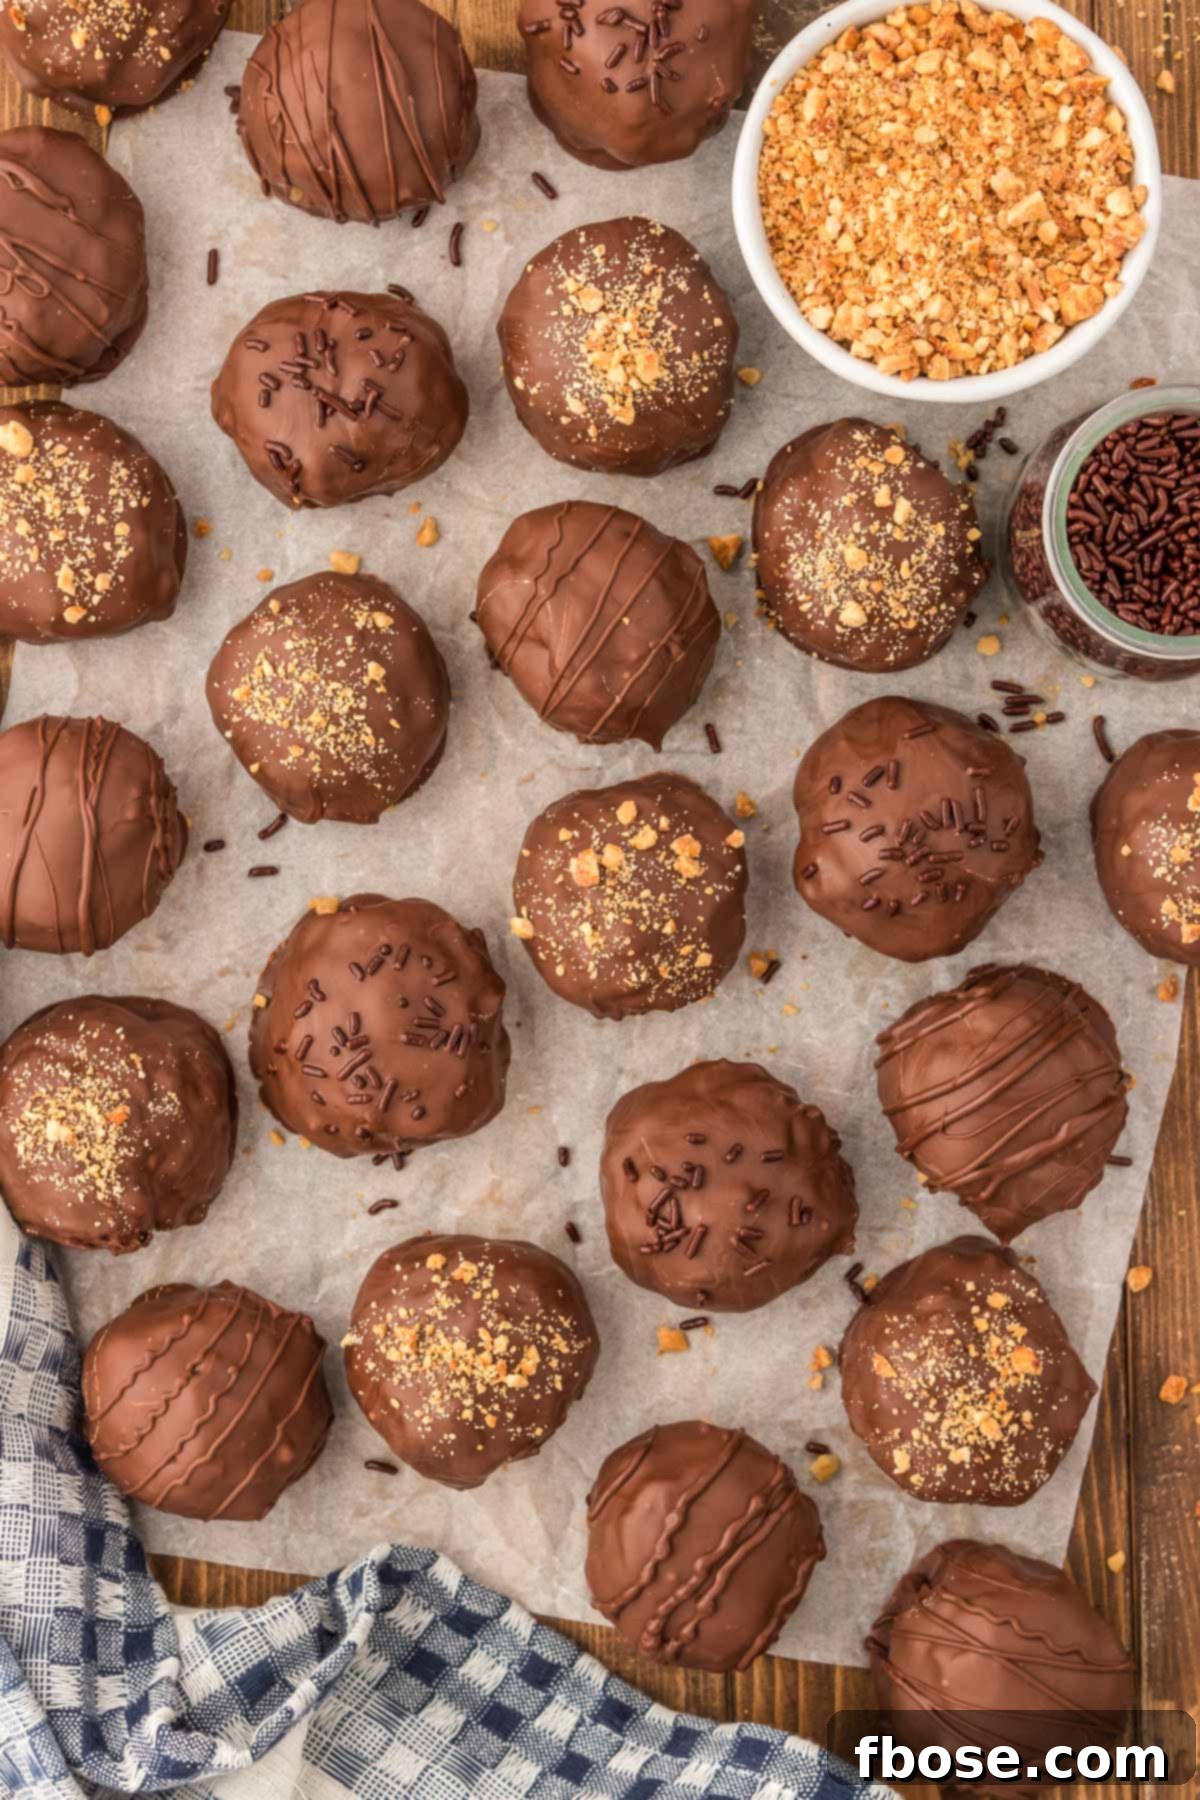
Step 7: Allow to Harden. Let the coated peanut butter balls sit at room temperature until the chocolate has fully set and hardened. For a quicker set, you can transfer the baking sheet to the refrigerator for about 15 minutes. Once hardened, they are ready to be stored or enjoyed immediately!
Storage and Freezing Instructions for Rice Crispy Peanut Butter Balls
These delightful treats are perfect for making ahead and enjoying over time. Proper storage ensures they remain fresh and delicious.
How to Store Rice Crispy Peanut Butter Balls
To keep your dessert balls at their best, store them in an airtight container or a Ziploc bag in the refrigerator. When properly stored, they will remain fresh and enjoyable for up to one week. The cool temperature helps maintain the firmness of the peanut butter filling and prevents the chocolate coating from becoming too soft.
How to Freeze Peanut Butter Balls with Rice Krispies
Freezing these treats is an excellent way to extend their shelf life and have them on hand for future cravings or unexpected guests. Once you’ve dipped the peanut butter balls in chocolate, arrange them on a baking sheet lined with parchment paper, ensuring they don’t touch each other. Transfer the entire baking sheet to the freezer and allow the balls to “flash-freeze” for approximately one hour. This initial freeze prevents them from sticking together once they’re fully stored.
After flash-freezing, remove the hardened balls from the baking sheet and transfer them to an airtight freezer-safe container or a heavy-duty Ziploc bag. Flash-freezing them individually is a critical step, as it ensures you can easily remove a few at a time without them being a solid block of frozen treats. When you’re ready to enjoy them, simply take out the desired number of balls and allow them to thaw for a short period at room temperature, or enjoy them chilled straight from the freezer for a firmer bite!
Frequently Asked Questions About Rice Crispy Peanut Butter Balls
Yes, you absolutely can use semi-sweet chocolate chips as an alternative to chocolate melting wafers (such as Ghirardelli wafers). However, for best results and a smooth dipping consistency, you’ll want to add about a teaspoon of shortening (like Crisco) or coconut oil to the chocolate chips before melting. This helps thin out the chocolate, making it easier to dip the balls and ensuring a thinner, more even coating. Besides chocolate chips, almond bark and candy melts are also excellent substitutes that melt beautifully for dipping.
The choice between milk chocolate and dark chocolate is entirely up to your personal preference and how sweet you like your dessert balls! Milk chocolate will yield a significantly sweeter peanut butter ball, which is perfect if you have a strong sweet tooth. Dark chocolate, on the other hand, provides a lovely contrast and helps to balance out the overall sweetness of the peanut butter filling, creating a more sophisticated and less cloyingly sweet treat. Feel free to experiment with both to find your ideal balance!
I strongly advise against using all-natural peanut butter in this recipe. All-natural peanut butter, especially varieties that separate oil, typically has a much runnier and less stable texture compared to conventional creamy or crunchy peanut butter. This difference in consistency would significantly alter the entire structure of these no-bake balls, making them very difficult to roll, causing them to be too soft, and preventing them from holding their shape effectively. For optimal results, stick to processed creamy or crunchy peanut butter brands.
If your peanut butter balls are sticky, there are a couple of common reasons. If they were recently chilled in the fridge, it’s likely that some condensation built up on their surface as they came to room temperature. This moisture can make them feel tacky. Another possibility, if they weren’t chilled, is that the melted chocolate coating did not fully set or harden. Ensure the chocolate has enough time to firm up completely, either at room temperature or with a quick chill in the refrigerator. Don’t worry too much, though; even sticky peanut butter balls will still taste perfectly delicious!
Soft peanut butter balls are usually a result of the butter used in the recipe being too soft to begin with, or the mixture not being chilled sufficiently. To firm them up, simply place the rolled (but not yet dipped) peanut butter balls in the fridge for about 10-15 minutes. This quick chill will help them hold their shape better during the dipping process. However, be cautious not to leave them in the fridge for too long before dipping. If they become excessively cold, the drastic temperature gap between the very cold ball and the warm melted chocolate could cause the chocolate coating to crack as it cools and contracts.
While Rice Krispies offer a unique light and airy crunch, you can certainly experiment with other crisp cereals if you wish. Cornflakes, crushed pretzels (for a super salty-sweet kick), or even puffed wheat cereal could work. Keep in mind that using different cereals will alter the flavor and texture significantly, so the end result may not be exactly like the classic Rice Krispie Peanut Butter Ball. Adjust the amount as needed to achieve your desired consistency.
Traditionally, Rice Krispies cereal contains malt flavoring, which is derived from barley and is not gluten-free. However, many brands now offer certified gluten-free crispy rice cereals! If you’re preparing these for a gluten-free diet, ensure you use a certified gluten-free crispy rice cereal and verify that all other ingredients (like peanut butter, butter, and chocolate) are also certified gluten-free. Always check product labels carefully to avoid cross-contamination.
Yes, these Rice Krispie Peanut Butter Balls can easily be adapted to be dairy-free or vegan! Simply substitute the regular salted butter with a high-quality vegan butter stick (ensure it’s softened). For the chocolate coating, use dairy-free chocolate melting wafers or dairy-free chocolate chips. Many brands offer excellent vegan chocolate options that melt beautifully. Always double-check ingredient labels to ensure all components meet your dietary requirements.

Let’s Connect and Share Your Creations!
If you’ve tried this delightful Rice Krispie Peanut Butter Balls recipe, please let me know how much you enjoyed it! Your feedback is invaluable, so feel free to share your thoughts in the comments below and leave a review. I absolutely love hearing from you and seeing your culinary successes!
Don’t forget to tag me – @sugarandsoulco – on Instagram and Pinterest with your photos of these delicious treats! You can also join our vibrant Sugar & Soul Show-offs Community on Facebook and share your creations there, where you can also participate in our fun recipe challenges!

Peanut Butter Balls with Rice Krispies
Ingredients
- 2 cups peanut butter creamy or crunchy
- ½ cup salted butter softened
- 2 teaspoons vanilla extract
- 2 cups powdered sugar
- 3½ cups rice krispies cereal
- 20 ounces chocolate melting wafers
Instructions
-
In a large bowl, beat together 2 cups peanut butter, ½ cup salted butter, and 2 teaspoons vanilla extract until fully combined.
-
Add 2 cups powdered sugar (½ cup at a time), mixing a little between each addition so it doesn’t make a mess.
-
Fold in the 3½ cups rice krispies cereal and portion the mixture out onto a parchment-lined baking sheet with a medium cookie scoop.
-
Roll the balls between your palms to smooth them out.
-
Melt 20 ounces chocolate melting wafers in a deep wide-mouth cup or bowl at 30-second intervals, stirring between each one, until fully melted.
-
Dip the balls in the melted chocolate one at a time, letting any excess chocolate drip off, then placing back on the parchment.
-
Reheat the chocolate if it begins getting too cool and thick, then finish dipping the balls.
-
Let the balls sit at room temperature until the harden or pop them in the fridge for 15 minutes.
Video
Notes
- How To Store: Keep these dessert balls stored in an airtight container or a Ziploc bag in the refrigerator to enjoy for up to a week. These are also great to freeze and enjoy later!
- How To Freeze: Transfer the baking sheet to the freezer once the peanut butter balls have been dipped. Allow them to freeze for about an hour before removing them from the pan and into an airtight container or Ziploc bag. Flash-freezing them before storing them will prevent the peanut butter balls from sticking together. This way, you can remove a few at a time to thaw and enjoy!
- Can Chocolate Chips Be Used Instead Of Melting Wafers? Yes, semi-sweet chocolate chips can be used instead of Ghirardelli wafers. To do so, you’ll want to add a teaspoon of shortening to the chocolate to create a better consistency for dipping. Almond bark and candy melts can also be used instead of chocolate chips.
- Should I Use Milk Chocolate Or Dark Chocolate Melting Wafers For Dipping? That’s up to you! Milk chocolate will create a much sweeter peanut butter ball, whereas dark chocolate balances out its overall sweetness.
- Can I Use All-Natural Peanut Butter When Making This Recipe? I wouldn’t suggest using all-natural peanut butter in this recipe. All-natural peanut butter has a runnier texture than crunchy or creamy peanut butter. Therefore, it would alter the entire structure of these, making them harder to roll and hold their shape.
Nutrition
Did You Make This Recipe?
Don’t forget to share it with me on Instagram @sugarandsoulco and follow on Tiktok @sugarandsoulco and Pinterest @sugarandsoulco for more!
Pin Recipe
Share Recipe