
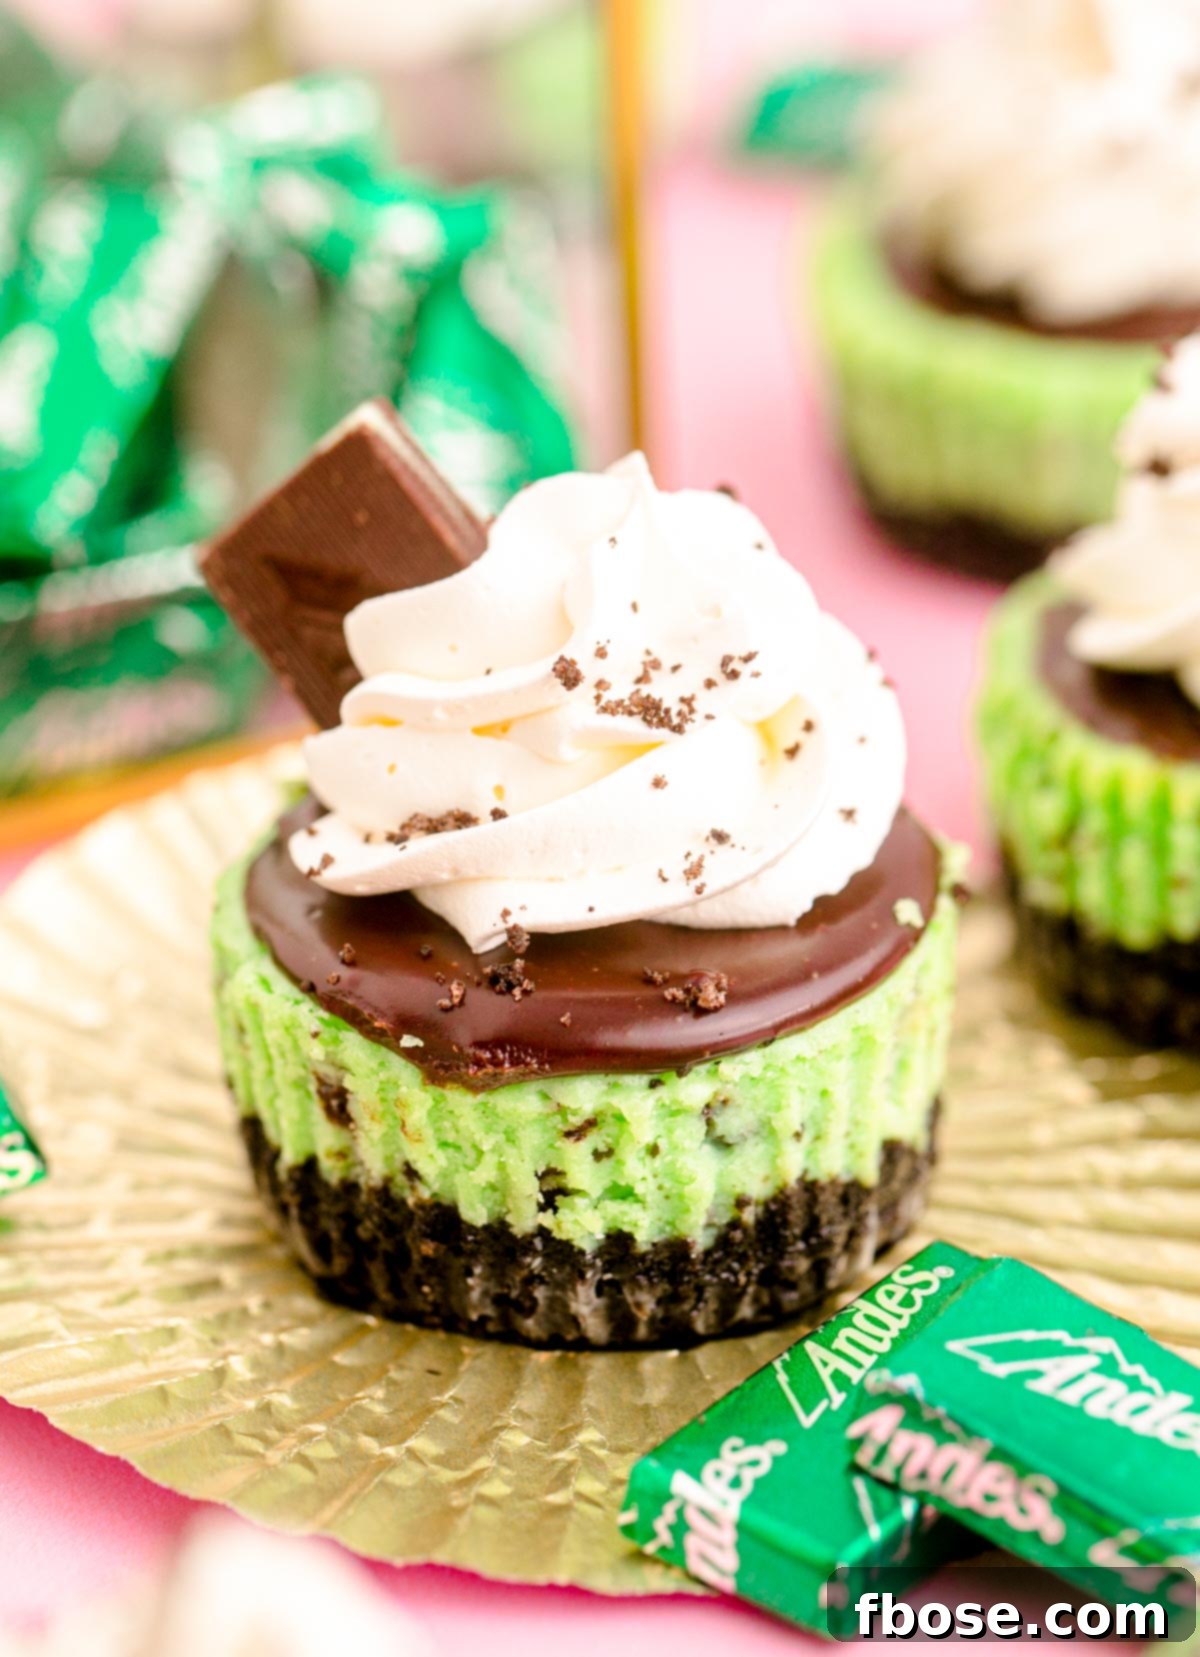
Oreo Chocolate Mint Cheesecakes are delightful mini desserts that combine the classic crunch of an Oreo crust with a lusciously creamy mint cheesecake filling, generously studded with chopped Andes mints. Crowned with a rich chocolate ganache and fluffy whipped cream, these individual treats are designed to be devoured! Perfectly portioned and bursting with cool, refreshing mint and deep chocolate flavor, they’re an irresistible choice for any occasion.
The enchanting fusion of chocolate and mint is a timeless favorite, captivating taste buds with its refreshing zest. If you’re as passionate about this flavor pairing as we are, you’ll love exploring other minty masterpieces. Don’t miss out on our delectable Chocolate Mint Cookies With Andes Mints, or dive into the rich indulgence of Mint Cookie Truffles for more delightful mint-infused experiences.
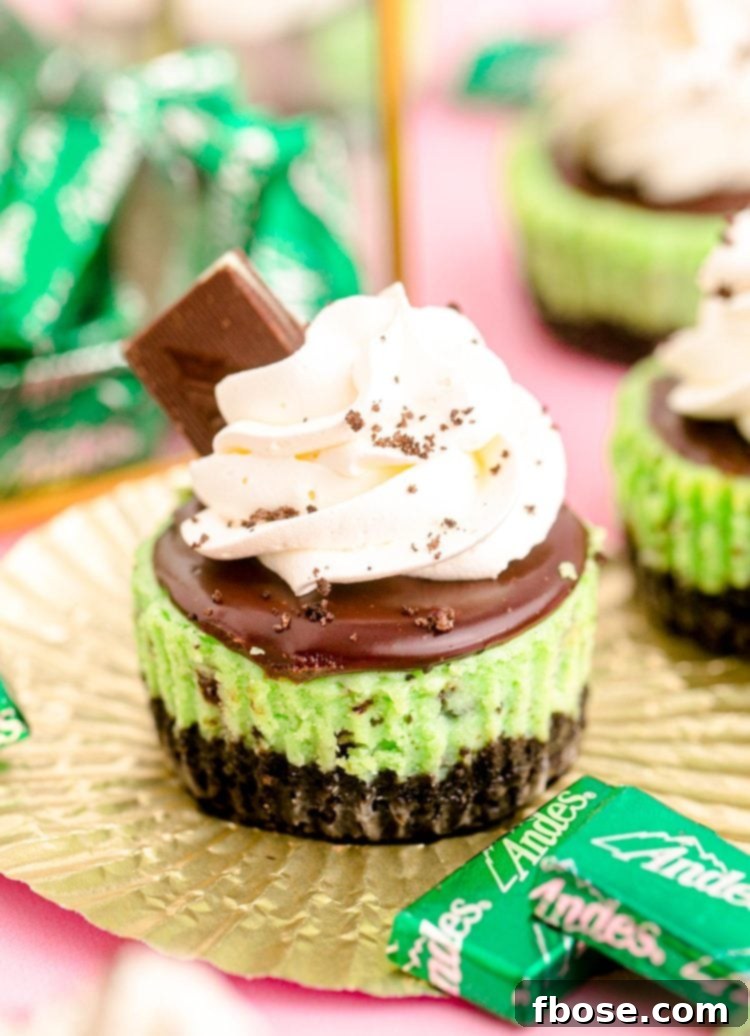
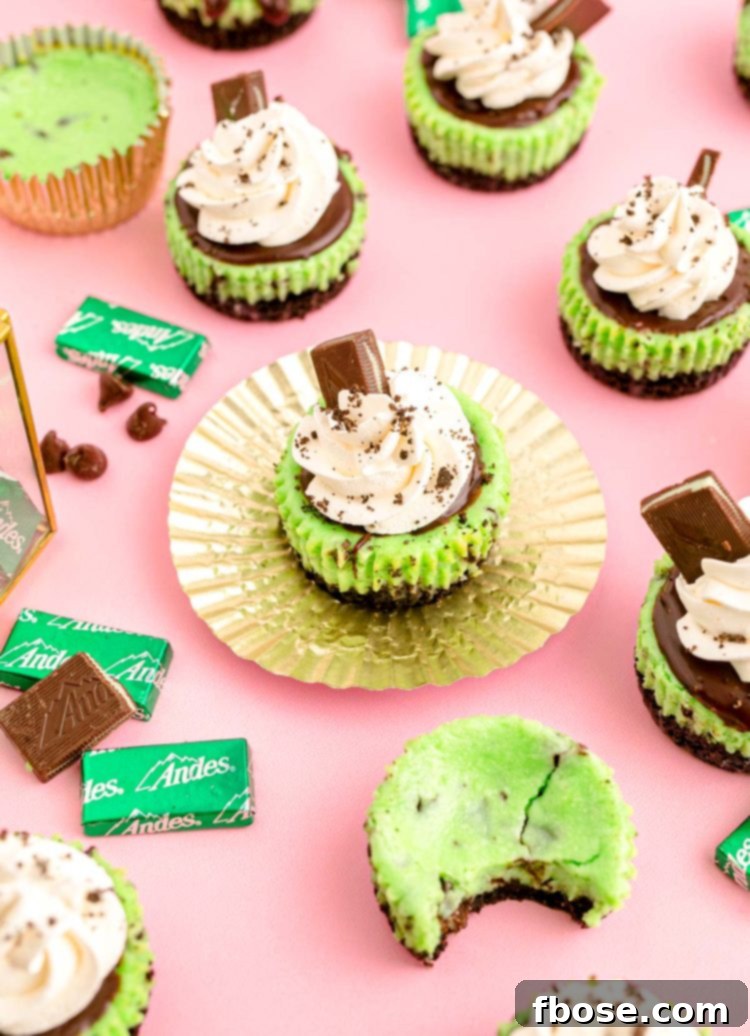
These Mini Oreo Chocolate Mint Cheesecakes are a symphony of flavors and textures, meticulously crafted into four distinct yet harmonious layers. Each component plays a crucial role in creating a dessert that truly stands out. It begins with a robust, dark chocolate Oreo crust, providing a delightful crunch and deep cocoa foundation. This perfect base supports a velvety smooth mint cheesecake filling, which is generously dotted with melt-in-your-mouth chopped Andes mints, infusing every bite with that signature cool mint flavor. A silky, decadent chocolate ganache then cascades over the cheesecake, adding an extra layer of chocolate richness. Finally, a cloud of homemade whipped cream, often garnished with an extra Andes mint and a sprinkle of Oreo crumbs, provides a light, airy finish, making these “Grasshopper Cheesecakes” not only a feast for the palate but also a visual delight.
While their vibrant green hue makes these “Grasshopper Cheesecakes” an ideal treat for festive springtime gatherings or St. Patrick’s Day celebrations, their utterly scrumptious flavor profile ensures they’ll be a requested favorite throughout the entire year. Once you taste the exquisite combination, you’ll find yourself eager to bake them again and again, regardless of the season.
Discover Why These Mini Cheesecakes Are a Must-Bake!
Prepare to fall in love with these Oreo Chocolate Mint Cheesecakes! This recipe isn’t just about deliciousness; it’s about convenience, customization, and pure dessert joy. Here are five compelling reasons why this recipe is about to become your new favorite:
- Endless Flavor Versatility: While the classic combination of mint and Andes mints is divine, this recipe is incredibly adaptable. Feel free to unleash your creativity! Instead of just chopped Andes mints, you can elevate the cheesecake filling by incorporating mini mint chocolate chips for a different texture, or even crumbled mint Oreo cookies for an extra layer of minty chocolate goodness. Each variation promises a unique and exciting twist on this beloved dessert.
- Customizable Mint Intensity: Are you a devoted mint enthusiast who craves an extra burst of refreshing flavor? Or perhaps you prefer a more subtle hint of mint? This recipe puts you in control. You can easily tailor the mint extract quantity to perfectly match your personal taste preferences, ensuring every bite is just right for your minty sweet tooth.
- Effortless Hand-Held Indulgence: Say goodbye to the hassle of slicing and serving! These mini cheesecakes are the ultimate hand-held dessert, making them perfect for parties, picnics, or simply enjoying a delightful treat without the need for plates and forks. Their individual portions mean less mess and more enjoyment for everyone.
- Adaptable to a Full-Sized Creation: Craving a grander dessert for a larger gathering? This versatile recipe can easily be scaled up to create one stunning, full-sized cheesecake. Imagine a beautiful Oreo Chocolate Mint Cheesecake as the centerpiece of your dessert table! Scroll down in our detailed FAQ section to find simple instructions on how to transform this mini recipe into a magnificent whole cheesecake.
- Generous Hands-Off Preparation Time: Despite their impressive appearance, these cheesecakes are surprisingly straightforward to make. With only about 20 minutes of active prep time, you’ll spend most of your effort assembling the delicious layers. The rest of the magic happens in the oven and refrigerator, leaving you ample time to relax, catch up on your favorite Netflix show, or simply enjoy some well-deserved downtime while your delectable desserts bake and chill to perfection.
Exploring the Ingredients: Crafting Your Mint Chocolate Cheesecake
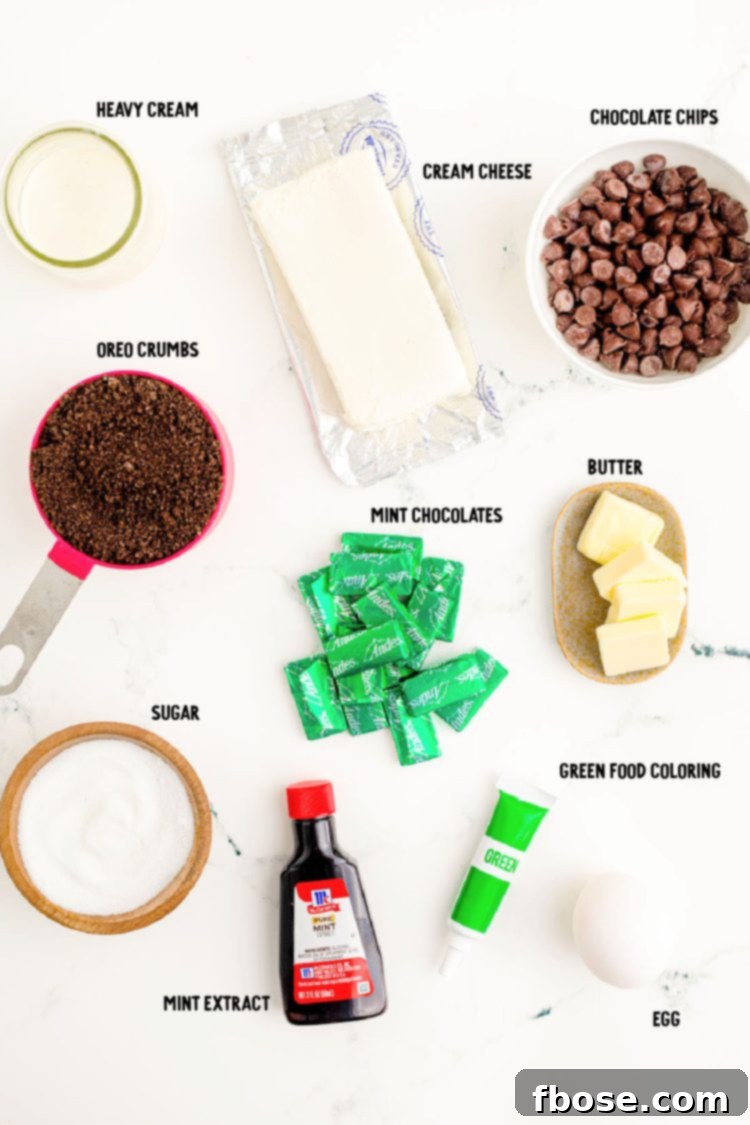
Creating these incredible Oreo Chocolate Mint Cheesecakes is a surprisingly simple process, broken down into four distinct and manageable stages: the irresistible Oreo crust, the creamy mint cheesecake filling, the luscious chocolate ganache, and finally, the delightful toppings. Understanding each component ensures a perfect outcome every time.
The Perfect Oreo Crust
The foundation of these mini cheesecakes begins with a classic Oreo crust. You’ll need either whole Oreos to crush yourself or pre-made Oreo crumbs for convenience. These are combined with a touch of granulated sugar to enhance sweetness and melted salted butter, which binds the crumbs together to form a firm, flavorful base. The salted butter also adds a subtle depth that beautifully complements the chocolate.
The Creamy Mint Cheesecake Filling
Once the Oreo crusts are pressed into your muffin tins, they’re ready to embrace the star of the show: the mint cheesecake filling. This exquisite layer comes to life with softened cream cheese, which is crucial for achieving that signature smooth, lump-free texture. Granulated sugar adds the perfect amount of sweetness, while an egg provides structure and richness to the cheesecake. A generous splash of mint extract infuses the filling with its refreshing flavor, and a few drops of green food coloring give these “Grasshopper Cheesecakes” their iconic vibrant hue. Finally, an abundance of chopped Andes mints is gently folded in, ensuring a delightful burst of chocolate and mint in every bite.
Decadent Chocolate Ganache
Next up is the effortlessly smooth chocolate ganache. This luxurious topping is surprisingly quick and easy to prepare, requiring just two key ingredients: heavy cream and semi-sweet chocolate chips. The hot cream melts the chocolate chips into a glossy, pourable consistency that adds a layer of sophisticated richness to each mini cheesecake. It’s the perfect chocolate complement to the minty filling.
Irresistible Toppings
After each mini cheesecake receives its luscious ganache coating, it’s time for the finishing touches! For toppings, we highly recommend a generous dollop of our perfect homemade whipped cream, which adds a light and airy contrast. To complete the presentation and enhance the flavor, each cheesecake is then adorned with a whole Andes mint and a sprinkle of extra Oreo crumbs. These final touches not only look beautiful but also add an extra layer of texture and taste.
Step-by-Step Guide: Crafting Your Mini Oreo Chocolate Mint Cheesecakes
Follow these detailed instructions to create perfect mini cheesecakes that will impress everyone!
Preparing the Flavorful Oreo Crust
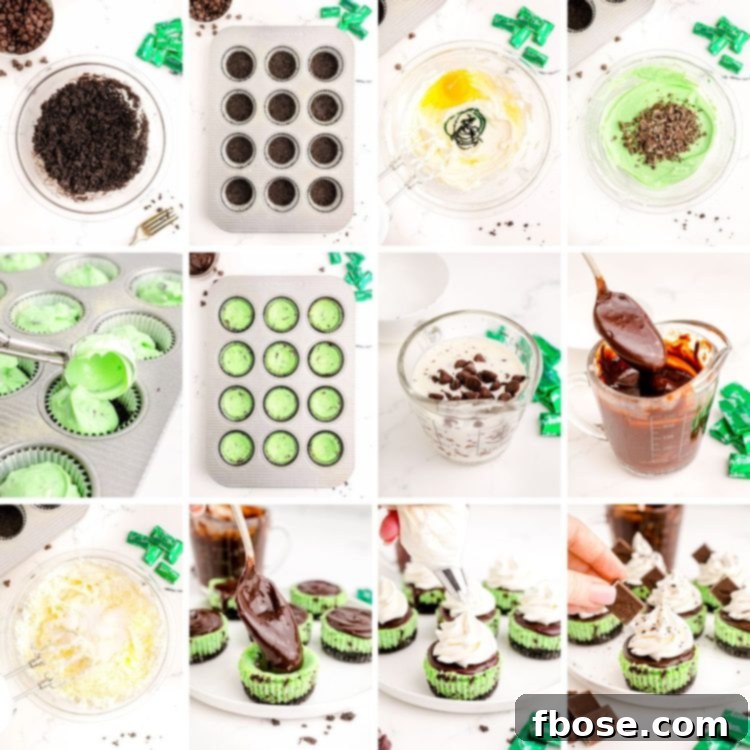
- Preheat Oven and Prepare Pan: Begin by preheating your oven to 325°F (160°C). Line a standard 12-cup muffin tin with paper liners. For easy removal, lightly spray the inside of each liner with nonstick cooking spray. Set the prepared pan aside.
- Create Oreo Crumbs: In a food processor, add 16 whole Oreos. Pulse until finely ground crumbs form. Measure out 1¼ cups of these crumbs. If you have less, simply crush a few more Oreos until you reach the desired amount.
- Combine Crust Ingredients: Transfer the Oreo crumbs to a medium-sized bowl. Add 1 tablespoon of granulated sugar and 4 tablespoons of melted salted butter. Stir thoroughly until all ingredients are evenly combined and the mixture resembles wet sand.
- Form the Crusts: Spoon about 2 level tablespoons of the crust mixture into the bottom of each of the 12 prepared muffin liners. Using the back of a spoon or your fingertips, gently but firmly press the mixture down to create a compact, even cheesecake crust.
Crafting the Creamy Mint Cheesecake Filling
- Beat Cream Cheese: In a large mixing bowl, or the bowl of a stand mixer fitted with a paddle attachment, beat the softened cream cheese on medium speed until it is completely smooth and free of lumps.
- Add Sugar: Gradually add ⅓ cup of granulated sugar to the cream cheese, continuing to beat until the mixture is light, fluffy, and creamy. Scrape down the sides of the bowl as needed to ensure everything is well incorporated.
- Incorporate Wet Ingredients: Reduce the mixer speed to low. Beat in the large egg (ensure it’s at room temperature for the best texture), ½ teaspoon of mint extract, and 3 teaspoons of green food coloring until just combined and the color is uniform. Be careful not to overmix at this stage.
- Fold in Andes Mints: Gently fold in the 20 chopped Andes mints using a rubber spatula. Mix only until the mint pieces are evenly distributed throughout the cheesecake batter, avoiding excessive mixing.
- Fill Liners: Divide the creamy cheesecake mixture evenly among the 12 prepared muffin liners, spooning it on top of each Oreo crust. Each liner should be a little more than three-quarters full. Use the back of a spoon or a rubber spatula to gently smooth out the tops of the cheesecakes.
- Bake and Cool in Oven: Bake the cheesecakes for 20 minutes. After 20 minutes, turn off the oven but do not remove the cheesecakes. Prop the oven door open slightly and allow the cheesecakes to cool in the warm, gradually cooling oven for an additional 10 minutes. This crucial step helps prevent cracking.
- Continue Cooling and Chill: Carefully remove the muffin tin from the oven and place it on a wire rack to cool at room temperature for about 30 minutes. Once cooled, transfer the entire pan to the refrigerator to chill for a minimum of 6 hours, or ideally, overnight. Proper chilling is essential for the cheesecakes to set fully.
- Unmold Cheesecakes: Once thoroughly chilled, remove the cheesecakes from the refrigerator. Carefully take them out of the muffin pan and gently peel off the paper liners.
Adding the Decadent Ganache and Finishing Touches
- Prepare Ganache: In a small saucepan, heat ⅓ cup of heavy cream over medium-low heat until small bubbles begin to form around the edges. Do not let it boil. Immediately pour the hot cream over 1 cup of semi-sweet chocolate chips placed in a large measuring cup or heat-proof bowl.
- Form Smooth Ganache: Cover the bowl with a lid or plastic wrap and let it sit undisturbed for 3 to 5 minutes. This allows the heat from the cream to melt the chocolate. After sitting, whisk the mixture gently but consistently until it becomes completely smooth, glossy, and uniform.
- Top Cheesecakes with Ganache: Spoon approximately 1 tablespoon of the warm chocolate ganache over the top of each mini cheesecake. Allow them to sit for about 5 minutes at room temperature for the ganache to slightly cool and set.
- Garnish and Serve: Before serving, generously garnish each cheesecake with a dollop of whipped cream, a whole Andes mint, and a sprinkle of fresh Oreo crumbs. Serve immediately and enjoy these delightful treats!
Expert Tips and Frequently Asked Questions for Perfect Mint Cheesecakes
Achieving cheesecake perfection is simpler than you might think! Here are some common questions and expert tips to ensure your Oreo Chocolate Mint Cheesecakes turn out absolutely flawless every time.
How Do I Store These Oreo Mint Cheesecakes?
To maintain their freshness and delicious taste, store your finished mini Oreo Mint Cheesecakes in an airtight container in the refrigerator. When properly stored, they will remain wonderfully enjoyable for up to one week. This makes them an excellent make-ahead dessert for parties or meal prep.
How Can I Make This One Large Cheesecake Rather Than A Dozen Minis?
Transforming this recipe into a single, show-stopping cheesecake is straightforward! Instead of using a muffin pan, you’ll need a 9-inch springform pan. To ensure you have enough crust and filling for a generously sized cake, we recommend increasing all the ingredient quantities by 1.5 times. The baking time will also need to be adjusted; expect it to bake for approximately 45-60 minutes, or until the edges are set and the center has a slight jiggle. The cooling and chilling steps remain the same, but you might need a longer chilling period for a large cheesecake to fully set.
Can I Freeze These Mini Cheesecakes?
Absolutely! These mini cheesecakes freeze beautifully, making them perfect for future indulgence. Once completely cooled and chilled, place them in an airtight freezer-safe container. They will stay good to enjoy for up to 2 months. For the best flavor and texture upon thawing, we highly recommend adding the chocolate ganache and all fresh toppings (like whipped cream and Andes mints) just after the cheesecakes have fully thawed in the refrigerator.
What Should I Do If I Can’t Find Any Oreo Crumbs To Make The Crusts?
No Oreo crumbs? No problem! You have a couple of excellent alternatives. You can either use chocolate graham cracker crumbs, if readily available, or easily make your own Oreo crumbs. To use graham crackers, you’ll need 1 ¾ cups of finely crushed graham cracker crumbs, mixed with 4 tablespoons of melted butter, 3 tablespoons of unsweetened cocoa powder, and an extra tablespoon of granulated sugar to balance the flavor. If you prefer to make your own Oreo crumbs, simply crush about 20 whole Oreos in a food processor until fine. Then, proceed with the recipe instructions as written.
Why Is It Important To Allow The Cheesecakes To Cool In The Oven?
This seemingly simple step is a crucial trick for cheesecake success! By turning off the oven and leaving the cheesecakes inside with the door slightly ajar, you allow them to cool down slowly and gradually. This gentle cooling process helps the cheesecakes maintain their beautiful height, preventing them from shrinking excessively, and most importantly, minimizes the risk of unsightly cracks forming on the surface.
Why Is It Important For The Cream Cheese And Egg To Be Room Temperature?
Using room temperature ingredients, particularly cream cheese and eggs, is vital for achieving the creamiest, silkiest texture in your cheesecakes. Cold ingredients don’t blend smoothly; they can lead to lumps in your batter and a denser, less desirable texture. Room temperature ingredients emulsify better, creating a wonderfully smooth and cohesive filling, which is exactly what we want for these delicate mini cheesecakes.
Can I Use Reddi Whip On These Grasshopper Cheesecakes?
You can certainly use Reddi Whip for convenience, but we recommend it only if you plan on serving the cheesecakes immediately. Reddi Whip tends to deflate and weep relatively quickly. If you’re preparing these delicious Grasshopper Cheesecakes ahead of time for serving later, we suggest using a more stable alternative. Opt for a good quality Cool Whip or, even better, make your own stabilized whipped cream. Stabilized whipped cream holds its shape much longer, ensuring your cheesecakes look and taste fantastic even after a few hours.
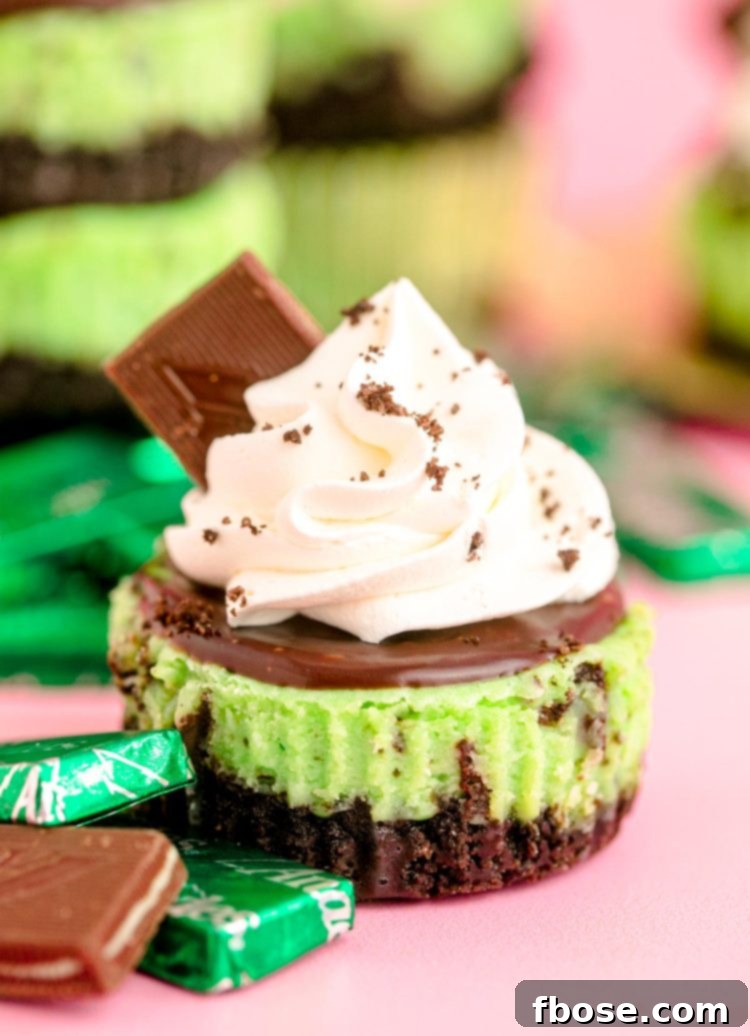
These Oreo Chocolate Mint Cheesecakes are more than just a dessert; they’re a standout experience that promises to be devoured in record time at any gathering. The perfect balance of rich chocolate, cool mint, and creamy cheesecake makes them truly unforgettable. If you’ve fallen in love with these, then you’ll undoubtedly appreciate our collection of other mouthwatering cheesecake recipes that are sure to impress friends and family just as much!
- Basque Burnt Cheesecake – Experience a unique, crustless cheesecake renowned for its incredibly silky texture and beautifully caramelized top.
- Strawberry Cheesecake Bars – Enjoy these deliciously layered bars, perfect for easy serving and a guaranteed crowd-pleaser at any party.
- No-Bake Peanut Butter Cheesecake – Indulge in this rich, creamy cheesecake, loaded with crunchy Reese’s Pieces, and ready in only 20 minutes of prep time!
- Sopapilla Cheesecake – A wonderfully simple dessert made with refrigerated crescent roll dough and just seven other easy-to-find ingredients.
- Instant Pot Chocolate Cheesecake – The ultimate dessert for true chocolate lovers, perfectly cooked right in your Instant Pot in just 40 minutes!
Connect With Us!
If you’ve had the pleasure of trying this fantastic recipe, we would absolutely love to hear from you! Please share your thoughts and let us know how much you enjoyed it by leaving a comment and a review below. Your feedback means the world to us!
Don’t forget to tag us – @sugarandsoulco – on Instagram and Pinterest with your beautiful photos of these cheesecakes, or join our exclusive Sugar & Soul Show-offs Community on Facebook to share your creations and participate in our fun recipe challenges!
Mini Oreo Chocolate Mint Cheesecakes
Author: Rebecca Hubbell
Course: Dessert
Cuisine: American
Prep Time: 20 minutes
Cook Time: 30 minutes
Chill Time: 6 hours
Total Time: 6 hours 50 minutes
Servings: 12 cheesecakes
Oreo Chocolate Mint Cheesecakes are mini desserts that have an Oreo crust with a mint cheesecake filling that’s studded with Andes mints! Finish them off with tasty toppings and you have a treat that everyone will devour!
Equipment
- Muffin pan
- Standing mixer with paddle attachment
- Measuring Cups
- Measuring spoons
- Rubber Spatula
- Whisk
- Food Processor (optional, for crushing Oreos)
Ingredients
Crust
- 16-18 Oreos (to make 1¼ cup crumbs)
- 1 tablespoon granulated sugar
- 4 tablespoons salted butter, melted
Cheesecake
- 16 ounces cream cheese, softened
- ⅓ cup granulated sugar
- 1 large egg, room temperature
- ½ teaspoon mint extract
- 3 teaspoons green food coloring
- 20 Andes mints, chopped (about ¾ cup)
Ganache
- ⅓ cup heavy cream
- 1 cup semi-sweet chocolate chips
Toppings
- Whipped Cream
- 12 Andes mints
- Oreo Crumbs
Instructions
Crust Preparation
- Preheat the oven to 325°F (160°C) and line a muffin tin with paper liners. Spray each liner with nonstick cooking spray and set aside.
- Add 16 Oreos to a food processor and pulse until fine crumbs form. Measure to make sure you have 1¼ cups of crumbs; crush more Oreos if needed.
- Transfer the crumbs to a medium bowl with 1 tablespoon of sugar and 4 tablespoons melted butter, and stir until evenly combined.
- Add about 2 level tablespoons of the crust mixture into each of the 12 muffin liners and press down gently to create the cheesecake crust.
Cheesecake Filling
- In a large bowl or stand mixer fitted with a paddle attachment, beat the cream cheese until smooth. Then add in ⅓ cup of sugar and beat again until smooth and creamy.
- Beat in the egg, mint extract, and green food coloring at low speed until evenly mixed and colored.
- Fold in the chopped Andes mints just until they’re evenly distributed throughout the batter.
- Divide the cream cheese mixture evenly on top of the cheesecake crusts. They will be a little more than ¾ full. Use the back of a spoon or rubber spatula to smooth out the top.
- Bake for 20 minutes. Then, turn off the oven but leave the pan in the oven and prop the door open. Allow the cheesecakes to cool in the warm oven for an additional 10 minutes.
- Then remove them from the oven and let them sit in the pan on a wire rack at room temperature for about 30 minutes before transferring to the refrigerator to chill for at least 6 hours.
- Remove them from the pan and take off the muffin liners.
Ganache and Toppings
- Heat the heavy cream in a small saucepan on the stovetop just until the edges begin to bubble. Transfer the hot cream to a large measuring cup or bowl.
- Immediately add the chocolate chips to the hot cream. Cover and let sit for 3 to 5 minutes. Then whisk the mixture until smooth.
- Add about 1 tablespoon of chocolate ganache to the top of each cheesecake and allow them to cool for about 5 minutes to set up.
- Top each with whipped cream, an Andes mint, and Oreo crumbs before serving.
Notes
- You can customize the mint intensity. We found that half a teaspoon of mint extract was plenty when paired with chopped Andes mints, but if you desire a stronger mint flavor, feel free to add another ½ teaspoon. We recommend making the recipe as written, then taste-testing the batter first before adding it to the muffin pan for precise adjustment.
- For whipped toppings: While a can of Reddi-Whip offers convenience if serving immediately, it tends to deflate quickly. If you’re preparing these cheesecakes ahead of time, we suggest piping a more stable topping like Cool Whip, or even better, making your own stabilized whipped cream for longer-lasting presentation.
- These cheesecakes should be stored in an airtight container in the refrigerator for up to 1 week, or frozen for up to 2 months.
- If you can’t find pre-made Oreo crumbs for the crust, consider using chocolate graham cracker crumbs. Alternatively, you can use 1 ¼ cups of regular graham cracker crumbs mixed with 4 tablespoons of melted butter, 3 tablespoons of unsweetened cocoa powder, and an extra tablespoon of granulated sugar. Or simply crush about 20 whole Oreos in a food processor to make your own crumbs.
- Allowing the cheesecakes to cool in the oven after baking is a critical step that helps them maintain their height and prevents cracking on the surface.
- For the creamiest texture in your cheesecake filling, ensure that both the cream cheese and egg are at room temperature before mixing.
- For variations, feel free to experiment by adding chocolate chips or additional crumbled Oreo cookies directly into the cheesecake batter before baking.
Did You Make This Recipe?
Don’t forget to share your culinary creations with us on Instagram @sugarandsoulco and follow us on Tiktok @sugarandsoulco and Pinterest @sugarandsoulco for even more delicious recipes and baking inspiration!
Pin Recipe
Share Recipe