
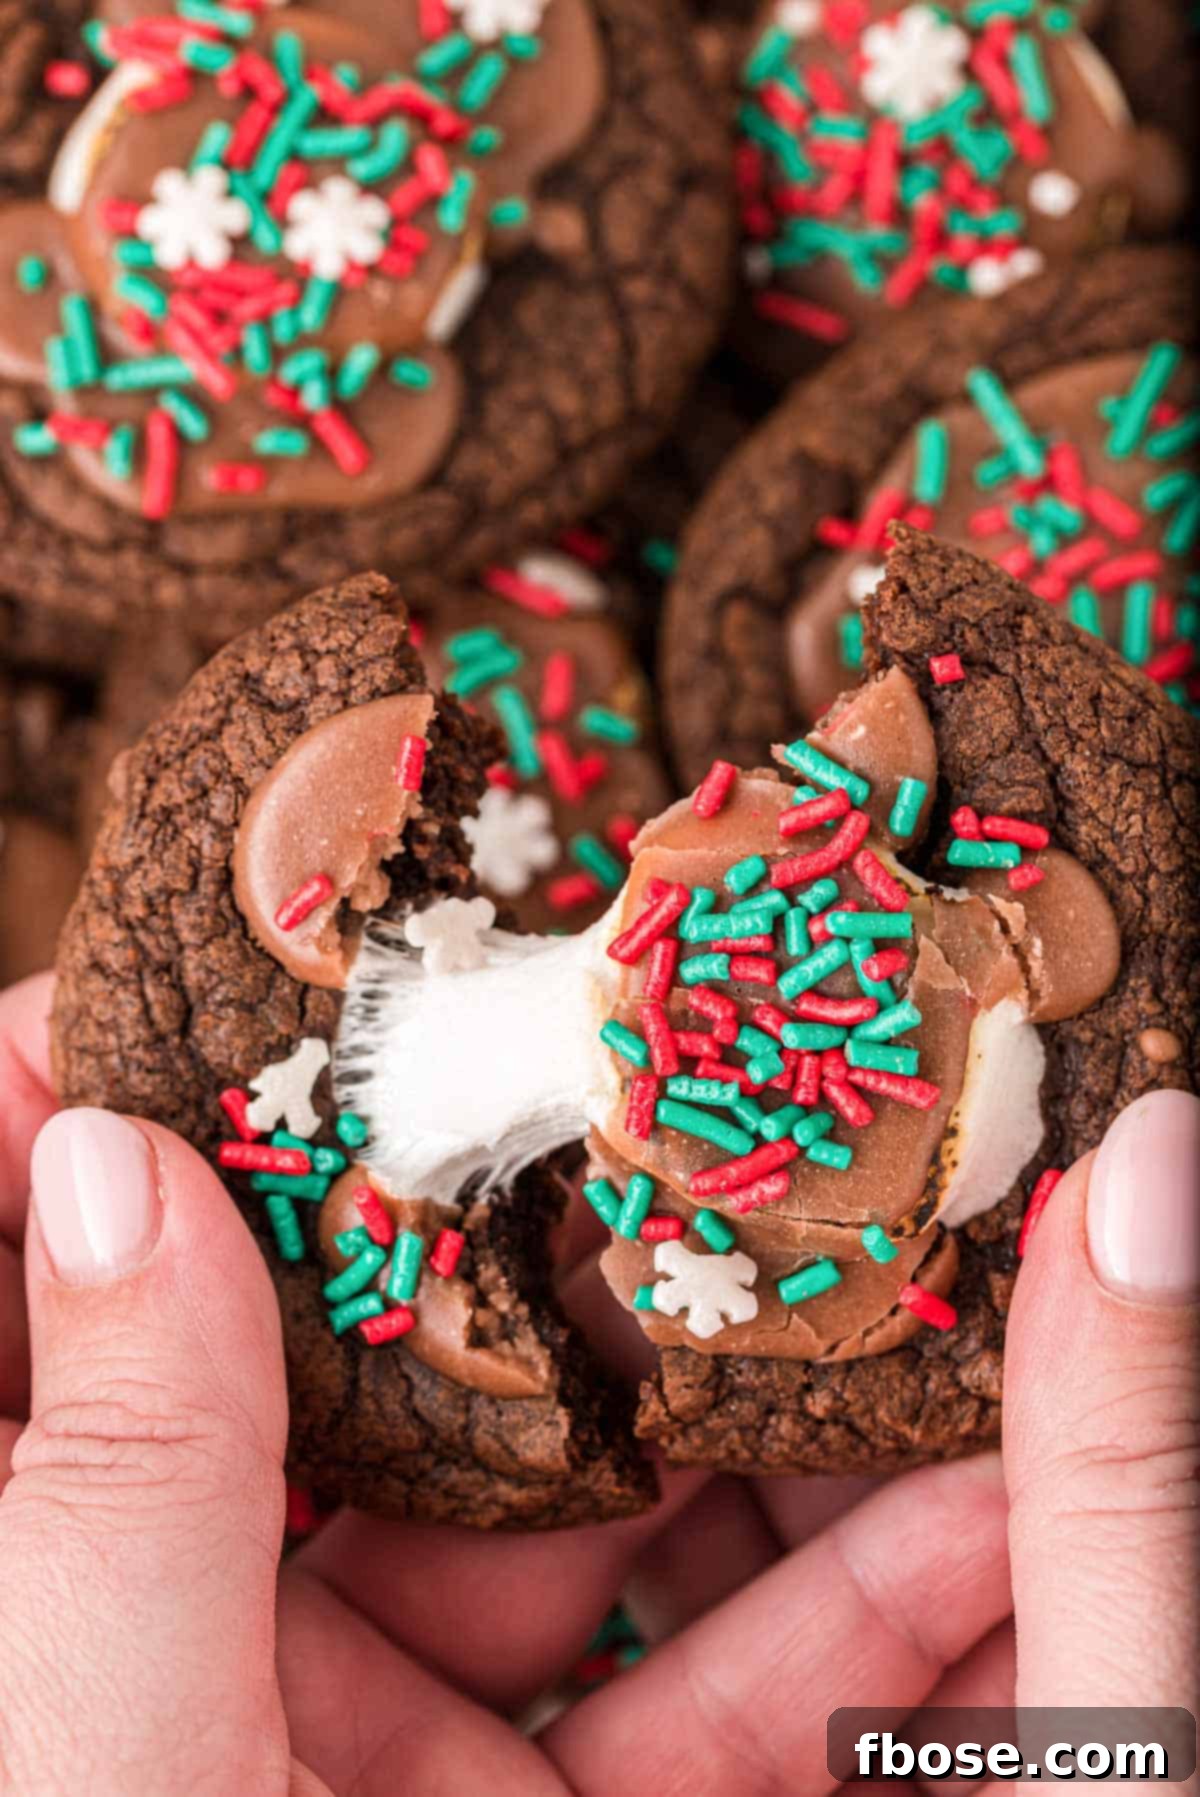
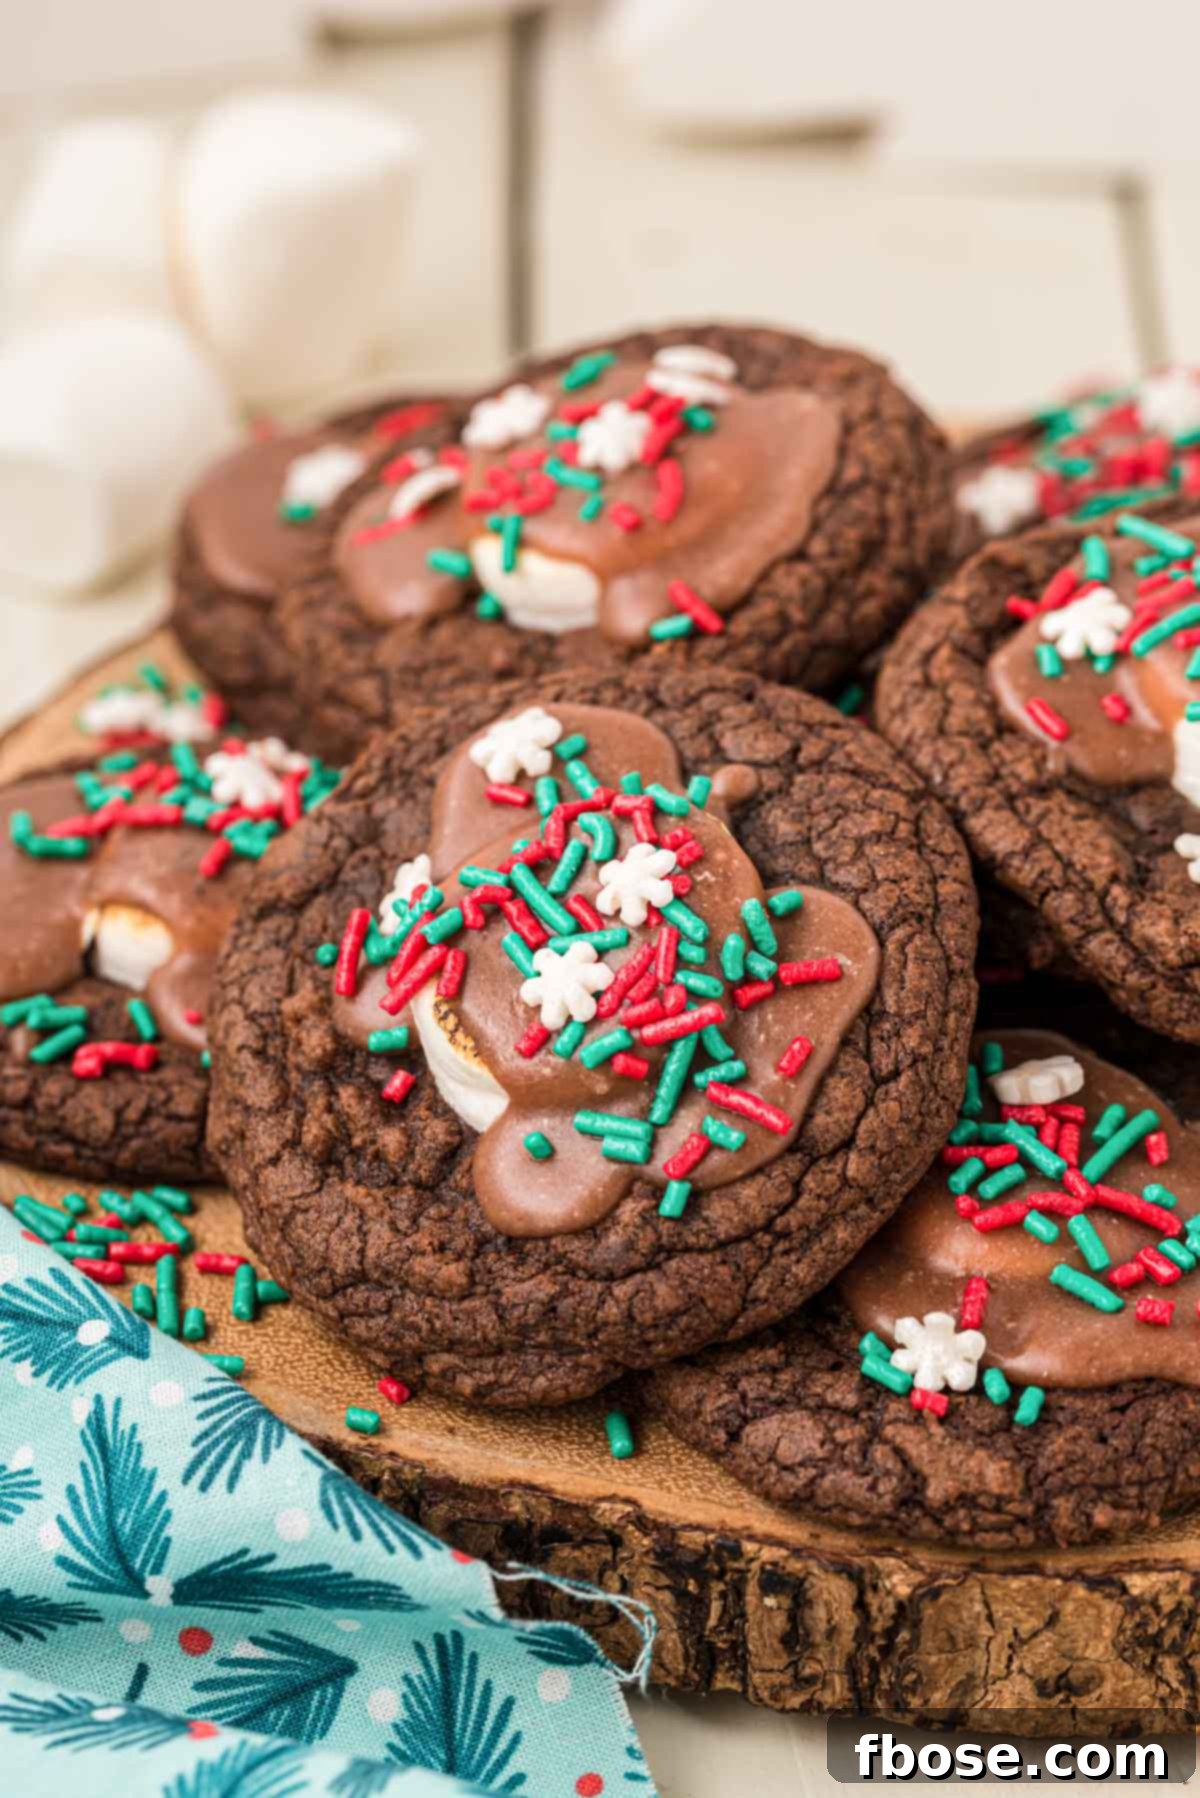
Hot Chocolate Cookies are not just a dessert; they are an experience, a delightful fusion of rich, fudgy brownie cookies, crowned with a perfectly gooey marshmallow and a decadent 4-ingredient hot chocolate icing. These irresistible treats are destined to become your go-to recipe for any occasion, whether it’s a cozy snow day, a festive holiday gathering, or simply a craving for something wonderfully sweet. They encapsulate the comforting warmth of your favorite winter beverage in every single bite, making them an absolute must-try!
Craving more hot chocolate-inspired delights? Explore other scrumptious recipes that bring the magic of hot cocoa to your dessert table. You might love this Hot Chocolate Dump Cake, a marvel of simplicity and flavor, or these playful Hot Chocolate Muddy Buddies, perfect for sharing. Both these recipes promise a quick turnaround, being ready to be savored in just around 45 minutes!
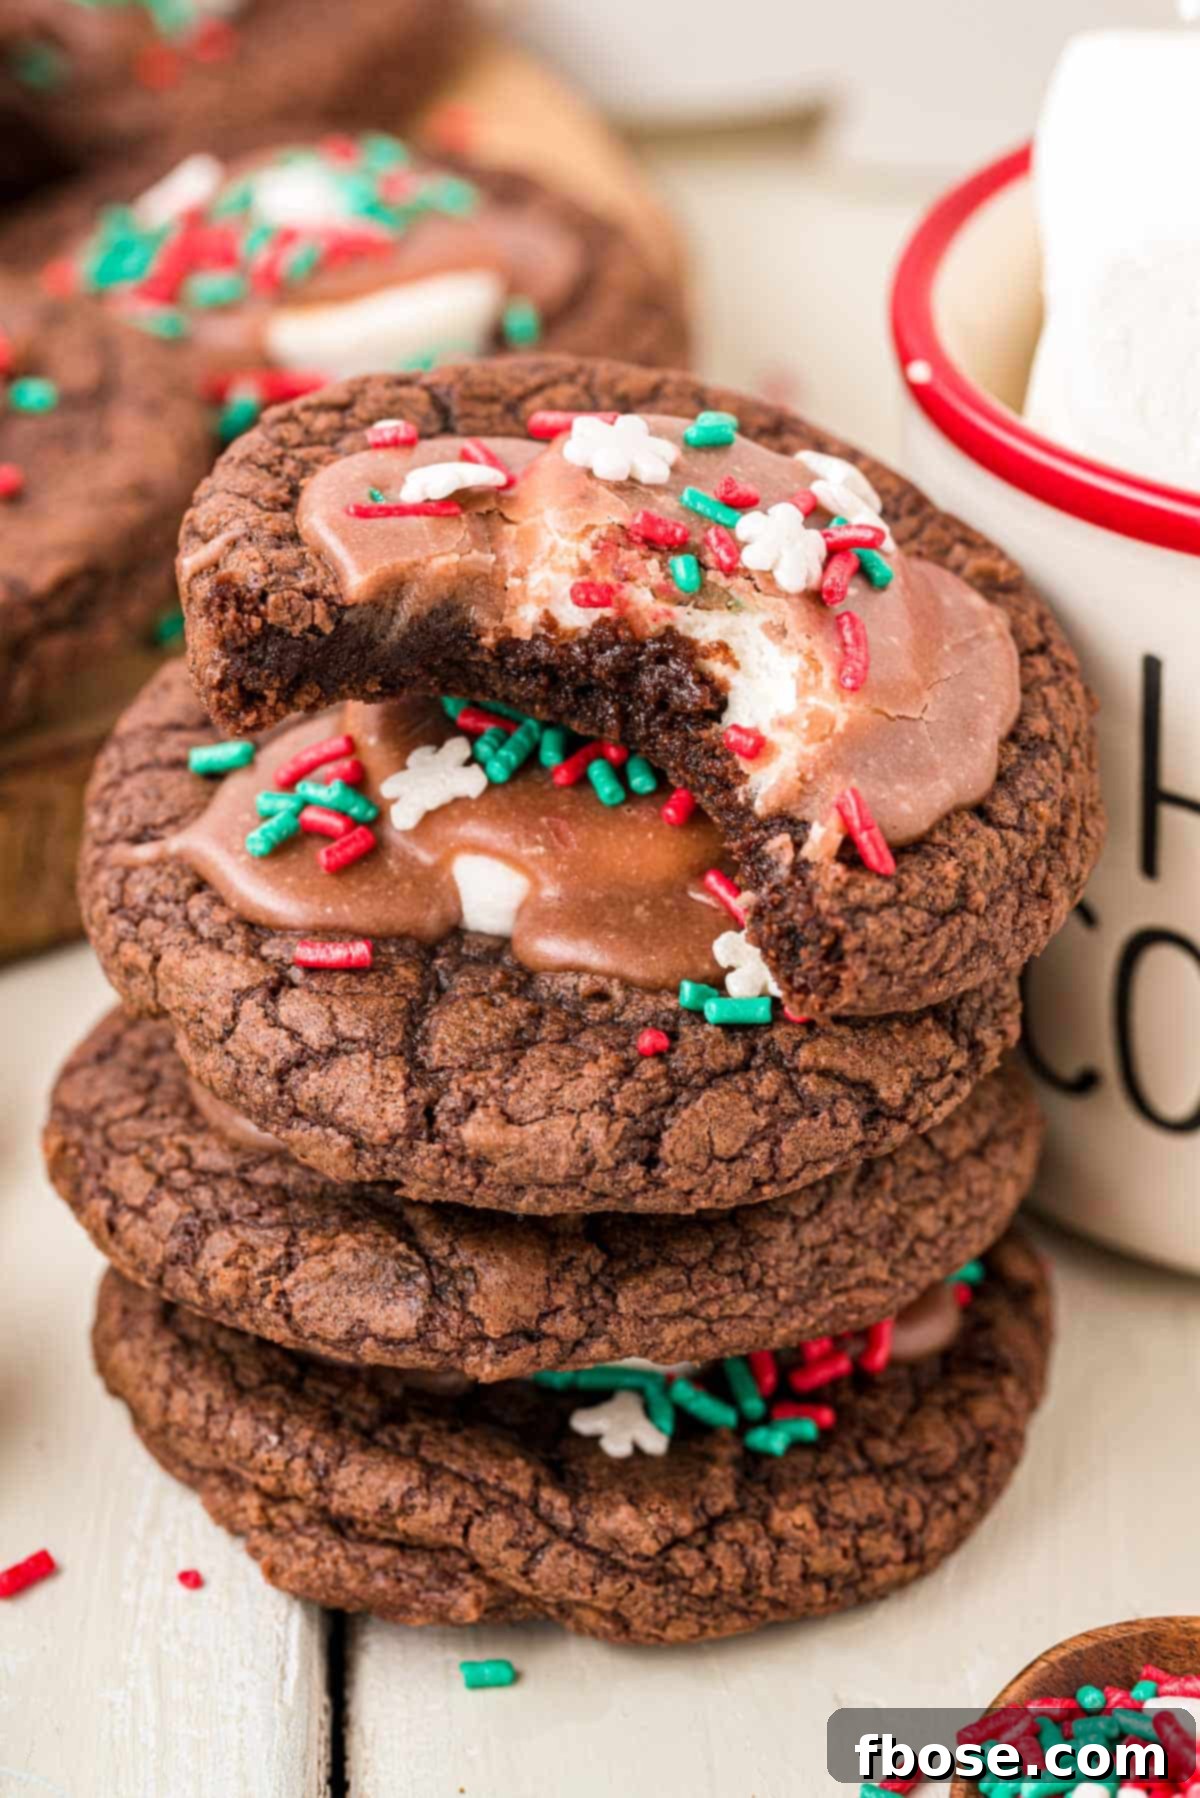
Easy and Delicious: Your New Favorite Hot Chocolate Cookie Recipe
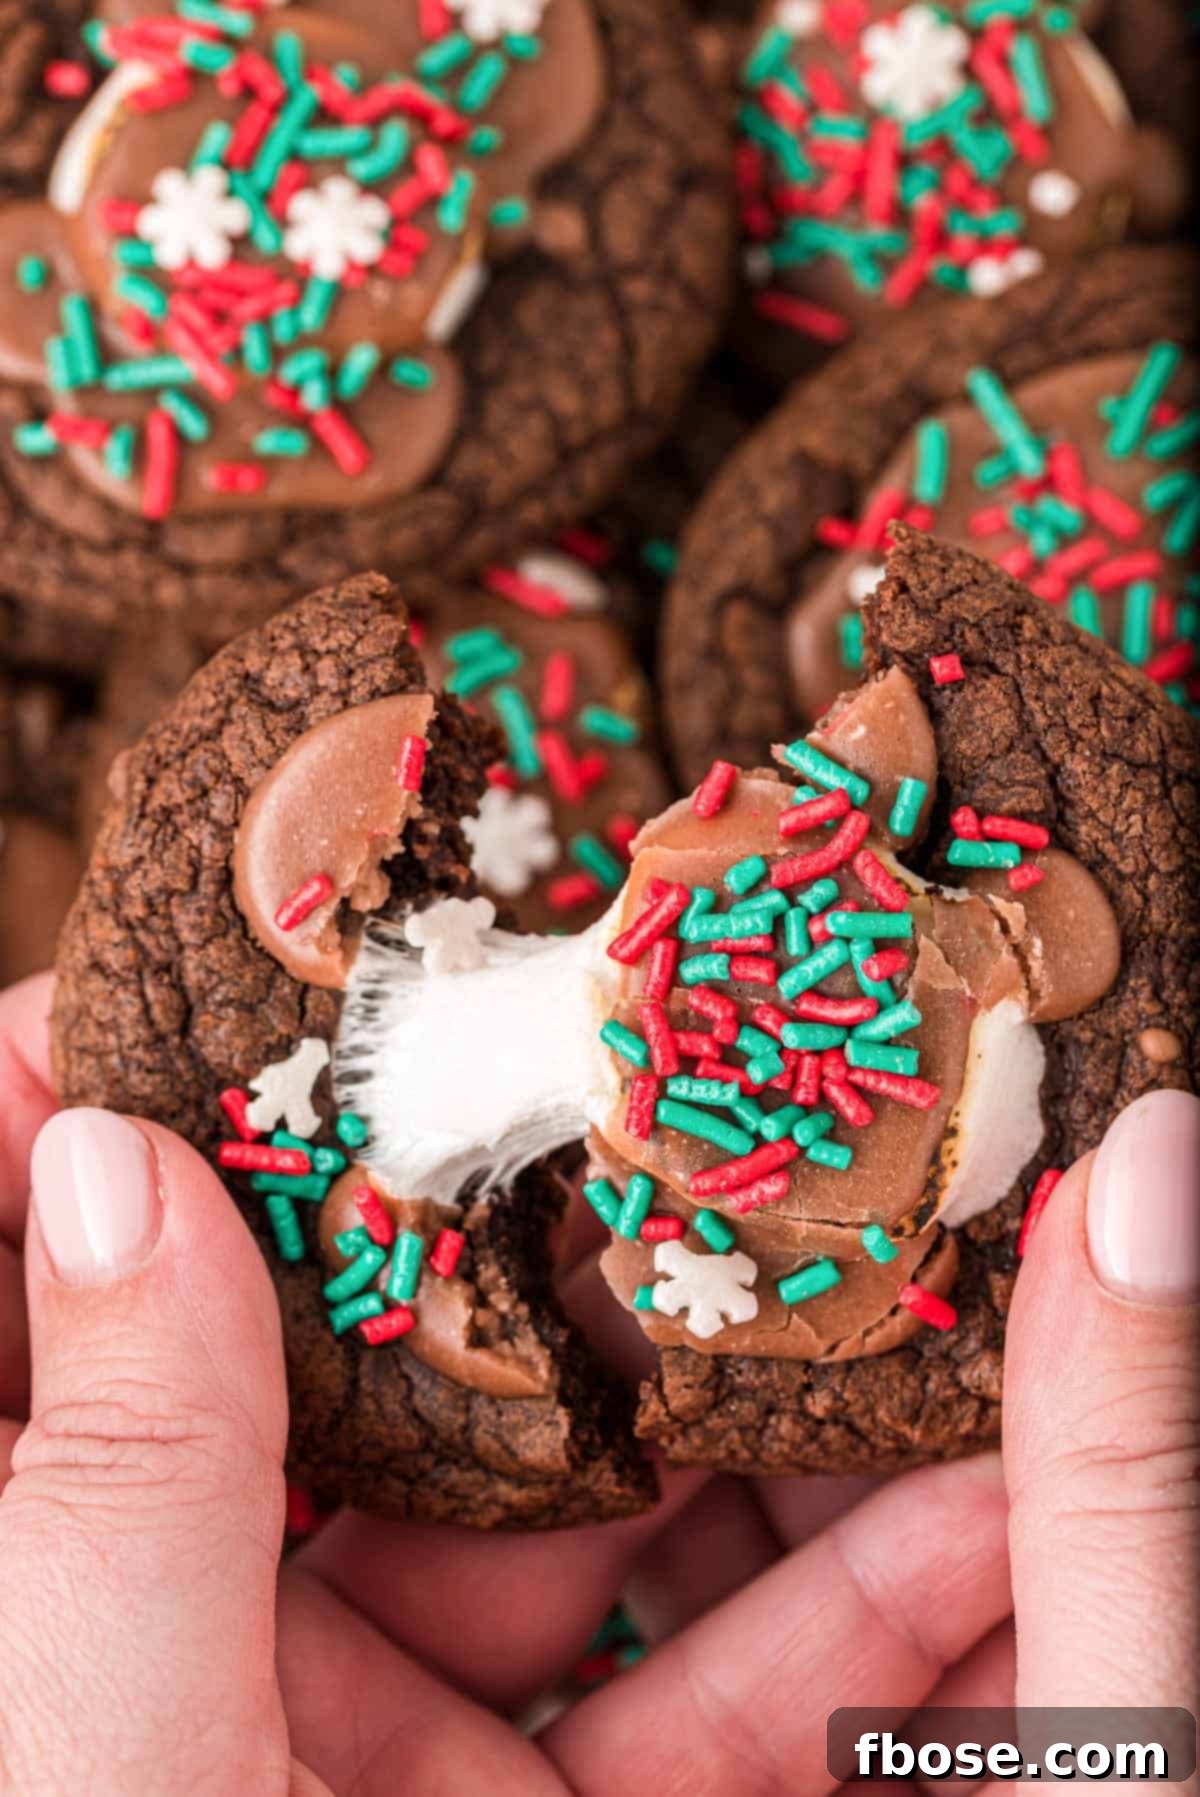
Embrace the quintessential flavors of your beloved winter drink, hot chocolate, transformed into an exquisite cookie form! These Hot Chocolate Cookies deliver an unparalleled taste adventure, starting with their deeply chocolatey, intensely fudgy brownie cookie base. Each bite is then elevated by the soft, melted marshmallow and a luscious cocoa icing, creating a symphony of textures and flavors that will undoubtedly leave you yearning for more. They are truly a treat that embodies comfort and joy.
What makes these cookies even more spectacular is their incredible ease of preparation. With a mere 5 minutes of active prep time and a quick 10-minute bake, these delightful cookies are ready to enjoy in record time! This makes them an ideal dessert solution for those moments when time is precious, but the desire for a homemade, absolutely delicious baked good is undeniable. Say goodbye to complicated recipes and hello to instant gratification with these fuss-free hot chocolate brownie cookies.
Unveiling the Irresistible Charm of These Hot Cocoa Cookies: Taste and Texture Beyond Compare
These Hot Cocoa Cookies are not just good; they are phenomenally good, a true masterpiece of winter baking. Here’s why they will captivate your taste buds and become a beloved staple in your recipe collection:
Taste: Prepare for an explosion of flavors with every bite. These cookies offer a harmonious blend of intense chocolate, characteristic of a rich fudgy brownie, perfectly complemented by the sweet, vanilla-kissed marshmallow. The experience culminates with a delicate drizzle of homemade hot chocolate icing, adding another layer of cocoa richness and sweetness. It’s like sipping your favorite hot chocolate by the fireplace, but in a delightfully chewable, handheld form. Each cookie is a miniature celebration of cozy, winter-flavored goodness that you’ll want to bake and enjoy all season long.
Texture: Beyond their incredible taste, these cookies boast a truly remarkable and satisfying texture profile. The journey begins with the base: a fudgy, chewy brownie cookie that provides a substantial, melt-in-your-mouth foundation. Nestled atop each cookie is a sticky, gooey marshmallow, soft and yielding, which creates a delightful contrast. Finally, the smooth, velvety hot cocoa icing glides over everything, tying the textures together into a perfectly balanced and utterly addictive treat. This multi-layered texture ensures every bite is an exciting and luxurious experience.
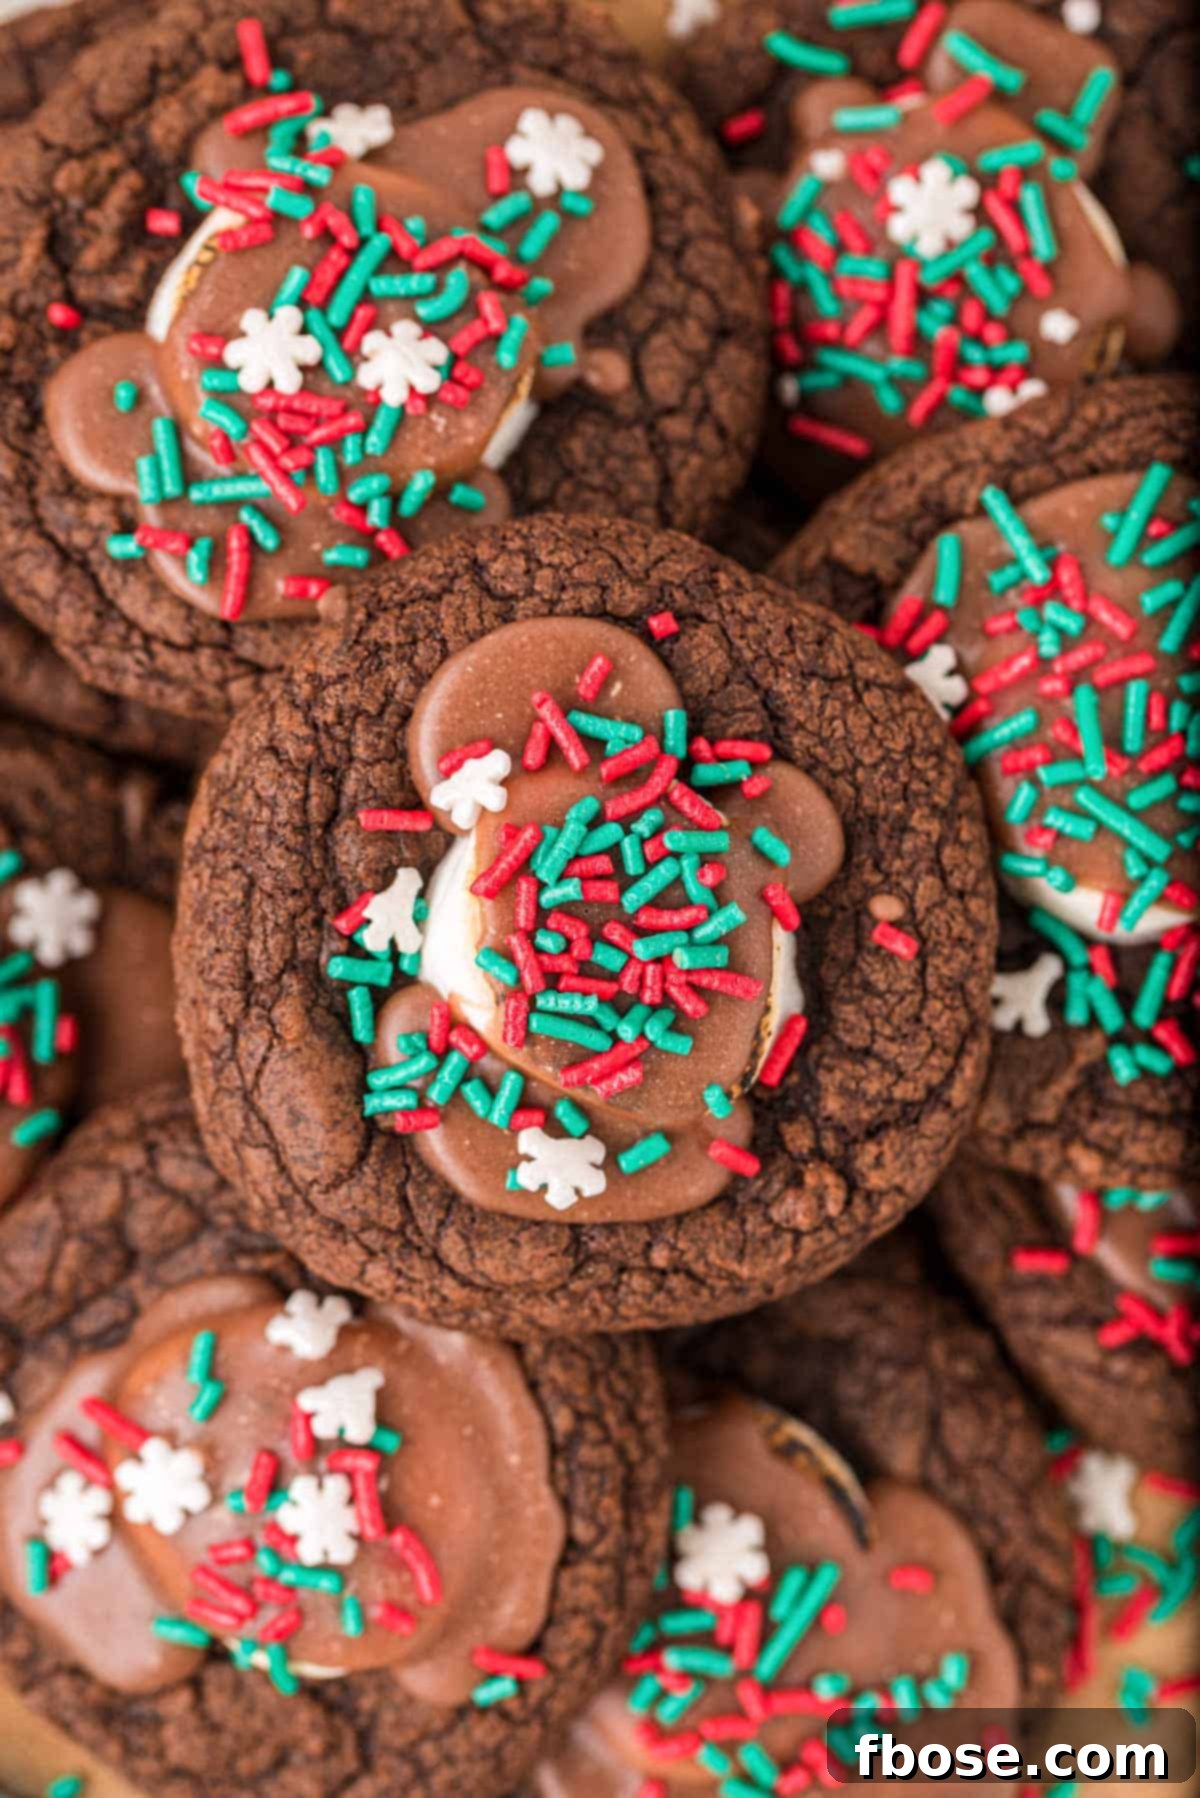
Essential Ingredients and Tools for Your Hot Cocoa Cookies
Gathering your ingredients and tools is the first step to creating these magnificent Hot Cocoa Cookies. This recipe is designed for simplicity, leveraging the convenience of a brownie mix while adding a homemade touch to ensure maximum flavor and texture. Here’s a comprehensive list to ensure you’re fully prepared:
For the Fudgy Brownie Cookies:
- Ghirardelli Brownie Mix (18 oz. box): This specific brand is recommended for its rich chocolate flavor and consistent results, providing a strong foundation for our cookies. While other brands might work, Ghirardelli offers a superior fudgy texture.
- All-purpose flour: A small amount of flour is added to adjust the brownie mix, giving the cookies a more structured yet still chewy consistency.
- Large eggs: Eggs bind the ingredients together, adding moisture and richness, crucial for that desirable fudgy center.
- Vegetable oil: Contributes to the cookies’ moistness and tenderness, ensuring a soft crumb.
- Water: Helps to bring the batter to the right consistency, ensuring all ingredients are well-incorporated.
- Marshmallows: The star topping! Opt for regular-sized marshmallows, which you’ll cut in half to create the perfect gooey layer on each cookie.
For the Dreamy Hot Chocolate Icing:
- Powdered sugar: The base of our smooth and sweet icing, dissolving easily for a lump-free finish.
- Unsalted butter (melted): Adds richness and helps create the creamy texture of the icing. Melting it ensures it blends seamlessly.
- Hot chocolate powder mix: This is where the “hot chocolate” flavor truly shines in the icing. Use your favorite brand for the best taste.
- Hot water: Essential for dissolving the powdered sugar and hot chocolate mix, creating a smooth, pourable icing consistency.
For the Festive Finish:
- Holiday sprinkles: An optional but highly recommended touch to add a festive look and a playful crunch. Choose colors that match the season or your party theme!
Essential Kitchen Tools:
- Large Mixing Bowl: For combining your brownie cookie dough.
- Stand Mixer with Paddle Attachment: Highly recommended for easily handling the thick cookie batter. A hand mixer might struggle.
- Cookie Scoop (medium size): Ensures uniform cookies, leading to even baking and a professional appearance.
- Baking Sheets: At least two, to efficiently bake multiple batches.
- Parchment Paper: Crucial for preventing sticking and making cleanup a breeze.
- Small Mixing Bowl and Whisk: For preparing the hot chocolate icing.
- Cooling Rack: For allowing your cookies to cool properly and for the icing to set.
- Sharp Knife or Kitchen Shears: For cutting marshmallows in half.
Brownie Mix Brands: Will a Betty Crocker Brownie Mix Work for These Cookies?
When selecting your brownie mix for these delightful Hot Chocolate Cookies, the brand truly makes a difference. My recipe specifically calls for Ghirardelli or Duncan Hines brownie mix, as they consistently yield the desired fudgy texture. However, some readers have inquired about using Betty Crocker Brownie Mix. It’s important to note that Betty Crocker mixes typically do not contain baking soda, which is a leavening agent crucial for helping the cookies rise and achieve that soft, yet substantial, fudgy center. As a result, using a Betty Crocker mix without modification can often lead to flatter cookies.
That being said, some resourceful bakers have experimented with adding 1 teaspoon of baking soda to a Betty Crocker brownie mix and reported successful results, achieving cookies that turned out just fine. While this modification sounds promising, I personally have not tested or tried this alteration myself when crafting these Hot Chocolate Brownie Cookies. For guaranteed results that mirror the recipe’s intended fudgy perfection, I highly recommend sticking with an 18-ounce box of Ghirardelli or Duncan Hines brownie mix. If you do decide to experiment with other brands, especially those without baking soda, be prepared for potential variations in texture and consider adding a leavening agent.
Transforming Your Hot Chocolate Cookies: How to Create Peppermint Hot Chocolate Cookies
Infusing these Hot Chocolate Cookies with a refreshing hint of peppermint is wonderfully easy and opens up a whole new world of holiday flavor! The classic pairing of chocolate and peppermint is a winter favorite, and you can achieve it in a few simple ways, allowing you to customize your batch to perfection.
The most straightforward method is to add peppermint extract directly to the cookie batter. A teaspoon or two, depending on your desired intensity, mixed in with the wet ingredients, will distribute that cool, minty flavor throughout the fudgy cookie base. For those who love a visual and textural peppermint burst, consider swapping out the regular marshmallows for festive peppermint-flavored marshmallows. These often come in pink or red hues and will melt into a beautifully aromatic and slightly chewy topping. Alternatively, for a more intense chocolate-peppermint combination, you could mix a generous amount of peppermint chocolate chips (or even crushed candy canes) directly into the cookie batter alongside the flour. This adds both flavor and a delightful crunch. Imagine the vibrant holiday sprinkles combined with a subtle peppermint crunch – truly magical! You could even combine a couple of these methods for an ultimate peppermint experience, perhaps a hint of extract in the dough and peppermint marshmallows on top.
Crafting Perfection: Step-by-Step Guide to Making Hot Chocolate Cookies
Creating these delightful Hot Chocolate Cookies is a straightforward and rewarding process. Follow these detailed steps to ensure your cookies turn out perfectly fudgy, gooey, and utterly delicious:
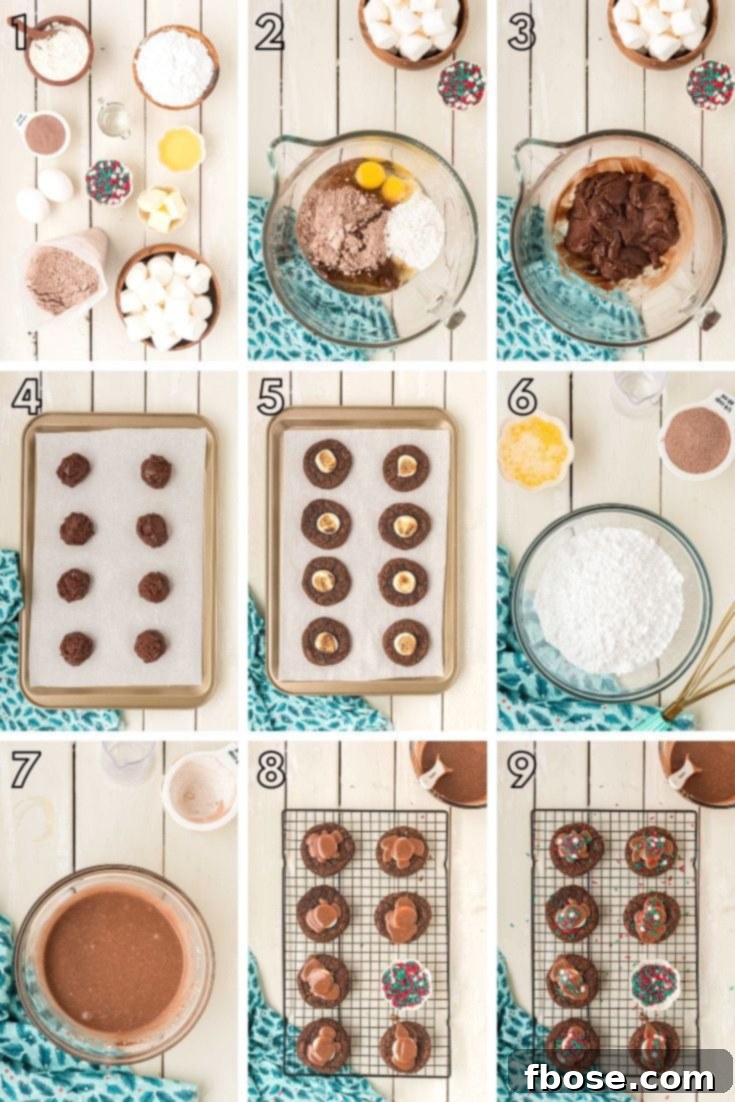
- Preparation is Key: Begin by preheating your oven to 350°F (175°C). Then, line a large baking sheet with parchment paper. This crucial step prevents sticking and ensures easy cleanup, allowing your cookies to slide off the pan effortlessly.
- Combine the Cookie Base Ingredients: In a large mixing bowl, or preferably in a stand mixer fitted with a paddle attachment, add the Ghirardelli brownie mix, all-purpose flour, large eggs, vegetable oil, and water.
- Mix Until Just Combined: Beat the ingredients together on medium speed until they are thoroughly combined. The dough will be noticeably thick and sticky. Make sure to scrape down the sides of the bowl periodically to ensure all ingredients are uniformly incorporated. Avoid overmixing once combined to maintain a tender cookie.
- Portion and Arrange the Dough: Using a medium-sized cookie scoop (about 1.5-2 tablespoons), drop uniform portions of the dough onto the prepared baking sheet. Leave approximately 2 inches between each cookie to allow for spreading during baking.
- Initial Bake and Marshmallow Addition: Bake the cookies for 7 to 9 minutes. At this stage, the cookies should have formed a thin film on top, and the batter should no longer appear glossy, though you might still see small ripples of darker, slightly underbaked batter. This is exactly what you want for a fudgy center. Carefully remove the baking sheet from the oven. Immediately press a marshmallow half, cut side down, into the center of each partially baked cookie. Return the baking sheet to the oven and bake for an additional 2 to 4 minutes, or until the marshmallows are lightly golden and gooey. For an extra touch, you can briefly broil them on low for a toasted marshmallow appearance and flavor, but watch them diligently to prevent burning.
- Cool Before Icing: Once the cookies are out of the oven, let them cool on the baking sheet for a couple of minutes before carefully transferring them to a wire rack to cool completely. This helps them set and prevents sticking.
- Prepare the Hot Chocolate Icing: While your cookies are cooling, prepare the luxurious icing. In a small bowl, combine the powdered sugar, hot chocolate powder mix, melted unsalted butter, and hot water.
- Whisk to Smooth Perfection: Whisk these icing ingredients together vigorously until the mixture is completely smooth and free of lumps. The consistency should be pourable but thick enough to coat the marshmallows beautifully.
- Icing and Sprinkles: As soon as the cookies are cool enough to handle (or while still slightly warm for a meltier look), immediately spoon the hot chocolate icing over the top of each marshmallow, allowing it to drip slightly down the sides. Don’t be shy; you might use more than one teaspoon of icing per cookie. Promptly top with your chosen holiday sprinkles while the icing is still wet so they adhere. Allow the icing to set for at least 30 minutes before indulging in these festive treats.
Expert Tips for Perfect Hot Chocolate Cookies Every Time
Achieving the perfect batch of fudgy, marshmallow-topped Hot Chocolate Cookies is easily within reach with these expert tips and tricks. Pay close attention to these details, and you’ll be enjoying sublime results:
- Choosing Your Brownie Mix Wisely: The foundation of these incredible cookies is a quality brownie mix. I’ve personally tested this Hot Chocolate Cookies recipe with 18-ounce boxes of both Ghirardelli brownie mix and Duncan Hines brownie mix, and both brands yielded fantastic results. Their consistent quality and ingredient balance are ideal. Be aware that using other brands or different-sized boxes (e.g., smaller or larger than 18 oz) could significantly alter the final texture and taste of your cookies, potentially leading to a less fudgy or desired outcome. Always check the box size and ingredient list if you deviate.
- Mastering the Thick Batter: Don’t be alarmed by the consistency of this cookie batter – it will indeed be very thick and quite sticky! This is completely normal and contributes to the fudgy texture of the finished cookies. For this reason, I strongly recommend using a stand mixer equipped with a sturdy paddle attachment. Attempting to mix this dough by hand, or even with a whisk attachment on a stand mixer, will likely prove challenging and may not result in a uniformly mixed batter. The paddle attachment is designed to handle dense doughs efficiently.
- Precision in Baking Time for Fudgy Centers: The key to those coveted fudgy centers lies in precise baking time. These cookies cook surprisingly quickly, and just one extra minute in the oven can transform that soft, gooey interior into a drier, cake-like texture – and nobody wants a “not-so-fudgy” cookie! Keep a very close eye on them during the baking process. They should appear set on the edges but still slightly soft and not fully glossy in the center when removed.
- The Art of the Toasted Marshmallow (Optional but Recommended): For an extra layer of flavor and visual appeal, consider broiling these Hot Chocolate Cookies on low for a beautifully toasted marshmallow topping. This step adds a slightly caramelized taste and a gorgeous golden-brown hue. If you choose this method, remain vigilant! Broilers can work very fast, and marshmallows can go from perfectly toasted to burnt in mere seconds. Watch them continuously until they reach your desired level of golden perfection.
While these easy hot chocolate cookies already boast such incredible flavor, I understand the desire to switch things up and explore different tasty variations from time to time. This recipe is wonderfully adaptable!
To pack in even more intense chocolate flavor, simply add a handful of your favorite chocolate chips – dark, milk, or semi-sweet – to the cookie batter before baking. Or, introduce an exciting spin of different flavors by incorporating peppermint chunks, zesty mint chocolate chips, or even creamy white chocolate chips for a delightful contrast. The possibilities are endless when it comes to customizing the chocolate base.
Another simple yet effective way to introduce new flavors and visual appeal is by changing up the marshmallows that adorn the top of the cookies! Seek out some fun-flavored marshmallows, perhaps ones with a surprise filling, or seasonally appropriate peppermint marshmallows during the holidays. These small changes can yield dramatically different and exciting results, making each batch a unique experience.
Since this robust recipe yields a generous two dozen cookies, you have the perfect opportunity to experiment! You could easily make half of them following this classic, tried-and-true recipe, while simultaneously putting your own tasty and creative spin on the second half. This way, everyone gets their favorite, and you get to unleash your inner baking innovator!
Proper Storage for Your Hot Cocoa Cookies
These delightful Hot Chocolate Cookies are truly at their peak when served warm and fresh, straight from the oven, allowing you to fully savor that irresistibly gooey, melted marshmallow. However, should you find yourself with any delicious leftovers (a rare but possible occurrence!), proper storage is key to maintaining their quality.
You can easily store leftover Hot Chocolate Cookies in an airtight container at room temperature. When stored correctly, they will remain wonderfully fresh and enjoyable for up to 5 days. To best preserve their texture, particularly the marshmallow and icing, ensure they are completely cooled before placing them in the container. For an extra touch of warmth and gooiness on subsequent days, you can briefly reheat them in the microwave for a few seconds before serving.
Frequently Asked Questions About Hot Cocoa Cookies
The secret to a luscious, fudgy center in your Hot Chocolate Cookies lies almost entirely in the baking time. If your cookies consistently turn out firm or cakey rather than fudgy, it’s highly probable that they’ve been baked for too long. Each oven can vary significantly, so finding the optimal baking duration is crucial. For instance, with my gas oven, I’ve discovered that 8 minutes is the sweet spot for achieving that ideal fudgy consistency.
If you’re using an electric oven, you might find that 8 to 9 minutes is sufficient. The best approach is to conduct a preliminary test: bake just one or two cookies first. This allows you to observe how they cook in your specific oven and determine the precise baking time needed to achieve that perfectly fudgy center. Look for edges that are set and a center that still looks slightly underbaked or glossy. By fine-tuning this, you can prevent an entire batch of cookies from losing those mouthwatering, gooey centers!
Hot chocolate cookies are a delightful confectionery innovation that brings the comforting flavors of the classic winter beverage into a cookie format. They are essentially rich, deeply chocolatey, and incredibly fudgy cookies that are crafted using a brownie mix base. These cookies are then elevated to a festive and indulgent treat with a topping of soft, melted marshmallows, a smooth and sweet hot chocolate-infused icing, and often a final flourish of colorful sprinkles. They are designed to evoke the warmth and joy of drinking hot chocolate, but in a convenient, chewable, and utterly satisfying bite-sized form, perfect for holidays and chilly days.
The texture of a cookie – whether it’s delightfully soft and chewy or satisfyingly crisp and crunchy – is influenced by a complex interplay of several factors within the recipe and baking process. Understanding these can help you achieve your desired cookie texture:
– Butter vs. Oil: Butter contributes to crispier edges and a richer flavor, while oil tends to yield a softer, more cake-like texture.
– Melted Butter vs. Softened Butter vs. Cold Butter: Melted butter promotes chewiness, softened butter leads to a soft, fluffy cookie, and cold butter cut into pieces creates flaky layers.
– Cornstarch: A small addition of cornstarch can often lead to an incredibly soft and tender cookie.
– Baking Powder vs. Baking Soda: Baking soda (which reacts with acidic ingredients) generally contributes to spread and chewiness, while baking powder (which has a double leavening action) typically creates a lighter, cakeier, and sometimes crisper cookie.
– Eggs: The ratio of egg yolks (for richness and chewiness) to egg whites (for spread and crispness) plays a role. Using more yolks often results in a softer, chewier cookie.
– Baking Time: Underbaking slightly will maintain a soft, fudgy center, while prolonged baking dries out the cookie, making it crisp.
– Baking Temperature: A higher temperature often sets the edges quickly, leading to crispness, while a lower temperature allows for more spread and a softer outcome.
While both hot chocolate mix and cocoa powder are derived from cocoa beans and contribute chocolate flavor, they are distinct products with different compositions and uses. Cocoa powder is essentially the concentrated cocoa solids that remain after most of the cocoa butter (fat) and liquid have been extracted from roasted, ground cocoa beans. These solids are then finely ground into a powder. It’s unsweetened and very intense in flavor, making it a foundational ingredient for baking where you control the sugar and fat content.
On the other hand, hot chocolate mix is a ready-to-use blend designed specifically for making a hot beverage. It contains cocoa powder, but it also includes a variety of other ingredients such as sugar (often a significant amount), powdered milk or creamer, whey powder, and sometimes flavorings like vanilla or spices. It’s formulated for convenience and balanced flavor in a drink, whereas pure cocoa powder offers a more versatile and intense chocolate base for recipes.
Discover More Irresistible Holiday Treats
The holiday season is synonymous with warmth, joy, and an abundance of delicious treats, and these Hot Chocolate Cookies are just the beginning! Beyond this delightful recipe, there’s a whole world of festive desserts waiting to be explored, many of which draw inspiration from the beloved flavors of hot chocolate. Desserts like these, along with Hot Chocolate Rice Krispie Treats, offer a playful and chewy twist on a classic, while Hot Chocolate Brownie Bites provide a rich, miniature indulgence. These are fun winter treats that I eagerly anticipate making for the kids and family every year, creating cherished culinary memories.
And when attending any holiday party or gathering, I always make sure to bring a crowd-pleasing dessert. A creamy bowl of Hot Chocolate Dip, perfect for sharing with an array of dippers, or a beautifully frosted batch of Hot Chocolate Cupcakes are always met with enthusiasm. These treats effortlessly capture the spirit of the season.
After all, whether we indulge in the classic comfort of hot chocolate served in a steaming mug, or enjoy its delightful essence in a creative snack or dessert form, one universal truth remains clear: We ALL adore that iconic, comforting, and utterly delicious winter flavor! Let these recipes inspire your holiday baking and bring a little extra magic to your celebrations.
Let’s Connect and Share Your Baking Success!
If you’ve tried this delightful Hot Chocolate Cookies recipe, please don’t hesitate to let me know how much you loved it in the comments section below, and kindly leave a review! Your feedback is incredibly valuable, and I genuinely love hearing from each and every one of you who brings these recipes to life in your kitchens.
Furthermore, if you snap some beautiful photos of your freshly baked cookies, don’t forget to tag me – @sugarandsoulco – on Instagram and Pinterest! You can also join our vibrant Sugar & Soul Show-offs Community on Facebook and share your creations there, where you can also participate in our fun recipe challenges and connect with fellow baking enthusiasts! I can’t wait to see your wonderful creations!
Hot Cocoa Cookies Recipe: Your Ultimate Winter Treat
Ingredients
For the Fudgy Chocolate Cookies
- 1 (18 oz.) box Ghirardelli Brownie Mix or Duncan Hines Brownie Mix, see notes for details
- ½ cup all-purpose flour to adjust cookie texture
- 2 large eggs for binding and richness
- 5 tablespoons vegetable oil contributing to moistness
- 1 tablespoon water to achieve desired dough consistency
- 12 Marshmallows regular sized, cut in half to top the cookies
For the Decadent Icing
- 2 cups powdered sugar for a smooth and sweet icing
- 4 tablespoons unsalted butter melted, for richness
- ¼ cup hot chocolate powder mix for authentic cocoa flavor
- ¼ cup hot water to create a pourable icing consistency
For Garnish (Optional)
- holiday sprinkles for a festive touch
Instructions
-
Preheat your oven to 350°F (175°C). Line a large baking sheet (or two, if you have them) with parchment paper. This will prevent sticking and make cleanup much easier.
-
In a spacious mixing bowl or, ideally, in a stand mixer fitted with a paddle attachment, combine the brownie mix, all-purpose flour, large eggs, vegetable oil, and water. Mix these ingredients thoroughly until a cohesive dough forms. The batter will be quite thick and sticky, so use the paddle attachment to ensure everything is well combined, scraping down the sides of the bowl as needed to incorporate any dry bits.1 (18 oz.) box Ghirardelli Brownie Mix, ½ cup all-purpose flour, 2 large eggs, 5 tablespoons vegetable oil, 1 tablespoon water
-
Using a medium cookie scoop (approximately 1.5-2 tablespoons), drop portions of the thick dough onto your prepared baking sheet. Ensure there is about 2 inches of space between each cookie to allow for proper spreading during baking.
-
Bake the cookies for an initial 7 to 9 minutes. The cookies should develop a thin, set film on their surface, and the batter should no longer look wet or glossy. You might still be able to discern small ripples of darker, slightly less-set batter in the center; this is perfectly normal and contributes to their fudginess.
-
Promptly remove the baking sheet from the oven. Carefully and quickly press a marshmallow half, with the cut side facing down, into the very center of each warm cookie. Return the cookies to the oven and bake for an additional 2 to 4 minutes, just until the marshmallows are soft, gooey, and lightly puffed. For a beautifully toasted marshmallow appearance and flavor, you can briefly broil the cookies on low heat for 30-60 seconds after the 2-4 minutes, but keep an extremely close watch to prevent burning.12 Marshmallows
-
Once baked, remove the cookies from the oven and allow them to cool on the baking pan for a few minutes. This initial cooling period helps them to set and firm up slightly before you transfer them carefully to a wire rack to cool completely.
-
While the cookies are cooling, prepare your luscious hot chocolate icing. In a small bowl, whisk together the powdered sugar, hot chocolate powder mix, melted unsalted butter, and hot water until the mixture is perfectly smooth and has a pourable, yet thick, consistency.2 cups powdered sugar, 4 tablespoons unsalted butter, ¼ cup hot chocolate powder mix, ¼ cup hot water
-
Once the cookies have cooled to at least warm (or completely, depending on your preference for icing consistency), use a teaspoon to gently drizzle and distribute the icing over the top of each marshmallow and cookie. You may find that more than 1 teaspoon of icing per cookie is ideal for full coverage and flavor. Immediately scatter your desired holiday sprinkles over the wet icing to ensure they adhere. Allow the icing to fully set, which typically takes at least 30 minutes, before delighting in these heavenly Hot Chocolate Cookies.holiday sprinkles
Notes
- The success of this recipe largely depends on the brownie mix used. I have only tested and successfully made this recipe with 18-ounce boxes of Ghirardelli brownie mix and Duncan Hines brownie mix. These brands consistently deliver the desired rich flavor and fudgy texture. Please be aware that using other mixes, or boxes of different sizes, could significantly change the outcome of the recipe, potentially affecting the cookie’s texture and overall quality.
- A crucial detail regarding brownie mixes: Betty Crocker’s brownie mix typically does not contain baking soda, a leavening agent essential for the cookies to rise and achieve a chewy, fudgy consistency. Its absence can result in noticeably flat cookies. While some readers have reported success by adding 1 teaspoon of baking soda to the Betty Crocker mix, I have not personally tested this modification. For reliable results, I recommend sticking to the specified brands.
- Baking time is incredibly temperamental for these cookies, and it’s the key to achieving that perfect fudgy center. They cook quite quickly, and even a single extra minute in the oven can transform them from gooey to cakey – a transformation no one desires! I use a gas oven and have found that exactly 8 minutes provides the perfect amount of time for a fudgy interior.
- It’s important to note that you want these cookies to appear slightly undercooked when you remove them from the oven. They will continue to cook gently from the residual heat of the baking sheet as they cool. If you have an electric oven, you might aim for 8 or 9 minutes of cook time. To get them just right for your specific oven, I highly recommend baking a test batch of one or two cookies first. This will help you pinpoint that sweet spot for baking time and ensure your entire batch has those irresistible fudgy centers!
- The cookie batter for this recipe is inherently very thick and sticky. Due to this dense consistency, I strongly advise against mixing it with a standard whisk by hand or even with a whisk attachment on a stand mixer. A sturdy stand mixer fitted with a paddle attachment is the most effective tool to ensure the dough is properly and uniformly mixed without overworking it.
Nutrition
Did You Make This Recipe?
Don’t forget to share it with me on Instagram @sugarandsoulco and follow on Tiktok @sugarandsoulco and Pinterest @sugarandsoulco for more!
Pin Recipe
Share Recipe