
Easy St. Patrick’s Day Dessert Parfaits: A No-Bake Festive Treat
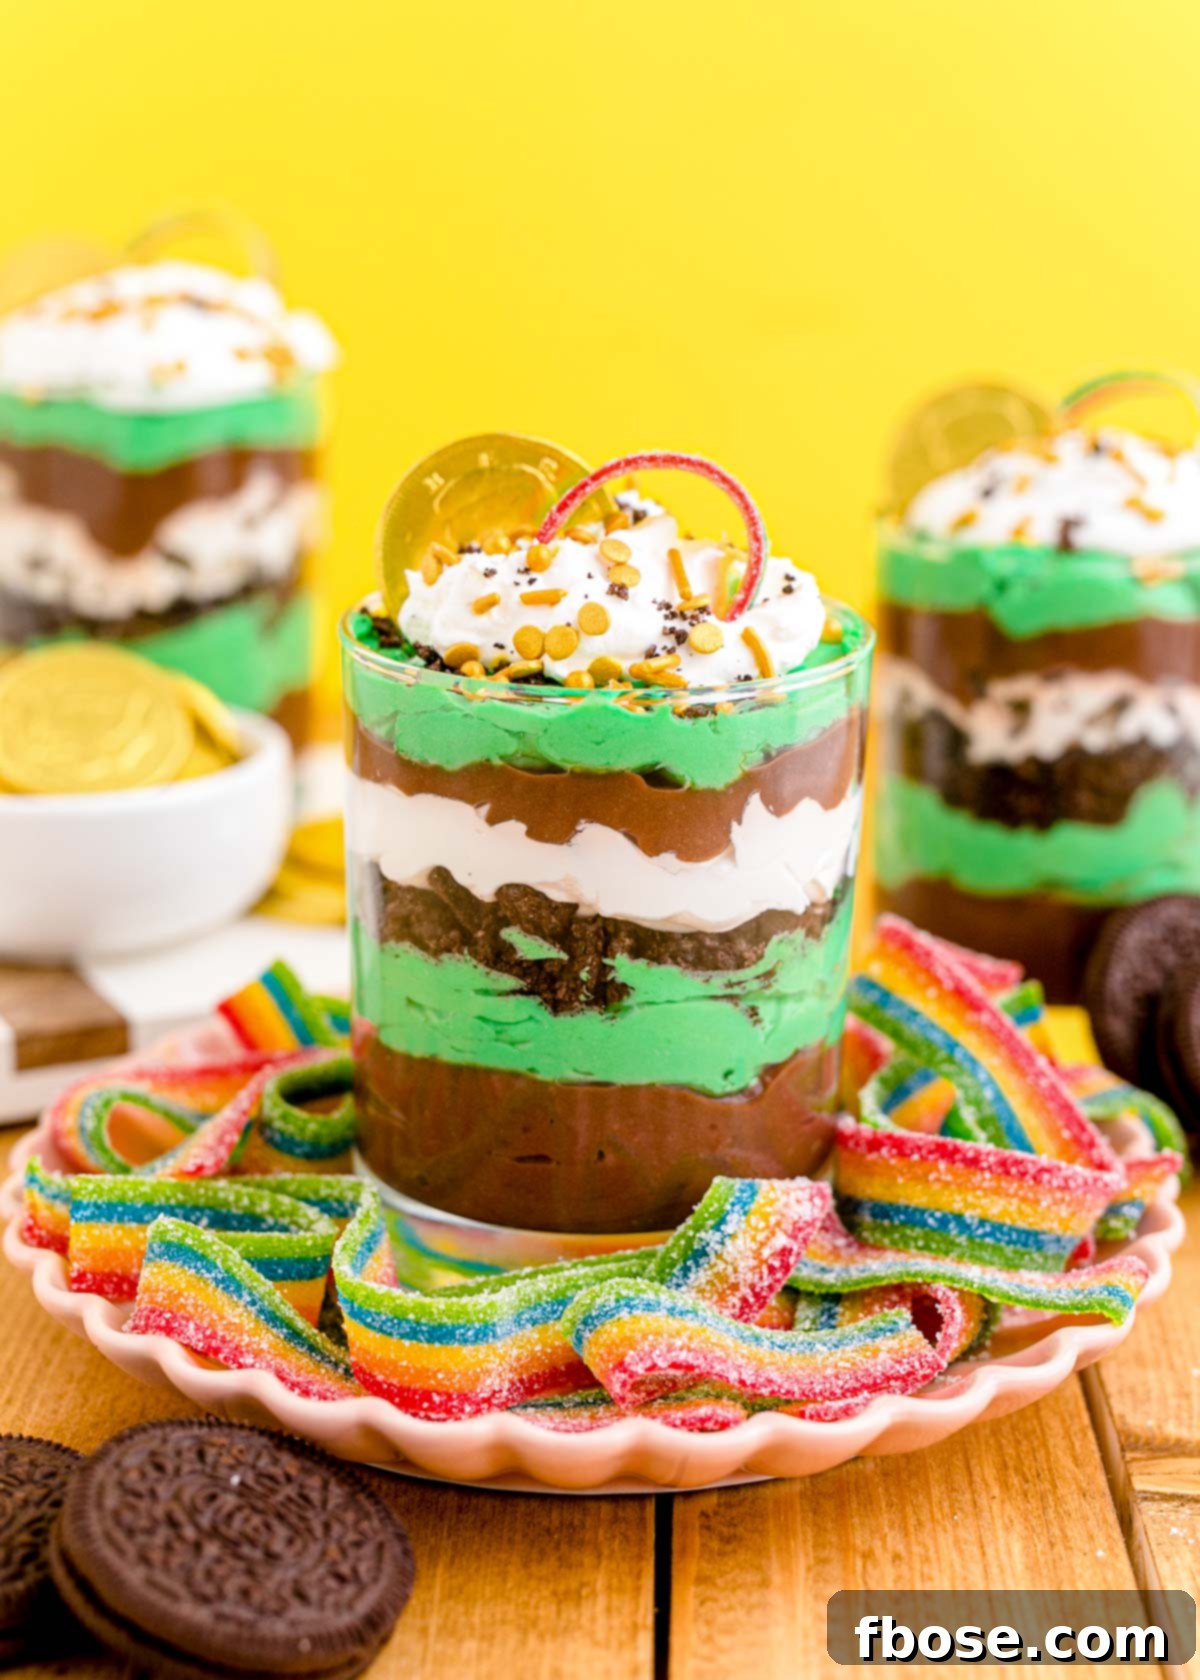
Celebrate the luck of the Irish with these delightful, vibrant, and incredibly easy St. Patrick’s Day Dessert Parfaits! Featuring luscious layers of rich chocolate pudding, creamy green vanilla pudding, satisfyingly crunchy Oreo crumbs, and a sweet, fluffy whipped topping, these dessert cups are a festive masterpiece. Best of all, they come together in just 30 minutes, making them the perfect stress-free treat to brighten your March celebrations.
Whether you’re hosting a party, looking for a fun activity with the kids, or simply craving a festive sweet, these parfaits are sure to impress. The playful green hue, combined with whimsical candy toppings, guarantees smiles all around. It’s more than just a dessert; it’s an experience that captures the joyful spirit of St. Patrick’s Day in every spoonful.
Looking for more ways to indulge in St. Patrick’s Day delights? Don’t miss out on other festive favorites like our McDonald’s Shamrock Shake Copycat and charming Pot of Gold Cupcakes!
Why These St. Patrick’s Day Parfaits Are a Must-Try
These St. Patrick’s Day dessert parfaits aren’t just visually appealing; they’re also incredibly delicious and convenient. Here’s why this recipe will become your go-to festive treat:
- **Effortless No-Bake Creation:** Forget turning on the oven! This recipe requires no baking, making it ideal for busy holidays or when you want a quick dessert without the fuss.
- **Ready in 30 Minutes:** From start to finish, you can have these stunning parfaits prepped and ready to chill in half an hour. Perfect for last-minute party preparations or spontaneous sweet cravings.
- **Kid-Friendly Fun:** The vibrant green pudding and playful candy decorations will captivate children and adults alike. It’s a fantastic recipe to make with little helpers, allowing them to participate in the layering and decorating.
- **Irresistible Mousse-Like Texture:** The green vanilla pudding layer, made with instant pudding mix and heavy cream, transforms into a wonderfully light and airy mousse. This creamy texture is a delightful contrast to the crunchy Oreo crumbs.
- **Customizable Flavors:** While delicious as is, this recipe offers flexibility. Easily swap vanilla extract for mint for a refreshing twist, or experiment with different Oreo flavors to suit your preference.
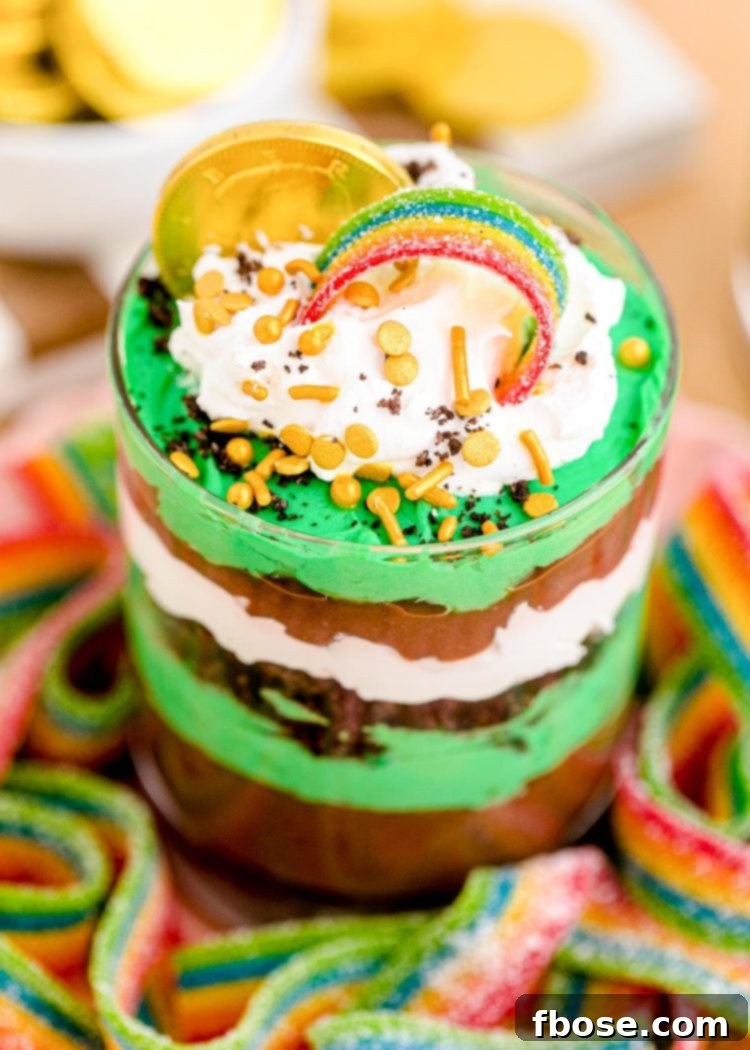
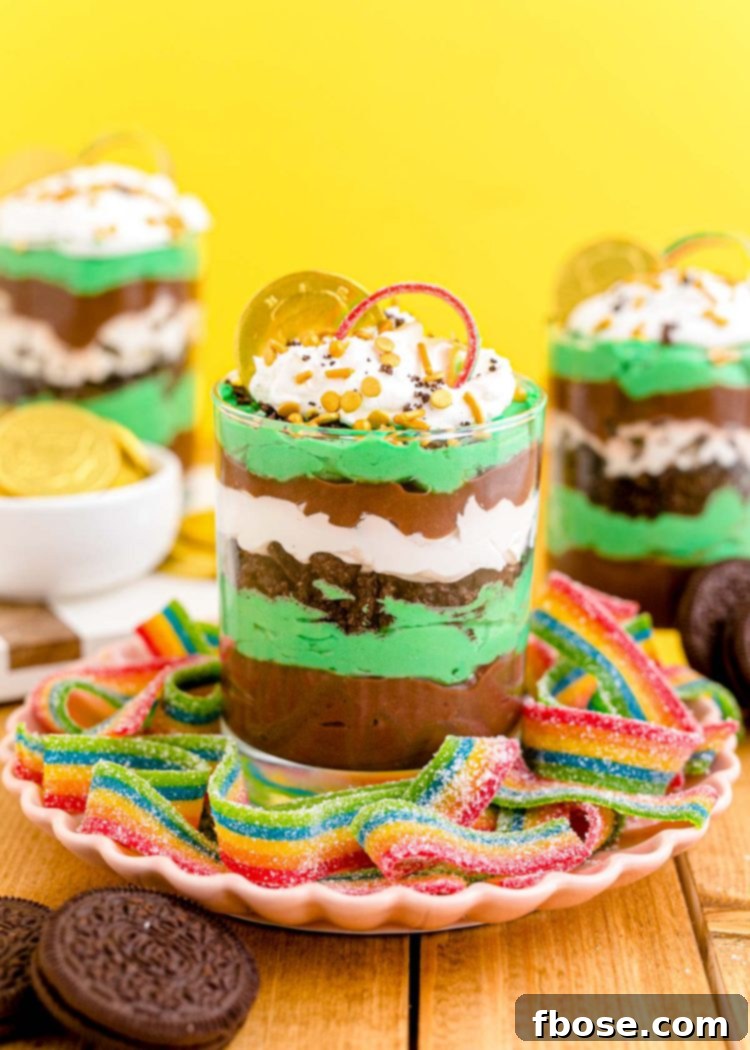
- **Visually Stunning Presentation:** Served in clear cups or jars, the distinct layers create an elegant and festive look that’s perfect for any St. Patrick’s Day gathering. They truly look like miniature pots of gold at the end of a rainbow!
Essential Ingredients for Your Festive Parfaits
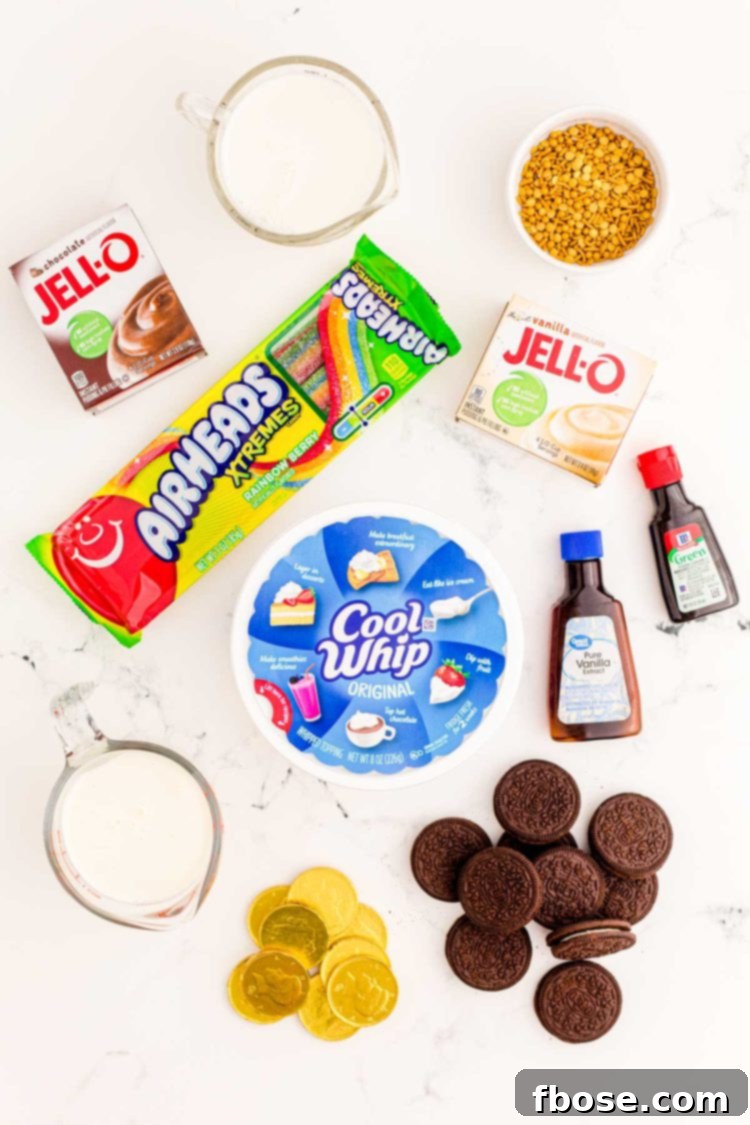
Crafting these spectacular St. Patrick’s Day Dessert Parfaits requires a simple list of ingredients, each playing a crucial role in creating a symphony of flavors and textures. We’ll be building these parfaits with four delightful layers: rich chocolate pudding, a luscious green vanilla pudding, crunchy Oreo crumbs, and a sweet, airy whipped topping.
For the Parfait Layers:
- Instant Chocolate Pudding Mix: A 3.9 oz box of instant chocolate pudding mix forms the foundational dark layer of our parfait. Instant pudding is key for quick preparation, ensuring your dessert is ready in no time.
- Whole Milk: Two cups of whole milk are used to prepare the chocolate pudding. The richness of whole milk contributes to a creamier, more luxurious pudding consistency compared to lower-fat alternatives.
- Instant Vanilla Pudding Mix: For our vibrant green layer, you’ll need one 3.9 oz box of instant vanilla pudding mix. Vanilla provides a neutral base that takes on food coloring beautifully.
- Heavy Cream: Two cups of heavy cream are essential for transforming the vanilla pudding into that heavenly, mousse-like texture. When whipped with the pudding mix, it creates a light and fluffy consistency that’s far superior to standard pudding.
- Vanilla Extract (or Mint): A half teaspoon of vanilla extract is added to the green vanilla pudding. This not only enhances the flavor but also helps to offset any potential bitter notes from the food coloring. For a delicious minty variation, simply swap this for mint extract!
- Green Food Coloring: A few drops of green food coloring are vital for giving our vanilla pudding its festive St. Patrick’s Day hue. Gel food coloring often provides a more vibrant and concentrated color with fewer drops.
- Oreo Cookies: Eight Oreo cookies (Double Stuffed are a personal favorite for their extra creaminess!) are crushed to form the delightful, crunchy cookie layers. Feel free to use your preferred flavor of Oreo, or even a mint-flavored variety for an extra kick.
- Whipped Topping: Eight ounces of thawed whipped topping, such as Cool Whip, provides the light and airy crown for our parfaits, as well as creamy layers in between. Its stability is crucial for holding the layers together. While store-bought is convenient, you can also make your own homemade whipped cream for an even fresher taste.
For Decorations and Toppings:
- Rainbow Airheads Xtremes Candy: These colorful candies are perfect for creating an edible rainbow arch over your parfaits, adding a whimsical touch of St. Patrick’s Day magic.
- Chocolate Gold Coins: A classic St. Patrick’s Day symbol, these edible gold coins add a festive “pot of gold” element to the top of each dessert.
- Sprinkles: Green and white sprinkles, or a festive St. Patrick’s Day blend, add extra sparkle and texture.
- Extra Oreo Crumbs: A sprinkle of additional Oreo crumbs on top ties all the layers together visually and adds another touch of crunch.
Step-by-Step Guide to Crafting Your St. Patrick’s Day Dessert Cups
Making these St. Patrick’s Day Dessert Parfaits is straightforward and fun! Follow these easy steps to prepare your pudding layers and assemble your festive treats.
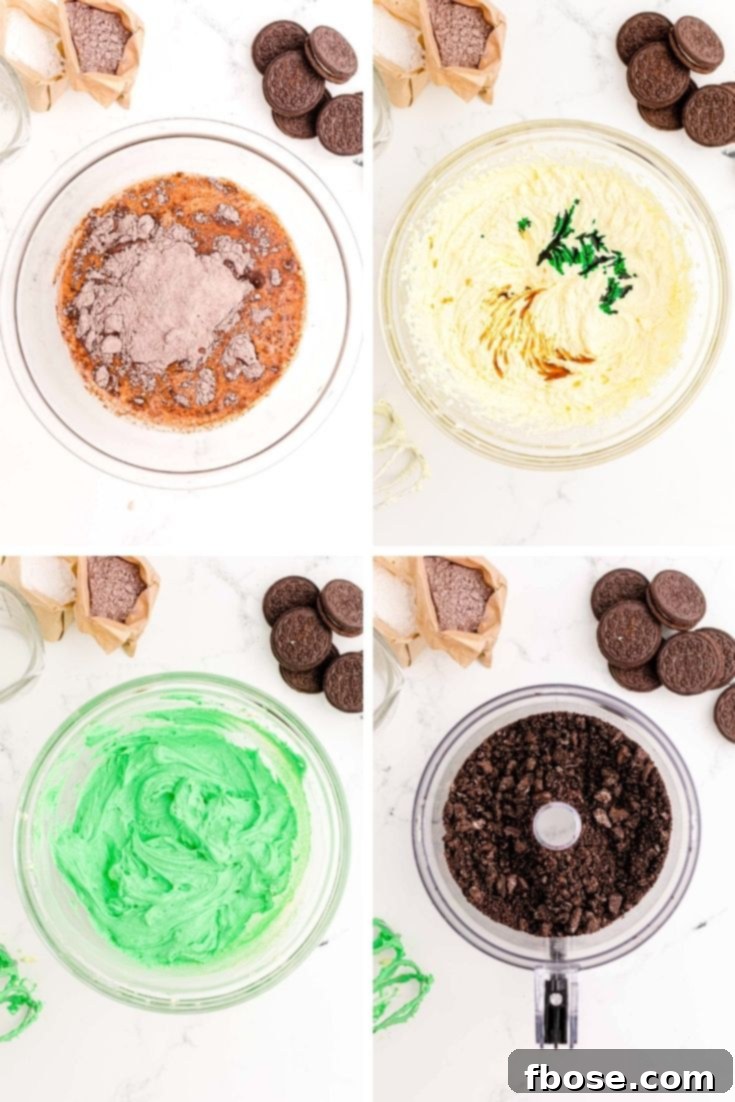
Step 1: Prepare the Chocolate Pudding
- In a medium-sized mixing bowl, combine one 3.9 oz box of instant chocolate pudding mix with 2 cups of whole milk.
- Using an electric hand mixer (or a whisk if you don’t have one), beat the mixture on low speed for 2 minutes until it begins to thicken and is smooth.
- Transfer the chocolate pudding to the refrigerator and allow it to set for at least 5 minutes while you prepare the green pudding. This ensures it’s firm enough for layering.
Step 2: Create the Green Vanilla Mousse-Like Pudding
- In a separate clean bowl, add one 3.9 oz box of instant vanilla pudding mix and 2 cups of heavy cream.
- Begin beating the mixture on low speed with your electric hand mixer. Gradually increase the speed to medium-high.
- Continue beating until the mixture becomes light, airy, and fluffy, taking on a mousse-like consistency. This process takes a few minutes as the heavy cream whips up.
- Once fluffy, beat in the ½ teaspoon of vanilla extract (or mint extract for a minty twist) and several drops of green food coloring. Continue mixing until you achieve your desired vibrant green hue. Remember, gel food coloring often yields a richer color.
Step 3: Prepare the Oreo Crumb Layer
- Place 8 Oreo cookies into a Ziploc bag and seal it, or use a food processor.
- If using a bag, use a rolling pin or the back of a spoon to crush the cookies into fine crumbs. If using a food processor, pulse until fine crumbs form. Set aside.
Assembling Your Delicious St. Patrick’s Day Parfaits
Now that your pudding layers and Oreo crumbs are ready, it’s time for the fun part: assembly! These parfaits are designed for clear cups or small jars to showcase their beautiful layers.
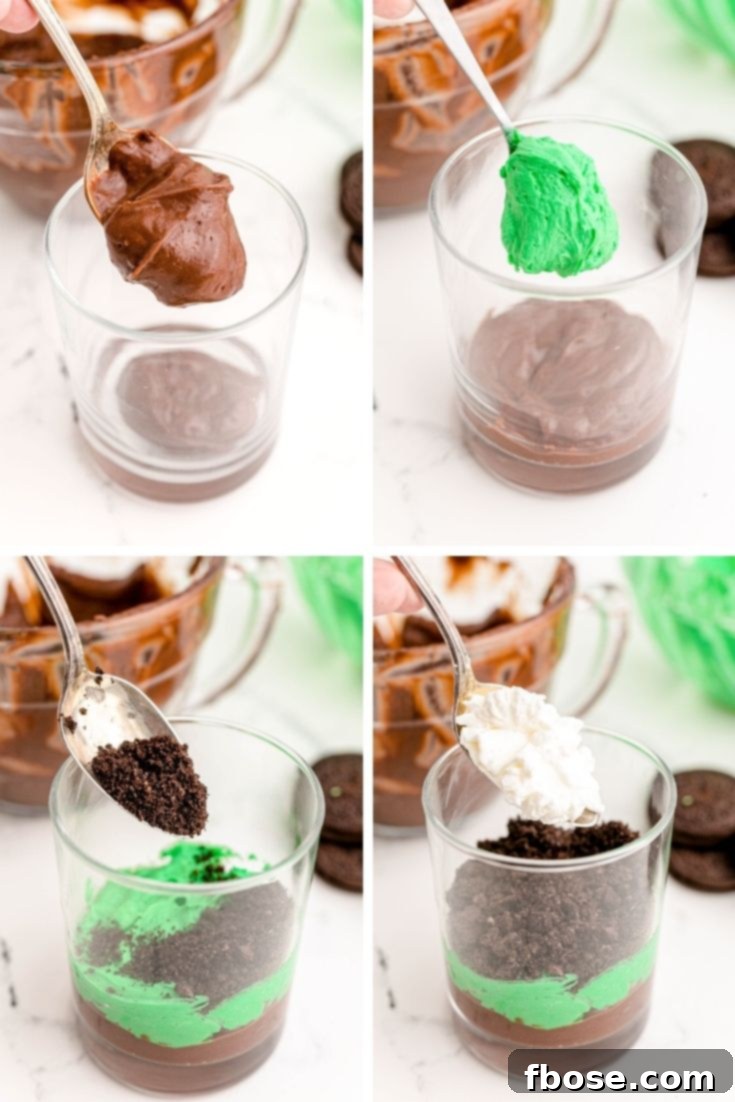
- First Layer: Chocolate Pudding. Take four clear dessert cups or jars. Spoon a thin, even layer of the set chocolate pudding into the bottom of each cup. This creates a solid base for your parfaits.
- Second Layer: Green Whipped Pudding. Carefully spoon a layer of the fluffy green vanilla pudding over the chocolate layer in each cup. Gently spread it to create a distinct, vibrant green stripe.
- Third Layer: Oreo Crumbs. Sprinkle a generous layer of crushed Oreo cookies over the green pudding. This adds a delightful crunch and a contrasting dark color.
- Fourth Layer: Whipped Topping. Top the Oreo crumbs with a layer of your thawed whipped topping. This adds a creamy, white element and prepares for the next round of layers.
- Repeat Layers. For optimal visual appeal and a balanced flavor profile, repeat these four layers once more in each cup. Be sure to finish with a final, generous layer of whipped topping on top.
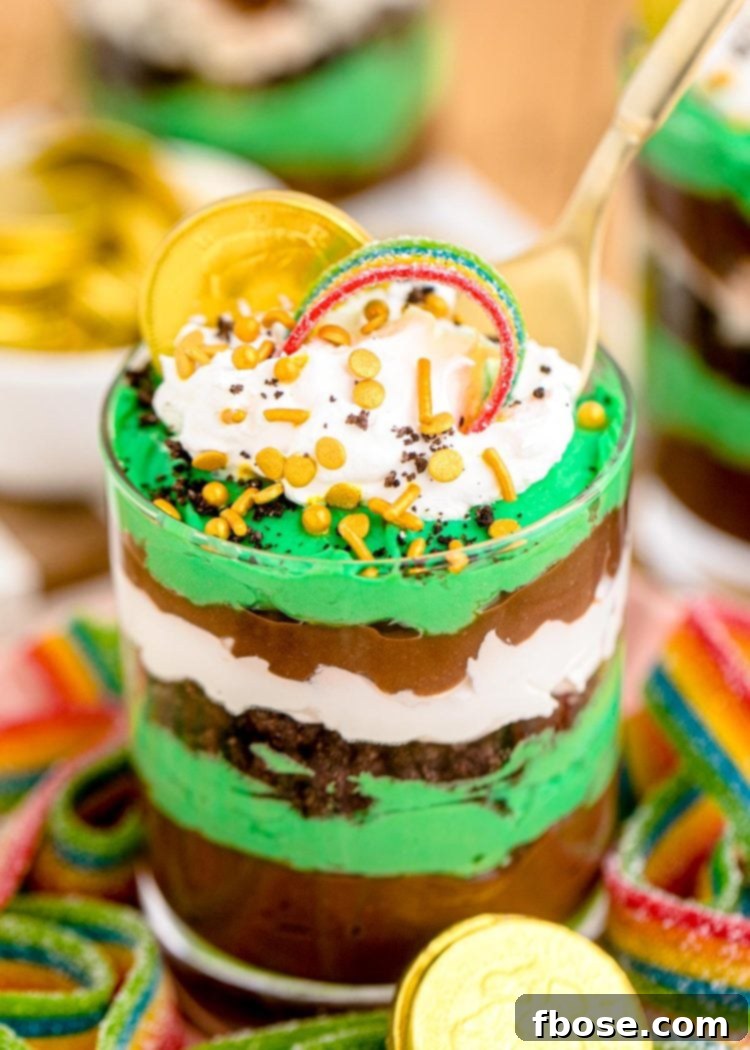
- Garnish and Chill. Now for the artistic touch! Take a Rainbow Airheads Xtremes candy, cut it in half, and arch it like a rainbow over the top of the whipped topping. Add a chocolate gold coin next to the rainbow, sprinkle with festive sprinkles, and add a few more Oreo crumbs.
- Place your beautifully assembled St. Patrick’s Day Pudding Cups in the refrigerator to chill for at least 30 minutes before serving. This allows the layers to set completely and flavors to meld, ensuring a perfectly chilled and enjoyable dessert.
Pro Tips for Perfect Parfaits Every Time
- Use Clear Serving Dishes: To truly appreciate the beautiful layers of these parfaits, serve them in clear glasses, small mason jars, or trifle dishes. The visual appeal is a huge part of their charm!
- Achieve Clean Layers: Use a spoon or a small offset spatula to gently smooth each layer against the sides of the cup before adding the next. This helps create those distinct, sharp lines between colors and textures.
- Don’t Skimp on Chilling Time: While you can eat them right away, chilling the parfaits for at least 30 minutes (or even an hour) allows the puddings to fully set and the flavors to deepen. This also helps the whipped topping become firmer and more stable.
- Crush Oreos Finely: For the best texture contrast, ensure your Oreo crumbs are finely crushed. This prevents large chunks that might make layering difficult and ensures a pleasant crunch in every bite.
- Customize Your Green: Adjust the amount of green food coloring to your preference. For a subtle, pastel green, use fewer drops. For a bold, vibrant green, add more, mixing until desired intensity is reached.
- Alternative Decorations: Get creative with your toppings! Consider adding mini marshmallows, green candies (like M&M’s or Skittles), edible glitter, or even a small sprig of fresh mint for a touch of elegance.
Frequently Asked Questions
Is There A Way To Make A Minty Variation Of This Dessert?
Absolutely! For a refreshing minty twist, simply swap the vanilla extract in the green pudding layer for an equal amount of mint extract. To further enhance the mint flavor, consider using mint-flavored Oreos (such as Mint Oreos) for your crushed cookie layers. This combination creates a delightful and festive flavor profile perfect for St. Patrick’s Day.
How Can I Make A Dairy-Free Version Of This Recipe?
Making this recipe dairy-free can be a bit tricky, as instant pudding mixes (like the Jell-O brand) generally don’t set well with dairy alternatives. Your best bet is to seek out a specifically formulated dairy-free instant pudding mix or, for guaranteed success, purchase a ready-made dairy-free pudding from your local grocery store. For the whipped topping, use a dairy-free whipped topping alternative, such as a coconut-based whipped cream.
Can I Use Less Heavy Cream In This Dessert Cup Recipe?
Yes, you can certainly make a lighter version of the green pudding! Instead of using 2 cups of heavy cream, you can mix together 1 cup of heavy cream and 1 cup of whole milk. The trick is to whip the 1 cup of heavy cream by itself first until it forms soft peaks. In a separate bowl, mix the instant vanilla pudding mix with the 1 cup of milk. Once combined, gently fold the whipped heavy cream into the pudding and milk mixture. Then, add your vanilla or mint extract and green food coloring as desired. This method yields a lighter, yet still creamy, pudding layer.
What’s The Best Way To Mix The Pudding If I Don’t Have An Electric Hand Mixer?
No electric mixer? No problem! A good old-fashioned whisk will do the job perfectly. For the best results, start by placing the powdered pudding mix into your bowl. Then, gradually add the milk or heavy cream a little at a time, whisking vigorously after each addition. Continue whisking until all the liquid is incorporated and the pudding is smooth and begins to thicken. It might take a bit more arm power, but the outcome will be just as delicious!
How Do I Store These Pudding Dessert Cups?
To store your St. Patrick’s Day Dessert Parfaits, cover each cup tightly with plastic wrap or an airtight lid. Pop them into the refrigerator, where they will stay fresh for up to 3 days. However, for the absolute best taste and texture (especially the crispness of the Oreo crumbs), we highly recommend enjoying these parfaits on the same day they are made.
Can I Use Canned Redi-Whip In This Recipe?
Unfortunately, canned whipped cream like Redi-Whip is not suitable for this recipe, especially for layering within the parfaits. Canned whipped cream is aerated and not stabilized, meaning it will quickly melt, deflate, and flatten between the layers, making your parfaits soggy and losing their structure. For stable and creamy layers, it’s crucial to use a whipped topping such as Cool Whip or freshly made homemade whipped cream, both of which hold their shape beautifully.
Why Is Vanilla Extract Added To The Vanilla Pudding?
Adding vanilla extract to the vanilla pudding layer serves a clever purpose: it helps to counteract and mellow out the sometimes slightly bitter or artificial taste that can come from significant amounts of food coloring. The vanilla enhances the overall sweetness and provides a smoother, more balanced flavor profile, ensuring your green pudding is as delicious as it is colorful.
Can I Make These Treat Cups Ahead Of Time?
You can certainly prepare these parfaits a day in advance if needed. However, be aware that the Oreo crumbs, when exposed to the moist pudding layers for an extended period, will gradually lose some of their crunchy texture and soften. If you choose to make them ahead, we recommend assembling all the pudding and cookie layers but leaving the whipped topping and any candy decorations off. Store the layered cups tightly covered in the fridge, and then add the final whipped topping and decorations just before serving to maintain the best texture and appearance.
More St. Patrick’s Day Sweet Treats to Explore
These St. Patrick’s Day Dessert Parfaits are a wonderfully fun and easy way to enjoy a festive treat this March! If you’re eager to explore more delicious ways to celebrate, here are some other St. Patrick’s Day dessert recipes that are just as delightful:
- Irish Cream Pie – Indulge in a rich chocolate cookie crust topped with a luxurious cream marshmallow and Irish cream filling. It’s a sophisticated and incredibly flavorful dessert for adults.
- Easy Rainbow Jello Poke Cake – Brighten your celebration with this eye-catching cake, filled with vibrant colors created using a simple white boxed cake mix and various flavors of Jell-O.
- Lucky Charms Treats – A magical, no-bake dessert that requires just 3 easy ingredients! These chewy, marshmallowy treats are perfect for kids and incredibly quick to make.
- Dark Chocolate Guinness No Bake Cookies – For the chocolate and stout lovers, these rich, sweet cookies are made following just two easy steps and offer a unique depth of flavor.
- Irish Potato Candy – These charming, grab-and-go bites are a traditional St. Patrick’s Day confection, made with only 7 ingredients in under an hour. They’re a fun and unique addition to any festive spread!
Let’s Connect!
If you’ve tried this St. Patrick’s Day Dessert Parfait recipe, please let us know how you liked it in the comments below and leave a review. We love hearing from you!
Don’t forget to tag us – @sugarandsoulco – on Instagram and Pinterest with your photos, or join our Sugar & Soul Show-offs Community and share them there, where you can join our recipe challenges!
5 from 5 votes
St Patrick’s Day Pudding Cups
Easy St. Patrick’s Day Dessert Parfaits have layers of chocolate and vanilla pudding, crunchy Oreo crumbs, and sweet whipped topping! Prep these fun dessert cups in just 30 minutes!
Pin Recipe
Rate this Recipe
Equipment
- Medium bowl
- Electric hand mixer
- Clear glasses (or small jars) to use as pudding cups
Ingredients
Parfait
- 1 (3.9oz.) box instant chocolate pudding
- 2 cups whole milk
- 1 (3.9oz.) box instant vanilla pudding
- 2 cups heavy cream
- ½ teaspoon vanilla extract or mint, depending on your tastes
- Green food coloring
- 8 Oreo cookies (feel free to pick your favorite flavor)
- 8 ounces whipped topping (thawed)
Decorations/Toppings
- Airheads Xtremes Rainbow Candy
- Chocolate gold coins
- Sprinkles
- Oreo crumbs
Instructions
- Add the chocolate pudding mix and milk to a medium mixing bowl and use a hand mixer or whisk to beat for 2 minutes. Place in the refrigerator for 5 minutes to set up.
- In a separate bowl, add the vanilla pudding mix and heavy cream and beat together at low speed. Then gradually increase speed and mix until the mixture is light and fluffy. Beat in the vanilla extract and green food coloring (to your desired color).
- Place a thin layer of the chocolate pudding into each of your 4 cups. Then layer on some of the green whipped pudding. Next, add a layer of crumbled Oreo cookies. Then a layer of whipped topping. Repeat these layers once more, ending with the whipped topping.
- Decorate with a rainbow airhead cut in half and arched like a rainbow, a chocolate gold coin, sprinkles, and more Oreo crumbs.
- Place them in the fridge until ready to serve.
Notes
- Is There A Way To Make A Minty Variation Of This Dessert? Yes! Simply exchange the vanilla extract in the green pudding layer and instead use mint extract. Then you could also use mint Oreos for the crushed cookie layers!
- How Can I Make A Dairy-Free Version Of This Recipe? I’d suggest looking for a dairy-free pudding mix or purchasing a dairy-free ready-made pudding. Instant pudding mixes such as the Jell-o brand just don’t generally work well with dairy alternatives.
- Can I Use Less Heavy Cream In This Desserts Cup Recipe? You can! For a lighter version, you can mix together just 1 cup of heavy cream and 1 cup of milk. To do so, whip the heavy cream by itself first. Then mix the pudding and milk together in a separate bowl. You can then add the mint and green food coloring if you’d like. Afterward, fold the whipped cream into the pudding mixture gently.
- How Do I Store These Pudding Dessert Cups? Cover the cups tightly and pop them in the fridge to store. Then enjoy them for up to 3 days! However, I do have to say, I find these are best when eaten the same day that they’re made.
- Can I Use Canned Redi Whip In This Recipe? Redi Whip will not work with these dessert cups. It will just melt and flatten. Instead, make sure you use a whipped topping such as cool whip. It’s more stabilized and will hold up between the layers in these Oreo Pudding Cups.
- Why Is Vanilla Extract Added To The Vanilla Pudding? Adding vanilla extract offsets the sometimes bitter taste of the food coloring.
- Can I Make These Treat Cups Ahead Of Time? You can but keep in mind that the cookie will lose its crunchy texture. If you do decide to make these ahead of time I’d recommend just leaving the tops bare. Then just add the decorations before serving.
Nutrition
Did You Make This Recipe?
Don’t forget to share it with me on Instagram @sugarandsoulco and follow on Tiktok @sugarandsoulco and Pinterest @sugarandsoulco for more!
Pin Recipe
Share Recipe