
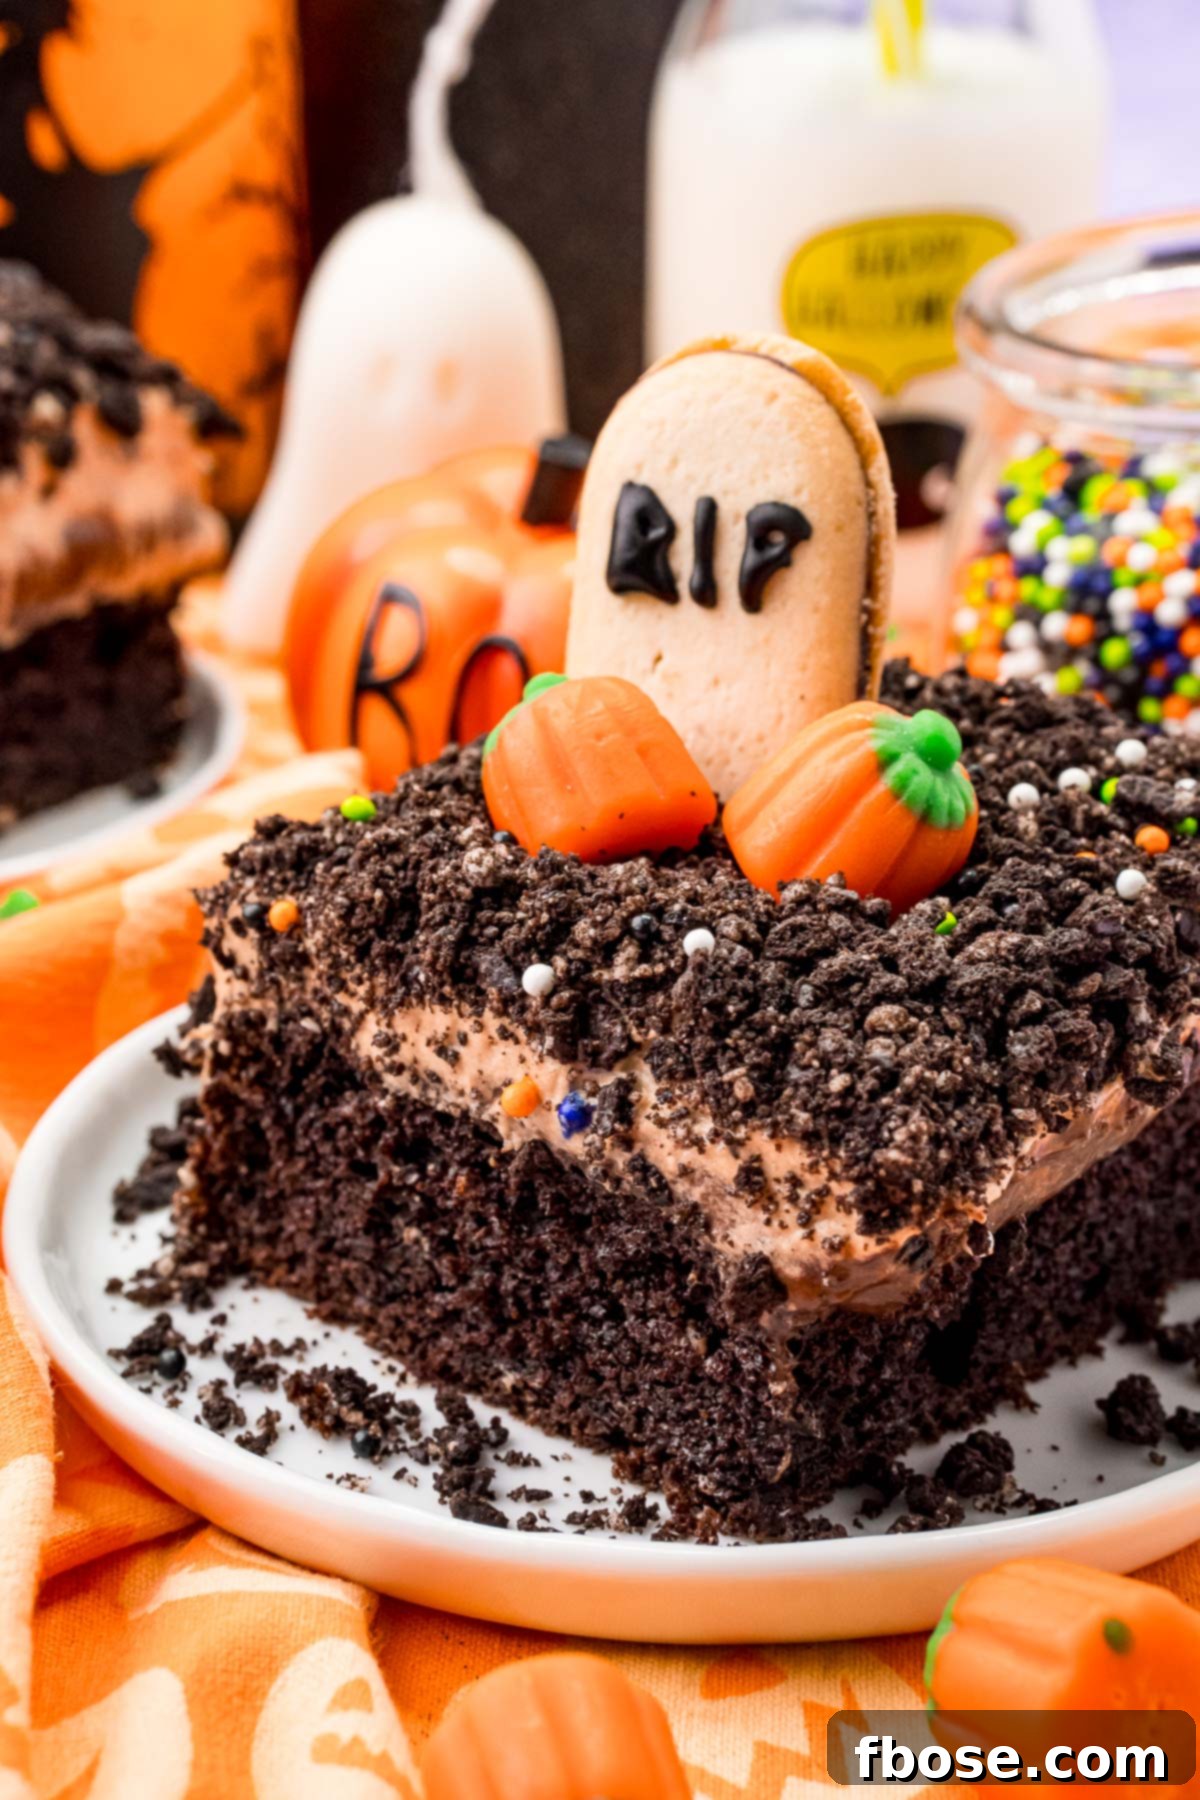
Halloween Dirt Cake isn’t just a dessert; it’s a centerpiece of spooky delight, layering rich chocolate pudding over a moist chocolate cake, all crowned with a luscious 3-ingredient frosting and imaginative, fun toppings! This festive and easy-to-make cake is guaranteed to be an absolute hit at this year’s Halloween Party, charming guests of all ages with its delicious taste and ghoulishly good looks.
Planning the ultimate Halloween bash? Don’t stop at just one treat! You can snag another tasty Halloween-themed recipe like my Halloween Spider Cookies, which are incredibly quick to prepare and ready in under an hour. Or, for another delightful chocolatey option, try these Easy Halloween Monster Cookies, magically made with a simple chocolate cake mix. These recipes, along with our Halloween Dirt Cake, will ensure your dessert table is both festive and unforgettable!
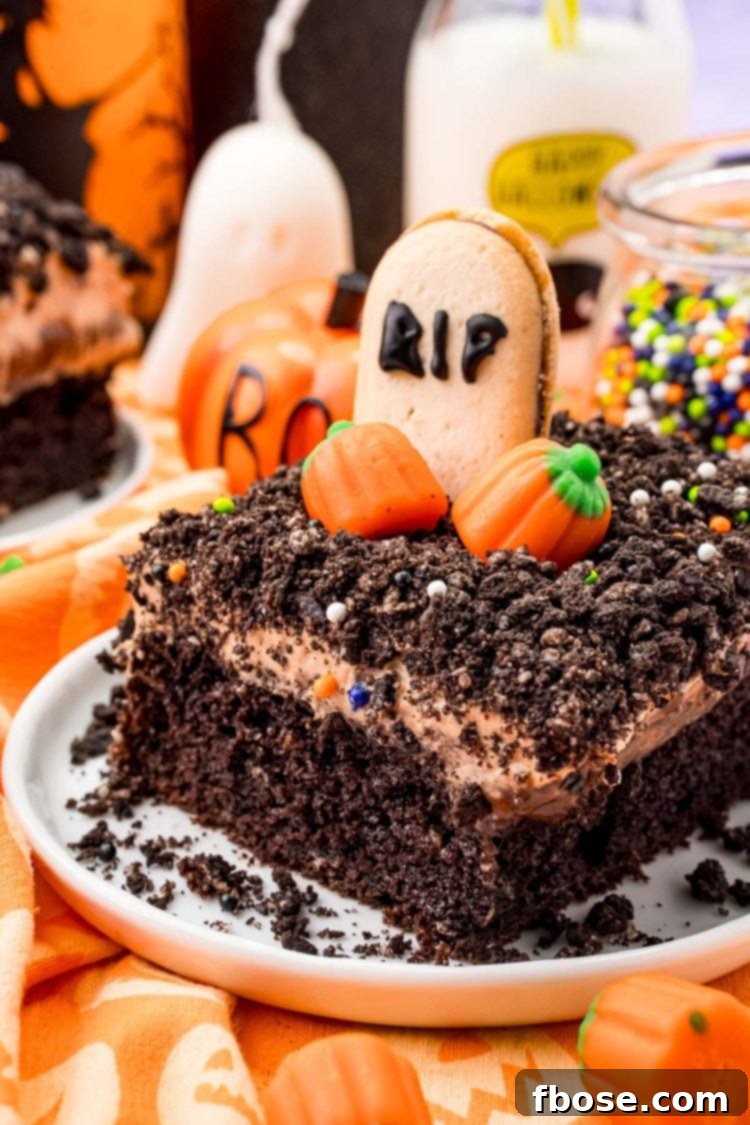
This Halloween, skip the tricks and dive headfirst into the ultimate treat with this extraordinary Halloween Dirt Cake! This dessert truly has it all, featuring layers of rich chocolate cake, velvety smooth chocolate pudding, a light and airy chocolate frosting, and an array of playful edible decorations that transform your cake into a spooky graveyard scene. It’s more than just a cake; it’s an edible work of art that captures the spirit of Halloween!
Imagine serving this decadent cake to excited kids and their friends after an evening of trick-or-treating, perhaps while they unwind and express their creativity with these fun and free Halloween Coloring Pages. This cake isn’t just for the little monsters, though! It’s equally perfect for an adult Halloween Party, where it can be enjoyed with your closest friends while you groove to the Ultimate Halloween Party Music Playlist or snuggle up to watch a spine-chilling movie from my curated 33 Must-See Halloween Movies List. Its versatility makes it the ideal dessert for any Halloween gathering.
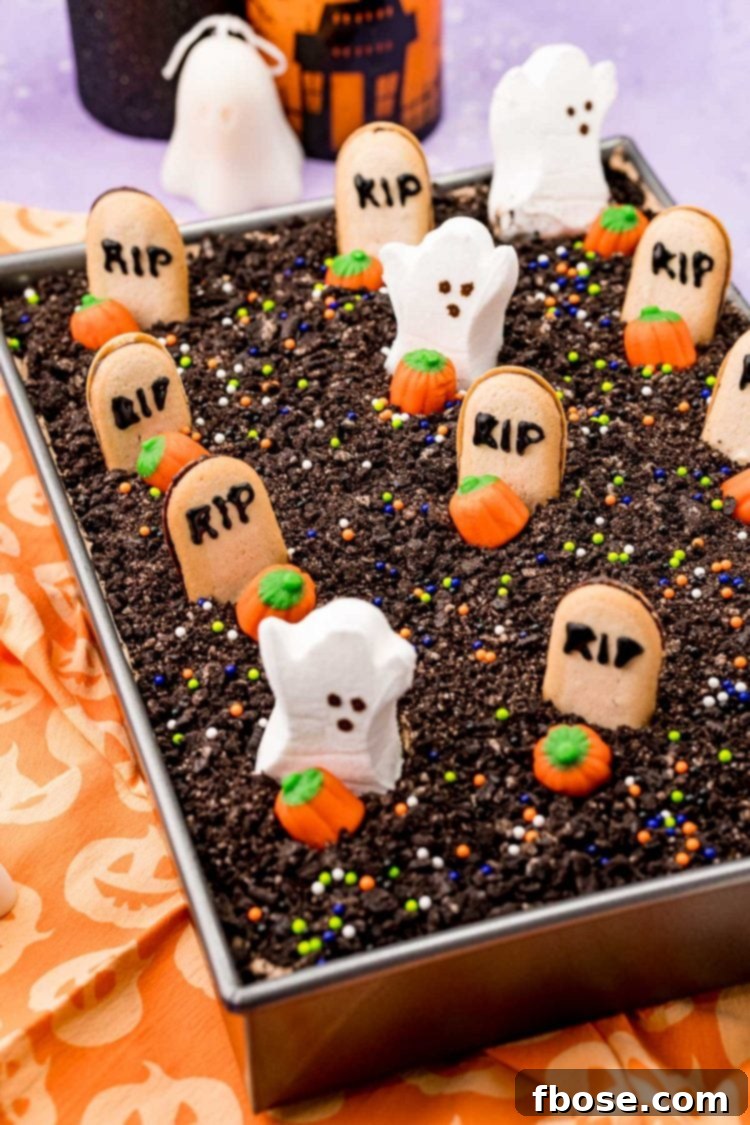
The beauty of this Halloween Dirt Cake lies in its adaptability. You can easily customize it to be as spooky or as family-friendly as your occasion demands. Whether you envision a solemn graveyard complete with edible tombstones and ghostly figures, a whimsical pumpkin patch brimming with candy corn pumpkins, or a creepy spider’s web spun from black gel icing, this cake promises a ton of “WOW!” factor. Every slice will be met with delight and amazement from those lucky enough to savor its rich chocolate flavor and charming Halloween theme.
This irresistible Halloween dessert is a true celebration of chocolate, meticulously crafted with four distinct layers of luxurious flavor that blend seamlessly to create a truly memorable experience. From the moist cake base to the creamy pudding and fluffy frosting, every spoonful is a journey into rich, decadent indulgence, perfectly suited for the season of spooks and sweets.
Ingredient Notes: Crafting Your Spooky Chocolate Masterpiece
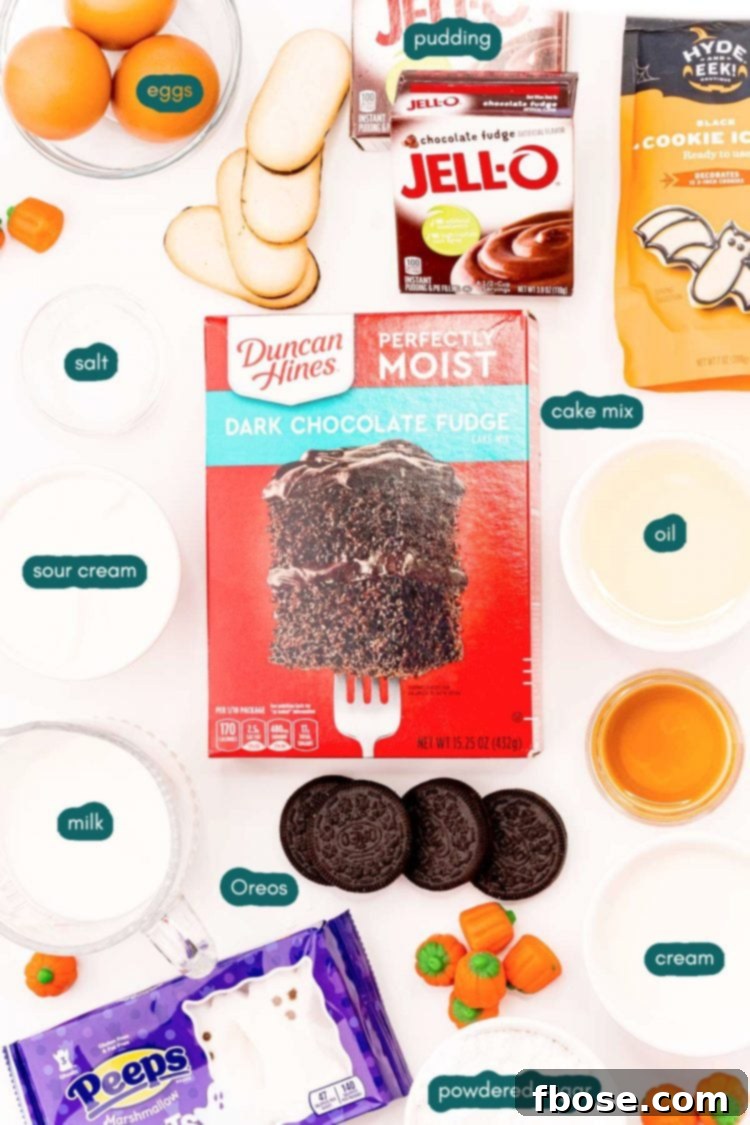
Creating this show-stopping Halloween Dirt Cake is surprisingly straightforward, thanks to a clever combination of pantry staples and readily available store-bought items. The recipe is thoughtfully divided into four distinct components: the cake base, the rich pudding filling, the light frosting, and, of course, the fun and spooky toppings. Let’s delve into what makes each layer so special.
The Foundation: A Moist & Flavorful Chocolate Cake
The journey begins with the cake batter, which ingeniously starts with a standard **boxed chocolate cake mix**. This convenient base is then “doctored up” with a **box of instant chocolate pudding mix (unprepared)**. This isn’t just for an extra punch of chocolate; the pudding mix is key to achieving an incredibly moist, tender, and dense crumb that sets this cake apart. To further enhance its texture and richness, we incorporate **sour cream**, which adds a delightful tang and helps create a velvety smooth batter. **Vegetable oil** ensures the cake remains incredibly moist, while **whole milk** brings all the ingredients together, contributing to a rich and well-balanced flavor. **Large eggs** provide essential structure and lift, and a hint of **vanilla extract** complements the chocolate beautifully, deepening its overall aroma and taste. Finally, a touch of **salt** is crucial for balancing the sweetness and intensifying the chocolate notes, ensuring every bite is perfectly seasoned.
The Decadent Filling: Rich Chocolate Pudding
Once your exquisite chocolate cake is baked and slightly cooled, the magic continues. We gently poke holes into its top, creating little wells for the luscious filling to seep down and infuse every part of the cake with moisture and flavor. To prepare this decadent filling, you’ll need another **box of instant chocolate pudding mix** and some more **whole milk**. Simply whisk these two ingredients together until the pudding begins to thicken, creating a smooth and creamy layer that adds another dimension of chocolatey goodness to your Dirt Cake.
The Light & Creamy Frosting: A 3-Ingredient Wonder
After the pudding filling has been generously spread over the cake, it’s time to seal in all that deliciousness with a light and airy chocolate frosting. Unlike heavy buttercreams, this frosting is designed to be perfectly balanced, offering richness without being overly sweet or dense. It’s a simple yet incredibly effective concoction made by combining chilled **heavy cream**, delicate **powdered sugar**, and a touch of **instant chocolate pudding mix (unprepared)**. Whisked together, these three ingredients transform into a fluffy, dreamy chocolate cloud that perfectly tops your cake, providing a smooth canvas for all your spooky decorations.
The Finishing Touches: Fun & Festive Toppings
The final and perhaps most exciting stage is adding the fun and imaginative toppings that bring the “dirt cake” concept to life! For our classic graveyard scene, I used:
- Oreos: These iconic chocolate sandwich cookies are essential! They get finely crushed to create the realistic “dirt” layer, providing a wonderful textural contrast and an extra burst of chocolate flavor.
- Milano Cookies and Black Gel Icing: Thin, elegant Milano cookies are transformed into edible tombstones. With a steady hand, use black gel icing to write “R.I.P.” or other spooky messages on them, adding a wonderfully eerie touch to your graveyard scene.
- Ghost Peeps: These adorable marshmallow ghosts are a must-have! They get playfully stuck into the frosting on top of the cake, standing upright as if haunting your delicious graveyard. Their soft texture and sweet flavor are always a crowd-pleaser.
- Candy: I chose festive candy corn pumpkins for a pop of autumnal color and extra sweetness, but feel free to let your imagination run wild! Any Halloween candy you’d like—gummy worms, candy corn, chocolate eyeballs—can be used to further personalize your cake.
- Sprinkles: To add a final, dazzling touch, generous Halloween-themed sprinkles are scattered all over the top of the cake. They provide a burst of color and a bit of sparkle, making your dessert truly irresistible.
Pro Tip for Flavor Variation: If you’re keen on exploring a delightful cookies and cream flavor profile, consider substituting vanilla pudding for the chocolate pudding in either the filling or the frosting. This simple swap offers a lighter, yet equally delicious, twist on the classic chocolate dirt cake.
How To Make This Easy Halloween Cake: A Step-by-Step Guide
Creating this impressive Halloween Dirt Cake is a fun and rewarding experience. Follow these simple steps to bring your spooky graveyard dessert to life:
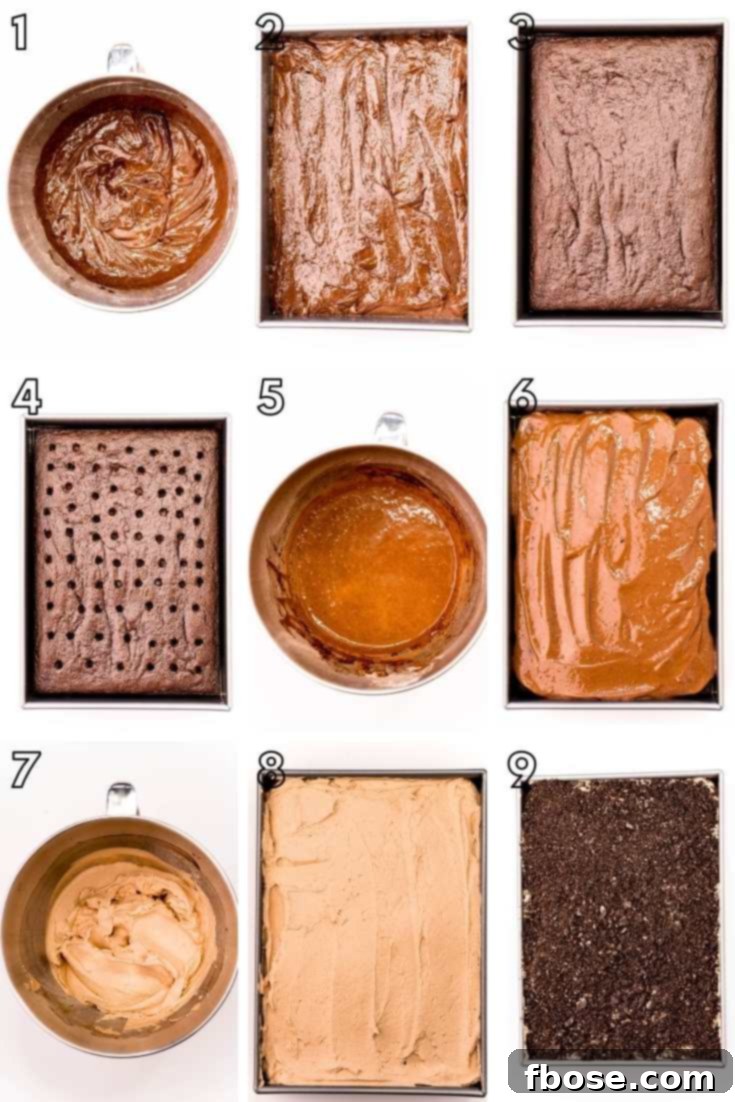
- Prepare the Cake: Begin by preheating your oven to 350°F (175°C). Lightly grease and flour a 9×13-inch cake pan, ensuring it’s ready for the batter. In a large mixing bowl, combine all the cake ingredients: the chocolate cake mix, instant chocolate pudding mix (unprepared), sour cream, vegetable oil, whole milk, eggs, vanilla extract, and salt. Mix thoroughly until all ingredients are fully combined and the batter is smooth. The batter will be quite thick, so use a rubber spatula to evenly spread it into the prepared cake pan.
- Bake and Cool: Transfer the cake pan to the preheated oven and bake for approximately 28 to 32 minutes, or until a cake tester inserted into the center comes out clean. Once baked, remove the cake from the oven and allow it to cool in the pan for about 30 minutes. This cooling period is important before the next step. After 30 minutes, use the handle of a wooden spoon (or similar blunt object) to carefully poke holes all over the top of the cooled cake. These holes will allow the pudding filling to seep down, making the cake extra moist and flavorful.
- Craft the Filling: While the cake cools, prepare your rich chocolate pudding filling. In a medium bowl, whisk together the instant chocolate pudding mix (unprepared) and 2 cups of whole milk for about 2 minutes. Continue whisking until the mixture is smooth and combined. Allow it to sit for a few minutes afterward so that it slightly thickens, reaching a spreadable consistency.
- Spread the Pudding: Once the pudding has thickened to your liking, carefully spread it evenly over the top of the cooled, hole-poked cake. Ensure the pudding fills the holes and covers the entire surface, creating a luscious middle layer.
- Whip the Frosting: In a large bowl, or using a stand mixer fitted with a whisk attachment, combine the heavy cream, powdered sugar, and instant chocolate pudding mix (unprepared). Whisk these ingredients together on medium-high speed until the frosting becomes thick, fluffy, and holds soft peaks. Be careful not to over-whip.
- Apply the Frosting: Gently spread the prepared chocolate frosting evenly over the top of the pudding layer, creating a smooth and creamy blanket for your “graveyard.”
- Prepare the Toppings: For your “dirt” layer, add the Oreos to a food processor and pulse until fine crumbs form, resembling rich soil. Alternatively, place them in a zip-top bag and crush them with a rolling pin. Evenly sprinkle these Oreo crumbs over the top of the frosted cake.
- Create Tombstones: Use the black gel icing to carefully write “R.I.P.” or other spooky epitaphs on your Milano cookies. Once decorated, stand these cookie tombstones upright in the frosting on the cake, arranging them to create a creepy graveyard scene.
- Add Ghostly Figures: Gently press the ghost Peeps into the frosting, positioning them around the tombstones. If your Peeps have trouble standing securely, you can use small pieces of toothpicks inserted into the base of the Peep and then into the cake to help stabilize them.
- Final Touches: Arrange the candy pumpkins (or your chosen Halloween candies) around the base of the ghosts and tombstones to complete your graveyard. If desired, sprinkle additional Halloween-themed sprinkles over the entire cake for an extra festive flourish.
Frequently Asked Questions About Halloween Dirt Cake
How To Store This Halloween Dirt Cake?
To keep your Halloween Dirt Cake fresh and delicious, store it loosely covered in the refrigerator. It will remain wonderfully tasty for up to 4 days. Proper refrigeration is key, especially given the dairy-based frosting and pudding layers.
Can I Use A Regular Buttercream Frosting On The Cake Instead?
While buttercream is a classic, for this particular Halloween Dirt Cake, I actually don’t recommend using a heavy regular buttercream frosting. The 3-ingredient frosting in this recipe is specifically designed to be light and creamy, offering a perfect balance without being overly sweet or dense. A traditional buttercream might make the cake too rich and heavy, detracting from the overall delicate balance of flavors and textures.
What If I Can’t Find A Specific Chocolate Cake Mix Brand?
Don’t worry if you can’t find a specific brand like Duncan Hines Chocolate Fudge cake mix. That’s perfectly fine! Any standard 16-ounce box of chocolate cake mix should work just as well and yield excellent results for this recipe. Just ensure it’s a quality chocolate cake mix you enjoy.
Can I Make This Cake Ahead Of Time?
Yes, you can absolutely make parts of this cake ahead of time to streamline your Halloween party preparations. I recommend baking the chocolate cake itself up to one day in advance. Once baked and completely cooled, wrap it tightly and store it at room temperature. However, for the freshest taste and best appearance, it’s best to assemble (add the pudding and frosting) and decorate the cake right before serving. This ensures the frosting remains fluffy and the toppings are vibrant.
What kind of cake pan should I use?
This recipe is perfectly suited for a standard 9×13-inch rectangular cake pan. This size allows for generous servings and provides a great surface area for creating your spooky graveyard decorations.
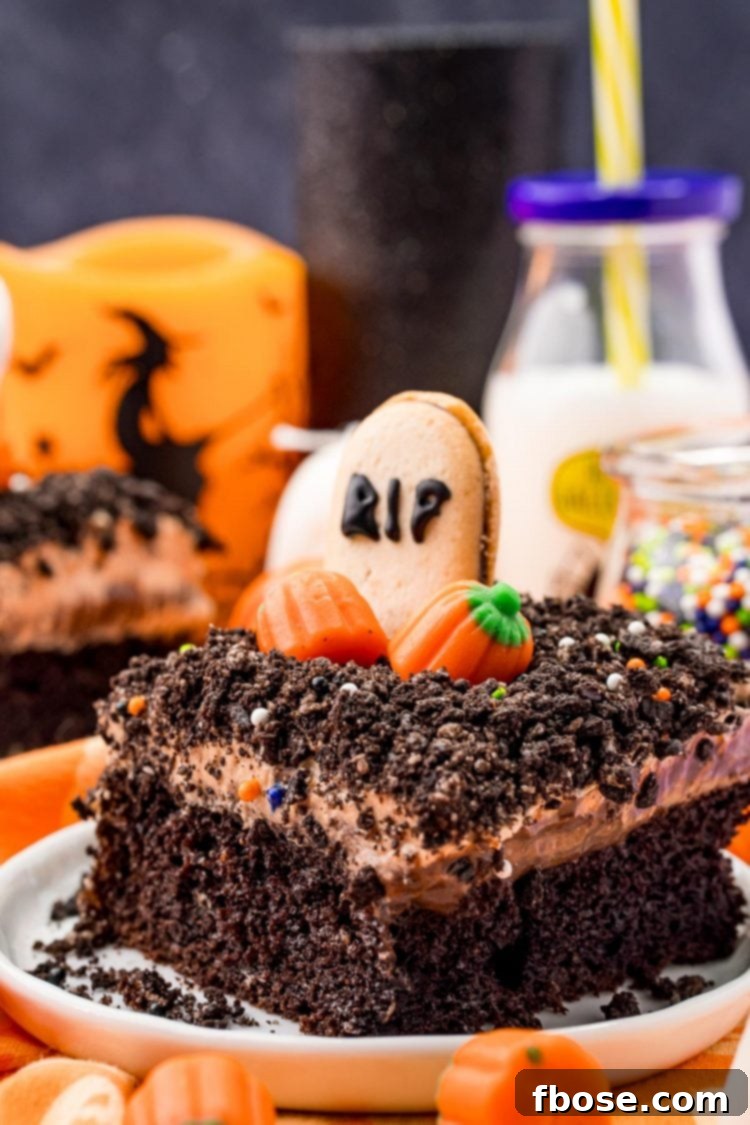
This Graveyard Cake offers an incredibly easy and effective way to impress everyone at your Halloween gathering – from excited kids and their friends to appreciative co-workers and beloved family members. It delights not only with its rich, irresistible taste but also with its captivating and festive appearance. It’s truly a conversation starter and a feast for the eyes as much as it is for the palate! If you’re looking for more deliciously impressive desserts to complete your Halloween spread, here are some other bewitching recipes that are sure to be a hit:
- Easy Halloween Chocolate Covered Oreos – A quick and delightful project! Grab a package of Oreos and some melting chocolate to whip up a simple yet adorable Halloween treat that the kids will absolutely adore decorating and eating!
- Mummy Halloween Cupcakes – Transform moist chocolate cupcakes into cute mummies using swirls of creamy vanilla buttercream and expressive candy eyes. These are perfect for individual servings and add a fun, spooky touch.
- Halloween Seven Layer Magic Bars – These magical bars start with refrigerated chocolate chip cookie dough, then get layered with crushed Oreos, gooey chocolate chunks, colorful M&Ms, and rich sweetened condensed milk, all topped with festive candy corn and Halloween sprinkles. A truly decadent treat!
- Melted Witch Cupcakes – Made using a convenient boxed cake mix, these creative cupcakes are ready to share in under an hour, featuring a whimsical “melted witch” design that is both spooky and charming.
- Easy Halloween Dirt Cups – For another twist on the “dirt” theme, these individual cups layer creamy chocolate and vanilla pudding with crushed Oreo “dirt.” They’re brought to life with playful pretzel “monster fingers,” squiggly gummy worms, and watchful candy eyeballs – a perfect, portion-controlled spooky treat!
Let’s Connect! Share Your Spooky Creations!
If you’ve tried this fantastic Halloween Dirt Cake recipe, please don’t hesitate to let me know how much you liked it in the comments below! Your feedback is invaluable, and I love hearing from you. Please take a moment to leave a review – it truly helps!
Don’t forget to tag me – @sugarandsoulco – on Instagram and Pinterest with your incredible photos of this cake (or any other recipe you make!). You can also join our Sugar & Soul Show-offs Community on Facebook and share your creations there, where you can also participate in our fun recipe challenges! Happy baking!
Halloween Dirt Cake Recipe Card
Average Rating: 5/5 from 3 votes
Author: Rebecca Hubbell
Course: Dessert | Cuisine: American
Prep Time: 20 minutes | Cook Time: 32 minutes | Cooling Time: 1 hour | Total Time: 1 hour 52 minutes
Servings: 20 people
Print Recipe | Pin Recipe
Ingredients
Cake:
- 1 (16oz.) box chocolate cake mix
- 1 (3oz.) box instant chocolate pudding mix (unprepared)
- ½ cup sour cream
- ¾ cup vegetable oil
- ½ cup whole milk
- 3 large eggs
- 1 teaspoon vanilla extract
- ½ teaspoon salt
Filling:
- 1 (3oz.) box instant chocolate pudding mix (unprepared)
- 2 cups whole milk
Frosting:
- 2 cups heavy cream
- ½ cup powdered sugar
- ⅓ cup instant chocolate pudding mix (unprepared)
Topping:
- 16 Oreos (crushed)
- 9 Milano cookies (or more if desired)
- 3 Ghost Peeps (or more if desired)
- 12 candy pumpkins (or more if desired)
- Sprinkles (optional)
- Black gel icing (for writing)
Instructions
Cake:
- Preheat the oven to 350°F (175°C) and grease a 9×13-inch cake pan, set aside.
- Mix together all cake ingredients until fully combined and transfer to the prepared cake pan. The batter will be thick and you will need to use a rubber spatula to spread it out evenly.
- Bake for 28 to 32 minutes or until a cake tester inserted into the center comes out clean.
- Let cool for 30 minutes in the pan, then poke holes all over the top with the handle of a wooden spoon.
Filling:
- Whisk together the pudding mix and milk for 2 minutes, then allow to thicken slightly.
- Spread the thickened pudding over the top of the cooled cake.
Frosting:
- In a large bowl or stand mixer fitted with a whisk attachment, whisk together the frosting ingredients (heavy cream, powdered sugar, instant chocolate pudding mix) until thick and fluffy.
- Spread the frosting evenly over the top of the cake.
Topping:
- Add the Oreos to a food processor and pulse until fine crumbs form. Sprinkle the Oreo crumbs over the top of the cake, creating the “dirt” layer.
- Write “R.I.P.” on the Milano cookies using black gel icing to make tombstones, then press them into the frosting so they stand upright.
- Press the ghost Peeps into the frosting so they stand up. If they have a hard time doing so, you can use toothpicks to help secure them.
- Add the candy pumpkins near the ghosts and tombstones to complete your graveyard scene.
- Add sprinkles, if desired, for an extra festive touch.
Notes
- I used Duncan Hines Chocolate Fudge cake mix, but any standard chocolate cake mix (16oz box) should work perfectly.
- This cake should be refrigerated within 2 hours after frosting to maintain its freshness and prevent the frosting from becoming too dark or dense. It should remain good in the fridge for up to 4 days.
- For convenience, the cake itself can be baked up to one day in advance. Simply cool it completely, wrap it well, and store it at room temperature. Frost and decorate just before serving for the best results.
- Feel free to get creative with other Halloween-themed toppings such as gummy worms, chocolate spiders, candy eyeballs, or miniature candy corn.
- The nutritional information provided is an estimate and does not include the toppings other than the crushed Oreos.
Nutrition
Calories: 181kcal | Carbohydrates: 13g | Protein: 3g | Fat: 14g | Saturated Fat: 8g | Polyunsaturated Fat: 1g | Monounsaturated Fat: 4g | Trans Fat: 1g | Cholesterol: 64mg | Sodium: 146mg | Potassium: 98mg | Fiber: 1g | Sugar: 9g | Vitamin A: 475IU | Vitamin C: 1mg | Calcium: 62mg | Iron: 1mg