
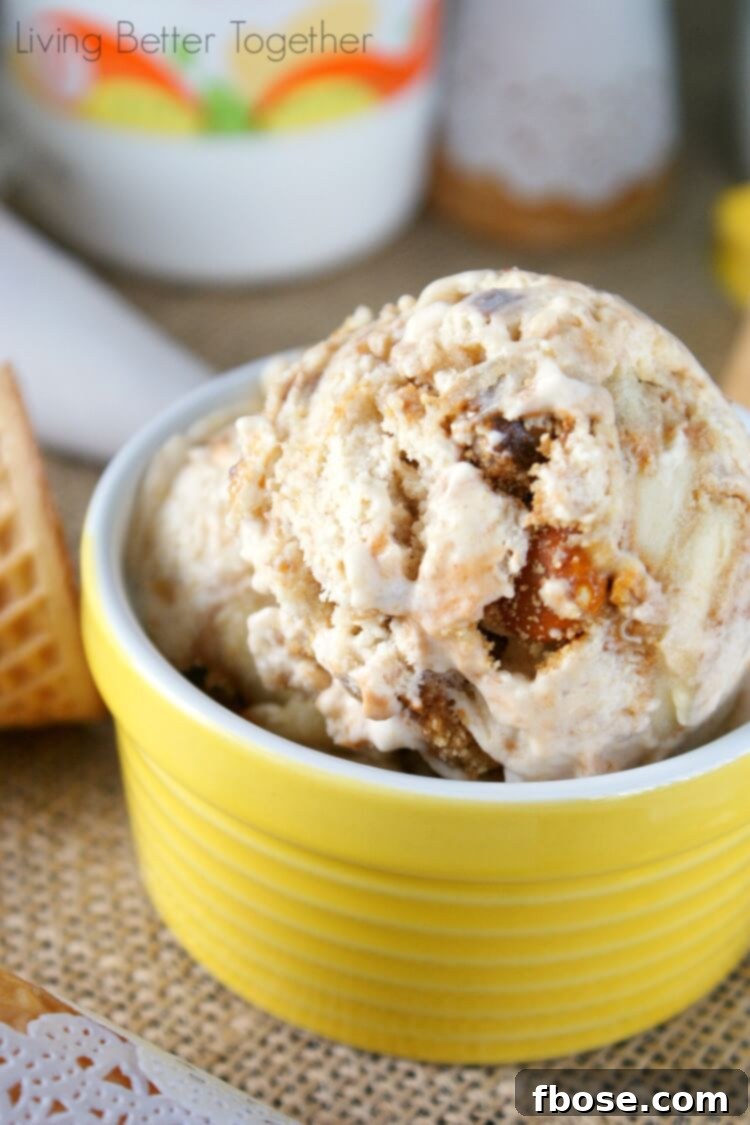
Indulge in Homemade No-Churn Banoffee Pie Ice Cream: Your New Favorite Summer Treat
As a devoted fan of desserts, few confections capture my heart quite like the classic Banoffee Pie. It’s truly my absolute favorite, a dessert so irresistible that sharing isn’t an option once it’s in front of me! While I adore a rich Black Forest Cupcake and certainly appreciate the elegance of a perfectly caramelized crème brûlée, the unique blend of flavors in Banoffee Pie holds a special, unmatched place in my culinary preferences. This year, I decided to embark on a delightful experiment, reimagining this beloved British classic into a refreshing, warm-weather sensation: Banoffee Pie Ice Cream. And dare I say it, this ice cream rendition might just surpass the original pie itself! It sounds audacious, I know, but prepare yourselves for a truly extraordinary dessert experience.
What Exactly is Banoffee Pie? A Brief Introduction to a British Classic
For those unfamiliar with Banoffee Pie, you’re in for a real treat! This iconic English dessert, though incredibly popular across the UK and beyond, often remains a delightful secret to many. The name “Banoffee” itself is a clever portmanteau, seamlessly blending its two primary and most delectable ingredients: banana and toffee. Imagine a heavenly concoction built upon a buttery graham cracker crust, generously layered with rich, sticky toffee (often made from condensed milk), fresh slices of ripe banana, and crowned with a luscious cloud of whipped cream, sometimes with a sprinkle of chocolate shavings. It’s a symphony of textures and flavors – sweet, creamy, fruity, and utterly decadent. My passion for Banoffee Pie runs deep, and transforming it into an ice cream required capturing every essence of what makes it so special. Did I mention the caramelized bananas in this ice cream? Yes, you read that right! We’re talking pure, unadulterated bliss in every spoonful.
The Simplicity of No-Churn: Your Easiest Path to Homemade Ice Cream
While the incredible flavor is undoubtedly the star of this Banoffee Pie Ice Cream, its second-best attribute is its sheer simplicity. Forget about specialized ice cream makers, constant churning, or any other cumbersome equipment. This is a wonderfully easy no-churn recipe, designed to bring the joy of homemade ice cream to everyone, regardless of their kitchen gadgets. The magic lies in whipping heavy cream to perfection and then folding in sweetened condensed milk, creating a rich, airy base that freezes beautifully without the need for an ice cream machine. This method ensures a creamy, smooth texture that rivals traditionally churned ice cream, all with minimal effort. Why would you ever need to venture out for ice cream when you can craft such a sensational treat right in your own kitchen? It’s convenient, rewarding, and delivers exceptional results every single time.
Banoffee Pie Ice Cream
Author: Rebecca Hubbell
Prep Time: 6 hours 20 minutes
Servings: Approximately 2 quarts
Print Recipe |
Pin Recipe |
Rate this Recipe
A favorite English dessert gets a summertime makeover into a creamy, no-churn ice cream!
Ingredients
- 2 cups Heavy Cream: Essential for the creamy, rich base of our no-churn ice cream. Ensure it’s very cold for optimal whipping.
- 14 oz. Can Sweetened Condensed Milk: This provides the necessary sweetness and prevents ice crystals, ensuring a smooth, scoopable texture without churning.
- 3 Bananas: Ripe but firm bananas are best for caramelizing. They’ll add that signature fruity sweetness.
- 3 tbsp Brown Sugar: Used to caramelize the bananas, adding a deeper, molasses-rich sweetness and creating a beautiful golden hue.
- 9 Whole Graham Crackers: Crushed graham crackers provide a delightful textural contrast, mimicking the pie crust of traditional Banoffee Pie.
- 1 1/2 cups Heath Pieces or Toffee Bits: These crunchy toffee pieces are crucial for the “toffee” element, offering a delicious chewiness and buttery flavor.
- 1/2 cup Caramel or Toffee Sauce: For swirling throughout the ice cream, enhancing the toffee flavor and creating beautiful ribbons of sweetness.
- 1/2 cup Hot Fudge: Adds a rich, chocolatey dimension, complementing the banana and toffee perfectly.
Instructions
- Prepare the Cream Base: In a large mixing bowl or the bowl of a stand mixer fitted with the whisk attachment, pour the very cold heavy cream. Whip the cream on high speed until stiff peaks form. This means when you lift the whisk, the peaks of cream stand upright firmly.
- Combine with Condensed Milk: Gently fold the sweetened condensed milk into the whipped cream. Use a spatula and a gentle hand, lifting from the bottom of the bowl and folding over, to maintain as much air as possible in the mixture. This airy texture is key to a smooth no-churn ice cream.
- Caramelize the Bananas: Slice the three bananas into rounds. In a skillet, melt a small knob of butter (about half a tablespoon, though not listed in ingredients, it helps prevent sticking and adds flavor) over medium heat. Add the sliced bananas and brown sugar. Stir constantly for about 3-4 minutes, until the bananas are softened, slightly browned, and coated in a gooey, caramelized syrup. Remove from heat and let cool completely.
- Crush Graham Crackers: Break the whole graham crackers into pieces and place them in a food processor or blender. Pulse until they form fine crumbs. Alternatively, place them in a zip-top bag and crush them with a rolling pin.
- Incorporate Dry Mix-ins: Once the graham cracker crumbs are ready, gently stir them and the Heath Pieces (or toffee bits) into the whipped cream and condensed milk mixture.
- Add Caramelized Bananas: Carefully fold the cooled caramelized bananas into the ice cream base. Distribute them as evenly as possible.
- Assemble and Swirl: Divide the mixture evenly into two quart-sized freezer-safe containers. Take the caramel or toffee sauce and the hot fudge. Drizzle generous amounts of each over the top of the ice cream in each container. Use a knife or skewer to gently swirl the sauces through the ice cream, creating beautiful ribbons of flavor. Be careful not to over-mix.
- Freeze to Perfection: Cover the containers tightly with lids or plastic wrap. Place them in the freezer for at least 6 hours, or preferably overnight, until the Banoffee Pie Ice Cream is firm and ready to scoop. Enjoy your incredible homemade treat!
Tips for Success & Variations
- Bananas: Ensure your bananas are ripe but not overly mushy. Overripe bananas will become too soft when caramelized.
- Chilling: For the best texture, make sure all your ingredients, especially the heavy cream, are very cold before you start.
- Storage: Store the ice cream in an airtight container in the freezer for up to two weeks.
- Chocolate Shavings: For an extra touch, sprinkle some dark chocolate shavings over the top before freezing, or as a garnish when serving.
- Espresso Powder: A tiny pinch of espresso powder in the cream base can enhance the toffee and chocolate notes without adding a coffee flavor.
Did You Make This Recipe?
We’d love to see your creations! Don’t forget to share your Banoffee Pie Ice Cream with us on Instagram @sugarandsoulco and follow us on Tiktok @sugarandsoulco and Pinterest @sugarandsoulco for more delicious recipes and inspiration!
Pin Recipe
Share Recipe
Elevate Your Serving: DIY Doily-Wrapped Ice Cream Cones
Once your Banoffee Pie Ice Cream is perfectly chilled and ready to serve, why not present it with an extra touch of charm? These doily-wrapped ice cream cones are an incredibly simple yet elegant way to add a delightful detail to your dessert presentation. They transform a simple cone into a whimsical treat, perfect for any occasion. This DIY hack is not only easy but also adds a personalized, stylish flair that guests will adore. It’s a small effort that yields a big impact, making your ice cream experience even more special.
What you’ll need:
Sugar or Waffle Cones
4-inch Paper Doilies
Edible Glue (food-grade adhesive)
How to Create Your Elegant Cones:
- Prepare Your Cone: Take one sugar or waffle cone. Select a doily that complements your cone size; 4-inch doilies generally work well for standard cones.
- Apply the First Edge: Squeeze a thin line or a few small dots of edible glue onto the lower portion of your cone. Carefully adhere one edge of the paper doily to the glue. Ensure the doily is positioned high enough on the cone so that it doesn’t extend past the tip, which would make it difficult to hold or place in a stand.
- Secure the Wrap: Add a little more edible glue to the edge of the doily you just secured. Gently wrap the other side of the doily around the cone, overlapping the glued edge. Press down firmly but gently to ensure it adheres smoothly and securely.
- Allow to Dry: Place the decorated cones on wax paper or parchment paper for a few minutes to allow the edible glue to dry and set. If any excess glue gets on your fingers, wipe it away promptly with a damp cloth or a wet wipe to keep your cones pristine.
There you have it – beautifully wrapped ice cream cones ready to impress! These elegant cones are the perfect detail to elevate an ice cream bar at a bridal shower, a festive birthday party, or simply to add a touch of personal luxury to your own dessert indulgence. This simple craft transforms serving ice cream into a memorable experience. And remember, pairing these charming cones with this killer Banoffee Pie Ice Cream is a decision you absolutely won’t regret. Trust me, it’s a promise you’ll be glad you kept!