
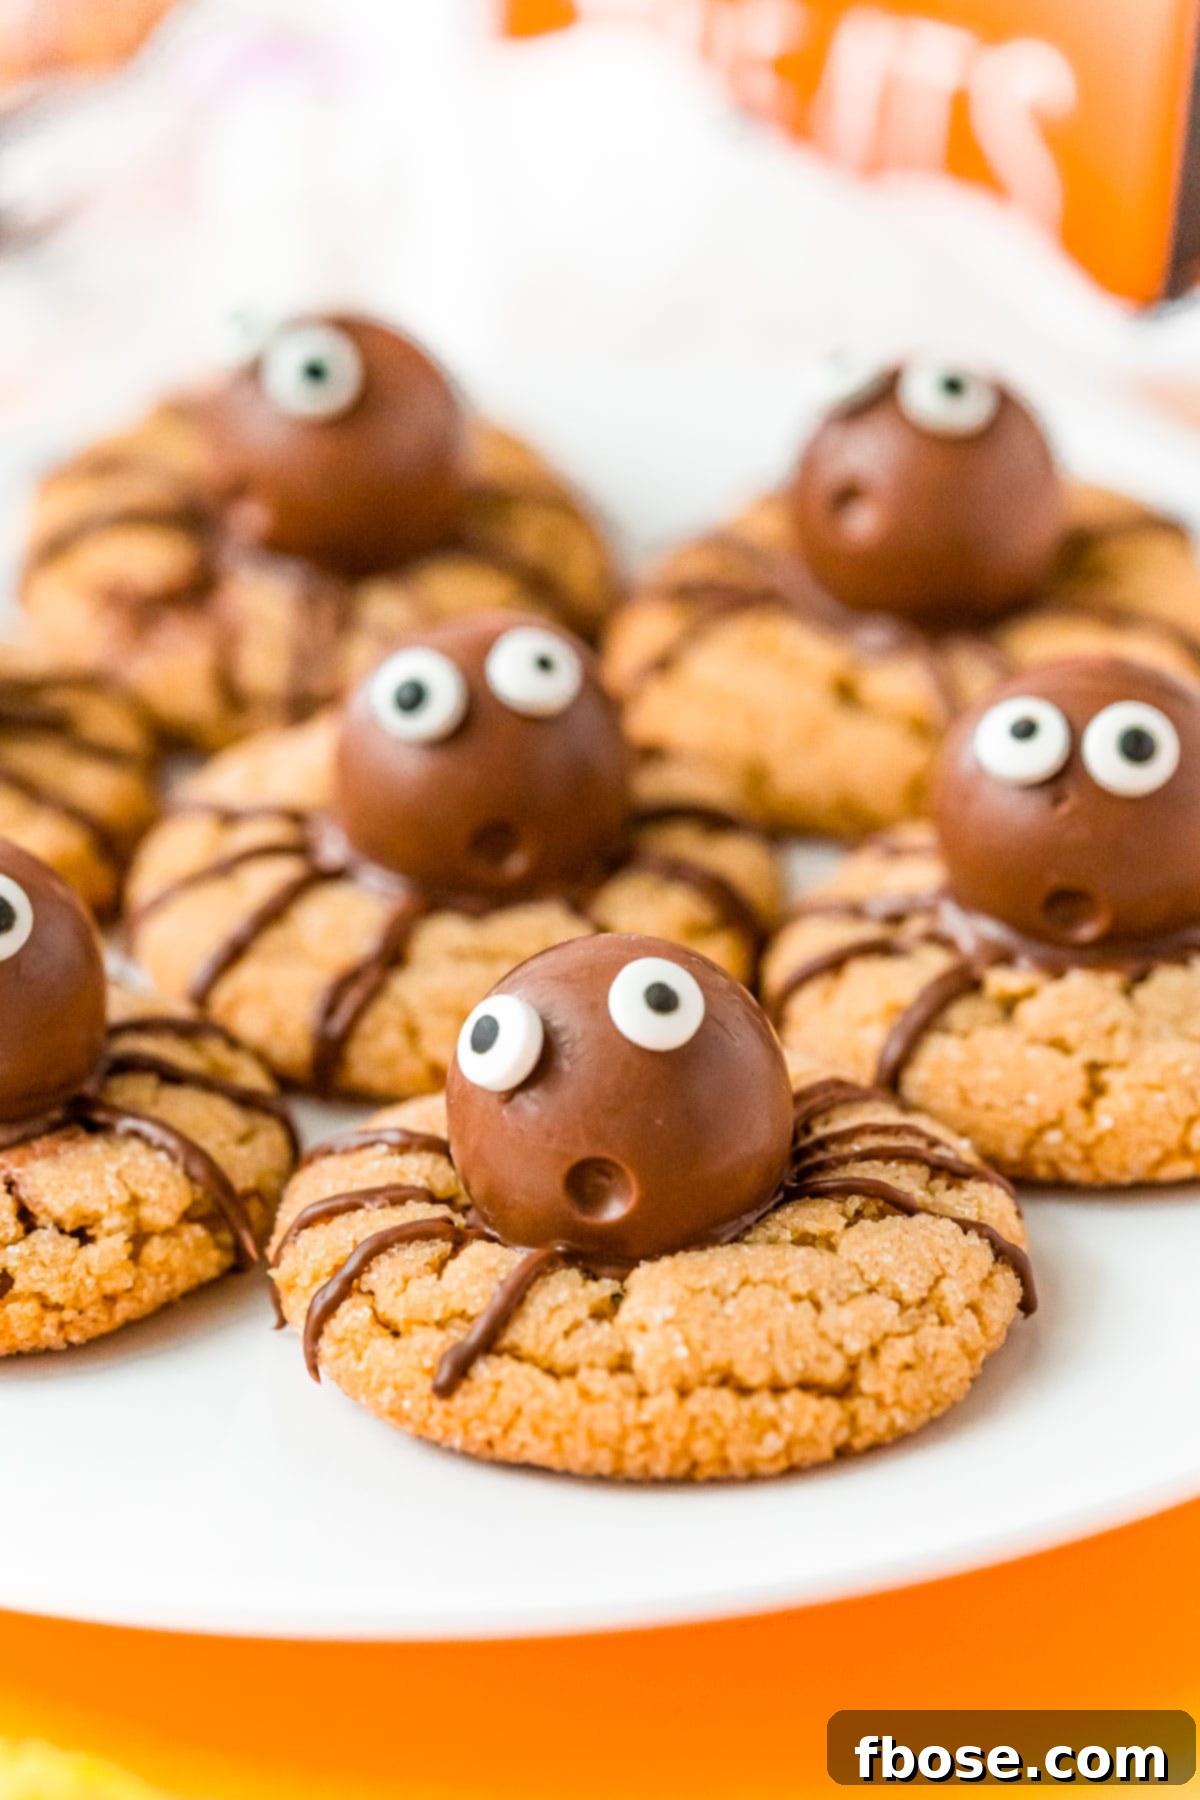
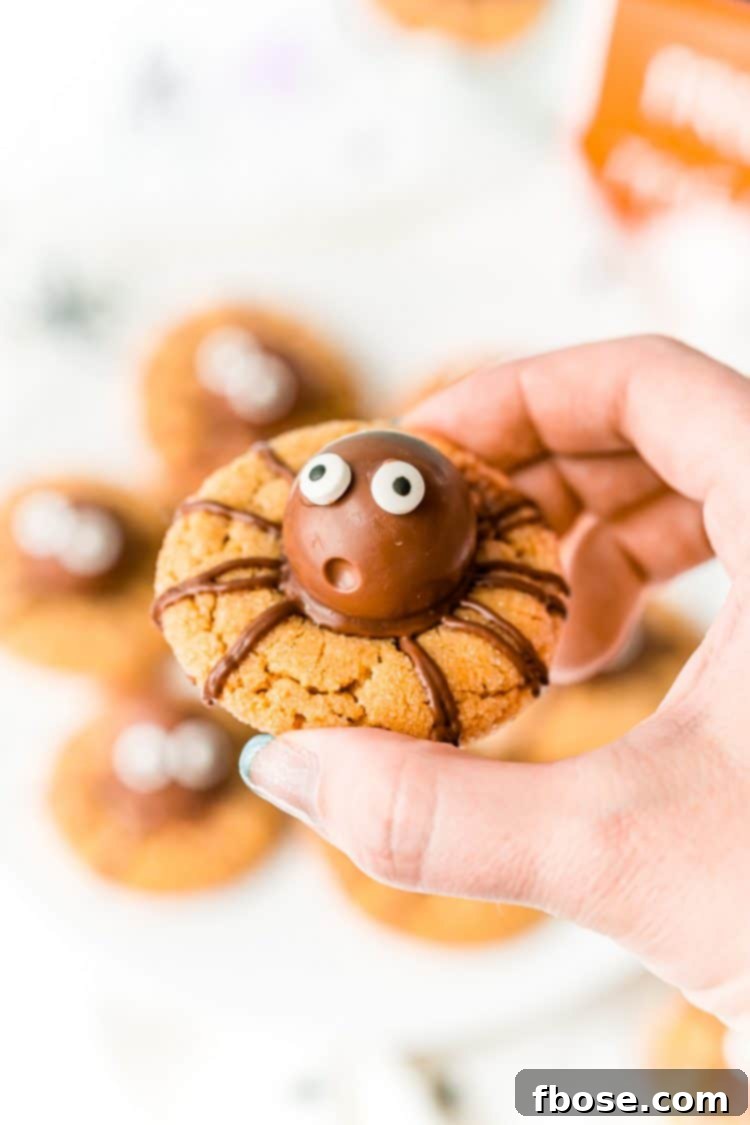
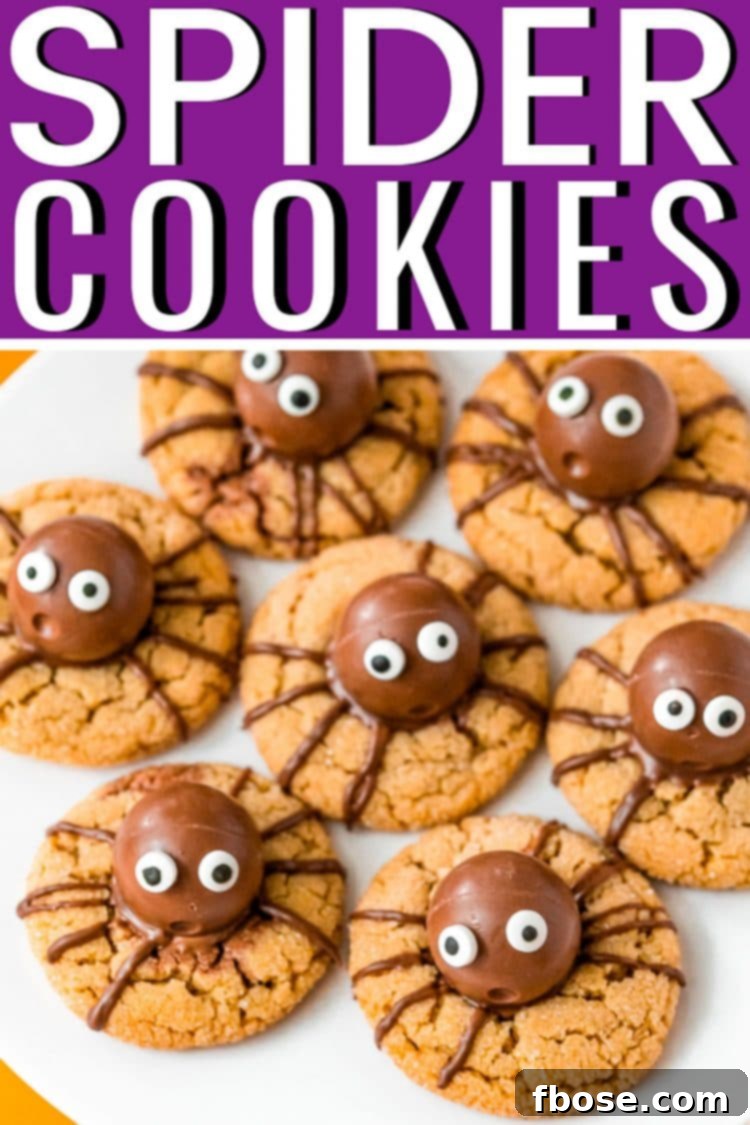
Halloween Spider Cookies offer a delightful and slightly spooky twist on the beloved classic Peanut Butter Blossoms. These enchanting treats feature soft, chewy peanut butter cookies, each cradling a rich chocolate truffle, all brought to life with piped chocolate spider legs and whimsical candy eyes. Perfect for any Halloween gathering, these cookies are not only incredibly delicious but also a joy to make, especially when little hands join in the fun.
As the autumn leaves begin to fall and the air gets crisp, Halloween approaches, bringing with it a festive spirit and a craving for seasonal treats. These adorable **Peanut Butter Spider Cookies** are an absolute must-have for your celebration. They combine the comforting taste of homemade peanut butter cookies with the irresistible allure of chocolate, making them a hit with both kids and adults alike. Imagine them gracing your dessert table alongside festive Halloween Cupcakes and a vibrant Halloween Punch – creating a truly memorable spread!
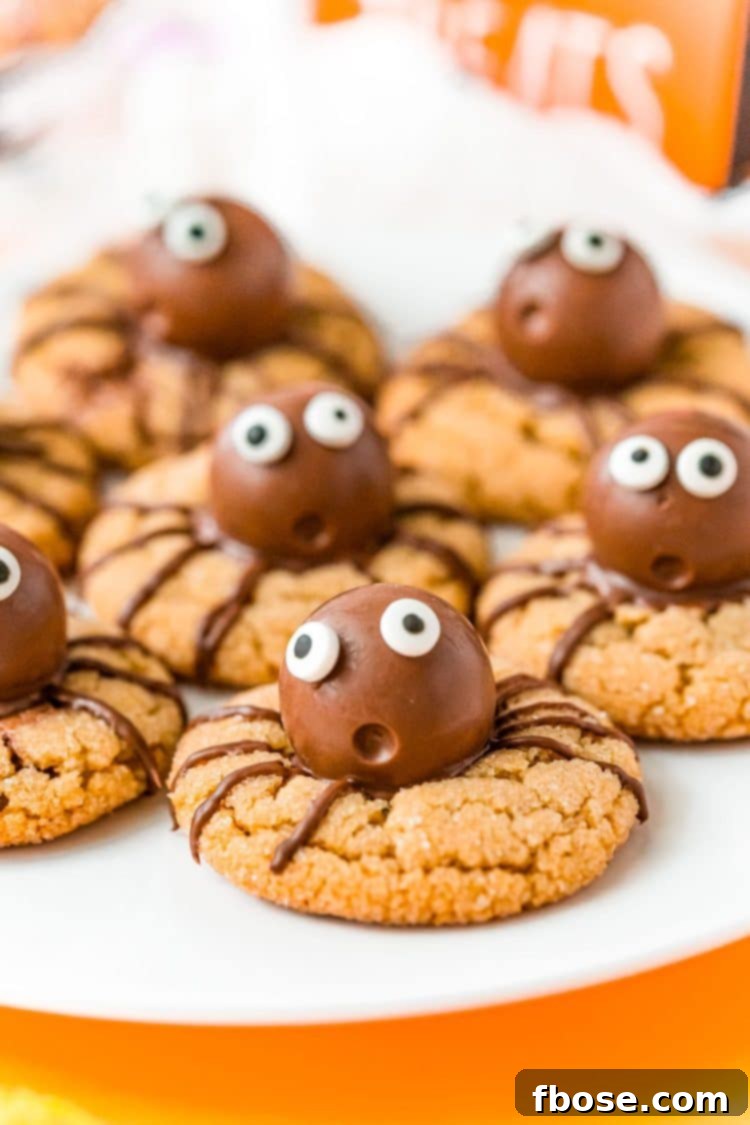
These **Easy Halloween Cookies** are designed for simplicity, ensuring that even the busiest of hosts or novice bakers can whip them up without a hitch. Their straightforward nature makes them an excellent project for baking with children. Kids will love helping to roll the cookie dough, and their eyes will light up when it’s time to add the “spooky” decorations. After the baking and decorating excitement, gather the family to enjoy these freshly baked delights with a glass of milk, perhaps even while coloring some Halloween Coloring Pages for a perfect autumn afternoon activity.
Why You’ll Adore These Halloween Spider Cookies
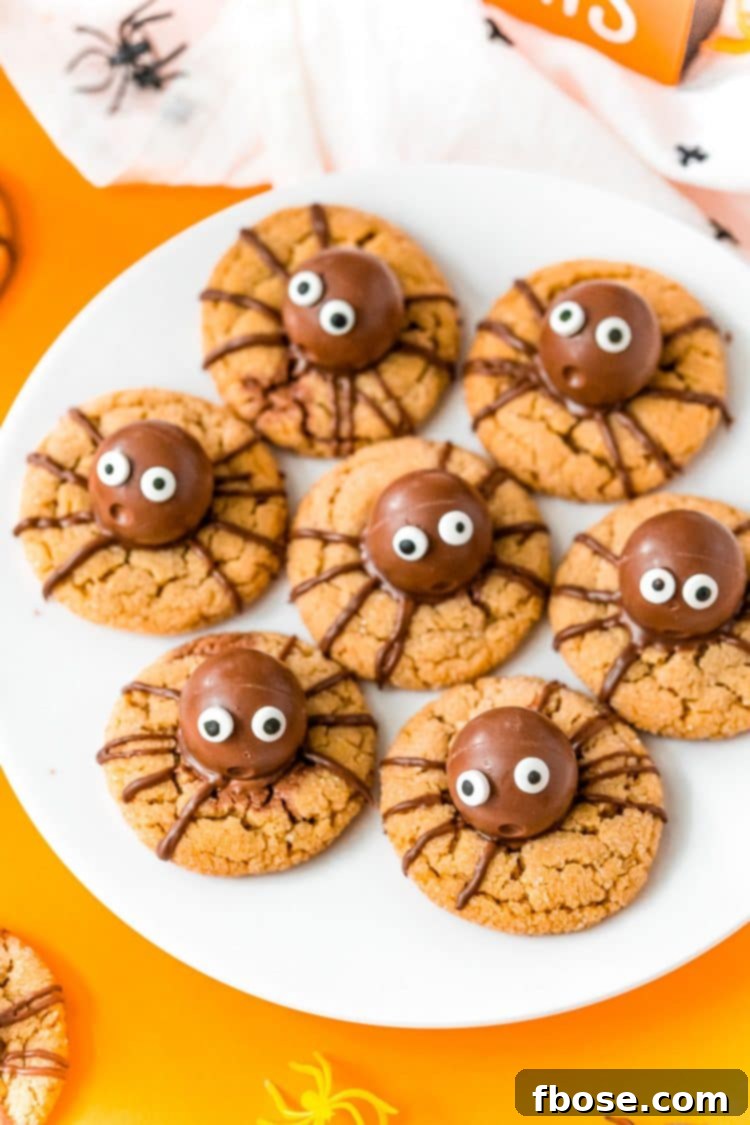
There are countless reasons why these **Halloween Spider Cookies** are destined to become a beloved tradition in your household. Firstly, their playful appearance makes them an instant crowd-pleaser for any Halloween-themed event. From school parties to trick-or-treat gatherings, these cookies are guaranteed to draw smiles and compliments. The contrast of the rich, golden-brown peanut butter cookie with the dark chocolate spider body and bright candy eyes creates a visually appealing treat that perfectly captures the essence of the holiday.
Beyond their charm, the flavor profile is simply irresistible. The soft, chewy texture of the peanut butter cookie base provides a comforting backdrop for the creamy, melt-in-your-mouth chocolate truffle. This combination is a classic for a reason – sweet, savory, and utterly decadent. Each bite offers a perfect balance of flavors and textures, making it hard to stop at just one. Plus, the customization options mean you can tailor them to suit various tastes or dietary needs, ensuring everyone gets to enjoy these fun, spooky treats.
Finally, the sheer joy of creating these cookies is a significant part of their appeal. Baking is a wonderful way to bond with family, and this recipe is particularly engaging for children. The steps are easy to follow, allowing kids to participate actively in various stages, from mixing ingredients (with supervision) to rolling dough balls and, of course, the exciting final step of decorating their very own spiders. This hands-on experience not only results in delicious cookies but also creates lasting memories and a sense of accomplishment.
How To Make Irresistible Peanut Butter Spider Cookies
Creating these delightful **Peanut Butter Spider Cookies** is a straightforward process, ensuring a fun and rewarding baking experience. Follow these detailed steps to bring your spooky treats to life:
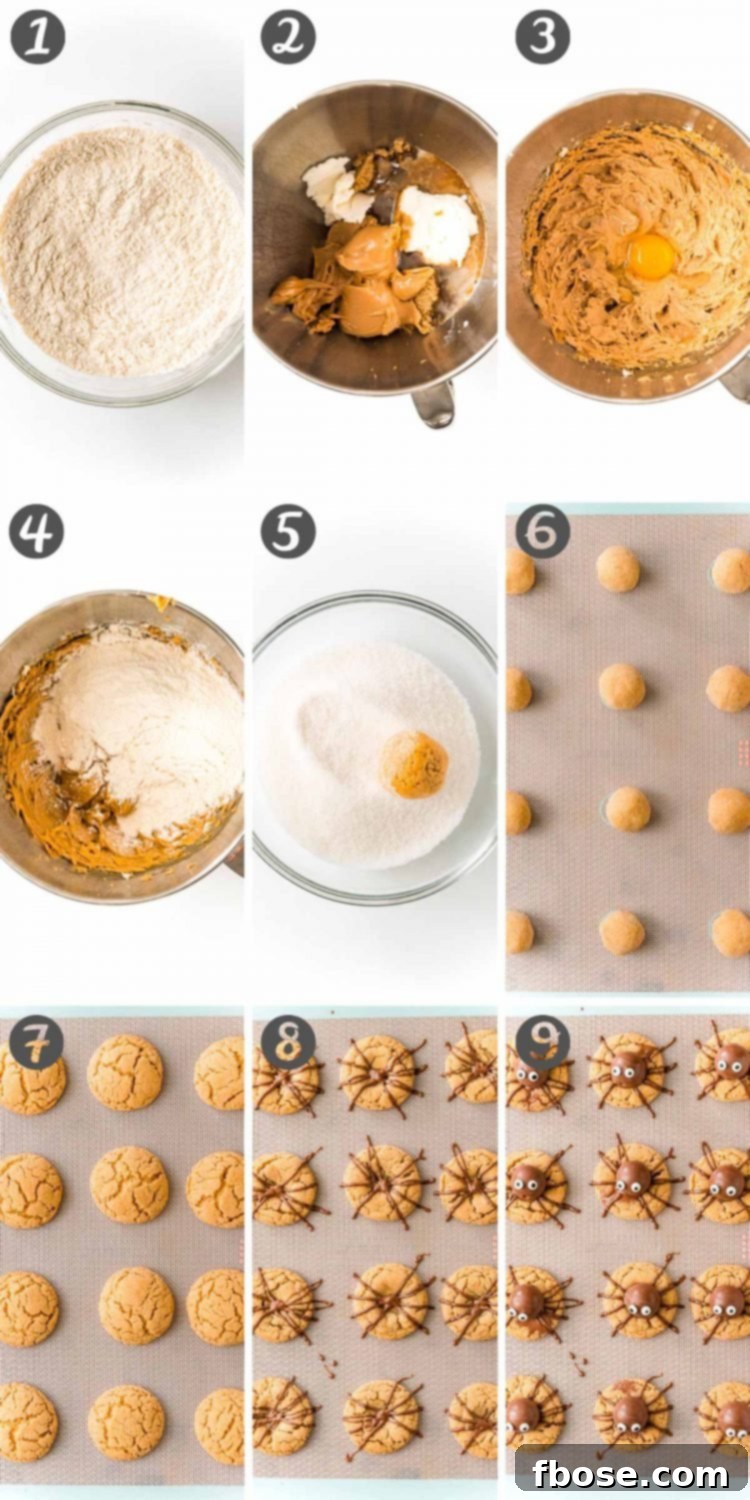
- First, prepare your baking environment. Preheat your oven to 375°F (190°C). Line a large baking sheet with parchment paper or a silicone baking mat. This step is crucial for preventing the cookies from sticking and ensures easy cleanup. Set the prepared baking sheet aside.
- In a medium-sized mixing bowl, combine the dry ingredients: all-purpose flour, baking soda, and salt. Use a whisk to thoroughly mix them until well combined. This ensures even distribution of the leavening agent throughout the dough, leading to perfectly risen cookies. Set this mixture aside.
- Now, in a large mixing bowl, using either an electric hand mixer or a stand mixer fitted with a paddle attachment, cream together the wet ingredients. Add the vegetable shortening, creamy peanut butter, light brown sugar, whole milk, and vanilla extract. Beat these ingredients on medium speed until they are light, fluffy, and well combined. Scrape down the sides of the bowl as needed to ensure everything is incorporated.
- Crack in the large egg and continue to beat the mixture just until it is fully combined. Be careful not to overmix at this stage, as overmixing can lead to tougher cookies.
- Gradually add the reserved flour mixture to the wet ingredients. Add it all at once and mix on low speed until the flour is just incorporated and no dry streaks remain. Again, avoid overmixing; stop as soon as the dough comes together.
- Use a medium cookie scoop to portion out uniform balls of dough. Roll each scoop between your palms to form a smooth ball. Then, roll each dough ball in granulated sugar to coat it completely. Place the sugar-coated balls onto your prepared baking sheet, ensuring they are at least 2 inches apart to allow for spreading during baking.
- Bake the cookies for 9 to 10 minutes. The edges should appear firm and lightly golden, but the centers will still look slightly puffy and soft. This indicates a perfectly chewy cookie. Remove the baking sheet from the oven. Immediately, while the cookies are still warm and soft, use the back of a round teaspoon (or a similar small, rounded object) to gently indent the center of each cookie. This creates the perfect nest for your chocolate truffle spiders.
- Carefully transfer the indented cookies to a wire cooling rack. Allow the cookies to cool completely for at least 20 minutes before proceeding with decoration. This step is vital; if the cookies are warm, the chocolate truffles will melt, creating messy chocolate puddles instead of distinct spider bodies.
- While the cookies cool, prepare your chocolate for decorating the spider legs. Melt the chocolate melting wafers in a microwave-safe bowl in 30-second intervals, stirring well after each interval, until smooth and fully melted. Alternatively, you can use a double boiler for a more controlled melt. Transfer the melted chocolate to a piping bag fitted with a #2 round tip (or a small zip-top bag with the corner snipped off).
- Now for the fun part! On each cooled cookie, pipe eight spider legs. Start from the outside edge of the indented circle and pipe a line curving outwards, then back towards the center indentation. Repeat this eight times, creating four legs on each side of the center. For practice or easier cleanup, you can pipe a few legs onto wax or parchment paper first.
- Finally, place a Lindt truffle (or your chosen chocolate candy) into the center indentation of each cookie, pressing gently to secure it. Using a tiny dab of the melted chocolate from your piping bag, carefully stick two candy eyes onto each truffle to complete your adorable (or spooky!) spider creation.
I found that using Lindt truffles works exceptionally well for this recipe. Their spherical shape is perfect for the spider body, and some even have a small indentation on one side that, when positioned correctly, resembles a spider’s mouth. This adds another layer of cuteness to these already charming cookies!
These **Halloween Spider Cookies** are not just a treat for the eyes but a true delight for the taste buds. The combination of the soft, chewy peanut butter base with the rich, decadent chocolate and the playful candy elements is simply unbeatable. They truly are a fantastic representation of **homemade Halloween cookies**, perfect for sharing the joy of the season.
Pro Tips for Perfect Peanut Butter Spider Cookies
Achieving bakery-quality **Peanut Butter Spider Cookies** is easier than you think with a few expert tips:
- Measure Flour Correctly: For consistent results, always use the “spoon and level” method when measuring flour. Spoon the flour into your measuring cup until it overflows, then level it off with the back of a knife. Never scoop directly from the bag, as this can compact the flour and lead to dry, crumbly cookies.
- Creaming Fats and Sugars: Ensure your shortening and peanut butter are at room temperature. This allows them to cream together with the sugar much more effectively, incorporating air that will result in a lighter, softer cookie texture.
- Don’t Overmix the Dough: Once you add the dry ingredients, mix just until combined. Overmixing develops the gluten in the flour, which can lead to tough, dense cookies. A few streaks of flour are better than an overmixed dough.
- Uniform Cookie Size: Using a cookie scoop is the secret to uniform cookies that bake evenly. This also makes decorating much easier as all your spider bodies will be roughly the same size.
- Cool Completely: Patience is key! Do not rush the cooling process before decorating. Warm cookies will melt the chocolate truffles and piped legs, leading to a messy outcome.
- Chocolate Consistency: When melting your chocolate wafers, aim for a smooth, flowing consistency. If it’s too thick, add a tiny bit of shortening or coconut oil (about ½ teaspoon at a time) and stir until it reaches the desired flow for piping. If it’s too thin, it will be harder to control the legs.
- Piping Practice: If you’re new to piping, do a few practice spider legs on a piece of parchment paper. This allows you to get comfortable with the pressure and movement before decorating your actual cookies.
- Securing Candy Eyes: Use a very small dot of melted chocolate as “glue” to attach the candy eyes to the truffles. This ensures they stay in place and creates a neat finish.
Spider Cookie Variations and Creative Customizations
While the classic peanut butter base is undeniably delicious, these **Halloween Spider Cookies** are incredibly versatile. Whether you’re dealing with allergies, specific dietary preferences, or simply want to experiment with different flavor combinations, these variations offer something for everyone:
- Double Chocolate Indulgence: For the ultimate chocolate lover, transform these into a rich, dark chocolate experience. Use a Double Chocolate Chip Cookie recipe as your base (simply omit the chocolate chips from the dough). Follow the same decorating method to add the truffle body, chocolate legs, and candy eyes. This variation delivers an intense chocolate flavor that is truly decadent.
- Classic Sugar Cookie Charm: If peanut butter isn’t your preference, or you’re looking for a more neutral base, opt for your favorite chewy sugar cookie recipe. The subtle sweetness of a sugar cookie provides a wonderful canvas for the chocolate spider decorations, allowing the chocolate and candy elements to truly shine. This is a great option for those who prefer simpler cookie flavors.
- Elevate the Peanut Butter: For an even more pronounced peanut butter flavor, replace the Lindt truffles with upside-down Reese’s Miniature Peanut Butter Cups. This not only enhances the peanut butter goodness but also adds a nostalgic touch that many will appreciate. Just press them into the warm cookie indentations and decorate as usual.
- The Super Easy, Time-Saving Version: When time is of the essence but you still want to participate in the festive fun, don’t hesitate to reach for a roll of store-bought, pre-made cookie dough (peanut butter or sugar cookie). Simply slice, bake, and then follow the decorating steps. This hack is perfect for busy parents or spontaneous party plans!
- Nut-Free Alternative: For those with peanut allergies, substitute the peanut butter with a seed butter like sunflower seed butter (SunButter). Ensure all other ingredients are also nut-free. This allows everyone to enjoy these fun cookies safely.
- Different Chocolate Bodies: While Lindt truffles are excellent, feel free to experiment with other round chocolates. Maltesers, Ferrero Rocher, or even chocolate-covered cherries could work, offering different textures and flavors for the spider’s body.
- Colorful Candy Eyes: Get creative with the candy eyes! While white and black are classic, you can find candy eyes in various colors or even draw your own with edible markers on white chocolate discs for a personalized touch.
Serving Suggestions and Storage Tips
These **Halloween Spider Cookies** are perfect as a standalone treat or as part of a larger Halloween dessert buffet. Arrange them artfully on a platter with other spooky snacks. They pair wonderfully with a tall glass of cold milk, hot chocolate, or even a fun Halloween-themed punch. For parties, consider placing them near a sign that says “Beware of Spiders!” or “Eat if you Dare!” to enhance the spooky atmosphere. They also make fantastic edible gifts for friends, neighbors, or teachers during the Halloween season.
Storage:
- Baked Cookies: Once completely cool, store your decorated Halloween Spider Cookies in an airtight container at room temperature for up to 5 days. Layer them with parchment paper to prevent the chocolate legs from sticking or breaking.
- Cookie Dough: The unbaked cookie dough can be prepared in advance and stored in an airtight container in the refrigerator for up to 3 days. When ready to bake, allow the dough to come closer to room temperature for easier scooping and rolling. If baking directly from the fridge, you may need to add 1-2 minutes to the baking time.
- Freezing Baked Cookies: For longer storage, freeze the undecorated peanut butter cookies in a single layer until solid, then transfer them to an airtight freezer-safe bag or container for up to 2-3 months. Thaw at room temperature and then proceed with decorating.
Frequently Asked Questions About Spider Cookies
Can I use natural peanut butter for these cookies?
While you can use natural peanut butter, results may vary slightly. Natural peanut butter tends to be oilier and can sometimes make the dough softer, potentially leading to cookies that spread more. For best results and consistency, especially if you’re new to the recipe, a creamy, processed peanut butter (like Jif or Skippy) is recommended as it provides a more stable fat content.
Can I make these cookies gluten-free?
Yes, you can! Substitute the all-purpose flour with a 1:1 gluten-free baking flour blend that contains xanthan gum. Ensure all other ingredients, especially the chocolate truffles and candy eyes, are certified gluten-free. The texture might be slightly different but will still be delicious.
What if I don’t have shortening? Can I use butter instead?
Shortening contributes to a very tender and soft cookie texture. While you can substitute butter for shortening, the cookies may spread a bit more and have a slightly different texture. If using butter, make sure it’s unsalted and at room temperature. You might also chill the cookie dough for 30 minutes before baking to help prevent excessive spreading.
How far in advance can I make these Halloween Spider Cookies?
You can make the cookie dough up to 3 days in advance and store it in the refrigerator. Once baked and decorated, the cookies are best enjoyed within 3-5 days when stored in an airtight container at room temperature. For longer storage, you can bake the cookies, let them cool, and freeze them (undecorated) for up to 2-3 months. Decorate them after thawing.
Can I use chocolate chips instead of melting wafers for the legs?
While chocolate chips can be melted, melting wafers (or candy melts) are specifically designed to melt smoothly and harden quickly, making them ideal for piping decorations like spider legs. If using chocolate chips, you might need to add a teaspoon of coconut oil or shortening to achieve a smoother, more pipeable consistency.
More Delicious Halloween Recipes
Looking for more spooky inspiration? Complement your **Peanut Butter Spider Cookies** with these other fantastic Halloween-themed recipes:
- Blood Bag Cocktail
- Melted Witch Cupcakes
- Shrunken Head Punch
- Blood and Guts Cocktail

Peanut Butter Spider Cookies
Author: Rebecca Hubbell
Course: Dessert
Cuisine: American
Prep Time: 30 minutes
Cook Time: 10 minutes
Cooling Time: 20 minutes
Total Time: 1 hour
Servings: 36 cookies
Print Recipe
Pin Recipe
Share Recipe
Halloween Spider Cookies are a spooky twist on classic Peanut Butter Blossoms! Made with truffles nestled in soft, chewy peanut butter cookies and decorated with chocolate and candy eyes.
Ingredients
- 1¼ cups light brown sugar
- ¾ cup peanut butter
- ½ cup vegetable shortening
- 3 tablespoons whole milk
- 1 teaspoon vanilla extract
- 1 large egg
- 1¾ cups all-purpose flour
- ¾ teaspoon baking soda
- ¾ teaspoon kosher salt
- ½ cup granulated sugar
- 1 cup chocolate melting wafers
- 36 Lindt truffles
- 72 candy eyes
Instructions
- Preheat the oven to 375°F and line a large baking sheet with parchment paper or a silicone baking mat and set aside.
- In a medium bowl, whisk together the flour, baking soda, and salt. Set aside.
- In a large bowl with a hand mixer or stand mixer fitted with a whisk attachment, cream together the shortening, peanut butter, brown sugar, milk, and vanilla on medium speed.
- Add in the egg and beat just until combined.
- Add in the flour mixture all at once and mix just until combined.
- Use a medium cookie scoop to portion out the dough. Roll each scoop into a ball and roll it in granulated sugar before placing on the baking sheet at least 2 inches apart.
- Bake the cookies for 9 to 10 minutes, the edges should be firm but the centers will be slightly puffy and soft. Remove from the oven and use the back of a round teaspoon to indent the center of each cookie. Transfer to a wire rack and allow the cookies to cool for 20 minutes.
- Melt the chocolate wafers on 30-second intervals in the microwave and then transfer to a piping bag fitted with a #2 round tip. Make the spider legs on the cookies by starting from the outside and going back to the center 8 times to create 8 legs. I recommend doing this on wax or parchment paper for easy cleanup.
- Then place a truffle in the center of each cookie and use the melted chocolate to carefully stick the candy eyes to the truffles.
Notes
- Reese’s peanut butter cups may also be used; insert them upside down on the cookie.
- Cookies should be stored in an airtight container for up to 5 days.
- Cookie dough can be stored in an airtight container in the fridge for up to 3 days before baking. If dough is cold going into the oven, bake for 1 additional minute than normal.
- Nutritional information is an estimate and does not include truffles.
- Recipe adapted from Hersheys.
Nutrition (Estimated)
Calories: 146kcal | Carbohydrates: 19g | Protein: 2g | Fat: 7g | Saturated Fat: 2g | Cholesterol: 5mg | Sodium: 101mg | Potassium: 69mg | Fiber: 1g | Sugar: 13g | Vitamin A: 11IU | Calcium: 13mg | Iron: 1mg
Did You Make This Recipe?
Don’t forget to share it with me on Instagram @sugarandsoulco and follow on Tiktok @sugarandsoulco and Pinterest @sugarandsoulco for more!
Rate this Recipe
Pin Recipe
Share Recipe