

Delight in the festive spirit this holiday season with our enchanting Reindeer Oreo Balls! These rich, melt-in-your-mouth truffles offer a simple, no-bake solution for a charming Christmas treat. Perfect for sparking joy at holiday parties, creating memorable moments with family, or enjoying a cozy evening by the fire, these adorable confections are guaranteed to be a hit with both kids and adults alike. Get ready to embark on a delightful culinary adventure that’s as easy as it is delicious!

Creating Adorable Reindeer Oreo Balls: The Ultimate No-Bake Holiday Treat
Prepare to be charmed by this year’s most irresistible holiday dessert: homemade Reindeer Oreo Balls! These delightful truffles aren’t just cute and incredibly delicious; they’re also remarkably easy to prepare, making them a true holiday blessing amidst the season’s joyful chaos. Forget complex baking schedules and intricate steps – this no-bake recipe is designed for maximum fun and minimal stress, allowing you to spend more precious moments with loved ones.
Our perfected Christmas truffle recipe requires only three core ingredients, plus a few simple additions like pretzels and candies to bring these festive reindeer to life. Despite the simplicity of the ingredients, the result is a supremely delicious, melt-in-your-mouth truffle that friends and family will crave throughout the entire holiday season. Imagine their smiles when they see these charming treats, each one a tiny masterpiece of holiday cheer!
These Reindeer Oreo Balls are incredibly versatile. Gather your little ones to help with the decorating – it’s a fantastic activity that doubles as a cherished holiday memory. Serve them proudly at all your Christmas gatherings, from casual family dinners to elegant festive parties. Or, simply whip up a batch to savor with your family while cuddled up watching your favorite Christmas movie. No matter the occasion, these truffles add a touch of magic and sweetness to any festive moment.
Pin This Recipe For Later

Rebecca’s Recipe Review: A Deeper Dive into Reindeer Oreo Balls
Taste: Prepare your taste buds for an explosion of rich, familiar flavors! Each truffle boasts a decadent Oreo cookie filling, expertly balanced with creamy sweetness. This core is then enrobed in a luscious layer of melted candy wafers, creating a smooth, chocolatey shell. The experience is further elevated by delightful sprinkles and the perfect salty crunch from pretzel antlers, offering a harmonious blend of sweet and savory that keeps you coming back for more.
Texture: From the moment you bite into a Reindeer Oreo Ball, you’ll notice its luxurious texture. The interior is wonderfully thick and creamy, a testament to the finely crushed Oreos and softened cream cheese. This soft, dense center contrasts beautifully with the smooth, firm chocolate coating, which melts delicately on your tongue. The edible decorations and pretzel antlers introduce an appealing crunch, adding another exciting dimension to this already delightful treat.
Ease: A fantastic 3 out of 10! This recipe is incredibly straightforward, requiring no oven time and minimal culinary skill. It’s an ideal project for even novice bakers or those looking for a stress-free dessert option during the busy holidays. The steps are simple enough for children to participate actively, making it a wonderful family activity.
Pros: The beauty of these truffles lies in their simplicity and the joy they bring. Made with common, easy-to-find ingredients, they eliminate the need for baking, saving you time and oven space. The hands-on decorating aspect provides immense fun, particularly for children, fostering creativity and festive cheer in the kitchen. They also make for stunning holiday platters.
Cons: The primary challenge is working quickly! Once the Oreo balls are dipped in melted chocolate, it begins to set relatively fast. This means you need to swiftly apply the edible decorations before the chocolate hardens completely, ensuring everything adheres properly. However, with a little preparation, this can be easily managed.
Would I Make This Again? Absolutely, without a doubt! These Reindeer Oreo Balls are a perennial favorite at our family holiday parties. The combination of easy preparation, delicious taste, and undeniable festive charm makes them a must-make tradition every year. They truly embody the spirit of the season.
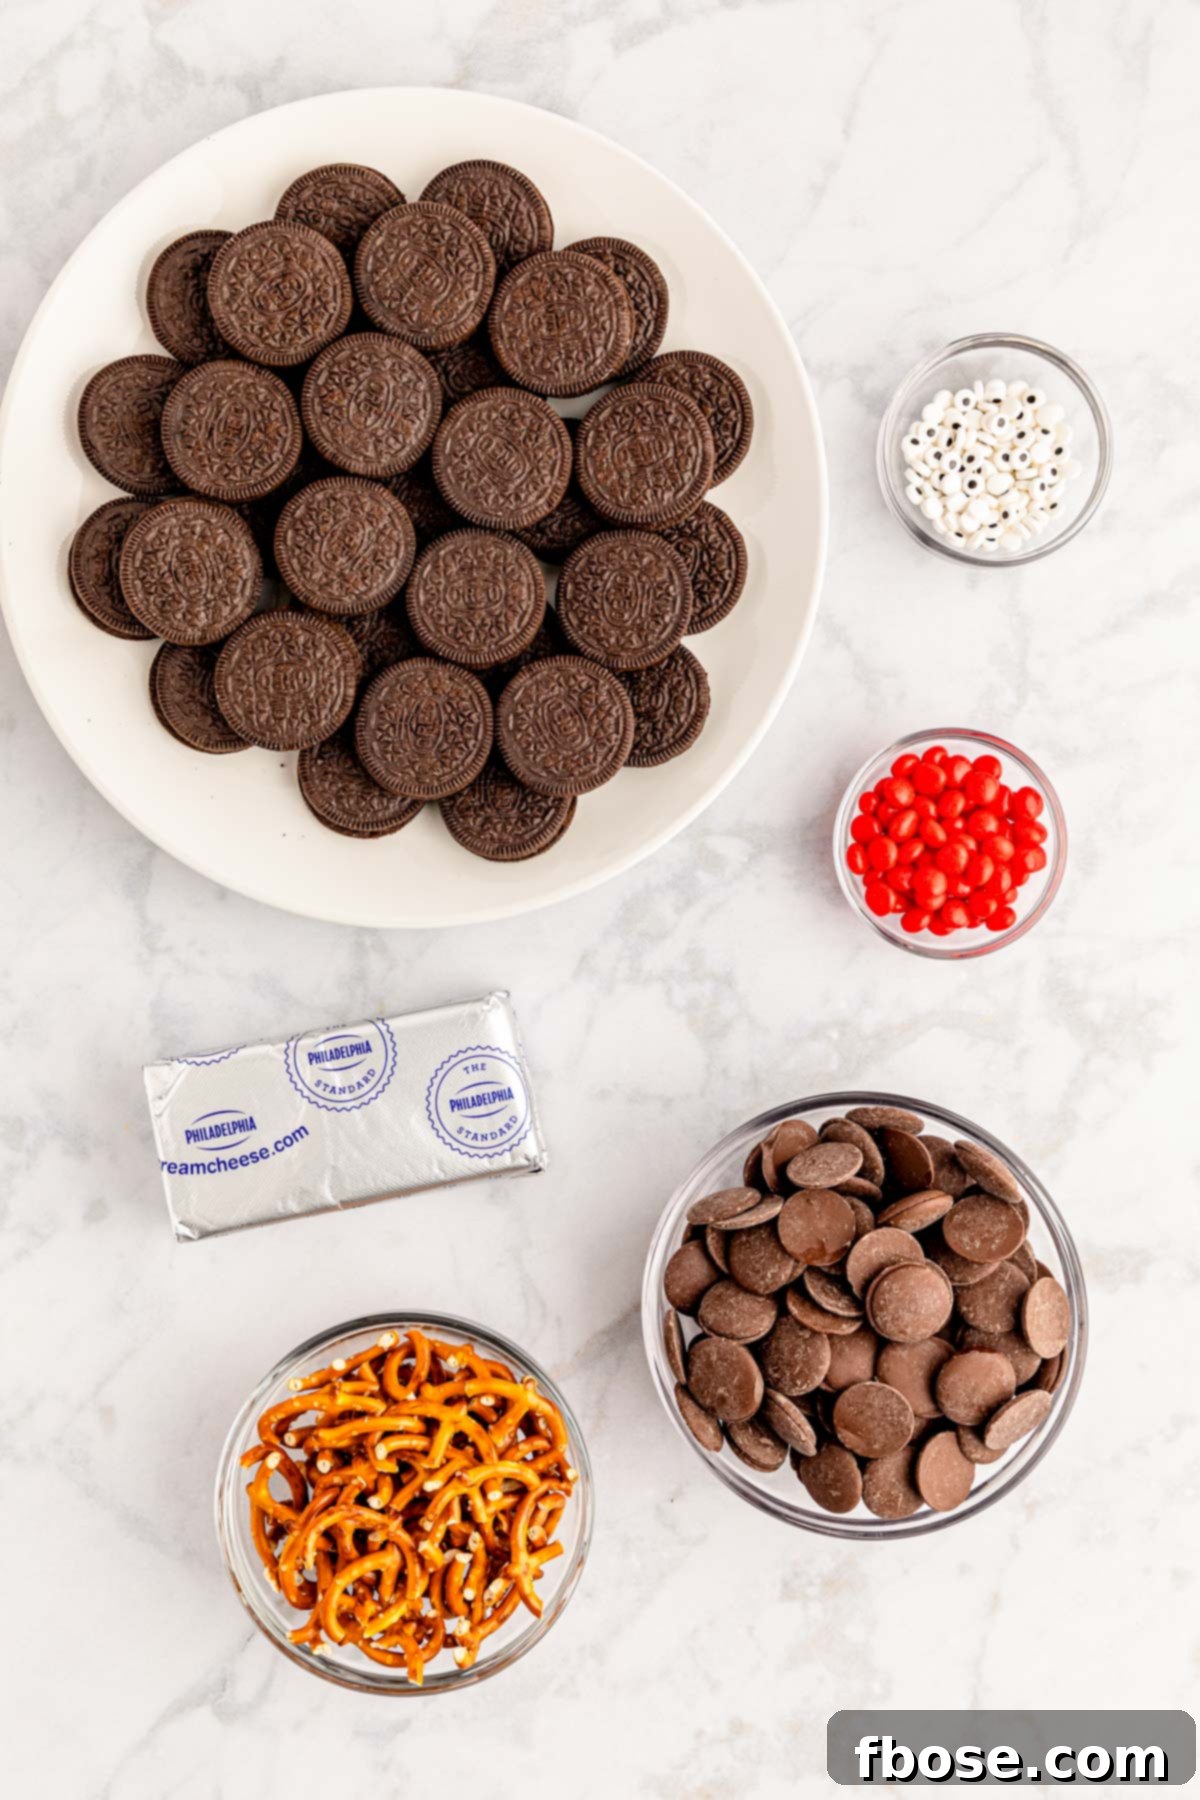
Essential Ingredients for Your Festive Reindeer Oreo Balls
Crafting these adorable Reindeer Oreo Balls begins with a selection of readily available ingredients, ensuring a smooth and enjoyable process. Here’s what you’ll need to bring these festive treats to life:
- Oreo Cookies: The foundational ingredient for that classic, beloved flavor.
- Cream Cheese: Provides the essential binding and creamy texture for the truffle filling.
- Pretzel Twists: Broken in half, these cleverly transform into the reindeer’s iconic antlers.
- Ghirardelli Dark Chocolate Melting Wafers: For a smooth, rich chocolate coating that sets beautifully.
- Black Sugar Pearls (or Candy Eyes): To give your reindeer that whimsical, watchful gaze.
- M&Ms or Red Hots: The perfect vibrant red for Rudolf’s shining nose.
Since this delightful recipe for Reindeer Oreo Balls starts with “milk’s favorite cookie,” you already know it’s destined for deliciousness! While a classic package of Oreos provides the perfect base, don’t hesitate to unleash your inner culinary adventurer. Many exciting flavored Oreo varieties can be used to create unique taste sensations. Imagine mint, toffee, hazelnut, or even chocolate creme-filled Oreos transforming these truffles into an entirely new experience!
To maintain the ideal consistency and flavor balance, aim for approximately 45 cookies, regardless of your chosen flavor. This typically corresponds to one standard 18-ounce package of Oreos. If you opt for Double Stuf or Mega Stuf varieties, be aware that their increased cream filling content can result in a slightly softer or wetter truffle mixture. In such cases, you might consider slightly reducing the amount of cream cheese to achieve the perfect texture, ensuring your reindeer truffles hold their shape beautifully.
Step-by-Step Guide: How To Make Festive Reindeer Oreo Balls
Creating these delightful Reindeer Oreo Balls is a straightforward process, perfect for an enjoyable session in the kitchen. Follow these steps for a perfect batch:
- Prepare Your Workspace: Begin by lining a large baking sheet with parchment paper. This crucial step will prevent sticking and make for effortless cleanup later, especially after the chocolate dipping. Set this prepared sheet aside.
- Crush the Oreos: Take your 45 Oreo cookies and place them into a high-speed blender or a food processor. Pulse until the cookies are transformed into fine, consistent crumbs. Ensure there are no large chunks remaining, as this will affect the truffle’s smooth texture.
- Cream the Cheese: In a spacious mixing bowl, beat the softened cream cheese using a hand mixer. Start on high speed and continue mixing until the cream cheese is wonderfully smooth and free of any lumps. This smooth base is key to a luscious truffle.
- Combine Ingredients: Add the finely crushed Oreo crumbs directly into the bowl with the smooth cream cheese. Switch your hand mixer to medium speed and mix thoroughly until the cookie crumbs and cream cheese are fully combined, forming a thick, uniform dough. Scrape down the sides of the bowl as needed to ensure everything is incorporated.
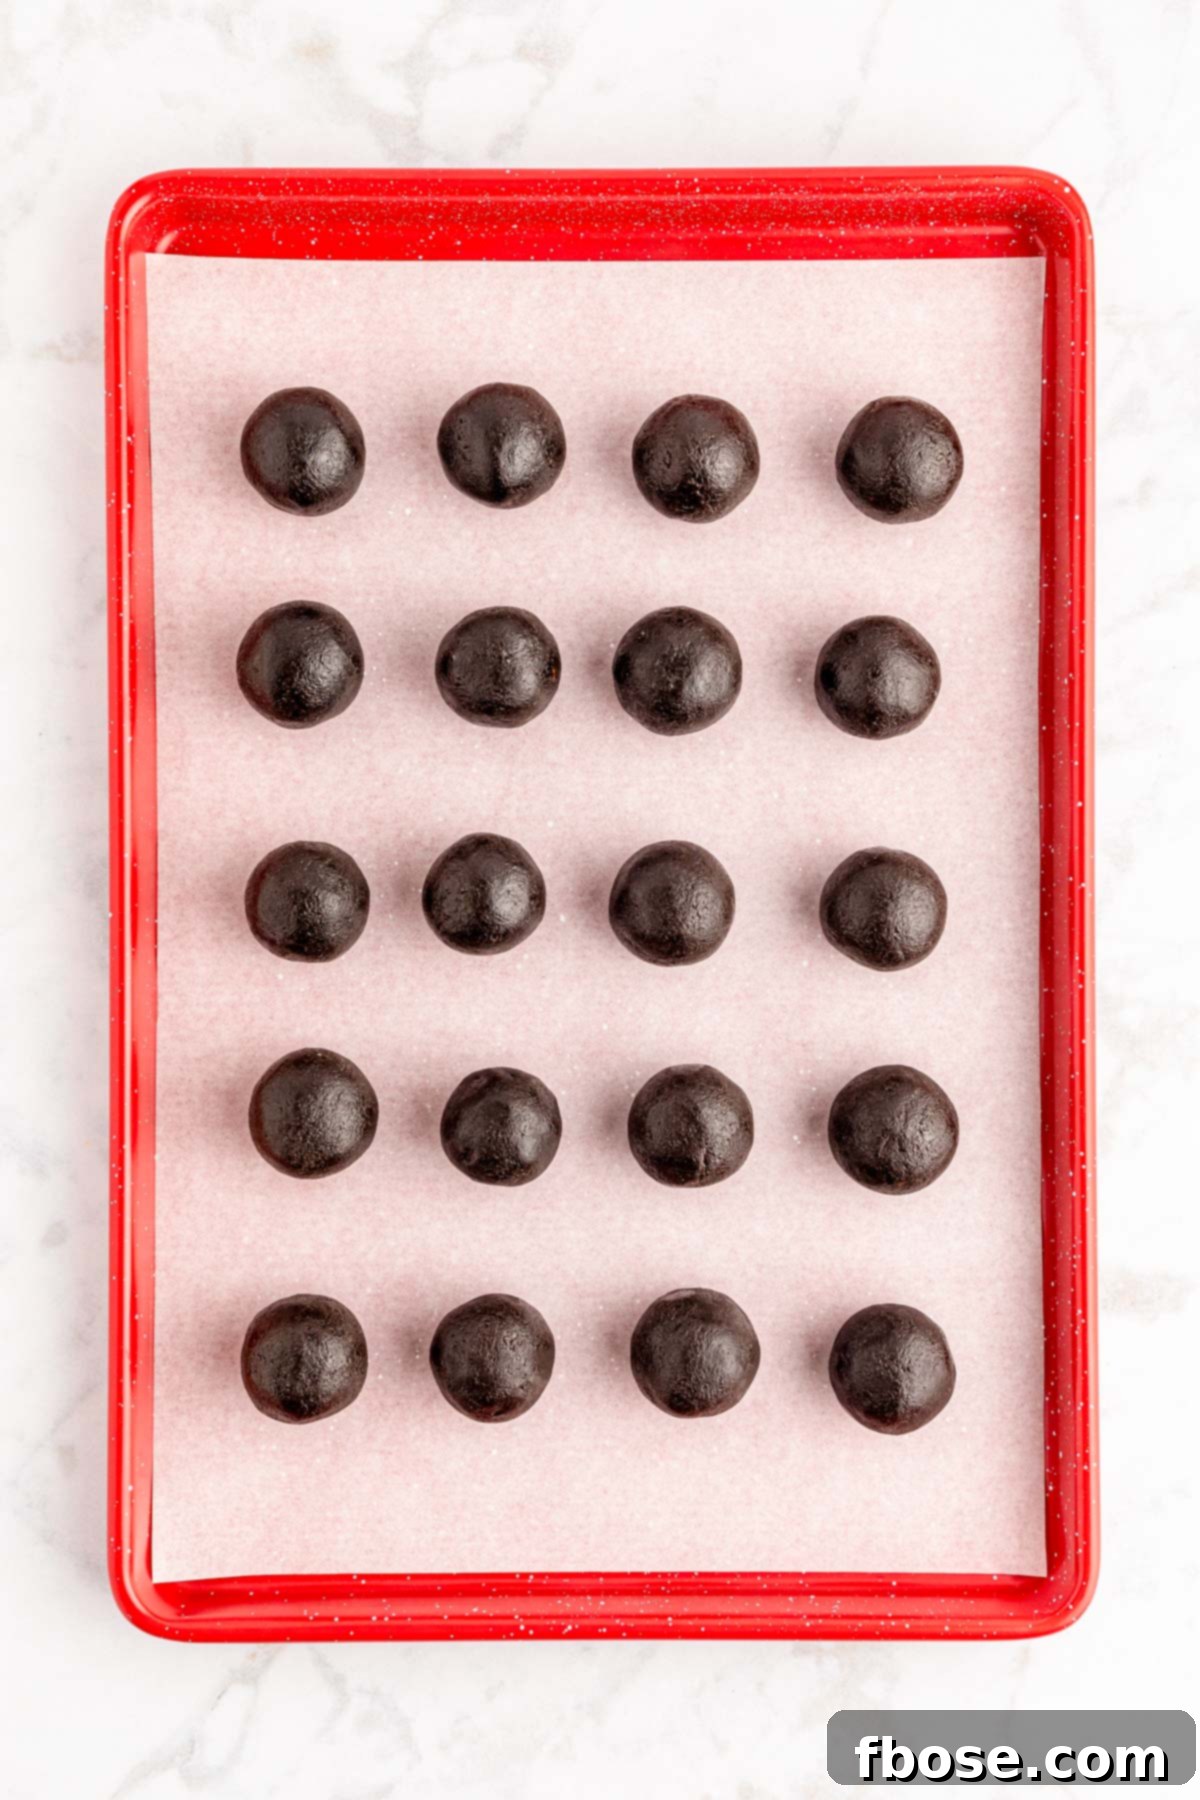
- Portion and Roll: Using a small cookie scoop (ideally 1.5 inches or 1½ tablespoons in size), portion out the Oreo mixture. Take each scooped portion and roll it gently between the palms of your hands to form a smooth, perfectly round ball. Transfer these rolled Oreo cookie balls onto your prepared baking sheet. Aim for consistent sizing for best results.
- Chill the Truffles: Once all the Oreo balls are rolled and placed on the baking sheet, transfer the entire tray into the refrigerator. Allow them to chill for at least 2 hours. This chilling time is essential for the balls to firm up, making them easier to dip and ensuring they hold their shape during the coating process.
- Melt the Chocolate: It’s time to prepare your chocolate coating. Place the Ghirardelli dark chocolate melting wafers into a double boiler set over low heat. Stir frequently until the chocolate is completely melted and smooth. Alternatively, you can use a microwave-safe bowl; heat the wafers in 30-second intervals, stirring well after each interval, until fully melted and creamy. Be careful not to overheat.
- Dip the Truffles: One at a time, use a fork (or a candy dipping tool) to gently dip each chilled Oreo ball into the melted dark chocolate. Ensure the ball is fully coated. Lift the fork and gently tap it against the side of the bowl to remove any excess chocolate, allowing for a neat, thin coating. Carefully place the chocolate-covered truffle back onto the parchment-lined baking sheet.
- Add Antlers: While the chocolate is still wet, carefully insert two broken pretzel pieces into the sides of the Oreo ball at the top, creating the reindeer’s antlers. Push them in about ¼-inch to ½-inch deep to secure them.
- Attach Nose and Eyes: Next, place one red M&M or Red Hot candy in the center for the reindeer’s nose. Gently hold it in place for about 10 seconds to allow the chocolate to begin setting around it, preventing it from sliding down. Immediately after, add two candy eyes just above the nose, pressing lightly to secure them.
- Repeat and Reheat: Continue this dipping and assembling process for all the remaining Oreo balls. If your dark chocolate starts to thicken or cool, reheat it over low heat in the double boiler or in the microwave on a low or defrost setting, stirring until smooth again.
- Allow to Set: Once all your adorable Reindeer Oreo Balls are assembled, allow them to set completely at room temperature or in the refrigerator for about 15 minutes before serving. This ensures the chocolate is firm and the decorations are secure. Store them in the refrigerator until ready to enjoy.


Rebecca’s Expert Tips for Perfect Reindeer Oreo Balls
- Parchment Paper is Your Best Friend: Don’t underestimate the power of parchment paper! Lining your baking sheet with it ensures a completely mess-free process, especially during the chocolate dipping phase. Once all the delicious Reindeer Truffles are finished and set, simply roll up the parchment paper and dispose of it. This simple trick saves you significant time and effort, eliminating the need to scrub melted chocolate from your baking pan. It’s a game-changer for easy cleanup!
- Ensure Softened Cream Cheese: For the smoothest and most uniform truffle mixture, it’s crucial that your cream cheese is properly softened. Remember to remove the cream cheese block from the refrigerator about an hour before you plan to begin making this Reindeer Oreo Balls recipe. This allows it ample time to reach room temperature, making it much easier to beat into a creamy consistency and combine seamlessly with the Oreo crumbs.
- Strategic Ingredient Prep: The key to successful decorating is speed! Once you’ve dipped the Oreo balls in melted chocolate, you need to work quickly to assemble the reindeer before the chocolate hardens. To facilitate this, prepare all your edible reindeer decorations in advance. Break the pretzel twists into the perfect antler shapes, sort out the red M&Ms (if using) for the noses, and place the candy eyes in a shallow, easily accessible bowl. This foresight in preparation will allow you to work efficiently and ensure every reindeer is perfectly adorned before the chocolate sets.
- Consistent Portion Sizing: For a batch of uniformly beautiful Christmas Oreo balls, consistent portioning is essential. I highly recommend using a 1.5-inch cookie scoop (or a 1½ tablespoon measure) to portion out the truffle filling. This not only makes the process faster but also ensures that each reindeer truffle is roughly the same size, contributing to an aesthetically pleasing presentation.
- Achieving Perfectly Melted Chocolate: The secret to a beautifully coated truffle lies in perfectly melted chocolate. I find that using a double boiler over low heat is the superior method for melting dark chocolate wafers. This technique provides a gentle, even melt, resulting in a super smooth and shiny consistency. This thin consistency is ideal for coating these truffles, ensuring a delicate shell rather than a thick, clumpy one. Always be cautious not to overheat the chocolate or heat it too rapidly on high heat, as this can cause the chocolate to “seize” and become thick, grainy, and unusable.
- Work in Manageable Batches: Assembling the reindeer can take a little extra time due to the delicate placement of the antlers, nose, and eyes. To prevent the undipped truffles from becoming too soft while you work, it’s best to proceed in small batches. I typically find it most effective to remove only 4 to 6 truffles from the refrigerator at a time, allowing the rest to remain chilled until they are ready to be dipped and decorated. This ensures optimal texture and ease of handling throughout the entire process.
Exciting Reindeer Oreo Balls: Substitutions and Creative Variations
While the classic Reindeer Oreo Balls recipe is a delight, don’t hesitate to personalize it with these fun substitutions and variations to match your taste or dietary needs:
- Alternative Melting Wafers: While I prefer the depth of dark chocolate melting wafers to balance the sweetness of the Oreos, you can easily swap them for milk chocolate for an even sweeter treat, especially popular with younger palettes. White chocolate wafers can also create a beautiful “snowy” effect. Another excellent option is using melted almond bark, which provides a similar smooth coating and sets well.
- Creative Candy Eyes: The standard candy eyes are fantastic for giving your reindeer character. However, if you’re looking for alternatives, small black sugar pearls can create a more subtle eye. For a truly homemade touch, you could even pipe on small dots for eyes using melted black chocolate or a black food-safe marker.
- Nose Candy Options: Rudolf’s iconic red nose is a must! Red Hots provide a spicy kick and a classic look, while red M&Ms offer a sweeter, more readily available option. Any small, round, red cinnamon-flavored candy, such as Hot Tamales, would also make a great, festive reindeer nose.
- Dairy-Free Truffles: For those with dietary restrictions, it’s entirely possible to make these truffles dairy-free. Since many Oreo varieties are already dairy-free, your main adjustments would be to select a high-quality dairy-free cream cheese alternative and dairy-free chocolate melting wafers. Always check product labels to ensure they meet your specific dietary requirements.
- Flavorful Truffle Bases: If you adore the reindeer design but want to explore different flavor profiles for the truffle base, consider adapting some of my other popular recipes! For a festive twist, dress up my Easy Peppermint Oreo Balls with reindeer features. The cool mint would be a fantastic contrast. Alternatively, my Oreo Peanut Butter Balls would offer a rich, nutty flavor, perfectly complemented by the chocolate coating and sweet decorations.
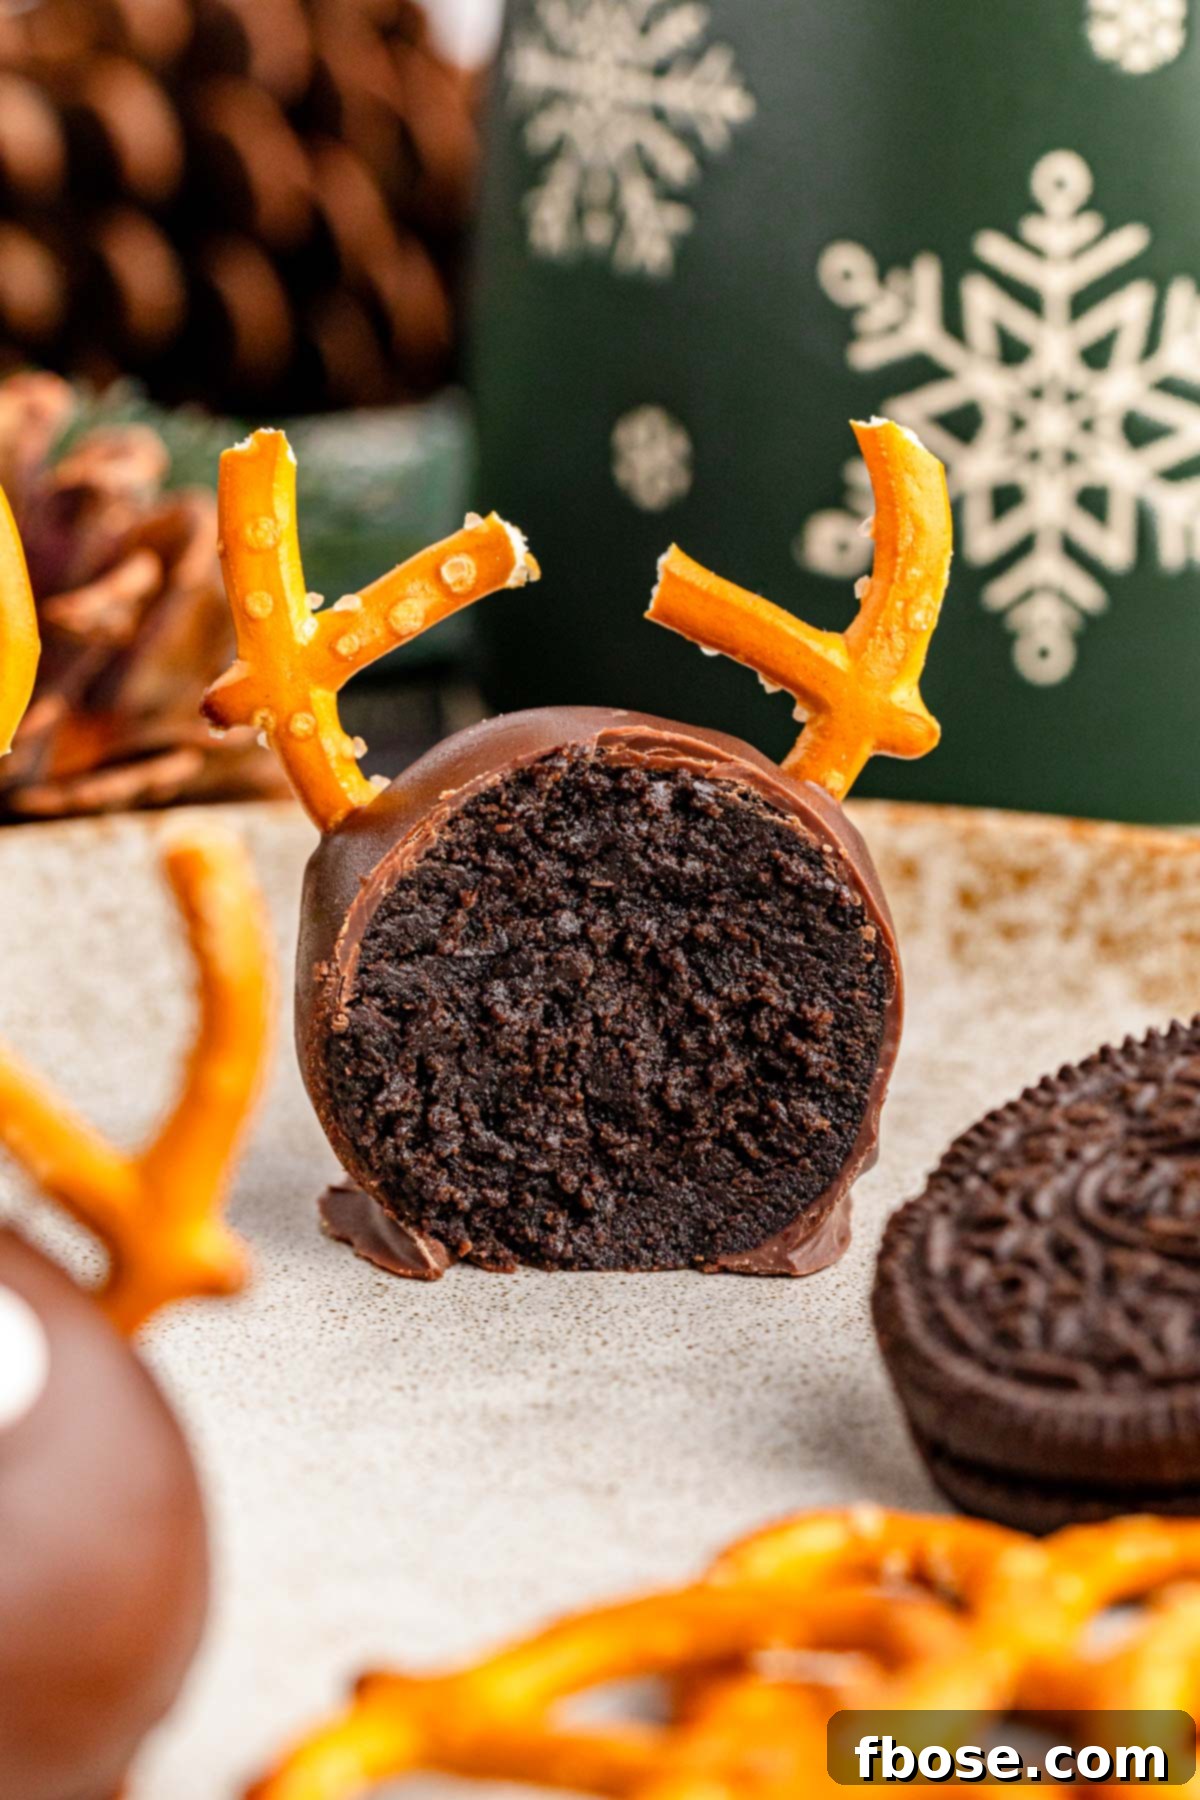
Delightful Ways to Enjoy Your Reindeer Oreo Balls
These charming Reindeer Oreo Balls are more than just a dessert; they’re an experience waiting to happen! Here are several wonderful ways to savor and share your festive creations:
- Unforgettable Fun With The Kids: This Christmas dessert recipe is a perfect invitation to get your children involved in the kitchen. You can prepare the truffle filling and then let them take charge of rolling the mixture into smooth balls, fostering their motor skills and creativity. Set out shallow prep bowls with the candy eyes, candy noses, and pretzel antlers, and watch as their imaginations soar, creating their very own unique reindeer characters. It’s a holiday tradition in the making!
- Star of Christmas Parties: Elevate any Christmas party with these festive and utterly delicious Reindeer Oreo Balls! Their adorable appearance and irresistible taste are guaranteed to bring smiles to faces of all ages. They serve as a wonderful conversation starter and a whimsical nod to the season, reminding everyone that you’re never too old to believe in the magic of Christmas Eve and the sight of Santa’s reindeer.
- Perfect for Potlucks: Looking for a crowd-pleasing dish to bring to a holiday potluck? These Reindeer Truffles are your answer! They travel well and are always a welcome sight, whether it’s an office holiday lunch, a church gathering, or your kids’ school festive event. They’re a unique and memorable contribution that stands out from typical holiday fare.
- Thoughtful Gifting: Spread holiday cheer and sweetness to your neighbors, friends, co-workers, and family by gifting them a batch of these homemade Reindeer Oreo Balls! Carefully arrange a few truffles in clear cellophane bags, tie them off with a festive ribbon, and you’ve created charming, edible, and inexpensive gifts that show you care. It’s a personal touch that truly embodies the spirit of giving.

Optimal Storage Instructions for Reindeer Oreo Balls
To keep your Reindeer Oreo Balls fresh and delicious, proper storage is key. Once they have fully set, arrange these festive truffles in a single layer within an airtight container. If you need to stack them, place a sheet of parchment paper between layers to prevent them from sticking together or damaging their delicate decorations. Store the container in the refrigerator, and your truffles will remain delightfully fresh for up to 5 days. For longer storage, Reindeer Oreo Balls can also be frozen for up to 2-3 weeks in an airtight container. Simply thaw them in the refrigerator before serving to enjoy their creamy texture.

Discover More Fun Christmas Recipes:
- Christmas Oreo Snow Globe Cookies – An edible cookie craft that requires no baking, perfect for a whimsical holiday activity!
- DIY Hot Cocoa Bar – Create the ultimate cozy corner with this perfect party setup, enjoyable long after the holidays are over!
- Reindeer Christmas Bark – Simplify your holiday baking with this incredibly easy and festive recipe that delivers big on cheer and flavor!
- Brownie Christmas Trees – Get the kids involved in the kitchen for this delightful and decorate-friendly recipe, turning simple brownies into miniature festive trees!
- Soft Christmas Sugar Cookies – A nostalgic, delicious, and utterly essential staple for the Christmas season, perfect for decorating and sharing!

Reindeer Oreo Balls
Rebecca Hubbell
Dessert
American
1 hour
2 hours
3 hours
24 balls
Equipment
-
Food processor or high speed blender
-
Mixing bowls
-
Hand mixer
-
Baking tray
-
Candy melt melting pot, double boiler, or microwave
Ingredients
- 45 Oreo Cookies about 1 (18oz.) package
- 8 ounce block cream cheese softened to room temperature
- 15 ounces Ghirardelli dark chocolate melting wafers
-
2 cups
pretzel twists
broken in half -
48
candy eyes
for the eyes - 24 M&M’s or Red Hots for the nose
Instructions
-
Line a baking tray with parchment and set it aside.
-
Place the 45 Oreo Cookies in a food processor or high speed blender and pulse into fine crumbs.
-
In a large mixing bowl with a hand mixer on high speed, beat the softened 8 ounce block cream cheese until smooth.
-
Add the Oreo crumbs to the bowl and mix on medium speed until well combined.
-
Using a 1½ tablespoon cookie scoop, portion out the Oreo mixture and then roll it in the palms of your hands to make it a smooth ball. Place the rolled balls on the prepared baking tray.
-
Once you are done making balls, place the tray into the refrigerator to chill for 2 hours.
-
In a double boiler over low heat (or in a microwave-safe bowl and microwave at 30-second intervals, stirring between each one), melt the 15 ounces Ghirardelli dark chocolate melting wafers, stirring every 30 seconds until fully melted and smooth.
-
Use a fork to dip one ball at a time into the melted dark chocolate. Lift the fork and tap it on the side to help remove any excess coating. Place the ball back onto the baking tray.
-
Carefully insert two broken pretzel pieces (from the 2 cups pretzel twists – these can be broken or cut in advance) for the antlers about ¼”-½” deep.
-
Add one of the 24 M&M’s or Red Hots for the nose and hold it in place for about 10 seconds or so to allow the chocolate to set a bit otherwise it will slide down.
-
Then, add two of the 48 candy eyes right above it.
-
Repeat with the rest of the Oreo balls. Reheat the dark chocolate melting wafers over low heat or on a low or defrost setting in the microwave if needed.
-
Allow the reindeer oreo balls to set completely before serving, about 15 minutes.
-
You can place them in the refrigerator to help them harden faster. Keep refrigerated until ready to eat.
Notes
- Any flavored Oreos will work in this recipe. Use the same amount, about 45 regular cookies.
- Store leftovers refrigerated in an airtight container for up to 5 days.
Nutrition
Did You Make This Recipe?
Don’t forget to share it with me on Instagram @sugarandsoulco and follow on Tiktok @sugarandsoulco and Pinterest @sugarandsoulco for more!
Pin Recipe
Share Recipe