
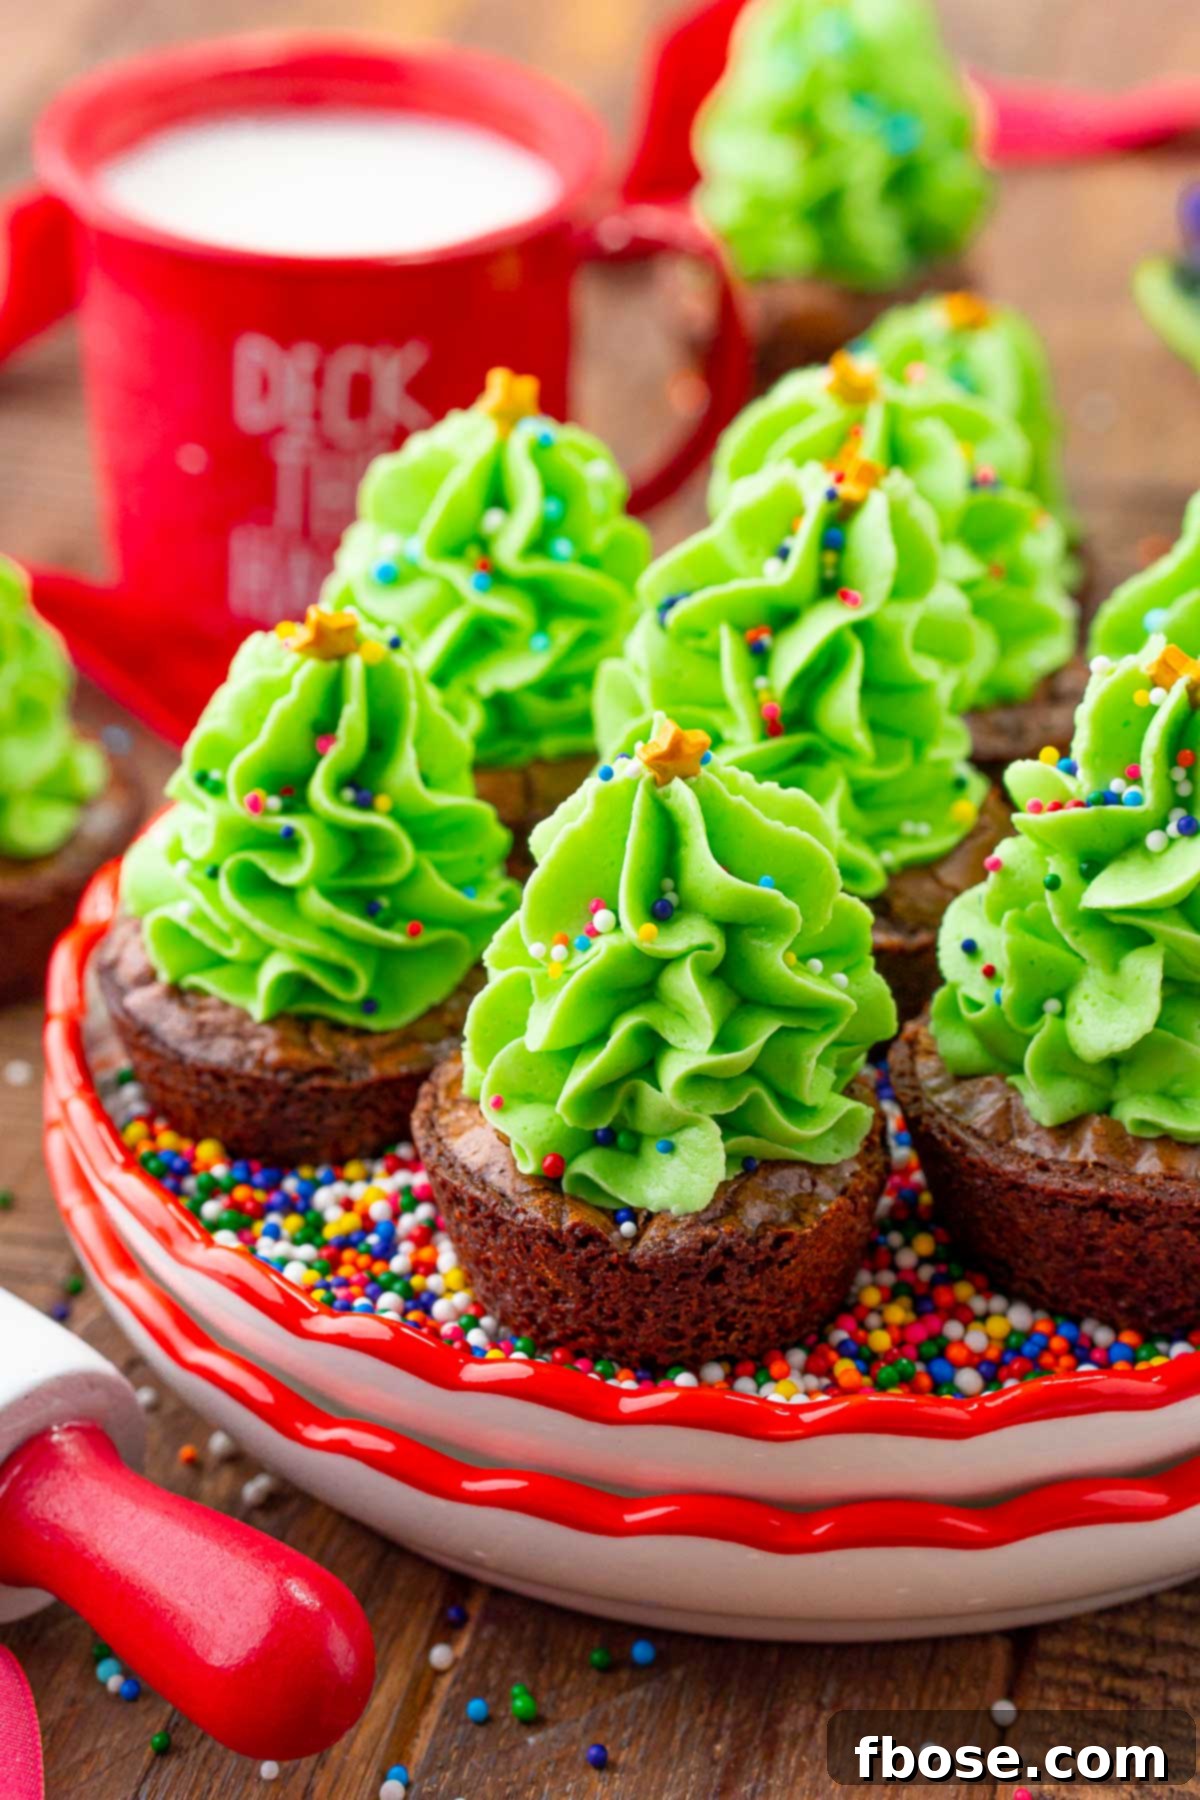
As the holiday season draws near, a special warmth fills the air, often accompanied by the delightful scents of festive baking. Among the myriad of holiday treats, few capture the spirit of joy and coziness quite like a perfectly crafted brownie. This recipe elevates the humble brownie into a show-stopping miniature masterpiece: Christmas Tree Brownie Bites. These treats combine the rich, fudgy goodness of a boxed brownie mix with the velvety smoothness of homemade buttercream frosting, all meticulously shaped and decorated to resemble charming little Christmas trees. Not only are they incredibly easy to prepare, making them accessible for bakers of all skill levels, but their festive appearance also ensures they’ll be the star of any holiday gathering or cookie exchange. Get ready to impress your friends and family with a dessert that tastes as wonderful as it looks, requiring minimal effort for maximum holiday cheer.
For those eager to expand their repertoire of stress-free holiday delights, we have more quick and festive options. Consider whipping up a batch of No-Bake Christmas Krispie Treats, which are ready to enjoy in under an hour, or embark on a fun decorating project with these adorable brownie mix Reindeer Cookies. Each recipe promises a unique way to celebrate the festive season with delicious results and minimal time spent in the kitchen.
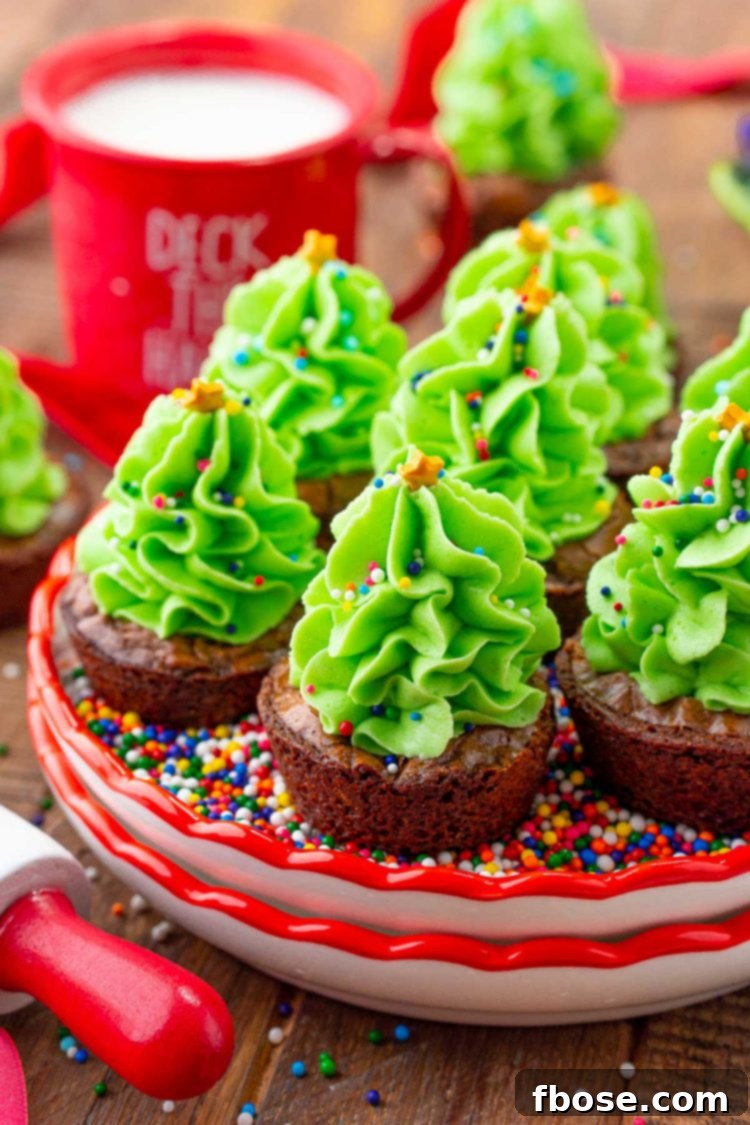
The Irresistible Charm of Christmas Tree Brownie Bites
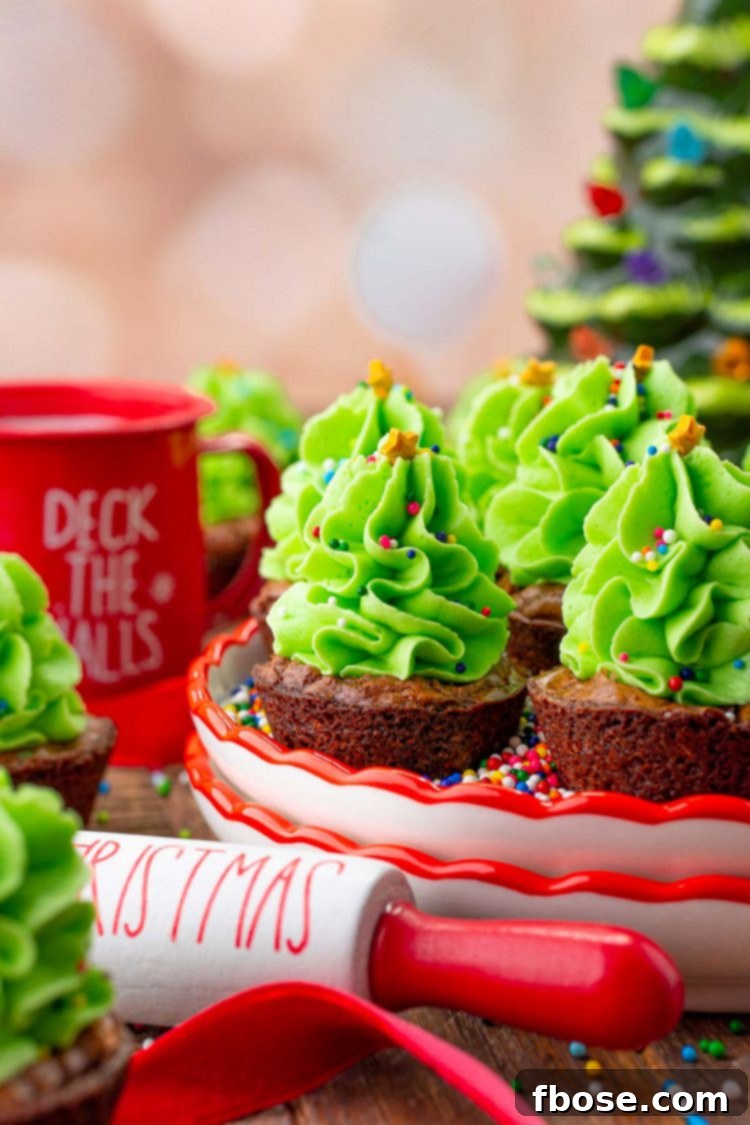
These Christmas Tree Brownie Bites are destined to become a new holiday tradition in your home. They perfectly marry the convenience of using a boxed brownie mix with the superior taste and texture of a homemade buttercream frosting. The result is a dessert that looks like it took hours to prepare but comes together with surprising ease. They are not just treats; they are tiny edible works of art that ignite the holiday spirit, making them ideal for everything from school parties to elegant festive gatherings. Here’s why these delightful bites deserve a top spot on your holiday baking list:
Unbeatable Convenience with a Homemade Touch
- Your Go-To Boxed Brownie Mix: We all have a favorite, and this recipe encourages you to use it! Starting with a beloved boxed brownie mix ensures a consistently delicious and fudgy base without the hassle of measuring multiple dry ingredients. This convenience allows you to confidently create a delectable foundation, knowing the flavor and texture will be exactly as you like them, whether you prefer a classic fudge, double chocolate, or dark chocolate variety.
- Generous Yield for Every Occasion: Planning a big holiday party, a cookie exchange, or just want enough treats to last through a festive week? This recipe is a winner! It yields approximately three dozen individual brownie bites, ensuring there’s plenty to go around. They are perfectly sized for small hands, ideal for sharing, and make wonderful edible gifts, making them a versatile choice for all your seasonal needs.
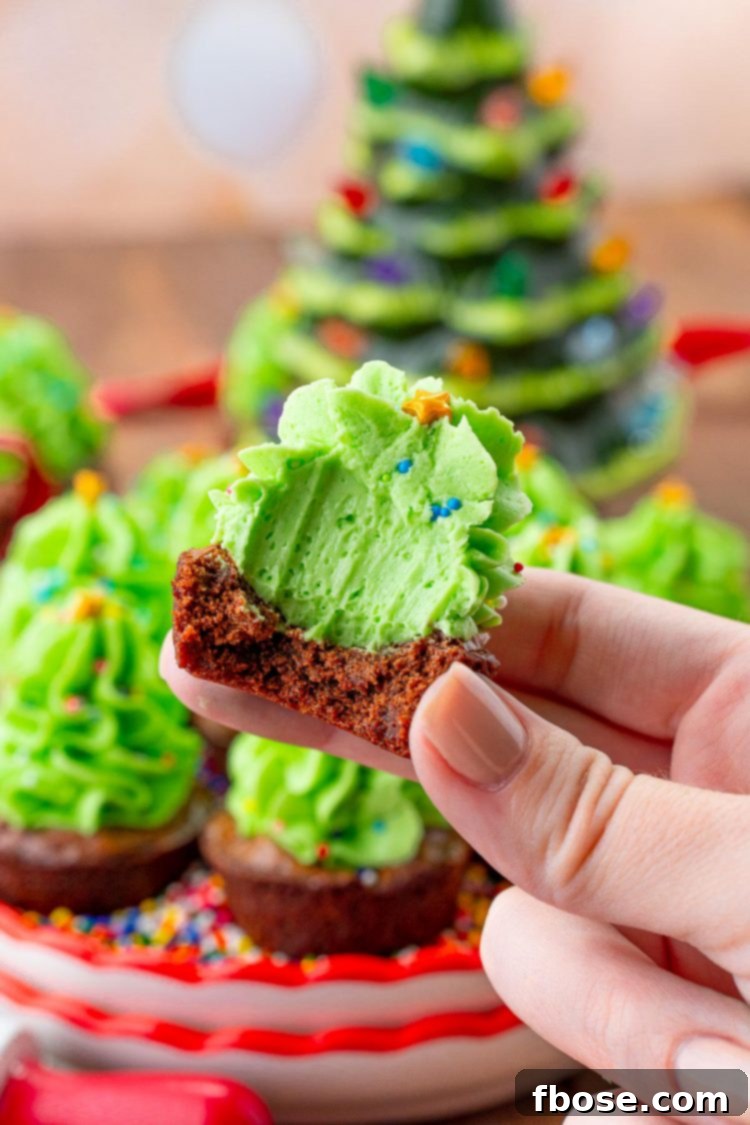
- Decadent Homemade Buttercream: While the brownie base offers incredible convenience, the homemade buttercream is truly the star of the show. Crafted with just five simple ingredients, this frosting transforms each brownie into a rich, creamy, and exquisitely flavored delight. Its smooth, pipeable consistency and fresh, buttery taste elevate the overall dessert, giving it that unmistakable “from scratch” quality that everyone will adore. It’s an easy step that makes a monumental difference in taste and presentation.
- A Delightful Activity for Kids: Involving children in holiday baking is a cherished tradition, and these brownie bites provide the perfect opportunity. Kids will be thrilled to take charge of decorating! They can enjoy piping the vibrant green Christmas tree frosting onto each brownie and then customizing their creations with a whimsical array of colorful sprinkles, tiny candy stars, or edible glitter. It’s a fantastic way to create lasting memories and foster their creativity in the kitchen.
- Remarkably Simple to Execute: Despite their intricate appearance, these Christmas Tree Brownie Bites are surprisingly straightforward to make. The process is broken down into manageable steps: prepare and bake the brownies in mini muffin tins, whip together the quick buttercream, pipe on the festive tree shapes, and finally, add your chosen decorations. It’s a gratifying baking project that delivers impressive, professional-looking results without demanding extensive time or specialized culinary skills.
Gather Your Ingredients: What You’ll Need
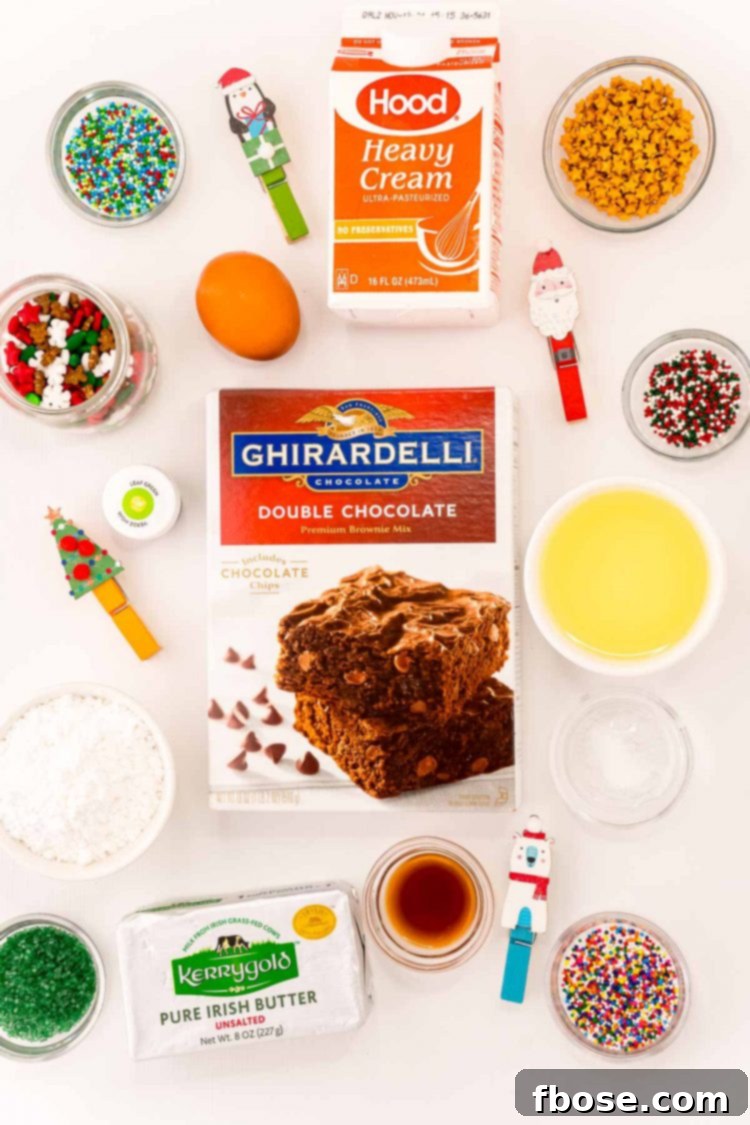
Creating these charming Christmas Tree Brownie Bites starts with a careful selection of ingredients. The beauty of this recipe lies in its balanced approach, leveraging the ease of a boxed brownie mix while giving you full control over a fresh, homemade frosting. Here’s a detailed look at what you’ll need to bring these festive treats to life, along with some helpful tips for each component.
For the Fudgy Brownie Bites:
- Boxed Brownie Mix: The foundation of our convenience! Any 18-ounce package of your favorite high-quality boxed brownie mix will work beautifully. For an extra rich and deep chocolate flavor, I often recommend a premium brand like Ghirardelli Double Chocolate Mix, but feel free to use your personal go-to. The size of the mix usually yields around 36 mini brownie bites.
- Required Mix Ingredients: Don’t forget the liquids that your chosen brownie mix calls for on its packaging. Typically, this includes water, large eggs, and vegetable oil. These ingredients are crucial for achieving that desirable moist and wonderfully fudgy brownie texture. Always check your specific box for exact measurements.
- Mini Muffin Tin: Absolutely essential for creating the perfect bite-sized form. You’ll want to ensure this is thoroughly greased with nonstick cooking spray to prevent sticking and guarantee easy removal of your delicate brownie bites.
For the Lush Homemade Buttercream Frosting:
- Unsalted Butter: You’ll need 1 cup (two sticks) of unsalted butter, softened to room temperature. This is a critical step; butter that is too cold will result in lumpy frosting, while butter that is too soft (melted) will yield greasy, unstable frosting. Unsalted butter allows you to precisely control the salt content.
- Powdered Sugar (Confectioners’ Sugar): Keep 3 to 4 cups on hand. This finely milled sugar dissolves easily, creating a smooth buttercream. Sifting it before adding is highly recommended to eliminate any lumps and ensure a silky final product. You’ll adjust the quantity to achieve your desired consistency.
- Heavy Cream: Begin with 3 to 4 tablespoons of heavy cream. This liquid ingredient is vital for achieving the rich, creamy texture and pipeable consistency of the buttercream. It adds richness and helps create that wonderful mouthfeel. If heavy cream isn’t available, whole milk can be used, but cream provides a superior texture.
- Vanilla Extract: One tablespoon of pure vanilla extract will infuse your buttercream with a classic, sweet, and aromatic flavor that beautifully complements the chocolate brownies. Don’t skimp on quality here!
- Salt: Just a quarter teaspoon of fine salt. This small addition is a flavor secret weapon! It expertly balances the sweetness of the powdered sugar, preventing the frosting from being overly sugary and enhancing the overall taste profile.
- Green Food Coloring: To transform your buttercream into the iconic Christmas tree hue! Gel food coloring is strongly recommended over liquid varieties. Gel colors are more concentrated, offering vibrant shades without adding excess moisture that can thin out your frosting. Start with a few drops and gradually add more until you achieve your desired festive green.
For the Festive Decorations:
- Holiday Sprinkles: A festive assortment of colorful holiday sprinkles is non-negotiable for decorating your miniature trees. Choose from classic nonpareils, jimmies, sparkling sugars, or even elegant edible silver or gold balls to add texture and visual appeal.
- Star Sprinkles (Optional): For that perfect finishing touch, consider topping each little tree with a small yellow or white star sprinkle. This simple addition mimics a shining tree topper, adding an extra layer of enchantment to your Christmas Tree Brownie Bites.
Baking Guide: How to Make Christmas Tree Brownie Bites
Follow these comprehensive, step-by-step instructions to effortlessly create a batch of festive and delicious Christmas Tree Brownie Bites. This guide ensures a smooth process from preparing your brownie batter to perfectly piping your buttercream trees.
- Preheat Oven and Prepare Pan: Begin by preheating your oven to 350°F (175°C). This ensures the oven is at the correct temperature for even baking. Generously grease a mini cupcake or mini muffin pan with nonstick cooking spray. This crucial step prevents the brownies from sticking and makes for easy removal. Set the prepared pan aside.
- Mix the Brownie Batter: Follow the instructions on your chosen boxed brownie mix package to prepare the batter. Typically, this involves combining the mix with water, eggs, and oil. Mix until just combined; avoid overmixing, as this can develop the gluten in the flour and result in tougher brownies instead of the desired fudgy texture.
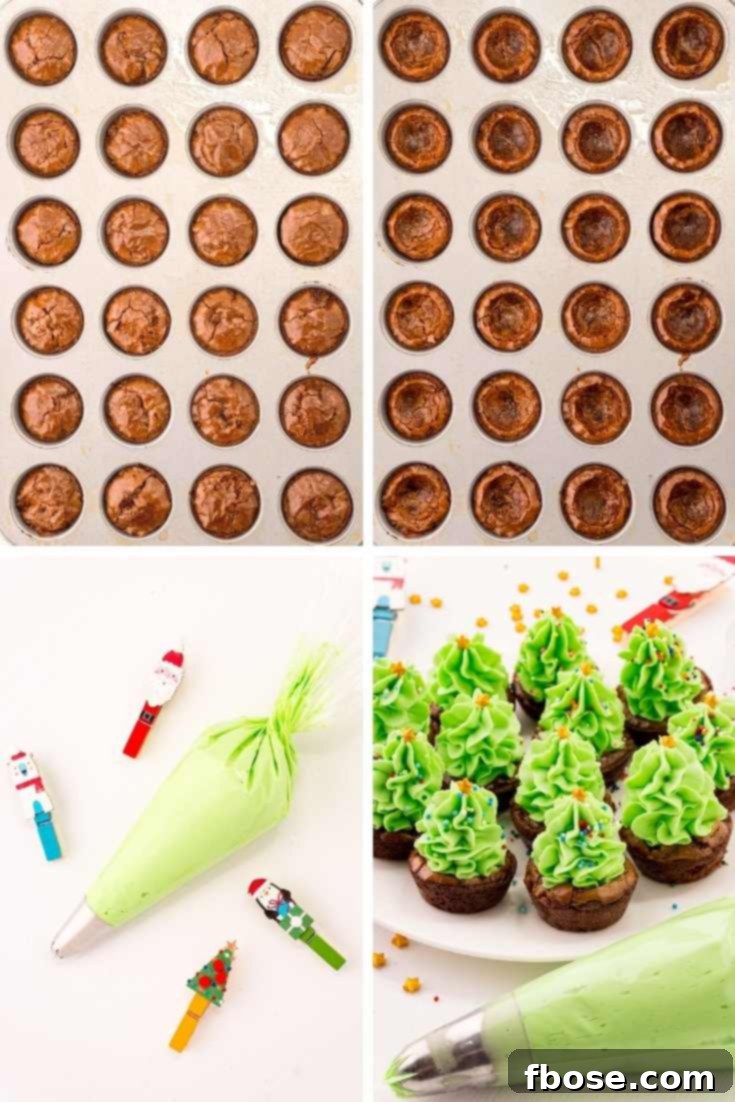
- Fill the Muffin Cavities: Carefully spoon or pour the brownie batter into each prepared mini cupcake cavity. Fill each cavity approximately two-thirds full. This allows sufficient room for the brownies to rise during baking without overflowing and creates a nice domed surface, perfect for frosting.
- Bake to Perfection: Place the mini muffin pan in the preheated oven and bake for approximately 15 to 17 minutes. Baking times can vary slightly depending on your oven. The brownies are done when the edges appear set and firm, but the very center still looks slightly soft or fudgy. A toothpick inserted into the center should come out with moist crumbs, not wet batter. Be careful not to overbake, as this will lead to dry brownies.
- Create Indentations for Frosting: Once the brownies are baked, remove the pan from the oven. While they are still warm, take the back of a rounded teaspoon or a small melon baller and gently press down into the center of each brownie. This creates a slight indentation or well, which helps to stabilize the piped frosting and gives your Christmas tree a natural base.
- Cool the Brownies: Allow the brownie bites to cool in the mini muffin pan for about 10 minutes. This resting period helps them set further. After 10 minutes, use a small paring knife to gently loosen the edges of each brownie, then carefully pop them out of the pan. Transfer them to a wire cooling rack and let them cool completely to room temperature before attempting to frost them. Frosting warm brownies will cause the buttercream to melt and slide off.
- Cream the Butter for Frosting: While the brownies are cooling, begin preparing your homemade buttercream. In a large mixing bowl, using an electric mixer fitted with a paddle attachment, cream the softened unsalted butter on low speed for about 2-3 minutes, until it becomes light, pale, and incredibly creamy. This step incorporates air and ensures a smooth frosting.
- Gradually Add Sweetness and Creaminess: With the mixer still running on low speed, slowly begin to add 3 cups of powdered sugar and 3 tablespoons of heavy cream, alternating between small additions of each. Mix thoroughly after each addition until just combined. This gradual process prevents a cloud of sugar from erupting and helps achieve a uniform, smooth consistency.
- Adjust Frosting Consistency: Now, assess the texture of your buttercream. If it appears too thin for piping and won’t hold its shape, gradually add the remaining powdered sugar (up to 1 cup more), a quarter cup at a time, mixing well after each addition until it thickens sufficiently. Conversely, if the frosting seems too stiff or thick to pipe smoothly, add the remaining heavy cream (up to 1 tablespoon more) half a tablespoon at a time, mixing thoroughly until it reaches a creamy, easily pipeable consistency.
- Add Flavor and Color: Once the consistency is right, incorporate the vanilla extract, the pinch of salt, and your green food coloring. Start with a few drops of gel coloring and mix until fully blended. Continue adding drops incrementally until you achieve your desired vibrant and festive Christmas green shade.
- Whip for Fluffiness: With all ingredients combined and colored, increase the mixer speed to high and whip the frosting for an additional 2 minutes. This final whip incorporates more air, making the buttercream light, airy, and perfectly fluffy, which is ideal for piping beautiful shapes.
- Prepare the Piping Bag: Transfer the vibrant green buttercream into a piping bag that has been fitted with a large star tip. A Wilton 1M or 2D star tip is excellent for creating the classic textured Christmas tree look.
- Pipe the Christmas Trees: Hold the piping bag perpendicular to the center of each completely cooled brownie bite. Apply gentle, consistent pressure, and pipe the frosting in a continuous swirling motion, moving upwards and twisting slightly back and forth. Start wide at the base of the indentation and gradually narrow the swirl towards the top, creating a lovely conical Christmas tree shape.
- Decorate Immediately and Enjoy: As soon as you finish piping the frosting onto each brownie tree, immediately shower it with your chosen holiday sprinkles. Buttercream frosting tends to form a slight crust quickly when exposed to air, so decorating each tree as you pipe it ensures optimal adherence for the sprinkles. Once decorated, your festive Christmas Tree Brownie Bites are ready to be served and enjoyed!
More Delightful Holiday Brownie Creations:
- Brownie Christmas Trees: Explore another take on festive brownies, shaped into traditional Christmas trees for a larger, more indulgent treat.
- Hot Cocoa Brownie Cups: Indulge in cozy flavors with these delightful brownie cups, reminiscent of a warm mug of hot chocolate, perfect for winter evenings.
Frequently Asked Questions About Christmas Tree Brownie Bites
To help you perfect your Christmas Tree Brownie Bites and answer any common queries, we’ve put together a comprehensive FAQ section.
How Should I Store These Brownie Bites?
To maintain the freshness and deliciousness of your Christmas Tree Brownie Bites, it’s best to store them in an airtight container at room temperature. They will remain wonderfully fresh and flavorful for up to 5 days. If your home tends to be quite warm, or if you want to extend their shelf life slightly, you can refrigerate them for up to a week. If stored in the refrigerator, remember to allow them to sit at room temperature for about 15-20 minutes before serving. This brings the brownies back to their optimal soft, fudgy texture and allows the buttercream to achieve its best creamy consistency and flavor.
What if the Sprinkles Are Not Sticking to the Frosting?
Homemade buttercream frosting, especially when made correctly with the right ratio of butter to powdered sugar, has a tendency to form a slight “crust” fairly quickly upon exposure to air. This characteristic is actually desirable for buttercream as it helps the frosting maintain its shape and firmness. However, it also means that timing is crucial for sprinkle adhesion. To ensure your festive sprinkles stick perfectly, you must add them immediately after piping the frosting onto each individual brownie bite. Do not wait until you’ve frosted the entire batch; decorate each tree as you go to guarantee maximum sticking power for your decorative elements.
How Can I Adjust the Consistency of My Frosting?
Achieving the ideal frosting consistency is key for beautifully piped Christmas trees. If your buttercream appears too thin and struggles to hold its shape, gradually incorporate more powdered sugar. Start by adding about a quarter cup at a time, mixing thoroughly after each addition, until the frosting reaches a stiffer, pipeable consistency. Conversely, if your buttercream is too thick, making it difficult to pipe smoothly, add more heavy cream. Begin with half a tablespoon at a time, mixing well after each addition, until the frosting becomes wonderfully creamy and effortlessly pipeable. Always make adjustments gradually to avoid over-thinning or over-thickening.
Can I Add Mini Chocolate Chips to the Brownie Batter?
Yes, absolutely! Adding mini chocolate chips is a fantastic way to boost the chocolate flavor and texture of your brownie bites. However, a common issue when adding chocolate chips directly into batter, particularly in smaller molds like mini muffin tins, is that they tend to sink to the bottom during baking. To prevent this and ensure an even distribution of chocolate chips throughout your brownie bites, I recommend a simple trick: once you’ve spooned the brownie batter into the mini muffin pan cavities, sprinkle a few mini chocolate chips directly on top of the batter in each cup just before baking. This way, they’ll bake beautifully into the top layer of your brownies.
Crafting Unforgettable Holiday Memories with Festive Treats
The holiday season is a cherished time dedicated to warmth, connection, and creating beautiful memories with loved ones. What better way to enhance these precious moments than by sharing delightful, homemade treats like these enchanting Christmas Tree Brownie Bites? Their captivating appearance and irresistible blend of fudgy chocolate and creamy buttercream make them an ideal centerpiece for any festive gathering, a heartfelt edible gift for neighbors and friends, or simply a sweet indulgence for a cozy night by the fireplace. Embrace the heartwarming spirit of the season by baking up a batch, sharing the sweetness, and creating joyous, lasting memories with those who matter most.
Discover More Festive Treats to Brighten Your Holidays:
- Santa Hat Brownies – Indulge in rich, homemade brownies, whimsically topped with juicy strawberries and a dollop of fluffy buttercream frosting, artfully designed to resemble Santa’s iconic hat.
- Easy Christmas Tree Cupcakes – Whip up these charming cupcakes using a convenient boxed cake mix, then adorn them with vibrant green frosting and a scattering of festive sprinkles for a quick and impressive holiday treat.
- Classic Christmas Sugar Cookies – The ultimate holiday baking tradition! These traditional cut-out sugar cookies are perfect for decorating with children, offering endless creative possibilities and delicious, buttery results.
- Christmas Popcorn – A wonderfully easy-to-make and addictive sweet and salty snack, ideal for cozying up with your favorite holiday movies or for a fun, shareable party treat.
- Heart-Shaped Grinch Cookies – Add a playful twist to your holiday baking with these whimsical sugar cookies, colored green and red and cleverly shaped to mimic the Grinch’s famously changing heart.
Connect With Us!
We absolutely love seeing your culinary creations and hearing about your experiences in the kitchen! If you’ve had the joy of making these Christmas Tree Brownie Bites, please take a moment to share your feedback and leave a star rating in the comments section below. Your insights and reviews are incredibly valuable to our community of home bakers!
For more baking inspiration, behind-the-scenes glimpses, and to showcase your delicious masterpieces, don’t forget to tag us @sugarandsoulco on Instagram and Pinterest. You can also join our vibrant Sugar & Soul Show-offs Community on Facebook, where you can participate in exciting recipe challenges and connect with fellow baking enthusiasts!
Christmas Tree Brownie Bites
Rebecca Hubbell
Dessert
American
30 minutes
17 minutes
40 minutes
1 hour 27 minutes
36 brownies
Pin Recipe
These Christmas Tree Brownie Bites combine homemade buttercream frosting with a boxed brownie mix to create a deliciously festive treat! An easy-to-make dessert that kids will love!
Ingredients
- 1 box brownie mix (plus ingredients called for on the back of the box, usually water, eggs, oil)
- 1 cup unsalted butter, softened to room temperature
- 3-4 cups powdered sugar
- 3-4 tablespoons heavy cream
- 1 tablespoon vanilla extract
- ¼ teaspoon salt
- Green food coloring
- Holiday sprinkles
Instructions
- Preheat the oven to 350°F (175°C) and generously grease a mini cupcake pan with nonstick spray.
- Prepare the brownie mix according to the box directions and fill each prepared mini cupcake cavity about ⅔ full with brownie batter.
- Bake for about 15 to 17 minutes until the edges are firm but the center is still slightly soft (not gooey).
- Remove from the oven and use the back of a round teaspoon to indent the center of each of the brownie cups. Let them cool in the pan for 10 minutes.
- Use a paring knife to help pop them out of the pan and transfer them to a cooling rack to cool completely before frosting.
- While they are cooling, cream the butter on low speed with a paddle attachment until pale and creamy.
- Slowly add in 3 cups of powdered sugar and 3 tbsp heavy cream a little at a time, alternating between each, while mixing on low over the course of about 3 minutes.
- If your frosting needs a more stiff consistency, gradually add remaining powdered sugar. For a thinner frosting, add the remaining heavy cream gradually, a little at a time.
- Add vanilla, salt, and green food coloring then whip on high speed for 2 minutes until light and fluffy.
- Fill a piping bag fitted with a large star tip (such as a Wilton 1M or 2D) with the frosting.
- Pipe the frosting onto the cooled brownies, twisting back and forth slightly to create a conical Christmas tree shape, starting wide at the base and tapering upwards.
- Top with holiday sprinkles immediately after piping each tree to ensure they stick, then enjoy!
Notes
- I typically use an 18-ounce Ghirardelli Double Chocolate Mix, which yields about 36 brownie bites. Other brownie mixes will also work, but the exact yield might vary slightly.
- Store these festive brownie bites in an airtight container at room temperature for up to 5 days. For optimal freshness, ensure the container is well-sealed.
- It’s crucial to add sprinkles immediately after piping the buttercream onto each brownie tree. Homemade buttercream frosting tends to form a slight crust quickly, which can make it difficult for sprinkles to adhere if you wait too long.
Did You Make This Recipe?
Don’t forget to share it with me on Instagram @sugarandsoulco and follow on Tiktok @sugarandsoulco and Pinterest @sugarandsoulco for more!
Pin Recipe
Share Recipe