
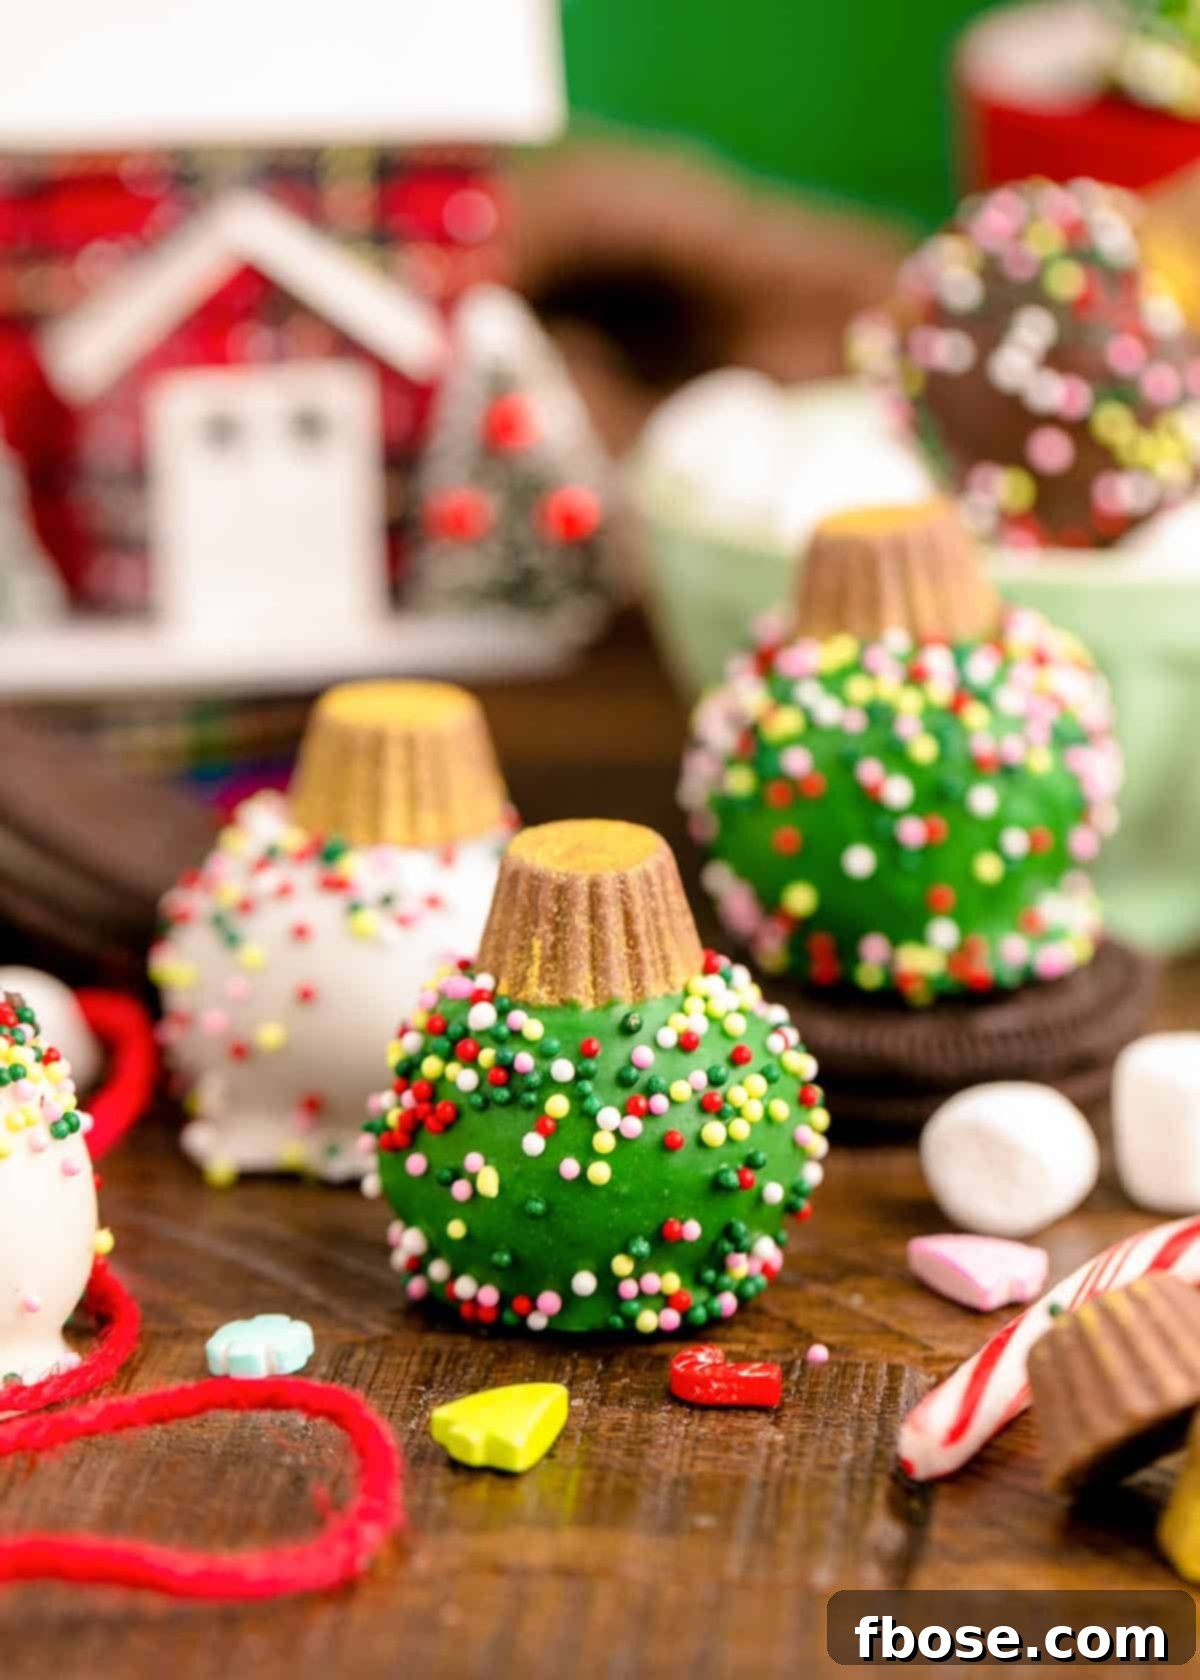
Oreo Ball Ornaments are more than just a sweet treat; they’re a delightful invitation to create lasting holiday memories. These fun, festive, and incredibly easy no-bake delights require only a handful of ingredients, finishing with vibrant edible color spray and charming sprinkles. This recipe promises an exciting, mess-free activity for the entire family, perfect for adding a touch of homemade magic to your holiday celebrations.
As the festive season approaches, the quest for simple yet impressive holiday treats becomes a delightful challenge. If you’re looking to expand your repertoire of seasonally fun goodies, consider exploring other vibrant options like Grinch Cake Balls or a batch of Christmas Chex Mix! Both are bursting with holiday colors and flavors, guaranteed to bring that special festive spirit to any gathering.
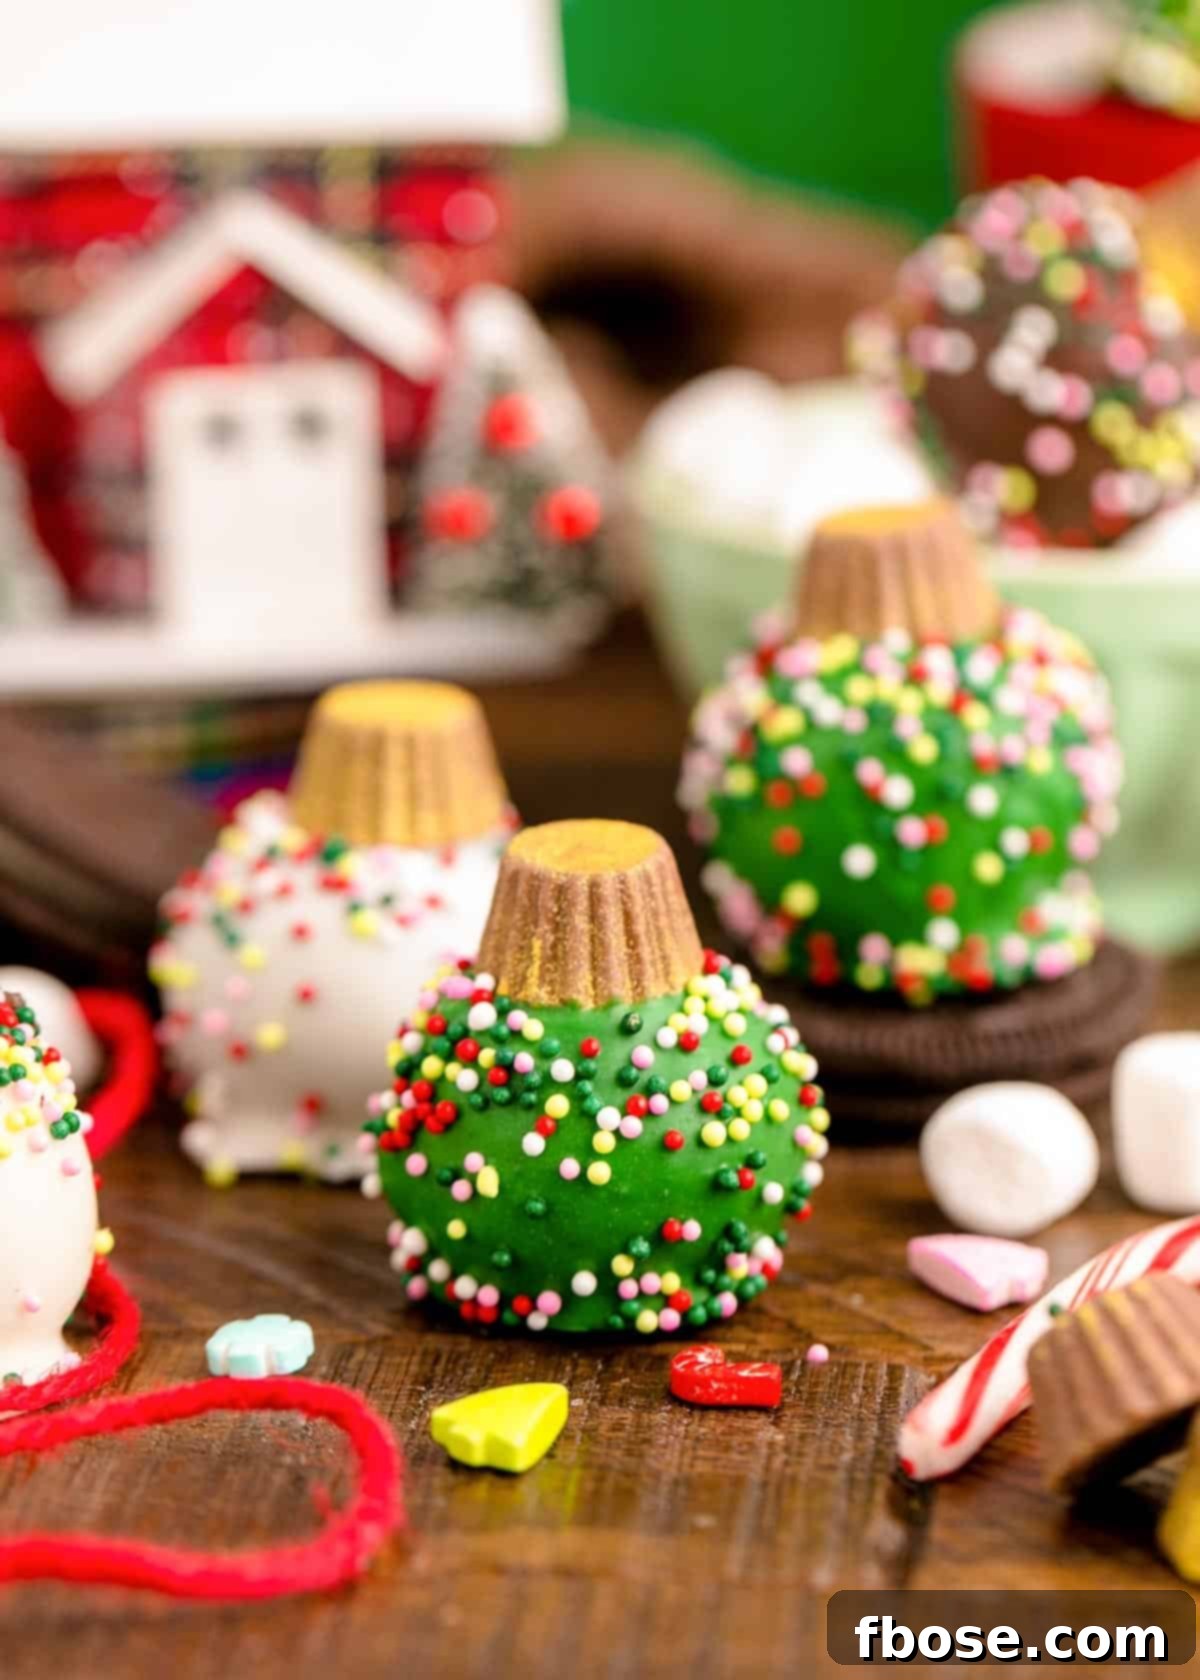
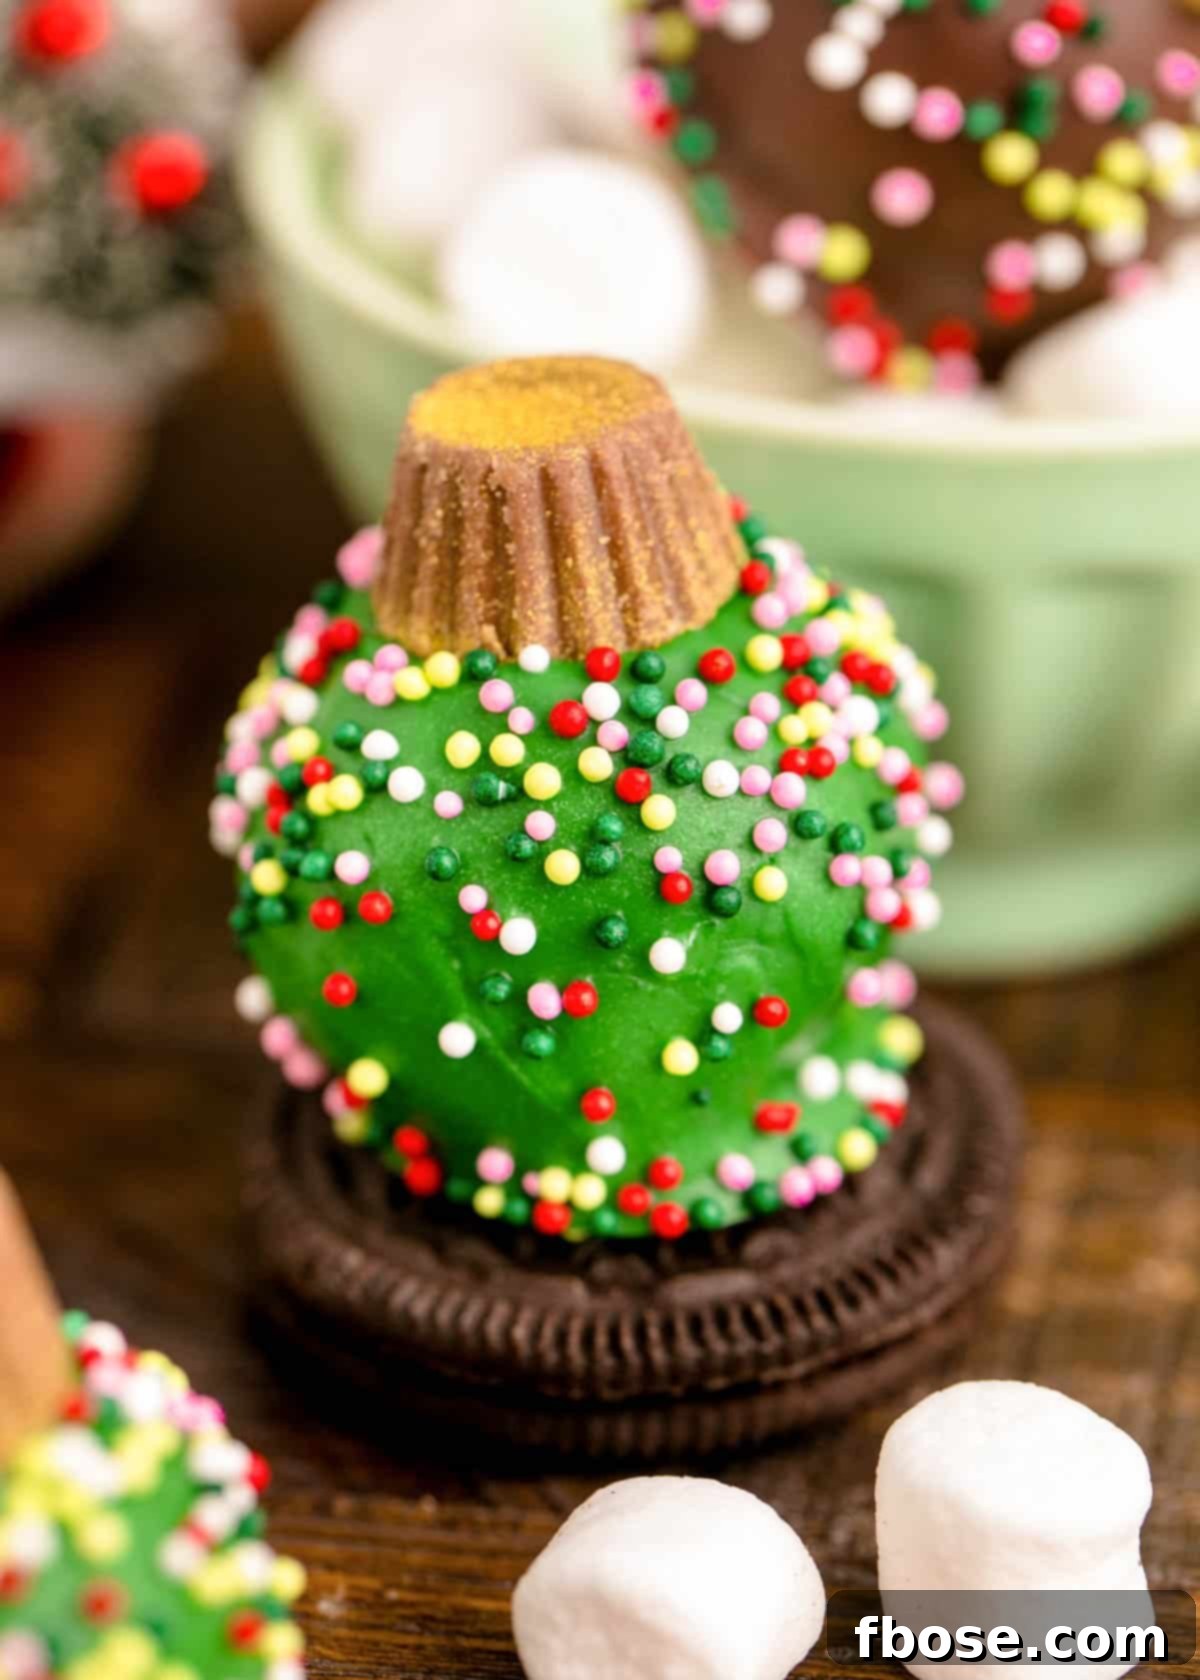
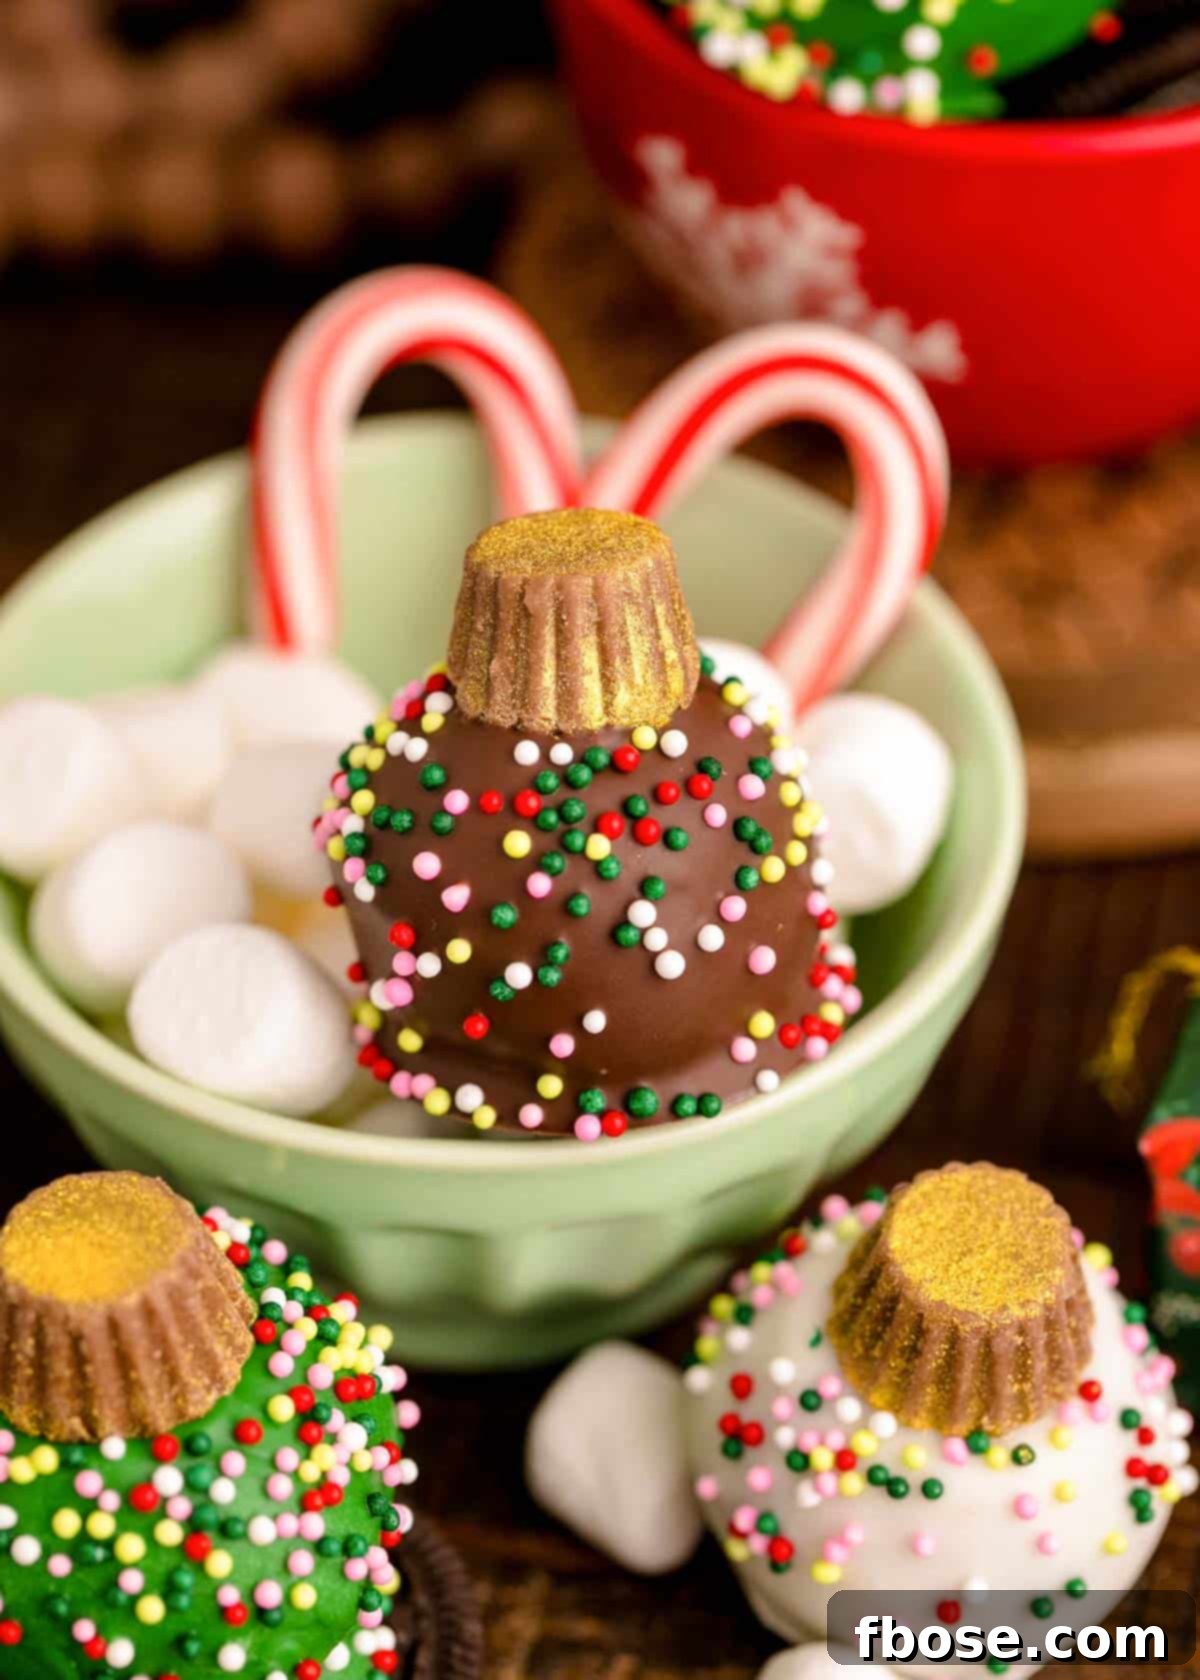
Transform your dessert table into a winter wonderland with these irresistibly delicious and adorably festive Oreo Ball Ornaments! This remarkably easy-to-follow recipe leverages the classic appeal of America’s favorite sandwich cookie, blended with creamy cream cheese, coated in luscious melted chocolate, topped with miniature Reese’s Peanut Butter Cups, and adorned with cheerful sprinkles. It’s a treat that captures the essence of holiday joy in every bite.
The beauty of this holiday recipe lies in its simplicity. With minimal ingredients and a no-bake approach, it’s designed to provide maximum festive fun with minimal cleanup. This means more quality time spent making cherished memories with your loved ones and less time worrying about kitchen chaos. Imagine the smiles as everyone gathers to create their own edible ornament masterpieces!
The Irresistible Charm of Oreo Ball Ornaments
These Oreo Ball Ornaments aren’t just visually appealing; they offer a delightful sensory experience that makes them truly irresistible during the holidays. From their satisfying crunch to their creamy center, they are designed to please every palate.
Taste Profile: A Symphony of Sweet and Tangy
Despite the filling for these truffles being composed of just two core ingredients, the flavor is surprisingly complex and utterly delicious. The iconic chocolatey, cream-filled Oreos are finely crushed and then expertly combined with softened cream cheese. This magical pairing creates a filling that is both rich and decadent from the chocolate and cream, balanced perfectly by a subtle tangy sweetness from the cream cheese. Each bite offers a harmonious blend that’s then enveloped in a smooth, sweet chocolate coating.
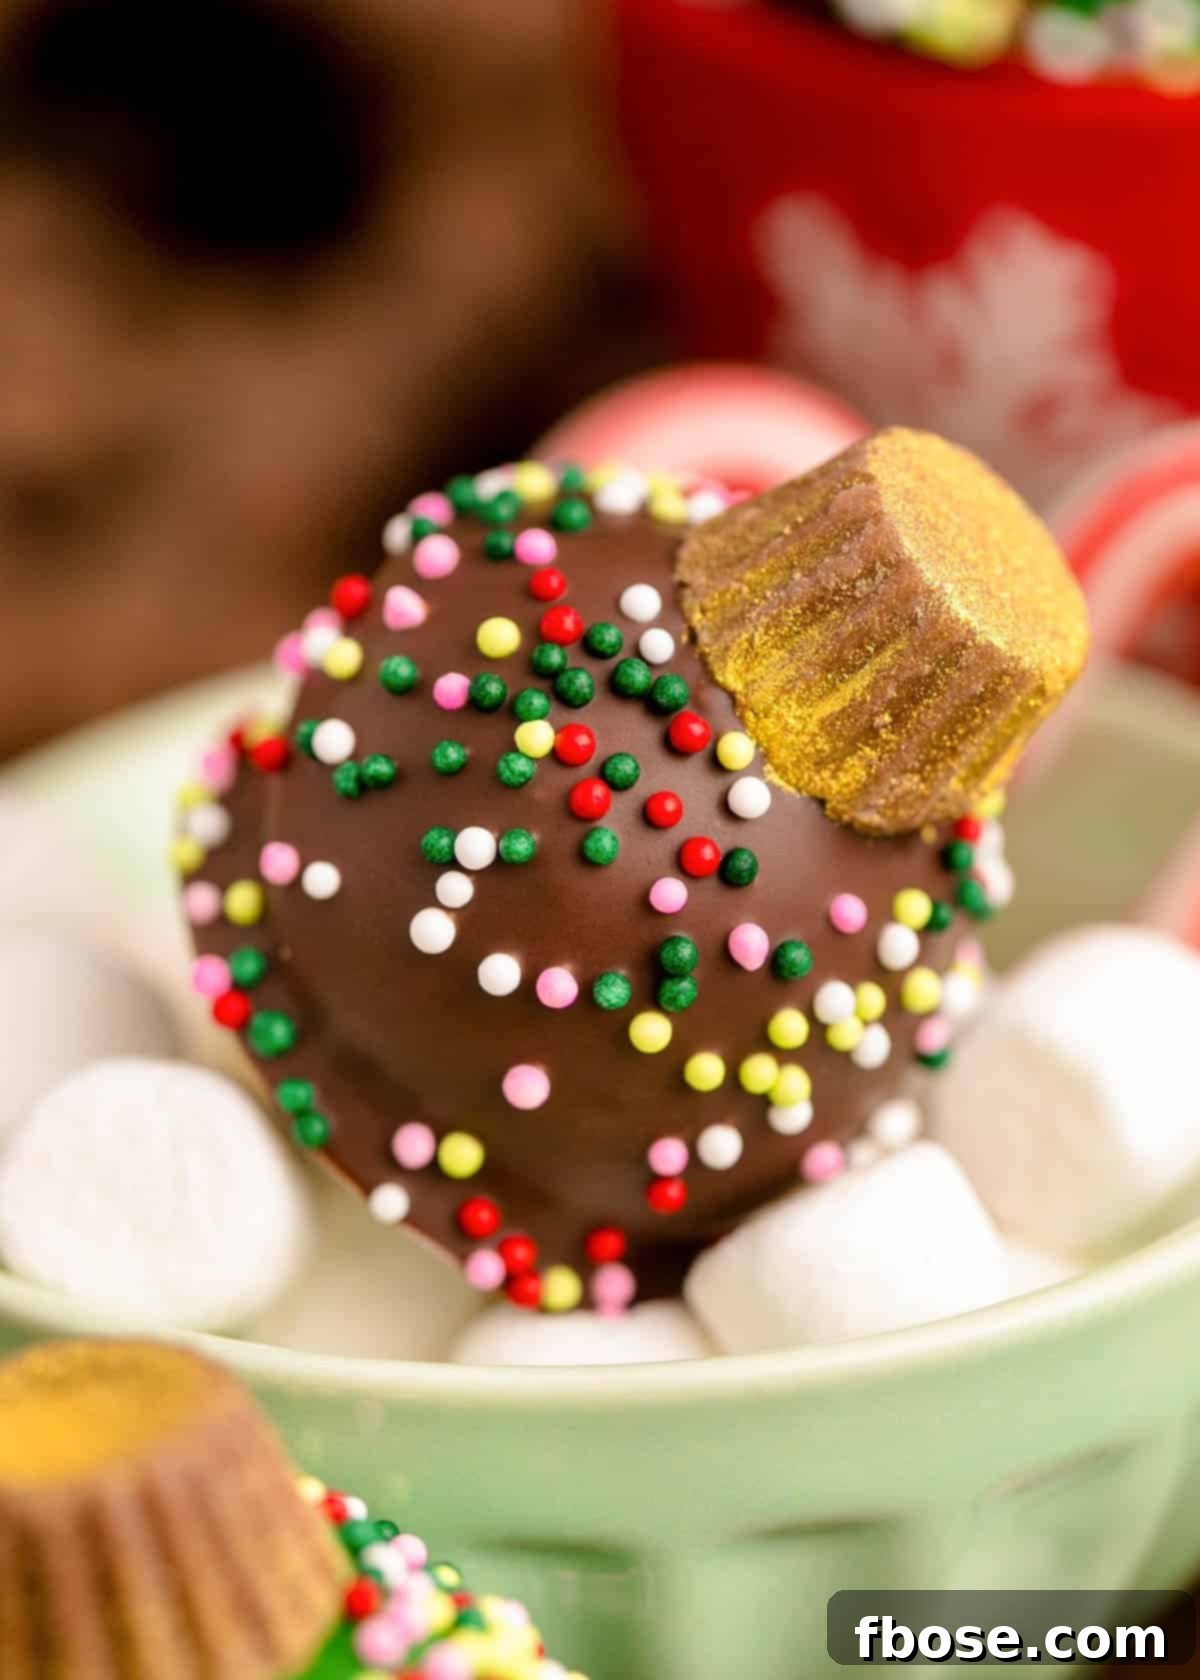
The addition of Reese’s Mini Cups introduces an exciting dimension of flavor. That classic peanut buttery taste provides a delightful contrast, along with a slight salty kick that beautifully complements the sweetness of the Oreo-cream cheese core and the chocolate shell. The overall experience is a heavenly fusion of chocolate, cream, and peanut butter – a combination that’s incredibly hard to resist and will have everyone reaching for more!
Texture: A Delightful Play of Contrasts
The texture of these handheld treats is a masterclass in delightful contrasts. You’ll first encounter the smooth, firm exterior of the hardened chocolate coating, which gives a satisfying snap upon the first bite. Beneath this, the creamy, dense filling, made from crushed Oreos and cream cheese, provides a soft, melt-in-your-mouth experience. This luxurious creaminess is perfectly juxtaposed with the crisp texture of festive sprinkles and the slight chewiness of the Reese’s Cup topping. The interplay of smooth, soft, and crunchy elements creates an engaging and highly enjoyable mouthfeel that elevates these simple truffles to a gourmet-like experience.
Oreos are truly a versatile ingredient, making it incredibly easy to craft charming holiday treats with minimal effort and mess. Beyond these delightful Oreo Ornaments, you can also whip up other festive variations like Festive Christmas Oreo Balls (4 Ingredient Oreo Truffles), customized with an array of fun sprinkles. For an even cuter twist, Oreos can be transformed into adorable Oreo Penguin Cookies or charming Easy Oreo Snowman Cookies. The best part about the penguin and snowman cookies is that their similar ingredient lists mean you can often prepare them simultaneously, maximizing your holiday baking efficiency!
Essential Kitchen Tips for Crafting Perfect Holiday Truffles
Achieving perfection with your Oreo Ball Ornaments is easier than you think with these expert kitchen tips. Following these guidelines will ensure a smooth, delicious, and beautifully decorated batch of holiday truffles.
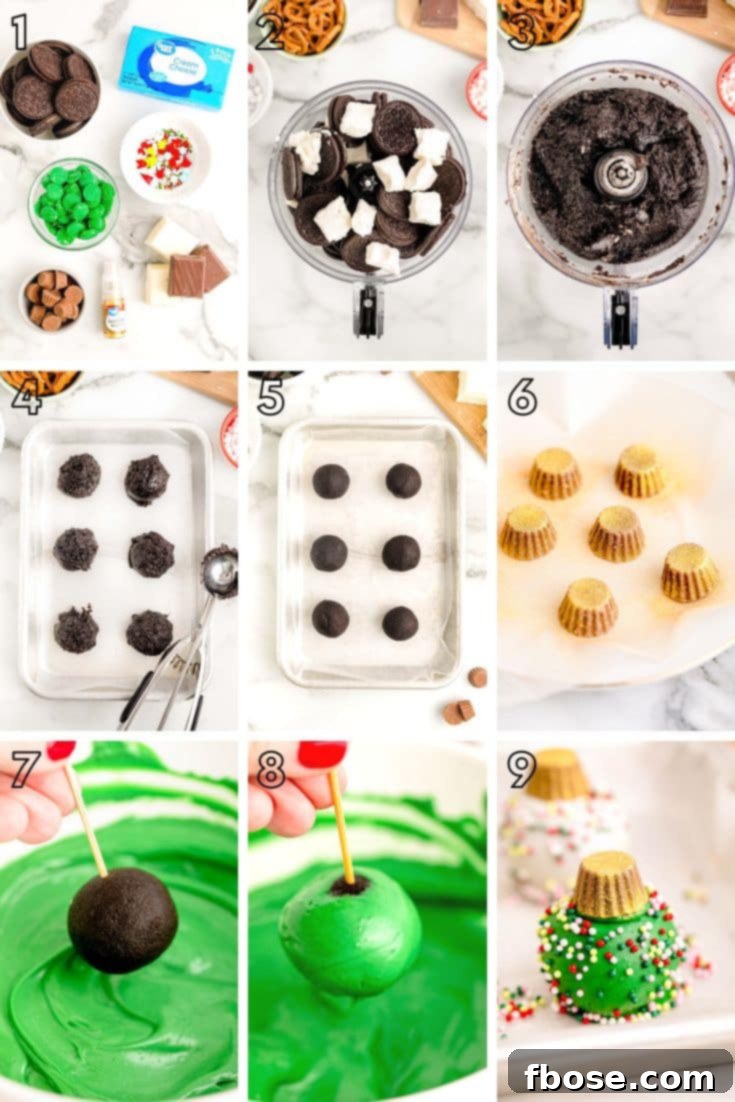
- Creating the Perfect Filling: A food processor is your best friend for making the creamy, consistent filling. For optimal blending, I recommend layering the ingredients: start with half of the softened, cubed cream cheese, then add a layer of Oreos, followed by the remaining cream cheese and Oreos. This method helps the ingredients incorporate evenly and prevents the mixture from getting stuck. Since the filling is quite thick, be prepared to pause the food processor a few times to scrape down the sides, ensuring everything is thoroughly mixed until smooth. The goal is a uniform, pliable dough-like consistency.
- Effortless Portioning: To ensure all your truffles are consistently sized and visually appealing, a 1-inch cookie scoop is invaluable. It takes the guesswork out of portioning, leading to uniform balls that will chill and dip more evenly. After scooping, gently roll each portion between your palms to create a perfectly smooth, round ball. This also helps compact the mixture, preventing crumbling.
- Strategic Chilling for Dipping Success: Once you’ve rolled all your Oreo balls, place the baking sheet into the freezer for about 15-20 minutes. This quick chill helps them firm up considerably, making them much easier to dip into the melted chocolate. However, exercise caution: avoid over-freezing. If the temperature difference between the frozen Oreo balls and the warm melted chocolate is too drastic, it can lead to thermal shock, causing the chocolate coating to crack as it sets. A slightly firm, but not rock-hard, truffle is ideal.
- Pre-Spraying for Pristine Decoration: For the Reese’s Mini Cups that act as the “caps” of your ornaments, it’s best to spray them with edible color mist *before* you begin the main recipe. Arrange them on wax paper, wide end down, and give them an even coat. Allowing them ample time to dry will prevent smudging and ensure a vibrant, clean finish when you’re ready to place them on your dipped truffles.
- Working in Small Batches: When it comes to dipping and decorating, working in small batches is key to success. I recommend taking out only about 3-5 Oreo balls from the freezer at a time. This allows you to dip them, promptly place a Reese’s Mini Cup on top, and decorate with sprinkles or other embellishments before the chocolate coating has a chance to harden. This methodical approach is especially helpful if you’re new to decorating truffles, giving you plenty of time to let your creative juices flow without the stress of rapidly setting chocolate.
- Melting Chocolate Like a Pro: Whether using a microwave or a double boiler, melt your chocolate coatings carefully. When using a microwave, heat in 30-second intervals, stirring thoroughly after each, until smooth. Avoid overheating, which can cause the chocolate to seize or burn. For a double boiler, ensure no water gets into the chocolate, as this will also cause seizing. A smooth, fluid consistency is crucial for an even coating.
- Mastering the Dipping Technique: For a clean, complete coating, use a fork or a specialized dipping tool to submerge each Oreo ball. Allow any excess chocolate to drip off by gently tapping the fork against the side of the bowl. This prevents puddles of chocolate at the base of your truffles.
- Efficient Decorating: Once dipped, place the truffle back on the wax paper-lined baking sheet. Immediately add your Reese’s cap and sprinkles. If you’re using various sprinkles, have them ready in small bowls. You can even roll the chocolate-coated ball gently in a shallow dish of sprinkles for full coverage, or sprinkle them on top by hand for a more controlled design.
Creative Ways to Enjoy and Share Your Oreo Ball Ornaments
These festive Oreo Ball Ornaments are not only a joy to make but also incredibly versatile in how they can be enjoyed and shared, adding a touch of sweetness to any holiday occasion.
- A Magical Decorating Party: Turn the creation of these ornaments into a delightful event! Host a decorating party with your family, or invite your children and their friends over for an afternoon of creative fun. Set up a “decoration station” with an array of colorful sprinkles, 2D icing decorations, edible glitter, and tubes of cookie icing. Let everyone unleash their inner artist, designing their own unique edible ornament. It’s a fantastic way to foster creativity and build cherished holiday memories.
- Thoughtful Homemade Gifts: These charming truffles make for the most heartwarming homemade gifts. Once a batch is complete and fully set, carefully place a few into clear cello bags. Cinch them closed with festive colored twine or beautiful holiday ribbon for an elegant touch. These thoughtful gifts are perfect for neighbors, co-workers, postal workers, teachers, or anyone who deserves a little extra holiday cheer. They show a personal touch that store-bought gifts often lack.
- The Star of Parties and Potlucks: Since this recipe yields a generous amount—almost two dozen delightful Oreo Ball Ornaments—they are absolutely perfect for bringing to holiday parties, potlucks, or family gatherings. Arrange them artfully on a tiered platter or a festive tray, and watch as they quickly become the most popular item on the dessert table. Their eye-catching appearance and irresistible flavor ensure they’ll disappear in no time!
- A Dazzling Dessert Table Centerpiece: Don’t just serve them; showcase them! Arrange your finished Oreo Ball Ornaments on a cake stand, nestled among fresh evergreen sprigs, miniature pinecones, or shiny Christmas baubles (non-edible, of course). The vibrant colors and festive shapes will make them a stunning and edible centerpiece for your holiday dessert spread.
- Perfect Pairing Suggestions: These sweet treats are wonderful on their own, but they also pair beautifully with a variety of beverages. Serve them alongside a warm mug of rich hot chocolate, a comforting cup of coffee, a glass of cold milk, or even a festive holiday punch. The contrasting flavors and temperatures enhance the overall experience.
Frequently Asked Questions About Oreo Ball Ornaments
How To Store Oreo Ball Ornaments
To keep your Oreo Ball Ornaments fresh and delicious, store them in a single, flat layer within an airtight container. Place the container in the refrigerator, where they can be enjoyed for up to 2 weeks. If you need to store multiple layers, be sure to separate them with sheets of parchment paper. This prevents the truffles from sticking together and helps preserve their beautiful decorations.
Can I Make This Oreo Balls Recipe Without A Food Processor?
Absolutely! While a food processor makes the job quickest, it’s not essential. You have a couple of excellent alternatives:
- Using a Blender: If your blender has a pulsing option, you can use it to finely crumble the Oreos. Be careful not to over-process, as you want crumbs, not a paste.
- Manual Crushing: For a hands-on approach, place the Oreos into a gallon-sized Ziploc bag. Squeeze out all excess air and seal it securely. Then, using a rolling pin, roll over the cookies until they form fine crumbs. Once you have your cookie crumbs, transfer them to a bowl with the softened cream cheese. An electric mixer can then be used to thoroughly incorporate the two ingredients until smooth and well combined.
Would Fat-Free Or Reduced Fat Cream Cheese Work In This Recipe?
While this recipe hasn’t been specifically tested with fat-free or reduced-fat cream cheese, it should generally work as a substitute. However, you might notice a slight difference in both the texture and the richness of the flavor. Full-fat cream cheese provides a creamier consistency and a more luxurious, robust taste that enhances the overall indulgence of these truffles. If you opt for a lower-fat version, the balls might be slightly less firm or the flavor less intense, but they should still hold together and be delicious.
Can I Just Dye White Almond Bark With Food Coloring Instead Of Buying Colored Candy Melts?
Yes, you certainly can dye white almond bark or white melting wafers to achieve your desired colors! For best results, I highly recommend using gel food coloring. Gel colors are concentrated and contain very little water, which is crucial when working with chocolate. Adding too many drops of liquid food coloring can introduce too much moisture into the melted chocolate, causing it to “seize up” and become thick, clumpy, and unusable for dipping. Gel food coloring allows you to achieve vibrant hues with minimal additions, keeping your chocolate smooth and perfect for coating your Oreo Balls.
Is It Okay To Freeze Undipped Oreo Balls To Decorate Later?
Absolutely! Freezing undipped Oreo balls is an excellent make-ahead strategy. To do this, first flash-freeze them: place the rolled balls in a single layer on a baking sheet and freeze for about 30 minutes to an hour until firm. Once firm, transfer the frozen Oreo balls to an airtight container or a heavy-duty Ziploc bag, squeezing out any excess air before sealing. They can be stored in the freezer for up to 2 months. When you’re ready to decorate, simply transfer them from the freezer to the refrigerator the night before, allowing them to thaw slowly overnight. This prevents excessive condensation that can occur with rapid thawing.
Can Chocolate Chips Be Used In Place Of Almond Bark And Candy Melts?
While chocolate chips can be used as a substitute for almond bark or candy melts, I generally prefer the latter for achieving the best smooth, professional-looking chocolate coating. Almond bark and candy melts are specifically formulated to melt smoothly and harden with a nice snap, without needing tempering. If you opt for chocolate chips, I highly recommend adding a small amount of coconut oil or vegetable oil (about 1 teaspoon per cup of chocolate chips) to the melted chocolate. This helps thin the chocolate and creates a smoother, more fluid consistency, making it much easier to dip your Oreo balls and achieve a glossy finish.
Let’s Connect!
If you’ve tried this delightful recipe, please let me know how you liked it in the comments below and leave a review. I love hearing from you and seeing your wonderful creations!
Don’t forget to tag me – @sugarandsoulco – on Instagram and Pinterest with your photos or join our Sugar & Soul Show-offs Community and share them there, where you can join our recipe challenges! Your culinary adventures inspire me!
Christmas Ornament Oreo Balls
Pin
Rate
Oreo Ball Ornaments are fun, festive, no-bake treats that are made with only 4 ingredients and finished off with edible color spray and sprinkles! This is an exciting recipe that the whole family can make together!
Ingredients
- 1 (14.3oz.) package Oreos (about 35 Oreos)
- 8 ounces cream cheese, softened and cut into cubes
- 20 Reese’s mini unwrapped cups
- Gold color mist
- 6 ounces white almond bark or white chocolate melting wafers
- 6 ounces chocolate almond bark or chocolate melting wafers
- 12 ounces green candy melts (you can also use red if you prefer)
- Christmas Sprinkles
Instructions
- Line a baking sheet with wax paper and set aside.
- Add the Oreos and softened cream cheese cubes to a food processor and pulse on high until smooth. This may take a while because the ingredients are thick. Be sure to stop the processing every so often to scrape down the sides if needed.
- Portion out the Oreo mixture with a small or medium cookie scoop. Roll each scoop into a smooth ball and place them on the prepared baking sheet. Transfer the baking sheet to the freezer for 15 minutes to firm up.
- Arrange the Reese’s mini cups on wax paper, wide end down, and spray them with the color mist. Let the mist set.
- When 5 minutes remain of the chill time, heat the almond bark and candy melts in separate microwave-safe bowls, one at a time. Each for 1 minute to start, then stir and microwave at additional 30-second intervals, stirring between each one until smooth.
- Remove the Oreo Balls from the freezer and dip them one at a time into the various melted chocolates, coating them completely, and set them back on the baking tray. I like to work in batches of 3, then immediately top the balls with a gold peanut butter cup and decorate with sprinkles quickly before the chocolate hardens.
- Place back in the refrigerator for at least 30 minutes to allow the Oreo balls to completely set up.
Notes
For detailed tips on storage, making without a food processor, cream cheese substitutions, coloring chocolate, freezing, and alternatives for chocolate coating, please refer to the “Frequently Asked Questions” section above in the article.
Nutrition
Calories: 182kcal | Carbohydrates: 18g | Protein: 1g | Fat: 11g | Saturated Fat: 9g | Polyunsaturated Fat: 0.2g | Monounsaturated Fat: 1g | Cholesterol: 11mg | Sodium: 48mg | Potassium: 15mg | Fiber: 0.002g | Sugar: 18g | Vitamin A: 152IU | Calcium: 11mg | Iron: 0.02mg
Did You Make This Recipe?
Don’t forget to share it with me on Instagram @sugarandsoulco and follow on Tiktok @sugarandsoulco and Pinterest @sugarandsoulco for more!
Pin Recipe
Share Recipe