

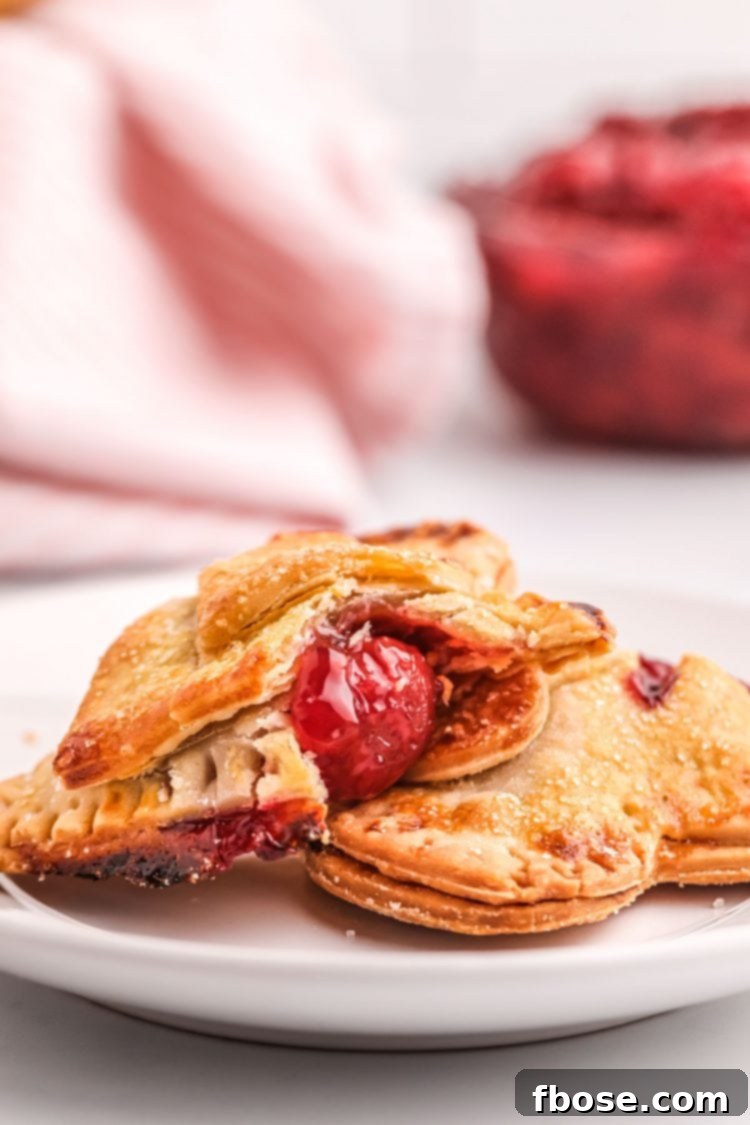
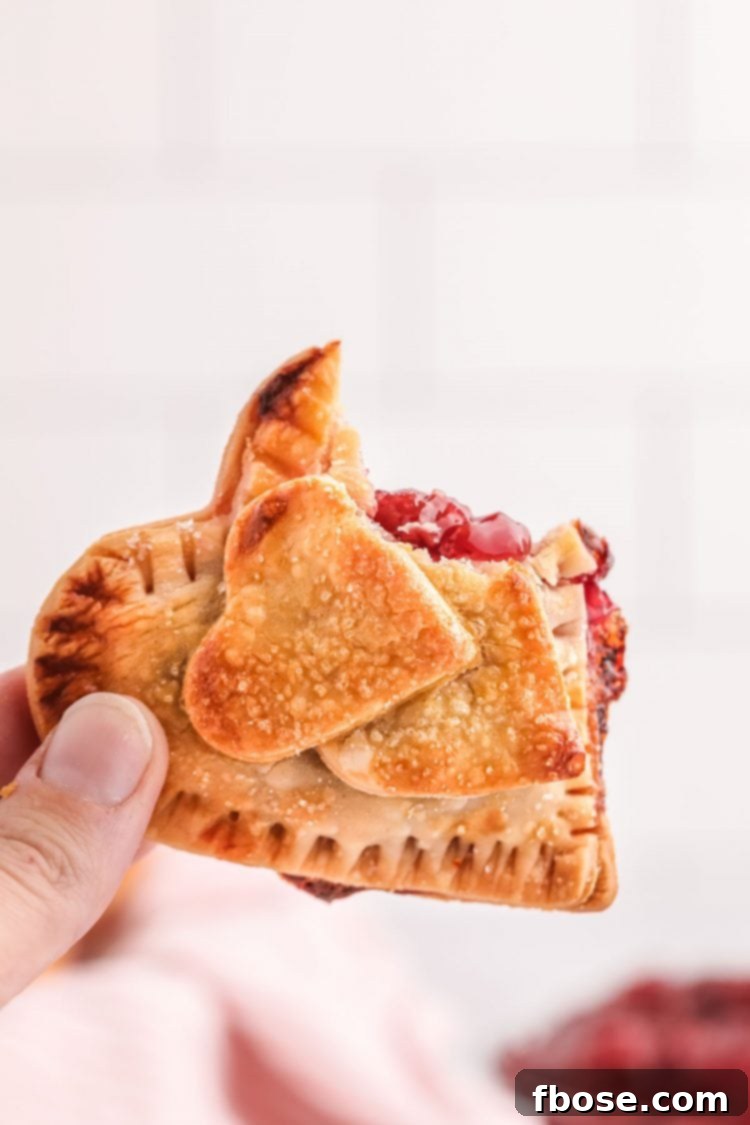
Cherry Hand Pies are an absolute delight, offering the comforting taste of a classic pie in a perfectly portioned, portable package. Each bite reveals a luscious, tart cherry filling, beautifully balanced with just the right amount of sweetness, all nestled within a tender, flaky, and golden-brown heart-shaped crust. These charming handheld desserts are not only incredibly delicious but also visually appealing, often adorned with delicate tiny hearts and a sparkling sugar sprinkle, making them a treat for both the eyes and the palate.
While my Berry Pie often calls my name when a fruit pie craving hits, I’ve been on a mission to expand my repertoire and explore new ways to enjoy these timeless desserts. That’s where these delightful Cherry Hand Pies, alongside my equally charming Apple Hand Pies, come into play. They offer a whimsical and convenient twist on traditional pie, delivering all the same beloved flavors and textures but with an added element of fun and ease. Forget the hassle of slicing and serving a whole pie; these individual portions are perfect for any occasion.

The vibrant, deep red cherry filling paired with the charming heart-shaped crust makes these Cherry Hand Pies an undeniably perfect dessert for Valentine’s Day. Their romantic aesthetic instantly elevates any celebration of love. However, their irresistible taste and sheer convenience will quickly reveal that these delightful treats are destined for more than just a single holiday. They are versatile enough to be enjoyed year-round, whether as a cozy weekend indulgence, a delightful addition to a picnic, or a sweet surprise for friends and family. Once you take that first bite, you’ll understand why these hand pies deserve a permanent spot in your baking rotation.
One of the most appealing aspects of this Cherry Hand Pie recipe is its incredible simplicity and speed. You can have these delectable treats ready to enjoy in just about 35 minutes, utilizing a mere five core ingredients. To make the process even more straightforward and accessible for busy home bakers, this recipe smartly calls for pre-made pie crusts. This simple hack significantly cuts down on prep time without compromising on flavor or texture. However, if you’re a purist or simply prefer the satisfaction of homemade dough, feel free to substitute with your go-to homemade pie crust recipe – the results will be equally spectacular.
If your love for cherries knows no bounds, then you absolutely must explore some of our other cherry-infused creations. Our Cherry Pie Dip recipe offers all the comforting flavors of classic cherry pie, reimagined into a fun, dippable form, perfectly complemented by crisp cinnamon chips. And for those who adore the creamy, dreamy combination of cherry and cheesecake, these **Cherry Cheesecake Cookies** are truly mouthwatering and not to be missed!
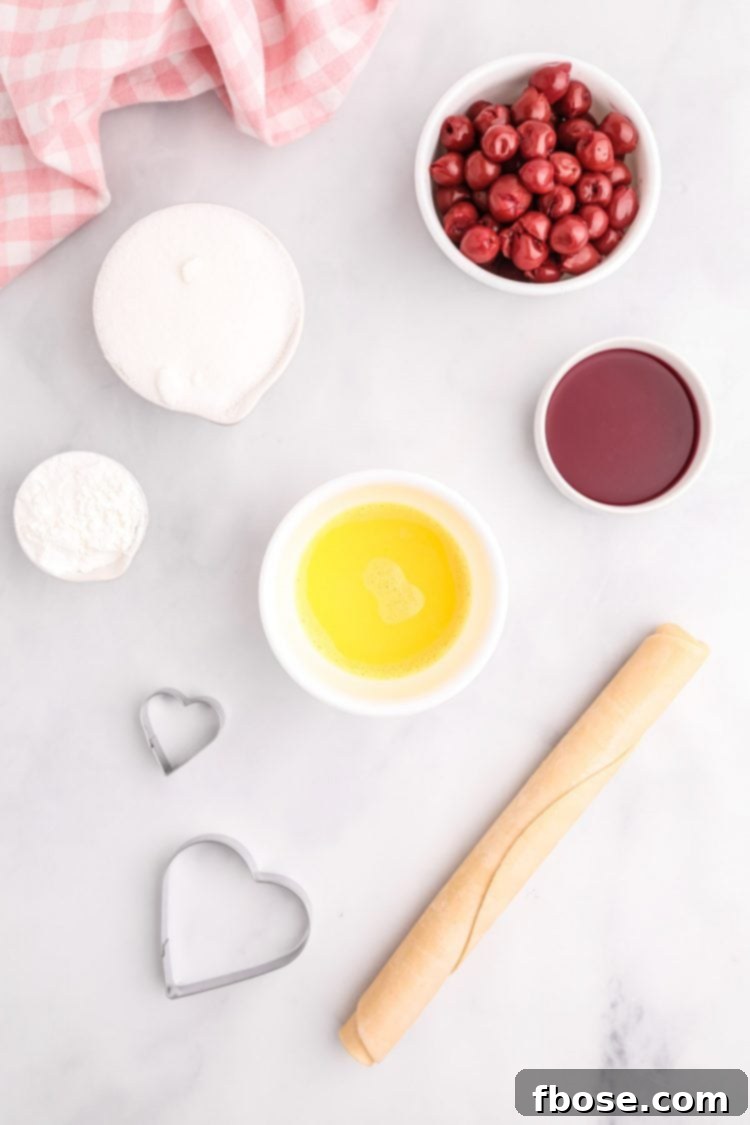
Essential Ingredients for Perfect Cherry Hand Pies
Crafting these delightful cherry hand pies requires a handful of simple ingredients, each playing a crucial role in achieving that perfect balance of tartness, sweetness, and flaky texture. Here’s a closer look at what you’ll need to create these irresistible treats:
- Canned Red Tart Cherries: The cornerstone of our delicious filling. These cherries provide a wonderfully tart contrast to the sugar, creating a complex and authentic cherry flavor. You’ll typically find them in the canned fruit section of your grocery store, rather than the baking aisle. For this recipe, we specifically recommend the quality of Oregon brand for their consistent flavor and texture.
- Corn Starch: This essential ingredient is what transforms the juicy cherries into a beautifully thick, luscious, and “ooey-gooey” filling that we all crave in a fruit pie. It ensures the filling sets perfectly, preventing it from being too runny and keeping it neatly tucked inside the crust.
- Granulated Sugar: Sugar serves a dual purpose in this recipe. It’s incorporated into the filling to sweeten the naturally tart cherries, creating a harmonious flavor profile. Additionally, a sprinkle of granulated sugar on top of the crust before baking contributes to that desirable golden-brown finish and adds a lovely textural crunch.
- Premade Pie Crusts: For ultimate convenience and a significant time-saver, refrigerated premade pie crusts are a fantastic choice. Simply unroll and cut! However, if you have a cherished homemade pie crust recipe, or simply prefer the taste and texture of scratch-made dough, feel free to use your favorite instead. Both options yield delicious results.
- Egg Wash: A simple mixture of one egg beaten with a tablespoon of water, this egg wash is brushed onto the pie crusts just before baking. It’s the secret to achieving that gorgeously shiny, rich golden-brown color and a crisp exterior that makes these hand pies look as good as they taste.
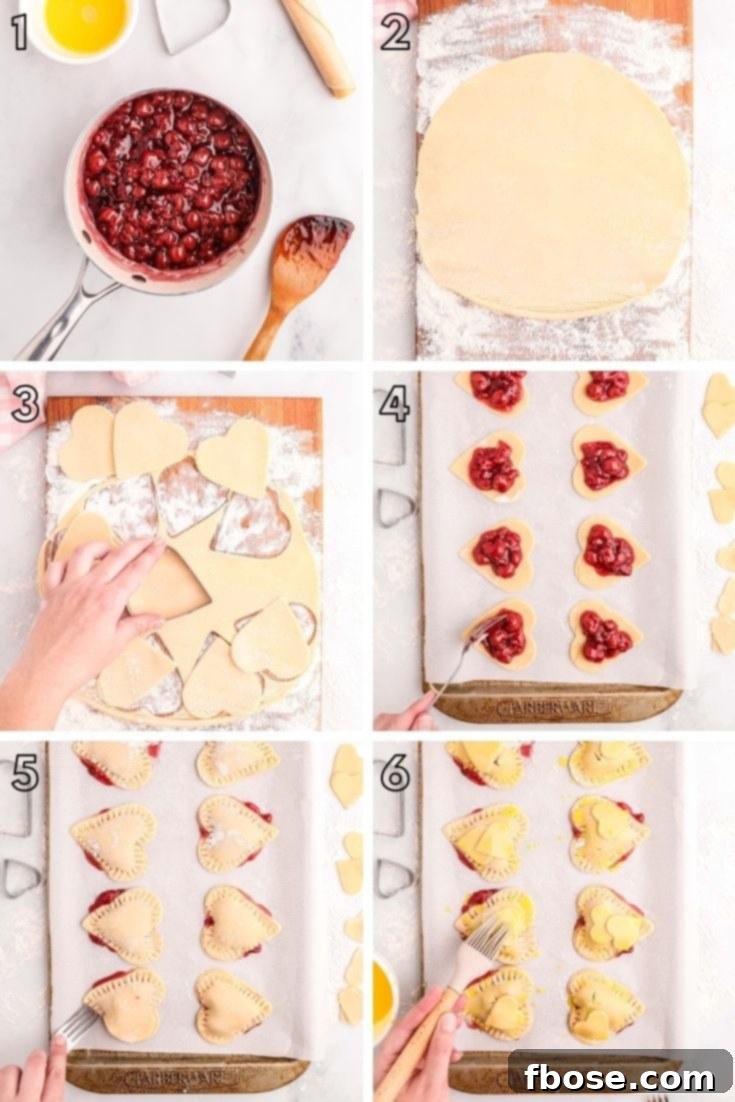
Crafting Your Own Delicious Cherry Heart Hand Pies
Don’t let the idea of making individual pies deter you; this recipe is designed for simplicity, making the process as easy and straightforward as the ingredients themselves. You’ll be surprised how quickly these charming treats come together!
- Prepare the Irresistible Filling: Begin by combining the canned cherries (along with about half of the liquid from the can), granulated sugar, and cornstarch in a medium saucepan. Cook this mixture over medium heat, stirring frequently, for approximately 10 minutes. Watch for it to thicken and start bubbling, indicating it’s ready. Once thickened, remove it from the heat and allow the cherry pie filling to cool completely. This cooling step is crucial to prevent the filling from being too runny when assembling your pies.
- Shape the Perfect Crusts: Lightly flour a clean surface and carefully unroll your premade pie crusts. Using a 3-inch heart-shaped cookie cutter, cut out as many large hearts as possible from the dough. These will form the top and bottom of your hand pies. If you wish to add a decorative touch, use a smaller heart-shaped cutter to create tiny hearts from the leftover dough scraps; these will adorn the tops of your assembled pies.
- Assemble with Care: Line a baking sheet with parchment paper. Carefully place half of your large heart-shaped dough cutouts onto the prepared baking sheet. Spoon a generous amount of the cooled cherry filling onto the center of each heart, making sure to leave a clear border around the edges. This space is essential for proper sealing.
- Seal and Decorate: Take another large heart-shaped dough cutout and gently place it on top of each filled heart, creating a neat sandwich. Using the tines of a fork, carefully crimp the edges of the dough together. This not only seals the filling inside but also creates a beautiful decorative pattern. Now, if you made them, gently place the smaller heart cutouts on top of the filled hand pies for an extra touch of charm.
- Brush and Sprinkle for Golden Perfection: In a small bowl, whisk together one large egg with one tablespoon of water to create an egg wash. Using a pastry brush, lightly coat the top of each hand pie with this egg wash. Immediately after brushing, sprinkle generously with the remaining granulated sugar. This step is key for achieving that beautiful golden-brown crust and a delightful sugary crunch.
- Bake to Golden Goodness: Preheat your oven to 425°F (220°C). Bake the hand pies for 18 to 20 minutes, or until their crusts are beautifully golden brown and the filling is bubbly. Once baked, remove them from the oven and allow them to cool slightly on the baking sheet for 5 to 10 minutes before transferring them to a wire rack to cool further. Enjoy them warm or at room temperature!
Storing and Reheating Your Cherry Heart Hand Pies
Proper storage ensures your delicious hand pies remain fresh and enjoyable for longer, allowing you to savor their delightful taste over several days. Simply place your baked cherry hand pies in an airtight container and store them in the refrigerator for up to 5 days. For longer storage, you can also freeze them. Once completely cooled, wrap individual hand pies tightly in plastic wrap, then place them in a freezer-safe bag or container. They can be stored in the freezer for up to 3 months. Thaw in the refrigerator overnight before reheating.
Warm or Cold: How to Enjoy Your Hand Pies
The beauty of these cherry hand pies lies in their versatility; they are utterly delicious whether enjoyed warm or cold. We particularly love them fresh out of the oven, when the filling is warm and gooey and the crust is perfectly crisp. However, they are equally delightful after they’ve cooled down to room temperature, offering a slightly firmer texture that’s perfect for on-the-go snacking.
To reheat any leftover hand pies and bring them back to their peak deliciousness, we recommend placing them in a preheated oven at 325 degrees Fahrenheit (160°C) for about 15 minutes. This method helps the pie crust regain its wonderful crispiness, as opposed to the microwave which can sometimes make the crust soft. Serve them alongside a scoop of vanilla ice cream for an extra special treat!
Customizing Your Cherry Hand Pies: Substitutions and Variations
While canned tart cherries offer a convenient and consistently delicious filling, you have plenty of options to customize your hand pies or adapt the recipe based on what you have on hand or your personal preferences. The versatility of this recipe means you can easily create different flavor profiles or use fresh ingredients:
- Using Fresh or Frozen Cherries: Instead of canned cherries, you can certainly make your own filling from scratch using fresh or frozen cherries. If using frozen cherries, there’s no need to thaw them beforehand; they can go straight into the saucepan. For both fresh and frozen, you might need to adjust the cooking time slightly and potentially add a touch more sugar, depending on the sweetness of your cherries. A squeeze of lemon juice can brighten the flavor, and a hint of almond extract truly complements cherry desserts beautifully. Combine them with water, almond extract, sugar, and corn starch, cooking until thickened.
- Homemade Cherry Pie Filling: If you already have a tried-and-true homemade cherry pie filling recipe that you adore, you can absolutely use that! Simply prepare your favorite filling and then proceed with the crust cutting, assembly, and baking steps as outlined in this recipe.
- Add a Glaze: For an extra touch of sweetness and a beautiful finish, consider adding a simple glaze. Simply omit the sprinkled sugar before baking. After the pies have cooled slightly, whisk together 1 cup of powdered sugar with 1 ounce of water until smooth. Spoon or brush this glaze over the warm pies and allow it to set for a few minutes. You can also add a drop of almond extract to the glaze for an enhanced flavor.
- Spice It Up: A pinch of cinnamon, nutmeg, or even a tiny dash of clove can add warmth and depth to your cherry filling, especially if you’re making these for fall or winter holidays.
- Other Fruit Fillings: This recipe is incredibly adaptable! Feel free to experiment with other fruit fillings like apples, berries, peaches, or even mixed fruits. Just ensure your chosen fruit is cooked and thickened to a pie-filling consistency before enclosing it in the crust.
Expert Tip: For an extra burst of flavor, consider adding a quarter teaspoon of almond extract to your cherry filling. It beautifully enhances the cherry notes!

Whether you’re looking for a delightful treat to enjoy at home with a cup of coffee, or preparing something sweet and thoughtful to share with a friend, pies have always been a comforting and universally loved dessert. These Cherry Hand Pies are sure to satisfy, but we also encourage you to explore these other fantastic pie recipes that promise equally delicious results and will surely become new favorites:
- Chocolate Cream Pie – Indulge in the rich, velvety, and intensely chocolatey classic dessert that holds a special place in everyone’s heart.
- Strawberry Jello Pie – A refreshing and vibrant pie featuring juicy slices of fresh strawberries, perfectly suspended under a glistening layer of strawberry jello.
- Easy Mini Apple Pies – All the comforting flavors of apple pie packed into charming, individual pie cups with a warm apple and cinnamon filling.
- Peanut Butter Pie – A decadent, creamy peanut butter pie built upon a unique pretzel crust and generously topped with chopped peanut butter cups.
- Meyer Lemon Meringue Slab Pie – A true showstopper for lemon lovers, this pie offers a silky, tangy Meyer lemon filling crowned with a towering, sweet meringue.
Connect With Us!
If you’ve had the pleasure of trying this Cherry Hand Pie recipe, please don’t hesitate to share your thoughts and experiences in the comments section below, and remember to leave a star rating. Your feedback is invaluable to us!
We’d also love to see your beautiful creations! Tag us – @sugarandsoulco – on Instagram and Pinterest with your photos, or become a part of our vibrant Sugar & Soul Show-offs Community on Facebook, where you can share your culinary triumphs and even join our fun recipe challenges!

Cherry Hand Pies
Rebecca Hubbell
Dessert
American
15 minutes
20 minutes
35 minutes
10 pies
Cherry Hand Pies have a tart cherry filling that’s been sweetened with sugar then tucked inside a heart-shaped crust! These baked handheld desserts showcase a beautiful golden-brown crust with tiny hearts that have been sprinkled with sugar!
Ingredients
- 1 (14.5 oz.) can red tart cherries
- ¼ cup corn starch
- 1 cup granulated sugar + 2 tablespoons (divided)
- 2 premade pie crusts (or your favorite homemade recipe)
- 1 large egg
- 1 tablespoon water
Instructions
- Preheat the oven to 425°F (220°C). Remove pie crusts from the freezer and allow them to soften slightly at room temperature.
- In a medium saucepan, combine the cherries along with half of the liquid from the can, 1 cup of granulated sugar, and cornstarch.
- Cook over medium heat, stirring frequently, for about 10 minutes, until the mixture becomes thick and begins to bubble.
- Remove the filling from the heat and allow it to cool completely before assembling the pies.
- On a lightly floured surface, carefully roll out the pie crusts. Use a 3-inch heart-shaped cookie cutter to cut out heart shapes from the dough.
- Transfer half of the cut-out hearts to baking sheets lined with parchment paper.
- Spoon the cooled cherry pie filling onto the center of each heart on the baking sheet, leaving a small border around the edges.
- Using a smaller heart cookie cutter, cut tiny decorative hearts out of the remaining large heart shapes or dough scraps.
- Cover each cherry-filled heart with another of the larger heart pieces, then seal the edges by gently pressing with a fork. Place the tiny decorative hearts on top if desired.
- In a small bowl, whisk together the large egg and 1 tablespoon of water to create an egg wash. Brush each hand pie with the egg wash before sprinkling generously with the remaining 2 tablespoons of granulated sugar.
- Bake for 18 to 20 minutes, or until the hand pies are beautifully golden brown. Allow them to cool for 5 to 10 minutes before serving.
Notes
- Red Tart Cherries are typically found in the canned fruit section (not the baking aisle). We recommend Oregon brand for this recipe.
- If you prefer, you can substitute store-bought pie dough with your favorite homemade pie crust recipe.
- Store leftover hand pies in an airtight container in the refrigerator for up to 5 days.
- For a beautiful glazed finish, omit the sprinkled sugar before baking. After the pies cool, whisk together 1 cup powdered sugar and 1 oz. water until smooth, then spoon or brush over the baked pies and let set.
Nutrition Facts
- Calories: 279 kcal
- Carbohydrates: 42g
- Protein: 3g
- Fat: 11g
- Saturated Fat: 3g
- Cholesterol: 16mg
- Sodium: 170mg
- Potassium: 45mg
- Fiber: 1g
- Sugar: 20g
- Vitamin A: 24IU
- Calcium: 10mg
- Iron: 1mg
Did You Make This Recipe?
Don’t forget to share your delightful creations with us! Tag us on Instagram @sugarandsoulco and follow us on Tiktok @sugarandsoulco and Pinterest @sugarandsoulco for even more inspiring recipes and baking tips!
Pin Recipe
Share Recipe