
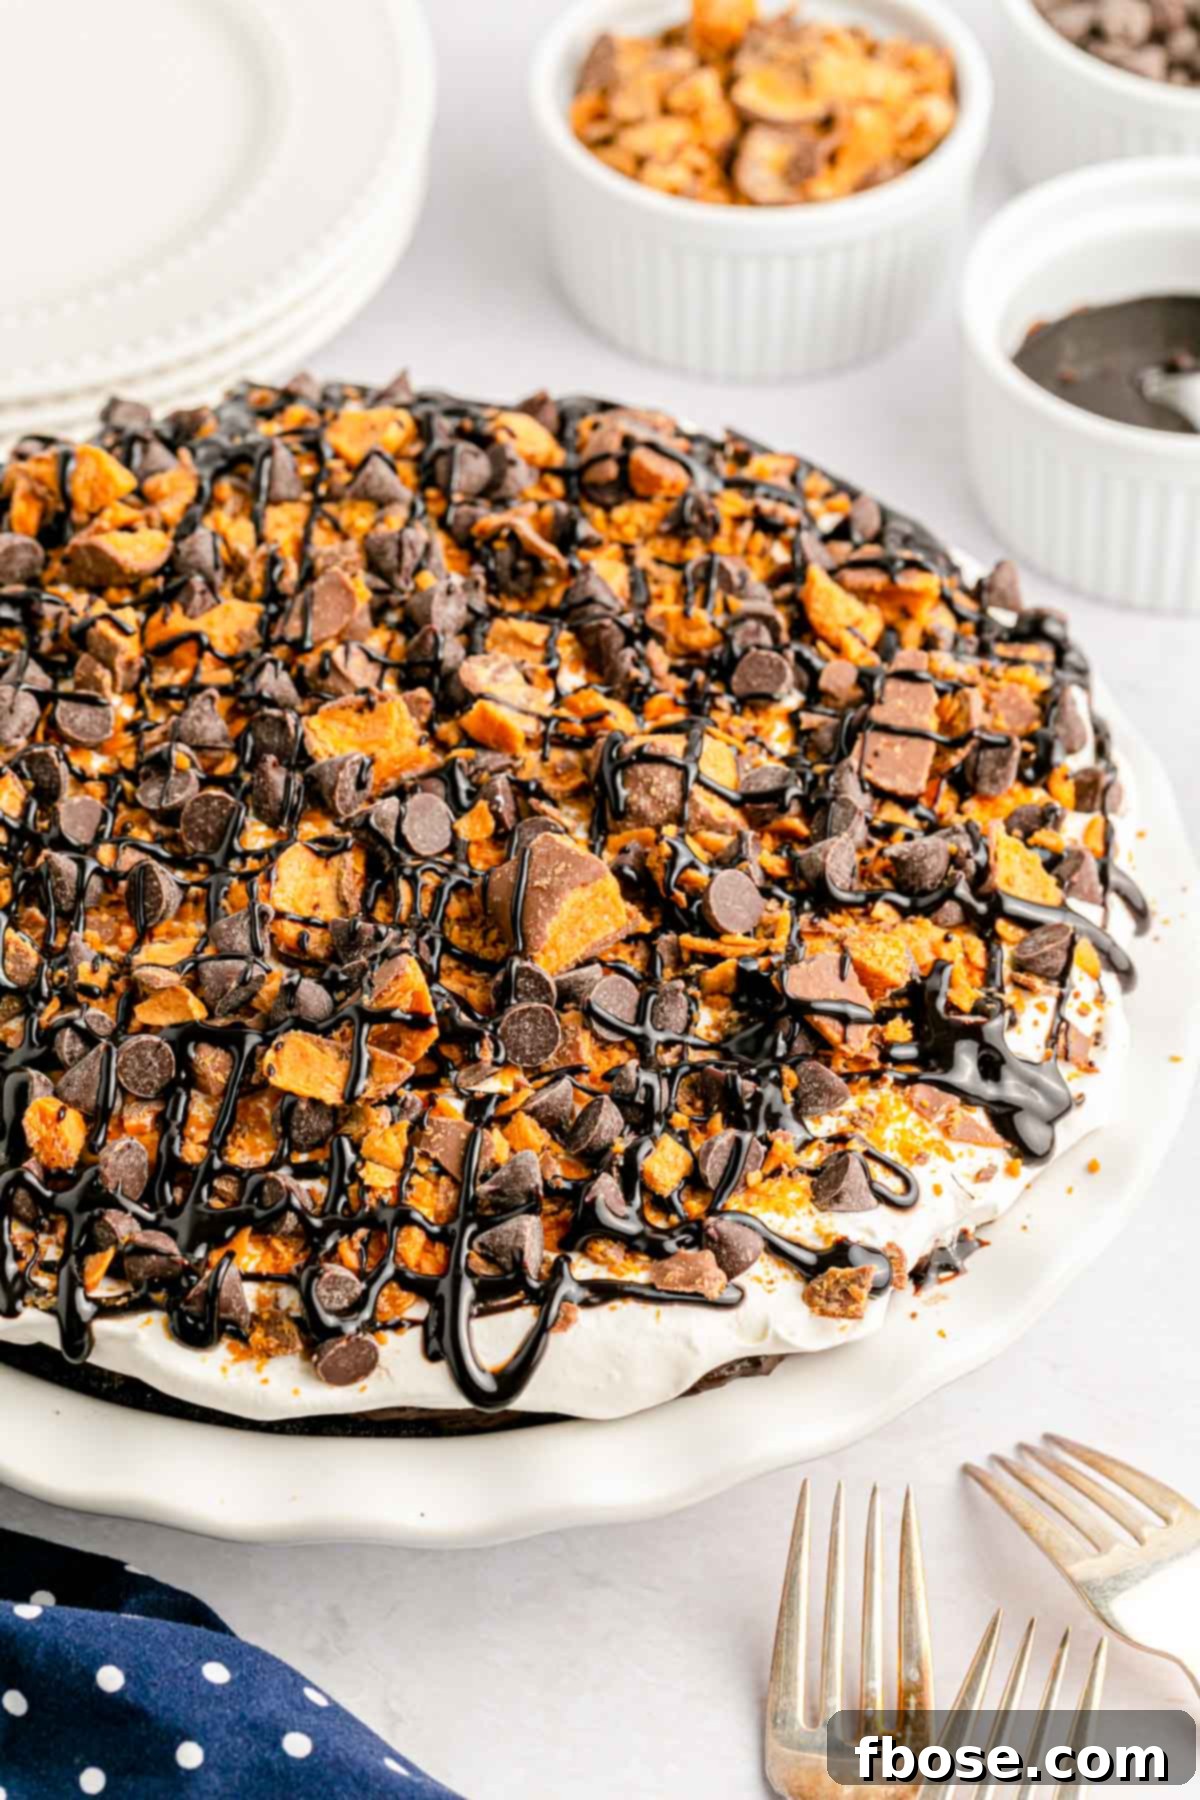
This **No Bake Butterfinger Pie** is an irresistibly decadent and exceptionally easy-to-make dessert, perfect for any occasion! Featuring a rich, chocolatey Oreo crust and layers of creamy peanut butter, smooth chocolate fudge, and a generous amount of chopped Butterfinger candy bars, this chilled treat promises a symphony of flavors and textures. In just about 20 minutes of active preparation time, you can create a show-stopping dessert that will amaze your friends and family.
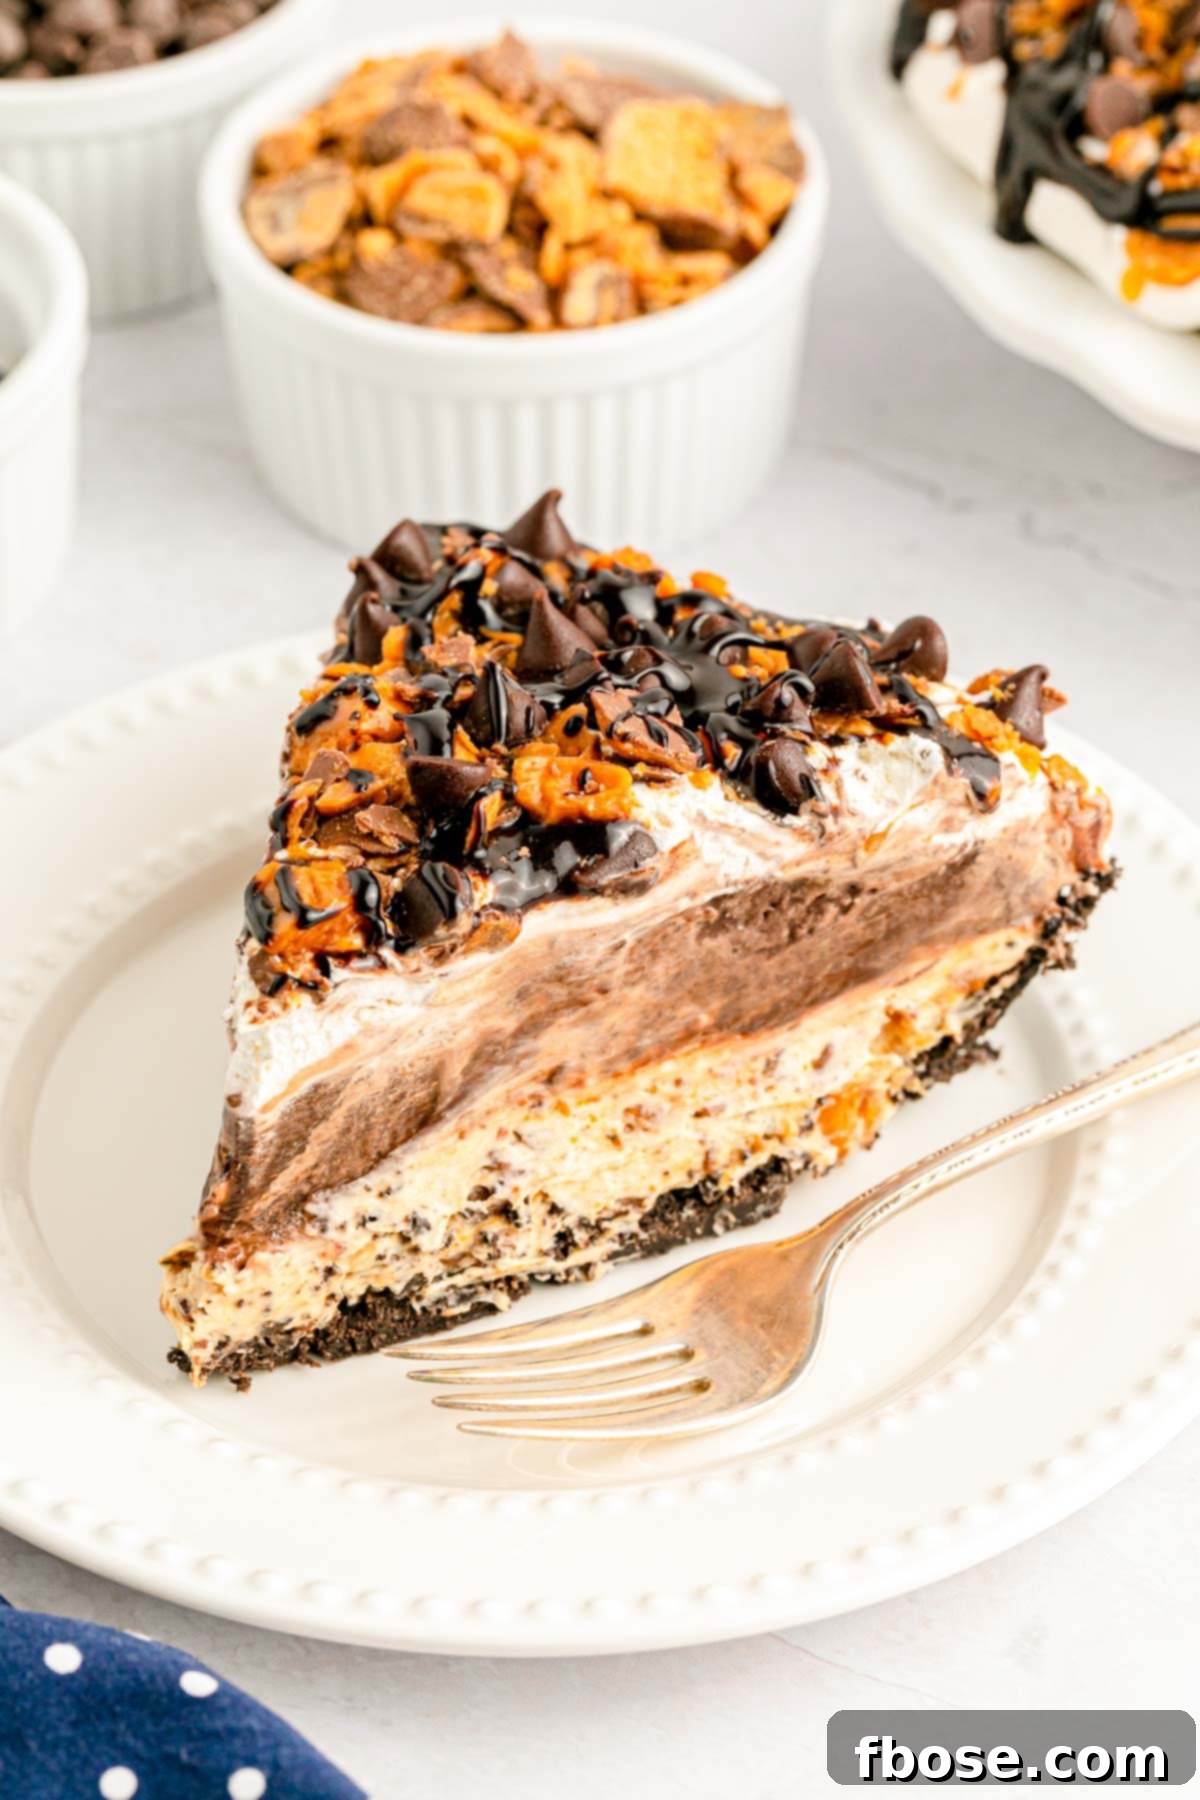
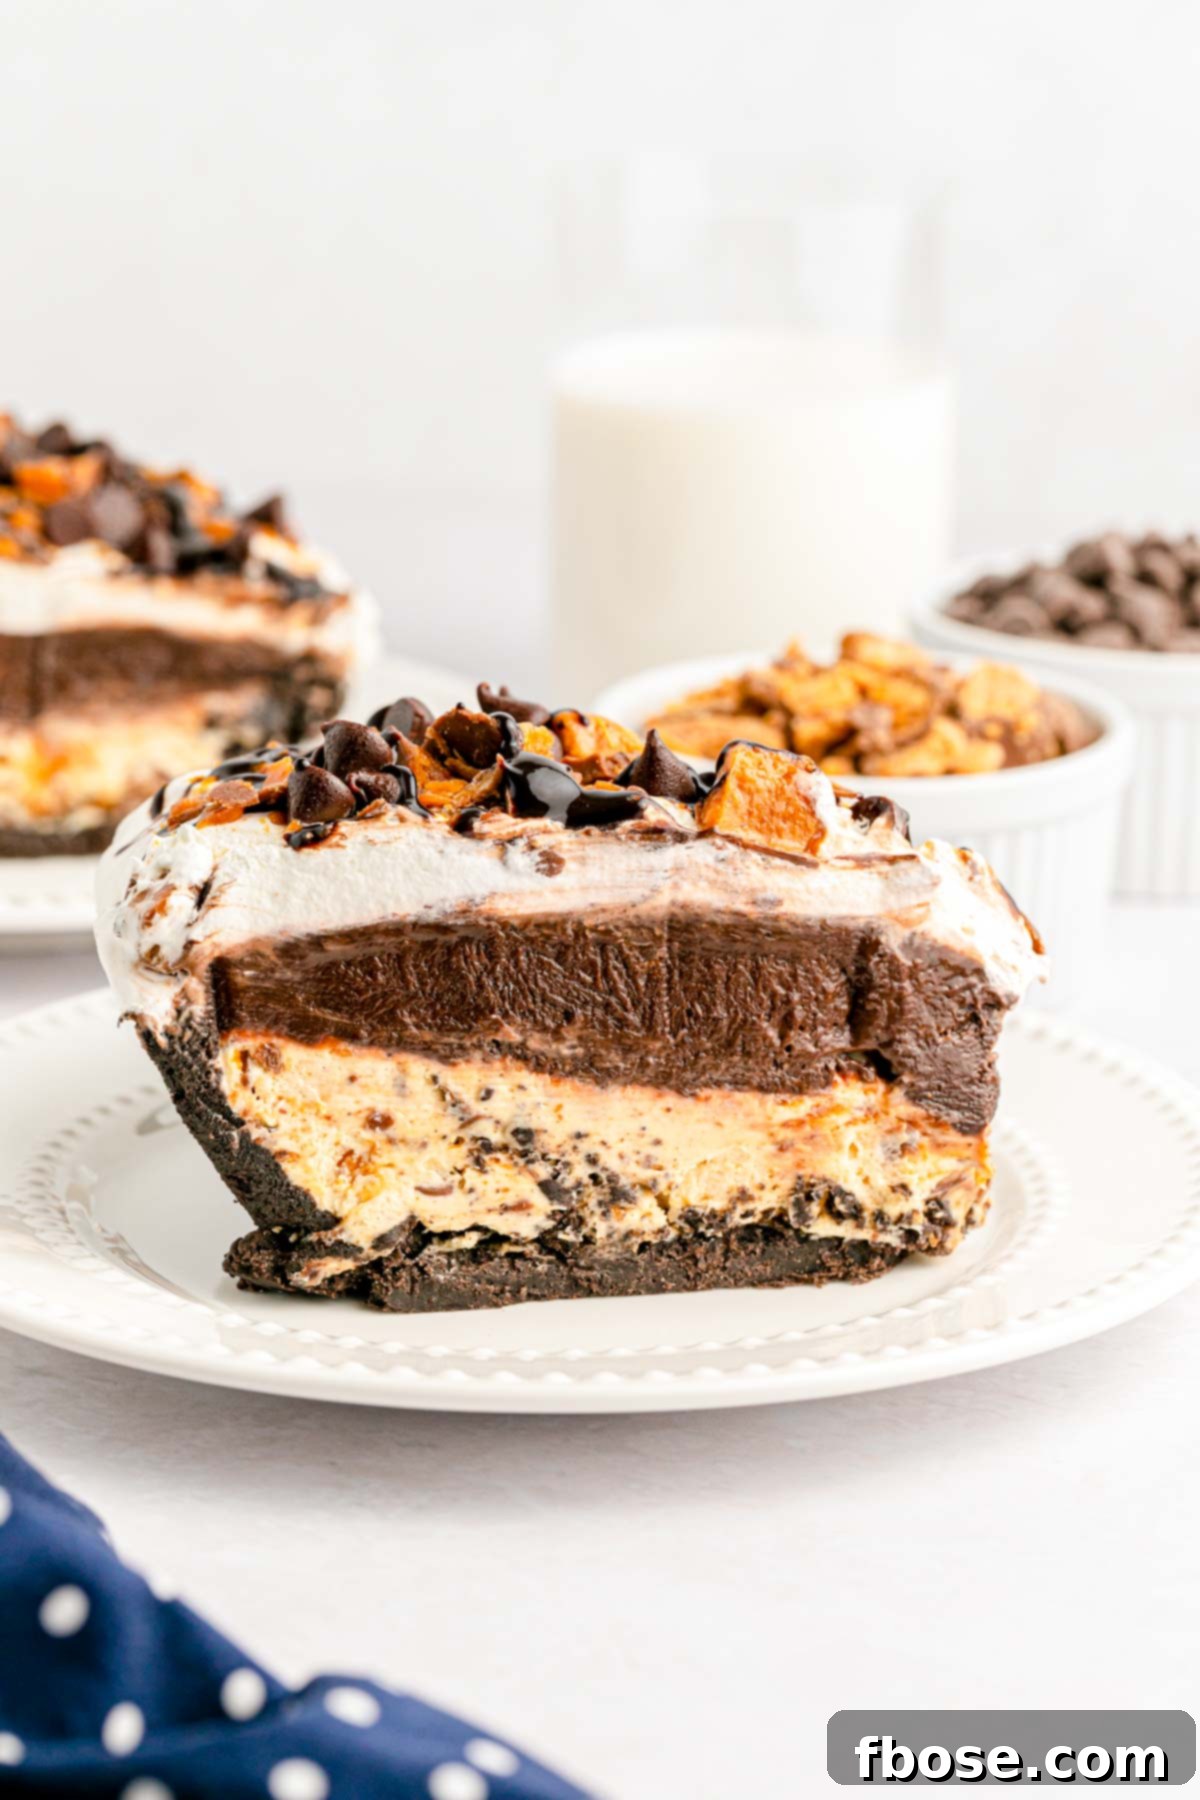
Prepare to delight everyone with this spectacular No Bake Butterfinger Pie! Each slice reveals luscious layers of filling, crowned with an abundance of chopped Butterfinger pieces, delicate chocolate chips, and a final flourish of chocolate syrup. This delightful dessert offers a fantastic balance of sweet and salty, combined with a satisfying crunch that makes every bite truly memorable.
While this chilled treat is a joy to savor year-round, its refreshing nature makes it an exceptionally excellent choice for cookouts, potlucks, and all your cherished summertime gatherings. Imagine the joy of serving a cool, creamy, and crunchy dessert that requires no oven, keeping your kitchen cool even on the hottest days!
Why You’ll Love This No-Bake Butterfinger Pie
This No Bake Butterfinger Pie isn’t just a dessert; it’s an experience. Its effortless preparation belies a complex flavor profile that will leave everyone craving more. Let’s delve into what makes this pie an absolute must-try for any dessert enthusiast.
An Unforgettable Flavor Profile
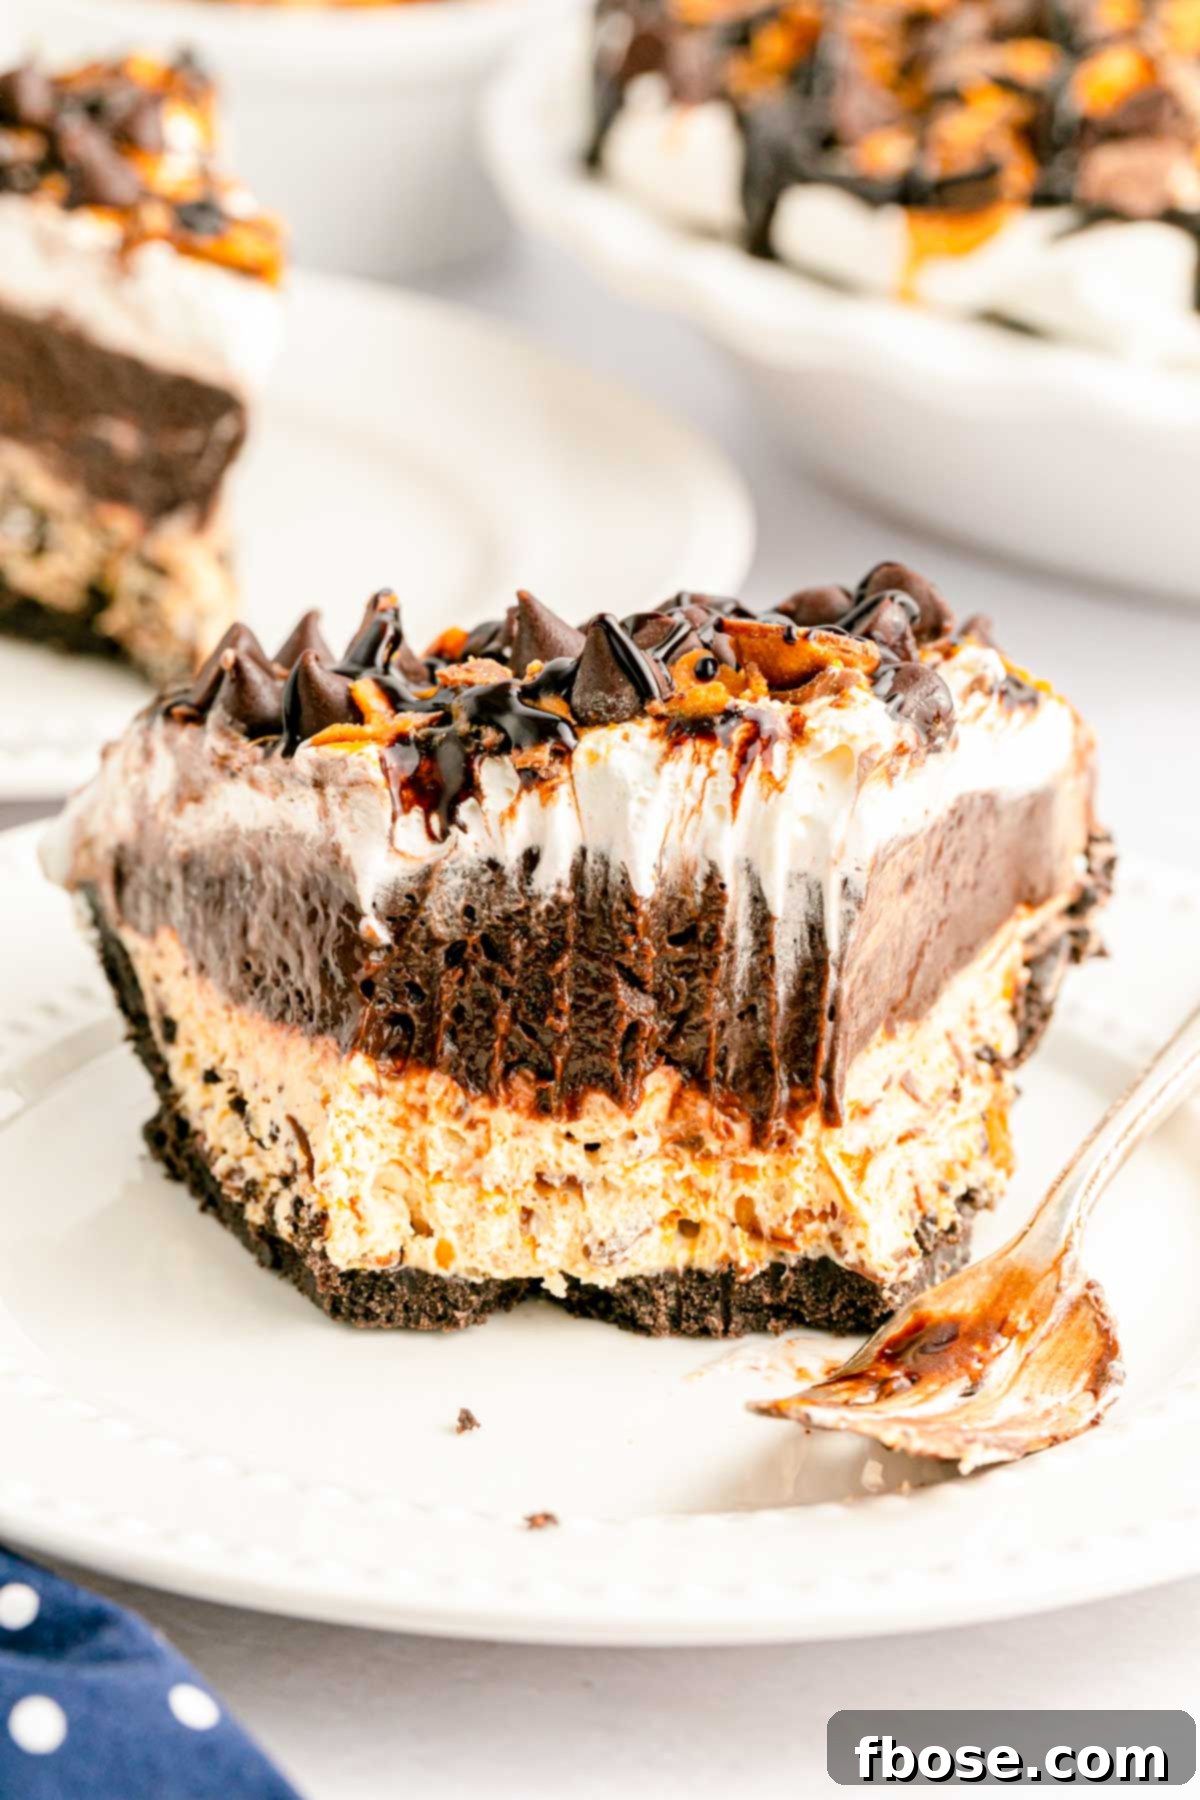
From the very first bite, this pie explodes with a rich, decadent combination of peanut butter and chocolate. The star, of course, is the Butterfinger candy bar, generously chopped and integrated throughout the entire pie, offering its signature crisp, peanut-buttery crunch. This is beautifully complemented by a smooth chocolate fudge pudding layer and a luscious peanut butter cream cheese layer. The interplay between the sweet chocolate, salty peanut butter, and the distinctive toffee-like notes of Butterfinger creates a harmonious flavor sensation that’s deeply satisfying yet surprisingly light.
Effortless Preparation for Any Occasion
One of the biggest advantages of this No Bake Butterfinger Pie is its incredible ease of preparation. With only about 20 minutes of active work, it’s an ideal dessert for busy individuals or for those who prefer to avoid turning on the oven. The simplicity means you can spend less time in the kitchen and more time enjoying the company of your guests. This makes it a perfect dessert for spontaneous gatherings or when you need a delicious treat without the fuss.
Delectable Texture That Impresses
Unlike a traditional no-bake cheesecake, which can sometimes be dense, this Butterfinger pie boasts a “lush” cake-like texture that is remarkably light and airy, yet undeniably rich. Each layer contributes to a delightful mouthfeel: the firm crunch of the Oreo crust, the creamy smoothness of the peanut butter and chocolate layers, and the scattered bits of Butterfinger adding an exciting textural contrast. It’s a sophisticated dessert disguised as a simple, no-bake wonder.
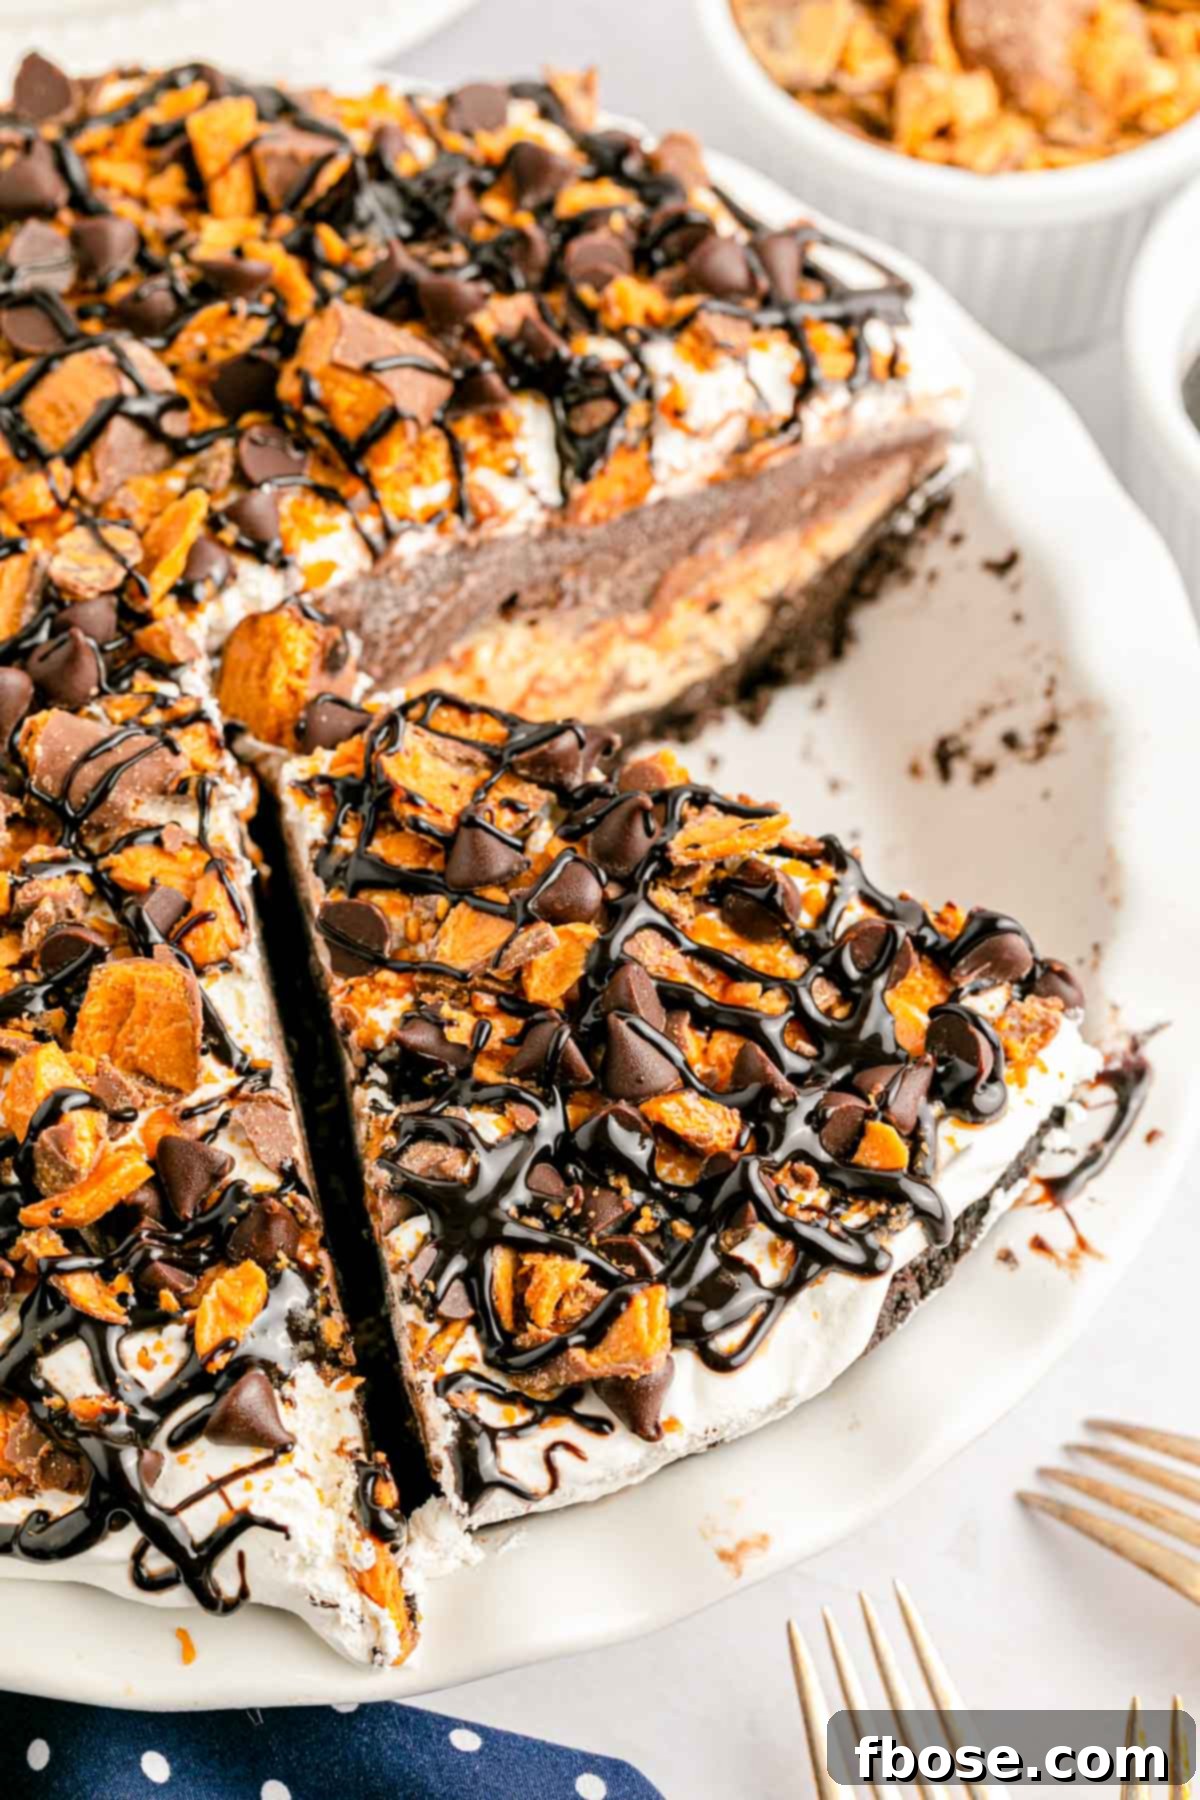
Customize This Butterfinger Pie To Fit Your Own Taste Buds
While this Easy Butterfinger Pie Recipe is absolutely divine as written, I understand that everyone has unique preferences. This recipe is wonderfully versatile, allowing for simple customizations to suit any palate or occasion. Here are some easy ideas to adapt this fantastic pie:
Crust Variations
For the pie crust, the classic Oreo cookie base provides a deep chocolate flavor and a perfect crunch. However, you can certainly experiment with different cookie or cracker bases. A **graham cracker crust** offers a slightly less intense chocolate profile and a buttery sweetness that pairs beautifully with peanut butter. For an even more pronounced peanut butter experience, a **Nutter Butter crust** would be a truly delicious swap, intensifying the nutty flavor. You could even try a **pretzel crust** for an amazing sweet and salty dynamic, adding an unexpected but welcome savory crunch.
Pudding Flavor Swaps
The chocolate fudge pudding layer adds rich depth, but don’t hesitate to try other flavors! Since this recipe uses two packets of pudding mix, you could create a dynamic flavor combination. For example, you could keep one layer of chocolate fudge and introduce an **extra layer of peanut butter flavored pudding** for a double dose of nutty goodness. Other delicious options include **vanilla pudding** for a milder, creamy contrast, or even **butterscotch pudding** for a caramel-like twist that would complement the Butterfinger candy beautifully.
Candy Bar Alternatives
The Butterfinger candy bar is central to this pie’s identity, but if you’re feeling adventurous or simply prefer a different treat, feel free to switch it up! Instead of Butterfinger, consider using **chopped Reese’s peanut butter cups** for an even richer peanut butter and chocolate experience. Other great options could be **chopped Snickers bars** for added nougat and caramel, or **Kit Kat bars** for a lighter, crispier texture. The key is to choose a candy that offers a textural contrast and complementary flavors.
Essential Ingredient Notes for Your Easy No-Bake Butterfinger Pie
To ensure your No-Bake Butterfinger Pie turns out perfectly every time, paying attention to the details of your ingredients is crucial. Here are some important notes and tips to guide you through the process:
- Crushed Butterfinger: The heart of this pie! You might find pre-crushed Butterfinger candy in the baking aisle or near ice cream toppings at your grocery store. However, if not readily available, it’s incredibly easy to make your own. Simply place whole Butterfinger bars in a food processor and pulse until you achieve your desired crumb size, or use a sturdy Ziploc bag and a rolling pin or kitchen mallet to crush them. Freshly crushed candy often offers a better texture.
- Peanut Butter Preference: For the best results and proper setting, stick to processed peanut butter brands like JIF or Skippy. These brands have a consistent texture and oil content. All-natural peanut butter, while delicious, tends to separate its oil, which can prevent the pie filling from setting up or holding together properly, resulting in a less stable dessert.
- Cream Cheese Quality: In this delightful Butterfinger Candy Bar Pie, always opt for full-fat cream cheese. It provides the necessary richness, body, and structure for the creamy layer. Using whipped cream cheese or a low-fat variety will significantly alter the texture of this dessert, making it too soft and potentially preventing it from holding its shape when sliced. Ensure it’s softened to room temperature for smooth blending.
- Crust Tricks for No-Bake Success: Since this is a no-bake recipe, the Oreo crust relies on solidified butter to hold its form. It is absolutely essential that the pie crust is thoroughly chilled in the refrigerator before you add any filling layers. This chilling period allows the butter to firm up, creating a stable and cohesive base. If you prefer a firmer, baked crust, you can bake it at 350 degrees F (175 degrees C) for 10 minutes. If you choose this option, remember to cool it completely on a wire rack before proceeding with the filling, as a warm crust will melt your creamy layers.
If you’re having trouble locating boxes of pre-made Oreo crumbs in the baking aisle, don’t fret! A fantastic alternative is to use about 28 regular-sized Oreos. Simply place them in a food processor and pulse until they are transformed into fine, uniform crumbs. This is a quick and easy way to get the perfect base for your pie.
How To Make Butterfinger Pie: A Step-by-Step Guide
Crafting this incredible No-Bake Butterfinger Pie is a straightforward process, built on simple steps that yield impressive results. Follow these instructions to create your own decadent dessert.
Step 1: Prepare the Oreo Crust
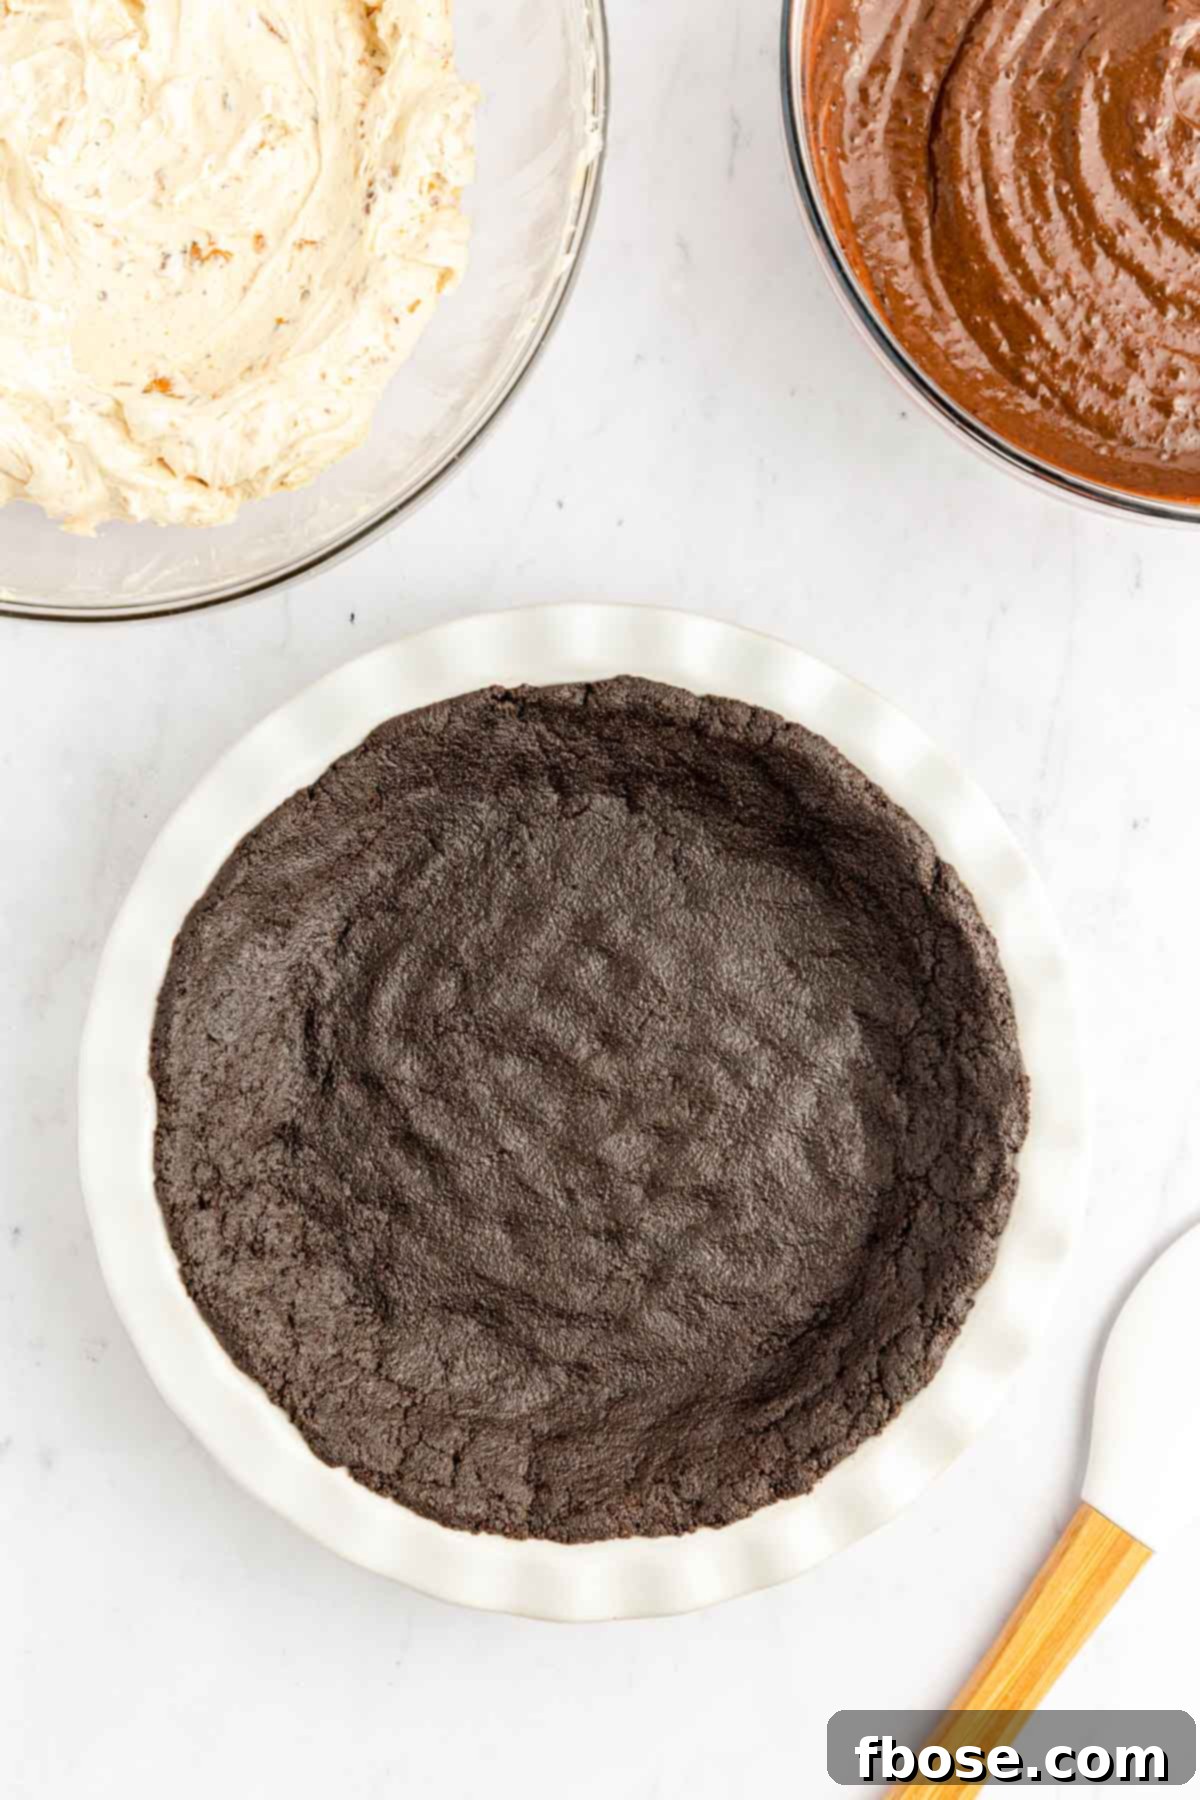
Begin by lightly greasing a 9-inch deep-dish pie pan with cooking spray; a springform pan can also be used for easier serving. In a medium mixing bowl, combine 2½ cups of Oreo cookie crumbs, ½ cup of melted (but cooled) unsalted butter, and ¼ teaspoon of salt. Mix these ingredients thoroughly until the crumbs are evenly moistened and resemble wet sand. Pour this mixture into your prepared pie pan and press it firmly and evenly into the bottom and up the sides of the pan. The key is to create a compact base. Once pressed, place the crust in the refrigerator to chill while you prepare the delicious fillings. This chilling step is crucial for the crust to set properly.
Step 2: Create the Creamy Peanut Butter Cheesecake Layer
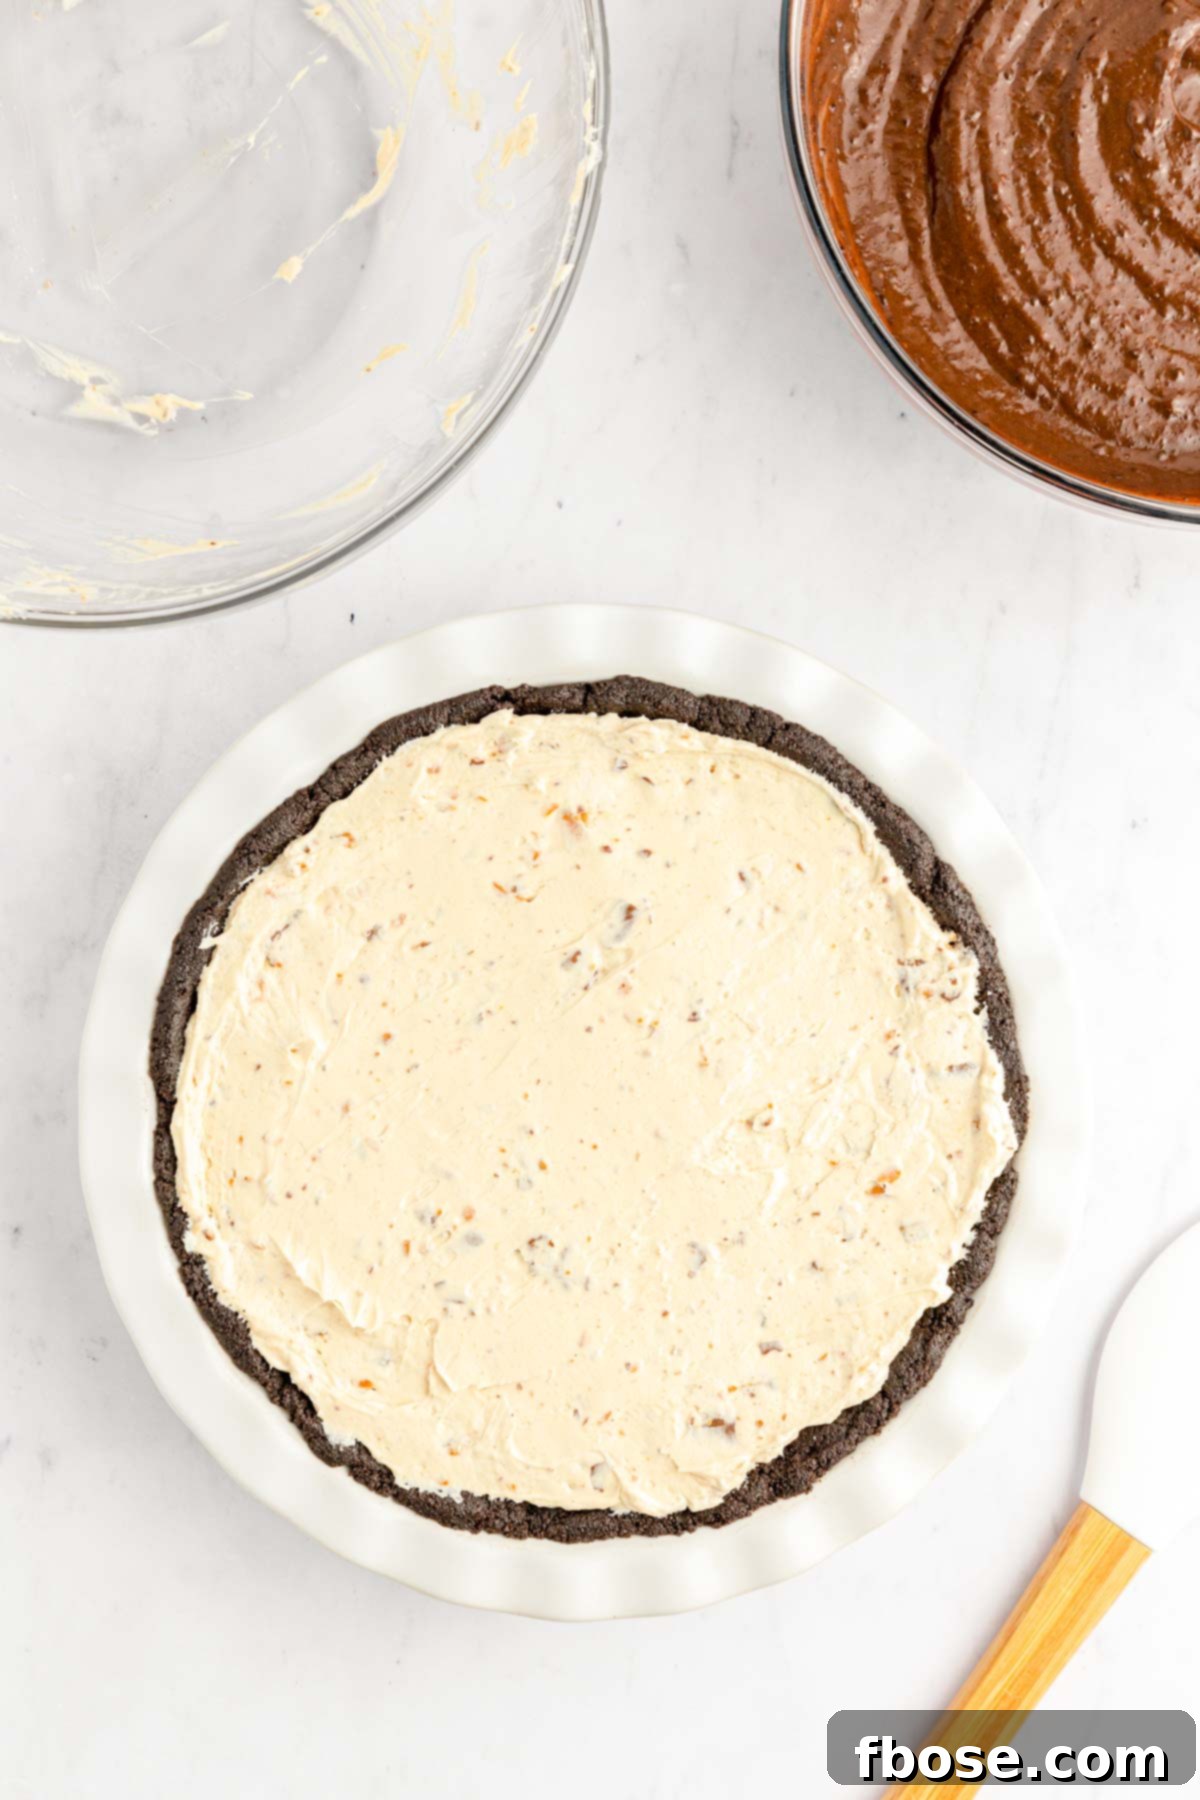
In a large mixing bowl, using an electric mixer, beat together 8 ounces of softened cream cheese (ensure it’s full-fat and at room temperature for optimal smoothness), ¼ cup of creamy peanut butter (JIF or Skippy recommended), and ½ cup of powdered sugar until the mixture is completely smooth and free of lumps. Next, gently fold in 2 cups of chopped Butterfinger pieces and 8 ounces of thawed Cool Whip with a rubber spatula. Mix until all ingredients are evenly combined and no streaks of white Cool Whip remain. Carefully spread this luscious peanut butter mixture evenly over the chilled Oreo crust in the pie pan.
Step 3: Add the Smooth Chocolate Fudge Pudding Layer
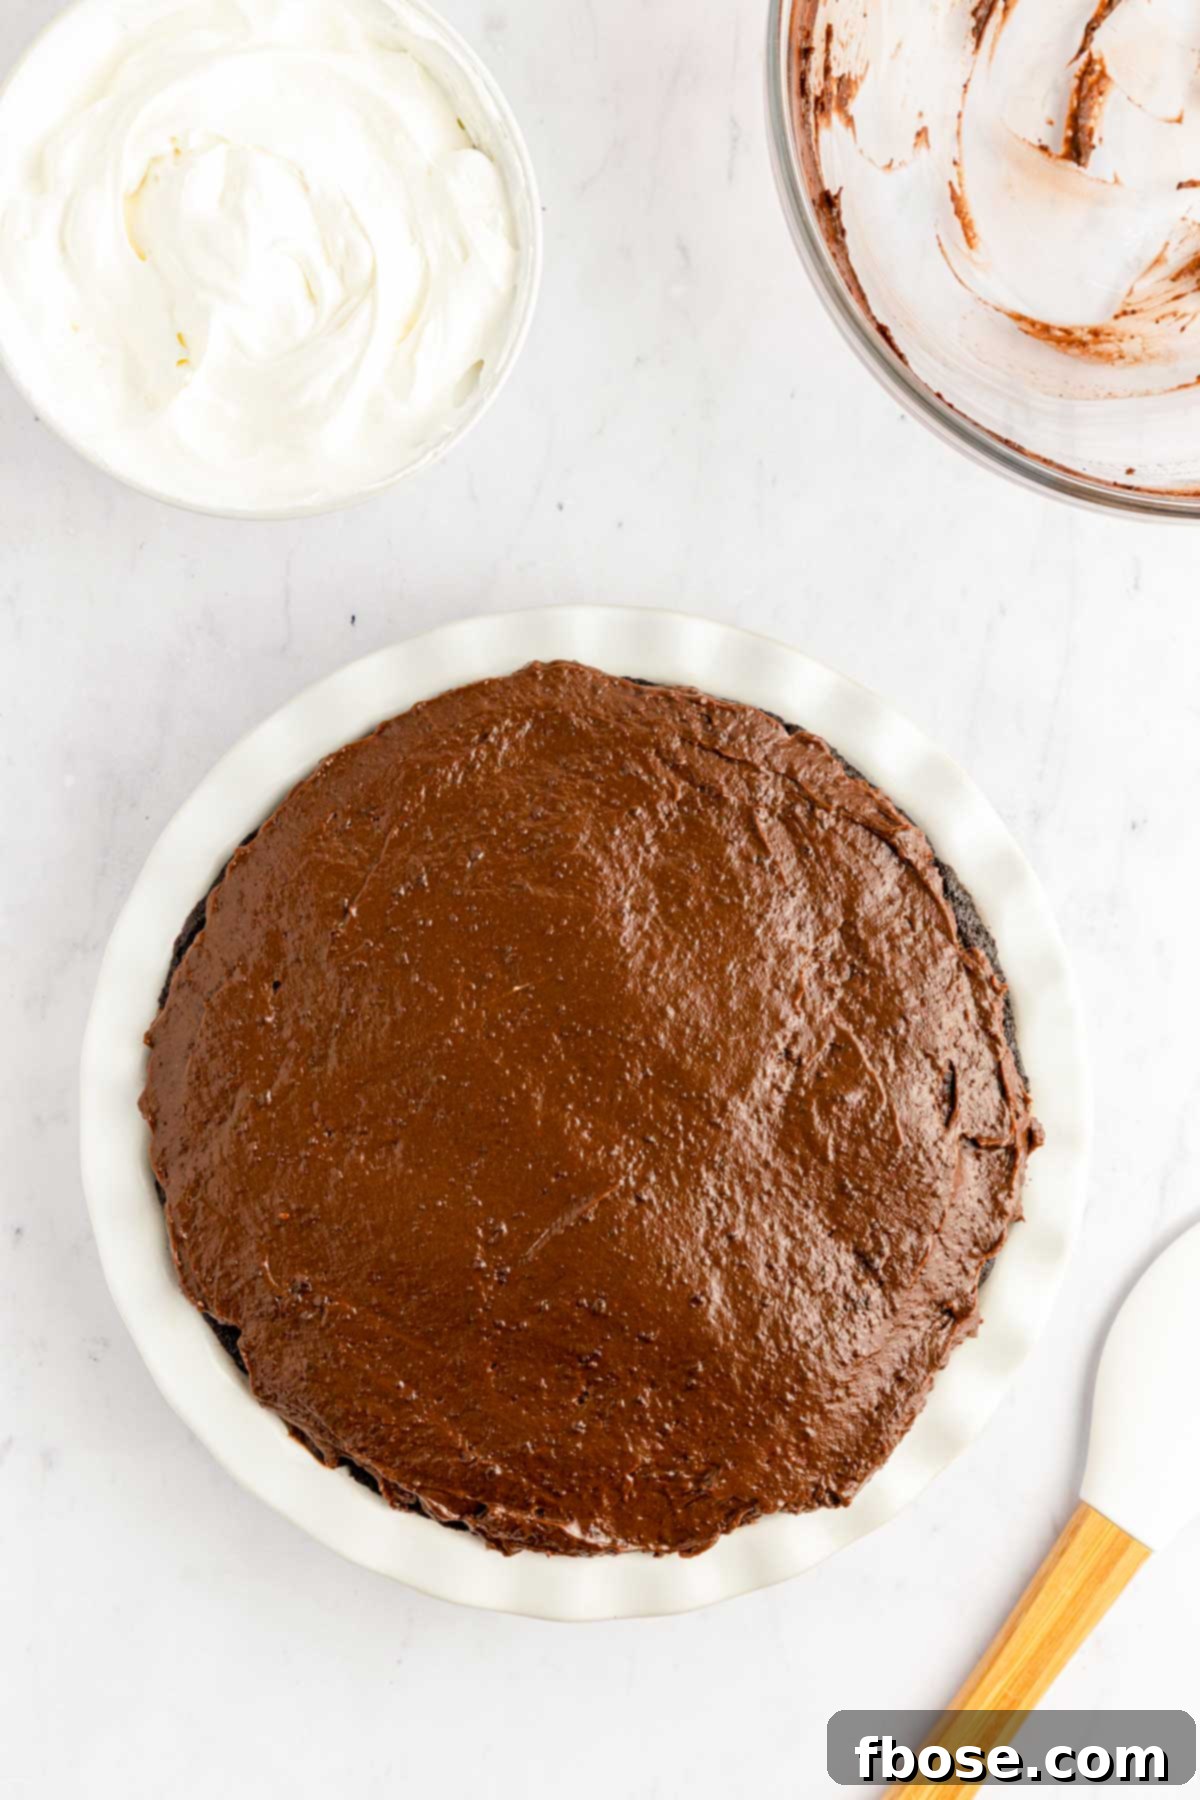
Now it’s time for the chocolatey goodness! In a separate medium mixing bowl, whisk together the contents of two 3.4 oz boxes of Chocolate Fudge instant pudding mix with 2½ cups of cold whole milk. Whisk continuously for about 2 to 3 minutes, or until the mixture thickens considerably and is smooth. Once thickened, carefully spread this chocolate pudding layer evenly over the top of the peanut butter cream cheese layer in your pie dish. Be gentle to avoid mixing the layers.
Step 4: The Grand Finale – Toppings and Chilling
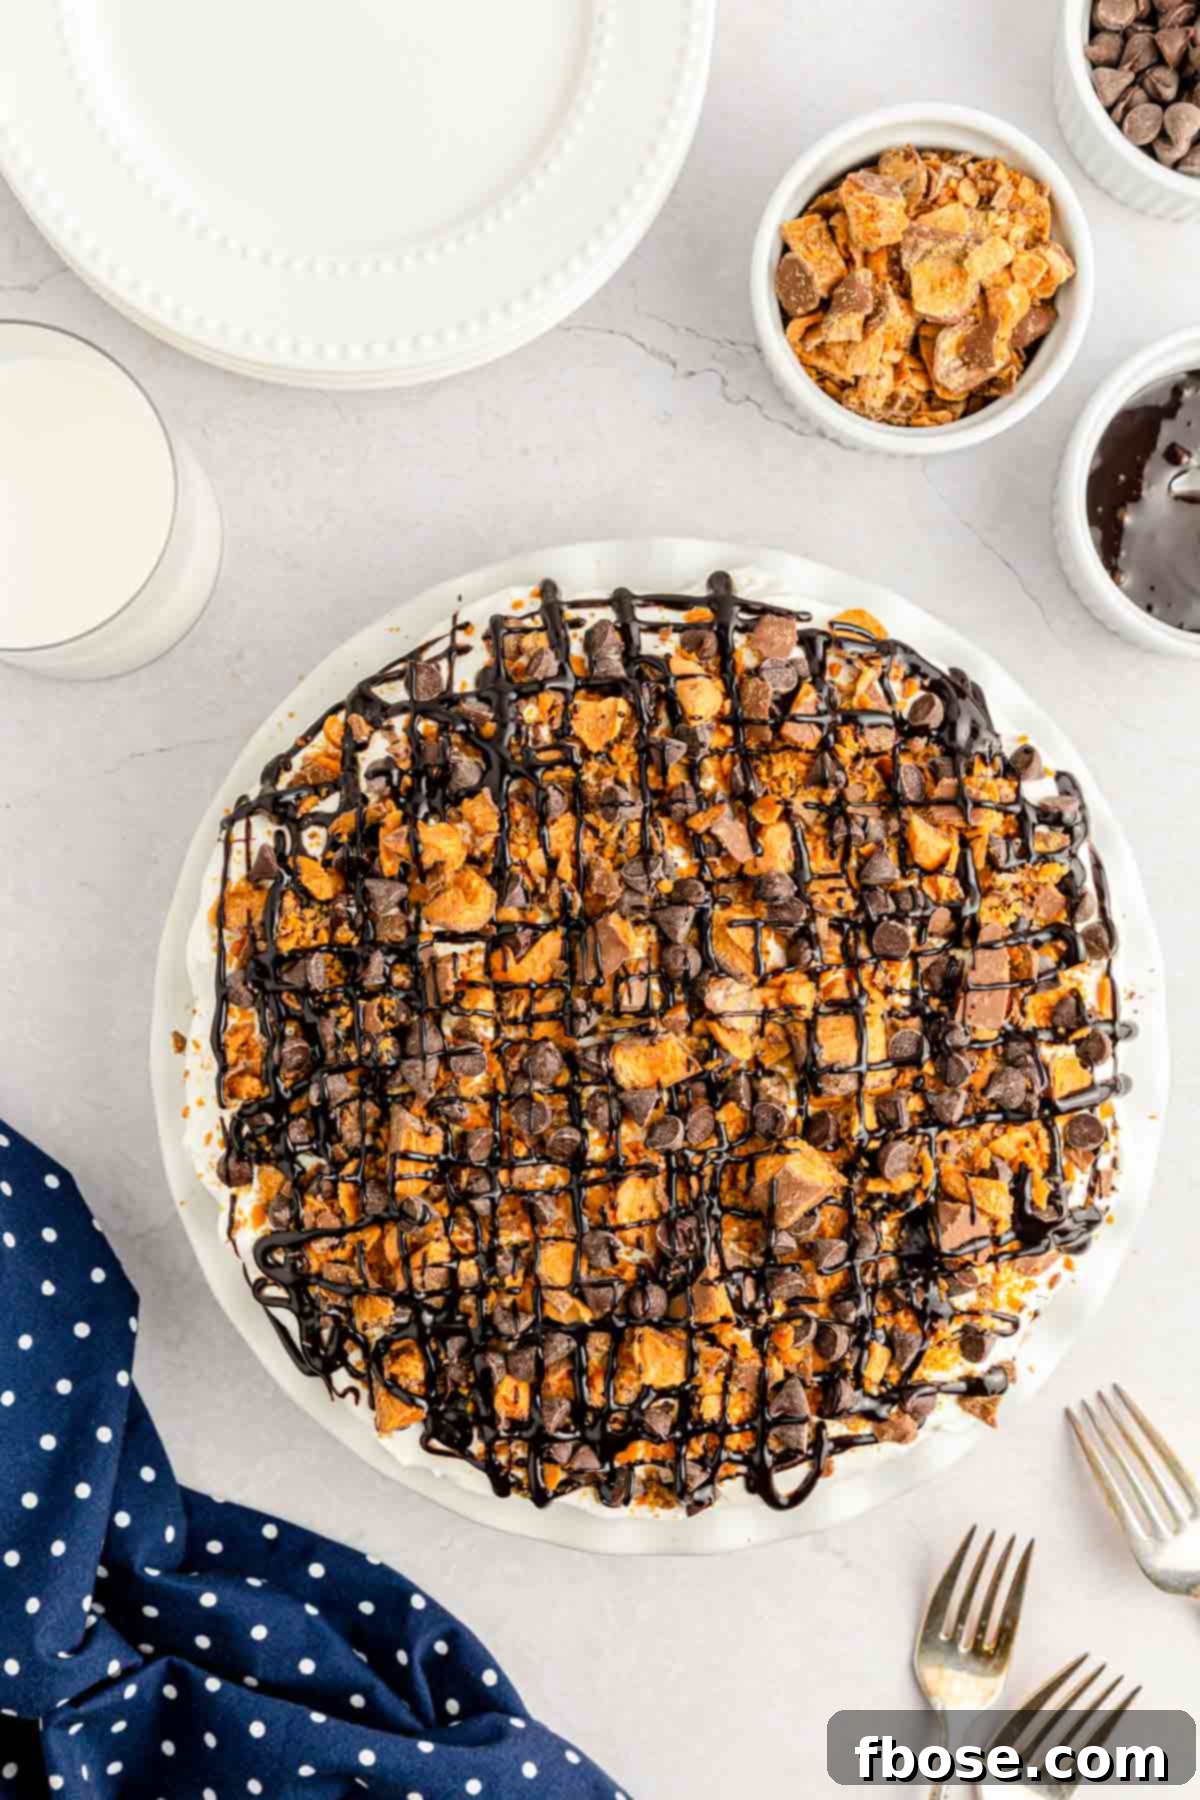
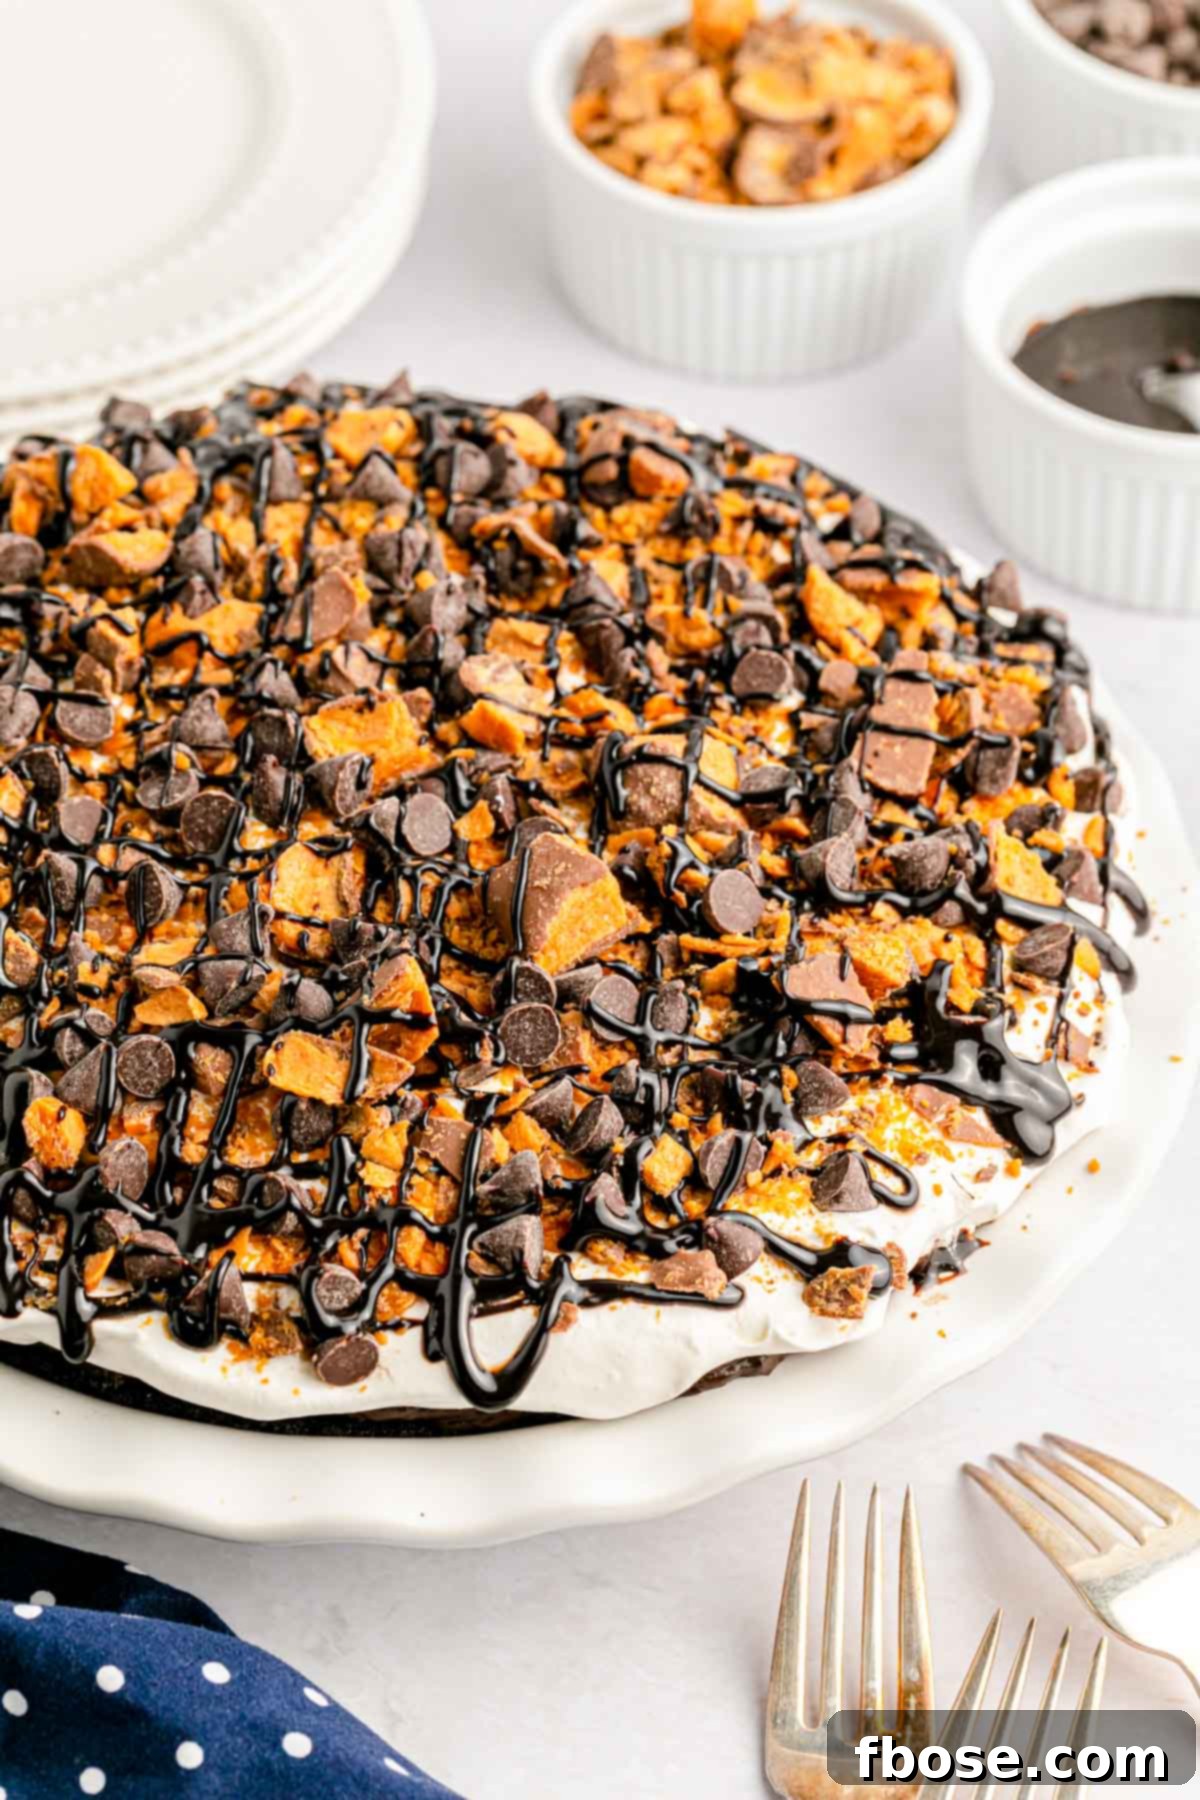
To complete your masterpiece, spread the remaining 8 ounces of thawed Cool Whip evenly over the top of the chocolate pudding layer. This adds another dimension of creamy lightness. Then, for that ultimate Butterfinger experience, sprinkle generously with more chopped Butterfinger candy bar pieces and 2 tablespoons of semi-sweet chocolate chips. Finish with a decadent drizzle of homemade or store-bought chocolate syrup all over the top. Once assembled, place the pie back in the refrigerator to chill for at least 4 hours, or ideally, overnight. This crucial chilling time allows all the layers to set and meld together, ensuring a firm, sliceable, and utterly delicious pie.
Storage Instructions For No-Bake Butterfinger Pie
Proper storage ensures that every slice of your No-Bake Butterfinger Pie remains as delicious as the first. To store any leftovers, you can either tightly wrap the entire pie plate with plastic wrap, ensuring it’s sealed to prevent air exposure, or transfer individual slices into airtight containers. When stored correctly in the refrigerator, your pie can be happily enjoyed for up to 3 to 5 days. This makes it a great dessert to prepare a day or two in advance for events.
Can I Make This Butterfinger Pie To Freeze And Serve Later?
Absolutely! This No-Bake Butterfinger Pie is an excellent candidate for freezing, making it perfect for meal prepping desserts or having a treat ready for unexpected guests. To freeze, either prepare the pie in a freezer-safe dish and wrap it tightly with multiple layers of plastic wrap and then foil, or transfer individual slices into airtight, freezer-safe containers. The pie can be frozen for up to one month without significant loss of quality.
When you’re ready to serve, simply transfer the frozen pie or slices to the refrigerator to thaw gradually for a few hours or overnight. For a unique twist on a hot day, you can even enjoy it partly frozen – it develops an delightful, ice cream-like consistency that is incredibly refreshing!
Can I Use Granulated Sugar Instead Of Powdered Sugar?
Technically, yes, you can swap granulated sugar for powdered sugar in the same amount. However, it’s important to be aware that using granulated sugar might affect the texture of your pie. Powdered sugar (also known as confectioners’ sugar) has a very fine consistency that dissolves easily and creates a smooth, velvety texture in no-bake fillings. Granulated sugar, with its larger crystals, may not dissolve completely, which can sometimes result in a slightly gritty texture in the creamy layers. For the smoothest, most luxurious pie, powdered sugar is highly recommended.
Let’s Connect!
If you’ve tried this recipe and loved it, please share your thoughts and leave a review in the comments section below. Your feedback truly brightens my day!
Don’t forget to tag me – @sugarandsoulco – on Instagram and Pinterest with your beautiful photos, or join our Sugar & Soul Show-offs Community on Facebook and share them there! We love seeing your creations and you can even join our recipe challenges!
No Bake Chocolate Butterfinger Pie
Rebecca Hubbell
Dessert
American
20 minutes
4 hours
4 hours 20 minutes
12 people
Pin Recipe
Rate this Recipe
This Butterfinger Pie recipe is an easy no-bake treat with layers of peanut butter and chocolate goodness! A cool and delightfully sweet dessert that’s perfect for any occasion!
Equipment
- 9-inch pie pan or springform pan
- Food processor
- Mixing bowls
Ingredients
Oreo Crust
- 2½ cups Oreo cookie crumbs
- ½ cup unsalted butter, melted but cool
- ¼ teaspoon salt
Filling
- 8 ounces cream cheese, softened to room temperature
- ¼ cup creamy peanut butter (JIF or Skippy recommended)
- ½ cup powdered sugar
- 2 cups chopped Butterfingers (about 4 to 5 bars)
- 8 ounces Cool Whip, thawed
- 2 (3.4 oz) boxes Chocolate Fudge pudding mix
- 2½ cups whole milk
Toppings
- 8 ounces Cool Whip, thawed
- 1 Butterfinger Bar, chopped
- 2 tablespoons semi-sweet chocolate chips
- Chocolate syrup
Instructions
- Lightly grease a 9-inch deep-dish pie pan with cooking spray and set aside. You could also use a springform pan.
- In a medium mixing bowl, combine 2½ cups Oreo cookie crumbs, ½ cup unsalted butter, and ¼ teaspoon salt.
- Pour the crumb mixture into the prepared pie pan and press it firmly into the bottom of the pan and up the sides. Then, place it in the refrigerator to chill while the filling is prepared.
- In a large mixing bowl, beat the 8 ounces cream cheese, ¼ cup creamy peanut butter, and ½ cup powdered sugar until smooth.
- Fold 2 cups chopped Butterfingers and 8 ounces Cool Whip (thawed) into the peanut butter mixture with a rubber spatula until evenly combined and there are no more streaks of white.
- Transfer the Butterfinger mixture to the prepared crust and spread it into an even layer.
- In a medium mixing bowl, whisk together the 2 (3.4 oz) boxes Chocolate Fudge pudding mix and 2½ cups whole milk for 2 to 3 minutes until it thickens.
- Carefully spread the chocolate pudding layer evenly on top of the Butterfinger cream cheese layer.
- Spread the remaining 8 ounces Cool Whip evenly on top of the pudding.
- Sprinkle with chopped 1 Butterfinger Bar and 2 tablespoons semi-sweet chocolate chips. Then drizzle Chocolate syrup all over the top.
- Place in the refrigerator to chill for at least 4 hours or overnight.
Notes
- How To Store: Store leftovers in an airtight container in the refrigerator for up to 3-5 days.
- How To Freeze: You can freeze this dessert in an airtight container for up to one month. Thaw it in the fridge before serving. Or you can even eat it partly frozen for more of an ice cream consistency!
- You can substitute a different cookie for the crust if you’d like. Try making it with a graham cracker crust or even a nutter butter crust!
- Make sure to use full-fat cream cheese and not the whipped variety. It will alter the texture of this dessert and may not hold its shape.
- Processed peanut butter brands like JIF or Skippy turn out the best with this recipe. The oil tends to separate in all-natural peanut butter.
- You can use a different flavor of pudding mix instead of the Chocolate Fudge flavor if you like. This recipe uses two packets. You can even make one layer of Chocolate Fudge and then make an extra layer of a peanut butter flavor, using one packet each.
- Instead of Butterfinger, try chopped Reese’s peanut butter cups!
- Because the Oreo crust is no-bake, it is held together by the solidified butter from refrigeration. Before adding the filling, make sure to chill it in the prepared pie pan. Chilling it will ensure it sticks together.
- If you can’t find boxes of Oreo crumbs in the baking aisle, you can use 28 regular-sized Oreos instead and turn them into fine crumbs in a food processor.
- I recommend chopping your own Butterfinger bars instead of using the bag of crumbs from the baking aisle for a fresher crunch.
Nutrition
Calories: 598 kcal | Carbohydrates: 69g | Protein: 9g | Fat: 34g | Saturated Fat: 17g | Polyunsaturated Fat: 4g | Monounsaturated Fat: 11g | Trans Fat: 0.3g | Cholesterol: 52mg | Sodium: 389mg | Potassium: 342mg | Fiber: 2g | Sugar: 45g | Vitamin A: 641IU | Calcium: 147mg | Iron: 5mg
Did You Make This Recipe?
Don’t forget to share it with me on Instagram @sugarandsoulco and follow on Tiktok @sugarandsoulco and Pinterest @sugarandsoulco for more delicious inspiration!
Pin Recipe
Share Recipe