

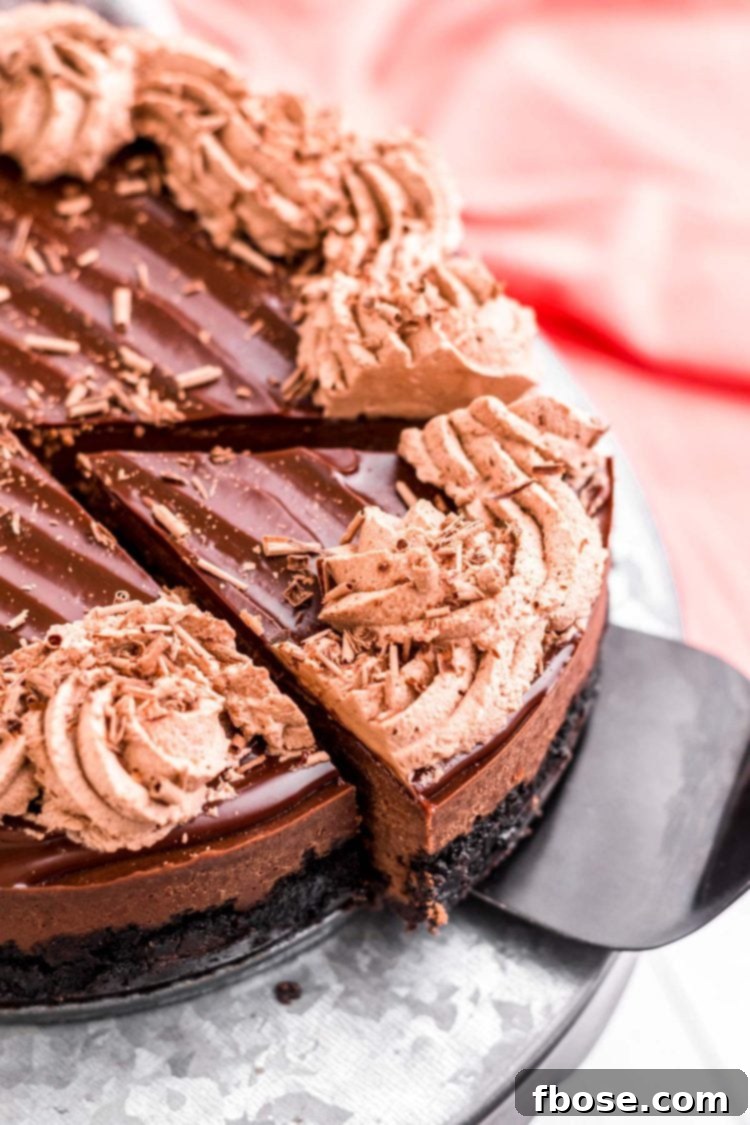
If you’re a true connoisseur of chocolate, prepare to be captivated by this incredible Instant Pot Chocolate Cheesecake. This isn’t just a dessert; it’s a multi-layered chocolate experience, offering a luxuriously smooth texture complemented by a rich ganache topping and elegantly swirled chocolate whipped cream. It’s the ultimate indulgence for anyone who cherishes the deep, comforting flavor of chocolate.
Craving a similarly decadent chocolate cheesecake but prefer the traditional oven-baked method? No problem! Our beloved Triple Chocolate Cheesecake delivers three sensational layers of chocolate, baked to perfection in under an hour, offering a fantastic alternative for those without an Instant Pot or who simply prefer conventional baking.
Unlock Dessert Perfection with Your Instant Pot
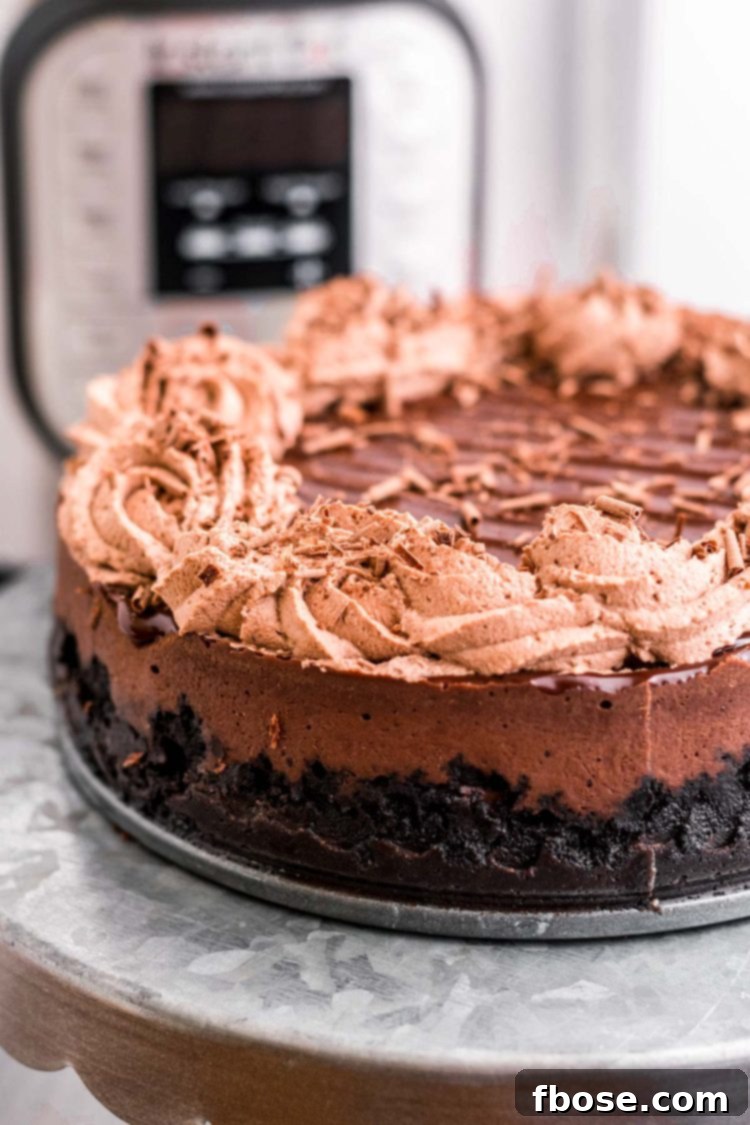
The Instant Pot is more than just a pressure cooker; it’s a versatile kitchen marvel that can transform your cooking and baking experience. If you haven’t yet discovered the joy of this appliance, I enthusiastically recommend adding one to your kitchen. Its ability to create a consistently moist, even cooking environment makes it an absolute game-changer for dishes that require precise heat and humidity, especially delicate desserts like cheesecake.
We absolutely adore preparing desserts in the Instant Pot, and this chocolate cheesecake stands out as one of our all-time favorites. What makes it even better is the minimal specialized equipment required: simply a trivet and a 7-inch springform pan are all you need to get started. It’s a delightful departure from savory Instant Pot recipes, proving that this appliance is equally adept at producing show-stopping sweet treats. Once you dive into Instant Pot dessert making, you’ll find it hard to stop!
Why This Instant Pot Chocolate Cheesecake Recipe Excels
This recipe isn’t just another chocolate cheesecake; it’s a testament to how the Instant Pot can elevate a classic dessert to new heights of perfection. Here’s why this recipe deserves a spot in your culinary repertoire:
- Unparalleled Chocolate Depth: Designed with multiple layers of chocolate – from the rich Oreo crust to the creamy filling, decadent ganache, and fluffy whipped cream – this cheesecake offers an immersive chocolate experience that will satisfy even the most intense cravings. Each bite is a harmonious blend of textures and cocoa notes.
- Effortless Baking, Flawless Results: The Instant Pot removes the guesswork from baking. Unlike traditional oven methods where constant vigilance is needed, pressure cooking ensures a consistent temperature and moisture level. This hands-off approach guarantees a perfectly baked cheesecake every time, without the stress of monitoring.
- The Built-in Water Bath Advantage: Achieving a perfectly smooth, crack-free cheesecake often necessitates a water bath in conventional baking, a step many home bakers find intimidating. The Instant Pot inherently creates a steamy environment, effectively serving as its own water bath. This natural humidity prevents the cheesecake from drying out and cracking, resulting in that coveted silky-smooth texture without any extra fuss.
- Consistently Creamy Texture: The controlled pressure and steam within the Instant Pot create a remarkably even cooking environment. This means your cheesecake will have an incredibly uniform, velvety-smooth texture from edge to center, a hallmark of a truly well-made cheesecake.
- Reduced Cooking Time: While cheesecake still requires significant chilling time, the actual cooking time in the Instant Pot is often shorter than in a conventional oven, making the active preparation phase quicker and more convenient.
Crafting the Perfect Instant Pot Chocolate Cheesecake: A Look at the Ingredients
Every exceptional dessert begins with quality ingredients, and this Instant Pot Chocolate Cheesecake is no exception. We carefully selected components that combine to create a symphony of chocolate flavors and an irresistibly creamy texture.
The Foundation: A Classic Oreo Crust
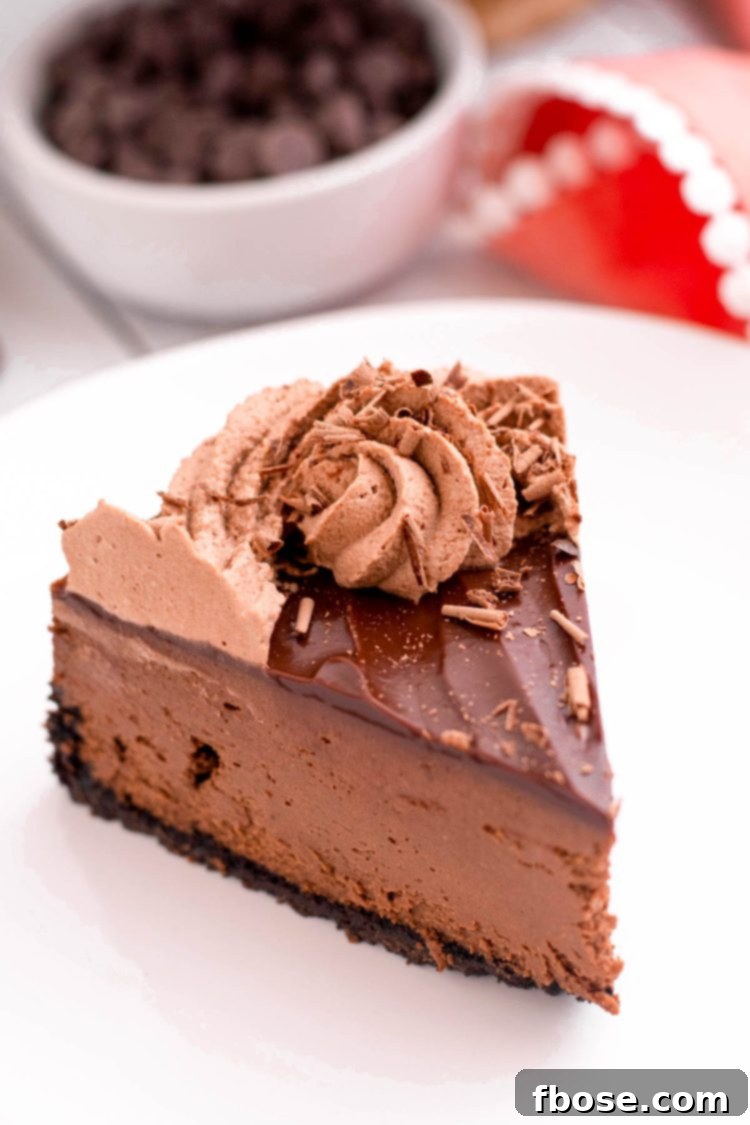
The journey to chocolate bliss begins with a simple yet sublime crust made from crushed Oreos, melted butter, and a hint of salt. This iconic cookie provides a perfectly balanced base – not too sweet, with just the right amount of crunch and a familiar, comforting chocolate flavor that sets the stage for the rich filling to come. The salt subtly enhances the chocolate notes, creating a more complex flavor profile.
The Heart: Rich & Smooth Chocolate Cheesecake Filling
The filling is where the magic truly unfolds. It starts with classic cheesecake ingredients, but we elevate it with the thoughtful addition of unsweetened cocoa powder and melted semi-sweet baking chocolate. This careful balance ensures a deep chocolate flavor that’s prominent but doesn’t overwhelm the delicate tang and creaminess characteristic of a perfect cheesecake. The flour helps to stabilize the filling, preventing cracks, while the heavy cream and vanilla extract contribute to its luxurious smoothness and aromatic depth.
The Crown: Decadent Ganache and Chocolate Whipped Cream
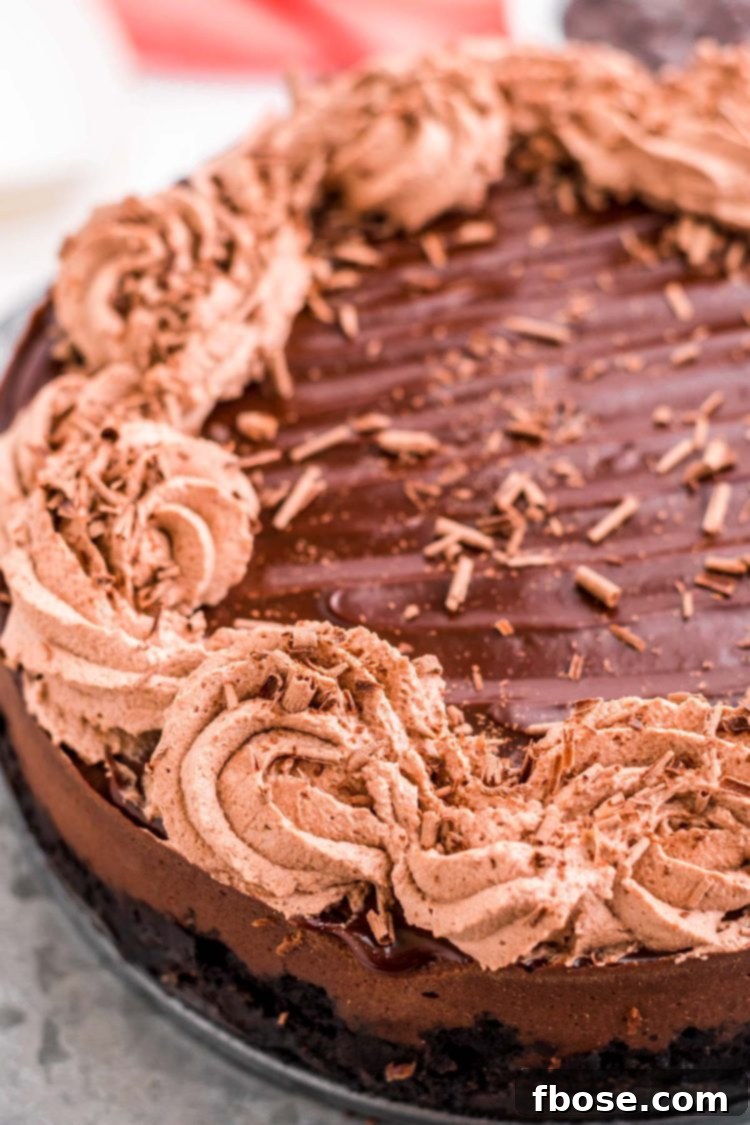
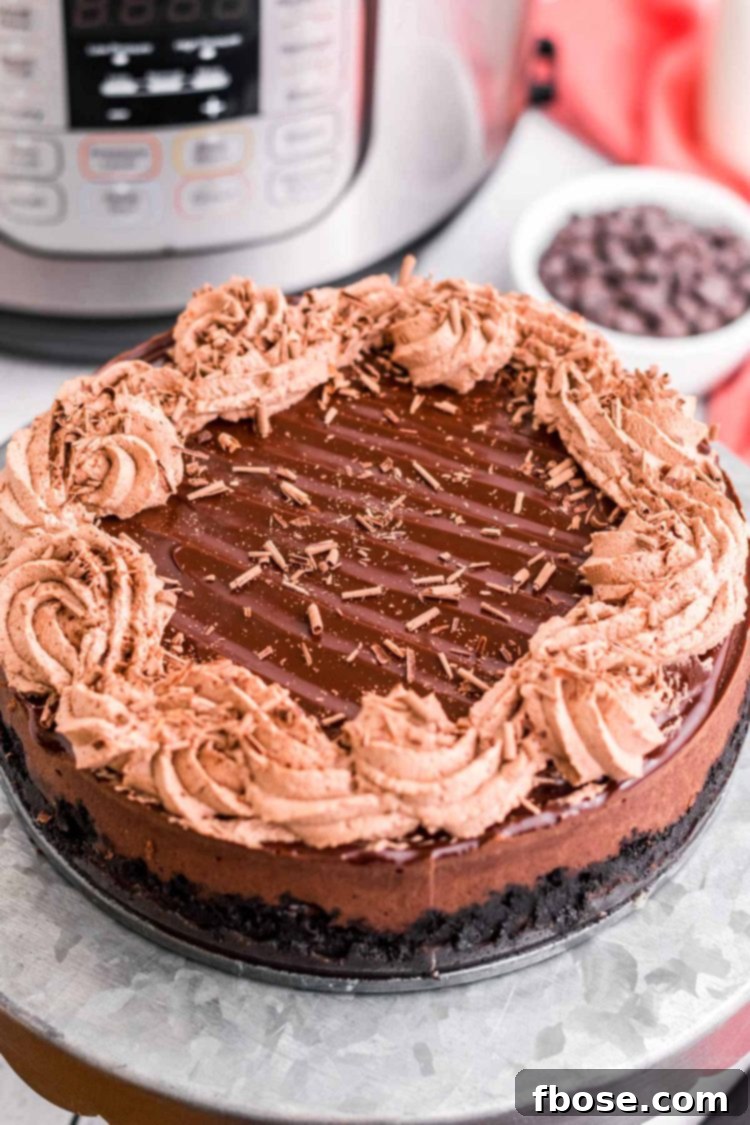
To crown this masterpiece, we layer on a silky chocolate ganache, offering an extra burst of intense chocolate flavor and a beautiful sheen. This is then adorned with swirls of light and airy chocolate whipped cream, providing a soft, contrasting texture and another layer of cocoa delight. The combination not only makes for a delicious dessert but also an absolutely stunning presentation.
Mastering Your Instant Pot Chocolate Cheesecake: Step-by-Step Guide
Creating this show-stopping dessert might seem like a multi-step process, but rest assured, cheesecakes are surprisingly straightforward to prepare. The key is to follow each step diligently, and the Instant Pot handles much of the complexity for you. Let’s break down the process:
Crafting the Perfect Crust
- Pan Preparation: Begin by coating a 7-inch deep springform pan with nonstick spray, ensuring the sides are well covered. This is crucial for easy release later.
- Crushing the Oreos: Add whole Oreo cookies to a food processor and pulse until finely crushed, yielding approximately 1½ cups of crumbs. The consistency should be fine, like sand.
- Combining Ingredients: Introduce the melted butter and a pinch of salt to the cookie crumbs in the food processor. Pulse again until the mixture is thoroughly combined and resembles wet sand.
- Forming the Crust: Press the cookie crumb mixture evenly into the bottom of the prepared springform pan. Use the back of a spoon or a flat-bottomed glass to firmly pack the crust, extending it about an inch up the sides of the pan. This creates a sturdy border for your cheesecake.
- Chilling: Transfer the pan to the freezer while you prepare the filling. This firming step helps prevent the crust from becoming soggy during baking.
Preparing the Velvety Filling
- Cream Cheese Base: In the bowl of a stand mixer fitted with a paddle attachment, beat the softened cream cheese on high speed for 3-4 minutes. This is a critical step; don’t rush it! Beating thoroughly ensures an airy, lump-free cheesecake.
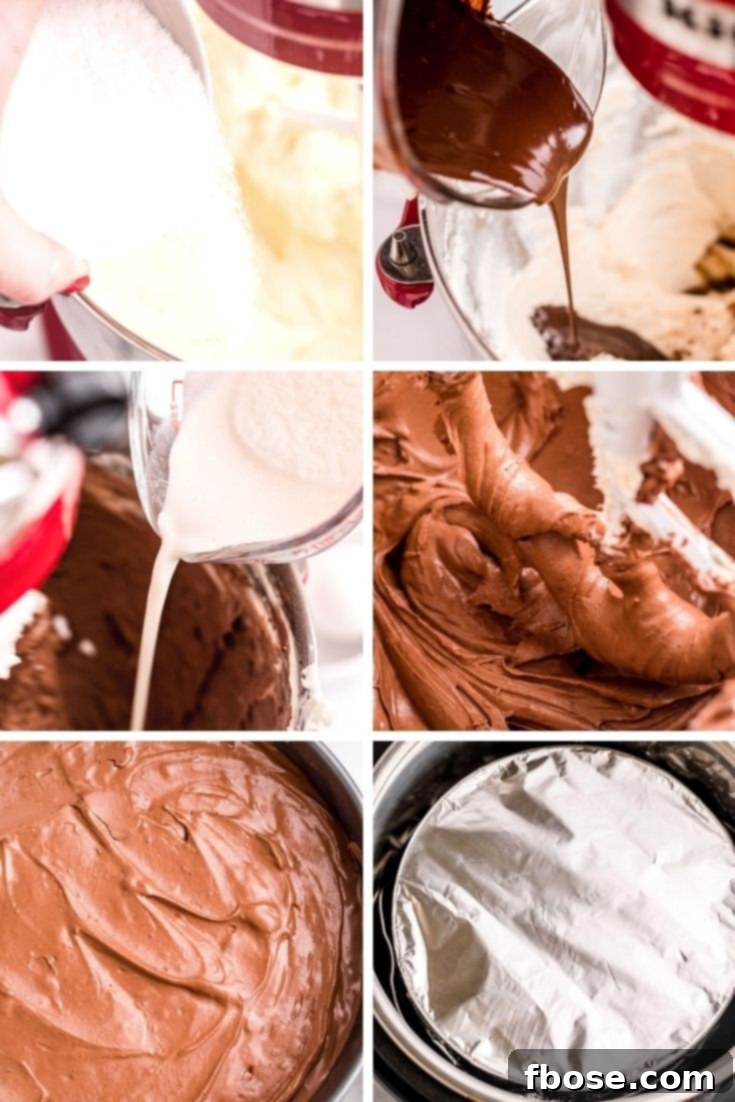
- Sweetening and Smoothing: Scrape down the sides and bottom of the bowl, then add the granulated sugar. Continue beating for another 2-3 minutes until the mixture is light, fluffy, and completely smooth.
- Adding Dry Ingredients: Scrape the bowl again. Add the unsweetened cocoa powder and all-purpose flour. Mix on low speed until *just* combined. Avoid overmixing once the flour is added. If any cream cheese lumps remain, beat for a few extra minutes until smooth.
- Infusing Flavor: Pour in the melted semi-sweet chocolate, heavy cream, and vanilla extract. Mix on medium-high speed for 2-3 minutes, ensuring all ingredients are fully incorporated.
- Incorporating Eggs: With the mixer on low speed, add the eggs one at a time. Mix *only* until the yolk disappears. Overmixing the eggs can introduce too much air, which can lead to cracks in your baked cheesecake.
- Final Check: Scrape the sides and bottom of the bowl one last time to ensure the batter is perfectly smooth and uniform.
- Pouring into Crust: Carefully pour the cheesecake batter into your chilled Oreo crust. Gently tap the pan on the counter a few times to release any hidden air bubbles, which can cause imperfections in the finished cheesecake.
- Sealing for Success: Tightly cover the springform pan with aluminum foil. This prevents condensation from dripping onto the cheesecake during the Instant Pot cooking process.
Instant Pot Cooking Method
- Setup: Pour 1 cup of water into the inner pot of your Instant Pot and place the trivet insert inside.
- Baking: Carefully place the foil-covered cheesecake pan onto the trivet. Secure the Instant Pot lid, ensuring the sealing valve is set to the “Sealing” position.
- Pressure Cooking: Cook on high pressure for 40 minutes. Once cooking is complete, allow a natural pressure release (NPR). This means you let the pressure release on its own without manually opening the valve. This gradual release prevents drastic temperature changes that can lead to cracking.
- Cooling & Setting: Once the pressure has fully released and the lid can be opened, carefully remove the cheesecake from the Instant Pot. Allow it to cool completely on a wire rack at room temperature. Don’t be alarmed if the cheesecake appears slightly soft or undercooked; it will firm up as it chills.
- Refrigeration: Once cooled to room temperature, transfer the cheesecake to the refrigerator for at least 6 hours, or preferably overnight. This chilling period is crucial for the cheesecake to fully set and achieve its signature dense, creamy texture.
Finishing Touches: Ganache and Whipped Cream
- Chocolate Whipped Cream: Once the cheesecake is thoroughly chilled and set, prepare the whipped cream. In a stand mixer with a whisk attachment, beat heavy whipping cream on high speed until it begins to thicken.
- Flavoring the Whipped Cream: Add cocoa powder, powdered sugar, vanilla extract, and a pinch of salt. Continue mixing on high speed until stiff peaks form.
- Decadent Ganache: Bring ¼ cup of heavy cream to a gentle simmer. Pour the hot cream over the semi-sweet chocolate chips in a heat-safe bowl. Let it sit undisturbed for 3-4 minutes to allow the chocolate to melt.
- Whisking the Ganache: Whisk the cream and chocolate chips together until completely smooth and glossy. Allow the ganache to cool slightly and thicken to a pourable consistency.
- Assembling the Toppings: Gently pour the cooled ganache over the top of the set cheesecake and spread it evenly. Transfer the chocolate whipped cream to a piping bag and pipe a decorative circle or swirls around the edge of the cheesecake.
- Garnish & Serve: For an extra touch of elegance and crunch, sprinkle with chocolate shavings. Slice and enjoy your magnificent Instant Pot Chocolate Cheesecake!
Creative Topping Ideas for Your Chocolate Cheesecake
While the chocolate ganache and whipped cream are undeniably delicious, this Instant Pot Chocolate Cheesecake is a versatile canvas for a myriad of other delightful toppings. Feel free to unleash your creativity and customize each slice to your liking. Here are some fantastic ideas to inspire you:
- Fresh Berries: Bright, tart raspberries or sweet sliced strawberries offer a beautiful color contrast and a refreshing counterpoint to the rich chocolate. A handful of fresh mint leaves alongside provides an aromatic touch.
- More Chocolate: For the ultimate chocolate lover, consider extra chocolate shavings, mini chocolate chips, or even chopped chocolate bars for added texture.
- Cookie Crumbles: Beyond the Oreo crust, consider crushing extra Oreos, graham crackers, or shortbread cookies for a varied crunchy topping.
- Nutty Indulgences: Chopped peanuts, pecans, or walnuts can add a delightful crunch and earthy flavor. For an extra treat, drizzle with warm peanut butter or a rich caramel sauce.
- Candy Creations: Crushed peppermint candies (especially around the holidays), miniature peanut butter cups, or even chopped candy bars can transform your cheesecake into a festive or fun dessert.
- Fruity Pairings: Sliced bananas, a cherry compote, or a tangy orange zest can beautifully complement the chocolate.
- Sauces and Syrups: A warm raspberry coulis, a drizzle of salted caramel, or even a simple vanilla bean sauce can add another layer of flavor and elegance.
Ultimately, anything that pairs wonderfully with chocolate will make an excellent topping for this exquisite dessert. Don’t hesitate to experiment and find your favorite combinations!
Expert Tips for a Flawless Instant Pot Chocolate Cheesecake
Achieving cheesecake perfection is easier than you think, especially with the Instant Pot. Here are some additional tips to ensure your dessert turns out beautifully every time:
- Room Temperature Ingredients: Ensure your cream cheese and eggs are at room temperature. This is crucial for a smooth, lump-free batter that incorporates air evenly, leading to a creamy texture. Cold ingredients will result in a lumpy batter.
- Avoid Overmixing (After Eggs): While you want to beat the cream cheese thoroughly, once the eggs are added, mix just until combined. Overmixing incorporates too much air, which can cause the cheesecake to puff up excessively during cooking and then crack as it cools.
- Don’t Skip the Chill Time: The lengthy refrigeration period is not merely a suggestion; it’s essential for the cheesecake to firm up, fully set, and develop its dense, rich texture. Rushing this step will result in a soft, potentially unset cheesecake.
- Proper Pan Sealing: Ensure your springform pan is tightly covered with aluminum foil. Any gaps can allow condensation to drip onto the cheesecake, affecting its surface texture.
- Natural Pressure Release is Key: Always use natural pressure release (NPR) for cheesecakes. A quick release can cause a sudden drop in pressure and temperature, leading to cracks on the surface.
- Patience is a Virtue: Resist the urge to peek during the pressure cooking or natural release phase. Let the Instant Pot do its work undisturbed for the best results.
Frequently Asked Questions About Instant Pot Chocolate Cheesecake
What Kind of Chocolate Should I Use?
For the cheesecake filling itself, we recommend a high-quality semi-sweet baking bar. Its balanced sweetness and rich cocoa flavor melt smoothly and integrate beautifully into the batter, providing that perfect chocolate essence without being overly bitter or too sweet. For the ganache, semi-sweet chocolate chips are excellent for convenience, as they melt easily. However, you can also use a chopped semi-sweet baking bar for an even richer, more artisanal ganache. Always opt for good quality chocolate as it significantly impacts the final taste.
How Do I Cut The Perfect Slice?
The secret to achieving perfectly clean, impressive slices of cheesecake is simple: use a sharp knife warmed under hot water. After warming, quickly wipe the knife dry to prevent water from marring the cheesecake’s surface. Make your slice, then repeat the warming and wiping process for each subsequent cut. This method ensures smooth, elegant edges every time.
How To Store Cheesecake
Since cheesecake contains dairy products, proper refrigeration is essential. For best results, store your cheesecake in an airtight container or tightly wrapped in its springform pan. It will remain fresh and delicious in the refrigerator for about 3 to 4 days.
To freeze your cheesecake for longer enjoyment, first bake and cool it as directed, ensuring it has fully chilled in the refrigerator. Once completely cold, remove the sides of your springform pan and place the uncovered cheesecake in the freezer for about one hour until firm. Then, remove it from the bottom of the pan. Wrap the cheesecake tightly in plastic wrap, followed by a layer of aluminum foil, and place it in an airtight freezer-safe container or a large zip-top bag. Properly frozen, your cheesecake can last for approximately 3 to 4 months. To serve, defrost the cheesecake overnight in the refrigerator. Once thawed, you can prepare and apply your fresh ganache and whipped cream toppings before serving.
Can I Make This in a Different Size Pan?
This recipe is optimized for a 7-inch springform pan. Using a different size would alter the cooking time. A smaller pan might require slightly longer cooking, while a larger, shallower pan would cook faster. Adjustments to the ingredient quantities would also be necessary to maintain the correct cheesecake height and density. For best results, we recommend sticking to the 7-inch pan.
Why Did My Cheesecake Crack?
Cracks can occur for a few reasons, even in an Instant Pot. Common culprits include: overmixing the batter (especially after adding eggs, which incorporates too much air), opening the Instant Pot lid too soon after cooking (not allowing a full natural pressure release), or extreme temperature changes during cooling. Ensure your ingredients are at room temperature and resist the urge to peek or rush the cooling process.
Discover More Decadent Cheesecake Recipes:
If you loved this Instant Pot Chocolate Cheesecake, you’re in for a treat! Explore more of our beloved cheesecake creations:
- Peanut Butter Chocolate Cheesecake – A divine fusion of creamy peanut butter cheesecake crowned with a rich chocolate ganache.
- Eggnog Cheesecake – A festive and fun holiday cheesecake, delightfully spiked with eggnog and a hint of whisky for grown-up flavor.
- No-Bake Raspberry Cheesecake – A quick, refreshing, and utterly simple fruity cheesecake that requires no oven time at all!
- Pumpkin Cheesecake – Experience the comforting flavors of autumn with this creamy pumpkin cheesecake, exquisitely drizzled with a homemade cinnamon caramel sauce.
Let’s Connect!
We cherish your feedback! If you’ve had the pleasure of trying this recipe, please share your thoughts and leave a review in the comments section below. Your insights truly inspire us!
Don’t forget to tag us – @sugarandsoulco – on Instagram and Pinterest with your beautiful photos. You can also join our Sugar & Soul Show-offs Community on Facebook to share your creations and participate in our exciting recipe challenges!
Instant Pot Chocolate Cheesecake Recipe
This recipe creates a rich, smooth, and incredibly decadent chocolate cheesecake using the convenience of your Instant Pot.
Author: Rebecca Hubbell
Course: Dessert
Cuisine: American
Prep Time: 30 minutes
Cook Time: 40 minutes
Cooling/Chill Time: 8 hours
Total Time: 9 hours 10 minutes
Servings: 6 people
Equipment
- 1 Electric pressure cooker
- 1 7-inch springform pan
- 1 pressure cooker trivet
Ingredients
Crust
- 1½ cups Oreo cookie crumbs (about 15 cookies)
- 3 tablespoons butter, melted
- ½ teaspoon salt
Filling
- 16 ounces cream cheese, softened
- ½ cup granulated sugar
- ¼ cup unsweetened cocoa powder
- 2 tablespoons all-purpose flour
- 6 ounces semi-sweet baking chocolate, melted
- ½ cup heavy whipping cream
- 1 teaspoon vanilla extract
- 2 large eggs
Toppings (Chocolate Whipped Cream)
- 1 cup heavy whipping cream
- 2 tablespoons unsweetened cocoa powder
- 3-4 tablespoons powdered sugar
- 1 teaspoon vanilla extract
Toppings (Ganache)
- ¼ cup heavy whipping cream
- ½ cup semi-sweet chocolate chips
- Chocolate shavings, for garnish
Instructions
Crust
- Prepare a deep 7” springform pan by generously coating it with nonstick spray, ensuring the sides are well covered. Set aside.
- Add Oreos to a food processor and pulse until you achieve approximately 1½ cups of fine cookie crumbs.
- Introduce the melted butter and salt to the cookie crumbs in the food processor. Pulse until all ingredients are well combined and the mixture resembles wet sand.
- Pour the cookie crumbs into the prepared springform pan. Use the back of a spoon or a flat-bottomed glass to gently but firmly press and form an even crust, extending it about one inch up the sides of the pan. Place the pan in the freezer to chill while preparing the filling.
Filling
- In the bowl of a stand mixer fitted with a paddle attachment, add the softened cream cheese and beat on high speed for 3 to 4 minutes until it’s light and fluffy. This crucial step ensures a smooth, lump-free cheesecake.
- Scrape down the sides of the bowl. Add the granulated sugar and beat for an additional 2 to 3 minutes until fully incorporated and the mixture is even lighter.
- Scrape the sides and bottom of the bowl again. Add the cocoa powder and flour, mixing just until combined. Avoid overmixing.
- Ensure there are no lumps of cream cheese in the batter; if so, mix on high speed for a few additional minutes until smooth.
- Pour in the melted chocolate, heavy cream, and vanilla extract. Mix on medium-high speed for 2 to 3 minutes until fully blended.
- With the mixer on low speed, add the eggs one at a time, mixing only until the yolk disappears. Be careful not to overmix here to prevent cracking.
- Scrape the sides and bottom of the bowl one final time to confirm everything is combined and the batter is smooth.
- Pour the prepared batter into the chilled crust in the springform pan. Gently tap the pan on the counter a few times to release any potential air bubbles.
- Cover the springform pan tightly with aluminum foil to prevent condensation from affecting the cheesecake surface.
- Prepare your Instant Pot by adding 1 cup of water and placing a trivet insert into the inner pot. Carefully place the foil-covered cheesecake on the trivet, then secure the Instant Pot lid and set the sealing valve.
- Cook on high pressure for 40 minutes. Once cooking is complete, allow a natural pressure release (NPR). After the pressure has fully released, carefully remove the cheesecake and let it cool completely on the counter. (It’s normal for it to still look soft; it will set in the fridge.)
- Once the cheesecake has reached room temperature, transfer it to the refrigerator for at least 6 hours, or ideally overnight, to allow it to fully set.
Toppings
- Once the cheesecake is thoroughly set, prepare the chocolate whipped cream. In the bowl of a stand mixer equipped with a whisk attachment, beat the heavy whipping cream on high speed until it begins to thicken.
- Add the cocoa powder, powdered sugar, vanilla extract, and salt. Continue mixing at high speed until stiff peaks form.
- Prepare the ganache by gently bringing ¼ cup of heavy cream to a simmer. Carefully pour the hot cream over the semi-sweet chocolate chips in a heat-safe bowl and let it sit for 3 to 4 minutes.
- Whisk the cream and chocolate chips together until the ganache is smooth and glossy. Allow it to cool slightly and thicken to a pourable consistency.
- Pour the cooled ganache evenly over the chilled cheesecake and smooth it out. Transfer the chocolate whipped cream to a piping bag and pipe a decorative circle or swirls around the top edge of the cheesecake. Sprinkle with chocolate shavings for garnish.
- Store any leftovers in an airtight container in the refrigerator.