
These Homemade Devil Dog Cakes are an exquisite, from-scratch recreation of the beloved chocolate cream-filled sandwich cakes that have graced pantry shelves for generations. Forget the store-bought box; this recipe elevates a classic nostalgic treat into a gourmet experience, using readily available pantry staples to deliver a flavor and texture that is truly unparalleled.
If your heart beats for rich, chocolaty desserts, you’re in for an absolute delight! After mastering these Devil Dog Cakes, consider exploring more of our indulgent recipes like the decadent Triple Chocolate Chip Cookies, bursting with multiple chocolate varieties, or the incredibly convenient and moist Crockpot Chocolate Cake, perfect for a fuss-free dessert.

Picture this: a freshly baked, tender chocolate cake, generously filled with a sweet, pillowy-soft frosting, enjoyed with an ice-cold glass of milk or a warm, comforting cup of coffee. That’s the dream these Devil Dog Cakes promise and deliver! This homemade rendition will undoubtedly become your new go-to, making those pre-packaged versions a distant memory. The convenience of a hand-held treat combined with the luxurious taste of a freshly baked dessert makes these cakes an ideal after-dinner indulgence. No messy slices or extensive clean-up – just pure, unadulterated chocolate bliss, ready to be savored.
The Unforgettable Homemade Devil Dog Experience
There’s something uniquely satisfying about recreating a cherished childhood snack from scratch, and these Devil Dog Cakes are no exception. The homemade experience transcends the ordinary, transforming a simple treat into a moment of pure culinary joy.
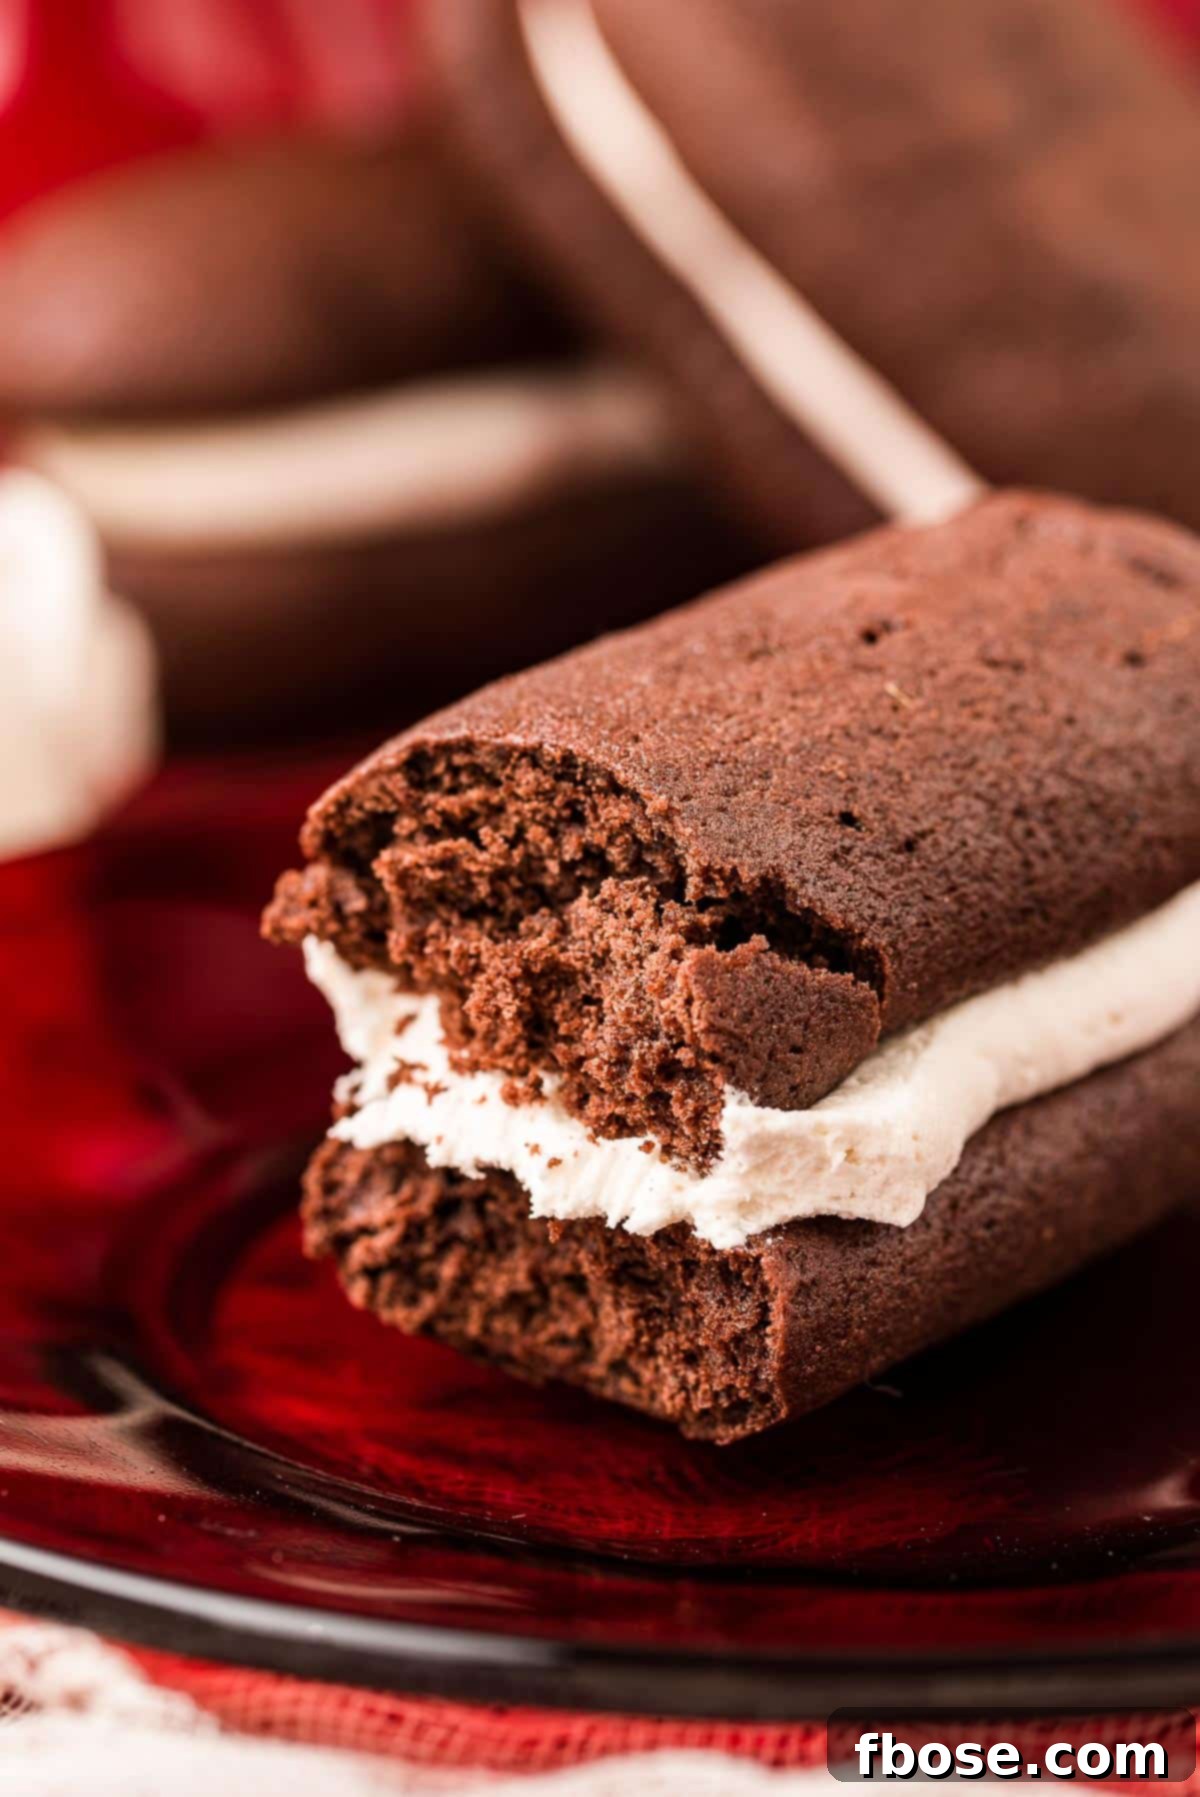
Taste: Each bite into one of these homemade marvels brings forth the familiar, comforting flavors we adore from classic Hostess or Drake’s Devil Dogs, but with an elevated richness and depth that only homemade can achieve. The intense chocolate flavor of the cake layers, paired with the perfectly balanced sweetness of the creamy filling, creates a symphony of taste that truly outshines any store-bought alternative. It’s a nostalgic journey with a gourmet upgrade, a testament to the magic of baking from the heart.
Texture: The textural contrast in these homemade Devil Dogs is simply divine. The chocolate cake layers are exceptionally tender and moist, with a delicate crumb that practically melts in your mouth. This luscious cake provides the perfect foundation for the sweet, fluffy, and incredibly creamy frosting filling. The harmonious interplay between the moist cake and the cloud-like filling creates an irresistible mouthfeel that will have you reaching for another without hesitation. Once you experience this superior texture, you’ll realize there’s no need to make that quick dash to the store for a box again.
Unlocking Deep Chocolate Flavor: The Power of Dutch-Processed Cocoa Powder
Achieving the signature dark color and intensely rich chocolate flavor characteristic of classic Devil Dog Cakes hinges on one crucial ingredient: Dutch-processed cocoa powder. While natural cocoa powder can be used in a pinch, substituting it will noticeably alter the final product, resulting in a lighter color and a less profound chocolate taste.
The fundamental difference between Dutch-processed and natural cocoa powders lies in their acidity. Natural cocoa powder is acidic, which reacts with baking soda to create leavening (rise) in baked goods. Dutch-processed cocoa, on the other hand, undergoes an alkalization process, typically washed with a potassium carbonate solution, to neutralize its acidity. This process not only darkens the cocoa powder, giving it that distinct deep, almost black hue, but also mellows its flavor, making it less bitter and more smooth and rich. For Devil Dog Cakes, this smooth, deep chocolate profile is exactly what we’re striving for. The absence of acidity in Dutch-processed cocoa also means it won’t react with baking soda in the same way, which is why recipes calling for it usually include baking powder or a combination of both to ensure proper rise.
Therefore, to truly capture that intense, dark chocolate essence and classic appearance in your homemade Devil Dog Cakes, prioritize using Dutch-processed cocoa powder. It’s the secret weapon for that authentic, rich flavor that will make your cakes truly irresistible.

Beyond these delightful Devil Dog Cakes, the world of chocolate desserts offers endless possibilities. Whether you prefer your chocolate in fudgy, cake-like brownies such as these delightful Twix Caramel Brownies or rich Classic Homemade Fudge Brownies, there’s a chocolate treat for every craving.
Perhaps you’re a devoted cookie enthusiast who cherishes a fresh batch of Double Chocolate Chip Cookies. And, of course, there’s always a special place in our hearts (and stomachs!) for a magnificent chocolate layer cake, a true celebration of all things cocoa. No matter the form, chocolate desserts are perfect for sharing with friends and family, creating sweet memories together.
Expert Tips for Crafting Perfect Homemade Devil Dog Cakes
Achieving bakery-quality Devil Dog Cakes at home is entirely possible with a few key techniques. Follow these expert tips to ensure your homemade treats are nothing short of spectacular:
- Combine Dry Ingredients Thoroughly: Always start by whisking your dry ingredients together (flour, cocoa powder, baking powder, baking soda, and salt) in a separate bowl before adding them to the wet mixture. This crucial step ensures that the leavening agents and flavorings are uniformly distributed throughout the batter. Uneven distribution can lead to inconsistencies in rise and flavor, resulting in a less-than-perfect cake.
- Embrace the Thick Batter: Don’t be alarmed by the consistency of the Devil’s Food cake batter – it will be noticeably thick. For best results, use a sturdy rubber spatula to gently fold the wet and dry ingredients together. Overmixing thick batters can develop gluten excessively, leading to tough cakes. Folding ensures everything is just combined, maintaining that tender crumb we desire.
- Precision Piping for Uniformity: To achieve consistently sized and shaped cake halves, a pastry bag fitted with a 1A piping tip is your best friend. This method allows for precise control, making it easier to pipe the batter into neat 1-inch by 3-inch oval shapes. Uniformity is key for assembling perfect sandwich cakes.
- Strategic Spacing is Essential: Remember that these chocolate cakes will spread during baking. It’s imperative to leave ample space (at least 3 inches) between each piped oval on your baking sheets. Overcrowding can cause the cakes to merge, bake unevenly, and prevent proper airflow, affecting their texture and appearance.
- Master the Art of Baking: Pay close attention to baking times. The cakes are typically done when their tops are no longer sticky to the touch and gently spring back when lightly pressed. Keep a watchful eye, as overbaking is the arch-nemesis of a moist Devil Dog Cake. Dry cakes lack that signature tender quality, so err on the side of slightly underbaked rather than overbaked.
- The Heavy Cream Secret for Filling: While heavy cream is listed as optional in the filling recipe, we wholeheartedly recommend including it. Just a couple of tablespoons make a significant difference, thickening the frosting to a wonderfully stable consistency. This allows the sweet, marshmallowy creme to hold its shape beautifully between the two moist cake layers, preventing it from oozing out and ensuring a perfectly structured sandwich cake.

Storing Your Homemade Devil Dog Cakes for Maximum Freshness
To enjoy these delightful Homemade Devil Dog Cakes at their absolute best, we recommend savoring them on the day they are baked. However, if you have leftovers (a rare occurrence!), they can be stored to maintain their deliciousness. Place the cakes in an airtight container and keep them at room temperature, where they will remain fresh and enjoyable for an additional day. This prevents them from drying out and preserves the delicate balance of cake and filling.
For longer-term storage, these Devil’s Food Cakes are perfectly freezer-friendly! To prepare them for freezing, wrap each individual cake tightly in plastic wrap. This barrier protects them from freezer burn and preserves their moist texture. Once wrapped, place the individual cakes into a freezer-safe bag or an airtight container, then transfer them to the freezer. They can be enjoyed for up to 3 months. When ready to indulge, simply thaw them at room temperature for an hour or so, and they’ll be ready to enjoy.
Sour Cream Substitution: A Handy Alternative
If you find yourself without sour cream, or simply prefer an alternative, plain Greek yogurt makes an excellent substitute in this cake recipe. Use an equal amount of Greek yogurt in place of the sour cream. The tanginess and moisture content of Greek yogurt are very similar to sour cream, ensuring that your cakes retain their moistness and a slight, pleasant tang that complements the rich chocolate flavor beautifully.
Yield: More Homemade Goodness Than Store-Bought
This generous recipe is designed to produce approximately 15 to 18 finished Devil Dog Cakes. That’s significantly more than the typical 8-count box you’d find at the grocery store, ensuring you have plenty of these irresistible homemade treats to share, or to keep all to yourself! With 30 to 36 individual cake halves, you’ll be well-stocked with homemade goodness.
Join Our Sweet Community!
We love seeing your culinary creations! If you’ve tried this delightful Devil Dog Cakes recipe, please share your thoughts and experiences in the comments section below and consider leaving a review. Your feedback is incredibly valuable and truly makes our day!
Don’t forget to connect with us on social media! Tag us – @sugarandsoulco – on Instagram and Pinterest with your beautiful photos of these homemade treats. You can also join our vibrant Sugar & Soul Show-offs Community on Facebook and participate in our fun recipe challenges! We can’t wait to see your masterpieces.

Average Rating: 4.80 from 10 votes
Homemade Devil Dog Cakes
Author: Rebecca Hubbell
Course: Dessert
Cuisine: American
Prep Time: 30 minutes
Cook Time: 12 minutes
Total Time: 42 minutes
Servings: 15 people
Pin Recipe |
Rate This Recipe
These Homemade Devil Dog Cakes are the ultimate from-scratch version of everyone’s favorite store-bought treat! Crafted right at home with simple pantry ingredients, they taste better than ever!
Ingredients
Cakes
- 2 cups all-purpose flour (spooned and leveled)
- ½ cup Dutch-processed cocoa powder
- 1 teaspoon baking powder
- ½ teaspoon baking soda
- ½ teaspoon salt
- ½ cup unsalted butter (melted and cooled)
- 2 ounces semi-sweet baking chocolate (melted and cooled)
- 1 cup granulated sugar
- 1 large egg yolk (room temperature)
- 2 teaspoons vanilla extract
- ½ cup whole milk (room temperature)
- ½ cup sour cream
Filling
- ½ cup unsalted butter (softened)
- ½ cup vegetable shortening
- 3 cups powdered sugar
- 3 cups marshmallow fluff
- 1 teaspoon vanilla extract
- 2 tablespoons heavy cream (optional, but highly recommended)
Instructions
- Preheat your oven to 350°F (175°C). Line two baking sheets with parchment paper and set them aside.
- In a large mixing bowl, thoroughly whisk together the all-purpose flour, Dutch-processed cocoa powder, baking powder, baking soda, and salt. Create a well in the center of the dry ingredients and set aside.
- In a separate medium bowl, combine the melted butter and melted semi-sweet chocolate, whisking until the mixture is smooth and uniform.
- Next, whisk the granulated sugar, large egg yolk, and vanilla extract into the chocolate-butter mixture until everything is fully incorporated and smooth.
- Finally, whisk in the whole milk and sour cream until the wet ingredients are completely combined.
- Pour the prepared wet ingredients into the well of the dry ingredients. Using a rubber spatula, gently fold the ingredients together until just combined. The batter will be quite thick, which is perfectly normal. Avoid overmixing.
- Carefully fill a pastry bag, fitted with a 1A piping tip, with the thick cake batter. On your prepared baking sheets, pipe the batter into 1-inch by 3-inch long flat ovals. Aim for a thickness of about ¼ to ½ inch. Ensure you leave approximately 3 inches of space between each piped oval, as the cakes will spread during baking. This recipe should yield enough batter for 15 to 18 Devil Dog Cakes (meaning 30 to 36 individual cake halves). You may need more than two baking sheets depending on their size.
- Bake the cakes one sheet at a time on the center rack of your preheated oven for 8 to 12 minutes. Rotate the baking sheet halfway through the baking process to ensure even cooking. The cakes are ready when their tops are no longer sticky to the touch and gently spring back when lightly pressed. Be careful not to overbake, as this will result in dry cakes.
- Once baked, allow the cakes to cool completely on the baking sheet, placed on a wire rack. While the first batch cools, bake any remaining cake halves.
- While the cake halves are cooling, prepare the luscious filling. In a large bowl, cream together the softened unsalted butter and vegetable shortening using an electric mixer until light and fluffy. Gradually add in the powdered sugar, marshmallow fluff, and vanilla extract. Mix on low speed until the sugar is just combined, then increase the speed to high and whip for a full 2 minutes until the filling is light and airy. If you choose to add the heavy cream (which is highly recommended for stability and texture), incorporate it before turning up the mixer speed to high.
- Transfer the prepared filling to a pastry frosting bag fitted with a large piping tip. Pipe a generous amount of filling onto the flat side of half of the cooled cake halves. Gently top with the remaining cooled cake halves, pressing lightly to form your delicious Homemade Devil Dog Cakes.
Notes
- For optimal freshness, these Homemade Devil Dog Cakes are best enjoyed on the day they are made. If you have leftovers, store them in an airtight container at room temperature for up to one day.
- For longer storage, individual cakes can be wrapped tightly in plastic wrap, then placed in a freezer bag and frozen for up to 3 months. Thaw at room temperature before serving.
- While baking chocolate is preferred for its deep flavor, ¼ cup of chocolate chips can be used as a substitute if needed.
- Plain Greek yogurt can be used in an equal amount as a substitute for sour cream in the cake batter, maintaining similar moisture and tanginess.
Nutrition
Calories: 515kcal | Carbohydrates: 76g | Protein: 3g | Fat: 24g | Saturated Fat: 12g | Polyunsaturated Fat: 3g | Monounsaturated Fat: 7g | Trans Fat: 1g | Cholesterol: 55mg | Sodium: 129mg | Potassium: 119mg | Fiber: 2g | Sugar: 55g | Vitamin A: 502IU | Vitamin C: 1mg | Calcium: 37mg | Iron: 1mg
Did You Make This Recipe?
Don’t forget to share it with me on Instagram @sugarandsoulco and follow on Tiktok @sugarandsoulco and Pinterest @sugarandsoulco for more sweet inspiration!
Rate this Recipe |
Pin Recipe |
Share Recipe
This Devil Dog Cakes recipe is inspired by culinary techniques found in Pastry Love by Joanne Chang.