

Irresistible Walnut Chocolate Fudge: Your Easy Guide to Homemade Bliss
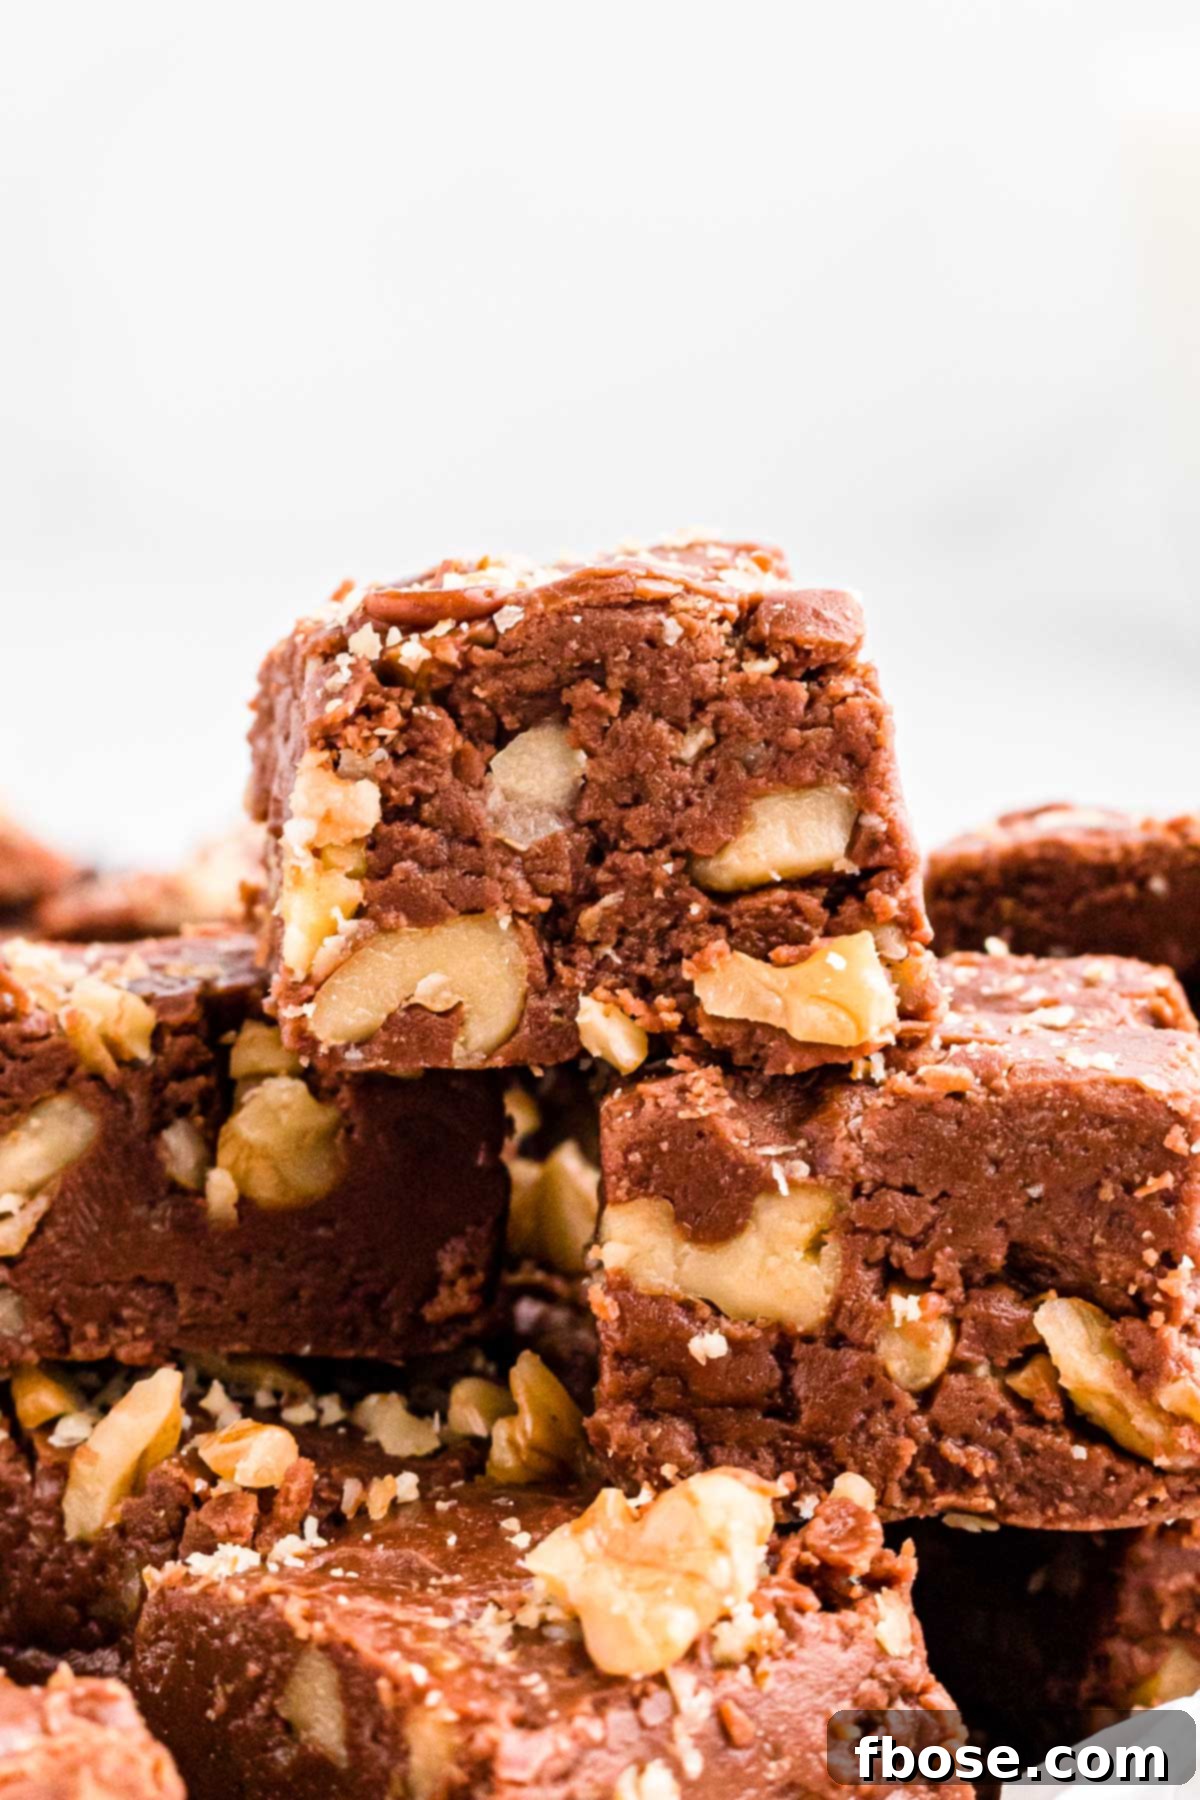
Indulge in the ultimate chocolate experience with this decadent Walnut Chocolate Fudge. This recipe delivers everything you crave in a classic fudge: a perfectly smooth, creamy texture combined with the delightful crunch of walnuts. Each square promises a moment of pure chocolate bliss, making it an ideal treat for any occasion, from festive holiday gatherings to a simple, sweet craving.
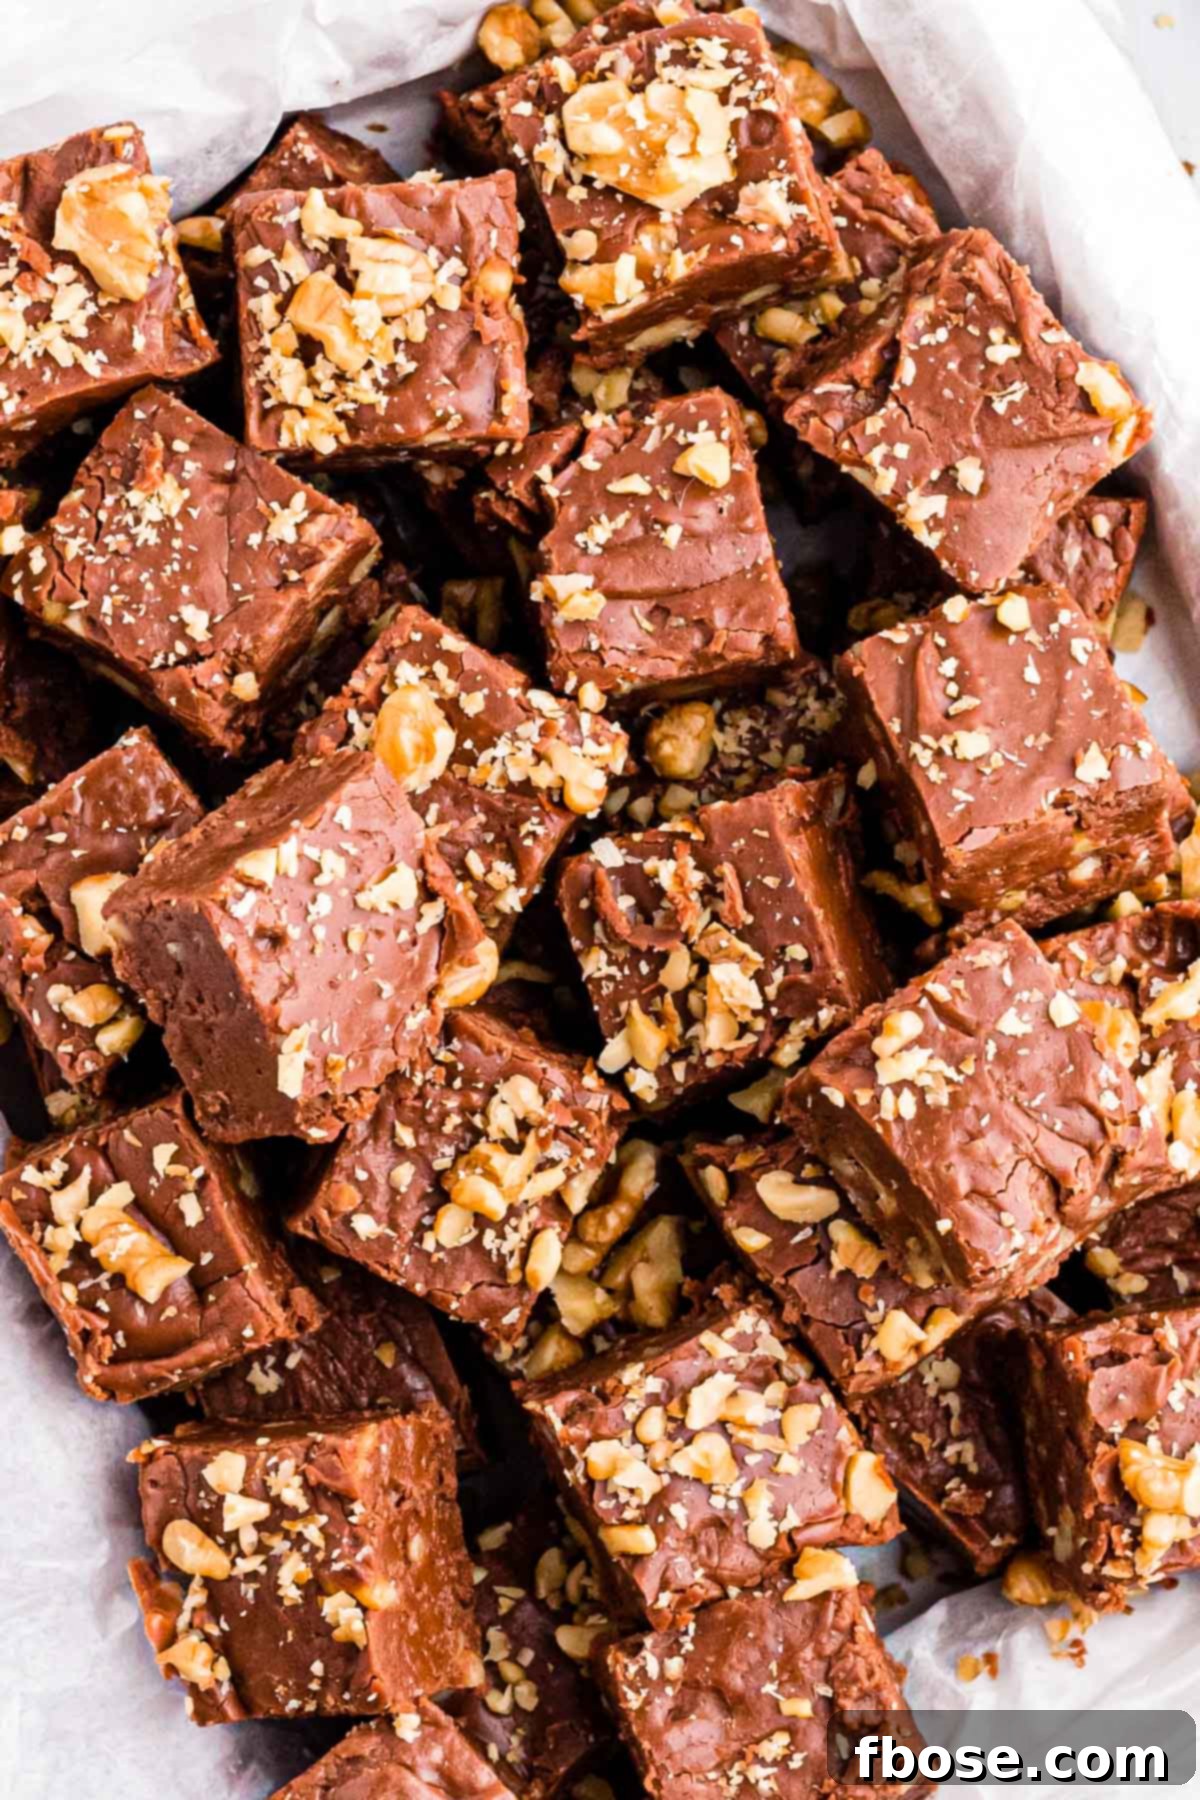
There’s nothing quite like homemade fudge to bring warmth and joy to your home. And when it comes to classic confections, this Walnut Chocolate Fudge stands out. Its rich flavor and appealing texture make it a fantastic addition to any dessert spread, especially during the holiday season. Imagine presenting beautifully wrapped pieces of this fudge to your neighbors, friends, or co-workers – it’s a gift that truly comes from the heart and is always appreciated.
If you’ve been searching for a new recipe to try, let this be it. This easy Chocolate Fudge recipe is designed to impress without requiring complicated techniques or a candy thermometer. With just five core ingredients (plus those crucial walnuts!), you can whip up a batch of heavenly fudge in no time. Forget the guesswork and dive straight into creating this delightful Walnut Fudge. Once you master this, you might also enjoy exploring other delightful variations like our Peanut Butter Fudge or the adventurous Nutella Rocky Road Fudge!
Why You’ll Adore This Easy Walnut Chocolate Fudge Recipe
This isn’t just another fudge recipe; it’s a gateway to simple, homemade dessert perfection. Here’s why this Walnut Chocolate Fudge will become your new go-to:
- Effortless Preparation: Say goodbye to intimidating candy thermometers! Our method simplifies the fudge-making process, ensuring perfect results every time, even for novice bakers.
- Rich & Creamy Texture: The combination of quality chocolate and marshmallow creme yields an incredibly smooth, melt-in-your-mouth consistency that is characteristic of premium fudge.
- Perfect Nutty Crunch: Walnuts are integrated into the fudge itself and generously sprinkled on top, providing a fantastic contrast in texture and a robust, earthy flavor that complements the sweet chocolate.
- Versatile Treat: Ideal for holiday platters, bake sales, thoughtful homemade gifts, or simply as an indulgent treat to share with family and friends.
- Customizable: While delicious as is, this recipe serves as an excellent base for various customizations, allowing you to tailor it to your preferences.
Essential Walnut Chocolate Fudge Ingredients
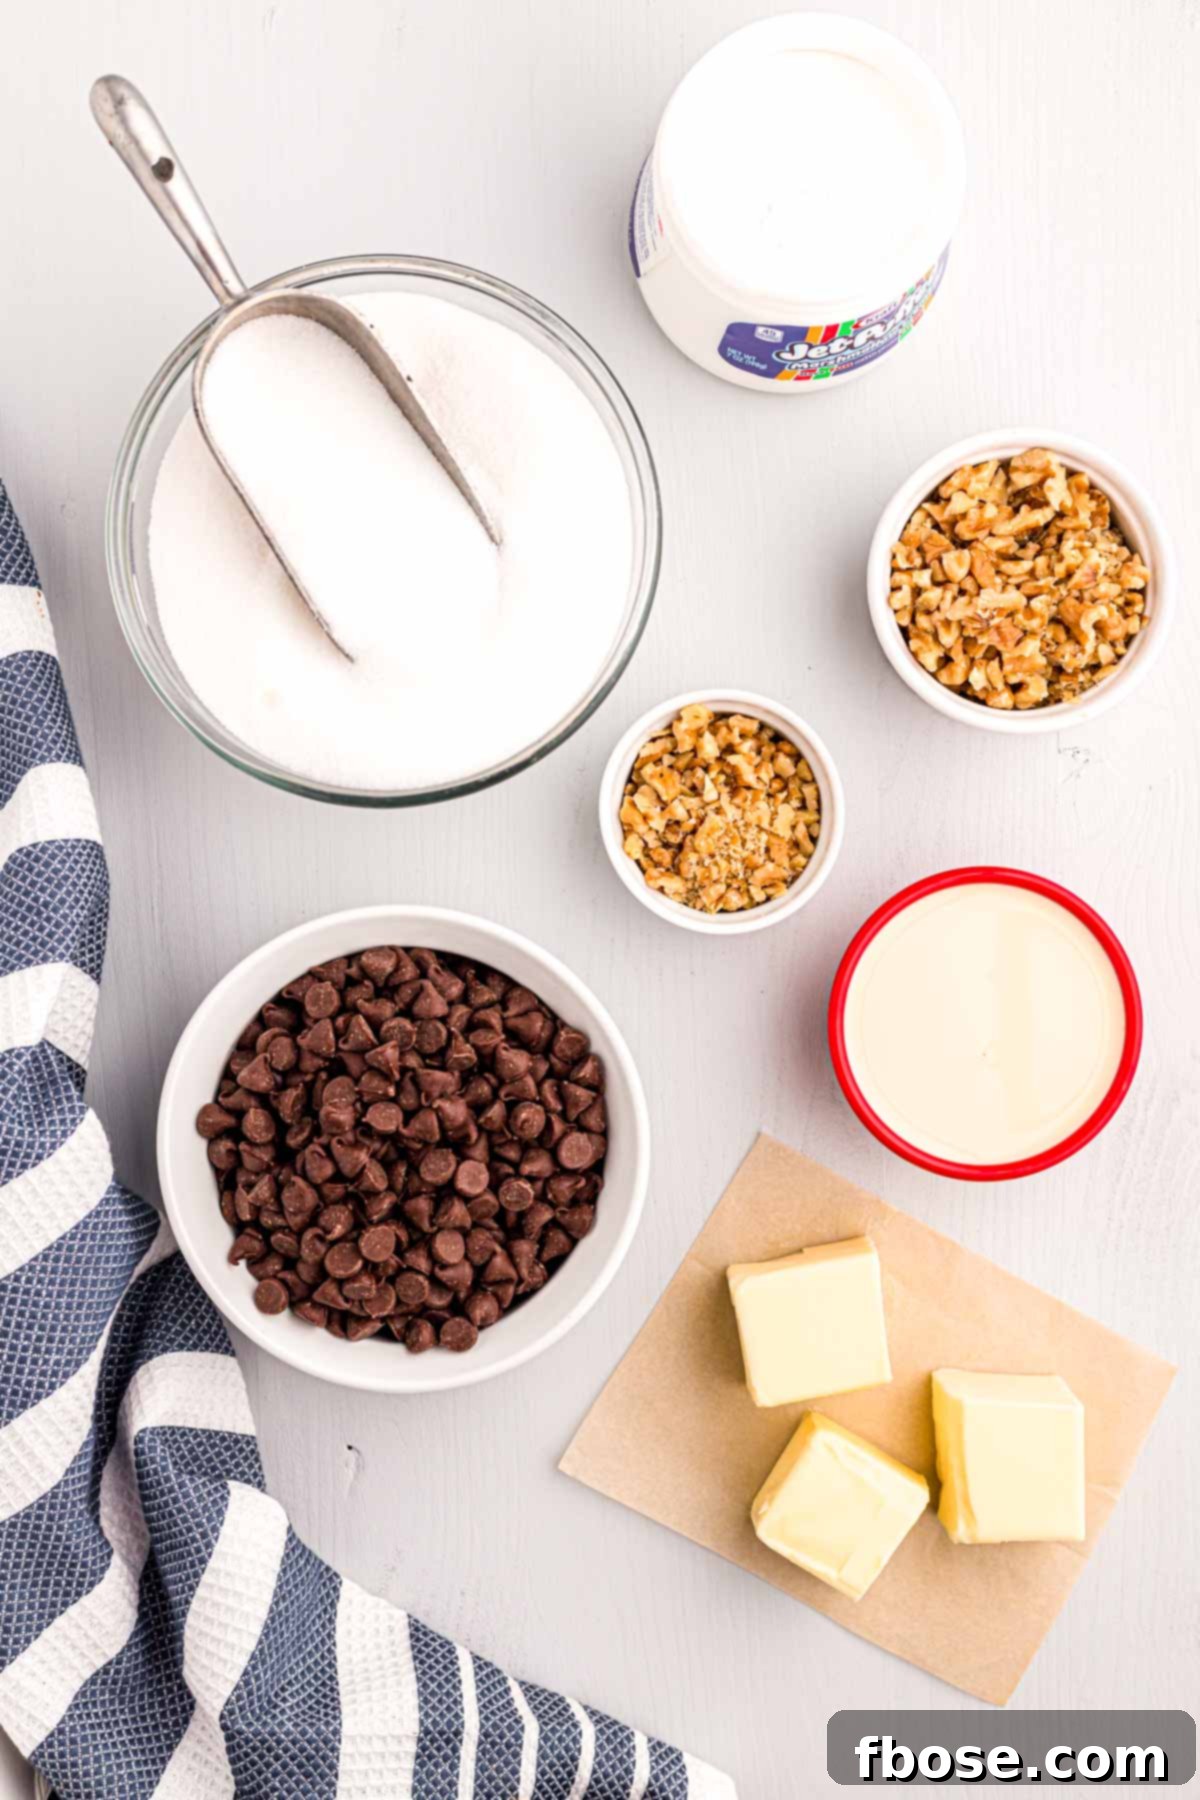
The beauty of this chocolate fudge lies in its simplicity. You’ll find the base ingredients are common pantry staples, making this recipe incredibly accessible. You’ll need:
- Granulated Sugar: The foundation of our sweet treat, providing the necessary structure and sweetness.
- Salted Butter: Contributes to the rich flavor and smooth texture. Using salted butter also balances the sweetness beautifully. For an even richer taste, ensure your butter is softened before use.
- Evaporated Milk: This key ingredient gives the fudge its creamy consistency without adding excess liquid, crucial for proper setting.
- Semi-Sweet Chocolate Chips: The heart of the fudge. Semi-sweet chocolate offers a balanced sweetness that pairs wonderfully with the walnuts. For those who prefer a sweeter profile, milk chocolate chips can be used as a delicious alternative.
- Marshmallow Creme or Fluff: This is our secret weapon for achieving that silky-smooth, no-fail fudge texture without needing a candy thermometer. It helps the fudge set perfectly every time.
And, of course, the ingredient that truly elevates this recipe: walnuts! They are generously studded throughout the creamy chocolate fudge and then sprinkled over the top, not just for an aesthetic finish, but to ensure you get a delightful crunch in every single bite. However, if you’re a purist who prefers a classic, unadorned chocolate fudge, feel free to omit the walnuts entirely.
How To Make This Amazing Walnut Chocolate Fudge
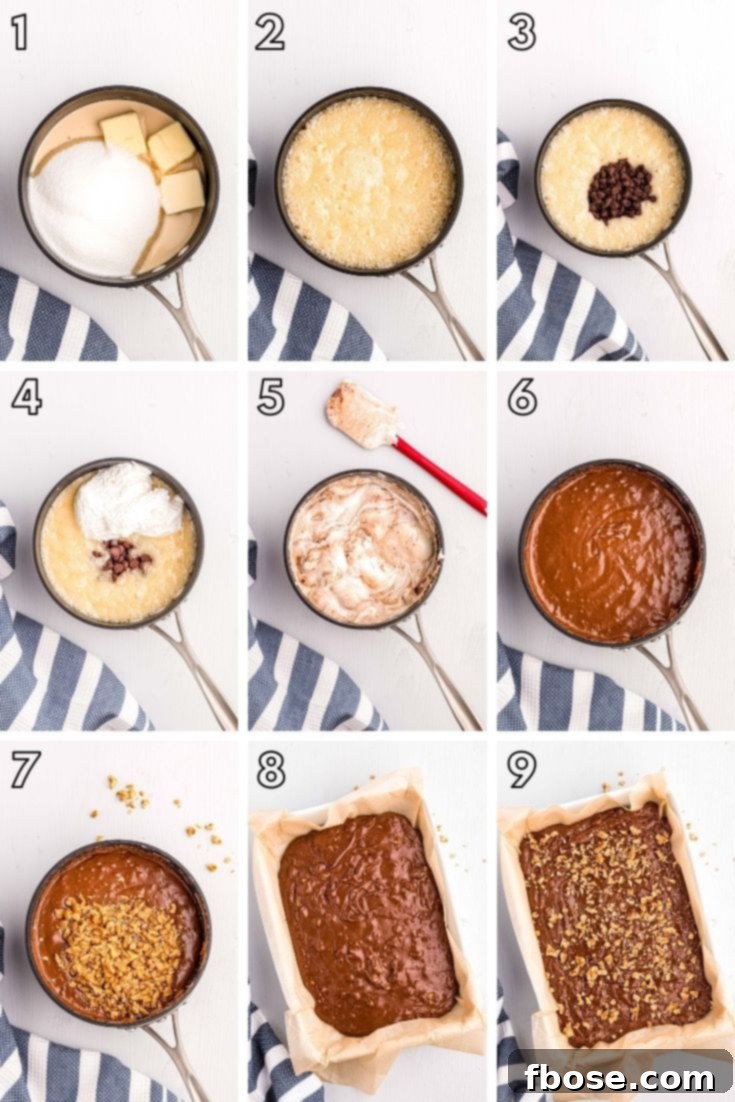
Making this homemade chocolate fudge with walnuts is straightforward. Follow these simple steps for a truly rewarding dessert:
- Prepare Your Pan: Start by lining your chosen baking dish (either a 9×13-inch or 8×8-inch, depending on your preferred fudge thickness – see notes below for details) with parchment paper. Ensure you leave an overhang of 1 to 2 inches on the sides; this will create convenient handles for lifting the set fudge later. Set the prepared pan aside.
- Create the Fudge Base: In a large, heavy-bottomed saucepan, combine the softened salted butter, granulated sugar, and evaporated milk. Place the saucepan over medium-high heat. Stir this mixture continuously. The goal is to melt the butter and dissolve the sugar evenly.
- Bring to a Boil: Keep stirring as the mixture comes to a boil. Once it starts boiling, reduce the heat to medium and continue stirring. You’ll notice it will begin to foam. This “foaming” appearance is your visual cue – it’s crucial for the fudge to reach the correct temperature for setting without needing a candy thermometer. Continue stirring and boiling for about 1 to 2 minutes after it starts foaming. If the mixture doesn’t reach this foaming stage and proper heat, your fudge may not set correctly.
- Incorporate Chocolate and Marshmallow: As soon as the mixture achieves the desired foam, remove the saucepan from the heat immediately. Swiftly add the semi-sweet chocolate chips and the marshmallow creme (or fluff) to the hot mixture.
- Stir Until Smooth: Using a rubber spatula or a wooden spoon, stir vigorously until both the chocolate chips and the marshmallow creme are completely melted and smoothly incorporated into the mixture. The residual heat from the sugar and milk mixture will melt them quickly, creating a luscious chocolate base.
- Add Walnuts: Once the chocolate and marshmallow are fully melted and combined, stir in ¾ cup of the chopped walnuts. Fold them gently until they are evenly distributed throughout the rich chocolate fudge.
- Pour and Top: Working quickly (as the fudge will start to set), pour the chocolate walnut fudge mixture into your prepared pan. Use your spatula to spread it evenly into all corners of the dish. Then, generously sprinkle the remaining ¼ cup of chopped walnuts over the surface of the fudge, gently pressing them down to ensure they adhere.
- Cool and Set: Allow the fudge to cool completely at room temperature. This can take several hours, or even overnight, depending on your kitchen’s temperature. Resist the urge to cut it too soon; patience is key to achieving perfectly set fudge squares.
- Slice and Serve: Once the fudge is firm, use the parchment paper overhang to lift the entire block of fudge out of the pan. Place it on a cutting board and slice it into desired serving sizes, typically 1×1-inch squares.
To keep your homemade Walnut Chocolate Fudge fresh and prevent it from drying out, store it in an airtight container at room temperature. Refrigeration is not necessary, though it can help prolong its freshness if you plan to keep it for an extended period.
Choosing the Right Pan Size for Your Fudge
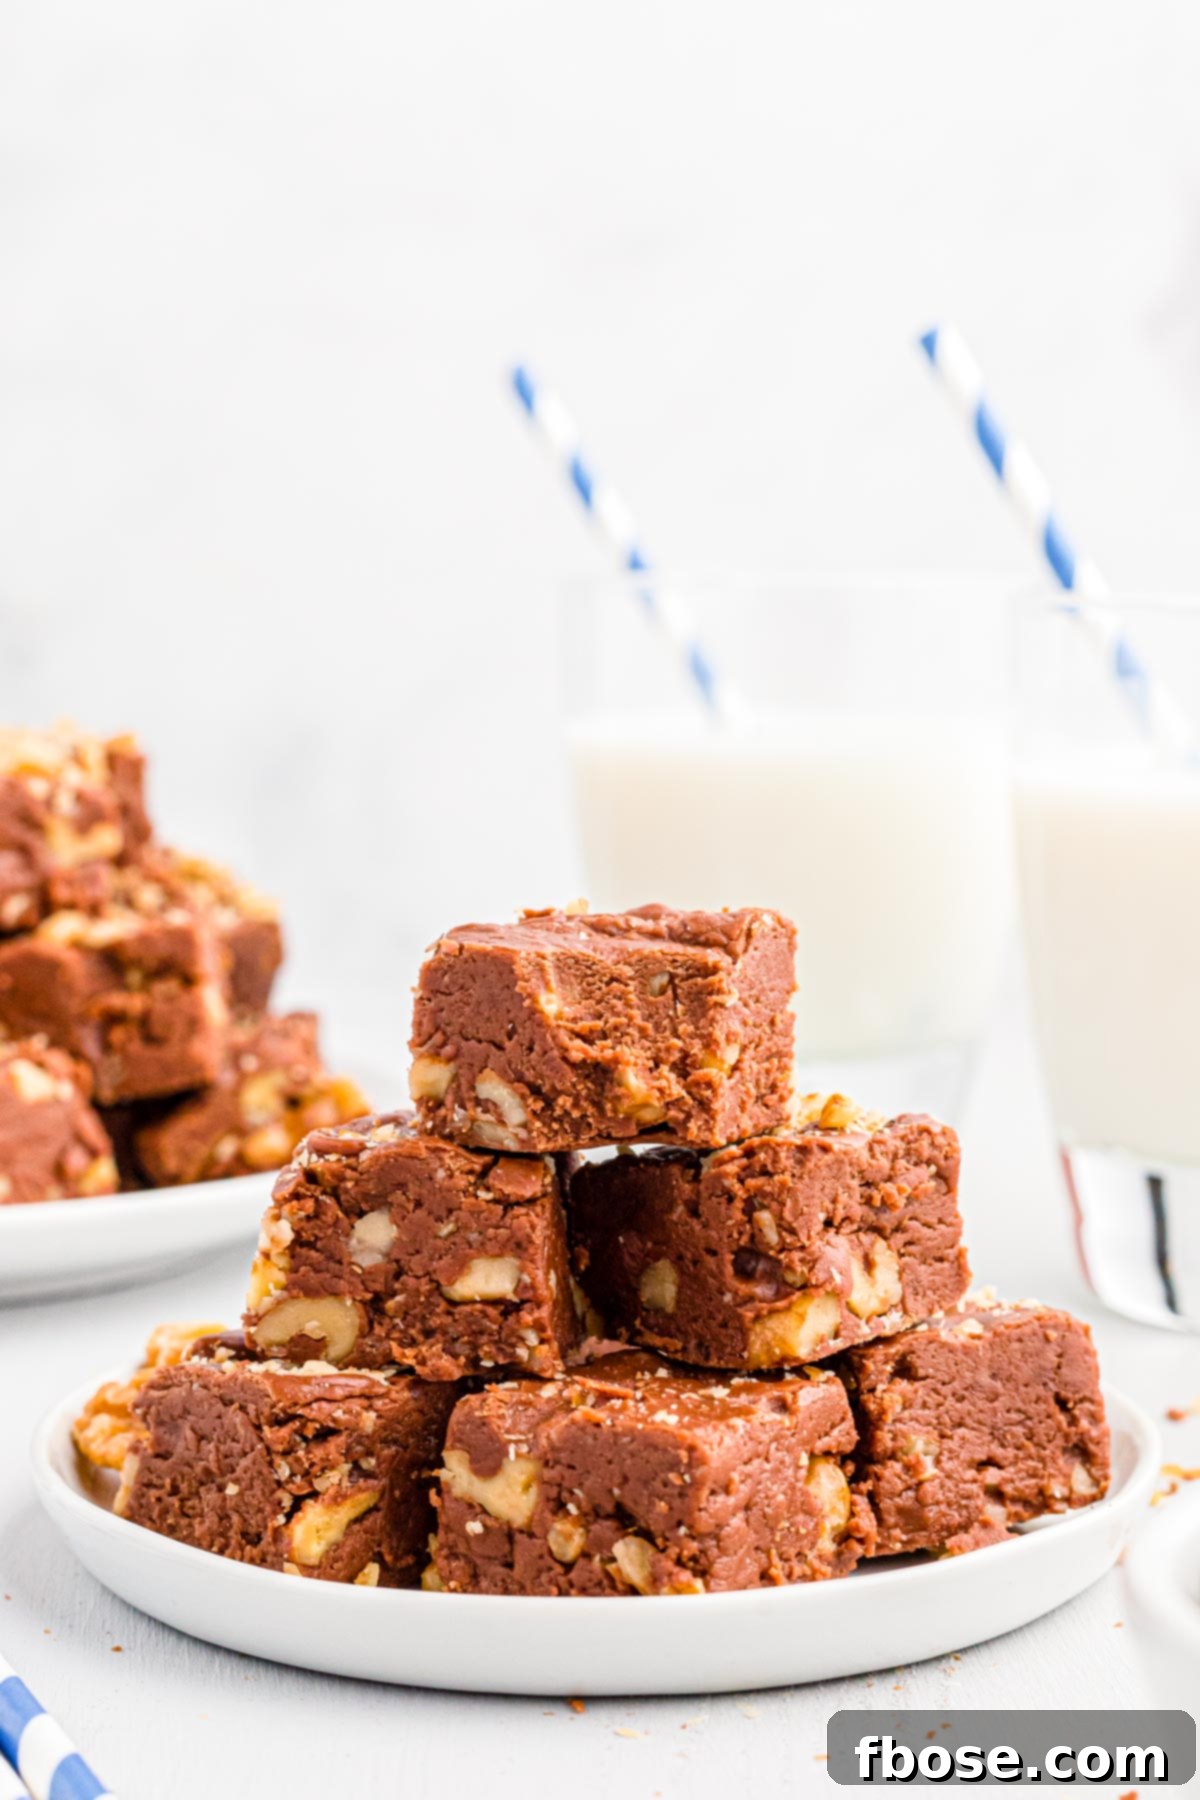
The pan size you choose will directly impact the thickness of your fudge. For this Walnut Chocolate Fudge recipe, I highly recommend using either a 9×13-inch baking dish or an 8×8-inch pan. If you prefer a thinner fudge, which is often easier to cut into small, neat squares (perfect for gift-giving!), opt for the larger 9×13-inch pan. This size also yields more pieces, making it great for bigger gatherings. For a thicker, more substantial piece of fudge that makes a beautiful statement on a dessert table, an 8×8-inch pan is ideal. Both sizes work perfectly with this recipe; it simply depends on your personal preference for fudge thickness.
Storage and Shelf Life: Keeping Your Fudge Fresh
One of the best things about homemade fudge is its excellent shelf life, making it perfect for making ahead or enjoying over several days. This Walnut Chocolate Fudge will remain wonderfully fresh when stored properly. Keep it in an airtight container at room temperature for up to 2 weeks. This prevents it from drying out and maintains its creamy texture. If you want to extend its freshness even further, this fudge freezes beautifully! When stored in a freezer-safe, airtight container, it will last for up to 3 months. Just be sure to let it thaw at room temperature before serving for the best taste and texture.
Parchment Paper vs. Wax Paper: An Important Distinction
When preparing your baking pan for fudge, it is absolutely crucial to use parchment paper, not wax paper. This is a common mistake that can ruin your delicious treat. Parchment paper is designed to withstand high temperatures and will not melt or stick to the hot fudge. Wax paper, on the other hand, has a lower heat resistance. If you pour hot fudge onto wax paper, the wax will melt into your fudge, affecting both its texture and flavor, and making it impossible to remove from the pan cleanly. Always double-check that you’re reaching for parchment paper to ensure a smooth, easy release of your beautifully crafted fudge.
Creative Variations & Customizations
While this recipe for Walnut Chocolate Fudge is perfect as is, it’s also wonderfully adaptable! You can easily tailor it to your preferences or to suit different occasions. The versatility means you can make it “half and half” – half with walnuts, half plain – pleasing everyone with just one recipe!
- Different Nuts: Not a fan of walnuts? No problem! Substitute them with pecans, almonds, or even a mix of your favorite nuts for a different flavor profile. Lightly toasting them before adding can enhance their natural flavors.
- Chocolate Choices: While semi-sweet is classic, consider using dark chocolate chips for a more intense, less sweet fudge, or milk chocolate for an extra creamy and sweet version. You could even swirl in some white chocolate for a beautiful marbled effect.
- Toppings Galore: Beyond walnuts, consider other delicious toppings. A sprinkle of flaky sea salt just after pouring the fudge can enhance the chocolate flavor. Mini chocolate chips, shredded coconut, or a drizzle of caramel or white chocolate once the fudge is set can also add extra flair.
- Extracts & Spices: A teaspoon of pure vanilla extract is always a welcome addition to chocolate fudge. For an adventurous twist, try adding a hint of peppermint extract for holiday fudge, or a pinch of chili powder for a spicy chocolate kick.
- Marshmallow Swirl: Instead of fully incorporating the marshmallow creme, you can swirl a portion of it into the chocolate base at the end for a beautiful marbled effect.
Here are some other decadent chocolate recipes to try that are equally impressive:
- Buche de Noel Chocolate Yule Log – A stunning and festive Christmas dessert that’s sure to be the centerpiece of your holiday table!
- Double Chocolate Chip Cookies – Incredibly soft and rich cookies made effortlessly with instant chocolate pudding mix!
- Chocolate Cream Pie – A luxurious dessert featuring a silky smooth chocolate filling, nestled in a crunchy graham cracker crust, and crowned with a generous layer of whipped cream!
- Homemade French Hot Chocolate – Experience the ultimate rich, thick, and creamy hot chocolate, perfect for warming up on a chilly day!
- Kahlua Chocolate Poke Cake – This indulgent, boozy cake is infused with Kahlua at every stage – baked in, soaked in, and frosted with the coffee liqueur!
Let’s Connect!
If you’ve tried this delicious Walnut Chocolate Fudge recipe, please let me know how you liked it in the comments below and leave a review. I absolutely love hearing from you and seeing your culinary creations!
Don’t forget to tag me – @sugarandsoulco – on Instagram and Pinterest with your photos, or join our Sugar & Soul Show-offs Community on Facebook and share them there, where you can also participate in our fun recipe challenges!
Chocolate Fudge with Walnuts
Author: Rebecca Hubbell
Course: Dessert
Cuisine: American
Prep Time: 5 minutes
Cook Time: 10 minutes
Cooling Time: 1 hour
Total Time: 1 hour 15 minutes
Servings: 24 pieces
Pin Recipe
This Walnut Chocolate Fudge checks all the boxes of what you expect fudge to be! The combination of dreamy, creamy fudge laced with walnuts as well as topped with them, brings you the ultimate slice of chocolate bliss!
Ingredients
- 3 cups granulated sugar
- ¾ cup salted butter, softened
- 5 ounces evaporated milk
- 12 ounces semi-sweet chocolate chips
- 7 ounces marshmallow creme or fluff
- 1 cup chopped walnuts, divided
Instructions
- Line a 9×13-inch or 8×8-inch pan or baking dish (see notes) with parchment paper, leaving an inch or two going over the sides for easy lifting.
- Using a heavy medium or large saucepan, melt the butter with the sugar and evaporated milk. Keep the mixture on medium-high heat, stirring continuously, until it begins to boil. Continue stirring on medium heat until it begins to foam, for about 1 to 2 minutes. (If you don’t get the mixture to the right heat, it won’t set. So use the “foam” look as a rule of thumb).
- Once the milk and sugar mixture has begun to foam, remove the saucepan from heat. Stir in the chocolate chips and marshmallow creme until they melt and combine. The chocolate will melt pretty quickly, so use a rubber spatula or wooden spoon to combine the melted creme with the chocolate.
- Once both have melted into the mixture, stir in ¾ cup of the chopped walnuts, if using. Quickly pour the chocolate mixture into the lined pan or baking dish, and then spread it out evenly. Sprinkle the top of the fudge with the remaining ¼ cup of walnuts, and gently press them into the mixture.
- Allow the fudge to cool completely at room temperature until it sets. Cut into 1×1-inch squares. To prevent your fudge from drying out, keep it stored in an airtight container. You can refrigerate, but it is not necessary.
Notes
- I have made this fudge using both pan sizes, and it works either way. The large pan (9×13-inch) makes the fudge thinner, and if gift-giving, I would suggest this size. It is easy to cut into 1×1-inch squares. The 8×8-inch pan gives a thicker fudge, which is really pretty on a dessert table.
- I used ¾ cup of chopped walnuts stirred into the fudge and then added ¼ cup sprinkled on top. My family likes a lot of chopped nuts in fudge, so we add enough so you get some in each bite. This is our personal preference. If you prefer less, change the total amount to ½ cup.
- You can also sprinkle flaky sea salt on top for a delightful flavor contrast, or simply leave any toppings off for a classic look.
- You can also leave the walnuts out entirely if you just want plain chocolate fudge.
Nutrition Facts
Here’s an estimated nutritional breakdown per serving (based on 24 servings):
- Calories: 295 kcal
- Carbohydrates: 41g
- Protein: 2g
- Fat: 15g
- Saturated Fat: 7g
- Cholesterol: 18mg
- Sodium: 59mg
- Potassium: 121mg
- Fiber: 1g
- Sugar: 36g
- Vitamin A: 198IU
- Vitamin C: 1mg
- Calcium: 31mg
- Iron: 1mg
Did You Make This Recipe?
Don’t forget to share it with me on Instagram @sugarandsoulco and follow on Tiktok @sugarandsoulco and Pinterest @sugarandsoulco for more!
Pin Recipe
Share Recipe