

Welcome to the ultimate guide for crafting the most delightful Chocolate Cheesecake Cookies you’ll ever bake! This comprehensive recipe provides easy-to-follow, step-by-step instructions, ensuring that every home baker can successfully create a batch of these exquisite, gourmet bakery-style treats. Prepare to impress with cookies that boast a perfect balance of deep, rich chocolate flavor and a luscious, sweet, cheesecake-like filling—a truly irresistible combination that becomes an instant favorite.
Imagine tender, chewy chocolate cookies giving way to a creamy, tangy cheesecake center. These aren’t just any cookies; they’re an experience. Perfect for special occasions, holiday gatherings, or simply elevating your everyday dessert repertoire, these chocolate cheesecake cookies promise a taste sensation that combines two beloved desserts into one unforgettable bite.
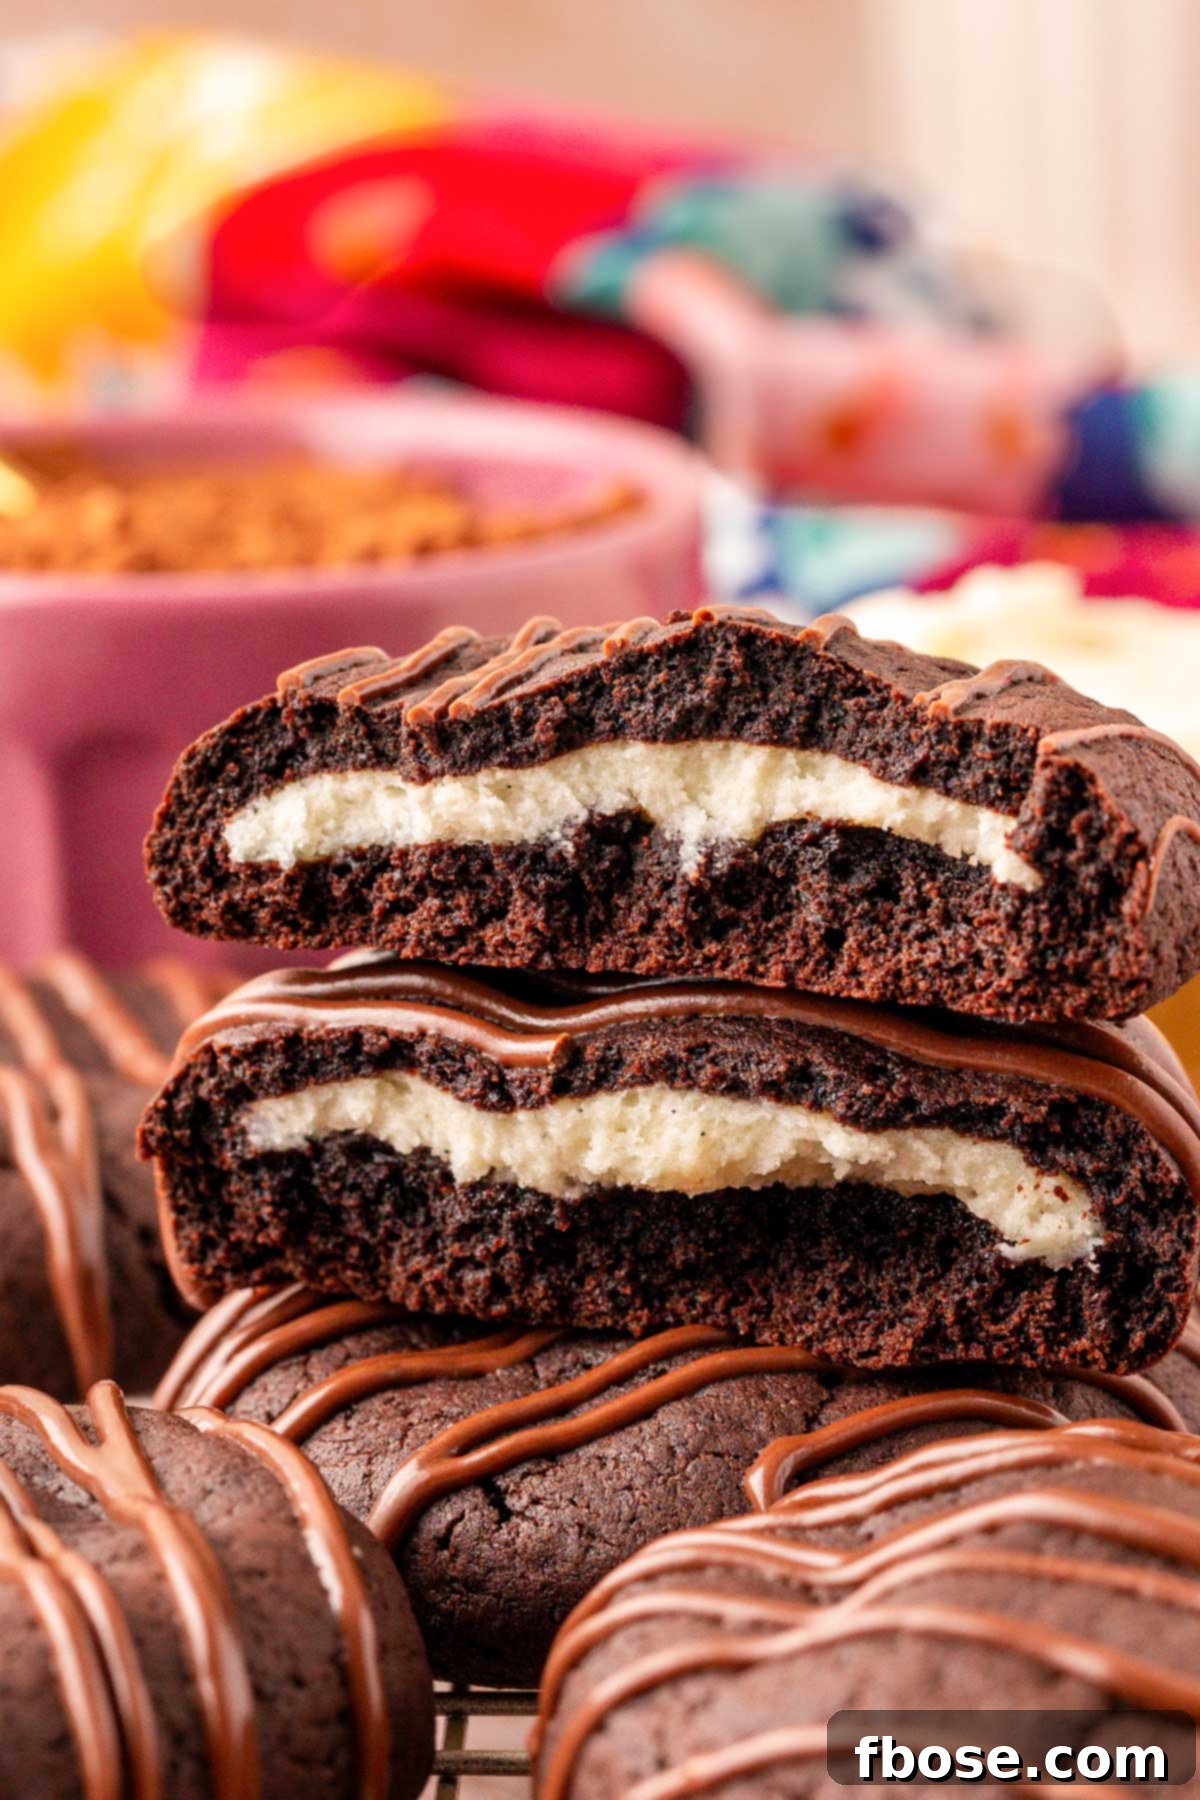
Indulgent Chocolate Cookies with Creamy Cheesecake Filling
Get ready to discover your new signature dessert: these incredible Chocolate Cheesecake Cookies! These treats elevate the humble cookie to an entirely new level, offering a symphony of textures and flavors. Each bite delivers a decadent, rich chocolate experience that perfectly complements the smooth, sweet, and slightly tangy cheesecake filling nestled within. It’s a flavor marriage you didn’t know you needed, destined to become a staple in your baking repertoire.
What makes this recipe truly stand out? Not only does it produce a remarkably delicious cookie, but it also requires **zero chill time** for the dough, meaning you can go from craving to biting into warm, freshly baked cookies in no time. Crafted mostly from common pantry ingredients, this recipe yields over a dozen generously sized cookies, making them ideal for sharing with loved ones, bringing to a potluck, or simply savoring as a personal indulgence. Whether you’re treating yourself, brightening a colleague’s day, or preparing a festive holiday spread, these cookies are a guaranteed hit that will earn you rave reviews.
The beauty of these gourmet chocolate cream cheese cookies lies in their perfect balance. The deep cocoa notes of the cookie dough provide a robust foundation, while the creamy cheesecake interior adds a delightful contrast in both flavor and texture. This unique combination ensures every cookie is moist, tender, and incredibly satisfying, offering a sophisticated twist on classic chocolate cookies.
Pin This Recipe For Later
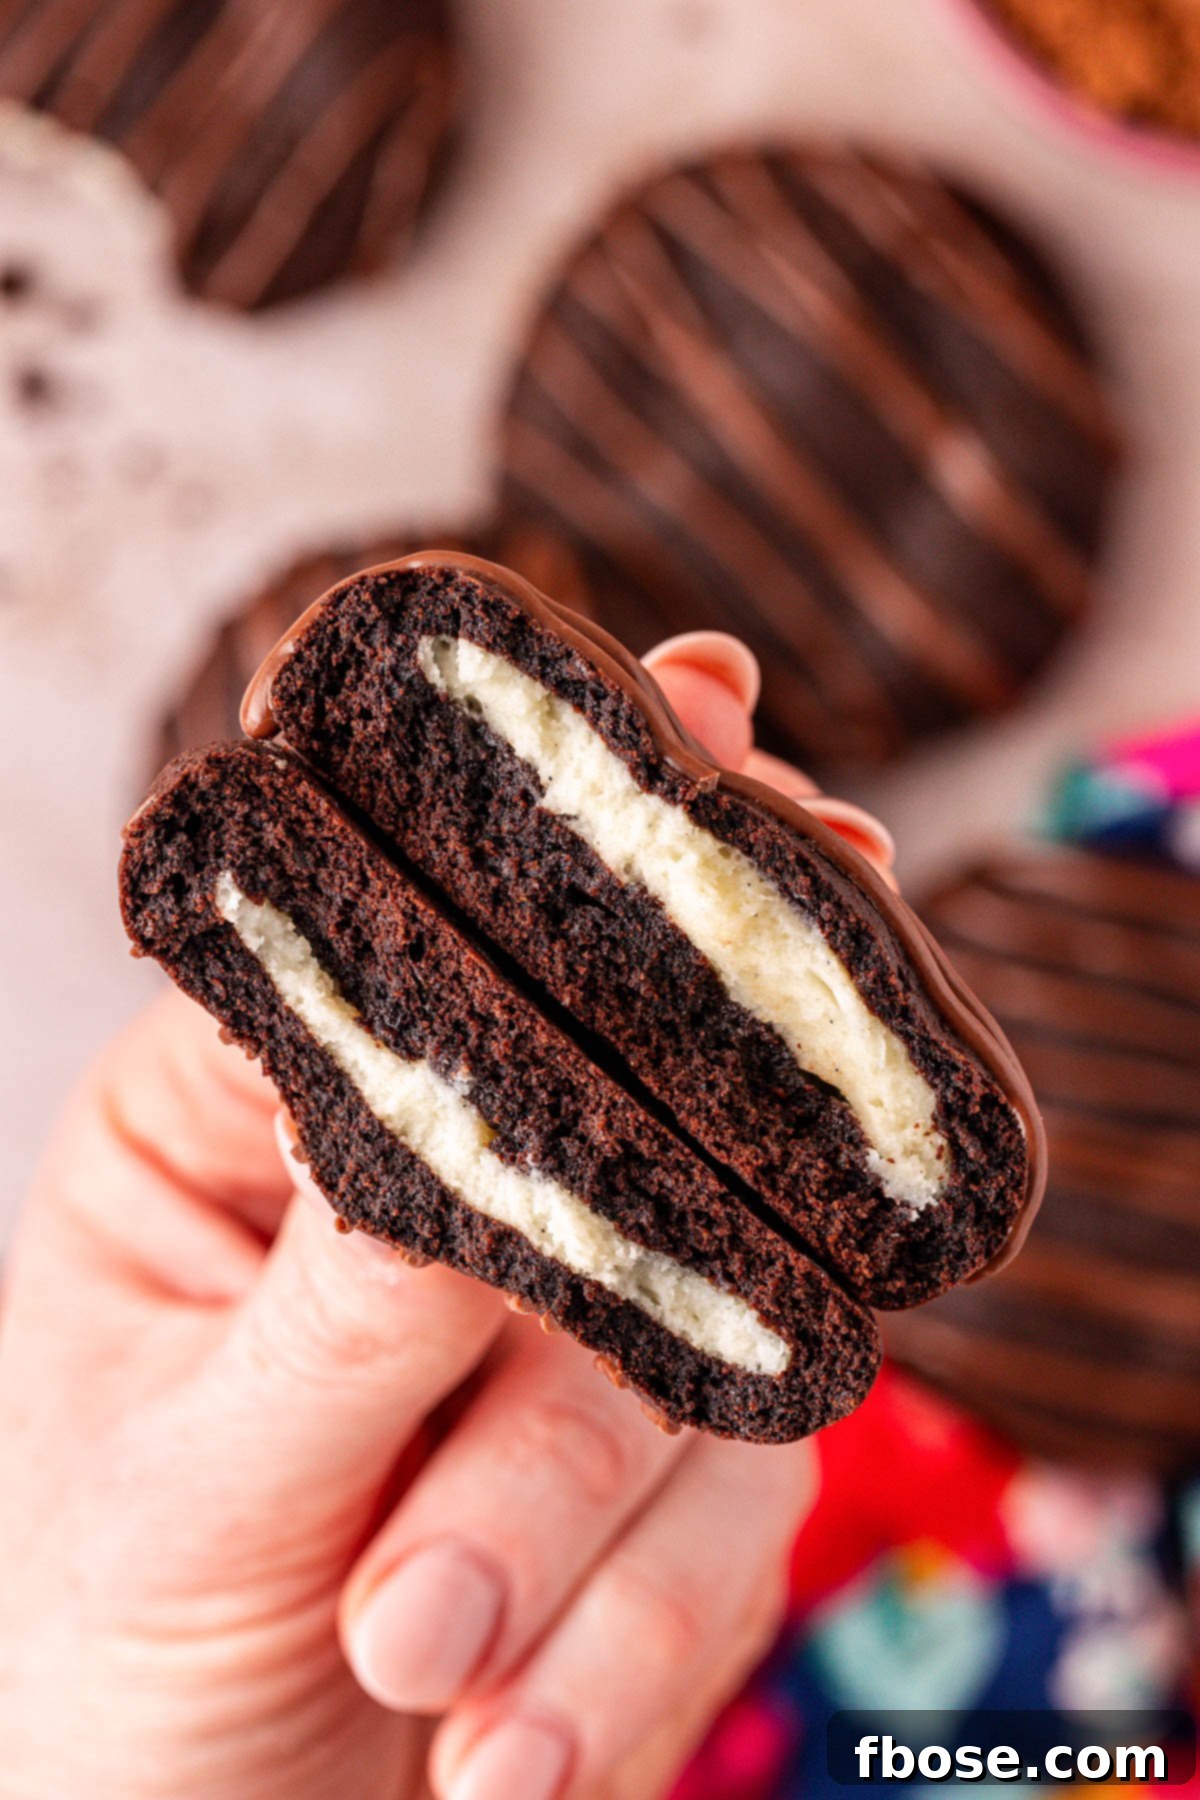
Expert Review: Chocolate Cheesecake Cookies
Taste: A sophisticated blend of intensely rich dark chocolate with a sweet, velvety vanilla cream cheese filling. Each flavor shines through, creating a harmonious and utterly addictive profile.
Texture: These cookies are wonderfully soft and tender, yielding easily to a bite, revealing a gloriously gooey, almost molten center of cream cheese. The exterior has a slight chew, providing a perfect textural contrast.
Ease: 6/10. While the steps are straightforward, the process of stuffing the cookies requires a bit of patience and a gentle touch. It’s not difficult, but it’s a technique that improves with practice.
Pros: Stuffed cookies are inherently fun and exciting, offering a delightful surprise with every bite. The layers of flavor and texture add an undeniable gourmet appeal, making them feel extra special.
Cons: The main challenge lies in successfully encasing the cream cheese filling within the cookie dough. Careful sealing is key to prevent any delicious leaks during baking.
Would I Make This Again? Absolutely, but these are definitely more of a show-stopping dessert for special occasions or when you want to truly indulge, rather than a quick everyday sweet treat.
If you’re captivated by the decadent chocolate and cheesecake combination, you must try our Cream Cheese Brownies for another rich dessert experience. And for those who adore this specific cream cheese filling, discover how versatile it is in our delightful Pumpkin Cheesecake Cookies!
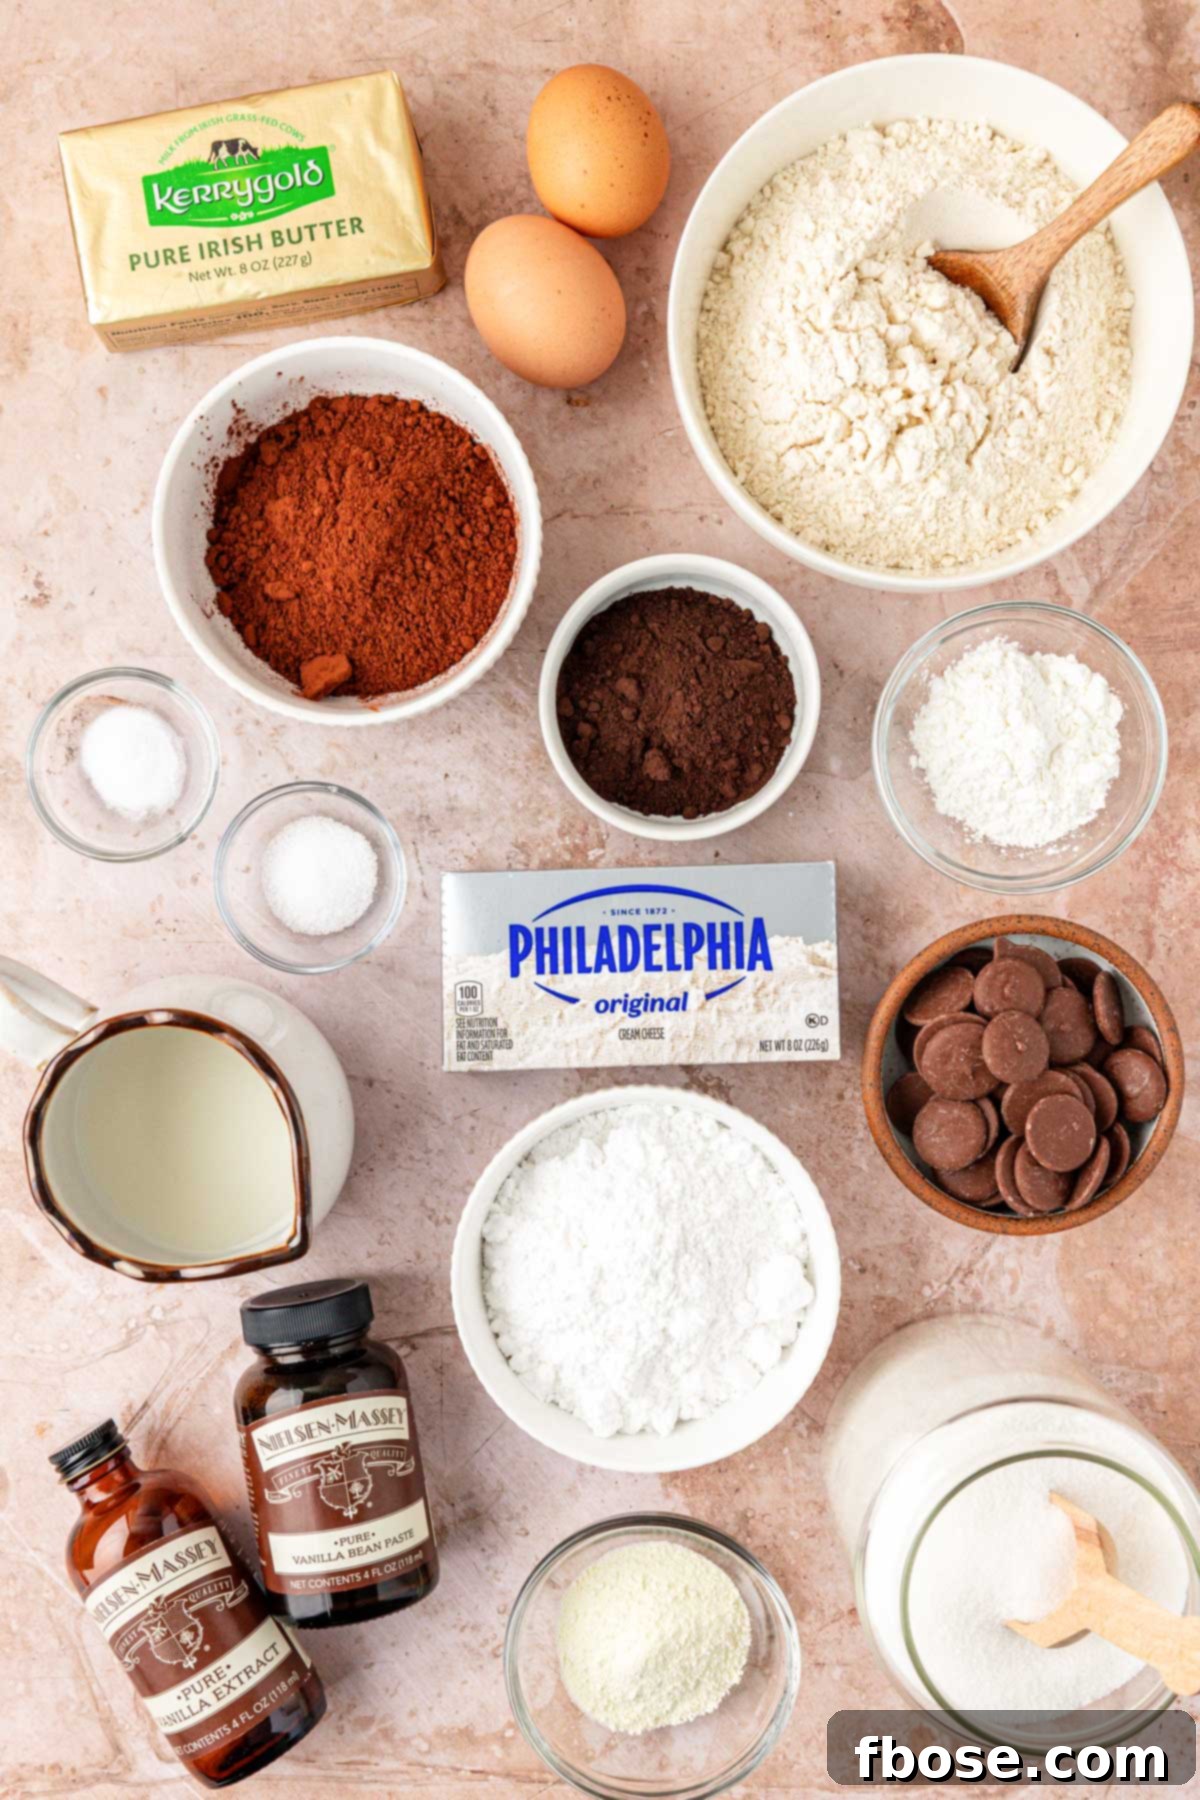
Key Ingredients for Unforgettable Chocolate Cheesecake Cookies
To embark on baking a batch of these exquisite, gourmet-style cookies, you’ll start with a foundation of essential pantry staples. Gather your all-purpose flour, granulated sugar, baking soda, and a touch of salt to build the perfect cookie base. For that irresistible depth of flavor, pure vanilla extract is indispensable, while powdered milk and cornstarch play crucial roles in achieving the ideal texture. From the refrigerator, you’ll need softened salted butter, fresh eggs, and rich whole milk to bring the dough to life.
For a cookie that is gloriously chewy and tender, we’ve carefully selected a combination of one whole egg and an additional egg yolk. This strategic addition of an extra egg yolk introduces more fat into the dough, which in turn helps the cookies retain a higher level of moisture. The result? Cookies that are exceptionally soft, delightfully chewy, and resist drying out, ensuring a truly melt-in-your-mouth experience.
To further elevate the perfection of these chocolate cookies, we’ve chosen a unique blend of two distinct cocoa powders: unsweetened cocoa powder and black cocoa powder. This carefully balanced combination is the secret behind the cookies’ stunningly deep, dark brown, almost black color, reminiscent of a decadent gourmet treat. It achieves this intense hue without imparting excessive bitterness or the often-overpowering “Oreo” flavor, allowing the pure chocolate taste to shine through.
However, if you only have one type of cocoa powder on hand, don’t fret! You can certainly opt to use all unsweetened cocoa powder or all black cocoa powder. Rest assured, your cookies will still turn out incredibly scrumptious and satisfying, though the color and flavor nuances might vary slightly. Experimentation is always encouraged in baking!
The crowning glory of these chocolate cheesecake cookies is, of course, their rich and creamy cream cheese filling! This simple yet sensational filling is crafted from just three key ingredients: smooth powdered sugar, aromatic vanilla extract, and high-quality cream cheese. To ensure the absolute best flavor and luxurious texture for your filling, we highly recommend using a full-fat cream cheese. The richness of full-fat cream cheese makes a noticeable difference, delivering a truly indulgent center that perfectly complements the deep chocolate cookie.
Can I Make These Chocolate Cheesecake Cookies Gluten-Free?
Absolutely! Adapting this recipe to be gluten-free is quite simple and yields fantastic results. For those with dietary needs or preferences, a high-quality 1-to-1 gluten-free flour blend will work beautifully. Brands such as King Arthur Gluten-Free All-Purpose Flour or Bob’s Red Mill 1-to-1 Baking Flour are specifically formulated to mimic the properties of traditional all-purpose flour. This means you can substitute them at the exact same ratios as regular flour without needing to make any other significant adjustments to the recipe. You’ll still achieve tender, delicious cookies with that signature cheesecake filling, perfect for everyone to enjoy.
Essential Equipment for Cheesecake-Stuffed Chocolate Cookies
The good news for home bakers is that you won’t need an arsenal of highly specialized gadgets or complicated bakeware to bring these delightful chocolate cheesecake cookies to life. The tools required are mostly kitchen basics that you likely already own or can easily acquire.
First, a stand mixer is highly recommended for efficiently creaming butter and sugar, as well as thoroughly combining the cookie dough. If a stand mixer isn’t available, a sturdy hand mixer will certainly get the job done, though it might require a bit more arm strength. You’ll also need a spacious mixing bowl for combining your dry ingredients and another for the wet ingredients. A reliable rubber spatula will be invaluable for scraping down the sides of your bowls and ensuring everything is perfectly incorporated.
For consistent cookie sizes and even baking, a set of cookie scoops (specifically a #24 scoop for this recipe) is incredibly helpful. This ensures each cookie bakes uniformly and contains a similar amount of delicious filling. Finally, a large baking sheet, generously lined with parchment paper, is essential. Parchment paper not only prevents sticking but also makes for effortless cleanup, which is always a bonus after a baking session.
While not strictly mandatory, a kitchen scale is a highly recommended tool for any serious baker. Measuring ingredients by weight in grams, especially flour, offers unparalleled precision compared to volume measurements. This accuracy is key to achieving consistent, bakery-quality results every single time, ensuring your cookies have the perfect texture and consistency. With these basic tools, you’ll be well on your way to baking impressive, gourmet cookies right from the comfort of your own kitchen.
Crafting Your Cream Cheese Chocolate Cookies: A Step-by-Step Guide
- Prepare Your Workspace: Begin by preheating your oven to 350°F (175°C). Line a large baking sheet with parchment paper to ensure easy release and minimal cleanup. If you only have one standard-sized baking sheet, prepare two batches as the cookies need space to spread. Set the prepared baking sheet aside.
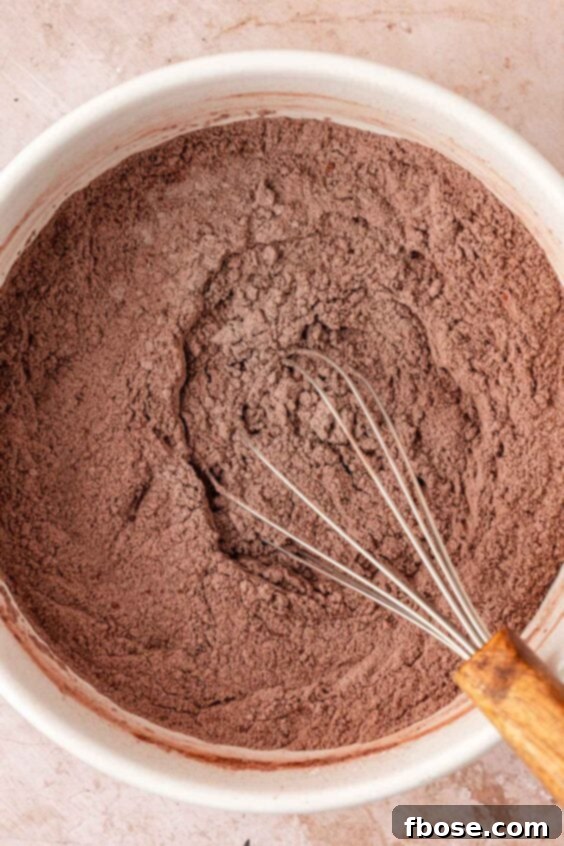
- Combine Dry Ingredients: In a medium-sized bowl, thoroughly whisk together the all-purpose flour, Dutch cocoa powder, black cocoa powder, cornstarch, powdered milk, and baking soda. Whisking ensures these ingredients are evenly distributed, preventing pockets of leavening agents or cocoa. Set this mixture aside.
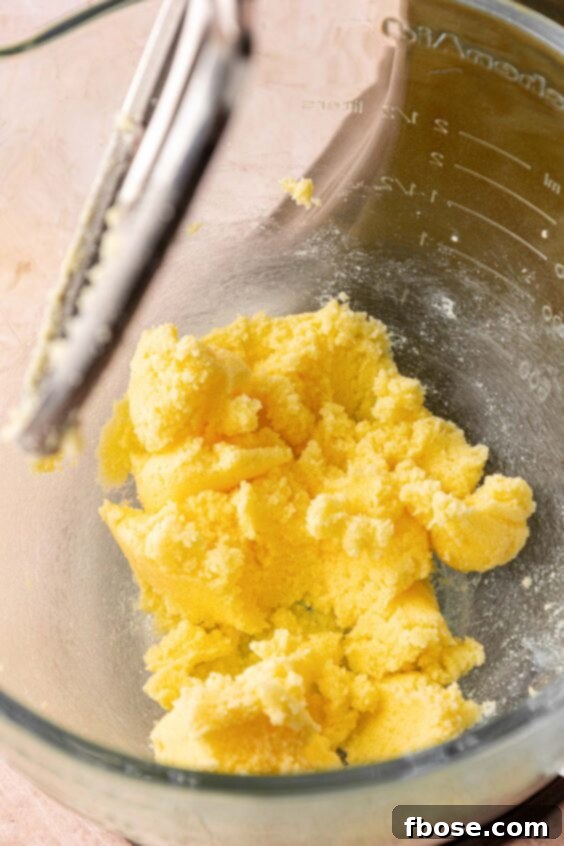
- Cream Butter and Sugar: In the bowl of a stand mixer fitted with a paddle attachment (or using a hand mixer in a large bowl), combine the softened salted butter, granulated sugar, and salt. Beat on medium speed for about 1 minute until the mixture is light, fluffy, and well-creamed. This step incorporates air, contributing to the cookie’s tender texture.
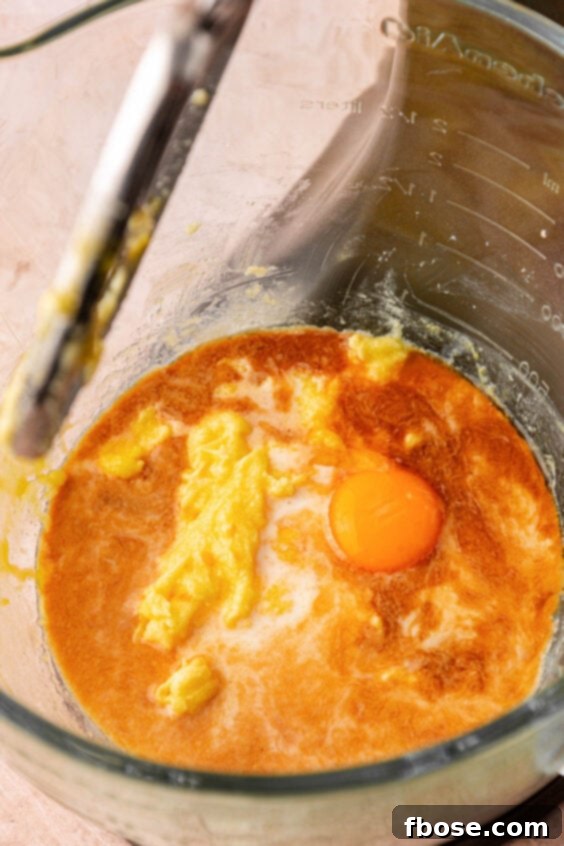
- Incorporate Wet Ingredients: Add the large egg to the creamed butter mixture and beat until just combined. Next, beat in the additional large egg yolk, whole milk, and pure vanilla extract. Mix until all these wet ingredients are fully incorporated but avoid overmixing at this stage.
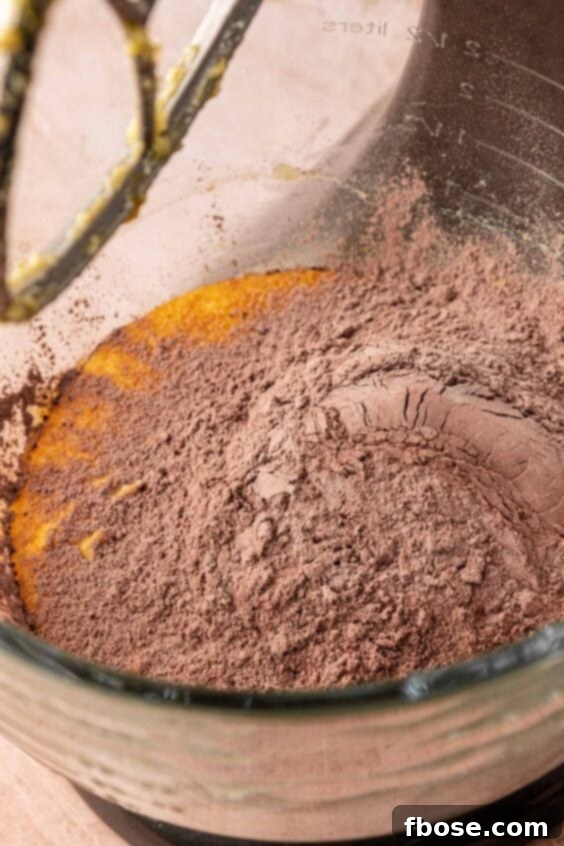
- Add Dry to Wet: Gradually add the dry ingredient mixture to the wet ingredients. Start by mixing in half of the dry ingredients until just incorporated. Then, add the remaining dry ingredients and continue mixing on low speed until the cookie dough is thoroughly combined. Be careful not to overmix, as this can lead to tough cookies.
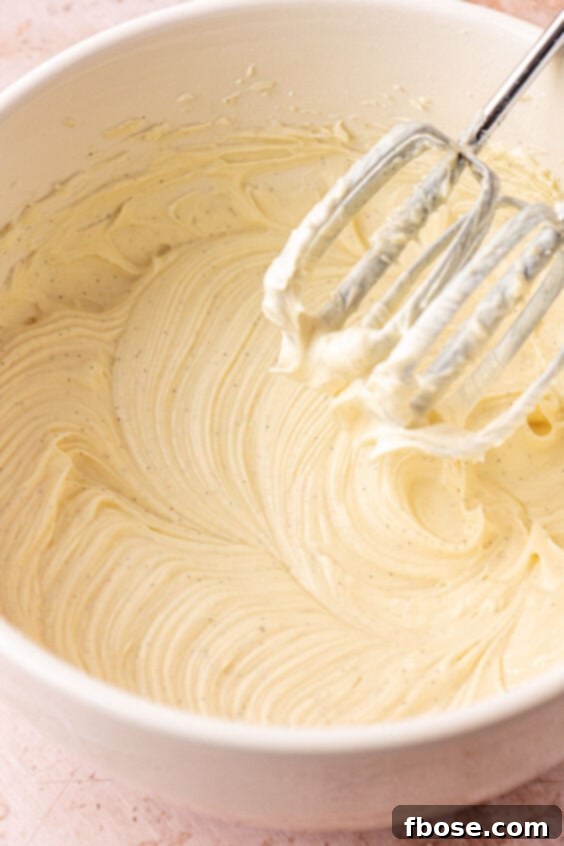
- Prepare the Cheesecake Filling: In a separate medium bowl, combine the softened cream cheese, powdered sugar, and vanilla extract. Beat these ingredients together until the mixture is completely smooth and creamy, with no lumps. This rich filling is the heart of your cookies!
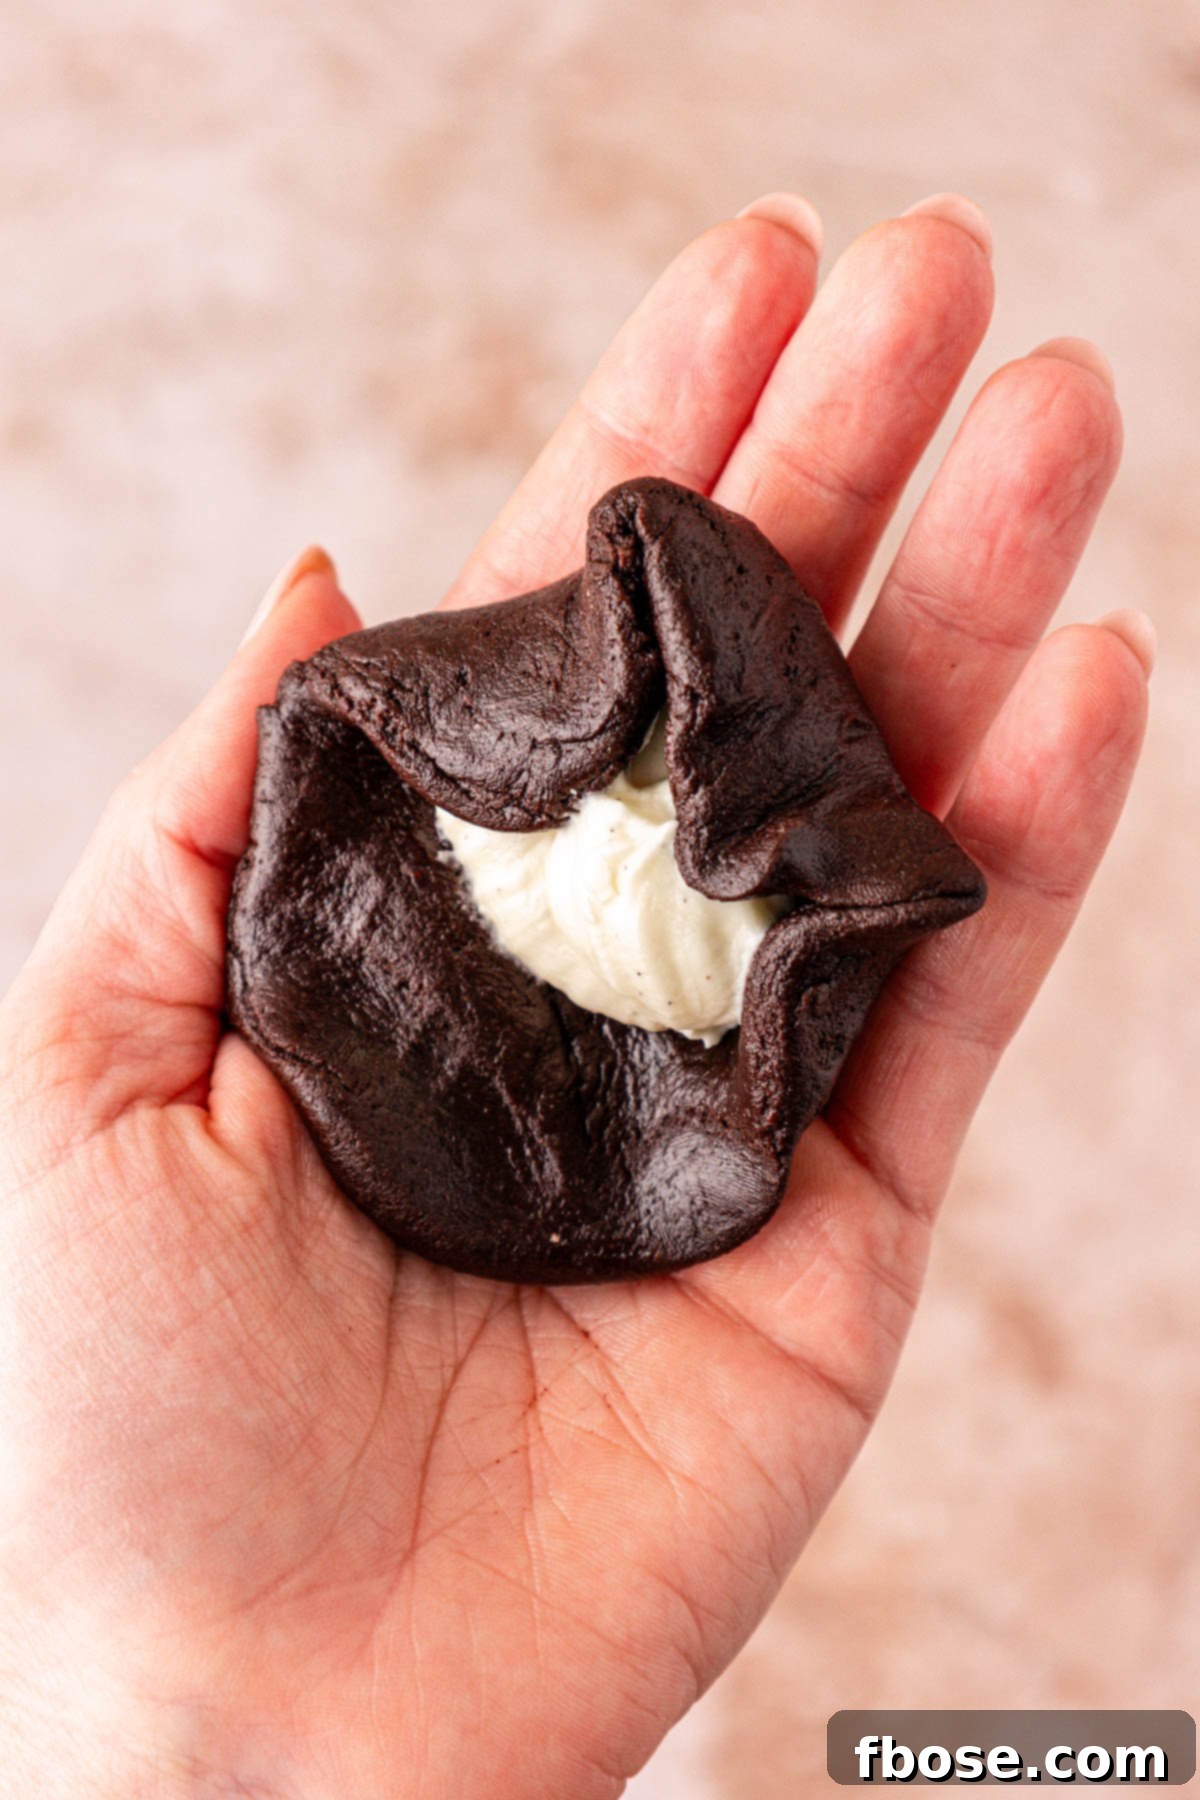
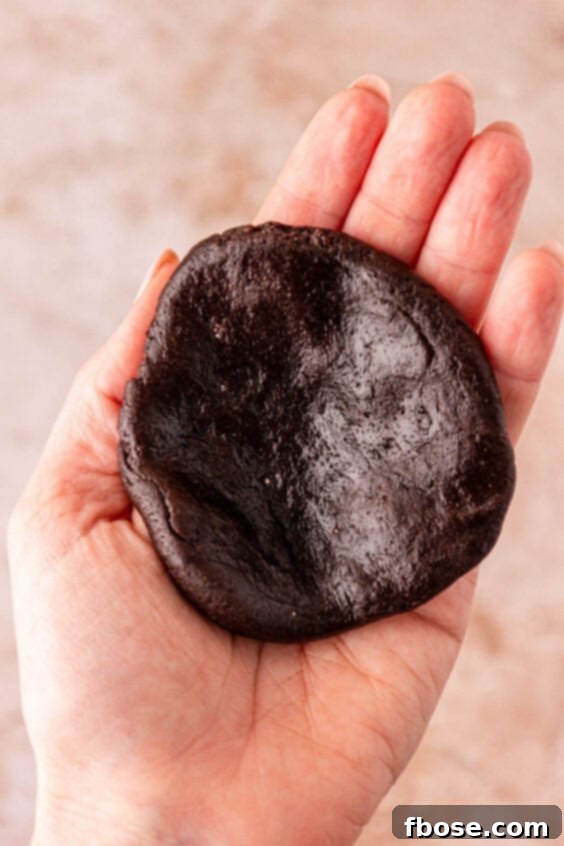
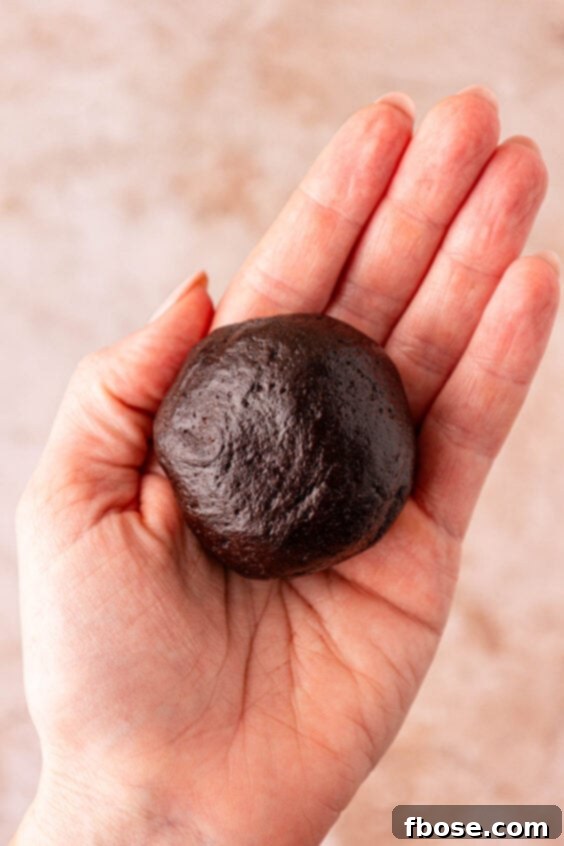
- Portion and Shape the Dough: Using a #24 cookie scoop (or about 1.8 ounces of dough per cookie), portion out the chocolate cookie dough. Gently press each mound of dough flat between your palms, then use your hands to carefully work the dough into a shallow bowl or cup shape. This creates a perfect nest for the filling.
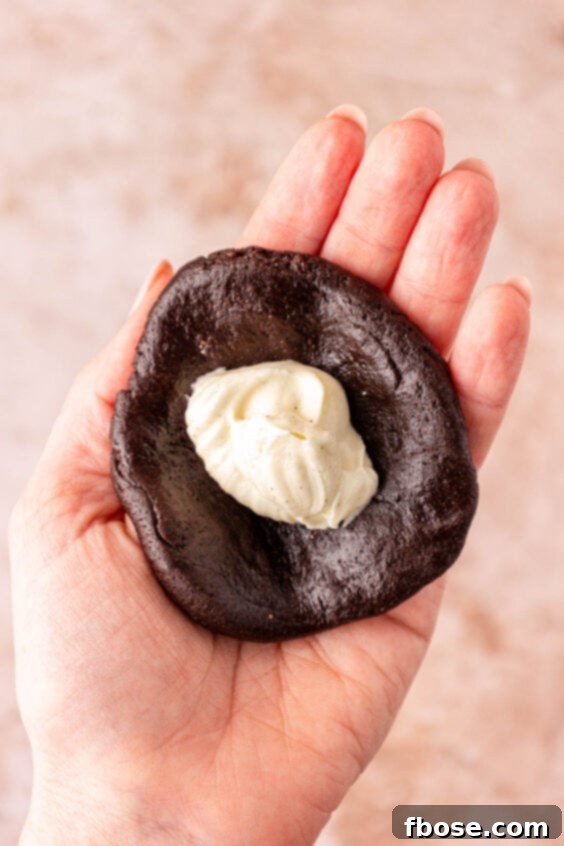
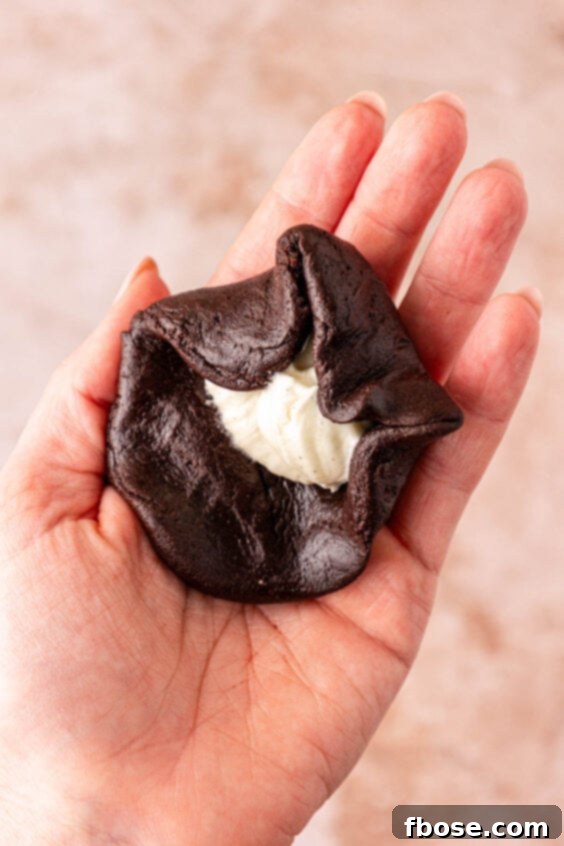
- Fill and Seal the Cookies: Place a heaping teaspoon (approximately 0.3 ounces) of the prepared cheesecake filling into the well of each shaped cookie dough “bowl.” Take your time and gently work the cookie dough up and around the sides and top of the cheesecake filling. It’s crucial to ensure the cookie dough completely seals around the filling to prevent it from leaking out during baking. Pinch the seams together firmly but carefully.
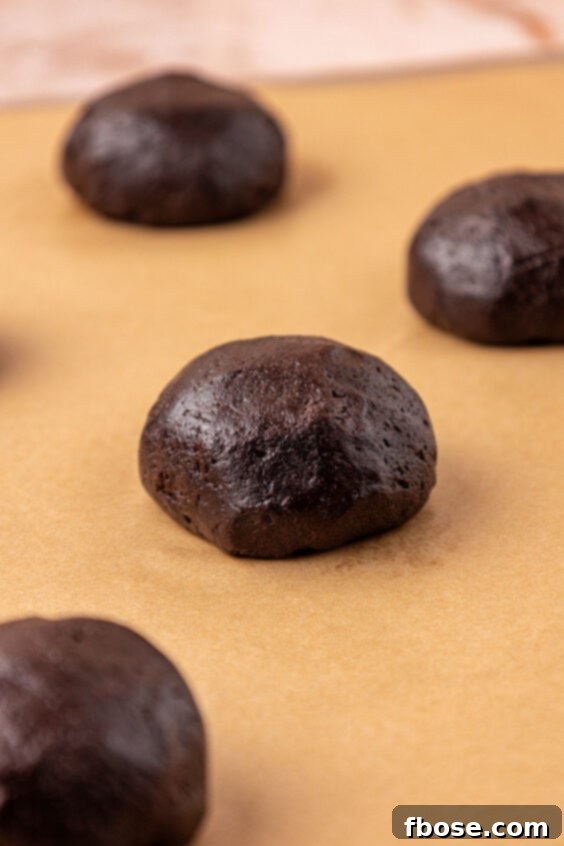
- Arrange for Baking: Once sealed, transfer each filled cookie dough ball onto your prepared baking sheet, placing them with the sealed side down for extra security. Ensure there is at least 2 inches of space between each cookie if making regular-sized cookies (or 4 inches if making larger ones) to allow for proper spreading.
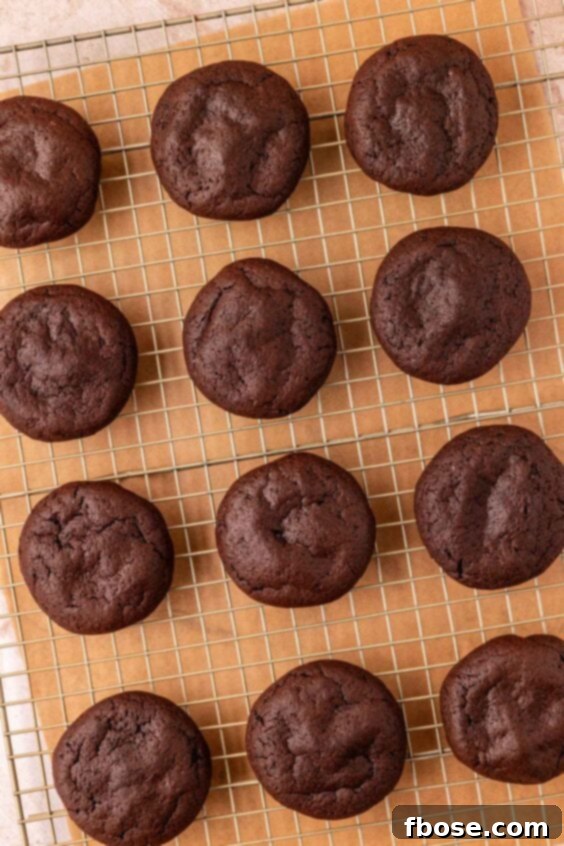
- Bake to Perfection: Bake the cookies for 9 to 11 minutes. You’ll know they’re ready when the edges are just set and the tops have a matte finish with some slight cracking. It’s important to note that the cookies will appear slightly underdone in the center; this is perfectly normal and contributes to their tender, gooey texture. They will continue to cook and set as they cool.
- Cooling Process: Allow the baked cookies to cool on the baking pan for at least 15 minutes. This is a critical step, as the cookies are very soft and delicate right out of the oven. After 15 minutes, carefully transfer them to a wire rack using a spatula to finish cooling completely. They will firm up beautifully as they reach room temperature.
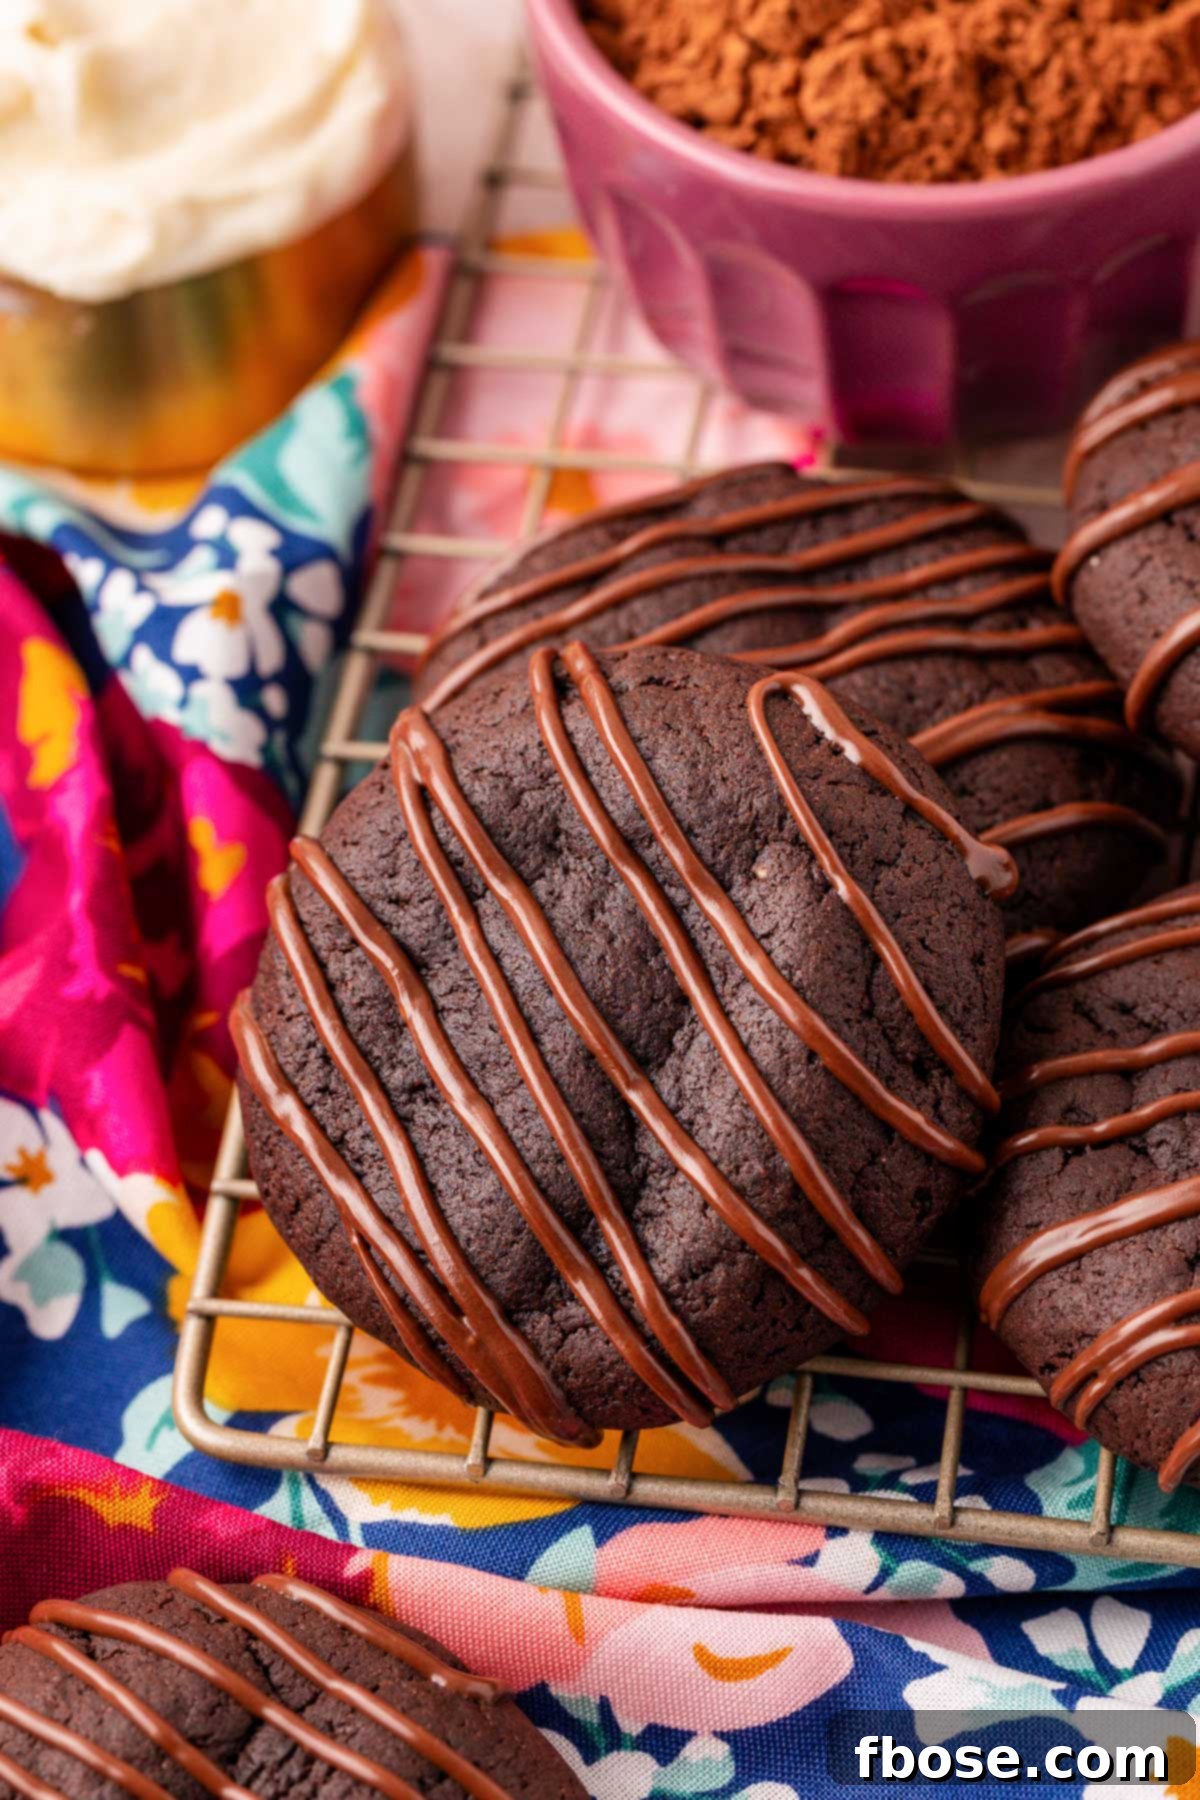
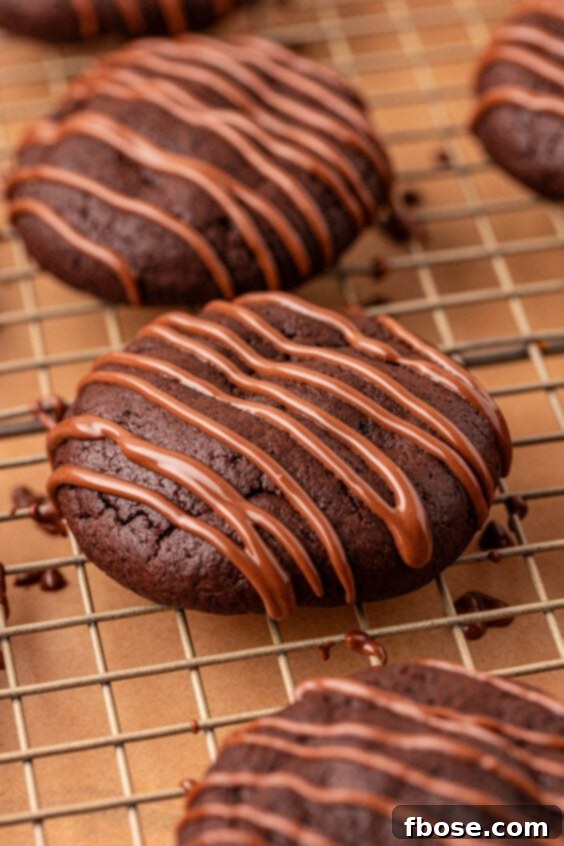
- Optional Chocolate Drizzle (Finishing Touch): Once the cookies are completely cool, melt the ½ cup chocolate melting wafers (milk, dark, or white, as preferred). Heat in the microwave at 30-second intervals, stirring well between each interval until the chocolate is smooth and fully melted. Transfer the melted chocolate to a piping bag (or a ziplock bag with a corner snipped off) and drizzle it artistically over the cooled cookies. Let the drizzle set until hardened before serving.
Expert Tips for Perfect Chocolate Cheesecake Cookies
- Accurate Flour Measurement is Key: For the most consistent and delicious results, mastering How To Measure Flour correctly is paramount. We highly recommend using a kitchen scale to measure your flour in grams (260g for 2 cups), as this is the most accurate method. If you don’t have a scale, use the spoon-and-level method: spoon flour into your measuring cup, then level it off with a straight edge. Never scoop flour directly from the bag, as this compacts it and can lead to adding too much, resulting in dry, crumbly, and dense cookies.
- Flawless Filling Seal: Achieving a good seal on these cheesecake-filled cookies is critical to prevent the delectable filling from leaking out during baking. The most effective method I’ve found involves flattening each mound of cookie dough into a disc and then gently shaping it into a small “bowl” or “cup.” Place a generous teaspoon of cream cheese filling into this well. Then, carefully work the chocolate dough up and around the filling, pinching the seam securely to seal it completely. For extra assurance, gently roll each filled dough ball between your palms to create a smooth, seamless sphere. Always aim to place the cookies on the baking sheet with the sealed side facing down.
- Mind the Spacing: These cookies will spread somewhat while baking, so proper spacing on your baking sheet is essential. Ensure you place each cookie dough ball at least 2 inches apart. This prevents them from baking into each other, allowing for even heat distribution and beautifully shaped, individual cookies. If your baking sheet is smaller, bake in batches.
- Trust the Process – Don’t Overbake!: It’s important to remember that these cheesecake cookies will appear slightly underdone when you first pull them from the oven, especially in the center. This is completely normal and intentional! The residual heat in the pan will continue to cook them as they cool, leading to that coveted soft and chewy texture. Resist the urge to bake them for longer, as overbaking will result in dry, crumbly cookies that lack their signature gooey center. Though the centers may feel very soft immediately after baking, have faith – they will firm up to absolute perfection as they cool.
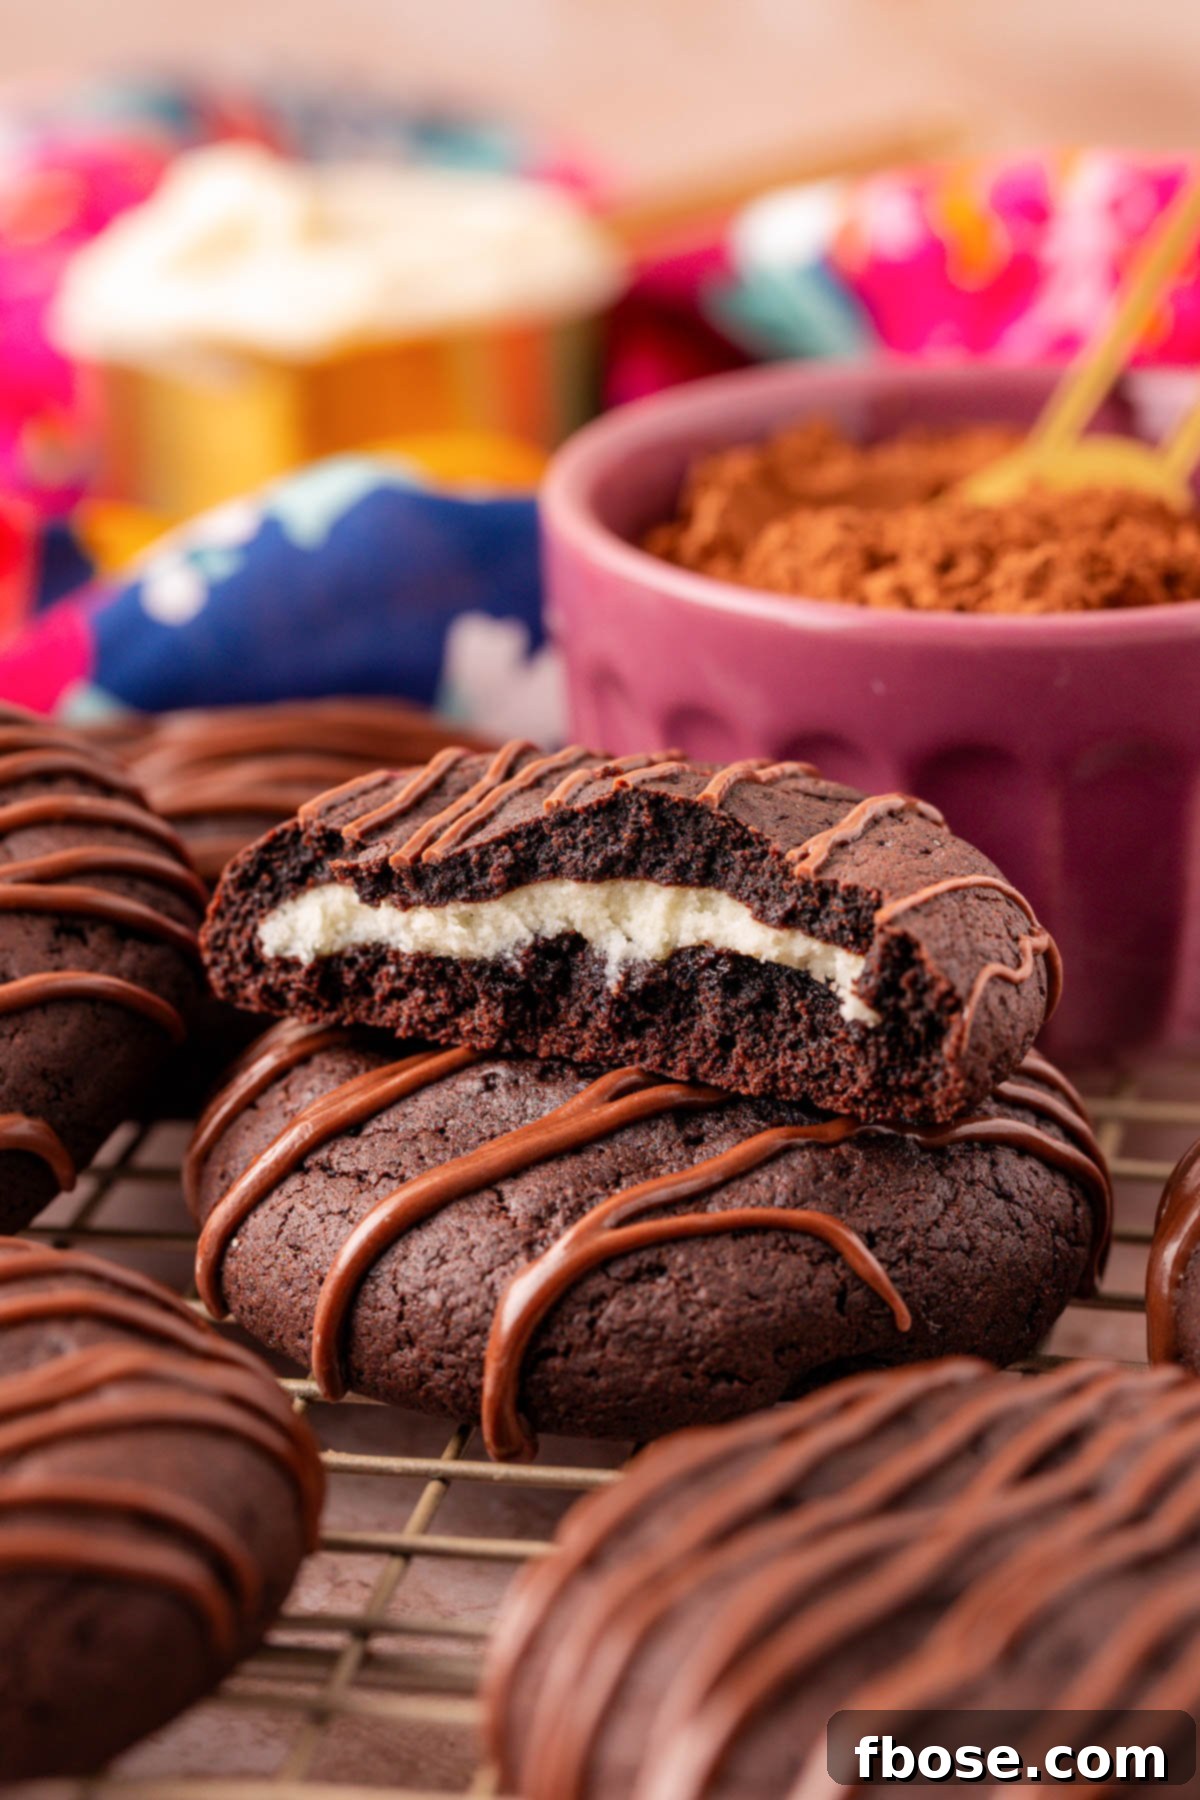
Optimal Storage for Chocolate Cream Cheese Cookies
Once your delicious chocolate cheesecake cookies have cooled completely to room temperature, they are ready for storage. Transfer them into an airtight container to maintain their freshness and prevent them from drying out. If your storage container is deep enough to stack multiple layers of cookies, we highly recommend placing a sheet of parchment paper between each layer. This simple step prevents the cookies from sticking together, preserving their beautiful appearance and texture.
You can store these Chocolate Cheesecake Cookies in the refrigerator or at cool room temperature for 2 to 3 days. For best results and to prolong their gooey center, refrigeration is often preferred.
Can You Warm Up Cheesecake Stuffed Chocolate Chip Cookies After Refrigeration?
Absolutely! One of the best ways to enjoy these cheesecake-stuffed chocolate chip cookies, especially after they’ve been refrigerated, is to warm them up slightly. A quick reheat will bring back that irresistible, just-baked texture and a wonderfully gooey filling. Simply pop an individual cookie into the microwave for about 10 seconds. This brief warming period will soften the cookie dough and restore the creamy, molten consistency of the cheesecake center, making it feel like it just came out of the oven. While these cookies are perfectly safe and delicious stored in the fridge for up to 5 days, I’ve also found that they hold up well at room temperature overnight, provided your kitchen isn’t excessively warm. That little extra warmth truly enhances the filling, making it even creamier and more delicious with every bite!
Freezing Chocolate Cookies with Cream Cheese Filling for Later Enjoyment
These delightful cookies can also be frozen, allowing you to enjoy a homemade treat whenever the craving strikes! First, ensure the cookies are completely cooled to room temperature after baking and drizzling (if applicable). Then, arrange them in a single layer on a baking sheet and flash freeze them for about 1 hour. This initial freezing step prevents them from sticking together. Once firm, transfer the cookies to a freezer-safe bag or an airtight container, separating layers with parchment paper if stacking. They can be stored in the freezer for up to 3 months. When you’re ready to indulge, simply thaw them at room temperature or warm them gently in the microwave as described above. If you plan to add a chocolate drizzle, it’s best to do so once the cookies have thawed and are ready to be served, as freezing and thawing can sometimes affect the appearance of the drizzle.
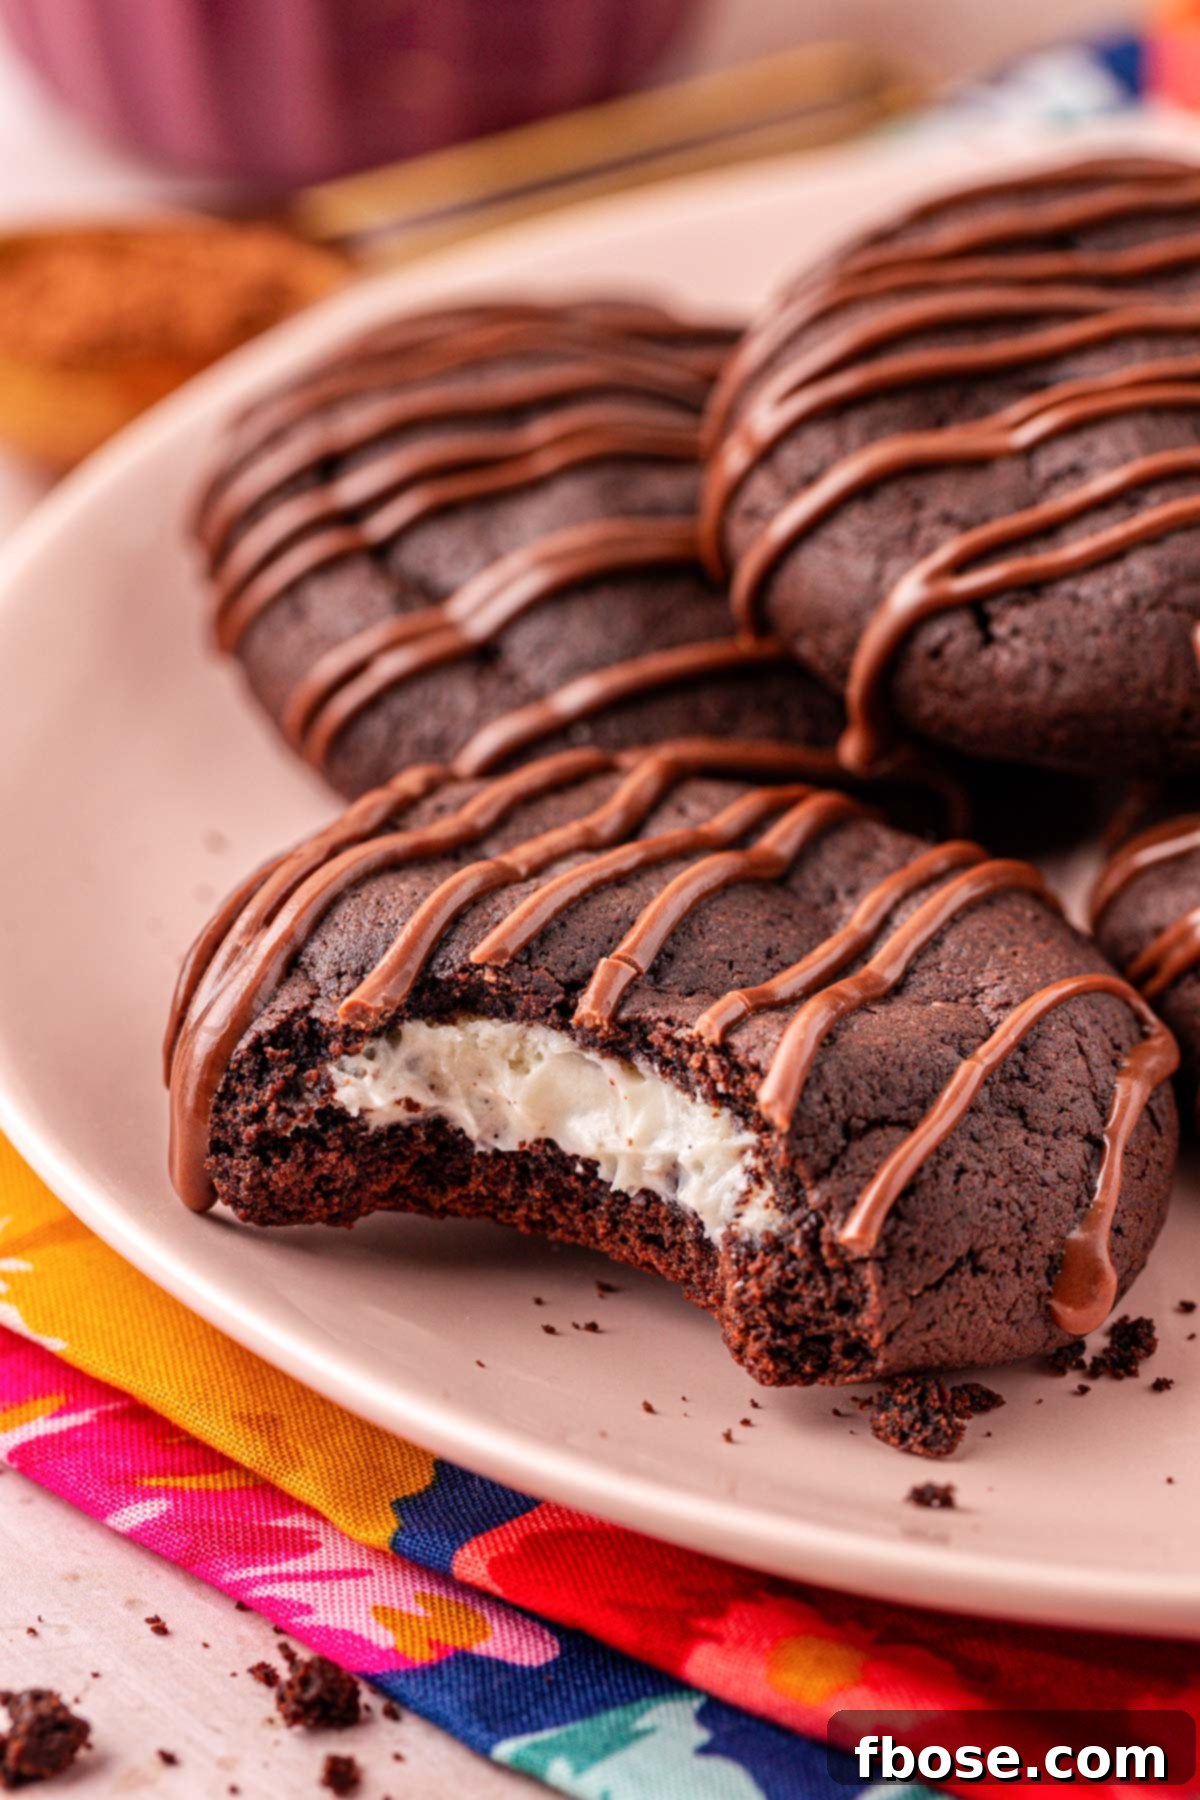
Explore More Decadent Chocolate Cookie Recipes
If you’re a chocolate lover, you’ll adore these other irresistible cookie recipes:
- German Chocolate Cookies – Rich chocolate cookies crowned with a luscious coconut pecan frosting!
- Chocolate Peanut Butter Cookies – Packed with Reese’s Pieces and creamy Reese’s peanut butter chips for a nutty, chocolatey explosion!
- Triple Chocolate Chip Cookies – A chocolate dream with a medley of dark, milk, and white chocolate chips for ultimate indulgence!
- Soft Chocolate Sugar Cookies – Delightfully thick, chewy cookies rolled in granulated sugar for a sweet, sparkling finish!
- Chocolate Caramel Cookies – Gourmet-style cookies featuring a delightful surprise: a gooey caramel candy center!
Did You Make This Recipe?
If you’ve tried this recipe, please leave a review in the comments below. I love hearing from you! Don’t forget to tag me – @sugarandsoulco – on Instagram and Pinterest with your photos, or join our Sugar & Soul Show-offs Community and share them there.
Chocolate Cream Cheese Cookies
Ingredients
Cookie Dough
- 2 cups all-purpose flour 260g
- ½ cup Dutch cocoa powder 50g
- 2 tablespoons black cocoa powder 14g
- 2 tablespoons cornstarch 16g
- 2 tablespoons powdered milk 10g
- ¼ teaspoon baking soda
- 1 cup granulated sugar 200g
- ½ cup salted butter softened, 113g
- ½ teaspoon salt
- 1 large egg room temperature
- 1 additional large egg yolk room temperature
- 2 ounces whole milk room temperature
- 1½ teaspoons pure vanilla extract
Cheesecake Filling
- 6 ounces cream cheese 170g, softened
- 1 cup powdered sugar 130g
- 1 teaspoon vanilla bean paste or extract
Topping
- ½ cup chocolate melting wafers milk, dark, or white
Instructions
Cookies
-
Preheat the oven to 350°F and line a large baking sheet with parchment paper and set aside. If you only have a 9×13-inch baking sheet, you’ll want to use two baking sheets for two batches.
-
In a medium bowl, whisk together 2 cups all-purpose flour, ½ cup Dutch cocoa powder, 2 tablespoons black cocoa powder, 2 tablespoons cornstarch, 2 tablespoons powdered milk, and ¼ teaspoon baking soda. Set aside.

-
Add together 1 cup granulated sugar, ½ cup salted butter, and ½ teaspoon salt to a large bowl or stand mixer fitted with a paddle attachment and cream for 1 minute.
-
Add in 1 large egg and beat until combined. Beat in 1 additional large egg yolk, 2 ounces whole milk, and 1½ teaspoons pure vanilla extract and mix just until combined.
-
Add half of the dry ingredients to the wet ingredients and beat just until incorporated. Then add the remaining dry ingredients and mix until thoroughly combined.
-
In a separate medium bowl, beat together 6 ounces cream cheese, 1 cup powdered sugar, and 1 teaspoon vanilla bean paste until smooth.
-
Scoop the dough with a #24 cookie scoop into 16 1.8-ounce portions. Gently press the dough flat and then shape it into a bowl shape.
-
Place a heaping teaspoon of the cream cheese mixture (about .3 ounces) in the well. There may be some filling leftover.
-
Then, gently use your hands to fold and work the dough up and around the sides and top of the cheesecake mixture.
-
Pat and pinch the dough to seal it and roll it between your palms to make a smooth ball.
-
Place the cookies on the baking sheet, usually with the sealed side down. Place cookie dough at least 2 inches apart for regular cookies or 4 inches apart for large cookies on the prepared baking sheet.
-
Bake for 9 to 11 minutes for regular cookies until the edges are just set, and the top has a matte look with some slight cracking. The cookies will look slightly underdone; this is normal, as they will continue to cook as they cool.
-
Allow the cookies to cool on the pan for 15 minutes before transferring them to a wire rack with a spatula to cool completely. These cookies are very soft right after baking and will firm up while they cool.
-
Once cooled, melt the ½ cup chocolate melting wafers in the microwave at 30-second intervals, stirring between each one until fully melted.
-
Transfer the melted chocolate to a piping bag, drizzle it over the cookies, and let set until it has hardened.
Video
Nutrition
Did You Make This Recipe?
Don’t forget to share it with me on Instagram @sugarandsoulco and follow on Tiktok @sugarandsoulco and Pinterest @sugarandsoulco for more!
Pin Recipe
Share Recipe