

Apple Slab Pie is a delightful autumn dessert, featuring a rich, tender spiced apple filling embraced by a perfectly flaky crust and crowned with a luscious, sweet glaze. This comforting classic bakes up beautifully in approximately 35-40 minutes, offering a simpler, more crowd-pleasing alternative to traditional round apple pies.
As the leaves begin to turn and the air grows crisp, Fall ushers in a season of warm, inviting apple-flavored treats. Among these cherished autumnal delights, the Apple Slab Pie stands out as a true star. It often shares the spotlight in my kitchen with other seasonal favorites like Apple Cheesecake Bars and a classic Apple Crisp, ensuring a steady supply of deliciousness throughout the harvest season.
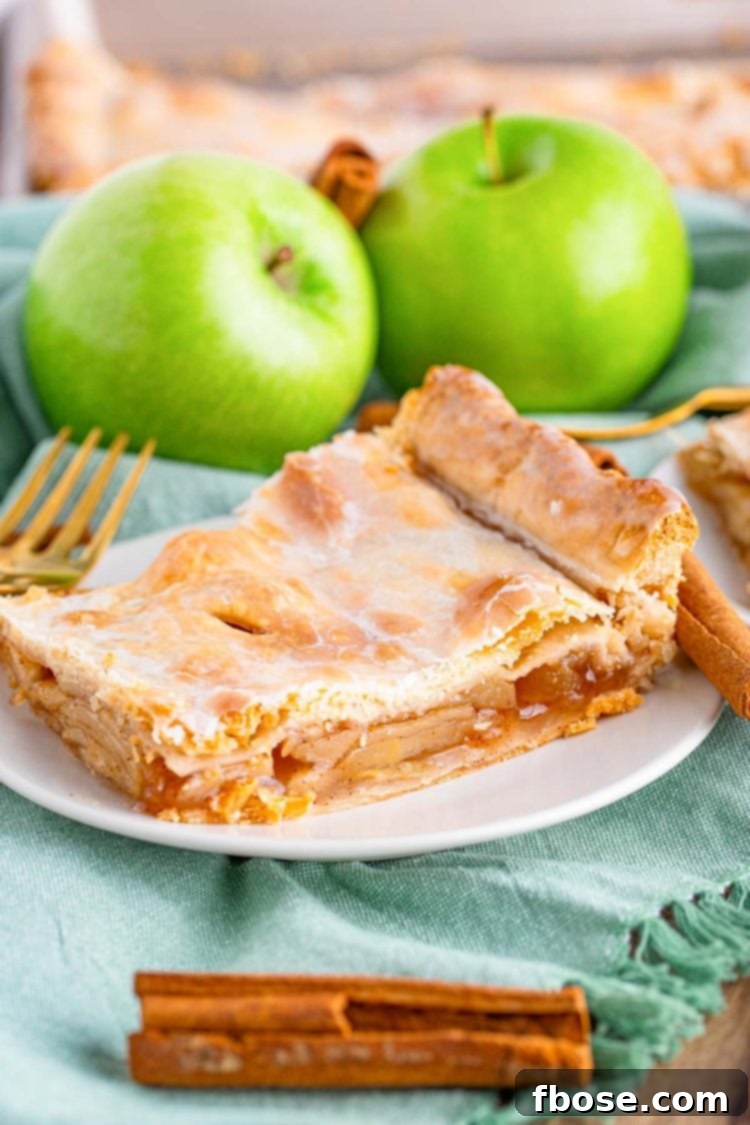
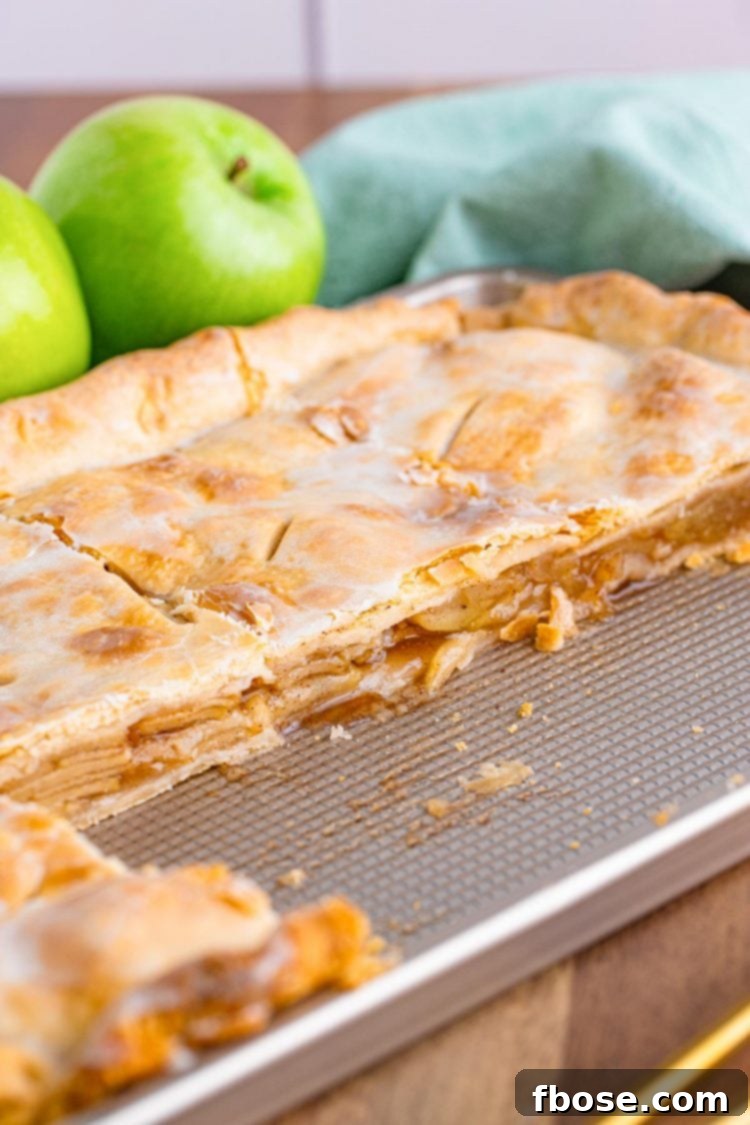
This easy Apple Slab Pie recipe captures all the irresistible flavors of a classic homemade apple pie, but with the added convenience of being baked on a large sheet pan. This format makes it incredibly easy to slice into neat squares, offering a fuss-free serving experience, especially when entertaining a larger crowd. Forget the struggle of cutting perfect wedges from a deep-dish pie; the slab pie ensures every guest gets a generous, beautifully portioned slice.
Why You Will Adore This Apple Slab Pie Recipe!
- Effortless Pie Dough! While you’re welcome to use your favorite homemade pie dough, this recipe shines with the simplicity of pre-made, store-bought refrigerated pie crusts. It’s a fantastic shortcut that doesn’t compromise on flavor or that coveted flaky texture, making baking accessible even on busy days.
- Simple, Wholesome Ingredients! Beyond the crusts and fresh apples, you’ll find most of the ingredients are likely already nestled in your pantry. We’re talking about basic baking staples that come together to create an extraordinary taste profile, ensuring this easy apple pie recipe is always within reach.
- The Irresistible Sweet Glaze! What truly elevates this Apple Slab Pie is its signature sweet glaze. Applied in multiple layers, it creates a wonderfully thick, slightly crisp, and utterly decadent topping that perfectly complements the spiced apple filling, adding an extra dimension of sweetness and visual appeal.
- Perfect for a Crowd! Unlike a standard 9-inch round pie, which typically yields 6-8 slices, this impressive slab pie generously serves a dozen or more. It’s the ultimate dessert for family gatherings, holiday feasts, or potlucks, ensuring there’s plenty for everyone to enjoy, with potential leftovers for a delightful breakfast treat! Plus, its rectangular shape makes slicing and serving infinitely easier than a traditional Apple Pie – though we cherish that classic, too!
Essential Ingredient Notes for the Perfect Apple Slab Pie
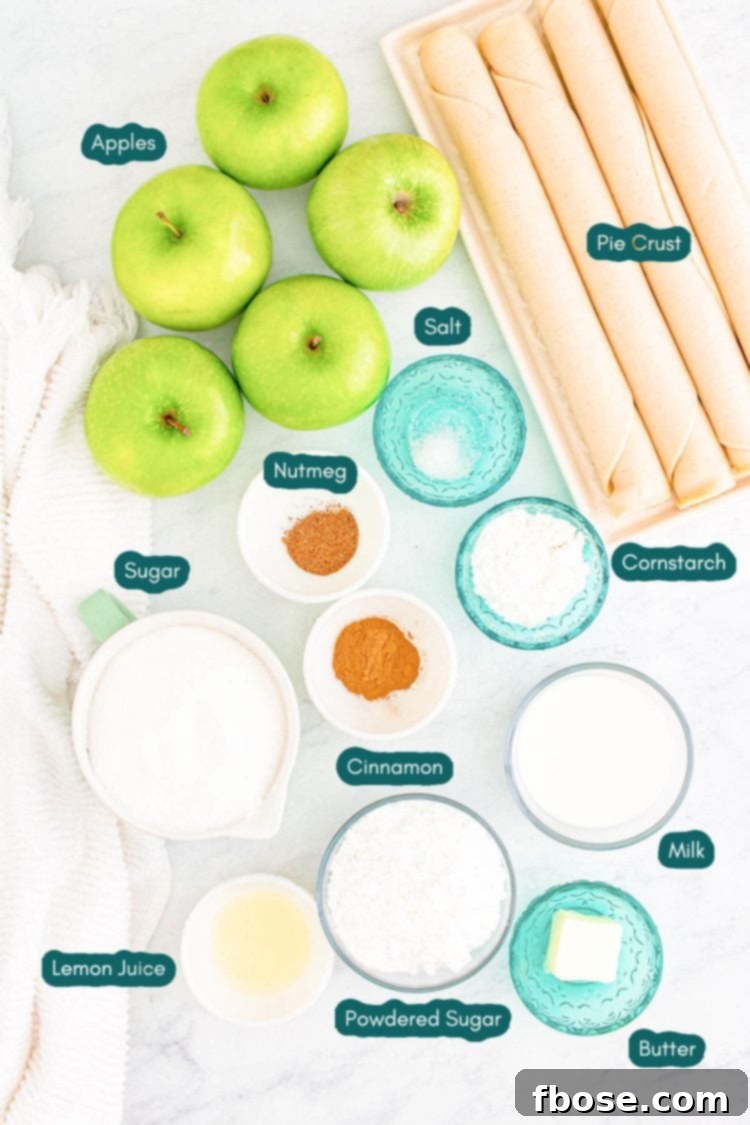
With a mere 15 minutes of hands-on preparation, this Apple Slab Pie recipe becomes an effortlessly delicious dessert, ideal for any Fall celebration or casual get-together. To create this comforting treat, you’ll need a handful of accessible ingredients:
For the pie itself, gather 4 refrigerated pie crusts (or enough for two double-crust recipes if making homemade), about 9 cups of peeled and thinly sliced Granny Smith apples, granulated sugar, cornstarch (a key thickening agent), fresh lemon juice (to brighten the apple flavor), ground cinnamon, ground nutmeg (for that classic warmth), and a pinch of fine sea salt.
While your magnificent apple dessert cools, you’ll quickly whisk together the simple yet divine homemade glaze. This sweet topping requires just three components: whole milk, unsalted butter, and powdered sugar. The combination creates a smooth, pourable glaze that sets beautifully.
When it comes to apple selection, feel free to personalize your pie! While Granny Smith apples are my top choice for their perfect balance of tartness and firm texture that holds up well during baking, other excellent options include Honeycrisp (sweet and crisp), Braeburn (sweet-tart and firm), or Pink Lady apples (sweet with a slight tang). A blend of two varieties can also add wonderful depth to your apple pie filling.
Required Kitchen Tools for Baking
Getting started on your Apple Slab Pie requires only a few standard kitchen essentials:
- 10x15x1 jelly roll pan: This specific size is crucial for achieving the ideal crust-to-filling ratio and overall pie thickness.
- Rolling pin: Essential for evenly rolling out your pie dough.
- Rubber spatula: Perfect for mixing the apple filling gently and scraping down bowls.
- Large mixing bowl: To combine the apples and spices.
- Whisk: For making a smooth, lump-free glaze.
- Small saucepan: For gently warming the milk and butter for the glaze.
- Wire rack: For proper cooling and air circulation around the baked pie.
How To Make The Ultimate Apple Slab Pie
Unlike some more intricate Pie Recipes, this glorious slab pie is remarkably straightforward to prepare. Let’s walk through the steps together to create this impressive dessert:
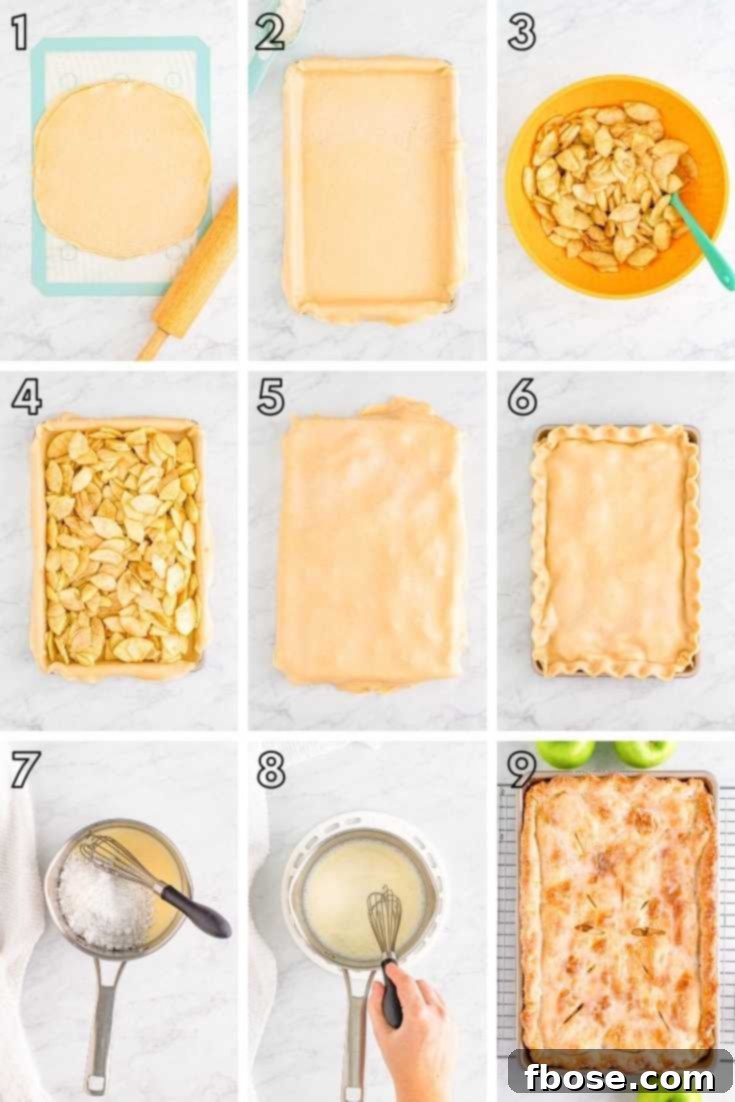
- Prepare Your Crust: Begin by preheating your oven to 425°F (220°C). Allow your refrigerated pie crusts to come to room temperature according to package instructions – this makes them much easier to roll out without cracking. On a lightly floured surface, place two pie crusts slightly overlapping. Using a rolling pin, carefully roll them together into a rough rectangular shape, approximately 18×12 inches.
- Line the Pan: Gently transfer the rolled-out bottom crust to your 10x15x1-inch jelly roll pan. Carefully press it into the pan, allowing any excess crust to overlap the sides. Don’t worry about perfection; rustic charm is part of a homemade pie! Set this aside while you prepare the filling.
- Craft the Apple Filling: In a large mixing bowl, combine your thinly sliced apples, granulated sugar, cornstarch, fresh lemon juice, ground cinnamon, ground nutmeg, and fine sea salt. Stir everything together thoroughly until the apples are evenly coated with the sweet and spicy mixture. Then, spoon this delicious apple filling evenly over the bottom crust in your prepared pan.
- Top and Crimp: Roll out the remaining two pie crusts into another 18×12-inch rectangle, just as you did for the bottom. Carefully lay this top crust over the apple filling. Tuck the edges of the top crust under the bottom crust and crimp them together firmly to seal the pie. This helps prevent the filling from bubbling out during baking. Don’t forget to cut a few small slits in the top crust; these vent holes allow steam to escape, preventing the crust from puffing up excessively and ensuring even baking.
- Bake to Golden Perfection: Place your Apple Slab Pie in the preheated oven and bake for 30 to 35 minutes. After the initial 15 minutes, gently tent the pie with aluminum foil. This prevents the top crust from over-browning while the apples cook through. Continue baking until the crust achieves a beautiful golden-brown hue and the filling is bubbly. If, after 35 minutes, you desire more browning, remove the foil and watch closely until your preferred color is reached.
- Cool the Pie: Once baked, transfer the hot pie to a wire rack to cool for at least 1 hour. Cooling is crucial for the filling to set properly and for the crust to maintain its integrity.
- Prepare the Sweet Glaze: While the pie cools, prepare your glaze. In a small saucepan, combine the whole milk and unsalted butter. Heat over medium-low heat, stirring occasionally. As soon as you see the very first signs of bubbling around the edges, immediately remove the saucepan from the heat. Whisk in the butter until melted, then allow the mixture to cool completely to room temperature before whisking in the powdered sugar until smooth. Cooling the liquid before adding sugar is vital to prevent a runny glaze.
- Glaze and Serve: After the pie has cooled for at least an hour, use a pastry brush to generously brush the glaze all over the top crust. Wait 30 minutes for the first layer to slightly set, then brush on a second layer of glaze. Allow it to set for another 30 minutes before slicing into squares and serving.
You might find yourself with some leftover glaze, which is a wonderful problem to have! You can save it to drizzle over individual slices of pie just before serving, adding an extra touch of sweetness. Alternatively, you can continue applying layers of glaze to the pie every 30 minutes until all of it has been used, creating an even thicker, more decadent coating.
Frequently Asked Questions About Apple Slab Pie
How To Store Leftover Apple Slab Pie
To keep any leftover Apple Slab Pie fresh, cover it tightly with plastic wrap or transfer slices to an airtight container. Store it at room temperature, and it will remain delicious for 2 to 3 days. For longer storage, refrigeration can extend its freshness slightly, though the crust may soften.
How To Freeze Apple Slab Pie
This easy apple pie recipe is fantastic for freezing! Once the pie is fully baked and completely cooled, you can freeze it for up to 3 months. Wrap the entire slab pie (or individual slices) tightly in a double layer of plastic wrap, followed by a layer of aluminum foil. To thaw, transfer the pie to the refrigerator overnight, then let it come to room temperature before serving. You can also gently rewarm slices in a low oven for a fresh-baked taste.
Can I Use This Filling With A Puff Pastry Instead?
Absolutely, yes! The delicious apple filling from this recipe pairs wonderfully with buttery, flaky puff pastry. You could create individual puff pastry tarts, a large puff pastry turnover, or even a lattice-topped puff pastry pie. The possibilities are endless for adapting this versatile filling!
What If I Don’t Have A Jelly Roll Pan?
If you don’t own a jelly roll pan, a standard baking half sheet pan can often be used as a substitute. The key is to find a pan that is as close as possible to the recommended 10x15x1-inch dimensions to ensure proper baking time and crust-to-filling ratio. Adjust baking time as needed if your pan size varies significantly.
Can I Leave The Nutmeg Out Of This Recipe?
Certainly! If nutmeg isn’t to your taste or you don’t have it on hand, you can omit it. I highly recommend replacing it with an equal amount of ground cinnamon to maintain that warm, spiced flavor profile that makes apple pie so comforting.
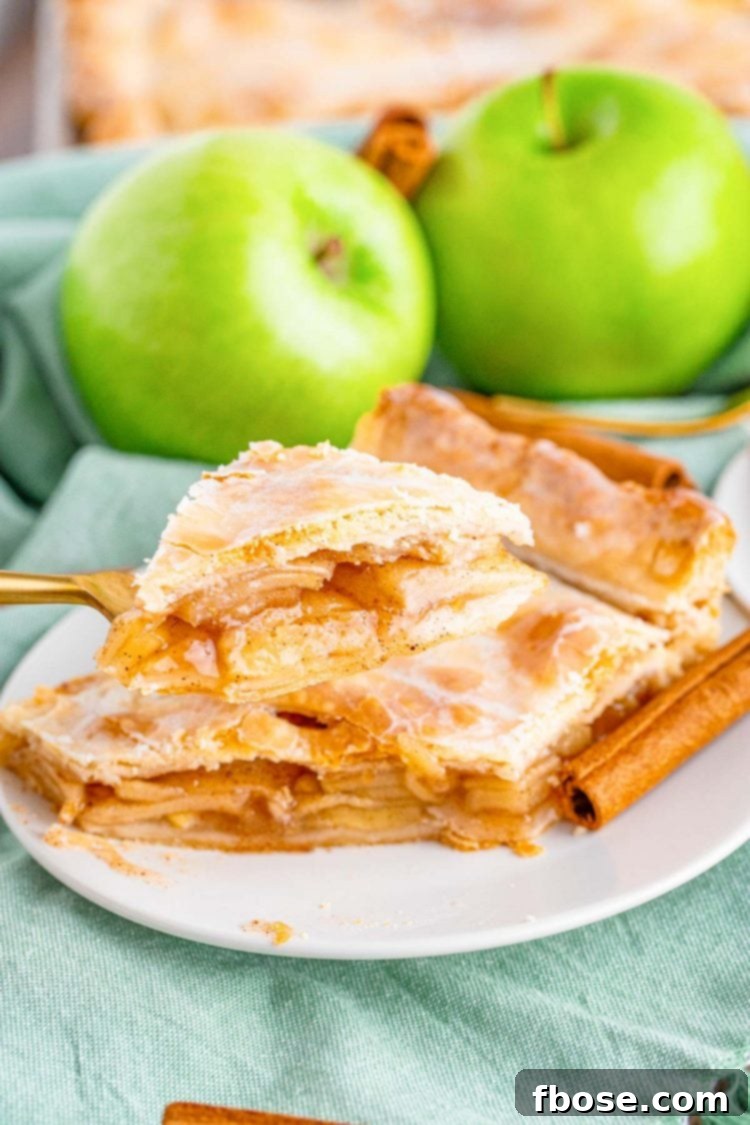
Tips for Success with Your Apple Slab Pie
- Room Temperature Crusts: Don’t skip allowing the refrigerated pie crusts to come to room temperature. This makes them pliable and prevents tearing when rolling and shaping.
- Consistent Apple Slices: Aim for uniformly thin apple slices. This ensures they cook evenly and become tender simultaneously, preventing some pieces from being too firm and others mushy.
- Don’t Overfill: While it might be tempting to pile on more apples, stick to the recommended amount. Overfilling can lead to a soggy bottom crust or messy spills during baking.
- Seal Those Edges: A good crimp on the pie edges is more than just decorative; it helps seal in the delicious filling and prevents leaks.
- Ventilation is Key: The slits on the top crust are vital. They allow steam to escape, preventing the pie from becoming soggy or bursting in the oven.
- Tent with Foil: The foil tenting trick after 15 minutes of baking is essential for achieving a perfectly golden-brown crust without burning, allowing the apples enough time to soften.
- Cool Completely: Patience is a virtue here! Letting the pie cool on a wire rack for the recommended time allows the filling to set and prevents a runny slice.
- Glaze Layers: Applying the glaze in two stages, with a short waiting period in between, creates a thicker, more impactful glaze that adheres beautifully.
Serving Suggestions for Apple Slab Pie
While Apple Slab Pie is perfectly delightful on its own, here are a few ways to elevate your serving experience:
- Classic à la Mode: A scoop of vanilla bean ice cream melting over a warm slice is always a winning combination.
- Whipped Cream: A generous dollop of freshly whipped cream adds a light, airy contrast to the rich filling.
- Caramel Drizzle: For an extra layer of decadence, drizzle a little warm caramel sauce over each slice.
- A Sprinkle of Cinnamon: A light dusting of ground cinnamon or a tiny sprinkle of flaky sea salt can enhance the flavors just before serving.
- With Coffee or Tea: Enjoy a slice with your favorite coffee, a cup of hot apple cider, or a comforting mug of tea for a perfect afternoon treat.
Everyone adores this homemade Apple Slab Pie when I bring it to gatherings! If you’re craving more apple goodness, be sure to explore these other popular apple recipes that are sure to excite your taste buds:
- Apple Hand Pies – These individual delights feature a thick, spiced apple filling encased in a convenient, pre-made pie crust, making for a delightfully easy and portable dessert!
- Crockpot Apple Butter – Slowly simmered with apples, sugar, a blend of warm spices, and butter, this recipe is a fantastic way to capture and preserve the cozy flavors of fall to enjoy all year long!
- Dutch Apple Pie – A classic spiced apple filling piled high into a flaky pie crust, elegantly crowned with a crumbly, buttery streusel topping made from flour, sugar, and butter!
- Caramel Apple Pie Dip – Ready in just 15 minutes, this quick and easy dip combines crisp apple chunks smothered in a luscious brown sugar and caramel sauce, finished with a hint of apple pie spice!
- Easy Old Fashioned Apple Cake – A truly unforgettable fall dessert, this cake is rich with warm spices, hearty oatmeal, and the delightful sweetness of apple jelly, promising a taste of comforting nostalgia!
Let’s Connect and Share Your Creations!
If you’ve tried this delightful Apple Slab Pie recipe, I would love to hear your thoughts! Please let me know how you liked it in the comments below and consider leaving a review. Your feedback truly means the world to me!
Don’t forget to tag me – @sugarandsoulco – on Instagram and Pinterest with your beautiful photos, or join our Sugar & Soul Show-offs Community and share them there, where you can also participate in our fun recipe challenges!
Apple Slab Pie
Ingredients
Pie
- 4 refrigerated pie crusts or 2 batches double pie crust recipe of choice
- 9 cups Granny Smith apples peeled and thinly sliced
- 1½ cups granulated sugar
- 2 tablespoons cornstarch
- 1 tablespoon lemon juice fresh squeezed
- 1 teaspoon ground cinnamon
- ½ teaspoon ground nutmeg
- ¼ teaspoon fine sea salt
Glaze
- 6 tablespoons whole milk
- 1 tablespoon unsalted butter
- 1¼ cups powdered sugar
Instructions
-
Preheat the oven to 425°F (220°C). Lay out the pie crusts to bring them to room temperature, following the directions on the package. On a lightly floured work surface, stack two of the pie crusts on top of each other. Using a rolling pin, roll them out into an approximate 18×12-inch rectangle.
-
Carefully place the rolled-out crust into a 10x15x1-inch jelly roll pan, gently pressing it to conform to the pan’s shape. Allow the excess crust to drape over the sides. Set the pan aside.
-
In a large bowl, combine the thinly sliced apples, granulated sugar, cornstarch, lemon juice, cinnamon, nutmeg, and salt. Stir vigorously until all ingredients are fully and evenly combined. Spoon the apple mixture evenly over the crust in the pan.
-
Roll out the remaining two pie crusts into another 18×12-inch rectangle. Carefully place this second crust on top of the apple filling. Tuck the edges of the top crust underneath the bottom crust’s overhang and firmly crimp the edges together to seal. Create several small slits in the top crust with a knife to allow steam to escape during baking.
-
Bake the pie for 30 to 35 minutes. After the initial 15 minutes of baking, gently tent the pie with aluminum foil to prevent the crust from over-browning. Continue baking until the pie is golden brown and the filling is bubbly. If, after 35 minutes, you desire a deeper golden color, remove the foil and bake for a few more minutes, watching closely to prevent burning.
-
Once baked, remove the pie from the oven and place it on a wire rack to cool completely for at least 1 hour. This crucial step allows the filling to set properly.
-
While the pie is cooling, prepare the glaze. Pour the whole milk into a small saucepan and place it over medium-low heat. Stir occasionally. As soon as you observe the very first signs of bubbling (small bubbles forming around the edges), immediately remove the saucepan from the heat. Whisk in the unsalted butter until it’s completely melted and incorporated. Allow this mixture to cool down to room temperature before whisking in the powdered sugar until a smooth, pourable glaze forms.
-
After the pie has cooled for the full hour, generously brush the prepared glaze all over the top crust using a pastry brush. Wait for approximately 30 minutes, then apply a second layer of glaze. Allow the second layer to set for another 30 minutes before slicing into neat squares and serving your delicious Apple Slab Pie.
Notes
- Each box of refrigerated pie crusts typically contains 2 crusts, so you will need two boxes to obtain the 4 crusts required for this recipe.
- You will likely have some glaze leftover. Feel free to save it to serve as an extra drizzle over individual slices of pie if desired. Alternatively, you can continue applying layers of glaze every 30 minutes until it’s all used up for an even thicker coating.
- While Granny Smith apples are recommended for their tartness and firm texture, any good baking apples can be used. Excellent alternatives include Honeycrisp, Braeburn, or Pink Lady apples.
- Enhance your serving experience by adding a dollop of whipped cream or a scoop of vanilla ice cream to each warm slice!
- How To Store: Keep any leftover Apple Slab Pie covered tightly with plastic wrap or in an airtight container. Store at room temperature and enjoy within 2-3 days.
- How To Freeze: To freeze, ensure the pie is fully baked and completely cooled. Wrap it tightly in a double layer of plastic wrap, then an outer layer of aluminum foil. It can be frozen for up to 3 months. Thaw in the refrigerator, then let it come to room temperature before serving.
- Can I Use This Filling With A Puff Pastry Instead? Yes, absolutely! This versatile apple filling would be fantastic baked inside a buttery, flaky puff pastry for a different textural experience.
- What If I Don’t Have A Jelly Roll Pan? If a jelly roll pan isn’t available, a baking half sheet pan can serve as a suitable alternative. Just aim for a pan size as close as possible to the 10x15x1-inch dimensions.
- Can I Leave The Nutmeg Out Of This Recipe? Yes, you certainly can omit the nutmeg if preferred. I suggest replacing it with an additional amount of ground cinnamon to maintain the warm spice balance.
Nutrition
Did You Make This Recipe?
Don’t forget to share it with me on Instagram @sugarandsoulco and follow on Tiktok @sugarandsoulco and Pinterest @sugarandsoulco for more!
Pin Recipe
Share Recipe