

This is the ultimate guide to hosting the most festive and fun DIY Hot Cocoa Bar with the best hot chocolate recipes and endless toppings! Host a DIY Hot Chocolate bar at your holiday parties or for a cozy winter night with friends!
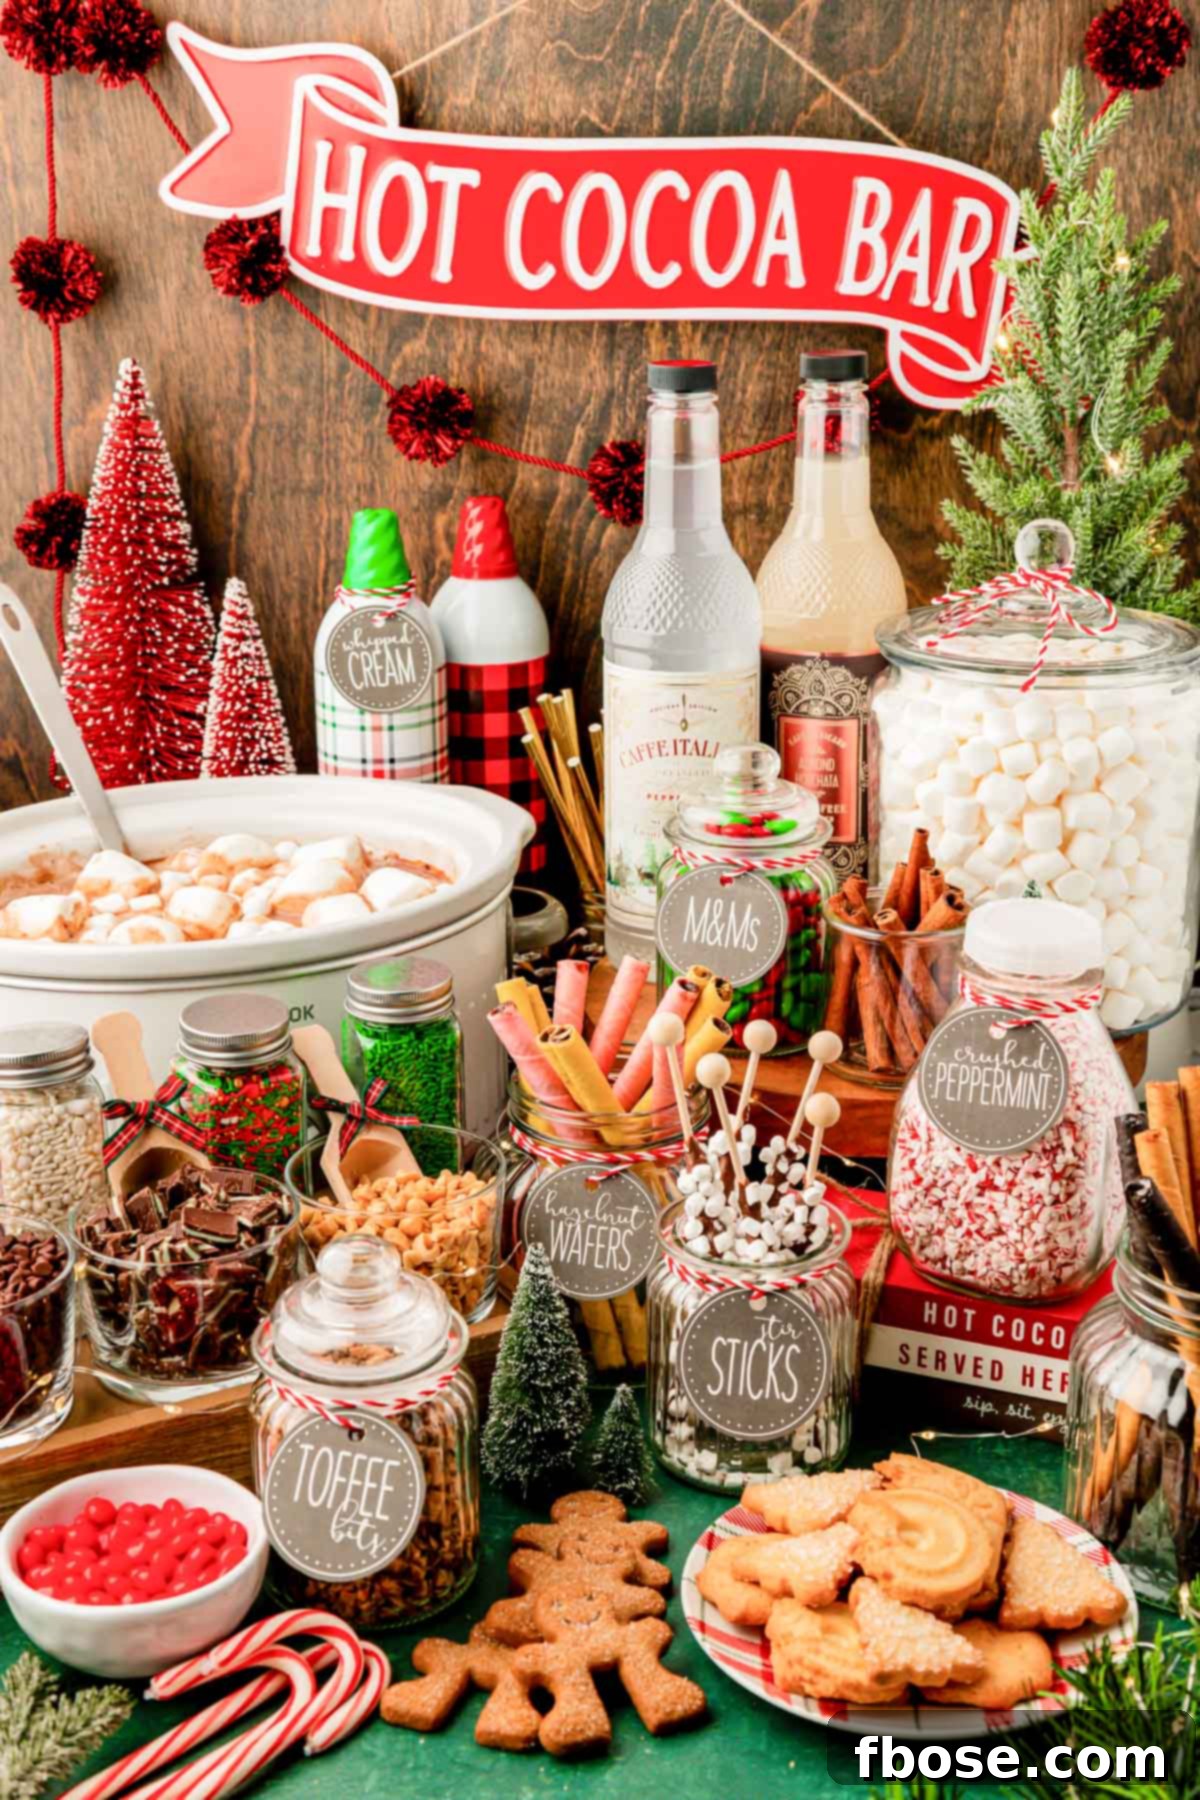
Transform Your Gatherings: The Ultimate DIY Hot Cocoa Bar Guide
Embrace the magic of the colder months and transform any ordinary get-together into an extraordinary celebration with a delightful DIY Hot Cocoa Bar! This comprehensive guide will equip you with everything you need to create a truly memorable experience, brimming with warmth, sweetness, and festive cheer. Whether you’re planning an intimate family evening, a bustling holiday party, a fun kid’s event, or a cozy winter sledding gathering, a customizable hot chocolate station is guaranteed to be a hit. It’s more than just a drink; it’s an interactive activity that brings people together, allowing guests of all ages to craft their perfect cup of hot chocolate, tailored precisely to their tastes.
Imagine the smiles as your friends and family discover a lavish spread of rich hot chocolate bases, an array of exciting toppings, and charming decorations that set the mood. From classic marshmallows to gourmet chocolate drizzles and unexpected crunchy delights, the possibilities for customization are endless. We’ve meticulously curated every detail, from selecting the finest hot chocolate recipes that cater to every palate, to showcasing the most delectable and visually appealing toppings. We even offer suggestions for complementary treats to serve alongside your cocoa creations, ensuring a truly immersive and satisfying experience that will be talked about long after the last drop of cocoa is savored.
Pin This Recipe For Later
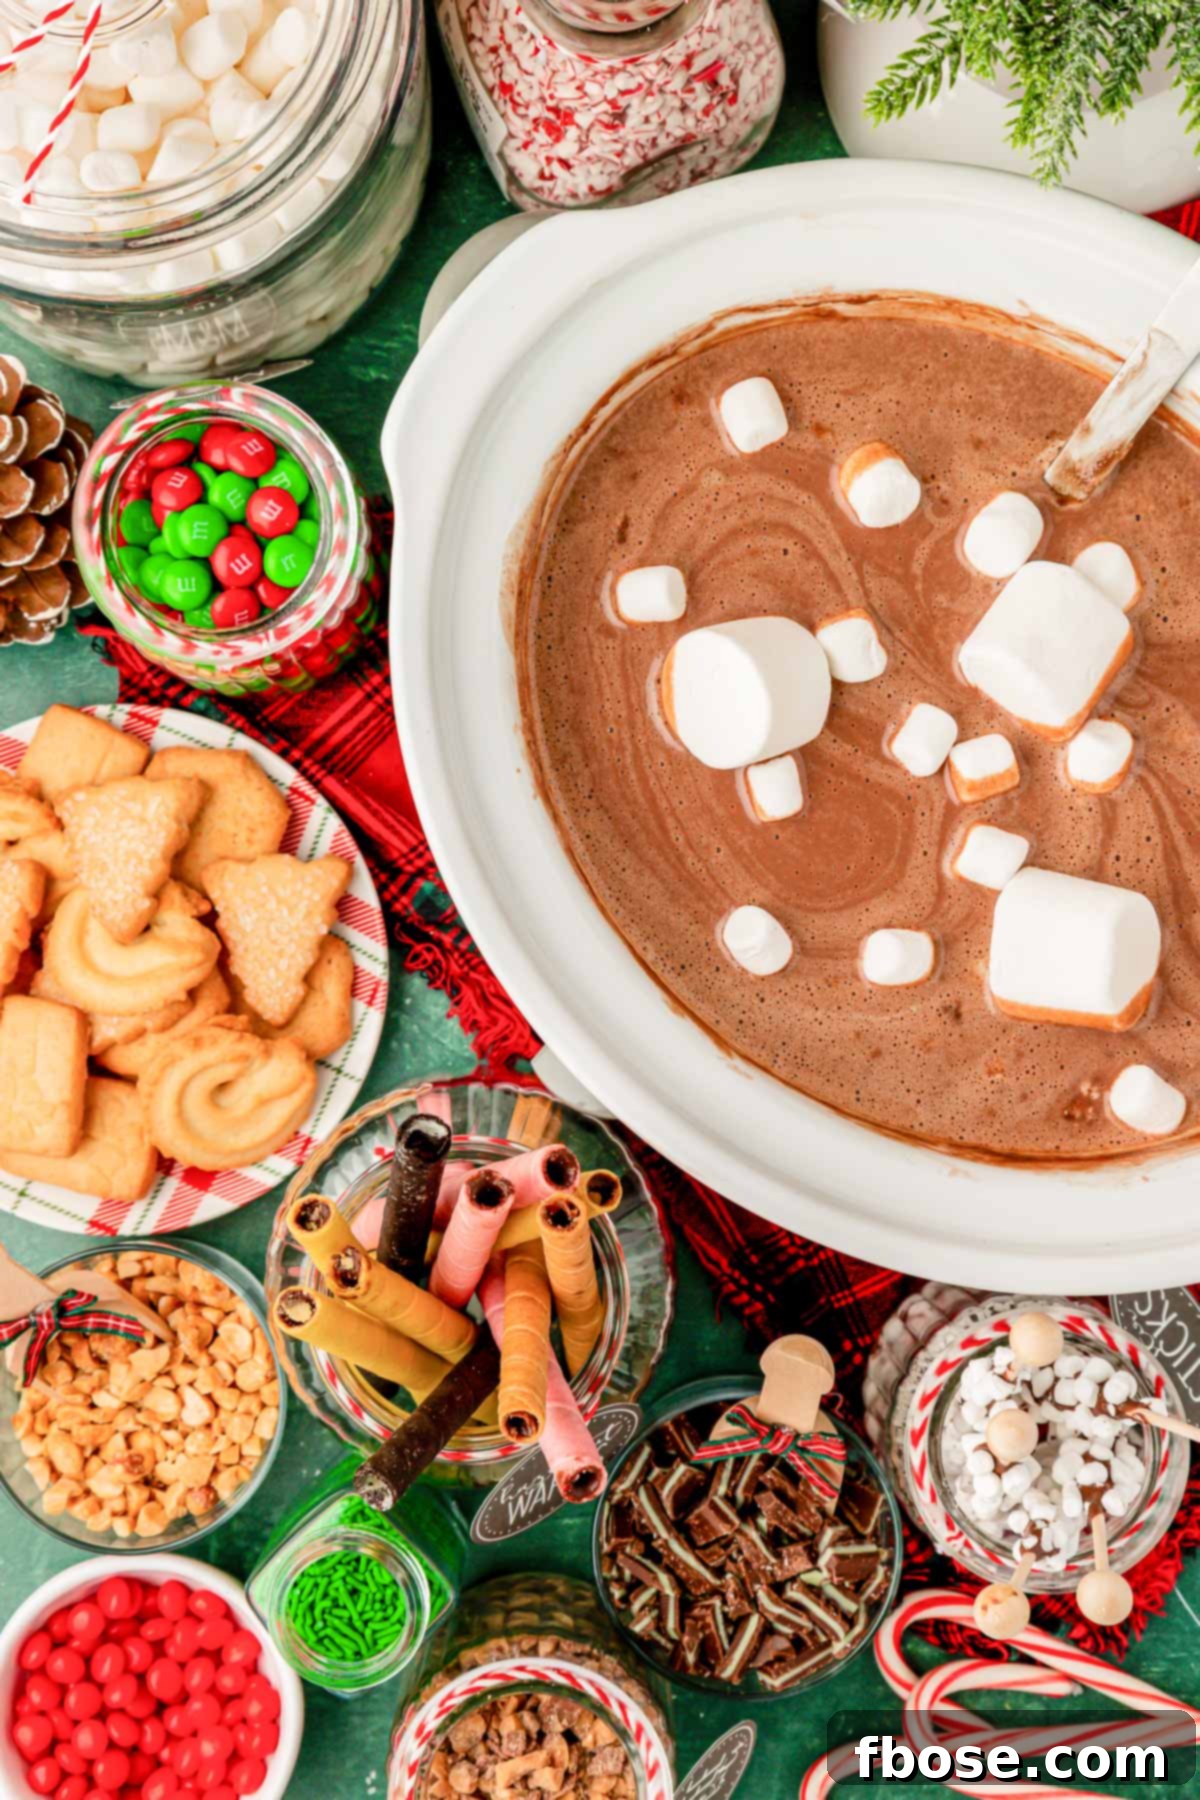
Essential Supplies and Ingredients for Your Hot Chocolate Bar
Setting up the perfect hot chocolate bar begins with gathering the right essentials. This section details both the delicious core ingredients and the practical supplies you’ll need to create a truly inviting and functional station. Remember, a successful hot cocoa bar is all about balancing mouth-watering flavors with thoughtful presentation.
The Perfect Hot Chocolate Base
The foundation of any great hot cocoa bar is, naturally, the hot chocolate itself! For ease of serving and to ensure a consistently warm beverage throughout your event, I highly recommend using a slow cooker. My rich and creamy Crock Pot Hot Chocolate Recipe is a fan favorite, designed to stay perfectly warm and delicious for hours, making it ideal for continuous self-service.
Don’t limit yourself to just one flavor! Offering a variety of hot chocolate bases can significantly elevate your bar. Consider classic milk chocolate, a rich dark chocolate, or even a decadent white chocolate option. For those who love a twist, explore exciting flavored recipes such as:
- Nutella Hot Chocolate: A delightful blend of hazelnut and chocolate for a rich, sweet experience.
- Peppermint Hot Chocolate: A refreshing, festive choice perfect for the holidays.
- Creamy Mexican Hot Chocolate: Infused with cinnamon and a hint of chili for a warm, spiced kick.
- Chai Hot Chocolate: A comforting fusion of warming spices and chocolate.
- Spiced Orange Hot Chocolate: For a zesty, aromatic alternative.
If you’re hosting a larger gathering, consider preparing multiple batches of different flavored hot chocolates in separate slow cookers. Alternatively, you can offer a single, delicious base and provide an assortment of flavored syrups – like vanilla, caramel, or peppermint – allowing guests to customize their drinks right in their mugs. This method offers flexibility and caters to diverse preferences without requiring multiple large batches of hot cocoa.
Essential Bar Supplies
Once your hot chocolate is ready, you’ll need the right supplies to serve it beautifully and efficiently:
- Mugs: Offer a selection of festive mugs to match your theme, or opt for convenience with sturdy paper coffee cups, especially for larger events or kid-friendly parties. Consider insulated cups to keep drinks warm longer.
- Stirrers: Beyond standard spoons, provide an exciting variety of stirrers. Think edible options like chocolate-dipped spoons, cinnamon sticks for aromatic notes, candy canes for a festive touch, or gourmet stir sticks with attached marshmallows or chocolates.
- Serving Utensils: Include mini scoops or tongs for each topping to ensure hygiene and easy portioning. A ladle is indispensable for serving hot chocolate from the crockpot.
- Dishes for Toppings: Clear glass jars, small bowls, or tiered serving trays are perfect for displaying your toppings. They allow guests to easily see all the wonderful options and add a professional, attractive touch to your bar setup.
- Napkins and Spoons: Don’t forget these practical items! Festive napkins can also contribute to your overall decor.
Adding thoughtful details like these will ensure your DIY Hot Cocoa Bar is not only delicious but also visually appealing and fun to use!
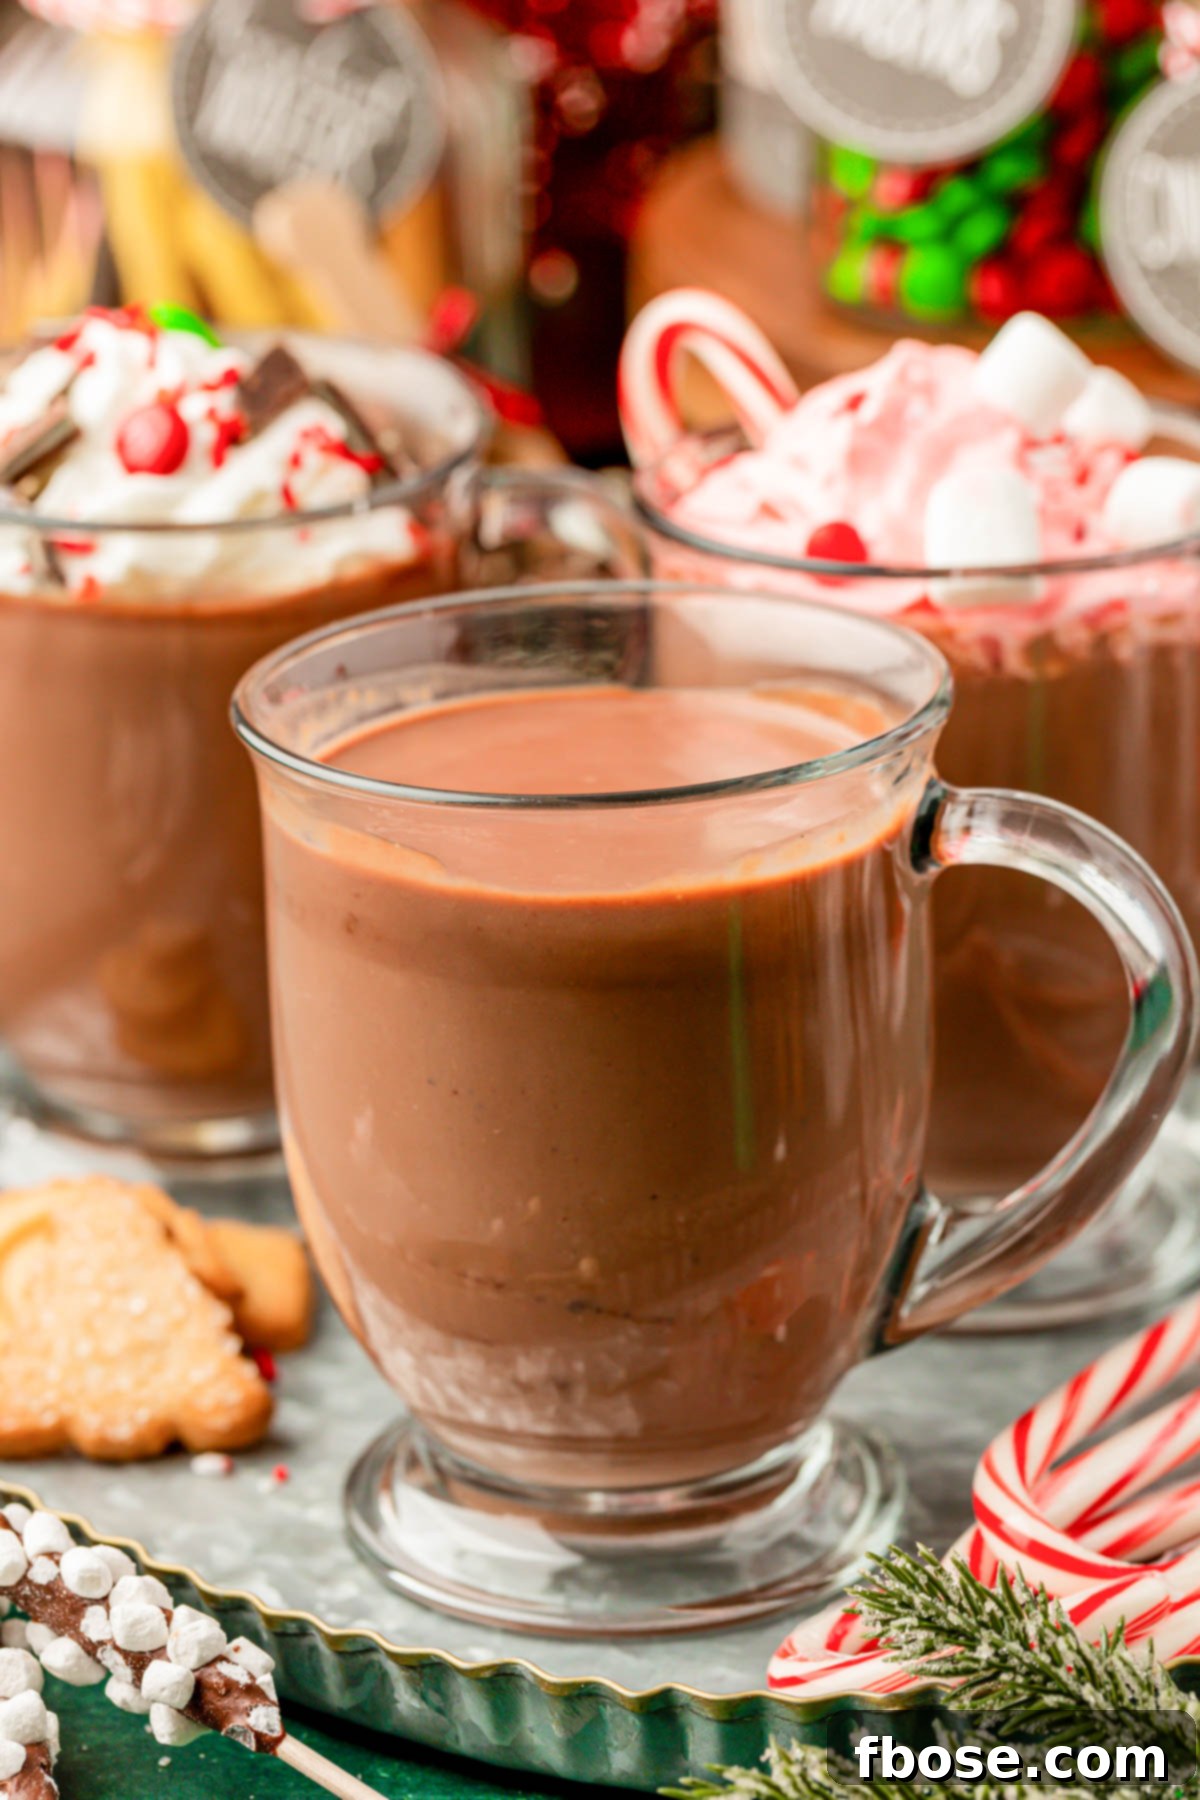
Why Host a DIY Hot Cocoa Bar?
A DIY Hot Cocoa Bar offers numerous advantages that make it a standout choice for entertaining:
- Interactive Fun: It transforms a simple drink into an engaging activity, allowing guests to express their creativity and personalize their experience.
- Caters to All Ages: Kids love piling on candies and marshmallows, while adults can appreciate gourmet flavors and even spiked options.
- Cost-Effective Entertainment: Compared to elaborate meals, a hot cocoa bar is relatively inexpensive to set up, yet delivers maximum impact and joy.
- Easy to Prepare: Many components can be prepared in advance, minimizing stress on the day of your event. A crockpot keeps the main beverage warm effortlessly.
- Visually Stunning: With colorful toppings and attractive serveware, it naturally becomes a beautiful centerpiece that adds to your party’s aesthetic.
- Perfect for Any Winter Occasion: From casual family nights to elegant holiday parties, it fits seamlessly into a variety of settings and themes.
- Warmth and Comfort: Nothing says cozy quite like a steaming mug of hot chocolate on a chilly day, instantly creating a welcoming atmosphere.
Crafting Your Dream Hot Chocolate Bar: A Step-by-Step Guide
Creating a captivating and delicious DIY Hot Chocolate Bar is a simple process when broken down into manageable steps. Follow this guide to ensure your station is perfectly prepared and ready to delight your guests:
- Choose Your Signature Hot Chocolate Recipe: Begin by selecting one or more hot chocolate recipes that you believe your guests will adore. Consider the richness, sweetness, and any unique flavor profiles (like peppermint or Mexican chocolate). Once chosen, carefully review the ingredients list. Make a master shopping list of anything you need to purchase, remembering to check your pantry first for staple items like cocoa powder, sugar, and milk. Preparing your hot chocolate in a crockpot is highly recommended, as it keeps the beverage warm throughout your event and simplifies serving.
- Curate an Exciting Toppings Menu: This is where the fun truly begins! Brainstorm a diverse array of toppings that cater to different tastes and dietary preferences. Think about various textures and flavors: crunchy candies, soft marshmallows, decadent drizzles, and aromatic spices. Create a comprehensive list, including mini chocolates, crushed cookies, whipped cream, and flavored syrups. As with the hot chocolate ingredients, cross-reference your pantry before heading to the store to optimize your budget and minimize waste.
- Design Your Display and Gather Decor: Envision the overall look and feel you want for your hot cocoa bar. Will it be rustic, elegant, whimsical, or modern? Browse local craft stores, department stores, or even online for charming decor elements such as small decorative signs, festive ribbons, unique serveware, and an assortment of fun mugs. Consider using varying heights with cake stands or overturned bowls covered with fabric to add visual interest. Don’t forget practical items like serving scoops for toppings and sturdy stirrers. A well-thought-out display enhances the entire experience and serves as a beautiful focal point for your gathering.
- Prepare Everything in Advance: To minimize stress on the day of your event, prepare as many elements as possible ahead of time. This includes making your hot chocolate base (it can often be made a day in advance and reheated in the crockpot), crushing candies and cookies, setting out empty jars and bowls for toppings, and arranging your mugs and stirrers. Having everything ready allows you to enjoy your party alongside your guests.
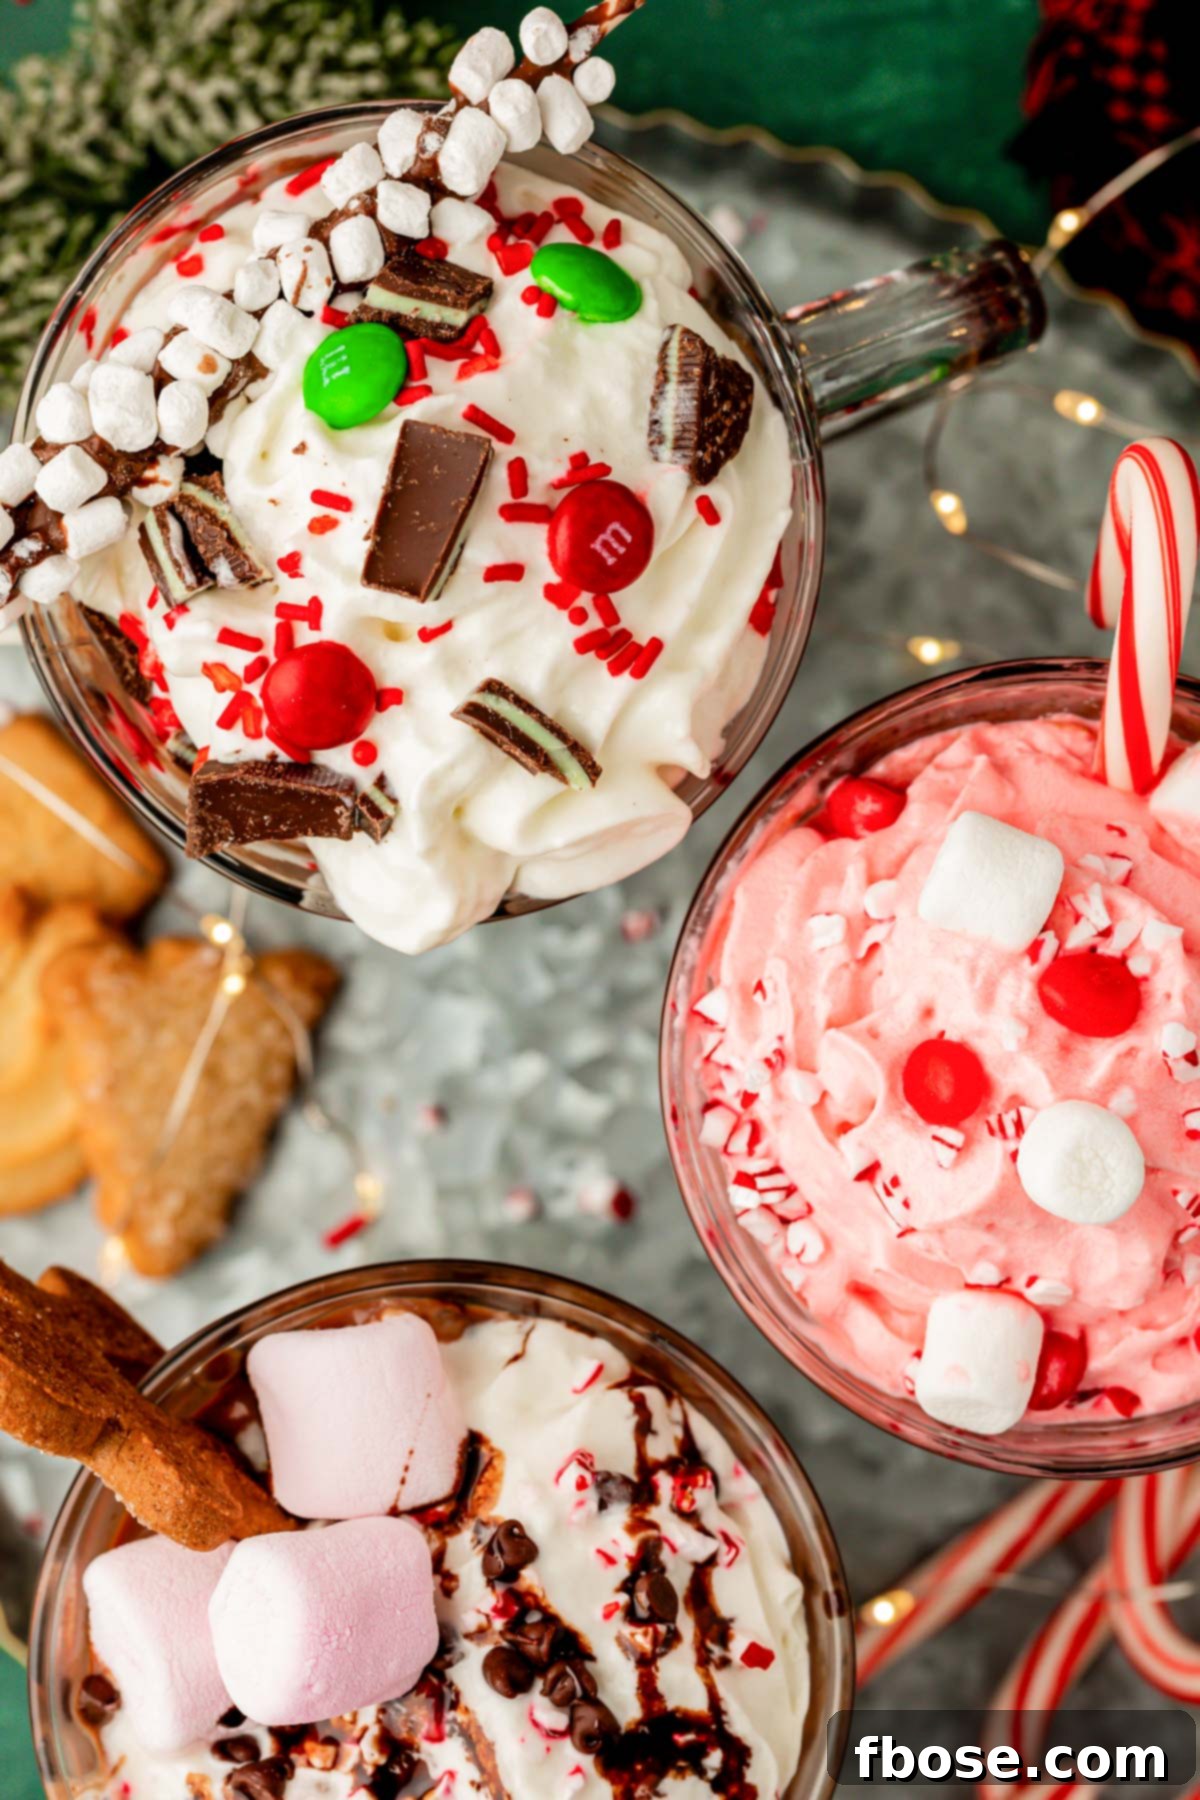
Irresistible Hot Chocolate Bar Toppings: Unleash Your Creativity
The true magic of a DIY Hot Cocoa Bar lies in the boundless potential for customization, and nothing offers more creative freedom than an abundant selection of toppings! From classic comforts to gourmet delights, the more options you provide, the more exciting and personalized each guest’s experience will be. Here’s an extensive list of delicious topping ideas to inspire your ultimate hot chocolate spread:
- Marshmallows Galore: No hot chocolate is complete without marshmallows! Offer a variety:
- Mini Marshmallows: The classic choice, perfect for floating on top.
- Large Marshmallows: For a more substantial, gooey treat.
- Flavored Marshmallows: Look for options like peppermint, vanilla bean, or even toasted coconut.
- Homemade Marshmallows: Elevate your bar with pillowy, freshly made marshmallows – they truly make a difference!
- Decadent Whipped Cream: A generous dollop of whipped cream is a must-have.
- Homemade Whipped Cream: Freshly made whipped cream is incredibly light and flavorful.
- Canned Whipped Cream: A convenient alternative.
- Flavored Whipped Cream: Keep an eye out for seasonal varieties like gingerbread or pumpkin spice whipped cream at your local grocery store for an extra special touch.
- Chocolaty Additions: You can never have too much chocolate!
- Chocolate Chips: Offer mini semi-sweet, milk chocolate, white chocolate, or even mint chocolate chips for an extra layer of flavor and melt-in-your-mouth goodness.
- Chocolate Shavings or Curls: A sophisticated touch that adds visual appeal and rich flavor.
- Crushed Chocolate Bars: Think classic Hershey’s, chopped Andes mints, or even crumbled chocolate-covered pretzels.
- Crunchy Candy & Cookie Delights: Add texture and burst of flavor with these fun options:
- Mini M&M’s: Colorful and always a crowd-plepleaser.
- Crushed Peanut Butter Cups: A delightful sweet and salty combination.
- Chopped or Whole Hershey Kisses: Offer a variety of flavors like classic milk chocolate, cookies ‘n’ creme, or caramel-filled.
- Crushed Peppermint Bark or Candy Canes: Essential for a festive holiday hot cocoa.
- Toffee Bits: For a buttery, crunchy caramel note.
- Crushed Twix or Kit Kat: Popular candy bar pieces add familiar sweetness.
- Gingerbread Cookies or Spiced Wafers: Crushed or whole, these add a delightful seasonal flavor.
- Crushed Oreo Cookies: A universally loved cookie that adds a creamy chocolate crunch.
- Sweet Syrups & Sauces: For a luxurious drizzle and added moisture.
- Caramel Sauce: A sweet, buttery classic.
- Chocolate Sauce: Enhance the chocolate flavor, consider dark chocolate or white chocolate variations.
- Peppermint Syrup: For an intense minty kick.
- Vanilla Bean Syrup: A fragrant and comforting addition.
- Butterscotch Sauce: For a rich, distinct flavor.
- Warm Spices & Aromatic Elements: For depth and a sophisticated flavor profile.
- Cinnamon Sticks: Perfect for stirring and infusing a warm aroma.
- Ground Cinnamon or Nutmeg: A light dusting adds warmth.
- Red Hots or Brach’s Cinnamon Imperials: For those who love a spicy kick.
- Star Anise or Cloves: For a very subtle, exotic spice note (use sparingly).
- Nutty & Salty Touches: To balance the sweetness.
- Crushed Peanuts, Walnuts, or Pecans: Add a lovely crunch and earthy flavor.
- Flaked Sea Salt: A tiny pinch can really enhance the chocolate’s depth.
- Pretzel Bits: For a salty, crunchy contrast.
- Festive Garnishes & Mug Toppers: For an extra special presentation.
- Little Debbie Christmas Tree Cakes or Hostess Holiday Cupcakes: Mini cakes that can be perched on the mug rim.
- Gingerbread Man Cookies: Small cookies that are perfect for hanging on the side.
- Chocolate-dipped Spoons: Practical and pretty.
- Cookie Straws or Pirouettes: Elegant and delicious edible stirrers.
- Sprinkles & Decorative Sugars: To add a burst of color and fun!
- Seasonal Sprinkles: Red and green for Christmas, blue and white for winter, or rainbow for a general celebration.
- Nonpareils, Jimmies, Sugar Pearls, Sanding Sugar: Offer a variety of shapes and textures to make each cup a work of art.
Remember to arrange your toppings in clear, easily accessible containers with small scoops or tongs, making it a joy for guests to create their custom cocoa masterpieces.
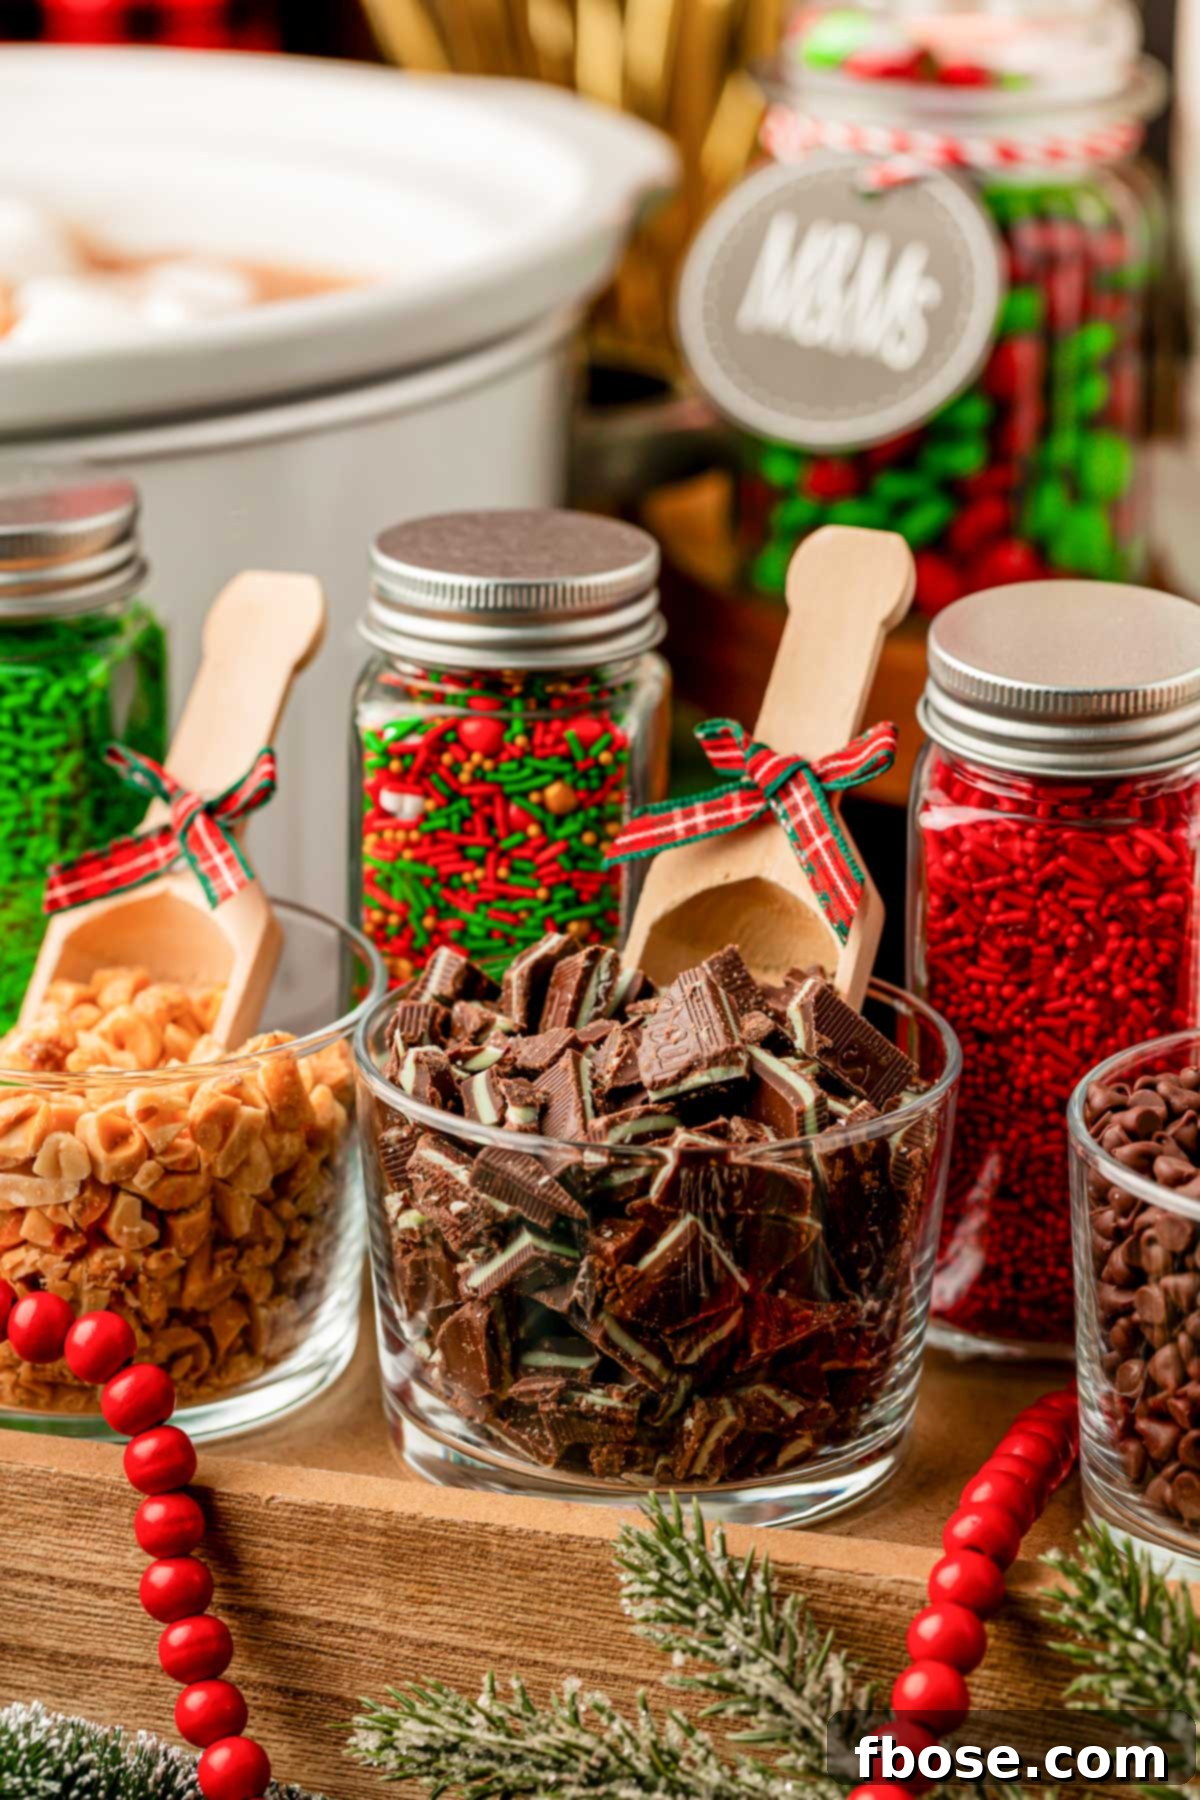
Creative Hot Chocolate Bar Ideas & Decor
A beautifully decorated hot cocoa bar isn’t just a treat for the taste buds; it’s a feast for the eyes and a central element of your event’s atmosphere. Tailoring your DIY Hot Cocoa Bar to a specific theme or aesthetic can significantly amplify the excitement and create a cohesive, inviting experience for your guests. From charming signs to festive lighting, thoughtful decor elevates your bar from a simple station to a memorable focal point.
Decorating Your Hot Cocoa Bar
You don’t need to break the bank to create stunning decor. Affordable yet high-quality items can be found at stores like Target’s Bullseye’s Playground, Hobby Lobby, Walmart, and Michaels Craft Store. Look for:
- Mini Signs: Small chalkboards or printed signs indicating “Hot Cocoa Bar,” “Toppings,” or specific flavor names add a professional and organized touch.
- Festive Ribbons: Drape ribbons around jars, tie bows on scoops, or incorporate them into a backdrop for a pop of color and texture.
- Fairy Lights: String subtle LED fairy lights around your display for a warm, magical glow, especially enchanting during evening events.
- Garlands & Banners: A “Hot Cocoa” banner or a festive garland (pinecones, faux cranberries, snowflakes) can instantly frame your station.
- Natural Elements: Incorporate pinecones, evergreen sprigs, cinnamon sticks (both as decor and stirrers), or small ornamental berries for an organic, cozy feel.
- Tiered Stands: Use cake stands or tiered serving trays to add height and dimension, making your spread look more abundant and easier for guests to access.
- Themed Linens: A tablecloth or runner that matches your color scheme or theme can tie the entire setup together.
Themed Hot Cocoa Bar Inspirations
If you’re someone who loves a good theme party, here are some fun ideas to make your hot cocoa bar truly unique:
- Hot Cocoa-Themed Delights: Keep the chocolatey goodness flowing with snacks that echo your main theme!
- Hot Chocolate Oreo Balls & Brownie Bites: These visually resemble mini cups of cocoa, adding a whimsical touch.
- Hot Chocolate Dip: Serve in an oversized mug, topped with mini marshmallows, for an adorable and delicious centerpiece.
- Desserts Made with Hot Cocoa Powder: Explore recipes like Hot Chocolate Muddy Buddies, Hot Chocolate Rice Krispie Treats, or an easy-to-make Hot Chocolate Dump Cake.
- A Magical Christmas Wonderland: If your hot cocoa bar is part of Christmas festivities, lean into the holiday cheer!
- Christmas-Themed Treats: Pair your cocoa with Festive Christmas Oreo Balls, Easy Christmas Wreath Cookies, or Meringue Christmas Trees.
- Savory Options: Balance the sweetness with light bites like an Easy Christmas Appetizer (think festive finger sandwiches) or a beautiful Christmas Tree Charcuterie Board filled with fresh vegetables, fruits, and cheeses.
- Decor: Use classic red, green, and gold colors, mini Christmas trees, ornaments, and twinkling lights.
- The Whoville Grinch Bash: Capitalize on the timeless popularity of The Grinch!
- Grinch-Themed Desserts: Delight guests with Grinch Cake Balls and Heart-Shaped Grinch Cookies.
- Color Palette: Focus on lime green, red, and white for your decor and toppings.
- Decor: Incorporate Grinch-themed signs, cutouts of Cindy Lou Who, and whimsical, slightly “wonky” decorations to mimic Whoville.
- Winter Wonderland Warm-Up: Extend the fun beyond the holidays with a general winter theme.
- Snowman & Penguin Treats: Serve adorable Easy Oreo Snowman Cookies, Cute Oreo Penguin Cookies, Adorable Snowman Cake Pops, or Cute Melted Snowman Cookies.
- Decor: Use a palette of blues, silvers, and whites. Incorporate snowflakes, faux fur throws, and frosted branches for a serene and inviting ambiance.
- Adults-Only Elevated Cocoa Bar: For a sophisticated twist, offer boozy additions.
- Alcoholic Pairings: Provide a selection of spirits for guests to spike their cocoa. Popular choices include Irish cream (like Bailey’s), coffee liqueur (Kahlua), dark rum, bourbon, or even peppermint schnapps.
- Gourmet Toppings: Offer more sophisticated toppings such as dark chocolate shavings, candied orange peel, high-quality sea salt, and elegant chocolate stirrers.
- Decor: Opt for a more refined aesthetic with elegant glassware, subtle lighting, and perhaps a small selection of artisanal cheeses to complement the rich drinks.
By thoughtfully choosing your theme and decor, you can transform your hot cocoa bar into an immersive experience that perfectly complements your gathering.
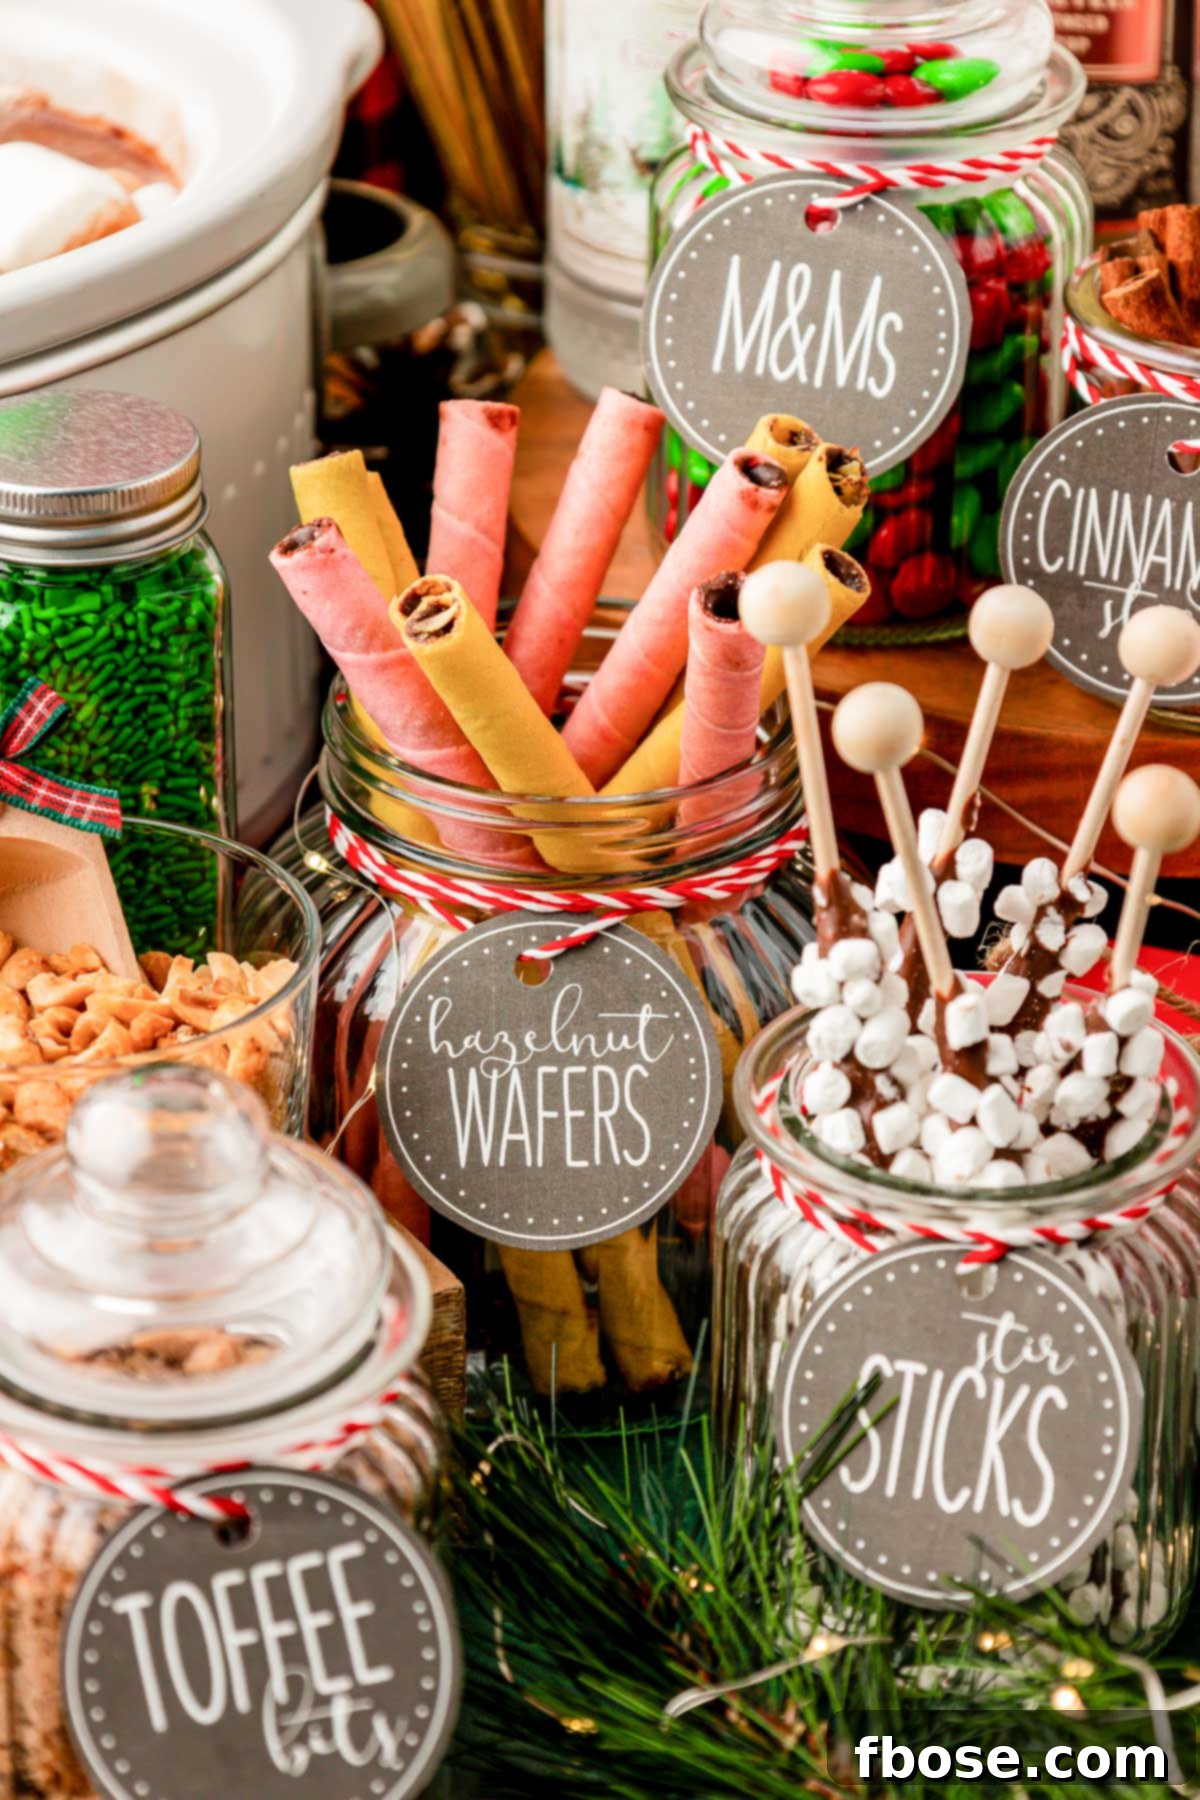
Expert Tips for Serving a Flawless Hot Cocoa Bar
To ensure your DIY Hot Cocoa Bar is a resounding success, consider these expert tips for preparation, presentation, and guest enjoyment. These thoughtful details will make your hot chocolate station not just delicious, but also incredibly user-friendly and visually appealing:
- Crockpot for Continuous Warmth: Regardless of your chosen hot chocolate recipe, serving it in a crockpot is paramount. This simple hack ensures your hot chocolate stays perfectly warm throughout your entire event, eliminating the need for constant reheating. A crockpot also simplifies serving, allowing guests to easily ladle their desired amount directly into their mugs, minimizing spills and mess.
- Utilize Clear Serveware for Toppings: For an organized and aesthetically pleasing display, opt for clear glass jars, bowls, and other serveware to hold your hot cocoa toppings, stir sticks, and small treats. Clear containers offer two key benefits: first, they allow guests to effortlessly see all the delightful options available, encouraging them to mix and match. Second, they create an eye-catching and bountiful appearance, making your bar look professional and inviting. Stores like Hobby Lobby often have a wonderful glassware selection that you can catch on sale.
- Provide Oversized Mugs: With an abundance of delicious topping choices, guests will appreciate having plenty of room to pile on everything their hearts desire! Oversized mugs are ideal for this, accommodating generous servings of hot chocolate and a mountain of marshmallows, whipped cream, and other goodies.
- Embrace a Plethora of Toppings: When it comes to toppings, the more, the merrier! While you don’t necessarily need a massive quantity of each option, offering a wide variety of choices is key to a truly exciting experience. Fill jars with diverse and fun selections – from different types of chocolates and candies to various syrups and spices. This encourages experimentation and personalization, making each cup unique.
- Strategic Display Arrangement: Arrange and display your DIY hot chocolate bar in a way that promotes easy flow and enjoyment. If you have ample space, such as a long table or kitchen island, spread out your items to allow multiple guests to top off their mugs simultaneously without feeling crowded. For smaller spaces, tiered serving trays are a fantastic solution. They allow you to vertically stack toppings and mugs, creating a cozy yet organized hot cocoa bar without consuming too much counter space.
- Complement with Savory and Sweet Snacks: While the hot cocoa bar is the star, offering a selection of complementary snacks can truly round out the experience. Consider serving a mix of delicious appetizers and yummy desserts. Savory options provide a welcome contrast to the sweetness of the cocoa, while additional sweet treats can enhance the indulgence. This ensures all cravings are satisfied and guests have more to enjoy beyond their drink.
- Maintain Hygiene: Place small tongs or spoons in each topping container to ensure guests can serve themselves hygienically. Also, have a small bin or designated area for used stirrers and spoons.
- Temperature Control: If you’re using syrups or sauces that might thicken in the cold, consider serving them in squeeze bottles or small warmed pitchers to keep them easy to drizzle.
By implementing these tips, you’ll create a hot cocoa bar that is not only a delightful treat but also a seamlessly enjoyable experience for everyone.
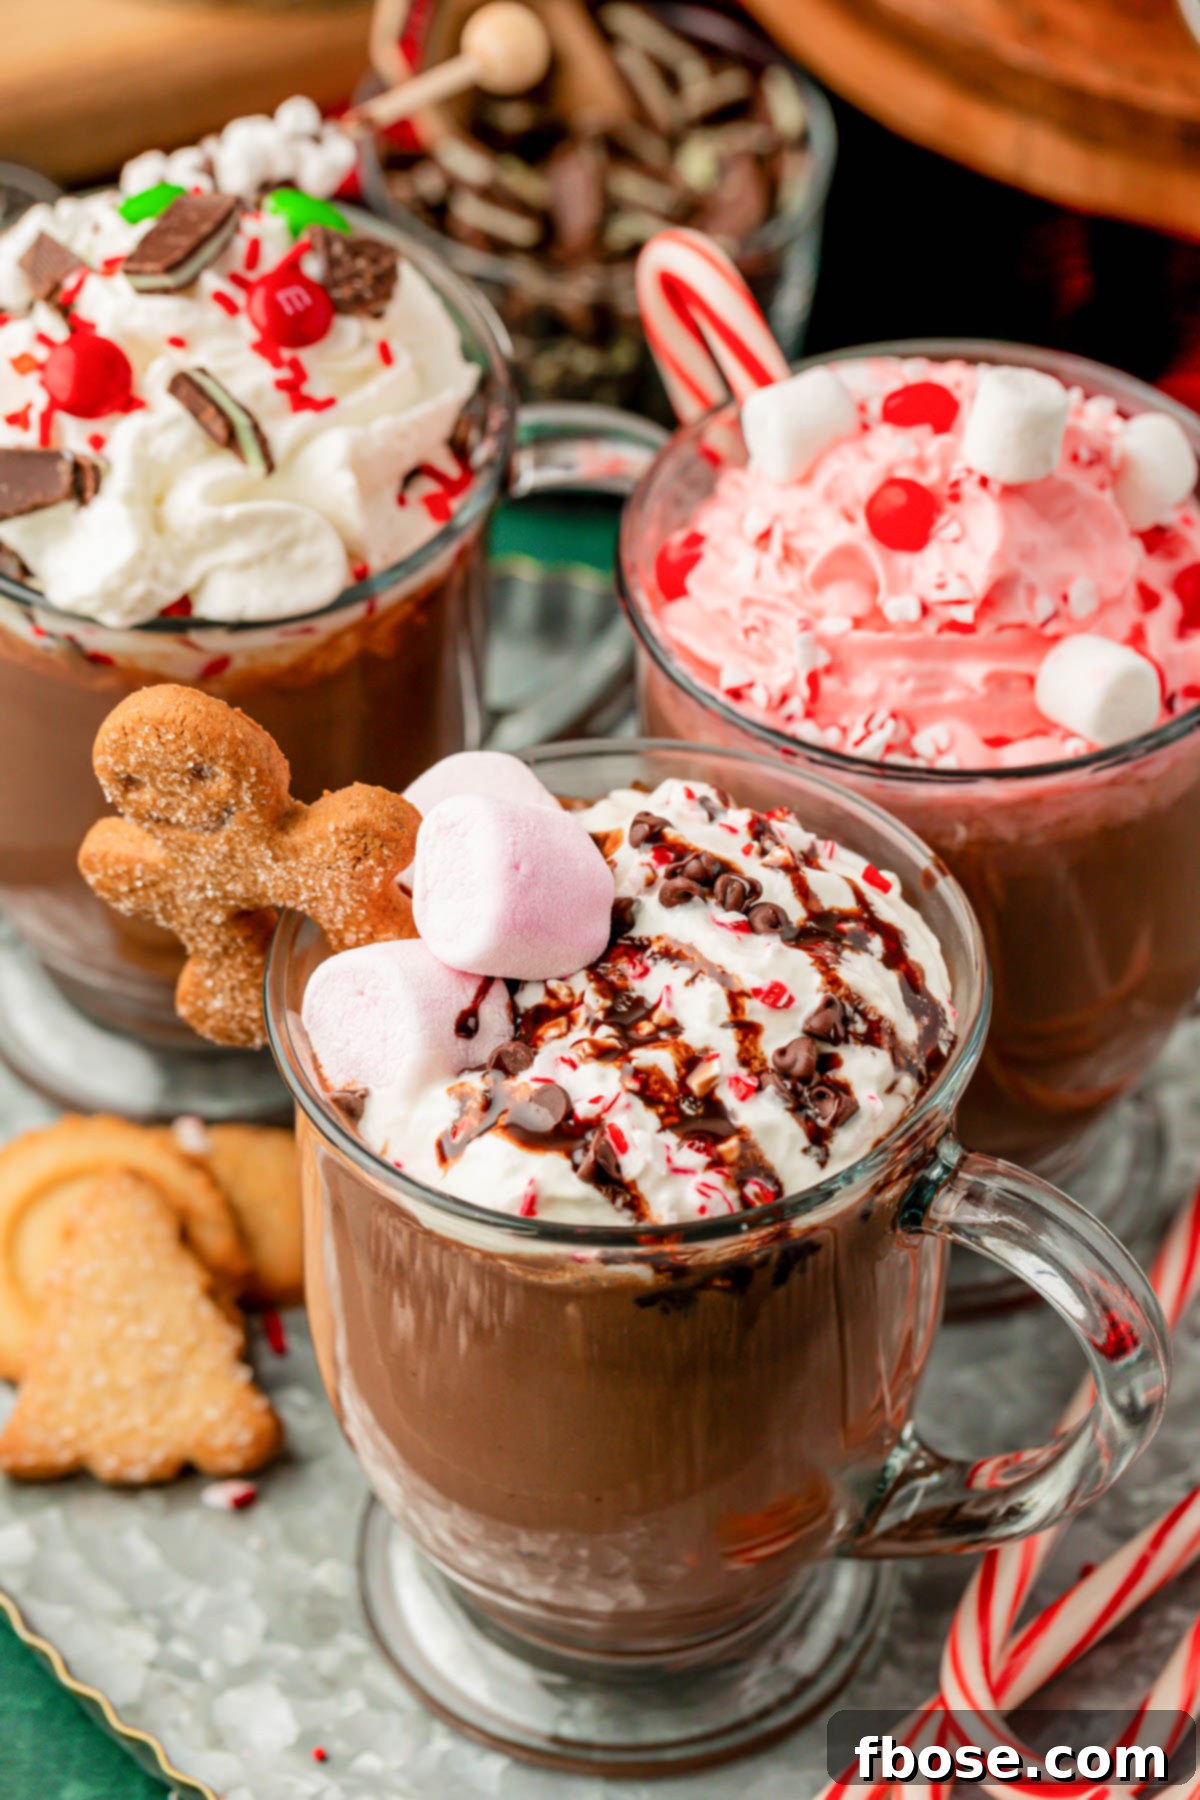
Delightful Pairings: What to Serve Alongside Your DIY Hot Cocoa Bar
While the DIY Hot Cocoa Bar is a standalone attraction, pairing it with an assortment of delectable snacks and treats will elevate your event and provide guests with even more to savor. Offering both sweet and savory options ensures a balanced experience for all palates.
- Freshly Baked Cookies: Cookies are the quintessential companion to hot chocolate, offering a comforting and satisfying pairing.
- Classic Choices: You can’t go wrong with a stack of Bakery Style Chocolate Chip Cookies or these adorable Small Chocolate Chip Cookies.
- Seasonal Favorites: For holiday gatherings, consider Homemade Sugar Cookies with Brown Sugar, Frosted Big & Chewy Gingerbread Cookies, or festive Peppermint Mocha Cookies.
- Dipping Cookies: Biscotti, pirouettes, or shortbread are perfect for dipping into rich hot cocoa.
- Irresistible Homemade Brownies: Keep the chocolate indulgence flowing with rich, fudgy brownies.
- Gourmet Brownies: For an extra special treat, bake up my Mud Pie Brownies, No Bake Cookie Brownies, or the incredibly rich Buckeye Brownies.
- Quick & Easy: If time is short, learn How To Make Box Brownies Better with simple additions.
- Brownie Bites: Cut brownies into small, bite-sized pieces for easy grabbing.
- Easy-to-Make Dips: Dips are always a crowd-pleaser and offer a delightful shared experience.
- Holiday Dips: During festive seasons, set out a Gingerbread Cheesecake Dip, the whimsical Buddy The Elf Christmas Dip, or the ever-popular Christmas Cake Dip.
- Year-Round Favorites: For any time of year, my Brownie S’mores Dip and Chocolate Chip Cookie Dough Dip are fantastic choices, served with graham crackers, fruit, or pretzels.
- Savory Snacks for Balance: To provide a palate cleanser and break up the sweetness, offer a selection of savory options.
- Classic Snacks: Crispy Soft Pretzels or a sophisticated Butter Board (TikTok Recipe) served with fresh bread slices are excellent choices.
- Mini Quiches or Sausage Rolls: Small, warm savory bites are always appreciated.
- Cheese and Crackers: A simple platter with a variety of cheeses, crackers, and perhaps some fruit will provide a refreshing contrast.
- Popcorn: A large bowl of lightly salted popcorn offers a satisfying crunch.
By thoughtfully curating your accompanying treats, you can create a culinary experience that perfectly complements your magnificent DIY Hot Cocoa Bar.
Smart Storage Solutions: Maximizing Your Hot Cocoa Bar Leftovers
After a fantastic gathering, you might find yourself with leftover hot chocolate and a medley of toppings. Proper storage ensures you can enjoy these delicious remnants long after the party has ended. Here’s how to efficiently store your hot cocoa bar components:
How To Store Leftover Hot Chocolate
To store leftover hot chocolate from your crockpot, first allow it to cool completely to room temperature. This prevents condensation and keeps the hot chocolate fresh. Once cooled, carefully transfer the hot chocolate into an airtight container. A pitcher with a tight lid, a large mason jar, or a sealed food storage container are excellent choices. Store the hot chocolate in the refrigerator, where it will remain fresh and delicious for approximately 4 to 5 days. When you’re ready to enjoy another cozy cup, simply reheat it gently using a microwave or a small saucepan on the stovetop, stirring occasionally until warmed through.
How To Store Leftover Hot Cocoa Toppings
Storing your leftover hot cocoa toppings correctly ensures they stay fresh for future use or for simply enjoying as standalone snacks. Group similar toppings together and use airtight containers or Ziploc bags, pressing out any excess air before sealing. Fragile items like crushed cookies should be stored gently to prevent further crumbling. Candies, sprinkles, and chocolate chips can be kept at room temperature in their sealed containers. Whipped cream should be discarded or used promptly, while sauces can be refrigerated in their original bottles or sealed jars. You can repurpose these leftover toppings for other delightful culinary adventures, such as decorating Classic Christmas Sugar Cookies, enhancing a bowl of ice cream, or even adding a creative touch to gingerbread houses. This way, nothing goes to waste, and the fun continues!
Did You Make This Recipe?
If you’ve tried this recipe, please leave a review in the comments below. I love hearing from you! Don’t forget to tag me – @sugarandsoulco – on Instagram and Pinterest with your photos, or join our Sugar & Soul Show-offs Community and share them there.
Hot Chocolate Bar Recipe
Pin
Rate
Equipment
-
Crockpot
-
Ladle
Ingredients
Crockpot Hot Chocolate
- 1½ cups chocolate chips
- ¼ cups cocoa powder
- ¼ cups powdered sugar
- 14 ounces sweetened condensed milk
- 2 cups heavy cream
- 6 cups whole milk
- 1 tablespoon vanilla extract
- 2 cups mini marshmallows
Flavor Syrups
- vanilla simple syrup
- peppermint simple syrup
- gingerbread simple syrup
Topping Ideas
- candy canes
- crushed peppermint
- toffee bits
- chocolate chips
- Andes mints
- M&M’s
- sprinkles
- sea salt
- whipped cream
- marshmallows
- chocolate syrup
- caramel syrup
For Serving
- cookies
- pirouettes
- mug toppers
- biscotti
- peanut butter balls
- truffles
Instructions
-
Add the 1½ cups chocolate chips, ¼ cups cocoa powder, ¼ cups powdered sugar, 14 ounces sweetened condensed milk, 2 cups heavy cream, 6 cups whole milk, and 1 tablespoon vanilla extract to a large crockpot and whisk together.
-
Cook the mixture on low for 2 hours, stirring occasionally.
-
While the hot chocolate cooks, set up your bar with your add-ins and toppings. Some ideas include vanilla simple syrup, peppermint simple syrup, gingerbread simple syrup, candy canes, crushed peppermint, toffee bits, chocolate chips, Andes mints, M&M’s, sprinkles, sea salt, whipped cream, marshmallows, chocolate syrup, and caramel syrup.
-
After the 2 hours is up, stir in the 2 cups mini marshmallows and let sit for about 10 minutes and stir them again, they should completely dissolve.
-
Serve with fun holiday treats like cookies, pirouettes, mug toppers, biscotti, peanut butter balls, truffles, and more!
-
Hot Chocolate can be kept on warm all day. Store any leftovers in an airtight container in the refrigerator for up to 5 days.
Video
Nutrition
Did You Make This Recipe?
Don’t forget to share it with me on Instagram @sugarandsoulco and follow on Tiktok @sugarandsoulco and Pinterest @sugarandsoulco for more!
Pin Recipe
Share Recipe