

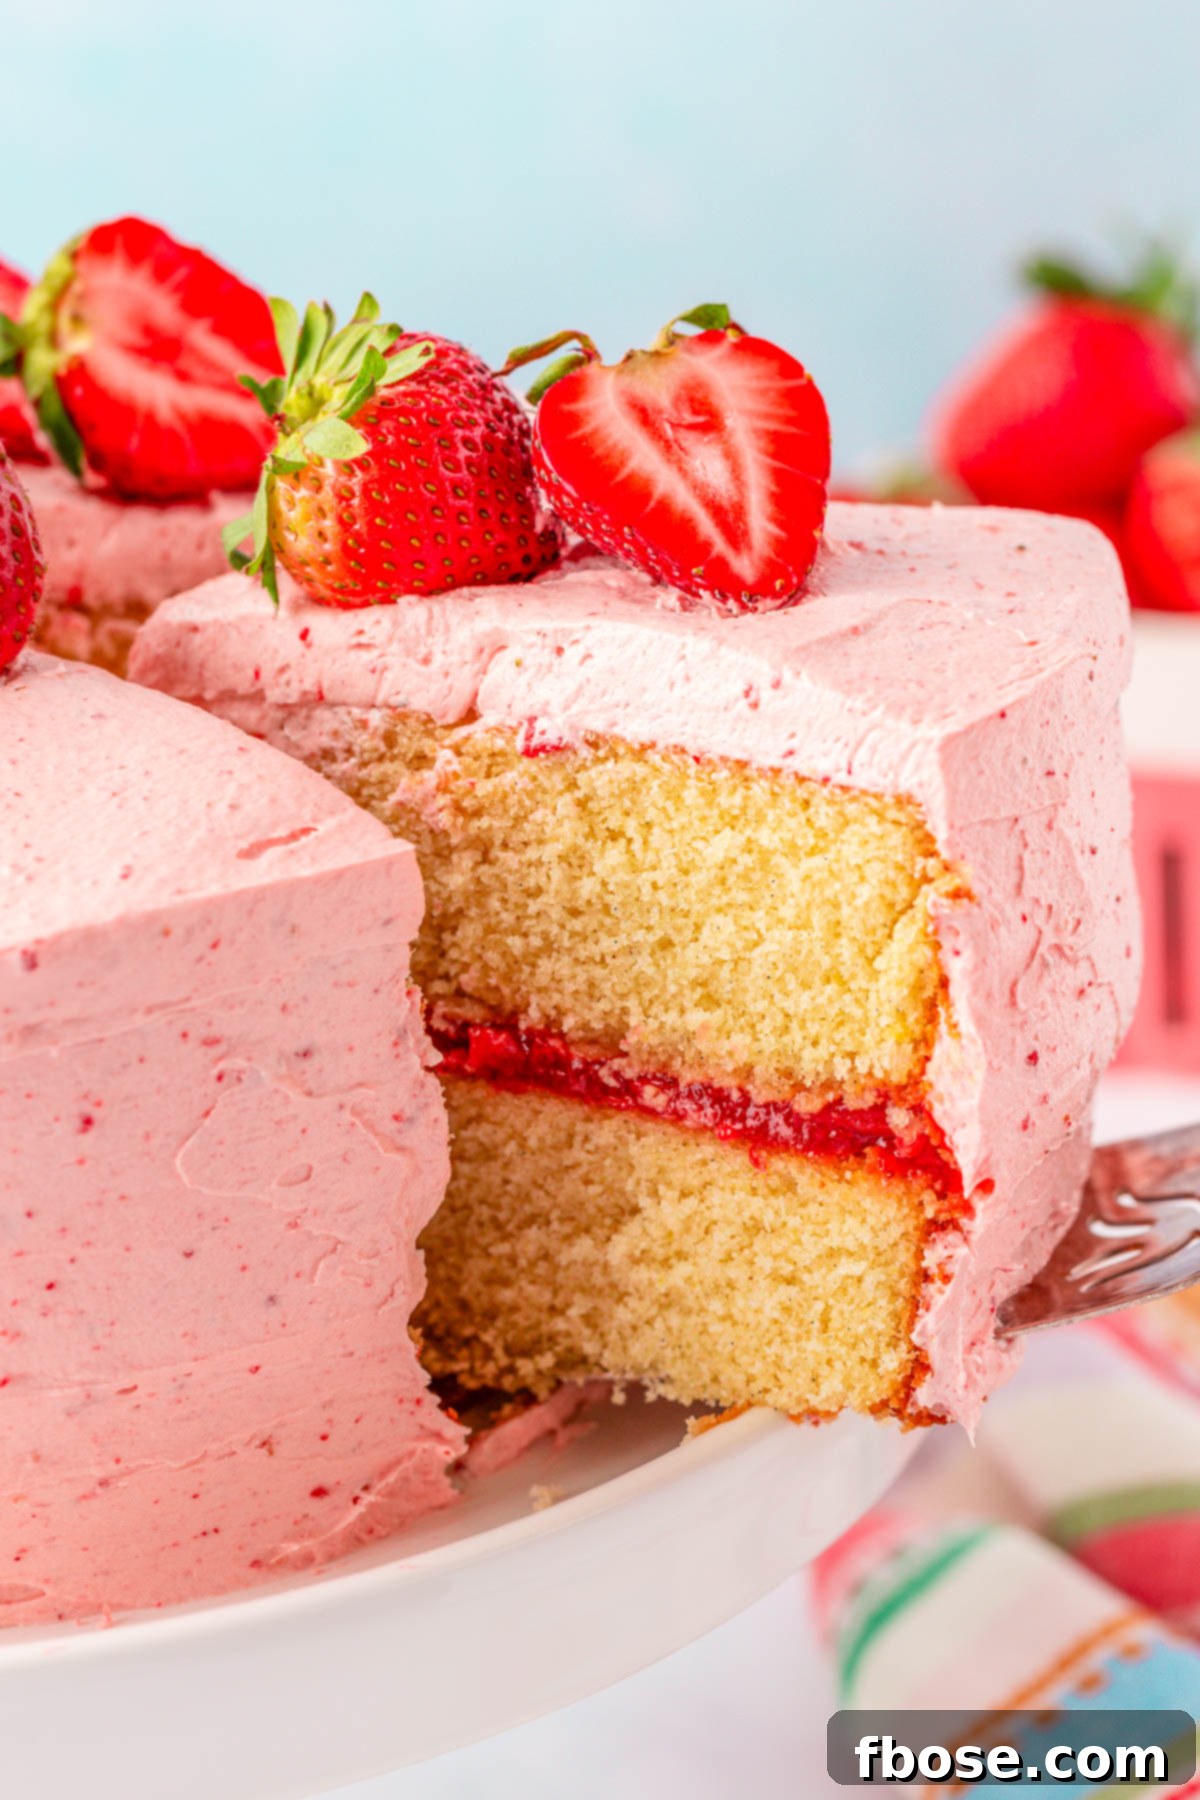
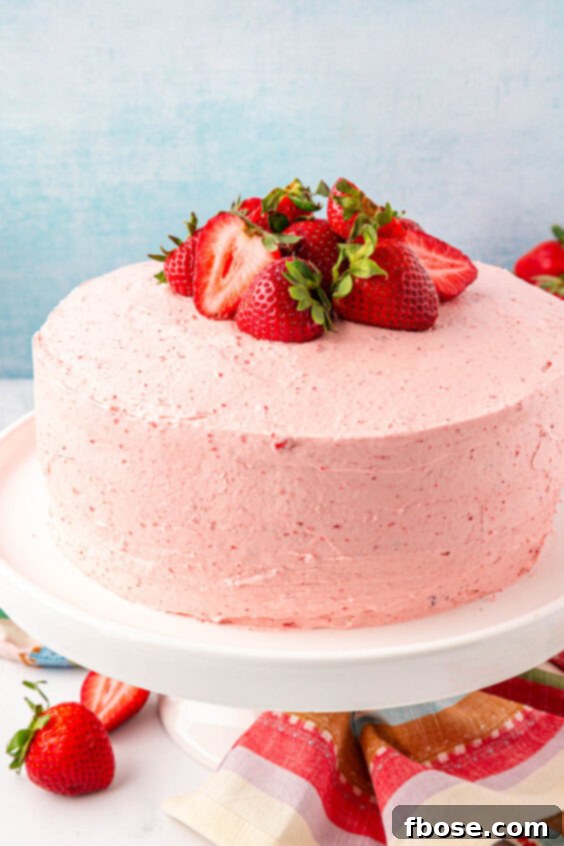
Prepare to be enchanted by a symphony of flavors in this exquisite **Strawberry Vanilla Cake**! This isn’t just a dessert; it’s an experience, a harmonious blend where the comforting warmth of vanilla meets the vibrant sweetness of fresh strawberries. Imagine two layers of supremely tender, homemade vanilla cake, generously filled with a luscious strawberry compote, all lovingly enveloped in a cloud of fluffy strawberry buttercream frosting. Every forkful promises an unforgettable journey of taste and texture, a truly decadent treat that feels gourmet yet is entirely achievable in your own kitchen with our detailed, easy-to-follow guide.
Baking this cake is more than just following a recipe; it’s an act of love, culminating in a show-stopping centerpiece perfect for any celebration or simply to elevate an ordinary day. Our meticulously crafted instructions break down each step, making what might seem like an ambitious project utterly delightful. Get ready to impress your family and friends with a dessert that looks as incredible as it tastes, marrying classic flavors with a touch of homemade magic. This Strawberry Vanilla Cake is destined to become a cherished favorite in your recipe collection, a testament to the joy of baking from scratch.
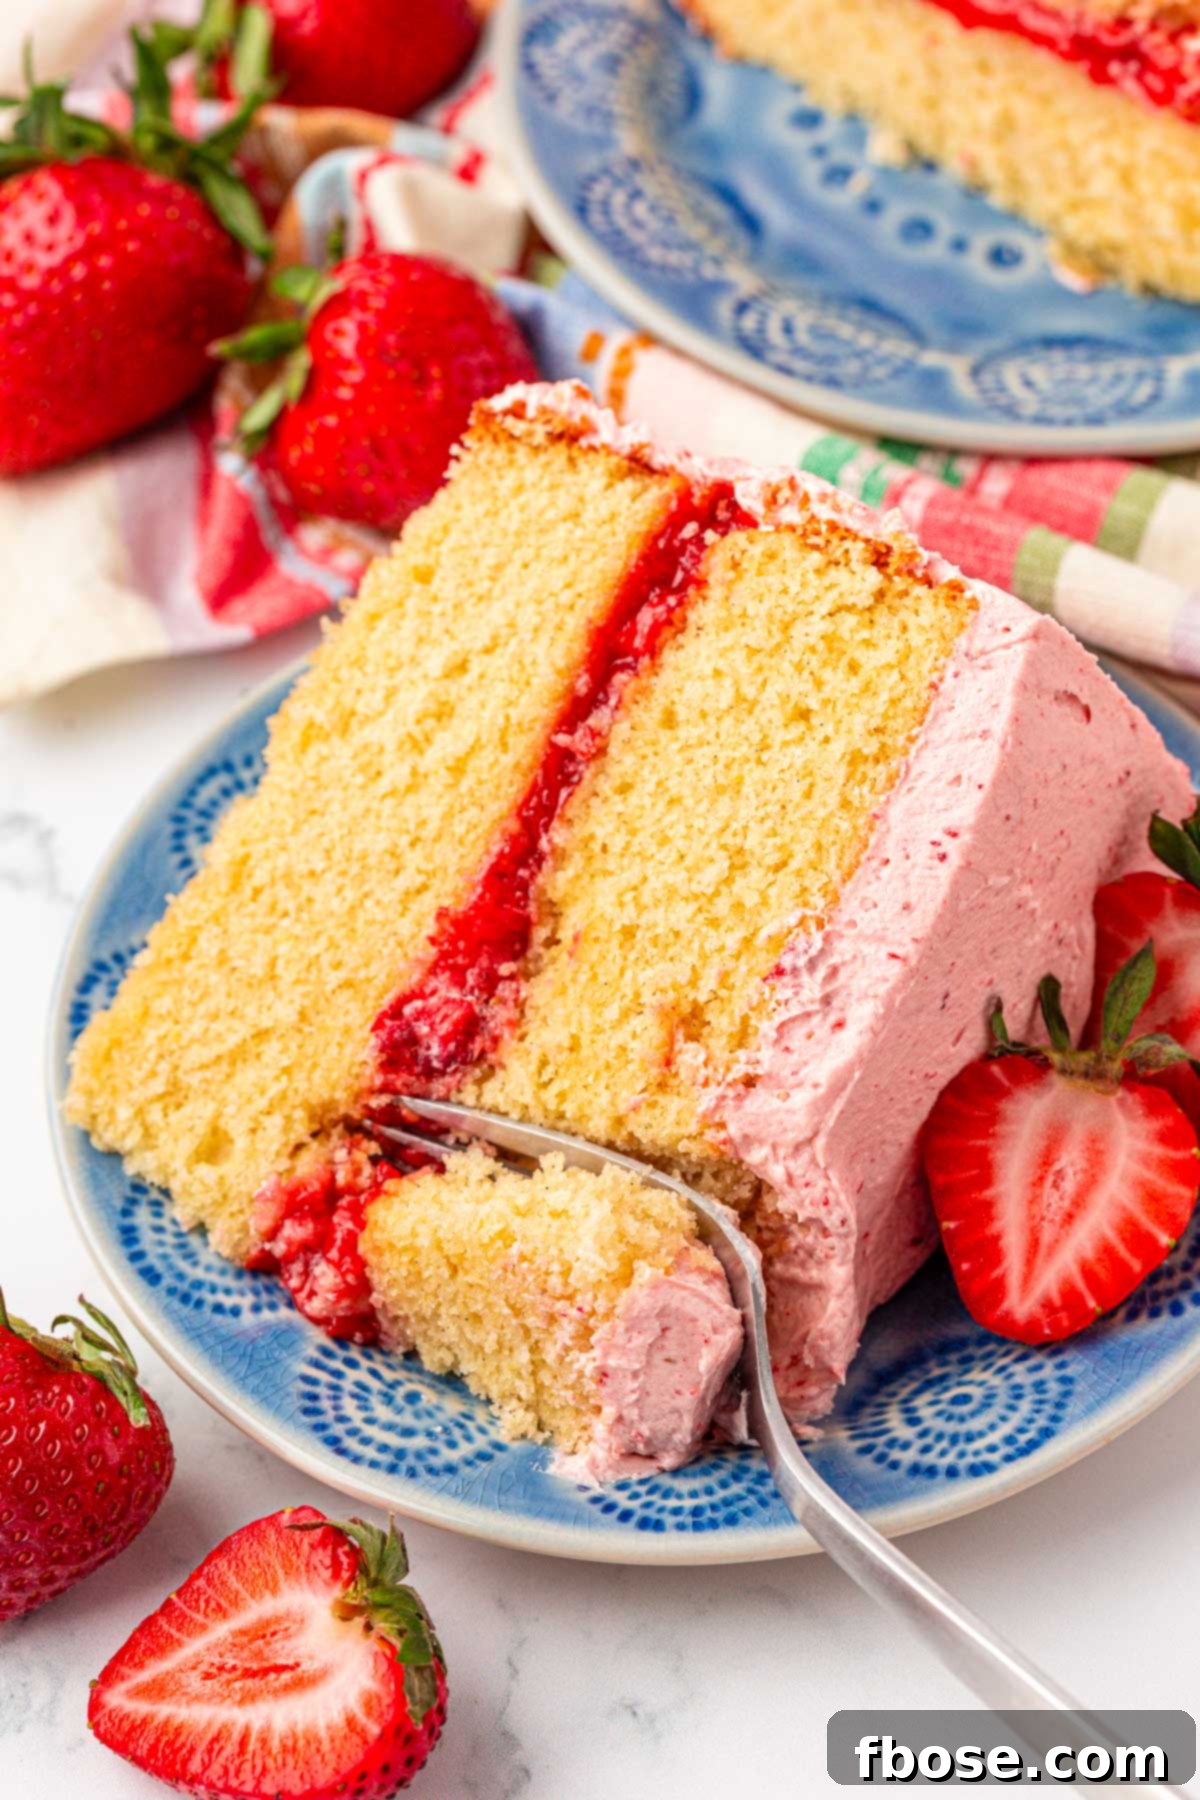
Crafting the Ultimate Homemade Vanilla Cake: A Journey to Perfection
If there’s one cake that embodies pure indulgence and sophisticated simplicity, it’s this magnificent Strawberry Vanilla Cake. My personal journey to perfecting this recipe spanned over two years, countless baking sessions, and numerous birthday parties where it was rigorously taste-tested and refined. The goal was simple yet ambitious: create a vanilla cake that isn’t just good, but truly exceptional. A cake where the cozy, aromatic notes of vanilla perfectly intertwine with the bright, juicy burst of strawberry, all held together by a tender crumb, a sticky-sweet filling, and a velvety frosting. The result is a flavor and texture combination that is genuinely out-of-this-world, guaranteed to earn rave reviews.
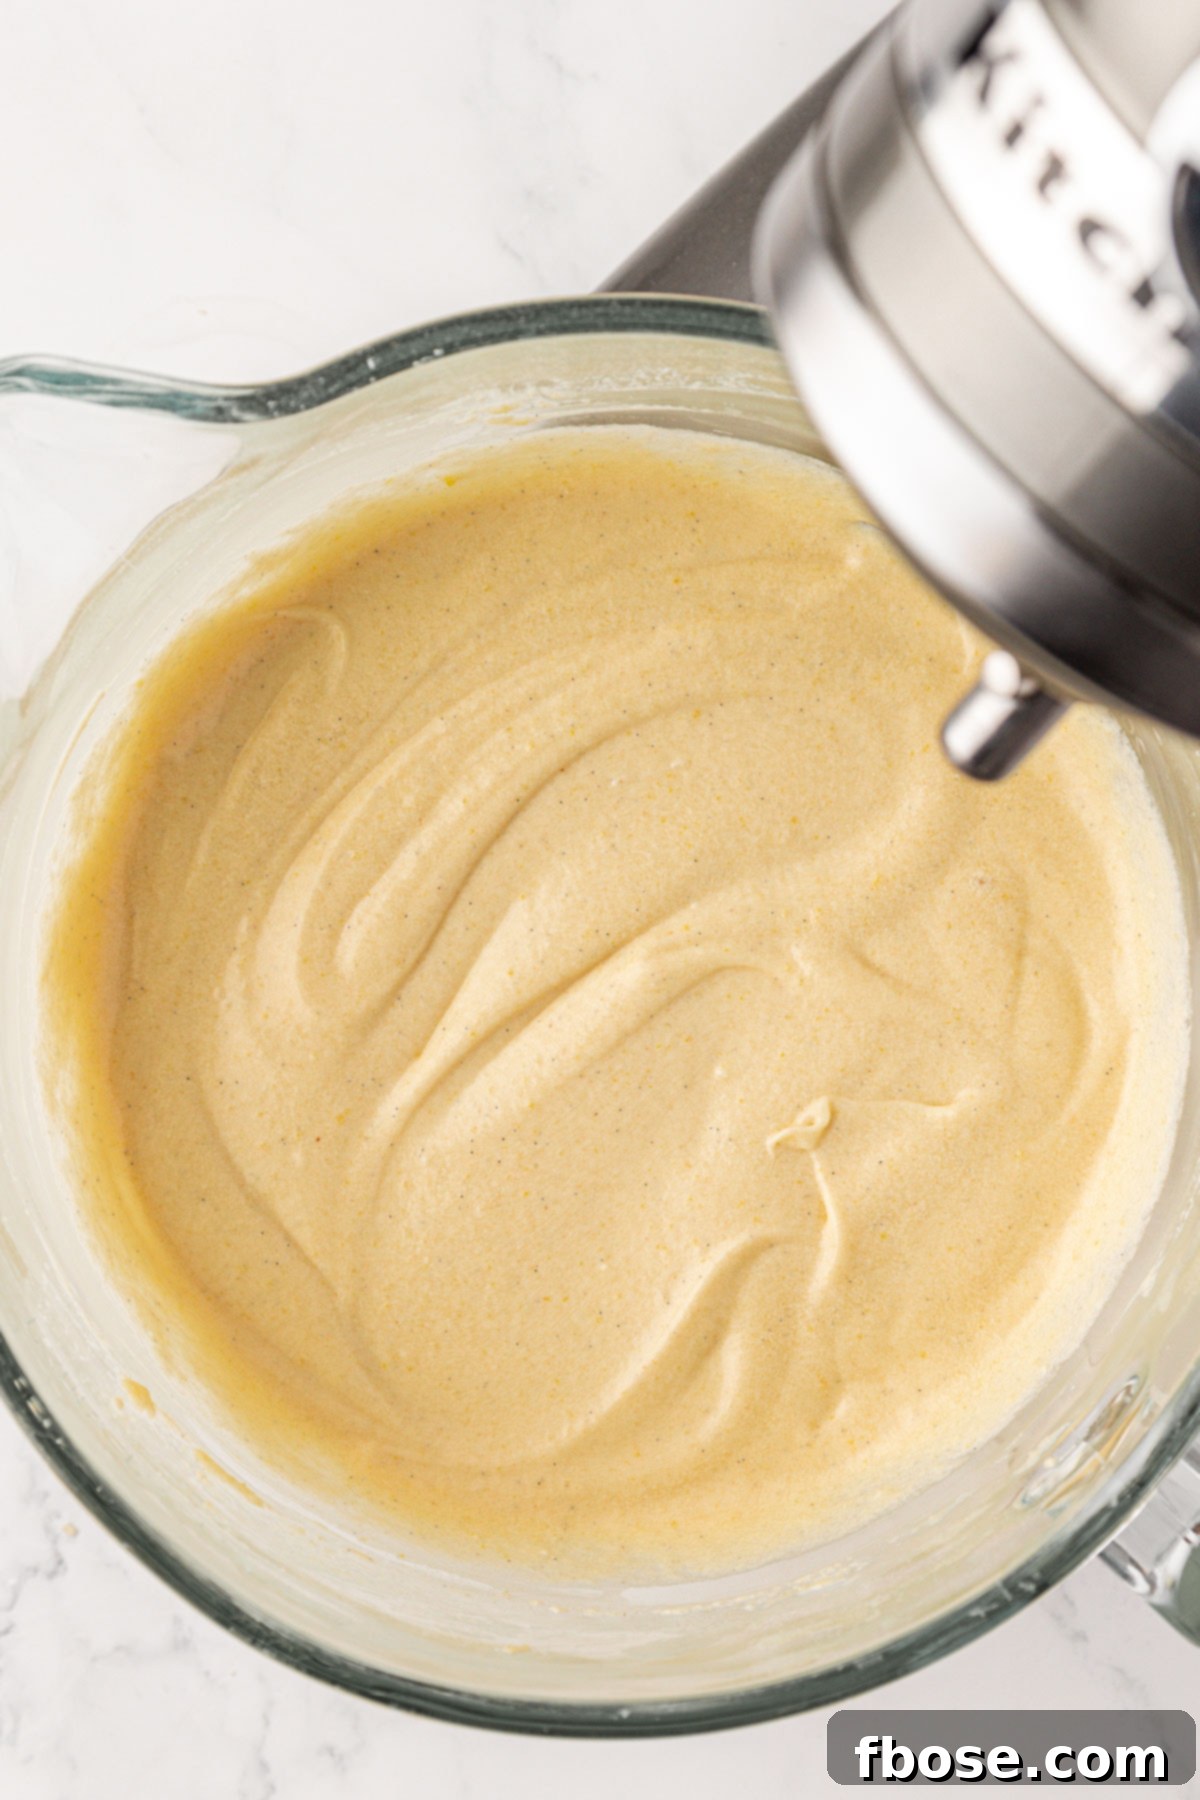
Achieving this level of perfection involved more than just mixing ingredients; it demanded a deep understanding of baking science and meticulous technique. For instance, a critical element in the superior texture of this cake is the strategic swap from standard all-purpose flour to delicate cake flour. Cake flour boasts a lower protein content, which directly translates to less gluten development. This reduction in gluten is key to yielding a cake with an incredibly soft, light, and airy crumb – a signature of a truly tender vanilla cake. Furthermore, I employ the reverse creaming method, a technique often favored by professional bakers for its ability to produce an exceptionally fine-crumbed, ultra-moist cake that melts in your mouth.
The reverse creaming method involves first combining the butter with the dry ingredients. This innovative approach coats the flour particles with fat, preventing excessive gluten formation and ensuring a tender, almost velvety texture reminiscent of a high-end bakery cake. This careful emulsification of butter into the dry components results in a cake that is not only ultra-tender but also boasts a more stable structure, making it a dream to slice and serve. What makes this recipe even better is that all of this mouthwatering goodness is encapsulated within an easy-to-follow, step-by-step guide. I walk you through each stage of the process, from selecting the finest ingredients to mastering the baking techniques, ensuring that you arrive at the best-tasting homemade vanilla cake you’ve ever had the pleasure to create. This isn’t just a recipe; it’s an education in exquisite baking, empowering you to bake with confidence and joy.
Pin This Recipe For Later
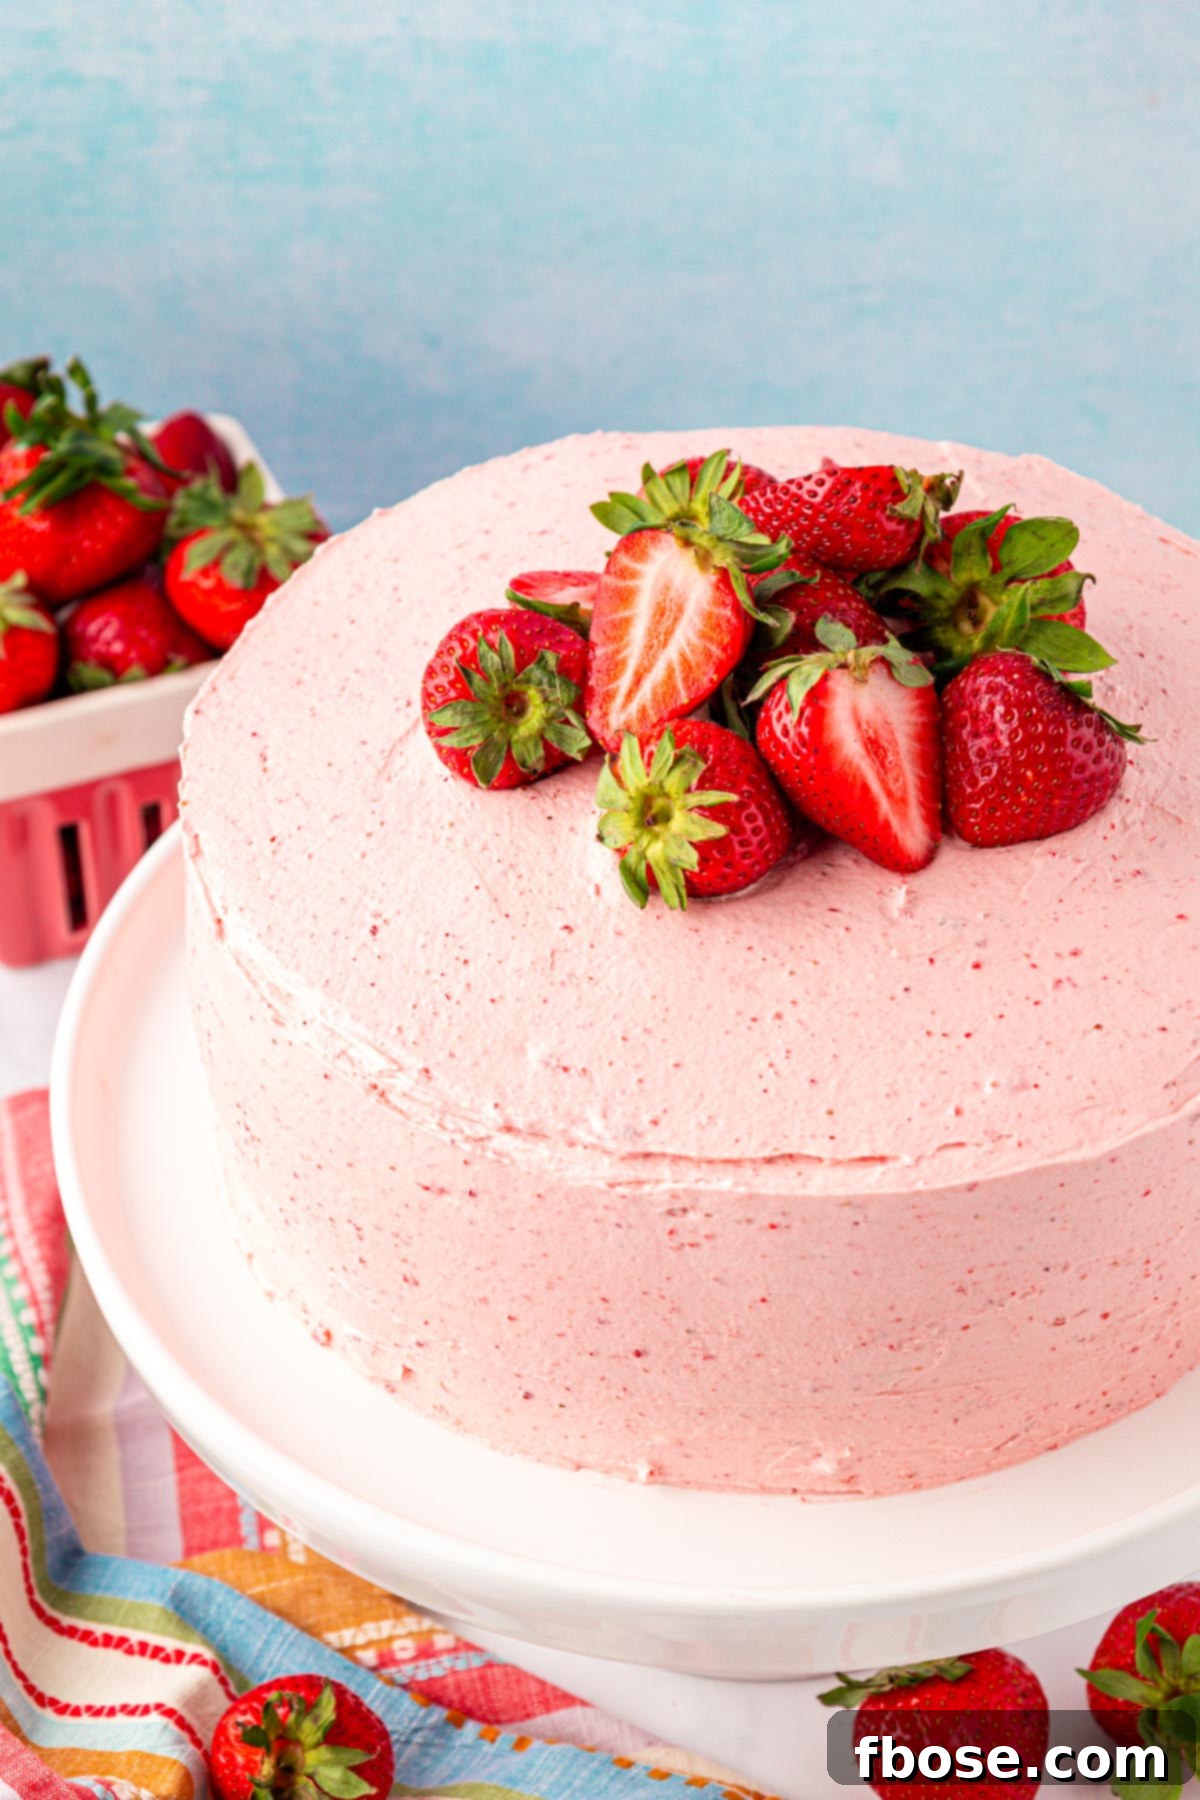
Rebecca’s Recipe Review: An Honest Take on This Strawberry Vanilla Delight
My quest for the ultimate Strawberry Vanilla Cake culminated in this recipe, and I’m thrilled to share an honest review of what makes it truly special:
Taste: The flavor profile of this cake is nothing short of sensational. It masterfully balances the deep, comforting sweetness of vanilla with the bright, tangy notes of juicy strawberries. Neither flavor overwhelms the other; instead, they complement each other in perfect harmony, creating a truly memorable and addictive taste experience. Each bite delivers a burst of fruity freshness followed by a mellow vanilla finish, making it irresistibly delicious.
Texture: The textural elements of this cake are carefully orchestrated to provide a delightful contrast. The vanilla cake layers are dense enough to hold their structure beautifully but remain incredibly tender and moist, thanks to the specific flour and baking method used. Sandwiched between these pillowy layers is a gooey, flavorful strawberry filling that adds a delightful chewiness and bursts with concentrated berry goodness. Finally, the cake is crowned with a silky, ethereal strawberry buttercream frosting, made with freeze-dried berries for an intense, natural strawberry flavor and a smooth, melt-in-your-mouth consistency. This symphony of textures elevates the entire dessert.
Ease: I would rate the ease of this recipe a 7/10. While it’s certainly approachable for intermediate bakers, and even ambitious beginners, it does involve multiple components (cake, filling, frosting) and a few specific techniques that require attention to detail. However, the instructions are thorough, guiding you every step of the way, making the process manageable and rewarding.
Pros: The most significant pro is undoubtedly the incredible flavor. This cake highlights the natural sweetness and vibrant acidity of strawberries in a remarkably fresh and impactful way, far superior to artificial strawberry flavors. The combination of vanilla and strawberry is classic yet feels elevated and refined. It’s a crowd-pleaser that consistently receives glowing compliments.
Cons: The primary downside is the time commitment. With multiple components and steps, preparing this cake from start to finish can be a relatively long process. It’s not a quick weeknight dessert, but rather a project for a special occasion or a weekend when you have ample time to dedicate to baking. However, the advanced preparation tips provided later in this article can significantly help manage this aspect.
Would I Make This Again? Absolutely, without hesitation! This cake holds a special place in my heart as it has become my daughter’s undisputed go-to birthday cake. We typically find ourselves making it at least three times a year, a testament to its enduring appeal and consistently delicious results. It’s truly a labor of love that is always worth the effort.
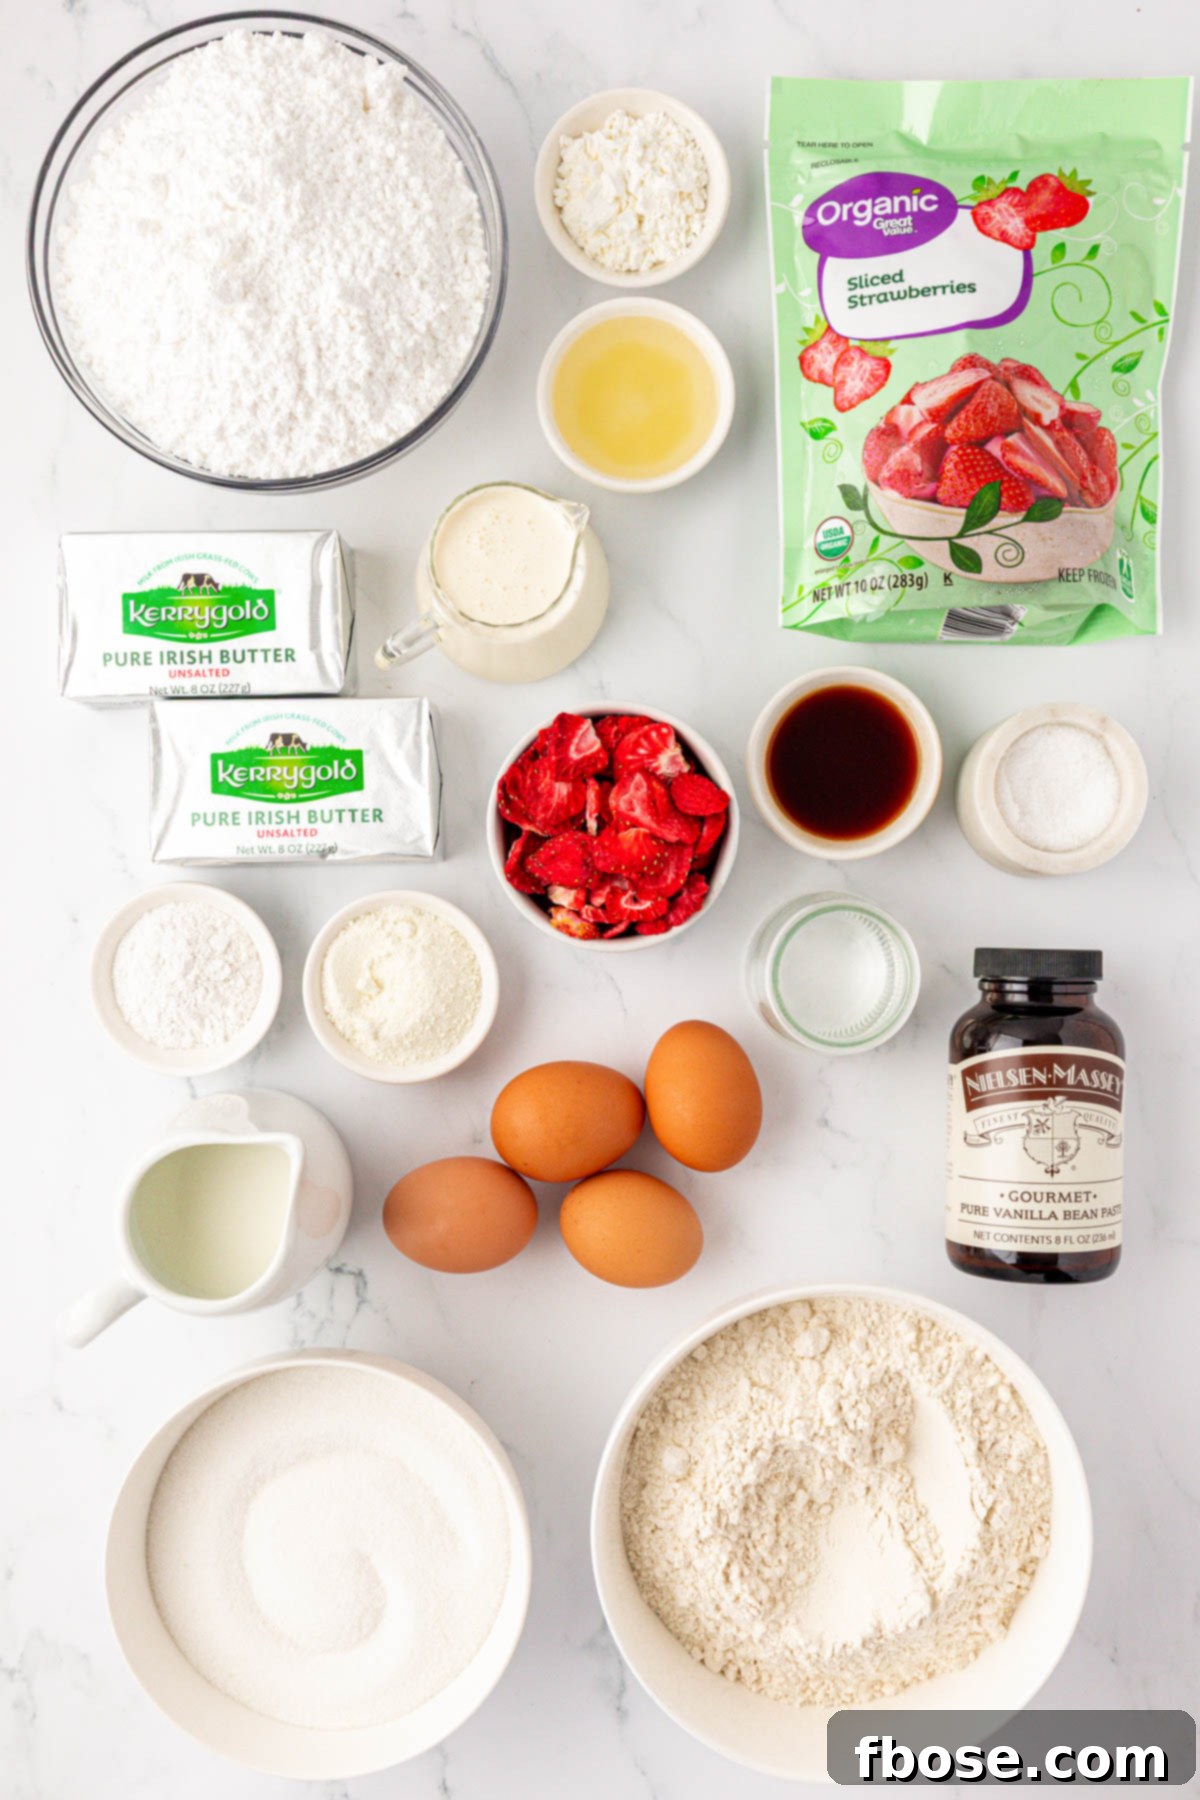
Essential Ingredients for Your Perfect Vanilla Cake with Strawberry Frosting
Crafting this delightful homemade vanilla cake with its exquisite strawberry frosting relies on a selection of high-quality ingredients, each playing a crucial role in achieving its signature taste and texture. For the vanilla cake layers, you’ll need foundational baking staples such as cake flour, granulated sugar, powdered milk, baking powder, and salt. These dry ingredients form the delicate structure of our cake. To infuse the cake with the richest, most aromatic vanilla flavor, I highly recommend using premium vanilla bean paste over standard vanilla extract. The tiny specks of vanilla bean visibly enhance the cake, promising a deeper, more complex vanilla experience. After baking, the cakes are brushed with a light vanilla simple syrup, ensuring maximum moisture and an added layer of vanilla essence.
For an unparalleled buttery flavor and a supremely tender crumb in the cake, my top recommendation is to use European-style unsalted butter. Brands like Kerrygold or Finlandia are excellent choices because they boast a higher fat content (typically 82-84%) compared to conventional American butter. This increased fat contributes significantly to the cake’s richness, moisture, and fine texture, making a noticeable difference in the final product. Ensure your butter is at a very soft, room temperature consistency for optimal emulsification during the reverse creaming method.
The heart of this layer cake is its sticky-sweet strawberry filling. This vibrant compote is lovingly prepared by simmering frozen strawberries, which release their juices beautifully, with granulated sugar, a splash of lemon juice for balance, and a touch of cornstarch to thicken it to a perfect, luscious consistency. Once this homemade strawberry filling is cooled and nestled between the two tender cake layers, it provides a burst of fresh fruit flavor and a delightful textural contrast that complements the vanilla cake impeccably.
Finally, the grand finale: the homemade strawberry buttercream frosting. This light and airy frosting is crafted using freeze-dried strawberries, which provide an intensely concentrated and natural strawberry flavor without adding excess moisture, resulting in a vibrant pink hue and authentic taste. Paired with unsalted butter, a hint of vanilla extract, a pinch of salt to balance the sweetness, powdered sugar for structure and smoothness, and a generous amount of heavy cream, this frosting whips up into a dreamily fluffy and spreadable masterpiece. Each ingredient is thoughtfully chosen to contribute to a dessert that is a true feast for both the eyes and the palate.
Berry Bonanza: Exploring Other Fruit Options for Your Cake
While strawberries are undeniably a classic and beloved choice for this vanilla cake, the beauty of this recipe lies in its versatility. Absolutely! If you’re feeling adventurous, have other seasonal berries on hand, or simply crave a different flavor profile, you can easily swap out the strawberries for a variety of other delicious berries. Consider raspberries, blueberries, blackberries, or even a delightful mix of your favorite berries to create a unique twist on this already fantastic cake.
It’s important to remember that each type of berry brings its own distinctive characteristics to the table. Raspberries offer a wonderfully tart and aromatic punch, while blueberries are sweeter and provide a softer texture when cooked. Blackberries, on the other hand, can be quite tart and have larger seeds, which might influence your preparation. When making substitutions, you might need to make slight adjustments to the amount of sugar and lemon juice in the filling. Sweeter berries may require less sugar, while tarter ones like blackberries or some raspberry varieties might benefit from a little extra. The lemon juice is crucial for brightness and balance, so adjust it cautiously, tasting as you go to achieve the perfect sweet-tart equilibrium for your chosen fruit.
For the best results, especially with softer berries, I recommend lightly mashing them with a potato masher as they simmer. This helps them break down more easily and encourages the release of their delicious juices, transforming them into a vibrant, flavorful fruit filling that will pair beautifully with the tender vanilla cake. If you opt for berries with prominent seeds, such as blackberries or raspberries, you might consider straining the filling through a fine-mesh sieve after cooking to achieve a smoother, seedless compote, similar to what you might find in a Raspberry Filling. This extra step ensures a silky-smooth mouthfeel, enhancing the overall elegance of your cake. Don’t be afraid to experiment; the world of berries offers endless possibilities for customizing this exceptional dessert!
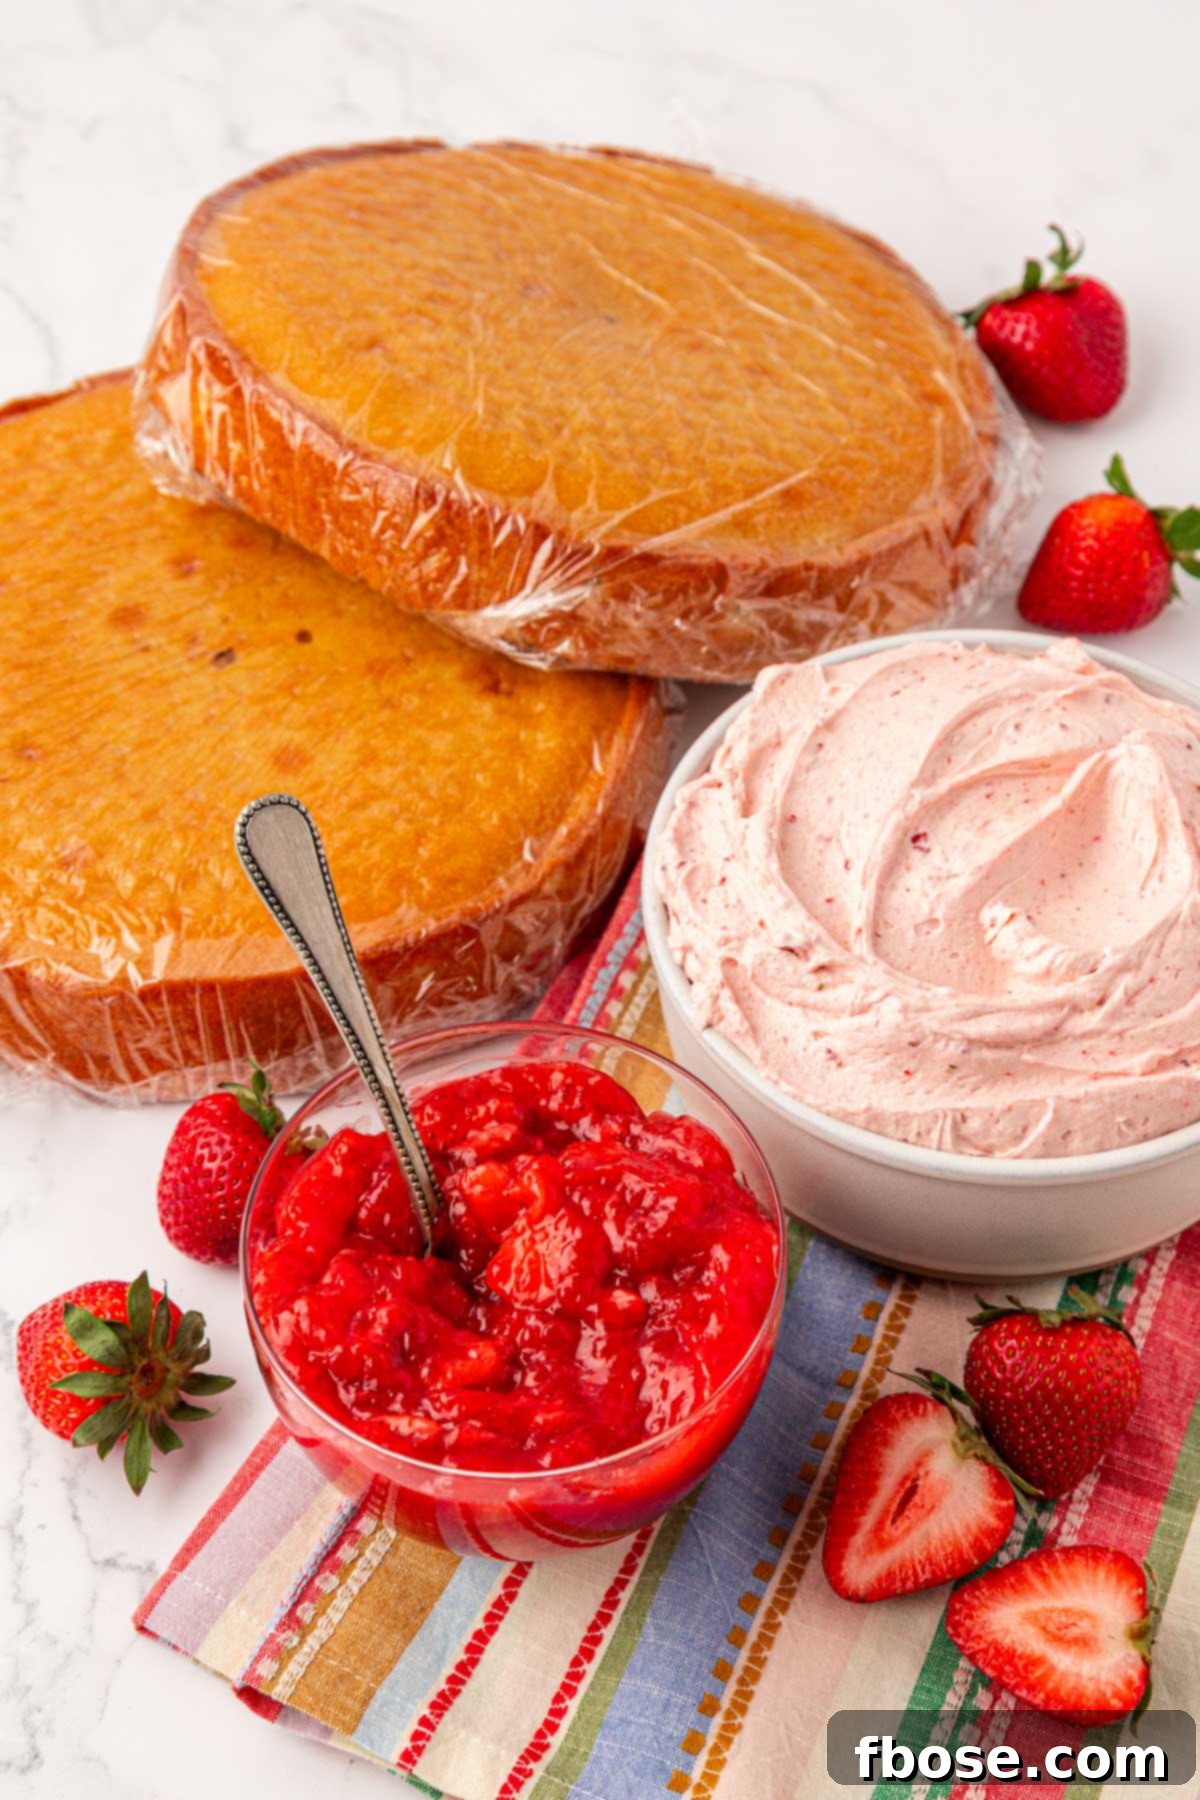
A Step-by-Step Guide: How to Make This Irresistible Strawberry Vanilla Cake
Creating this stunning Strawberry Vanilla Cake is a rewarding process that involves distinct stages, each contributing to the overall deliciousness. Here’s an overview of how we bring together the tender cake layers, vibrant filling, and silky frosting:
- **Bake the Perfect Vanilla Cake Layers:** The journey begins with preparing our signature vanilla cake batter. Using the reverse creaming method ensures a light, tender, and moist crumb. The batter is divided and baked until golden and perfectly set, signaling readiness for the next steps.
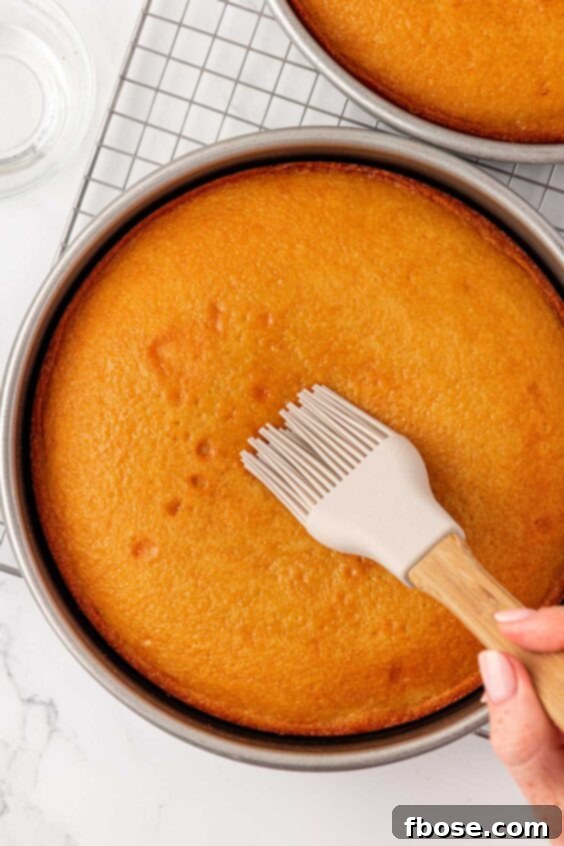
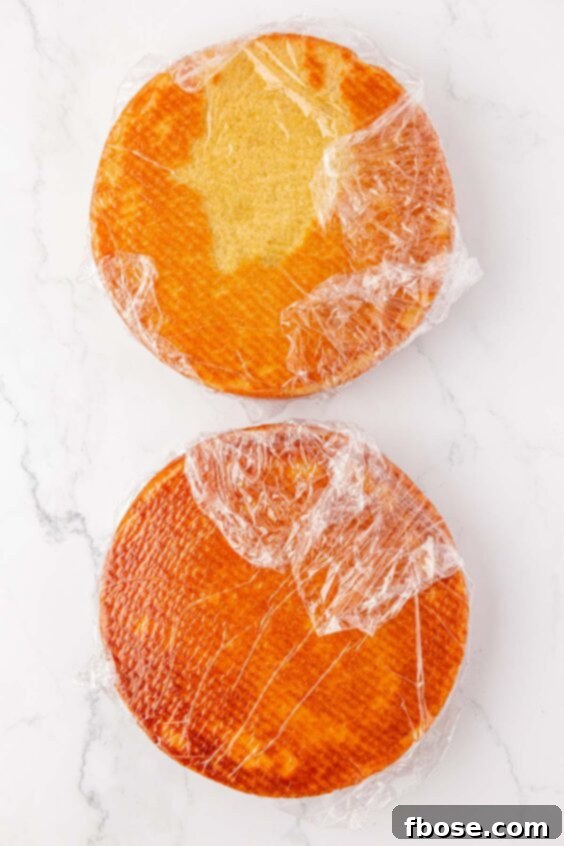
- **Infuse with Vanilla Simple Syrup:** Immediately upon removing the cakes from the oven, they are generously brushed with a vanilla simple syrup. This crucial step locks in moisture and enhances the vanilla flavor, ensuring each cake layer remains incredibly tender and flavorful. Once syruped, they are wrapped and allowed to cool completely, ideally overnight.
- **Prepare the Luscious Strawberry Filling:** While the cakes cool, we craft the homemade strawberry filling. Frozen strawberries are gently simmered with sugar and lemon juice, then thickened with cornstarch. This creates a vibrant, sweet-tart compote that will serve as the delectable heart of our cake. It’s then set aside to cool completely, allowing it to thicken further.
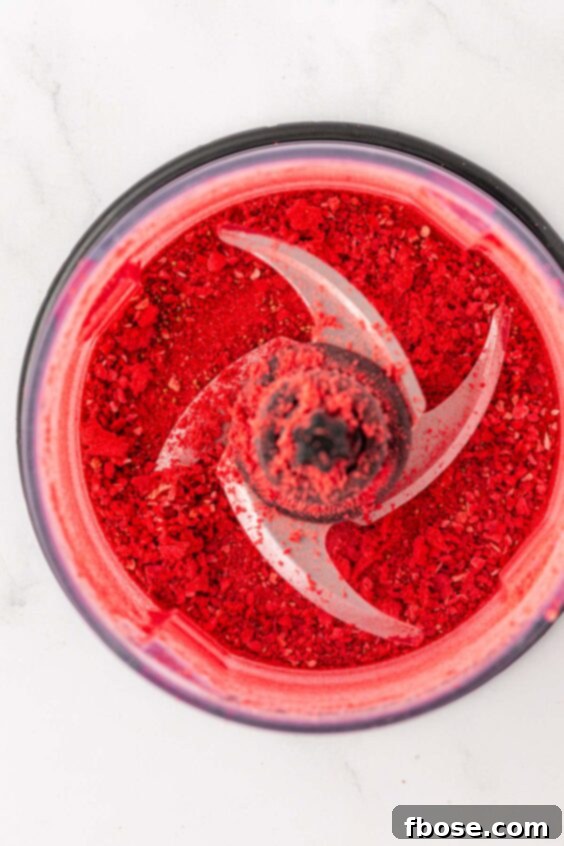
- **Whip Up the Fluffy Strawberry Buttercream:** The crowning glory is our homemade strawberry buttercream. Freeze-dried strawberries are pulverized into a powder, then whipped with unsalted butter, vanilla extract, salt, powdered sugar, and heavy cream until it transforms into a light, airy, and intensely flavorful frosting. The texture is sublime, perfect for both filling and decorating.
- **Assemble Your Masterpiece:** With all components prepared and cooled, it’s time for the exciting assembly. The cooled cake layers are stacked with the rich strawberry filling sandwiched in between. A crumb coat of frosting is applied, followed by a final, generous layer of the vibrant strawberry buttercream. The cake is then ready for its final decorative touches and to be proudly presented.
Each of these steps is designed for success, leading you to a beautifully crafted and incredibly delicious Strawberry Vanilla Cake that will be the highlight of any occasion.
Rebecca’s Expert Tips for a Flawless Strawberry Vanilla Cake
Achieving a truly exceptional Strawberry Vanilla Cake goes beyond just following the steps; it involves incorporating a few expert tips that can elevate your baking experience and ensure perfect results every time. Here are my tried-and-true recommendations:
- **Precision with a Kitchen Scale:** For the most accurate and consistent cakes, I wholeheartedly recommend using a digital kitchen scale to weigh your dry ingredients, rather than relying on volumetric measuring cups. Flour, in particular, can be easily over-measured when scooped, leading to a denser, drier cake. Weighing ensures precise ratios, guaranteeing a consistent, tender crumb every single time.
- **Mastering the Berry Filling Texture:** When preparing your strawberry filling, a potato masher is your best friend. After the berries have softened during simmering, use the masher to break them down into smaller, uniform bits. This creates a delightful consistency for the filling, ensuring that you get a burst of fruity flavor and texture in every slice without large, unwieldy chunks.
- **The Advantage of Baking Ahead:** For optimal flavor and ease of assembly, the vanilla cake layers are best prepared the day before you plan to frost and serve the cake. Baking them in advance allows the flavors to meld and the cake to fully cool and firm up, which makes handling and frosting significantly easier. If possible, aim to bake the layers one day ahead, then assemble the entire cake the following day.
- **Perfectly Prepped Cake Pans:** Preventing your cakes from sticking is crucial. Before adding your batter, generously grease your cake pans with Cake Goop (Magic Pan Release) or a high-quality non-stick cooking spray. For an extra layer of insurance and effortless release, I also strongly recommend lining the bottom of your round cake pans with parchment paper. This creates a foolproof barrier, ensuring your beautiful cake layers slide out perfectly every time.
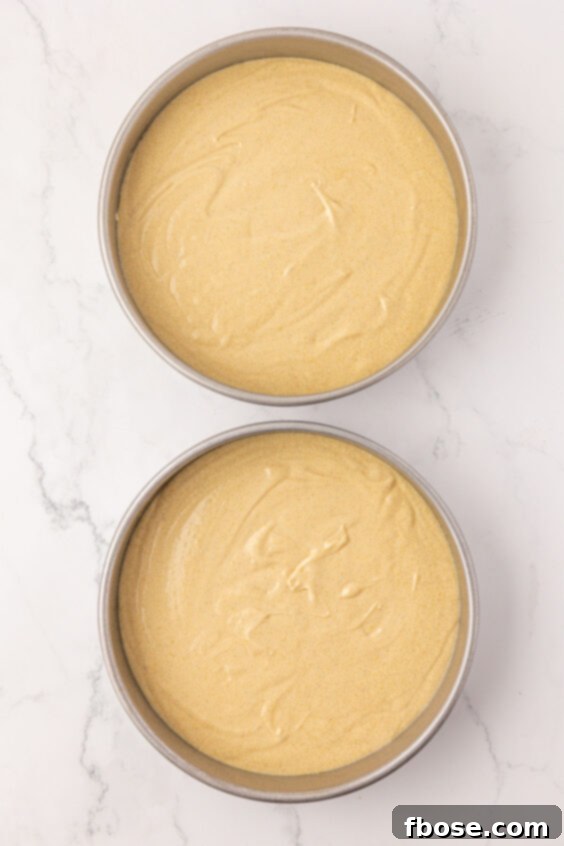
- **Consistent Batter Division:** To ensure your cake layers bake evenly and have a uniform thickness, aim for precision when dividing the batter. For two 9-inch round pans, I find that distributing approximately 765 to 780 grams of batter per pan yields consistently balanced layers. Using your kitchen scale for this step is incredibly helpful.
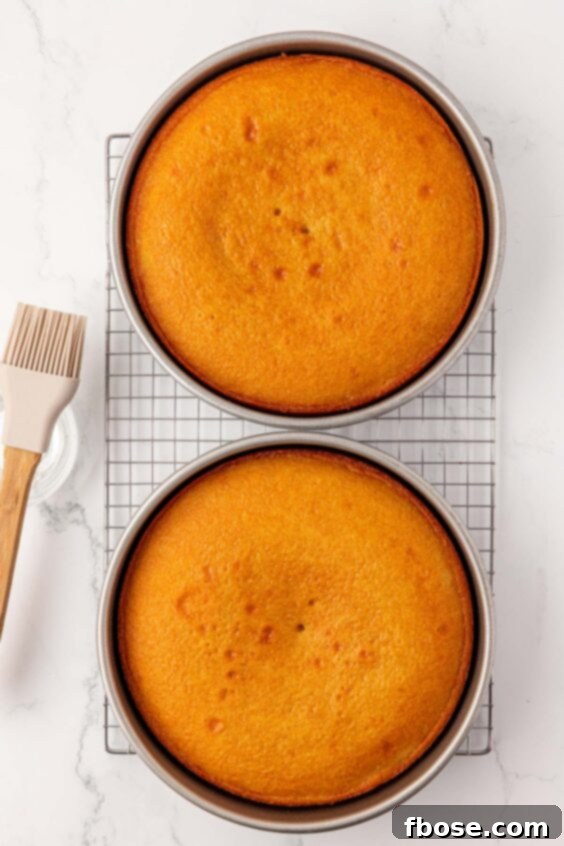
- **Monitoring Baking Doneness:** Baking times can fluctuate significantly depending on individual oven calibration and the material of your cake pans. Therefore, I recommend starting to check your cakes for doneness around the 35-minute mark. Look for visual cues: the edges of the cake should begin to pull away slightly from the sides of the pan, and the top should spring back gently when lightly touched. For ultimate accuracy, use an instant-read thermometer; the center of a fully baked cake should register an internal temperature of 200°F (93°C). Add a few minutes to the baking time as needed, checking frequently.
- **Creative Cake Decoration:** While it’s incredibly fun to create luscious, elegant swirls with this strawberry buttercream, feel free to let your creativity shine! You can pipe intricate designs, opt for smooth, clean edges, or even experiment with different spatula techniques. The key is to add any sprinkles, edible glitter, or other garnishes immediately after applying the final frosting layer. This ensures that they adhere securely to the moist buttercream before it has a chance to develop a crust, keeping your decorations vibrant and intact.
Serving Your Strawberry Vanilla Cake: Enjoying Your Masterpiece Fresh or Stored
Once your exquisite Strawberry Vanilla Cake is beautifully assembled and frosted, the next delightful decision is whether to slice into it immediately or save it for a special moment later. Regardless of your choice, here’s how to ensure your masterpiece retains its stunning appearance and sensational taste.
- **For Immediate Indulgence:** If the aroma of fresh cake and strawberry buttercream is simply too tempting to resist, a quick chill is your secret weapon for a clean slice. Place the fully assembled and frosted cake into the freezer for approximately 15 to 20 minutes. This short burst of cold air will firm up the buttercream frosting just enough to allow for neat, precise slices. It also helps those beautiful swirls and decorative touches maintain their picture-perfect form, ensuring every plate looks as impressive as the first.
- **For Anticipated Enjoyment (Storing Frosted Cake):** If your plans call for serving the cake at a later time, perhaps the next day, proper storage is key to maintaining its freshness and moist texture. Store the frosted cake in the refrigerator for up to 24 hours. To prevent it from drying out or absorbing any refrigerator odors, make sure to cover it loosely with plastic wrap. Alternatively, placing it in a dedicated airtight cake container is an excellent way to keep it fresh and protected. Remember to allow the cake to come to room temperature for about 30-60 minutes before serving to ensure the cake and frosting are at their optimal texture and flavor.
When the moment arrives to serve, elevate the presentation and flavor even further. Garnish the top generously with fresh, vibrant whole strawberries. For an extra touch of juiciness and intensified strawberry flavor, drizzle a bit of the reserved strawberry syrup (if you have any left from making the filling) over the top. As you slice into the cake, don’t forget to serve any leftover strawberry filling on the side, allowing guests to add an extra dollop of berry goodness to their slice. Then, sit back, relax, and savor every last blissful bite of your homemade Strawberry Vanilla Cake!
Comprehensive Storage Instructions for Your Strawberry Vanilla Cake
While this exquisite Vanilla Cake with Strawberry Filling is undeniably at its peak when enjoyed on the day it’s freshly made, thoughtful storage can extend its deliciousness for a few days. Proper handling ensures that both the delicate cake layers and the vibrant fillings and frosting remain moist and flavorful.
For short-term storage, any leftover slices or a whole frosted cake should be kept in an airtight cake container. If you don’t have a dedicated cake container, wrapping the cake loosely but thoroughly with plastic wrap is an effective alternative. Store the cake in the refrigerator for 2 to 3 days. It’s crucial to minimize air exposure to prevent the cake from drying out and to maintain the freshness of the strawberry components. Before serving chilled cake, allow it to sit at room temperature for 30-60 minutes; this brings out the best in both the cake’s texture and the buttercream’s creaminess.
For longer-term storage, especially if you have un-frosted cake layers or excess filling, freezing is an excellent option. Wrap individual cake layers tightly in plastic wrap, then again in aluminum foil, and place them in a large freezer-safe bag. This double-wrapping prevents freezer burn and protects the cake. Frozen cake layers can be stored for up to 3 months. The strawberry filling can also be frozen in an airtight container for up to 2-3 months. Thaw frozen components in the refrigerator overnight or at room temperature for several hours before proceeding with assembly or serving. The frosting, while best made fresh, can be prepared a few hours in advance and stored in the fridge, then re-whipped before use. These storage methods ensure you can enjoy the delightful taste of your Strawberry Vanilla Cake even days or weeks after baking.
Smart Strategies for Preparing Strawberry Vanilla Cake Ahead of Time
Planning ahead can transform the baking experience from a last-minute rush to a relaxed, enjoyable process. This Strawberry Vanilla Cake is particularly well-suited for advance preparation, allowing you to break down the task into manageable steps and ensure a fresh, delicious dessert when you need it most. Here’s how you can prepare various components ahead of time:
One of the greatest advantages of this recipe is the ability to bake and prepare the cake layers well in advance, even freezing them for later assembly. To do so, follow the vanilla cake recipe instructions completely. Once the cake layers have cooled and been brushed with simple syrup, wrap them individually and tightly in plastic wrap. Then, for an extra layer of protection against freezer burn, wrap them again in aluminum foil. Carefully transfer these double-wrapped cakes into a large, freezer-safe Ziploc bag, making sure to gently squeeze out any excess air before sealing. These perfectly preserved cake layers can then be stored in the freezer for up to 3 months, ready for when inspiration strikes or a special occasion arises.
When you’re ready to embark on the joyous journey of assembling and enjoying your magnificent cake, simply remove the frozen layers from the freezer. Allow them to thaw gradually at room temperature, which typically takes a few hours. Once thawed, they will be as fresh and tender as if they were just baked. At this point, you can proceed with preparing the luscious strawberry filling and whipping up the fluffy strawberry frosting, bringing all the elements together for a show-stopping dessert.
- Cake Layers (Refrigeration Option): If you prefer not to freeze the cake layers, you can still get a head start by baking them a day or two in advance. Once they are fully cooled and brushed with simple syrup, keep them wrapped (you can even store them in their pans if space allows) and place them in the refrigerator. This method helps maintain their moisture content and ensures they are perfectly firm and easy to handle when it’s time for assembly.
- Strawberry Filling: The star-studded strawberry filling can also be prepared a little in advance. After cooking, let it cool completely, then transfer it to an airtight container and refrigerate. For best results, macerate the strawberries with sugar for at least 30 minutes and up to 8 hours in the fridge before cooking them into a filling. However, avoid letting them sit for too long after cooking, as this can cause them to lose too much juice and become overly mushy. The filling holds up beautifully in the fridge for up to 2 days.
- Frosting: While the strawberry buttercream frosting is at its absolute peak when whipped up fresh, you can certainly prepare it a few hours ahead of time. Store it covered tightly in the refrigerator. Before using, allow it to come to room temperature for about 15-20 minutes, then give it a quick re-whip in your stand mixer. This will restore its light, fluffy texture and make it perfectly spreadable again.
By strategically planning and preparing these components ahead of time, you can significantly reduce stress on the day you plan to serve your show-stopping Strawberry Vanilla Cake, allowing you to truly enjoy the process and the delicious outcome!
Essential Supplies for Baking Your Best Strawberry Vanilla Cake
Having the right tools and high-quality ingredients can make a significant difference in your baking success and enjoyment. To help you create the perfect Strawberry Vanilla Cake, here are some indispensable supplies I recommend:
- Vanilla Bean Paste: This is a game-changer for infusing your cake with the richest, most authentic vanilla flavor. Unlike extract, it contains real vanilla bean specks, delivering a more intense and visible vanilla presence. It’s an absolute must for achieving that gourmet taste.
- Freeze-Dried Strawberries: The secret ingredient for an intensely flavored, naturally colored strawberry frosting. Grinding these into a powder provides concentrated fruit flavor without adding excess moisture, making your buttercream exceptionally vibrant and delicious.
- Cake Pans: The quality of your cake pans can impact how evenly your cakes bake. During testing, both Nordic Ware and USA Pan Bakeware were used and performed exceptionally well, yielding consistently beautiful cake layers. Investing in good quality pans is worthwhile.
- Large Offset Spatula: An offset spatula is an indispensable tool for frosting cakes. Its angled blade allows for smooth, even spreading of buttercream and helps achieve those coveted clean edges or elegant swirls with ease, making the decorating process much more enjoyable and professional-looking.
Explore More Delicious Strawberry Desserts!
If you adore the sweet, fresh taste of strawberries as much as we do, you’re in for a treat! Here are some more beloved strawberry dessert recipes to inspire your next baking adventure:
- Homemade Strawberry Shortcake (With Cream Biscuits): A timeless summer classic, featuring tender cream biscuits, fresh strawberries, and a dollop of whipped cream. Pure seasonal bliss!
- Strawberry Heaven On Earth Cake: Indulge in this quick and easy 15-minute no-bake layered dessert that truly lives up to its name. Perfect for when you need a delicious treat without turning on the oven.
- Lemon Strawberry Cupcakes: Experience the bright, zesty flavor of lemon perfectly harmonizing with sweet, luscious strawberry frosting in these delightful individual treats.
- Easy Fresh Strawberry Coffee Cake: A wonderfully tender and moist coffee cake generously loaded with an abundance of fresh, juicy strawberries. Ideal for breakfast, brunch, or an afternoon pick-me-up.
- Strawberry Rhubarb Crisp: Savor the nostalgic flavors of an old-fashioned summer staple. The delightful tang of rhubarb complements the sweetness of strawberries, topped with a comforting, buttery crisp.
Did You Make This Recipe?
If you’ve tried this recipe, please leave a review in the comments below. I love hearing from you! Don’t forget to tag me – @sugarandsoulco – on Instagram and Pinterest with your photos, or join our Sugar & Soul Show-offs Community and share them there.
★
★
★
★
Vanilla Cake with Strawberry Filling & Frosting
Rebecca Hubbell
Dessert
American
1 hour
45 minutes
8 hours
9 hours
45 minutes

Servings
24
people
Ingredients
Vanilla Cake
- 3½ cups cake flour 420g
- 2 cups granulated sugar 400g
- 2 tablespoons powdered milk 10g
- 4 teaspoons baking powder 16g
- 1 teaspoon salt 7g
- 1 cup unsalted butter 227g, room temperature, very soft – see notes
- 2 large eggs room temperature
- 4 large egg whites room temperature
- 1 cup whole milk 240mL, room temperature
- 1 tablespoon vanilla bean paste
- ⅓ cup vanilla simple syrup
Filling
- 10 ounces frozen strawberries
- ½ cup granulated sugar 100g
- 1 tablespoon lemon juice
- 1 tablespoon cornstarch 18g
Strawberry Frosting
- 1.2 ounces freeze-dried strawberries
- 1 cup unsalted butter 227g, room temperature
- 1 tablespoon vanilla extract
- ¾ teaspoon salt
- 4 cups powdered sugar 480g
- ¾ cup heavy cream 180mL
Instructions
Cake
-
The cakes are best prepared the day before frosting and serving. Preheat the oven to 325°F (160°C). Grease two 9-inch round cake pans with cake goop, or use non-stick spray and line the bottom with parchment paper, and set aside.
-
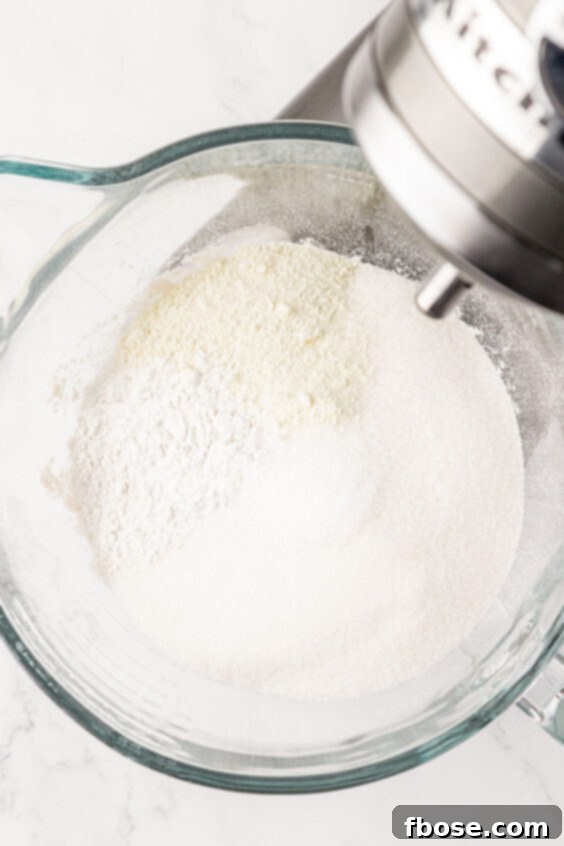
Add 3½ cups cake flour, 2 cups granulated sugar, 2 tablespoons powdered milk, 4 teaspoons baking powder, and 1 teaspoon salt to a stand mixer bowl fitted with a paddle attachment and mix for 1 minute until well combined.

-
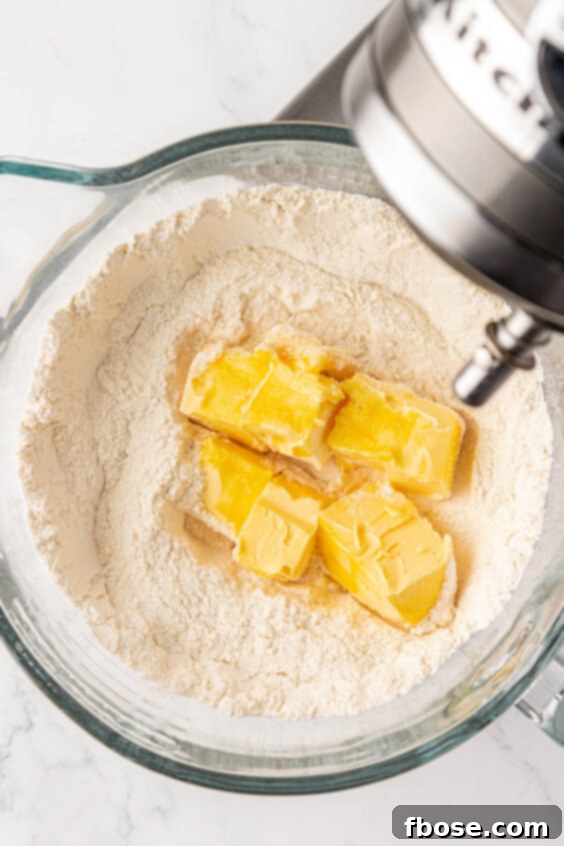
Add 1 cup unsalted butter (room temperature, very soft) and mix at medium-low speed until the mixture becomes sandy in texture, ensuring the butter is fully incorporated into the dry ingredients.
-
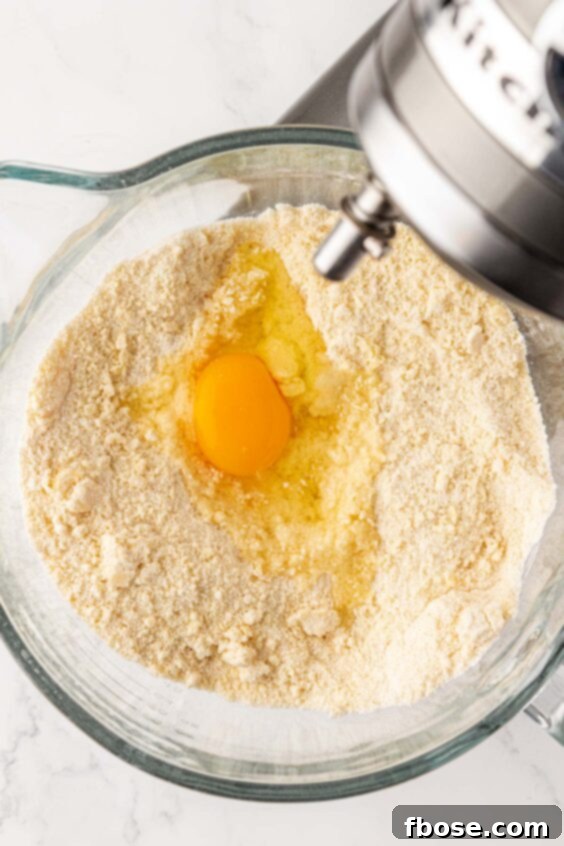
Add 2 large eggs and 4 large egg whites, one at a time, mixing thoroughly after each addition until just combined. Scrape down the sides of the bowl with a spatula to ensure all ingredients are incorporated.
-
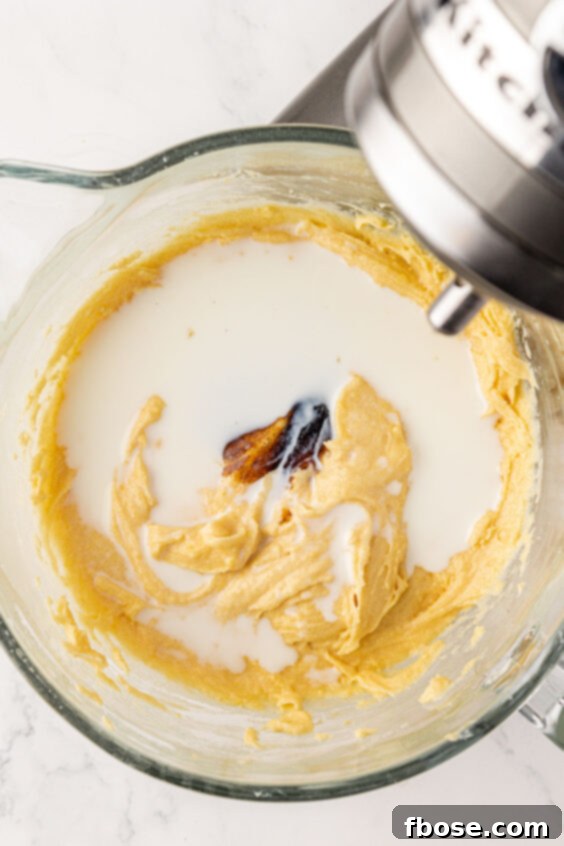
Add 1 tablespoon vanilla bean paste, then gradually pour in 1 cup whole milk in three equal parts. Mix for 1 minute after each addition, scraping down the bowl as needed, until the batter is smooth and well emulsified.
-
Divide the batter evenly between the two prepared pans. For optimal consistency, aim for approximately 765 to 780 grams of batter per pan using a kitchen scale.
-
Smooth out the top of the batter in each pan. Bake for 35 to 45 minutes (refer to notes for detailed guidance) or until the edges of the cake begin to pull away from the pan and the top springs back when gently touched. A cake tester inserted into the center should come out clean, and the internal temperature of the cake should read 200°F (93°C). Note: If using 8-inch pans, the cakes will likely require an additional 5 to 7 minutes of baking time.
-
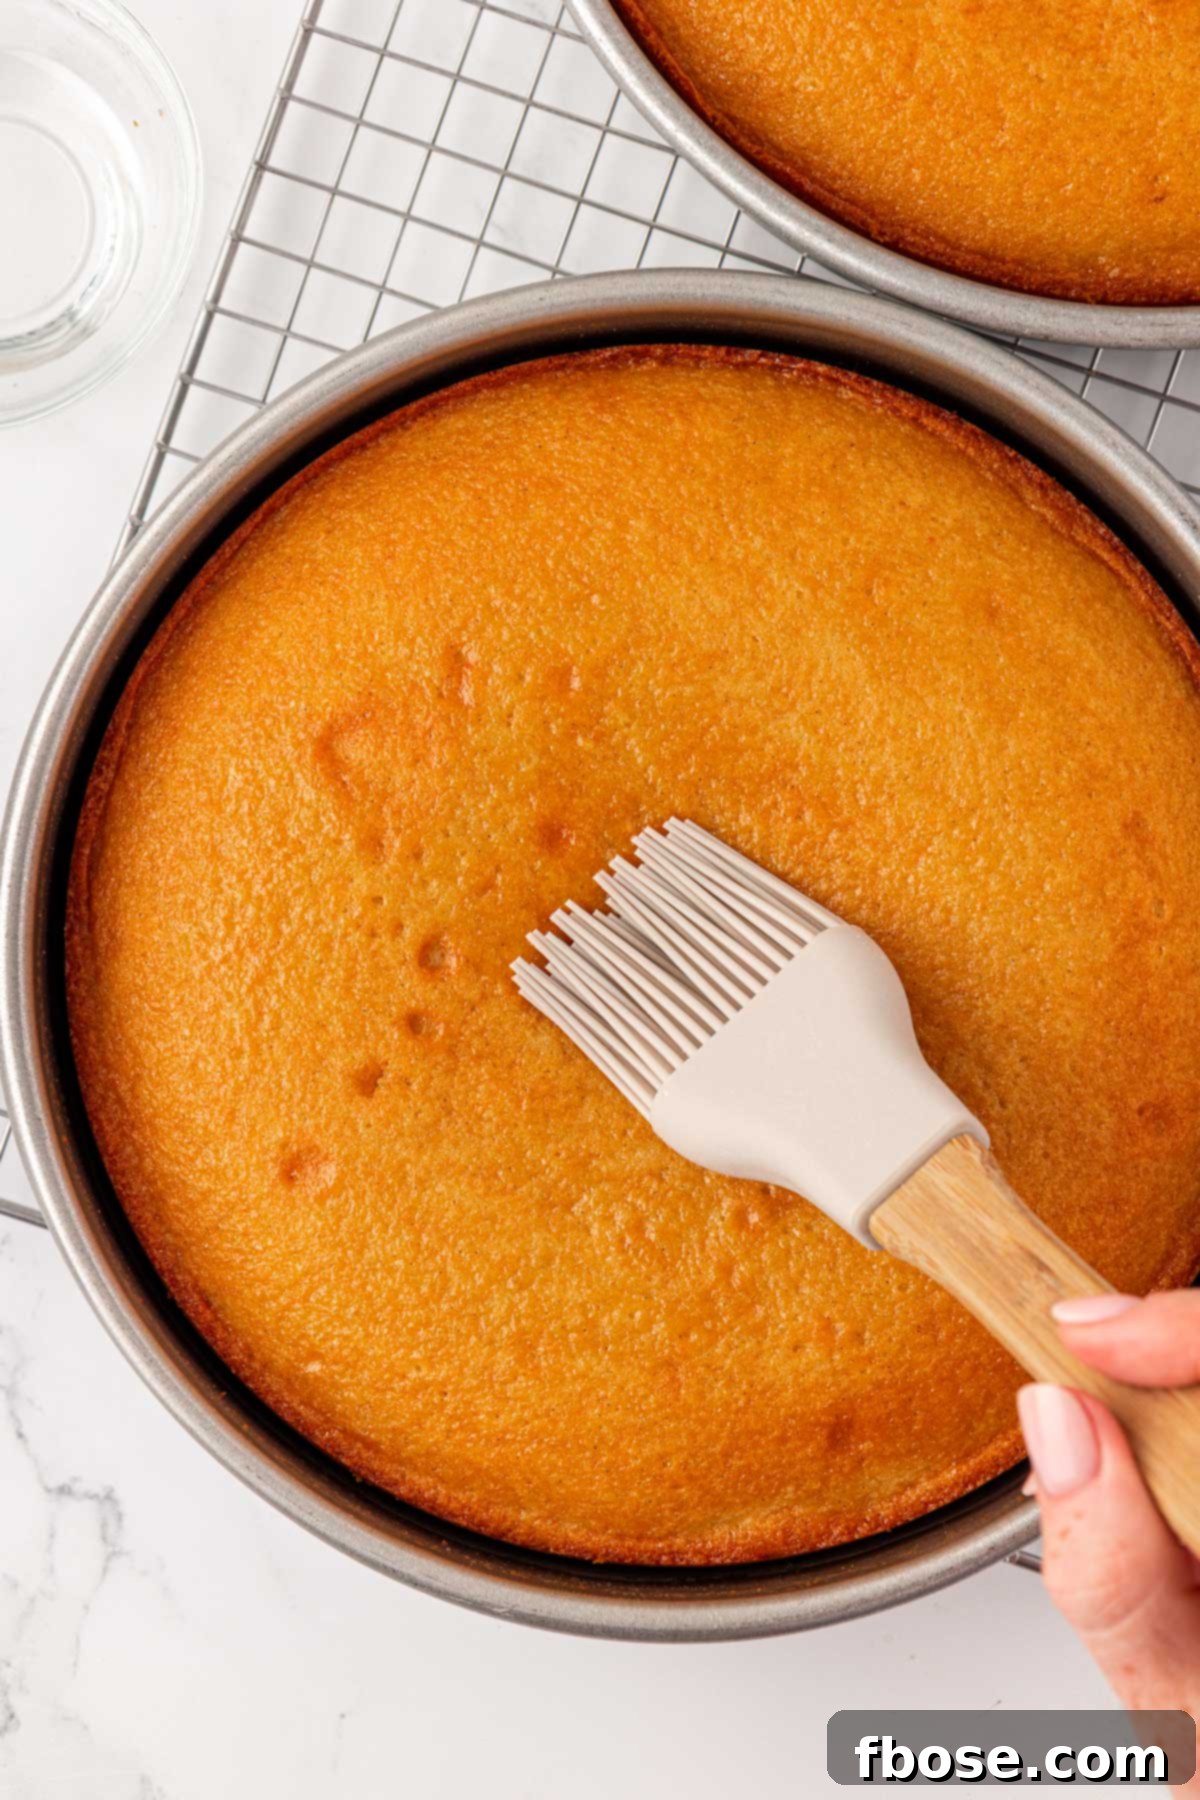
Immediately after removing the cakes from the oven, use a pastry brush to generously moisten the tops of the cakes with some of the ⅓ cup vanilla simple syrup. Allow the cakes to cool in their pans for precisely 10 minutes.
-
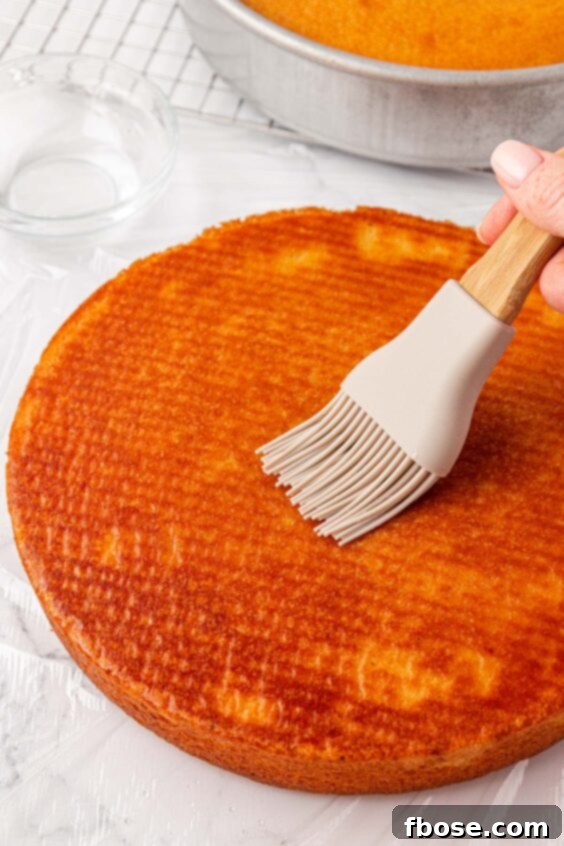
After 10 minutes, carefully invert the cakes onto a piece of plastic wrap. Brush the bottoms and sides of the cakes with the remaining vanilla simple syrup, ensuring even coverage for maximum moisture.
-
Immediately wrap the syruped cakes tightly with plastic wrap to lock in all moisture. Let them sit at room temperature until completely cool, preferably overnight, for the best texture and flavor development.
Filling
-
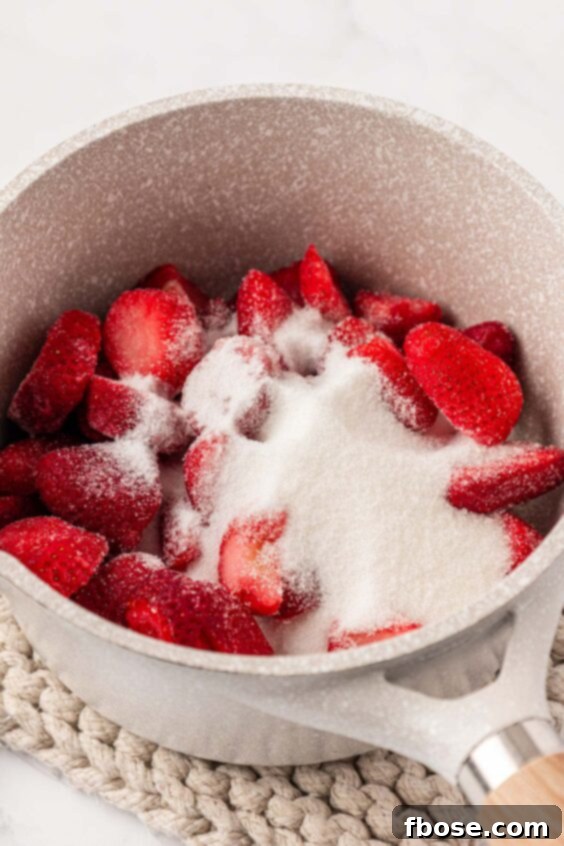
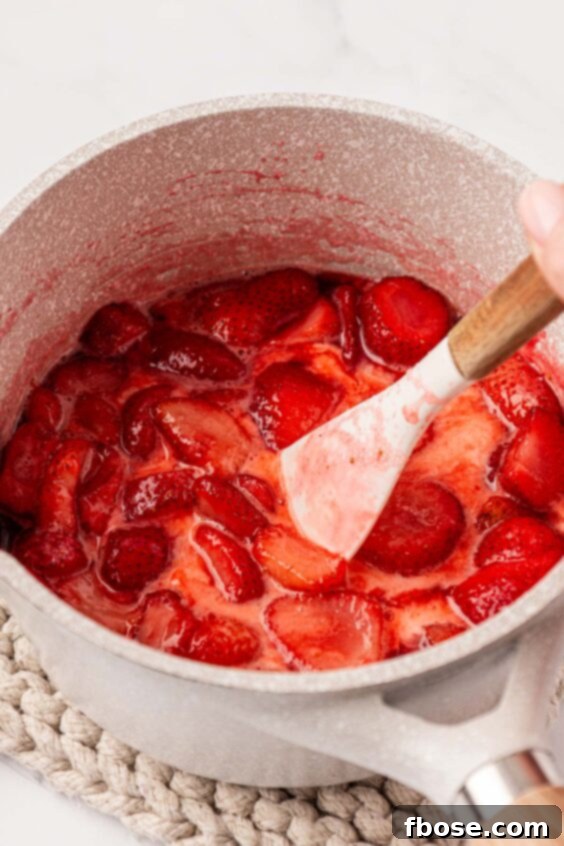
Combine 10 ounces frozen strawberries and ½ cup granulated sugar in a small pot. Bring the mixture to a gentle simmer over medium-high heat, stirring frequently, and continue to simmer for 5 minutes, allowing the strawberries to soften and release their juices.
-
Once the berries have started to break down, use a potato masher to further break them into smaller, uniform pieces. This creates a more consistent and appealing texture for the filling.
-
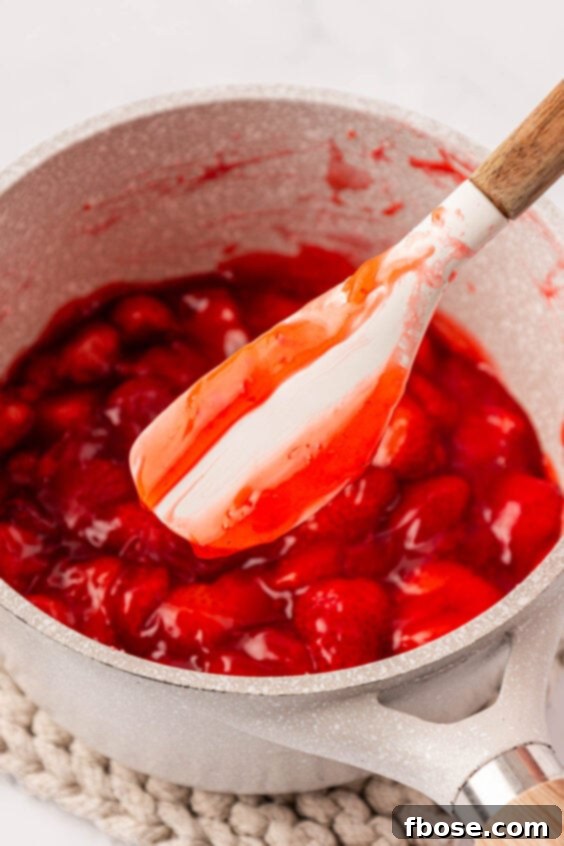
In a separate small prep bowl, whisk together 1 tablespoon lemon juice and 1 tablespoon cornstarch with a fork until smooth. Quickly pour this cornstarch and lemon mixture into the simmering strawberries while continuously stirring to prevent lumps.
-
Continue to stir the filling over medium heat for another 2 minutes, or until the mixture has noticeably thickened and coats the back of a spoon. Remove from heat and allow the filling to cool completely in the pot before using. It will thicken further as it cools.
Frosting
-
Add 1.2 ounces freeze-dried strawberries to a food processor and pulse until they are mostly ground into a fine powder. This powder will infuse your frosting with intense strawberry flavor.
-
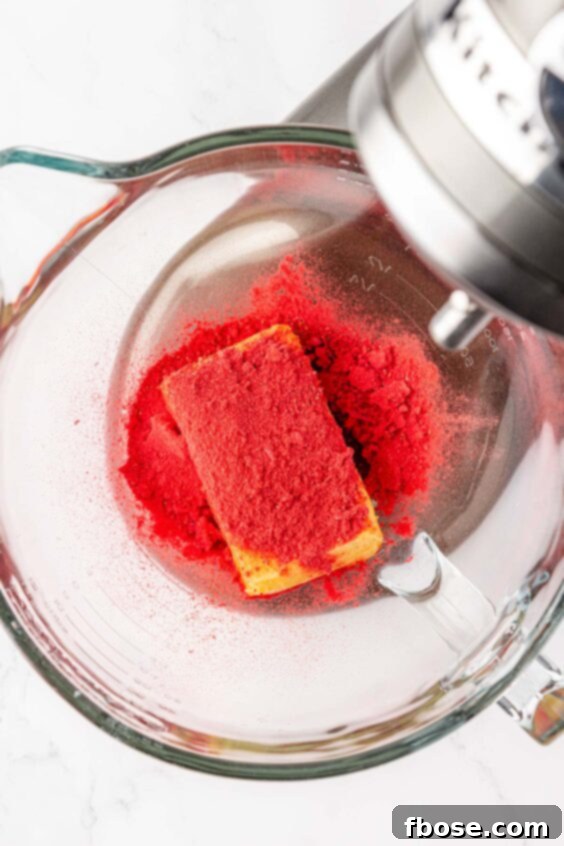
In a stand mixer bowl fitted with a paddle attachment, combine the strawberry powder, 1 cup unsalted butter (room temperature), 1 tablespoon vanilla extract, and ¾ teaspoon salt. Cream these ingredients together at medium speed for 1 minute until light and smooth.
-
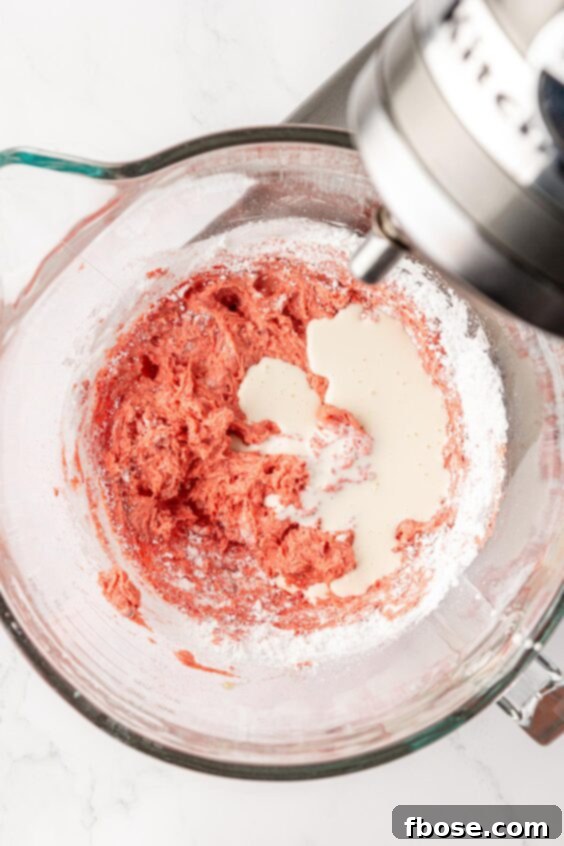
Gradually add 4 cups powdered sugar, one cup at a time, alternating with ¾ cup heavy cream, adding about 3 ounces of cream after each cup of sugar. Mix at low speed after each addition just until incorporated. Scrape down the sides of the bowl frequently to ensure all ingredients are well combined.
-
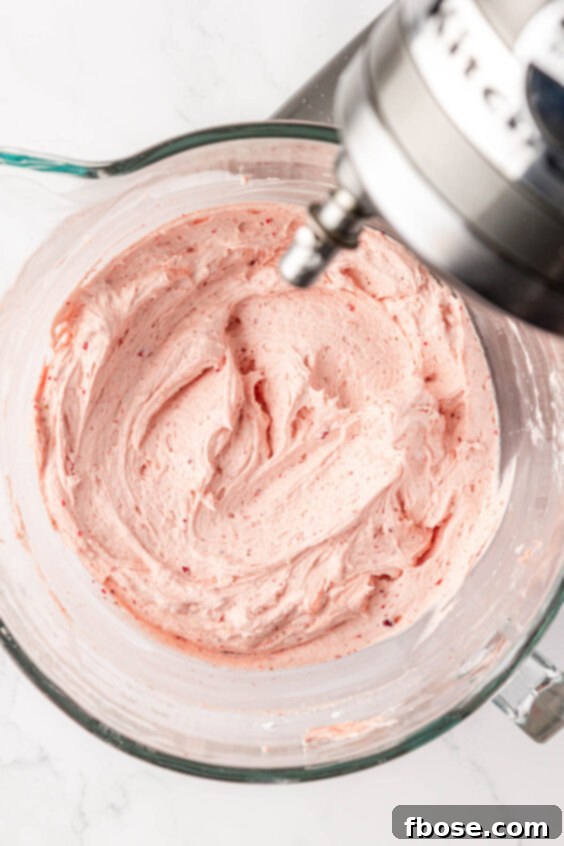
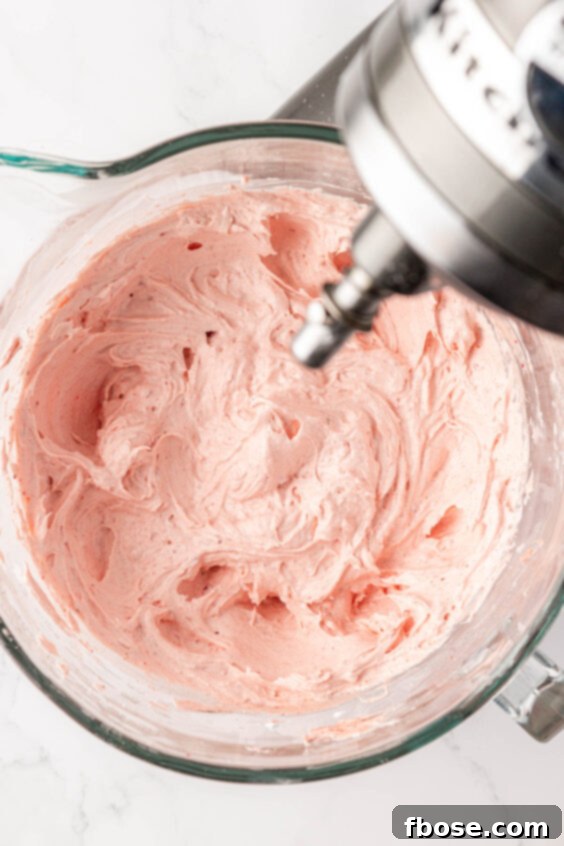
Once all ingredients are added, increase the mixer speed to high and whip the frosting for 2 to 3 minutes until it becomes wonderfully light, fluffy, and smooth.
-
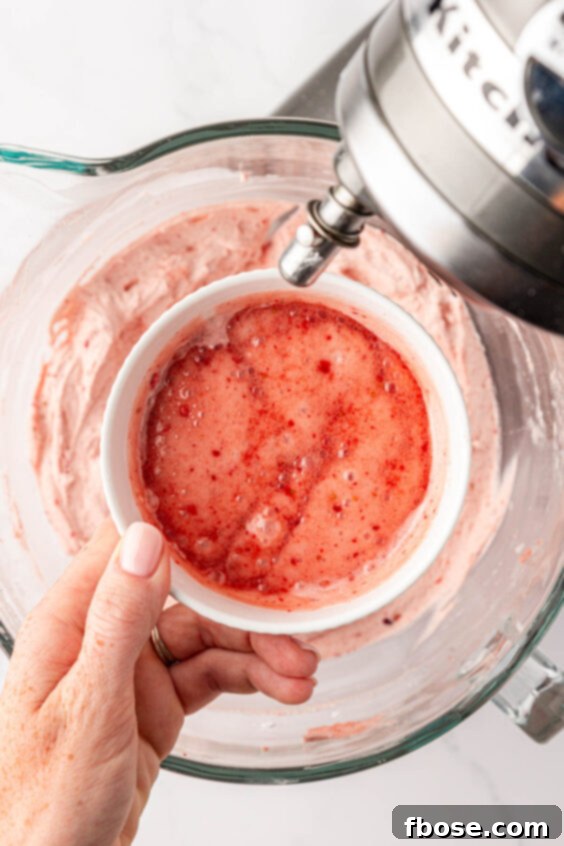
Scrape down the sides of the bowl once more. Transfer about ¼ cup of the prepared frosting to a small, microwave-safe bowl and microwave for approximately 30 seconds, or until it is slightly melted and smooth.
-
Pour the slightly melted frosting back into the main bowl with the rest of the frosting. Whip for an additional 1 minute on high speed. This technique helps to create an incredibly smooth and silky frosting texture while preserving the volume achieved from the initial whipping, making it perfect for decorating.
Assembly
-
To prevent your cake from sliding, spread a small amount of strawberry frosting onto the center of your cake stand, board, or serving plate. This creates a secure grip for the first cake layer.
-
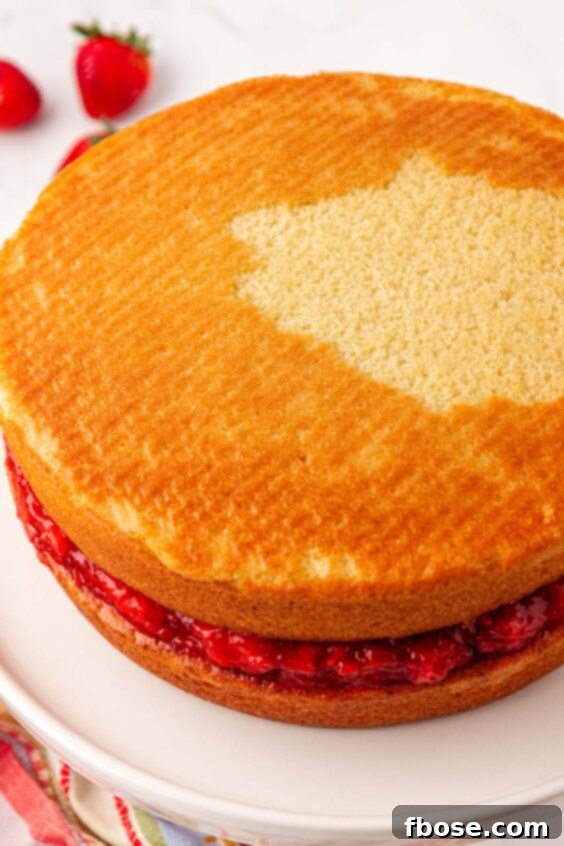
Carefully place one of the cooled cake layers on top of the frosting base. Evenly spread the cooled strawberry filling over this cake layer, creating a thick, luscious middle layer. For added stability and to create a “dam” that holds the filling in, you can pipe a border of frosting around the edge of the first cake layer before adding the filling.
-
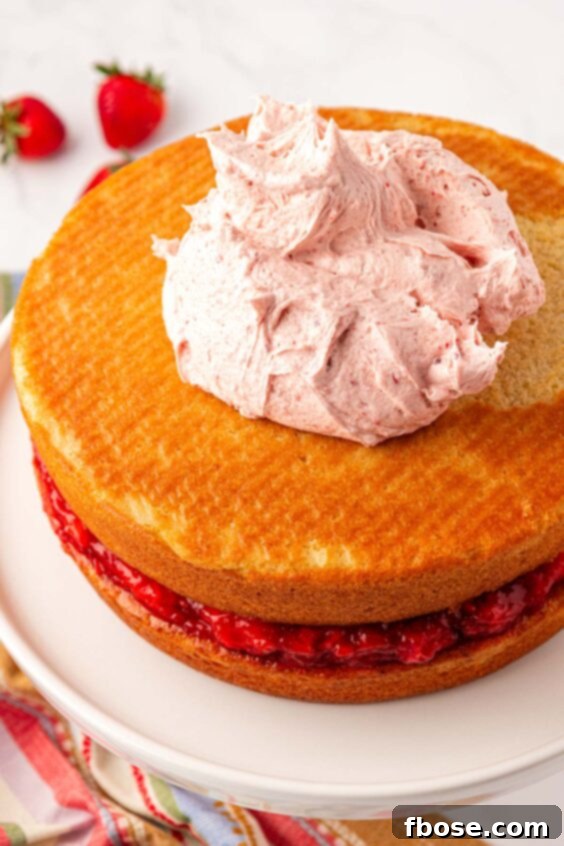
Gently place the second cake layer directly on top of the strawberry filling. Apply a thin, even layer of frosting over the entire cake (top and sides) to create a “crumb coat.” This traps any loose crumbs, ensuring a smooth finish for your final frosting layer. Transfer the cake to the refrigerator for 15-20 minutes to allow the crumb coat to set firmly.
-
Remove the cake from the fridge. Apply the remaining strawberry frosting to finish decorating your cake. You can opt for perfectly clean, smooth edges (as beautifully pictured), create elegant swirls with your offset spatula, or pipe decorative details – the choice is yours! If adding any sprinkles, edible glitter, or other garnishes, do so immediately after applying the final frosting layer to ensure they adhere before the buttercream begins to crust over.
Video
Notes
- I highly recommend using European-style butter for the best flavor and texture in your cake. For optimal results, allow it to sit out overnight at room temperature before use to ensure it’s very soft.
- These are the pan sizes I frequently use: a 9-inch pan yields perfectly sized layers, while an 8-inch pan can also be used, though it will produce thicker cake layers. With 8-inch pans, the centers of the cakes may have some small bubbles due to the increased batter depth, but this will not affect the taste.
- The baking time for cakes can vary significantly due to differences in ovens and pan materials. I advise starting to check for doneness around 35 minutes into baking, then adding a few minutes at a time as needed. The cake is fully baked when an instant-read thermometer inserted into the center reads 200°F (93°C).
- For the strawberry filling, I used these frozen strawberries, which worked wonderfully.
Nutrition
Calories:
425
kcal
|
Carbohydrates:
60
g
|
Protein:
4
g
|
Fat:
20
g
|
Saturated Fat:
12
g
|
Polyunsaturated Fat:
1
g
|
Monounsaturated Fat:
5
g
|
Trans Fat:
1
g
|
Cholesterol:
65
mg
|
Sodium:
198
mg
|
Potassium:
157
mg
|
Fiber:
1
g
|
Sugar:
46
g
|
Vitamin A:
635
IU
|
Vitamin C:
7
mg
|
Calcium:
65
mg
|
Iron:
1
mg
Did You Make This Recipe?
Don’t forget to share it with me on Instagram @sugarandsoulco and follow on Tiktok @sugarandsoulco and Pinterest @sugarandsoulco for more!
Pin Recipe
Share Recipe