
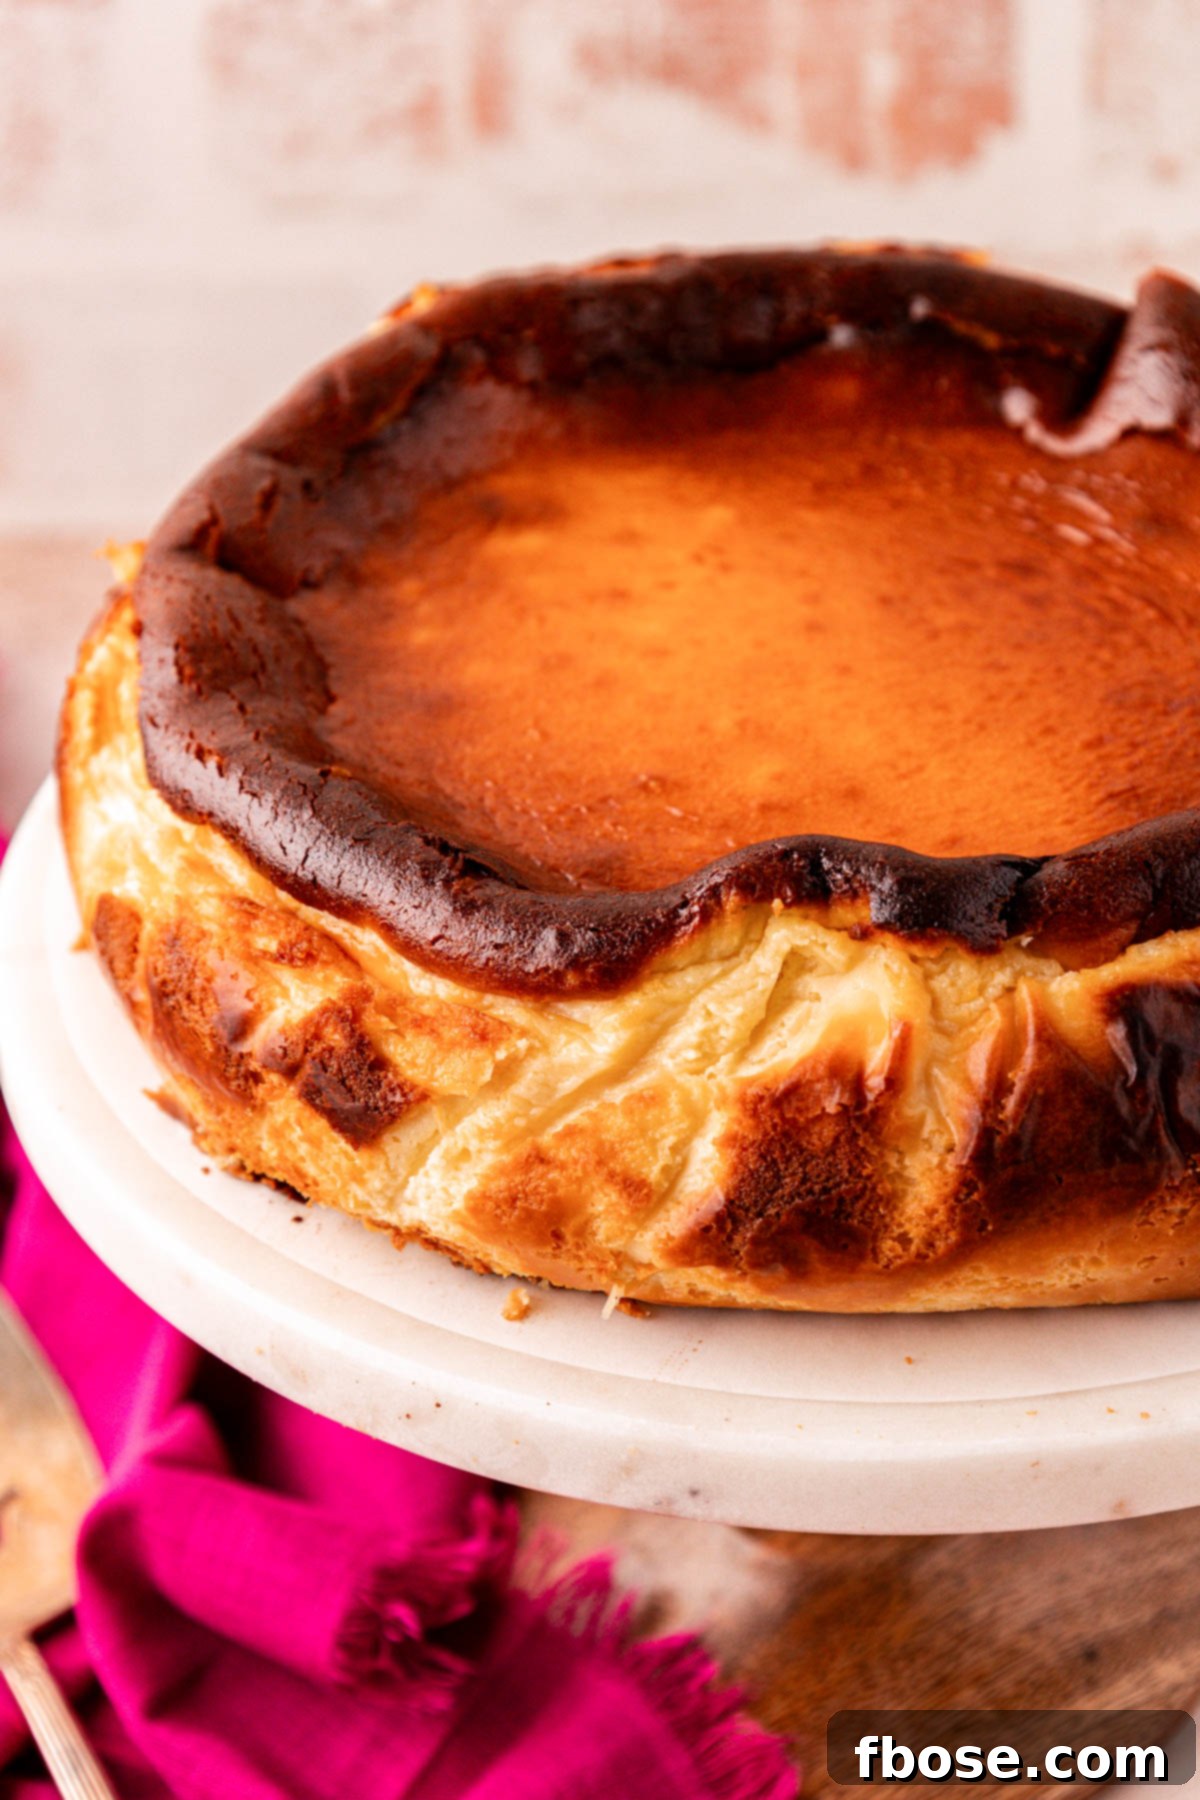
Basque Cheesecake is more than just a dessert; it’s an effortless masterpiece, renowned for its incredibly silky texture and signature caramelized top that emerges perfectly from the oven every single time! If you’re looking for an indulgent treat that’s surprisingly simple to prepare and boasts a charmingly rustic, imperfect aesthetic, this Basque Burnt Cheesecake recipe is your perfect match. It’s designed to impress with minimal fuss, making it the ideal dessert for any gathering or a special everyday indulgence. This unique cheesecake defies conventional expectations, offering a delightful experience that will captivate your taste buds and earn you rave reviews.
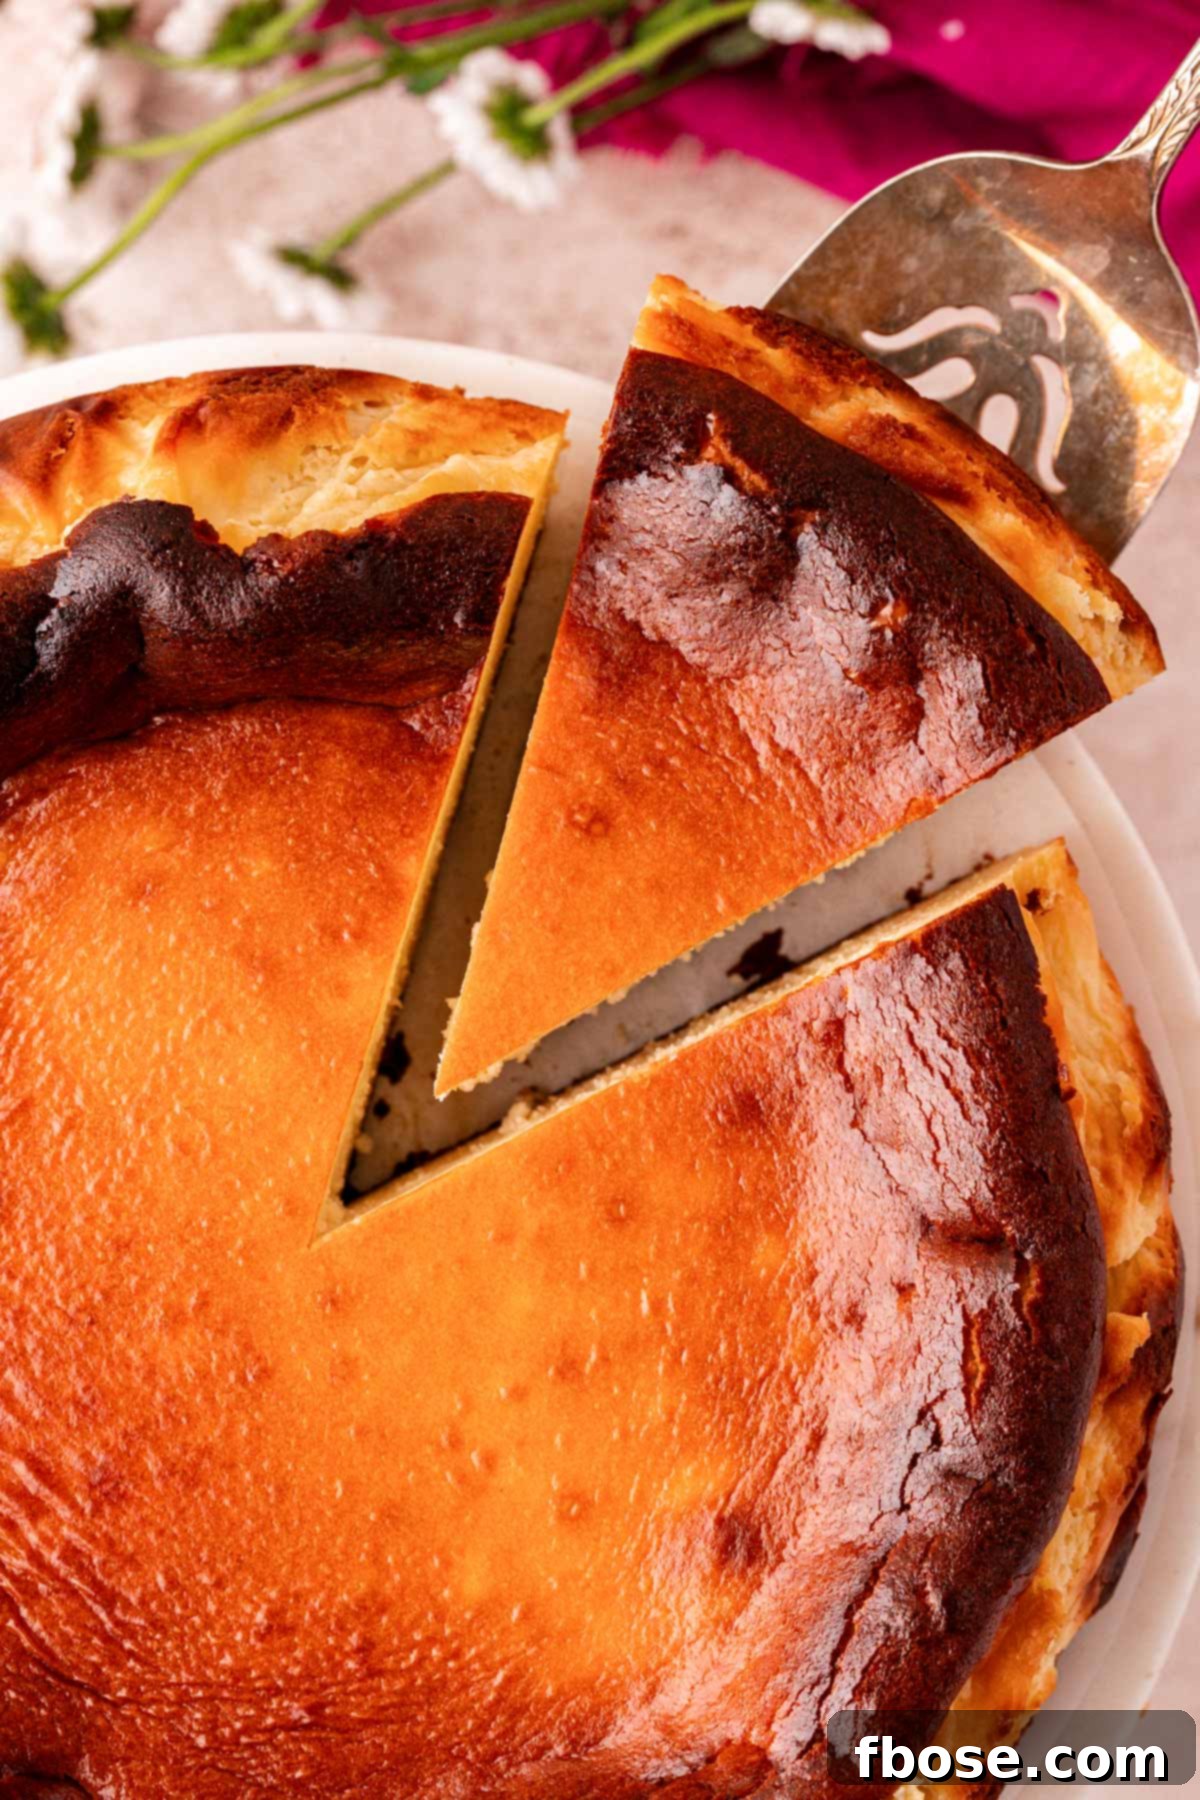
Why Basque Burnt Cheesecake Is a True Culinary Delight!
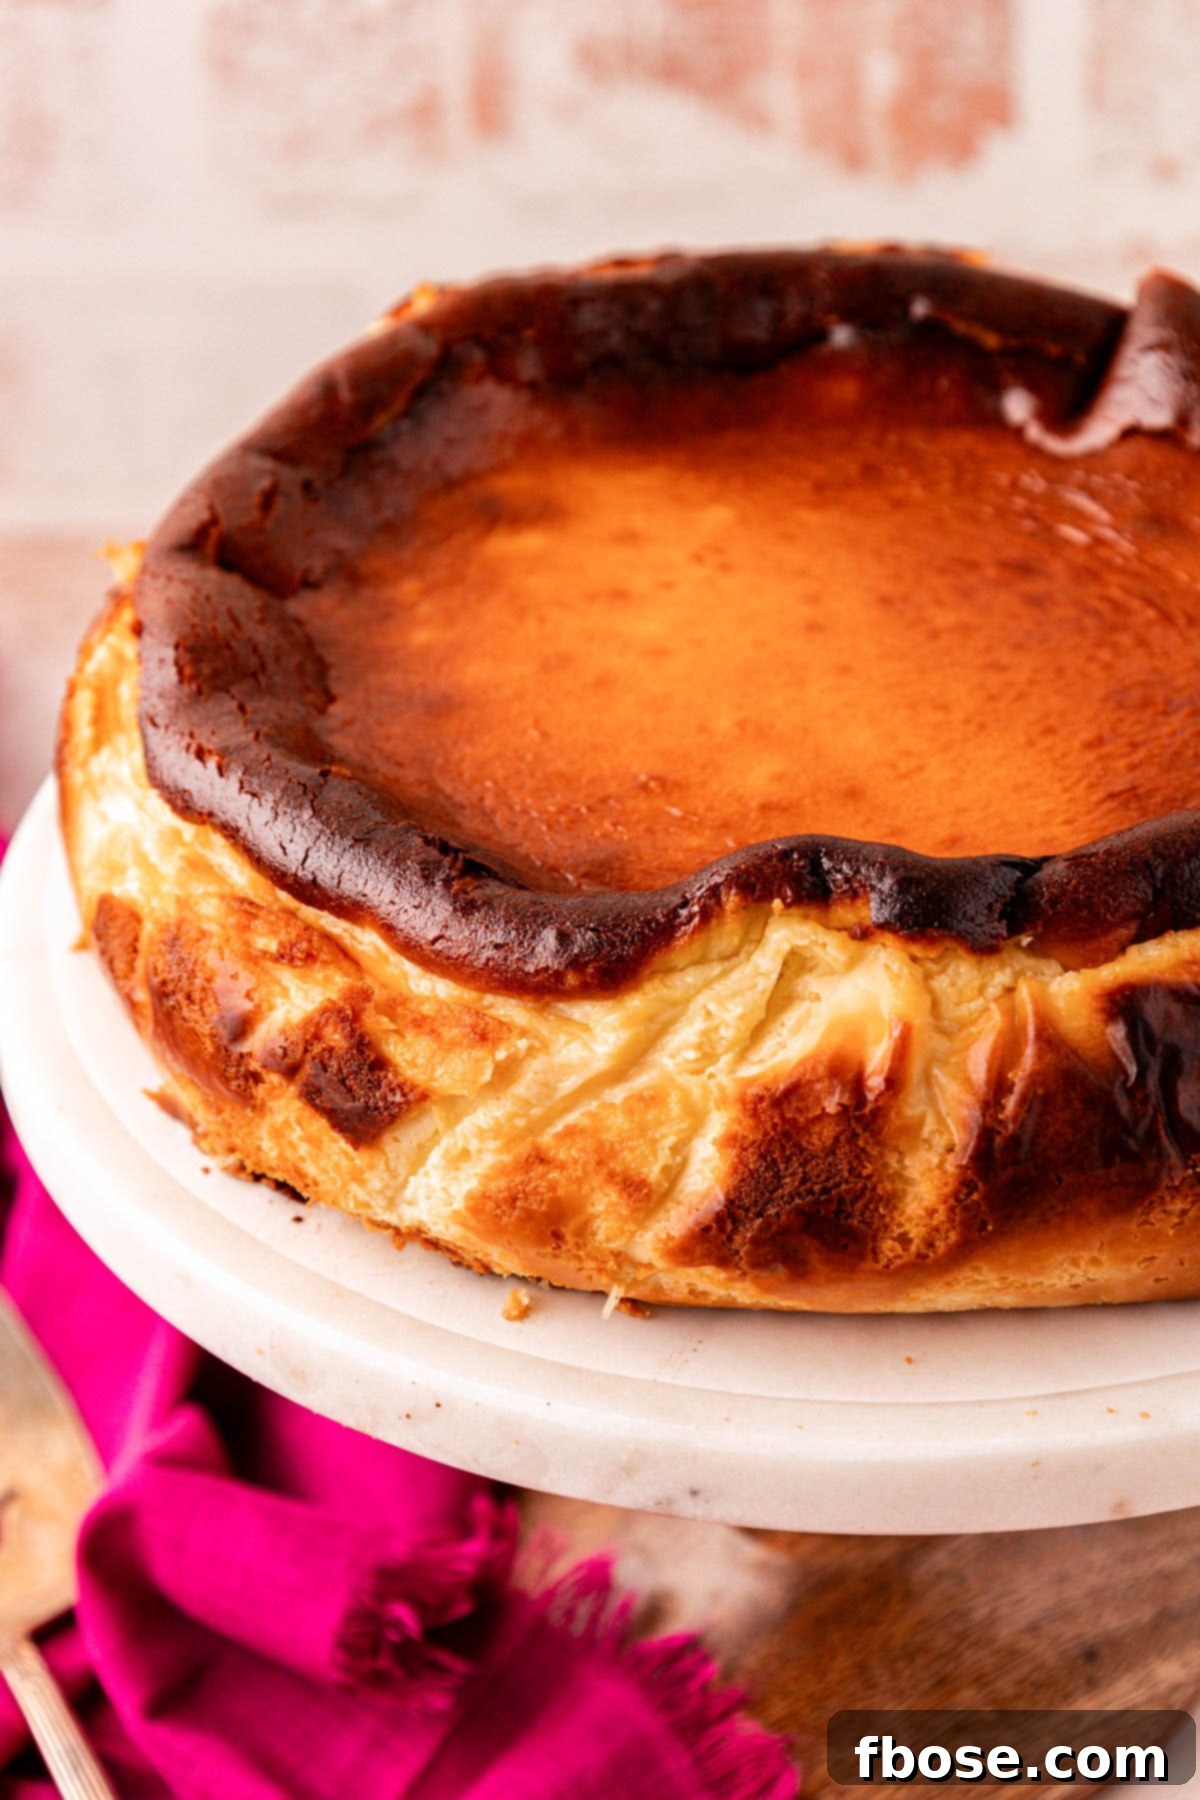
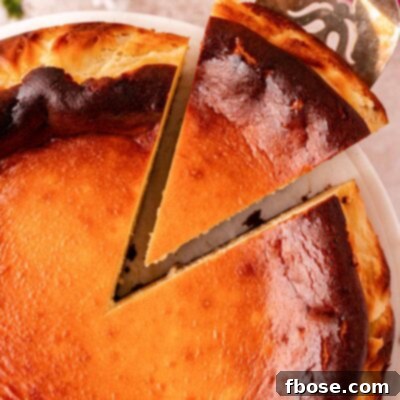
Forget everything you thought you knew about traditional cheesecakes. This Basque Burnt Cheesecake isn’t just simple and rustic; it’s a beautifully elegant dessert that instantly wins hearts with both its distinctive appearance and unforgettable flavor profile. Unlike its tangier counterparts, this cheesecake offers a beautifully balanced sweetness, crowned with a “burnt top” that evokes the delectable taste of a heavily toasted marshmallow. The deep caramelization of the surface is not merely a visual statement but an integral part of its complex taste, adding layers of flavor that are truly unique.
The idea of a “burnt top” might initially raise an eyebrow, but rest assured, it’s far from charred. Instead, it’s a sophisticated caramelized sugar taste, a delicate interplay of bitter and sweet. While a rich, smoky aroma might be prominent straight out of the oven, once the cheesecake chills, this robust scent mellows beautifully, harmonizing with the sweet, creamy interior. This transformation results in a dessert that is smooth, rich, and utterly luxurious, providing a unique gastronomic experience that sets it apart from any other cheesecake you’ve ever tasted. It’s a captivating dessert that promises to be a conversation starter and a memorable ending to any meal.
Unveiling the Mystery: What Exactly Is Basque Cheesecake?
Basque Cheesecake, often referred to as “burnt cheesecake,” is a distinct dessert hailing from San Sebastian, Spain. Its origins are typically traced back to 1990 at the renowned La Viña restaurant. What makes this Spanish cheesecake truly unique and distinguishes it from traditional New York-style cheesecakes are several key characteristics. Firstly, it famously comes without a crust, offering an uninterrupted creamy texture from edge to edge. Secondly, it is baked at a remarkably high temperature, a method that creates its signature dark, caramelized surface. This high heat is crucial for achieving the characteristic “burnt” exterior while leaving the interior incredibly custardy and soft.
One of the greatest advantages of Basque Cheesecake is its incredible simplicity. I personally adore how this recipe completely bypasses the need for a traditional crust, eliminating the extra step of preparing a graham cracker or cookie base. Even better, it doesn’t require a fussy water bath, which is often a dreaded step in many cheesecake recipes. These omissions significantly streamline the preparation process, making it much easier and quicker to get into the oven. Despite its straightforward nature, the result is an ultimately sophisticated, make-ahead dessert that proves to be an instant hit. It’s the perfect solution for busy holidays, spontaneous dinner parties, or any family gathering where you want to serve something impressive yet low-stress. Its rustic charm and effortless elegance make it a go-to choice for any occasion.
Rebecca’s Recipe Review: A Deeper Look
Curious about what makes this Basque Burnt Cheesecake truly special? Here’s my honest take on this delightful recipe:
Taste: Expect a rich, creamy vanilla flavor that beautifully complements a delicate hint of burnt sugar. It’s sweet, but not overly so, with a complex undertone from the caramelized crust.
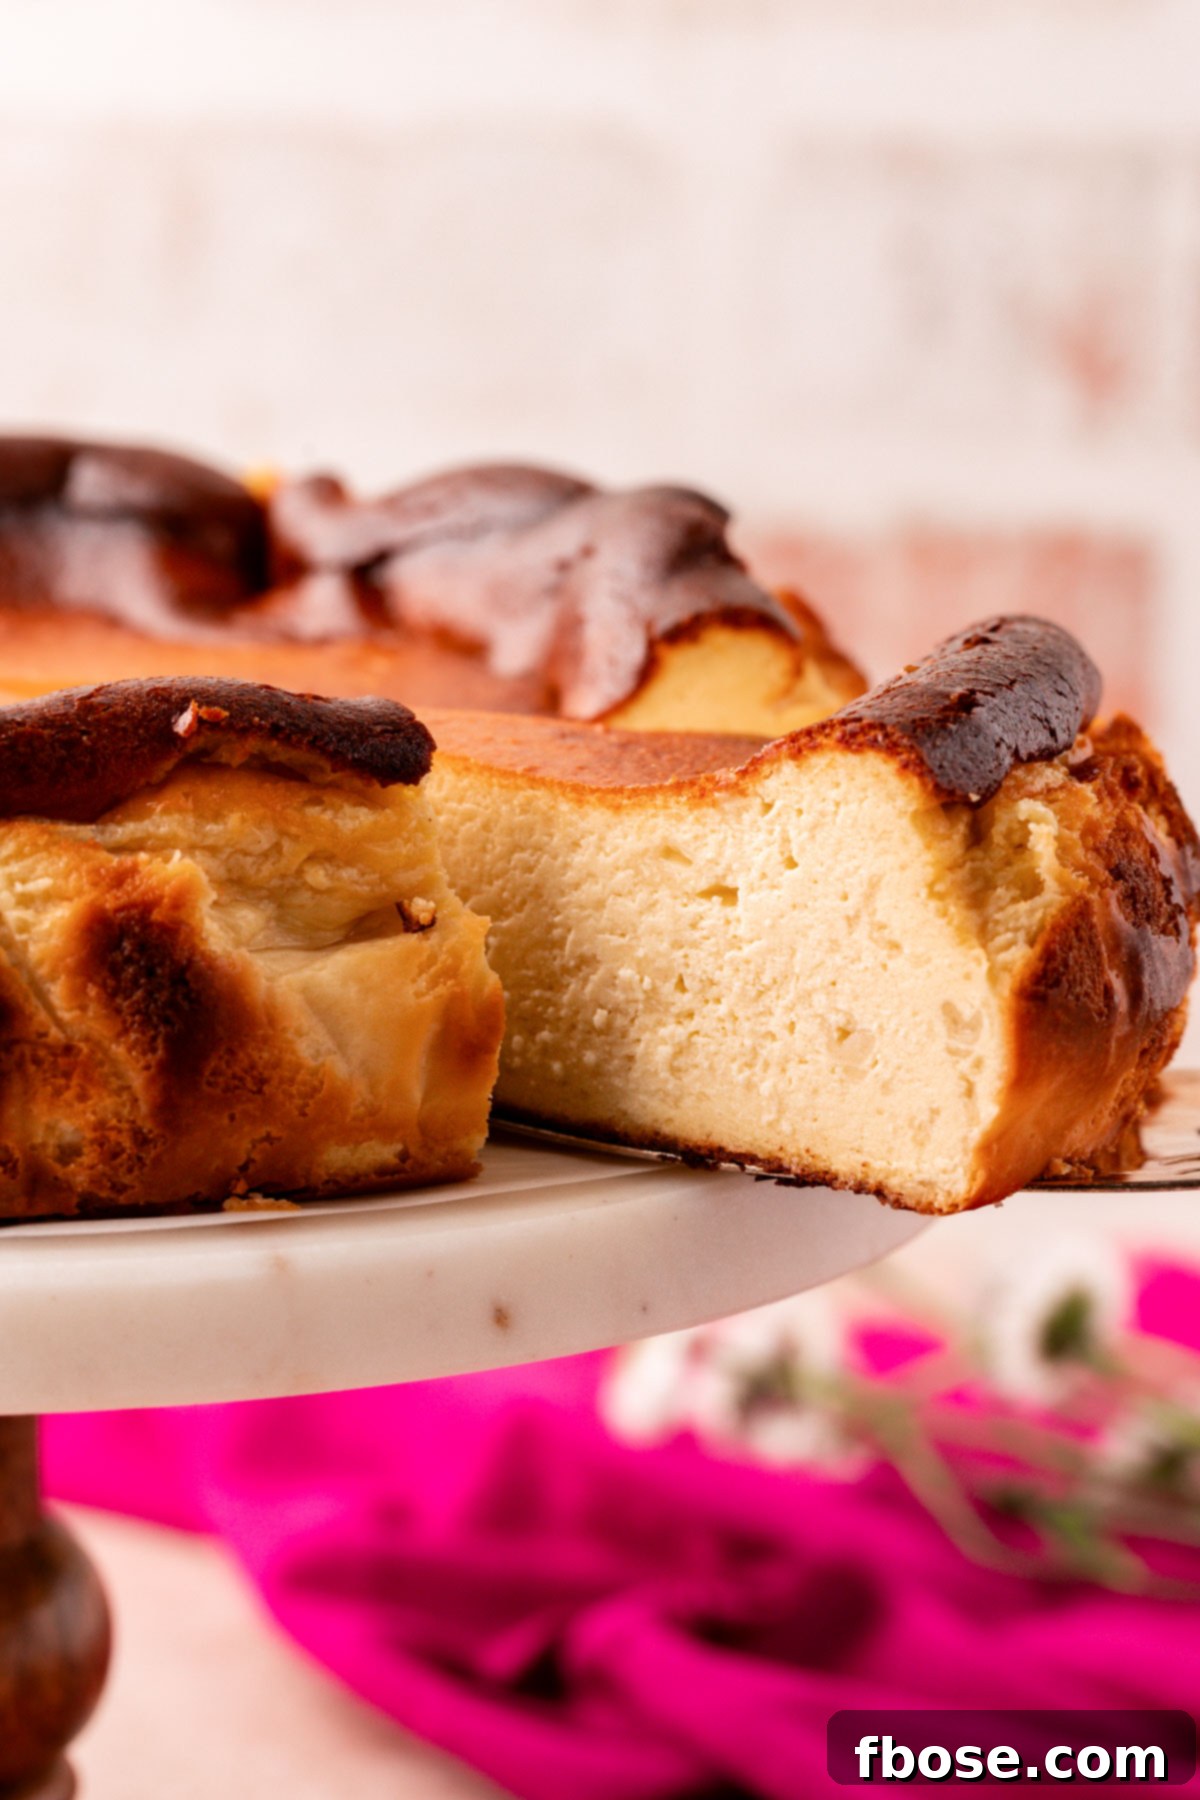
Texture: This cheesecake is firm enough to hold its shape, yet remarkably silky and melt-in-your-mouth smooth. The topping provides a slightly thicker, caramelized layer that contrasts wonderfully with the custardy interior.
Ease: 5/10. While the steps are simple, precision in mixing and baking time is key to achieving that perfect texture, though the recipe is very forgiving overall.
Pros: Exceptionally simple to prepare with minimal steps and no water bath. Its rustic appearance means perfection isn’t the goal, reducing baking stress. It’s incredibly versatile and makes a fantastic make-ahead dessert.
Cons: The high baking temperature means the top can brown very quickly, requiring a vigilant eye to prevent actual charring. Don’t be tempted to overbake!
Would I Make This Again? Absolutely! This recipe has earned a permanent spot in my dessert repertoire due to its simplicity, unique flavor, and universal appeal.
Pin This Recipe For Later
Essential Ingredients for the Perfect Basque Cheesecake
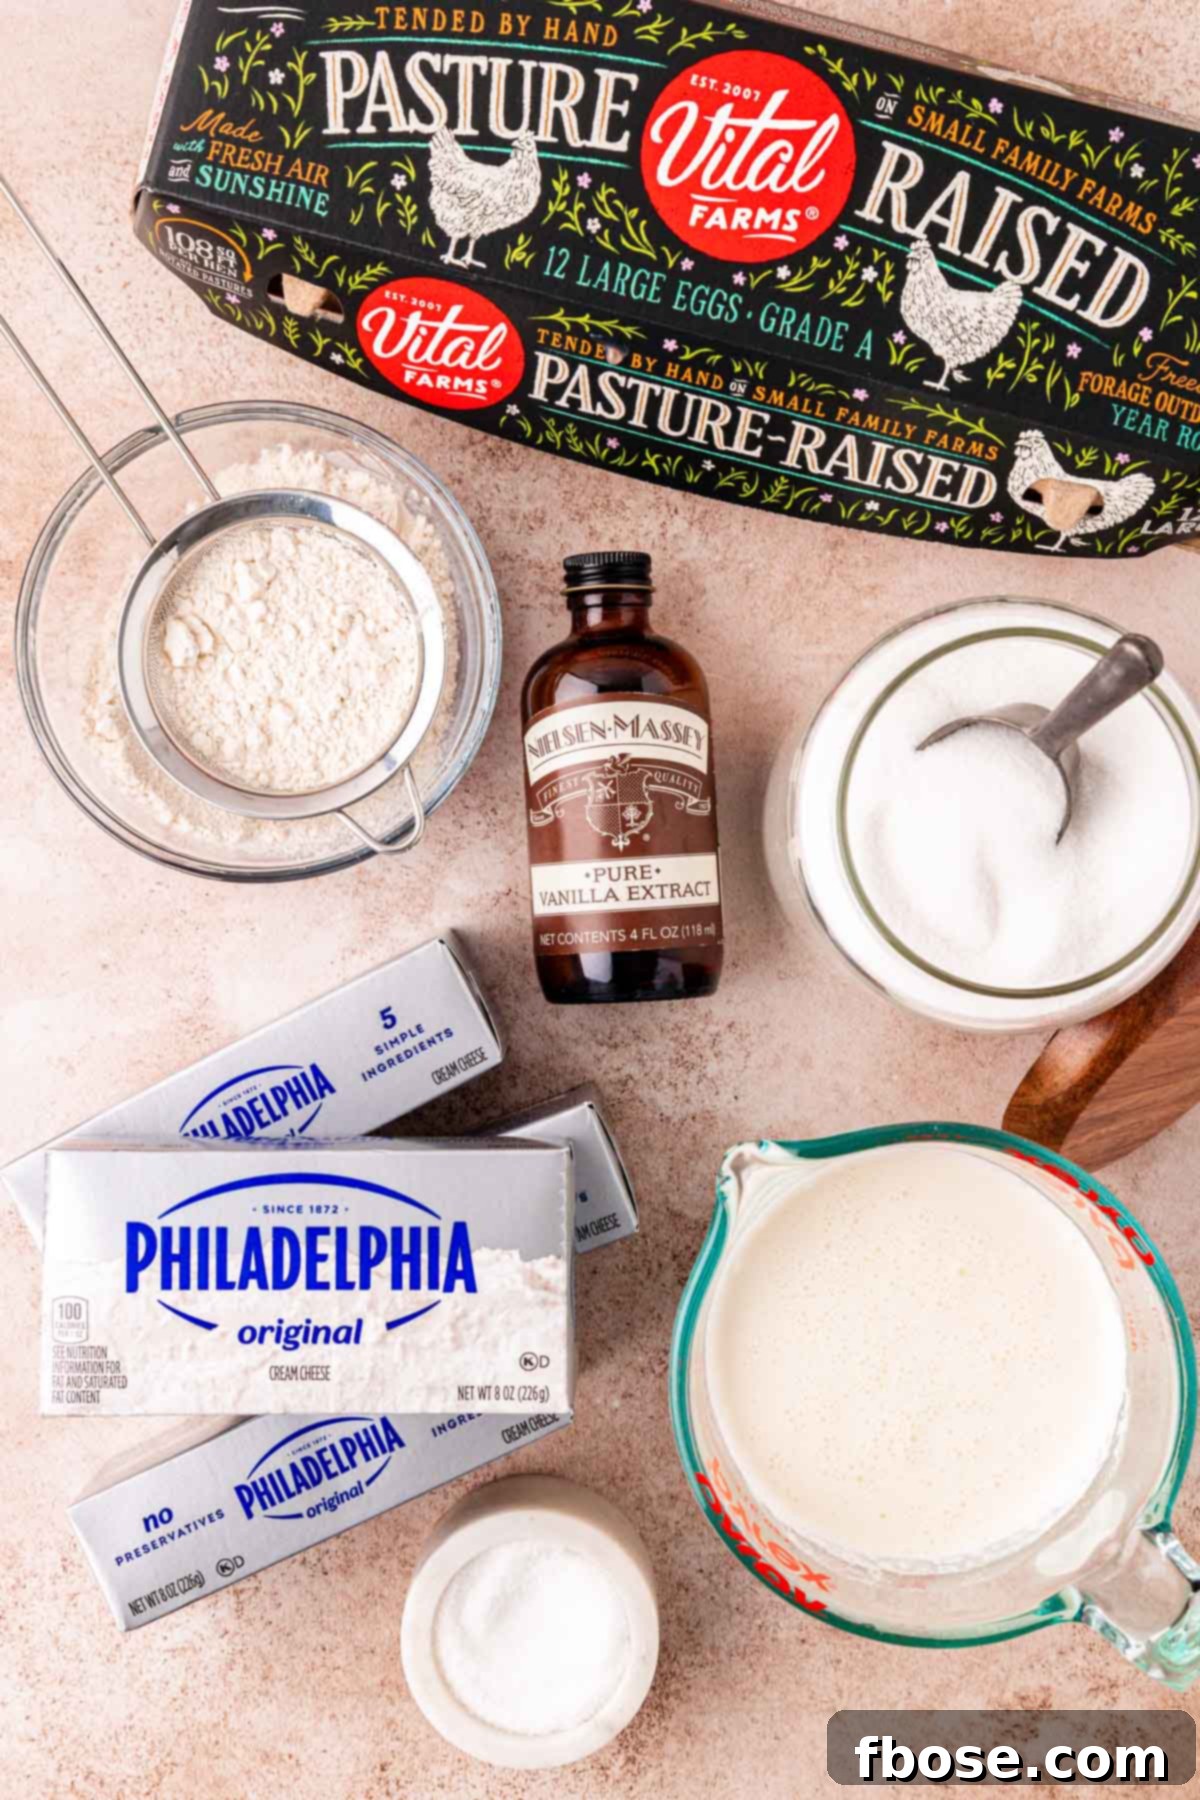
This deceptively simple Basque Cheesecake recipe relies on a minimal list of ingredients, yet the resulting flavor and texture are astonishingly complex and delicious. To truly achieve the ultimate taste and signature silky consistency, selecting high-quality ingredients is paramount. Each component plays a crucial role in crafting this exquisite dessert:
- **Cream Cheese:** The undisputed star of this cheesecake is, of course, the cream cheese. For the richest taste and most luxurious texture, it’s absolutely essential to choose a high-quality, full-fat cream cheese. Avoid any reduced-fat versions, as they can compromise the creamy consistency and rich flavor that defines Basque Cheesecake. Ensure it’s at room temperature for smooth mixing.
- **Eggs:** This recipe calls for a generous quantity of eggs, which contribute significantly to the cheesecake’s structure and richness. As with the cream cheese, opting for high-quality, large eggs will enhance the overall flavor and ensure a beautifully consistent texture. Room temperature eggs also blend more seamlessly into the batter.
- **Granulated Sugar:** Sweetness is key, and granulated sugar provides the perfect balance. It also plays a vital role in the caramelization process, contributing to that iconic burnt top. The sugar content can be slightly adjusted to your personal preference for sweetness, as noted in the tips.
- **Pure Vanilla Extract:** A touch of pure vanilla extract elevates the flavor profile, adding a warm, aromatic note that complements the richness of the cream cheese and the sweetness of the sugar. Always choose pure vanilla for the best results, as imitation vanilla can leave an artificial aftertaste.
- **Full-Fat Heavy Cream:** To achieve that coveted creamy, almost custardy texture, full-fat heavy cream is indispensable. It adds richness and moisture, making the cheesecake incredibly smooth. If you can source it, farm-fresh double cream is an excellent, albeit slightly more expensive, choice that will yield truly exceptional results, imparting an even richer mouthfeel.
- **Salt:** A pinch of salt is crucial for balancing the sweetness and enhancing all the other flavors in the cheesecake. It prevents the dessert from tasting one-dimensional and brings out the subtle nuances of the vanilla and cream cheese.
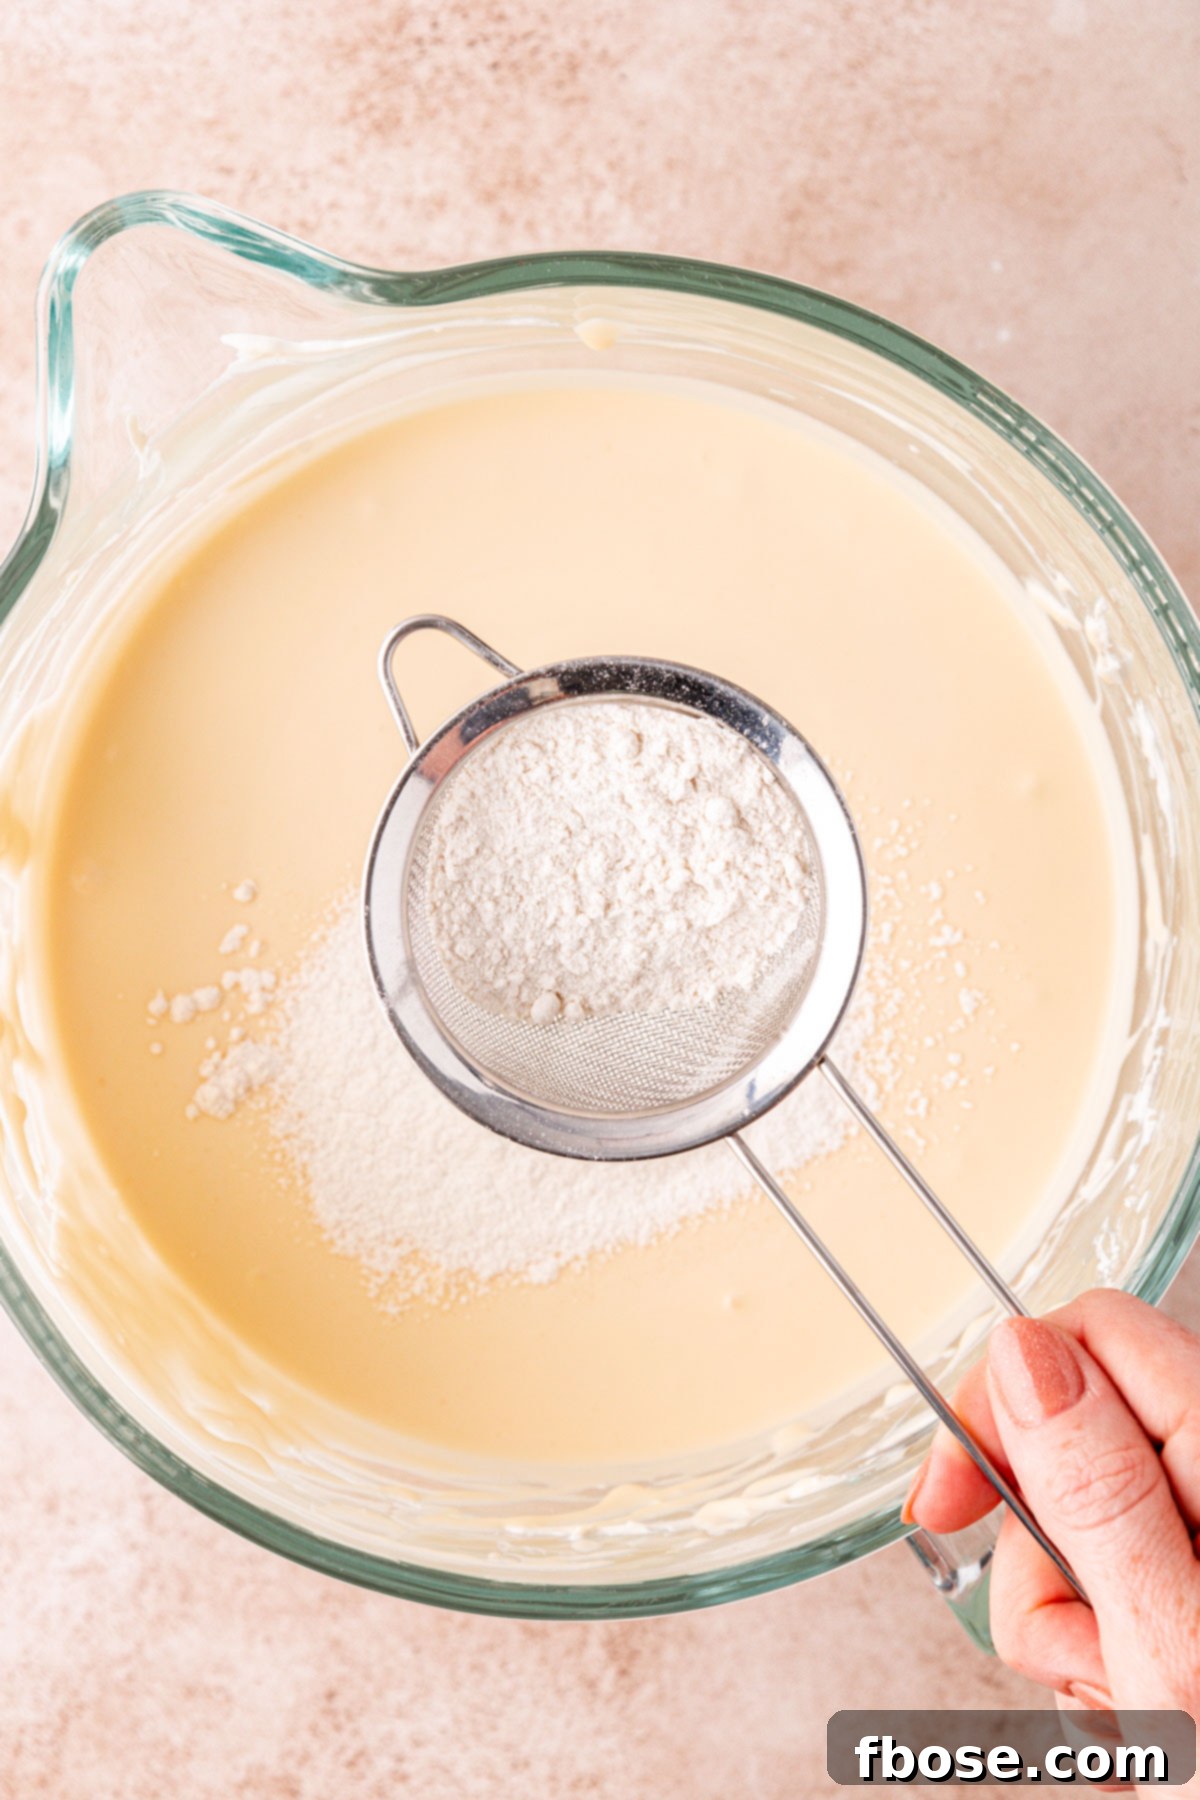
- **All-Purpose Flour:** A small amount of all-purpose flour acts as a stabilizer, helping to bind the ingredients and give the cheesecake its characteristic structure without making it dense. Sifting the flour ensures there are no lumps in the final batter, contributing to that desired silky finish.
By focusing on the quality of these core ingredients and ensuring they are at the correct temperature, you’re well on your way to creating a Basque Burnt Cheesecake that’s truly remarkable and deeply satisfying.
Step-by-Step Guide: Crafting Your Basque Burnt Cheesecake
Creating this stunning Basque Burnt Cheesecake is surprisingly straightforward. Follow these steps for a perfectly creamy, caramelized dessert:
- Prepare Your Pan: Begin by preheating your oven to 425°F (218°C). Then, prepare a 9 or 10-inch springform pan. Line it with a crisscrossed double layer of parchment paper, ensuring the paper extends approximately 2 inches above the rim of the pan. A helpful trick is to slightly wet, scrunch, and then dry the parchment paper before lining; this makes it more pliable and easier to fit snugly into the pan.
- Whip the Cream Cheese: In a large mixing bowl, preferably of a stand mixer fitted with a whisk attachment, whip the softened, full-fat cream cheese for about 2 minutes until it becomes light and smooth. This initial whipping is crucial for eliminating lumps and achieving a creamy base.
- Incorporate Sugar: Gradually add the granulated sugar to the whipped cream cheese. Continue whipping on medium speed for another 2 minutes, or until the mixture is completely smooth and fluffy. Periodically scrape down the sides of the bowl with a spatula to ensure all ingredients are well combined and no sugar granules or cream cheese lumps remain.
- Add Eggs Gradually: With the mixer set to low speed, incorporate the large eggs one at a time. Mix each egg just until the yolk has broken and a little yellow remains, then add the next. It’s important not to overmix the eggs at this stage to avoid introducing too much air, which can lead to a soufflé-like texture rather than the desired dense silkiness.
- Fold in Liquids and Seasoning: Still on low speed, pour in the heavy cream and pure vanilla extract. Follow this by adding the salt. Mix gently until all these ingredients are just fully incorporated. Overmixing will create air bubbles, so keep it slow and brief.
- Sift in Flour: Sift the all-purpose flour directly into the cheesecake batter. Using a rubber spatula, gently fold the flour into the mixture until just combined. Again, minimize mixing to maintain the desired smooth, dense texture.
- Pour and Bake: Carefully pour the prepared cheesecake batter into your lined springform pan.
- Oven Time: Place the springform pan onto a rimmed baking sheet (to catch any potential drips, though it’s usually not an issue) and transfer it to the middle rack of your preheated oven. Bake for approximately 50 to 65 minutes. The cheesecake will puff up significantly during baking and then settle as it cools – this is entirely normal and expected for a Basque cheesecake.
- Check for Doneness: Your Basque Cheesecake is perfectly done when its top achieves a deep, golden brown to almost dark brown hue (the “burnt” aesthetic), yet the center still appears noticeably jiggly when gently shaken. Resist the urge to overbake, as the internal temperature will continue to rise, and the cheesecake will firm up significantly as it chills.
- Cool to Room Temperature: Once baked, remove the pan from the oven and place it on a wire rack. Allow the cheesecake to cool completely to room temperature. This gradual cooling is essential for its texture.
- Chill Thoroughly: Transfer the cheesecake (still in its pan) to the refrigerator and chill for a minimum of 8 hours, though overnight is highly recommended. This chilling period allows the cheesecake to fully set and develop its signature dense, creamy interior.
- Serve and Enjoy: Once thoroughly chilled, your Basque Burnt Cheesecake is ready to be served. Enjoy it plain to savor its pure flavor, or adorn it with your favorite delicious toppings for an extra touch of indulgence!
Rebecca’s Expert Tips for Basque Cheesecake Perfection
Achieving the perfect Basque Burnt Cheesecake is simple when you know a few key tricks. Here are my top tips to ensure your dessert turns out flawlessly:
- Elevate Your Cream Choice: For an unparalleled richness and texture, I highly recommend using farm-fresh double cream heavy cream if it’s available in your area. While standard heavy cream works beautifully, the extra fat content in double cream creates an even more luxurious, dense, and silky cheesecake. It truly makes a noticeable difference.
- Mastering Parchment Paper Lining: Lining the springform pan can sometimes be a challenge. To make the parchment paper more manageable, wet it thoroughly with water, then gently scrunch it into a ball, and finally, unscrunch it and allow it to dry slightly. This technique makes the paper much more pliable, allowing it to adhere better to the pan and create a neater, more secure lining that extends generously above the rim.
- Say Goodbye to Lumps: A truly silky cheesecake requires a completely smooth batter. After combining your cream cheese and sugar, and especially after adding eggs, always make sure to stop the mixer and thoroughly scrape down the sides and bottom of the bowl. Mix again briefly to ensure everything is evenly incorporated and free of any hidden lumps. A lump-free batter is the secret to that coveted creamy texture.
- The Art of Gentle Mixing: This is a crucial tip for Basque Cheesecake. Pay very close attention to the mixing speeds and times. It is vital *not* to overwhip the eggs or the cream. Overmixing introduces too much air into the batter, which can result in unwanted air bubbles in your finished cheesecake or a lighter, more soufflé-like texture, deviating from the dense, custardy interior that defines a traditional Basque cheesecake. Slow, minimal mixing is the golden rule here to preserve the integrity of the batter and achieve that irresistible, silky-smooth consistency our palates crave.
- Explore Flavor Variations: While vanilla is classic, feel free to experiment with other extracts. You can reduce the vanilla extract to 1 teaspoon and then add 1 to 2 teaspoons of another flavor extract. For instance, peppermint extract is a wonderful choice for a festive holiday twist, or try almond extract for a subtle nutty note.
- Adjust Sweetness to Your Liking: The beauty of this recipe is its adaptability. If you prefer a sweeter cheesecake, you can increase the granulated sugar to 2 cups. Conversely, for a less sweet, more savory-leaning dessert, you can reduce the sugar to 1 1/4 cups. Taste the batter before adding eggs if you’re unsure about your preferred sweetness level.
- Recognizing Doneness – The Jiggly Center: It’s easy to be tempted to overbake the cheesecake, but resist! The center of the cheesecake should be very jiggly when it’s done baking, almost like firm Jell-O. It might even look undercooked. This is absolutely correct! The residual heat will continue to cook it, and it will set fully as it chills. Overbaking will result in a drier cheesecake and could lead to an *actual* burnt, bitter taste rather than the desired sophisticated caramelization.
- The Importance of Cooling: Allow the cheesecake to cool slowly at room temperature within its pan before transferring it to the refrigerator. Rapid cooling can sometimes cause cracking or affect the texture. Patience is a virtue here!
Serving Your Exquisite Basque Cheesecake
After your Basque Cheesecake has patiently chilled in the refrigerator for at least 8 hours (or ideally overnight), it’s finally time for the grand reveal and serving! The presentation is as delightful as the taste. To remove the cheesecake from the springform pan, simply lift it gently by the edges of the parchment paper that are hanging over the sides. The rustic, wrinkled appearance of the parchment is part of its charm.
For immaculately clean slices that will impress your guests, here’s a professional tip: heat a large, sharp chef’s knife under hot running water for a few seconds. Wipe it dry, then slice into the cheesecake with one swift, clean motion. For subsequent slices, repeat the process of heating and wiping the knife. This prevents the cheesecake from sticking and ensures each slice is picture-perfect.
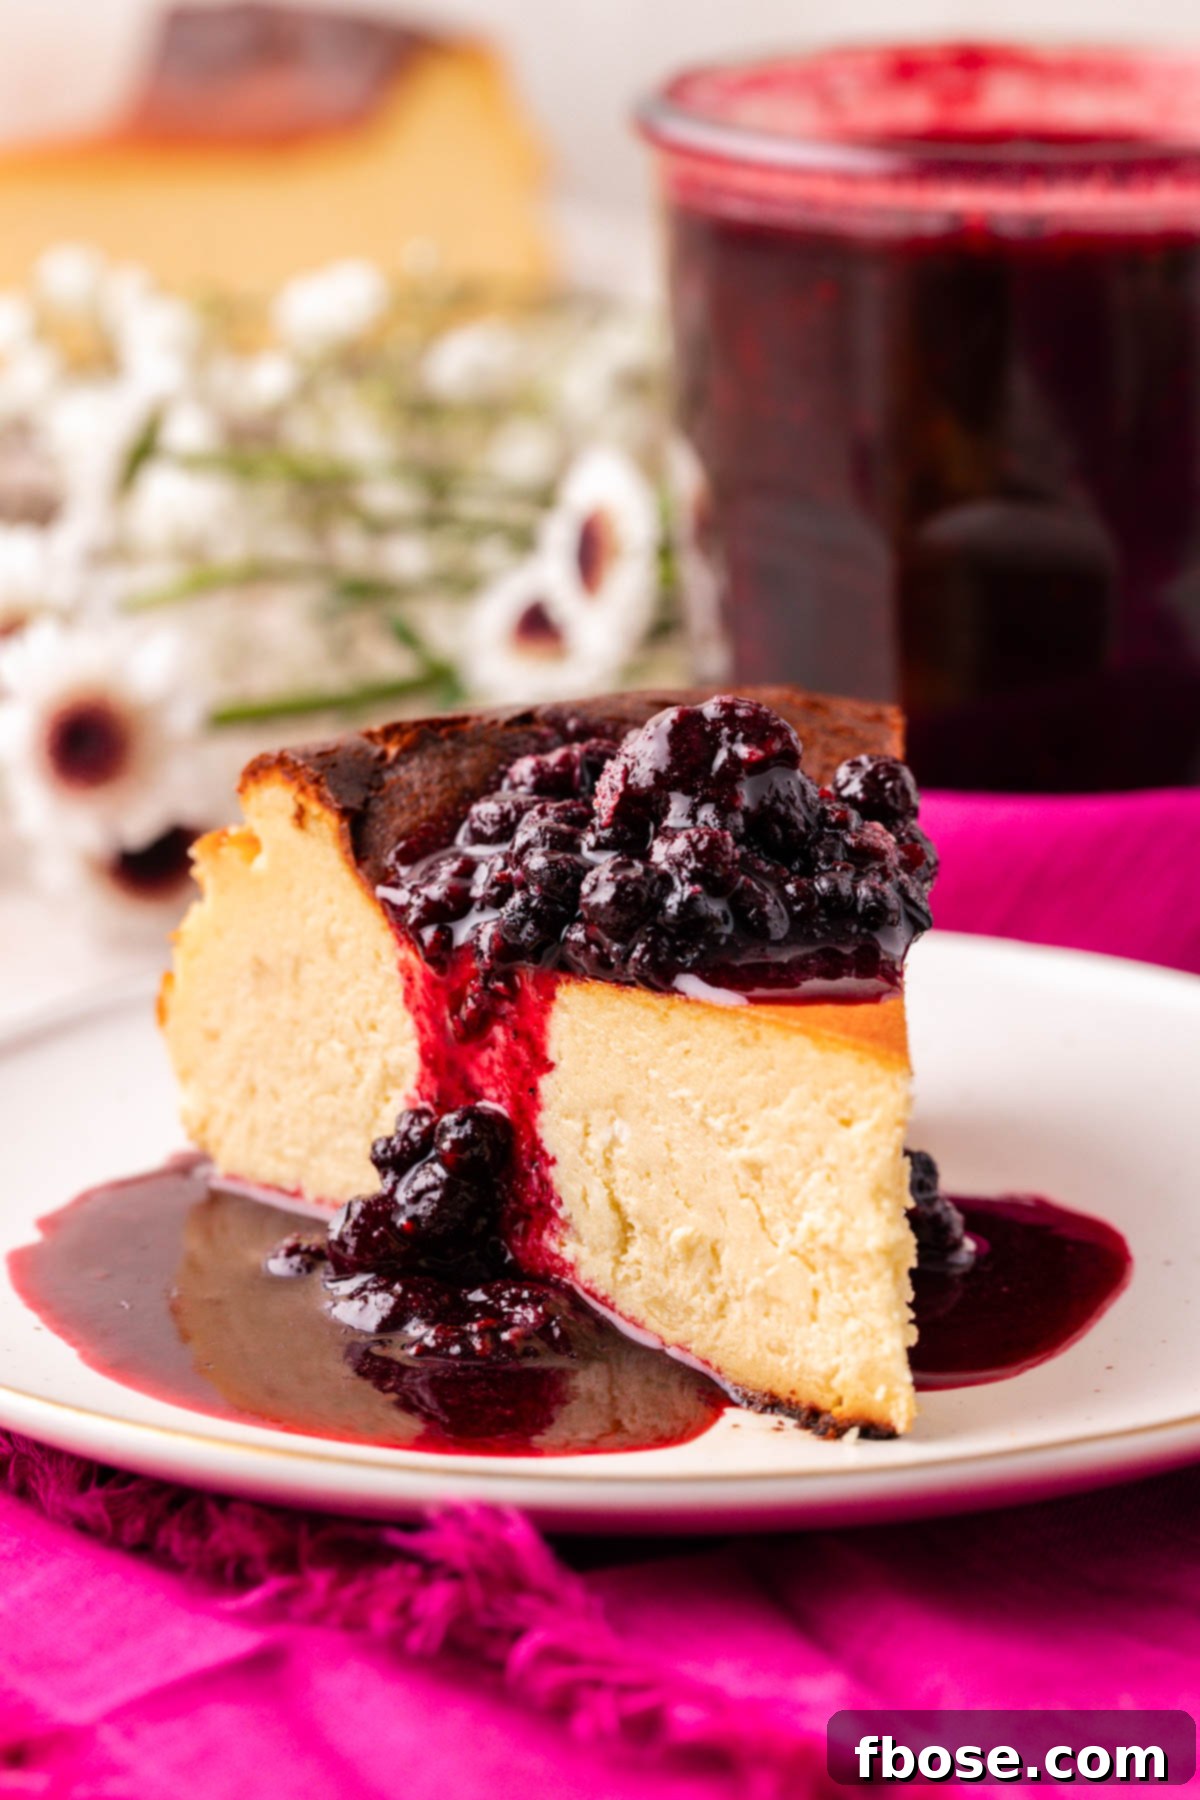
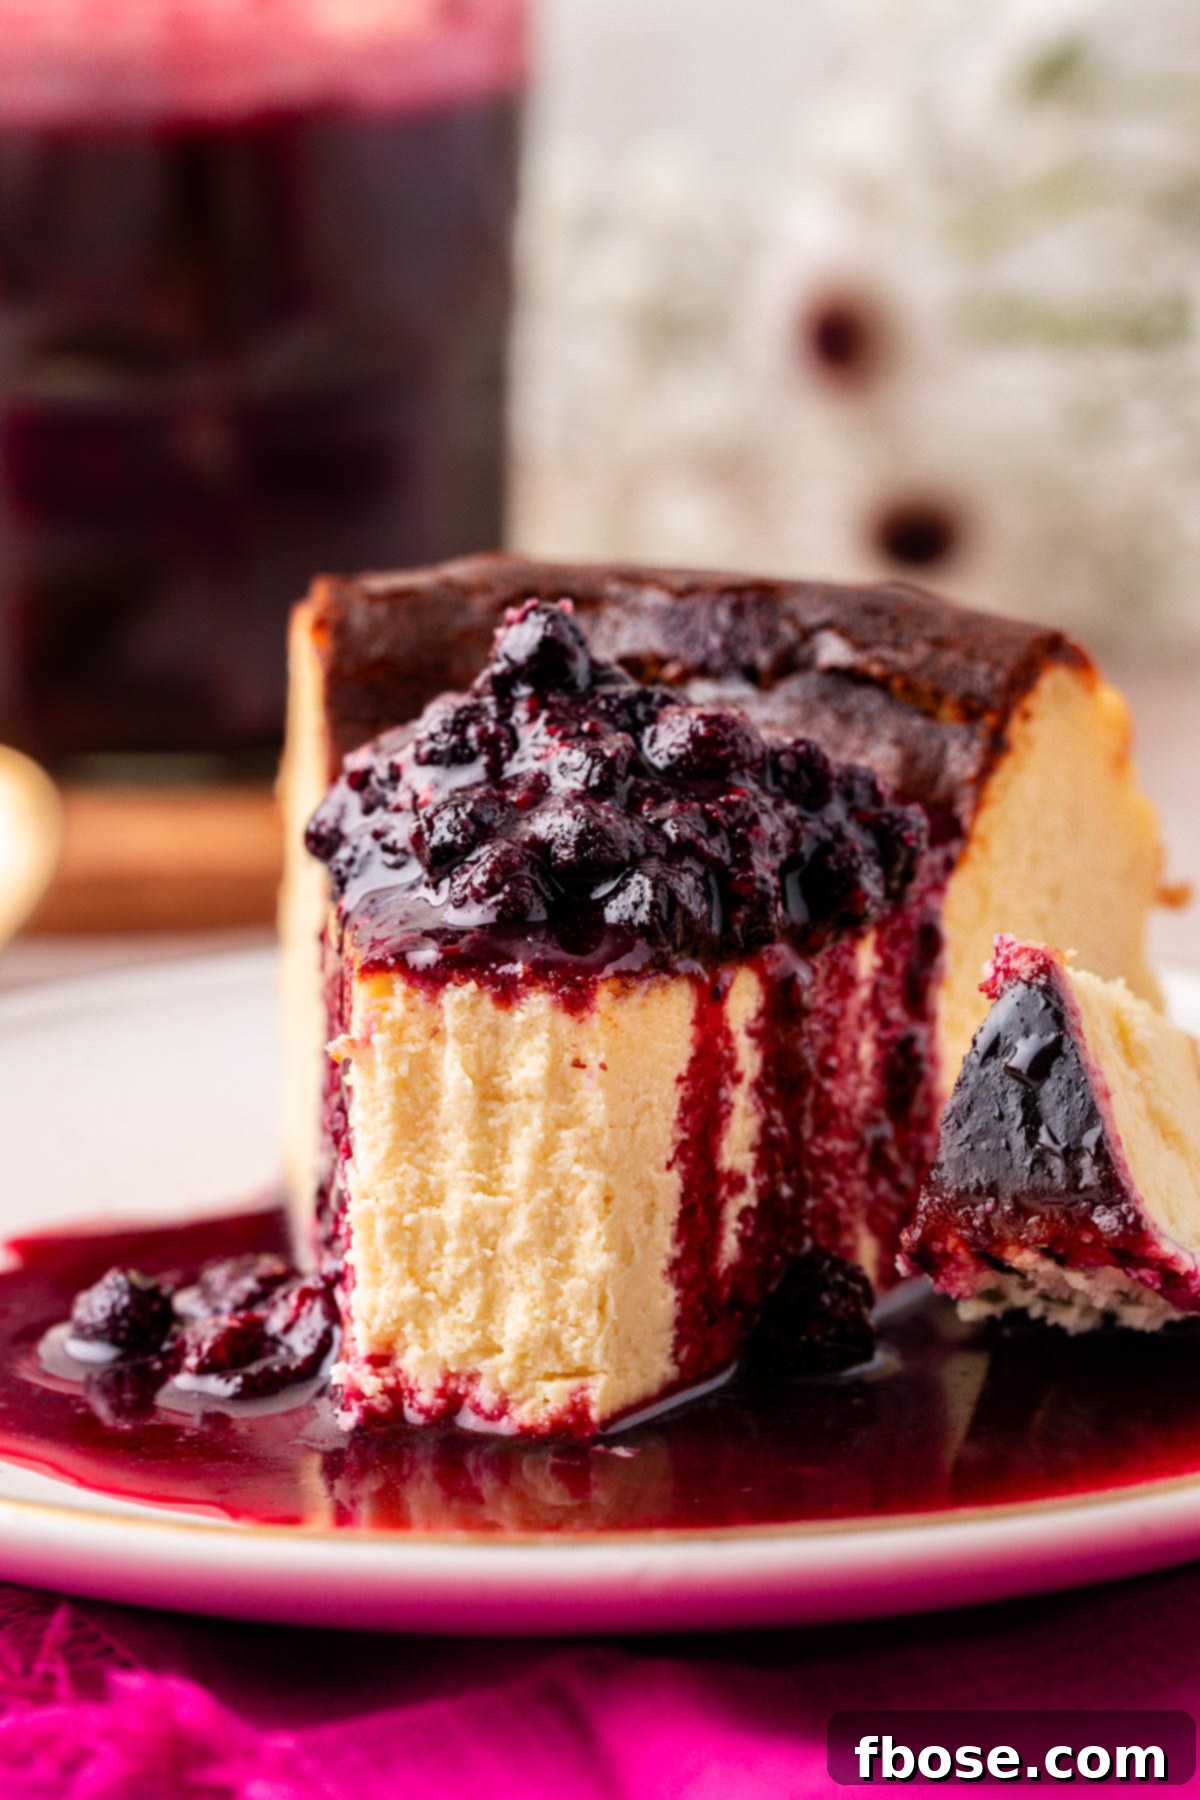
While Basque Cheesecake is traditionally served plain, allowing its unique flavor and texture to shine, don’t hesitate to elevate it with a variety of delicious toppings! We particularly love it with a vibrant Berry Compote (as beautifully captured in the photos), but the possibilities are endless. Here are some delectable topping ideas to inspire your next serving:
- Homemade Strawberry Sauce or Strawberry Puree: The sweet and slightly tart notes of strawberries perfectly complement the rich cheesecake.
- Fresh Fruit: A medley of fresh berries like strawberries, raspberries, or blackberries adds a burst of freshness and a beautiful pop of color.
- Rich Homemade Chocolate Syrup or Slow Cooker Dulce de Leche Caramel Sauce: For the ultimate indulgence, a drizzle of chocolate or a decadent, gooey caramel sauce is simply divine.
- A Dollop of Whipped Cream: A generous serving of light and airy Homemade Whipped Cream provides a beautiful textural contrast and a classic finish.
- Citrus Zest: A sprinkle of fresh orange or lemon zest can add a bright, aromatic lift to each bite.
- Nuts: Toasted slivered almonds or chopped pecans can provide a pleasant crunch and nutty flavor.
No matter how you choose to serve it, this Basque Cheesecake promises a truly memorable dessert experience, blending simplicity with sophisticated flavors.
Storage Instructions for Your Basque Cheesecake
Proper storage is key to enjoying your delicious Basque Cheesecake for as long as possible. Once fully cooled and chilled, the cheesecake should always be stored in the refrigerator. Transfer the leftover cheesecake to an airtight container to prevent it from absorbing other odors in the fridge and to maintain its freshness. Alternatively, you can carefully wrap the cheesecake on its serving dish with multiple layers of plastic wrap, ensuring it’s completely sealed. When stored correctly, you can enjoy your leftover Basque Cheesecake for up to one week, allowing you to savor its unique flavor over several days.
How to Freeze Basque Cheesecake for Future Enjoyment
One of the many appealing qualities of this Basque Cheesecake is how wonderfully it freezes, making it an excellent dessert to prepare well in advance for upcoming holidays, parties, or simply to have a ready-made treat for unexpected guests. Freezing is a fantastic way to extend its shelf life without compromising its delicious taste or texture.
To freeze your cheesecake, ensure it has completely cooled down to room temperature and has been thoroughly chilled in the refrigerator first. This prevents condensation from forming and helps the cheesecake maintain its structural integrity. Once chilled, meticulously wrap the entire cheesecake with several layers of plastic wrap, ensuring every surface is covered to protect against freezer burn. Follow this with a layer of heavy-duty aluminum foil for an extra barrier of protection. For added support and to prevent the cheesecake from getting crushed in the freezer, consider placing it on a cardboard cake round, typically used to support layered cakes.
Once securely wrapped and supported, transfer the cheesecake to your freezer. It will remain fresh and delicious for up to 3 months. When you’re ready to enjoy it, simply transfer the frozen cheesecake to the refrigerator and allow it to thaw slowly overnight. This gradual thawing process helps maintain its creamy texture. Once thawed, you can serve it chilled or let it come to room temperature for the best flavor experience.
More Irresistible Cheesecake Recipes To Explore!
If you’ve fallen in love with the magic of cheesecake, you’re in for a treat! Here are more of my favorite cheesecake recipes, each offering a unique twist on this beloved dessert:
- Triple Chocolate Cheesecake – A decadent dream for chocolate lovers! Experience a silky-smooth, incredibly creamy chocolate cheesecake, generously topped with a rich ganache and a scattering of delectable chocolate chips.
- Caramel Pear Cheesecake Bars – A delightful layered treat featuring a luscious homemade pear filling, nestled atop a buttery crust and crowned with a crisp, sweet oatmeal crumble. Perfect for a cozy autumn dessert!
- Gingerbread Cheesecake with Gingersnap Crust – Get into the holiday spirit with this spiced, creamy gingerbread filling, perfectly complemented by a crunchy gingersnap crust and a light, fluffy ginger whipped cream topping.
- No-Bake Peanut Butter Cheesecake – For a quick and easy indulgence, this cheesecake is packed with crunchy peanut butter flavor and requires absolutely no baking! It comes together in just about 20 minutes of prep time.
- Coffee Cheesecake – A sophisticated and rich cheesecake that’s the ultimate dessert for any coffee aficionado. Its deep coffee notes are perfectly balanced with creamy sweetness.
Did You Make This Recipe?
If you’ve tried this recipe, please leave a review in the comments below. I love hearing from you! Don’t forget to tag me – @sugarandsoulco – on Instagram and Pinterest with your photos, or join our Sugar & Soul Show-offs Community and share them there.
This recipe was originally published in August 2021 and was updated with new photos and recipe notes in November 2024.
Basque Cheesecake
Ingredients
- 32 ounces cream cheese 908g, room temperature and full-fat only
- 1½ cups granulated sugar 300g
- 5 large eggs room temperature
- 1½ cups heavy cream 360mL, room temperature, see notes
- 1 tablespoon vanilla extract
- 1 teaspoon salt
- ⅓ cup all-purpose flour sifted
Instructions
-
Preheat the oven to 425°F and line a 9 or 10-inch springform pan with a criss-crossed double layer of parchment paper. Wetting, scrunching, and drying the parchment paper will make it easier to work with. You want the parchment to stick up about 2 inches above the top of the pan. Set aside.
-
In a large bowl or stand mixer fitted with a whisk attachment, whip the 32 ounces cream cheese for 2 minutes.
-
Add 1½ cups granulated sugar on medium speed until smooth, about 2 minutes. Scrape down the sides as necessary and make sure no lumps remain.
-
Add 5 large eggs one at a time, mixing on low speed. Ensure only a little yellow remains from the previous egg before adding the next.
-
With the mixer on low speed, add in 1½ cups heavy cream, 1 tablespoon vanilla extract, and 1 teaspoon salt and mix until fully incorporated.
-
Sift the ⅓ cup all-purpose flour into the mixing bowl and mix in the flour for about 20 seconds.
-
Pour the cheesecake batter into the prepared pan.
-
Place the cheesecake on a rimmed baking sheet on the middle oven rack and bake for 50 to 65 minutes. The cheesecake will puff up when baking and then sink when it cools, this is normal. The cheesecake is done once the top has turned a nice golden brown, and the center is still pretty jiggly. It will continue to brown as it cools, and the center of the cheesecake will set up once chilled.
-
Transfer the cheesecake (in the pan) to a wire rack to cool to room temperature.
-
Transfer the cheesecake (in the pan) to the refrigerator to chill for at least 8 hours, preferably overnight. Remove the cheesecake from the refrigerator 1 to 2 hours before slicing and serving. Use the parchment edges to lift the cheesecake off of the pan base.
-
For super clean cheesecake slices, heat a large chef knife under hot water and slice the cheesecake.
-
Serve plain or topped with fruit compote or your favorite cheesecake topping.
Notes
- If you have farm fresh double cream available locally, use that in place of regular heavy cream in this recipe! It’s SO good!
- Do not remove the cheesecake from the pan until it has completely cooled.
- This cheesecake should be served at room temperature but stored in the refrigerator.
- Store in the refrigerator for up to 1 week.
- It’s extremely important that you pay attention to the mixing speeds and time in this recipe. You do not want to overwhip the eggs or cream as it will result in air bubbles or a more souffle-like texture. Slow and minimal mixing will help obtain the silky, creamy cheesecake texture.
- You can freeze this cheesecake for up to 3 months. Simply let it cool completely in the refrigerator, then wrap with plastic wrap and aluminum foil. If you have a cardboard cake round used to support layer cakes, this would also be great for supporting the cheesecake.
- This cheesecake recipe is extremely forgiving and is meant to have an imperfect and rustic look but is still impressive and perfect for a party.
- You can increase the sugar to 2 cups or reduce it to 1 1/4 cup depending on the sweetness level desired.
Nutrition
Did You Make This Recipe?
Don’t forget to share it with me on Instagram @sugarandsoulco and follow on Tiktok @sugarandsoulco and Pinterest @sugarandsoulco for more!
Pin Recipe
Share Recipe