
Irresistible Buckeye Brownie Cookies: Your Easiest Peanut Butter Chocolate Treat
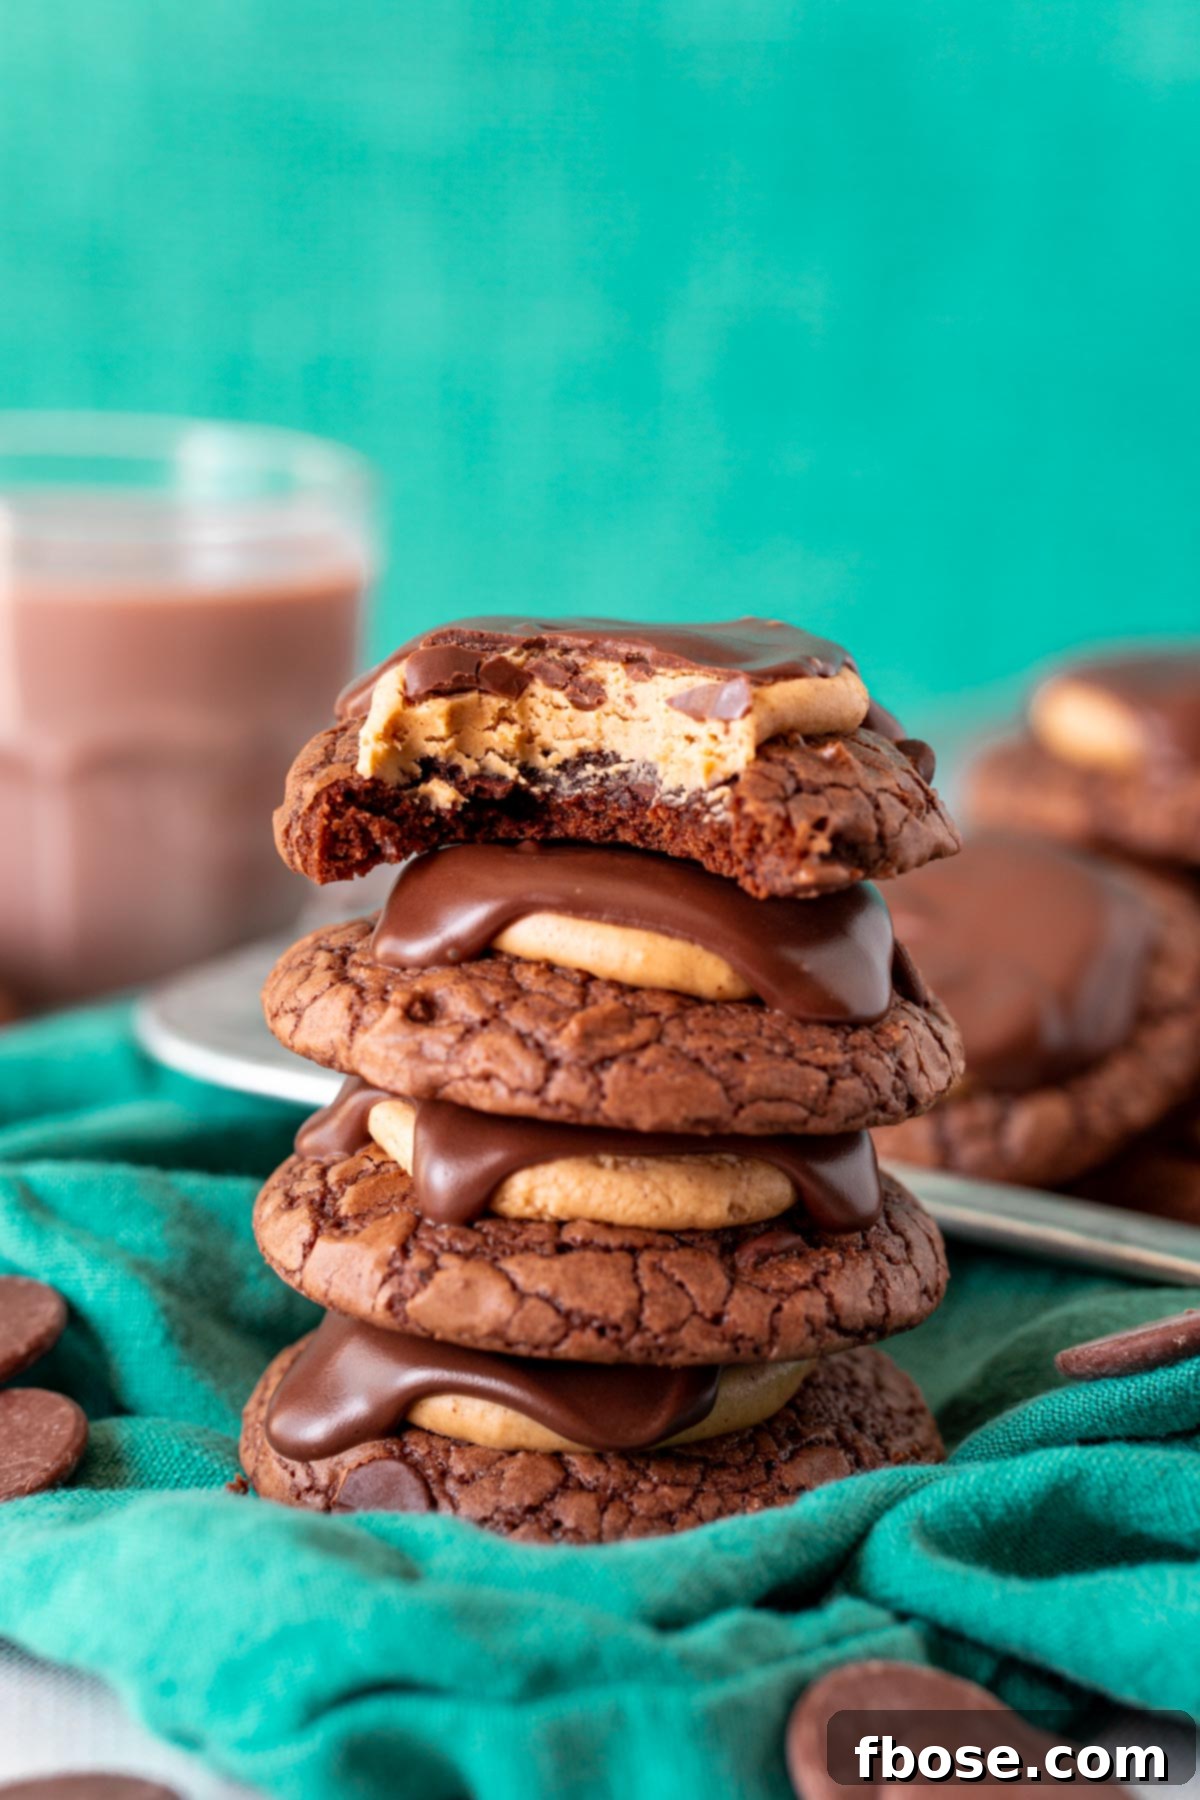
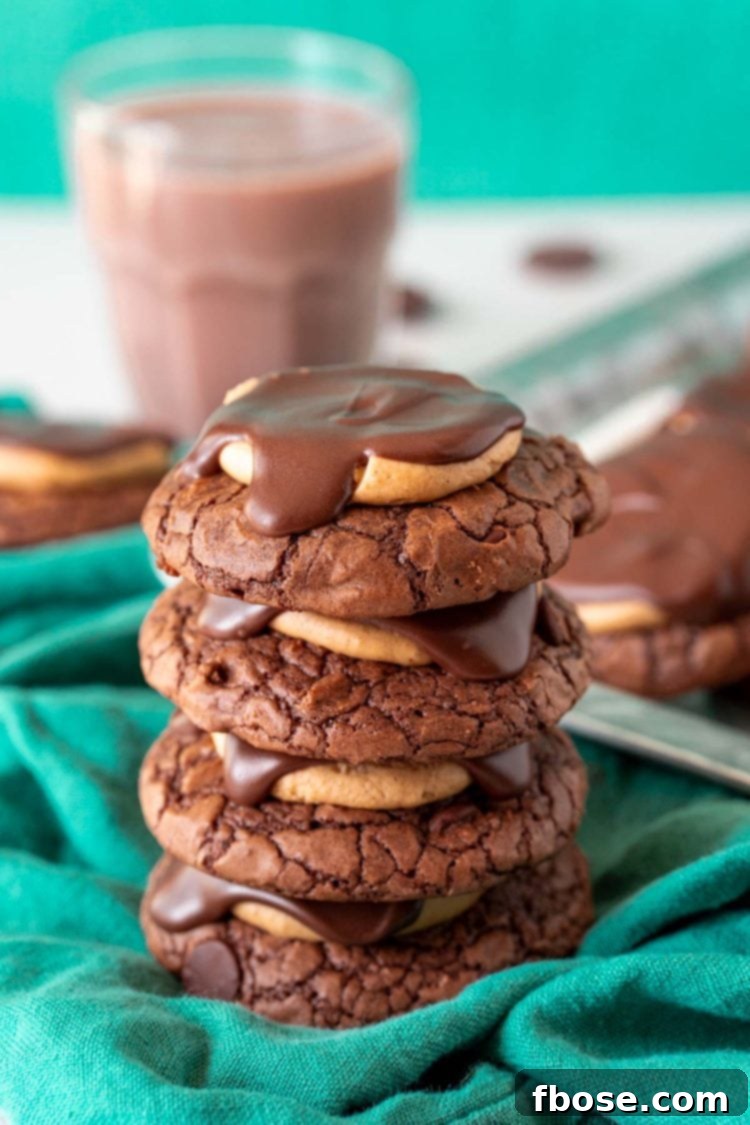
Buckeye Cookies are a delightful fusion of rich, fudgy brownie and creamy peanut butter, all enrobed in a luscious chocolate coating. This irresistible recipe transforms a simple boxed brownie mix into over two dozen decadent treats in under an hour, making them perfect for any occasion when you crave something special yet easy to prepare.
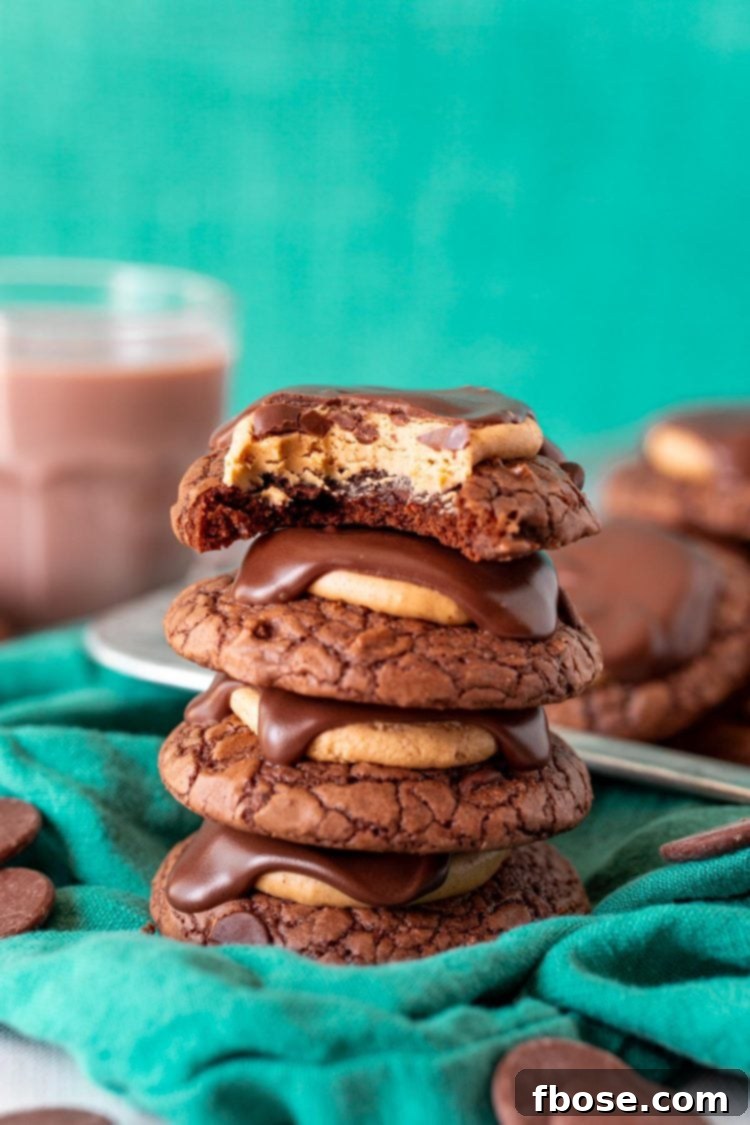
If you adore the classic combination of chocolate and peanut butter, then Buckeye Cookies are about to become your new favorite dessert. Inspired by the beloved Buckeye Candies, these cookies capture all the iconic flavors and textures in a convenient, handheld form. The tender, chewy brownie base offers a deep chocolate foundation, beautifully complemented by a velvety smooth peanut butter layer, crowned with a crisp, melt-in-your-mouth chocolate shell. These cookies don’t just taste amazing; they’re also a fantastic visual treat, with their signature chocolate and peanut butter layers peeking through, reminiscent of the Ohio Buckeye nut.
Why You’ll Love Making These Easy Buckeye Cookies
These aren’t just any cookies; they’re a symphony of flavors and textures designed for maximum indulgence with minimal effort. Here’s what makes these Buckeye Brownie Cookies truly exceptional and a must-try for any dessert enthusiast:
- Effortless Preparation: Say goodbye to complicated baking! Starting with a high-quality pre-packaged brownie mix drastically cuts down on prep time, making this recipe incredibly accessible even for novice bakers or those with busy schedules. It’s proof that homemade deliciousness doesn’t have to be laborious.
- Irresistible Flavor Profile: The classic pairing of rich chocolate and creamy peanut butter is a timeless crowd-pleaser. Each bite delivers a perfect balance of deep cocoa notes from the brownie and the sweet, slightly salty richness of peanut butter, creating a harmonious taste sensation that’s utterly addictive.
- Perfect Texture Combination: Prepare for a delightful textural journey. You’ll experience the best of all worlds – a perfectly fudgy, soft, and chewy brownie cookie base, followed by a smooth, melt-in-your-mouth peanut butter layer, all sealed with a satisfyingly snappy chocolate coating. This multi-layered texture is what makes Buckeye Cookies so uniquely satisfying.
- Remarkably Quick to Make: From mixing bowl to cooling rack, you can have a fresh batch of these delectable cookies ready to enjoy in less than an hour. This makes them an ideal solution for last-minute cravings, spontaneous gatherings, or when you simply want to whip up something special without spending hours in the kitchen.
- Generous Yield for Sharing: One easy recipe yields over two dozen cookies, making them perfect for sharing at parties, holiday gatherings, school events, office potlucks, or simply for stocking up your cookie jar for everyday treats. You’ll always have enough to go around (or keep for yourself!).
For another delightful twist on this classic dessert theme, be sure to try my Buckeye Brownies! They also start with a convenient boxed brownie mix and feature a luscious creamy peanut butter layer crowned with a rich chocolate ganache. They’re a fantastic alternative if you prefer a decadent brownie bar over a handheld cookie!
Ingredients You’ll Need for Buckeye Brownie Cookies
One of the best aspects of these Buckeye Brownie Cookies is that they rely on readily available ingredients, many of which you likely already have in your pantry. Here’s a detailed breakdown of what you’ll need to create this amazing treat:
For the Fudgy Brownie Cookie Base:
- Boxed Brownie Mix (18 oz.): This is the hero of our quick and easy recipe! An 18-ounce box provides the perfect foundation. While specific brands like Ghirardelli Double Chocolate or Duncan Hines are highly recommended for their consistent quality, rich chocolate flavor, and reliable results, feel free to experiment with your personal favorite brand. Just ensure it’s an 18-ounce box.
- All-Purpose Flour (½ cup): A small but mighty addition, all-purpose flour helps to “doctor up” the brownie mix, giving it the ideal cookie-like structure. It prevents the cookies from spreading too thinly and ensures they maintain that wonderfully thick, fudgy, and chewy texture we all crave.
- Large Eggs (2): Eggs act as a crucial binding agent, holding all the ingredients together. They also contribute significantly to the rich, moist, and tender crumb of the cookies, ensuring they’re never dry.
- Vegetable Oil (5 tablespoons): This essential fat provides incredible moisture to the cookie dough, playing a key role in creating that signature fudgy consistency that makes these cookies so irresistible.
- Water (1 tablespoon): Used sparingly, water helps to achieve the correct batter consistency. It ensures your cookie dough is neither too thick nor too runny, allowing for easy scooping and proper baking.
For the Creamy Peanut Butter Topping:
This is where the “Buckeye” magic truly happens, delivering that iconic peanut butter flavor and smooth texture.
- Creamy Peanut Butter (1 cup): The heart and soul of the topping! Opt for a smooth, creamy variety for the best, most uniform texture. While natural peanut butter (the kind that separates and requires stirring) can be used, it might result in a slightly grainier or oilier consistency in your topping. Ensure it’s at room temperature for easier mixing.
- Powdered Sugar (1 cup): Also known as confectioners’ sugar, this finely milled sugar blends seamlessly with the peanut butter, creating a silky-smooth, sweet, and perfectly pliable topping that holds its shape beautifully on top of the cookies.
- Vanilla Extract (½ teaspoon): A dash of pure vanilla extract is indispensable. It significantly enhances the overall flavor profile of the peanut butter topping, adding a warm, aromatic depth that elevates the entire cookie.
For the Decadent Chocolate Coating:
The final glorious layer that brings all the flavors together in a delightful snap.
- Chocolate Melting Wafers (8 ounces): These are specifically engineered for easy melting and provide a smooth, glossy finish that sets beautifully and quickly. You have the freedom to choose between milk chocolate wafers for a classic, sweeter profile or dark chocolate wafers for a more intense cocoa contrast against the sweet peanut butter.
- Optional for Chocolate Chips (1 teaspoon coconut oil): If you prefer to use regular chocolate chips instead of melting wafers, a teaspoon of coconut oil can be added to the chips while melting. This helps them achieve a smoother consistency for spreading and ensures the chocolate sets with a slightly softer bite, as chocolate chips tend to cool harder than melting wafers.
How To Make Buckeye Brownie Cookies: A Simple Guide
Making these impressive Buckeye Brownie Cookies is much simpler than you might imagine, promising a satisfyingly quick and rewarding baking experience. Follow these straightforward steps for a guaranteed delicious outcome:
- Prepare Your Baking Environment: Start by preheating your oven to 350°F (175°C). While the oven heats, line a large baking sheet with parchment paper. This crucial step not only ensures easy cleanup but also prevents your precious cookies from sticking, allowing for flawless removal.
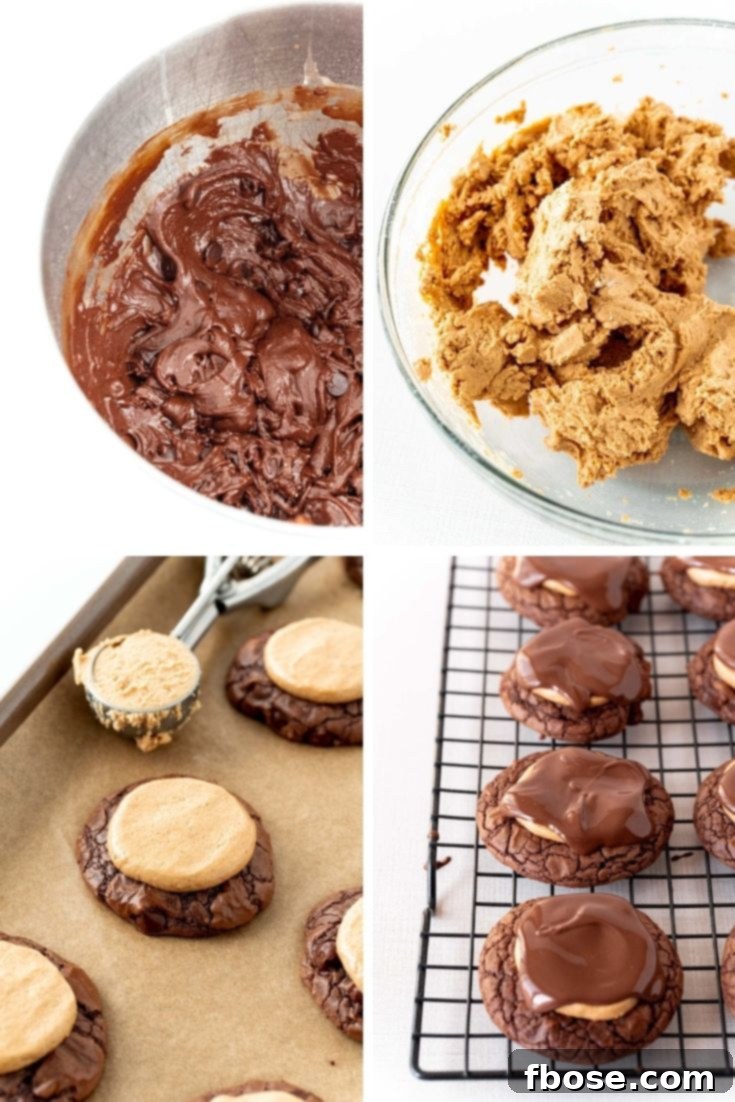
- Combine the Cookie Dough Ingredients: In a spacious mixing bowl or the bowl of a stand mixer equipped with a paddle attachment, add the entire contents of the boxed brownie mix, all-purpose flour, large eggs, vegetable oil, and water. Mix thoroughly on low speed, then increase to medium, until all ingredients are perfectly combined and no dry pockets of mix remain. Remember to pause and scrape down the sides of the bowl with a spatula as needed to ensure even incorporation. Expect the dough to be notably sticky; this is absolutely normal and contributes to the cookies’ fudgy texture.
- Scoop and Initiate Baking: Using a small cookie scoop, portion out the sticky cookie dough onto your prepared baking sheet. Ensure you leave approximately 2 inches of space between each dough ball, as they will spread slightly during baking. Carefully place the baking sheet into your preheated oven and bake for an initial 8 minutes.
- The Golden Rule: Avoid Overbaking: This is arguably the most critical step for achieving that coveted fudgy center! The cookies are ready when a thin, set film forms on top, and the glossy appearance of the raw batter has just disappeared, though you might still observe faint, darker ripples in the center. Even a single additional minute in the oven can transform your perfectly fudgy treats into dry, crumbly ones. Since every oven calibrates differently, it is highly recommended to bake a small test batch (2-3 cookies) first. This will help you pinpoint the precise baking time for your specific oven – typically around 8 minutes for a gas oven, and often 9 to 10 minutes for an electric oven.
- Prepare the Creamy Peanut Butter Topping: While your brownie cookies are in the oven, shift your focus to the glorious peanut butter topping. In a separate large mixing bowl, combine the creamy peanut butter, powdered sugar, and vanilla extract. Beat these ingredients together using an electric mixer until the mixture is completely smooth, lump-free, and well combined. The resulting mixture should be thick enough to easily form into small balls.
- Apply the Peanut Butter Layer: As soon as the baked cookies emerge from the oven, and while they are still warm, it’s time to add the peanut butter. Using a medium cookie scoop, portion out the prepared peanut butter mixture. Take approximately half a scoop for each cookie, gently roll it into a neat ball, and then slightly flatten it into a disc. Carefully press this flattened peanut butter disc onto the center of each warm brownie cookie. The residual warmth of the cookie base will help the peanut butter adhere perfectly.
- Allow to Cool Completely: With the peanut butter layer now in place, gently transfer the cookies to a wire rack. It is absolutely essential to allow them to cool completely to room temperature. This cooling period is crucial as it enables the peanut butter layer to set firmly, making the subsequent chocolate coating application much easier and cleaner.
- Melt the Chocolate Coating: Once your cookies are thoroughly cooled, it’s time for the final, decadent step – the chocolate coating. Place your chocolate melting wafers in a medium microwave-safe bowl. Heat them in short, controlled 30-second intervals, stirring vigorously after each interval, until the chocolate is entirely melted and beautifully smooth. As an alternative, a double boiler can be used for a more gentle and controlled melting process; remember to stir continuously until it reaches a silky consistency.
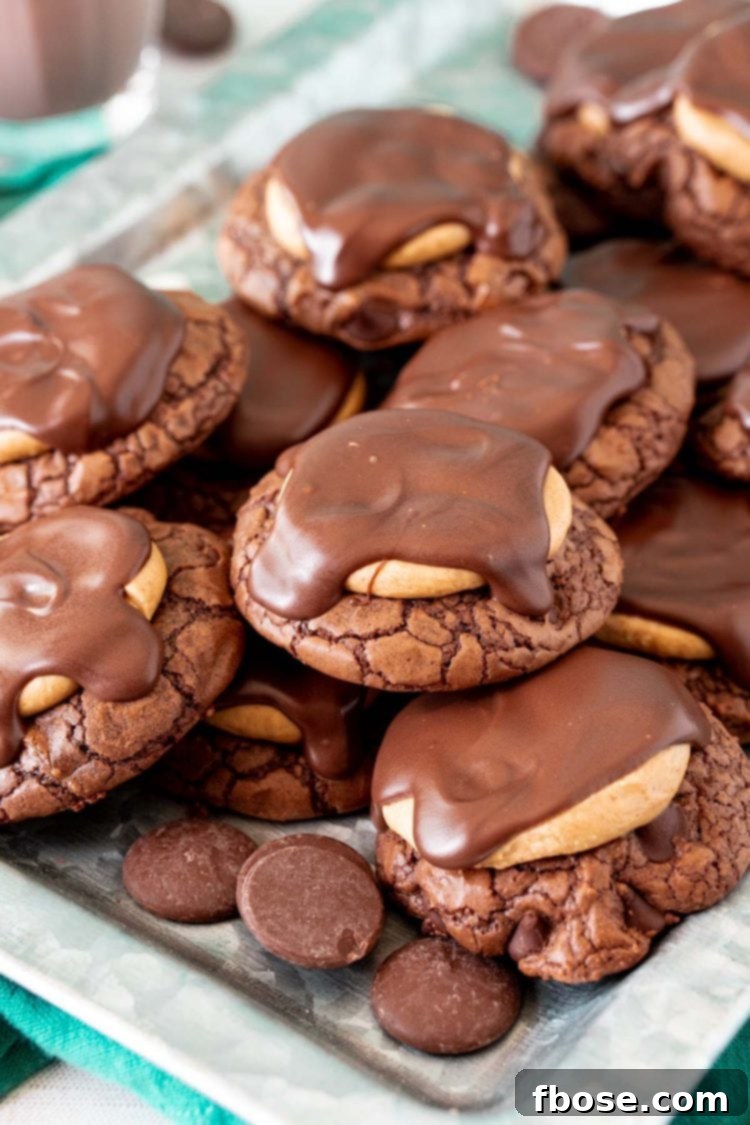
- Finish with a Chocolate Drizzle: Using a small spoon or an offset spatula, carefully spread the perfectly melted chocolate evenly over the tops of each peanut butter layer. Aim to create a smooth, glossy finish that generously covers the peanut butter but leaves a small, distinct edge of the fudgy brownie cookie exposed. This signature appearance beautifully mimics the traditional Buckeye nut.
- Set and Serve: Allow the chocolate-covered cookies to sit undisturbed at room temperature, or for quicker setting, place them in the refrigerator for a brief period, until the chocolate coating is completely firm and set. Once the chocolate has hardened to a satisfying snap, your irresistible Buckeye Brownie Cookies are ready to be savored!
Expert Tips for Achieving Buckeye Cookie Perfection
While making these Buckeye Brownie Cookies is wonderfully straightforward, a few expert tips can elevate your baking experience and ensure every cookie turns out absolutely perfect:
- Select the Right Brownie Mix: The foundation of these cookies is a good quality boxed brownie mix. For the most consistent and deliciously fudgy results, stick to an 18-ounce box from reputable brands like Ghirardelli Double Chocolate or Duncan Hines. If you opt for a different brand or a different size, be aware that the liquid ratios and overall texture might vary, potentially affecting the cookie’s spread and chewiness. Some bakers have experimented with adding a teaspoon of baking soda to certain lighter brownie mixes (like Betty Crocker) to enhance the rise, but this specific modification has not been personally tested or verified in this recipe.
- Don’t Overmix the Dough: When combining your cookie ingredients, mix just until everything is incorporated and no dry streaks remain. Overmixing can overdevelop the gluten in the flour, which can lead to a tougher, less tender cookie. A gently mixed dough results in a beautifully fudgy and soft texture.
- Master the Baking Time: The Key to Fudginess! This is perhaps the most crucial tip. Overbaking is the quickest way to ruin the perfect fudgy texture of these brownie cookies. Keep a vigilant eye on them. They should be removed from the oven when a thin, set film has formed on top, and the glossy look of raw batter has just disappeared, even if the center still seems very soft. To account for oven variations, conducting a small “test batch” of 2-3 cookies before baking the entire tray is highly recommended. This allows you to fine-tune the baking duration for your specific oven. Typically, a gas oven may reach perfection in about 8 minutes, while an electric oven might require 9 to 10 minutes. Trust your visual cues more than just the timer alone!
- Ensure Room Temperature Peanut Butter: For a flawlessly smooth and easy-to-work-with peanut butter topping, ensure your creamy peanut butter is at room temperature. Cold peanut butter will be stiff and challenging to beat evenly with the powdered sugar, potentially leading to lumps.
- Precision in Chocolate Melting: Whether you choose milk or dark chocolate melting wafers, proper melting technique is vital for a smooth, glossy coating. When using a microwave, heat in short bursts of 30 seconds, stirring thoroughly after each interval, to prevent scorching and ensure a uniform consistency. If you prefer using regular chocolate chips, adding a teaspoon of coconut oil during melting will help them become more fluid and spreadable, and they will set with a slightly softer, more enjoyable bite, as chocolate chips naturally harden more than melting wafers. A double boiler offers excellent, gentle heat control for an equally smooth melt.
- Uniformity with a Cookie Scoop: A medium cookie scoop is your secret weapon for achieving uniformly sized cookies. Consistent size is important not only for presentation but also for ensuring even baking across the entire batch. This size will typically yield approximately two dozen cookies, perfect for sharing.
- Patience During Cooling: It’s tempting to rush, but allowing the cookies with their peanut butter topping to cool completely on a wire rack before applying the chocolate is non-negotiable. If the cookies are still warm, the melted chocolate will simply melt the peanut butter layer, leading to a messy rather than a beautifully layered result. A fully cooled cookie ensures the chocolate sets quickly and neatly.
Storage & Freezing for Lasting Enjoyment
To ensure your delightful Buckeye Brownie Cookies remain fresh and delicious for as long as possible, follow these simple storage and freezing guidelines:
- Room Temperature Storage: Once the chocolate coating has fully set, place the cookies in an airtight container. For optimal freshness and to prevent them from sticking together, lay a sheet of parchment paper or wax paper between each layer of cookies. Stored this way, they will maintain their quality and flavor for up to 4 days at room temperature.
- Freezing for Extended Freshness: These cookies are excellent candidates for freezing, allowing you to enjoy them weeks or even months later. To freeze, arrange the cooled, chocolate-set cookies in a single layer on a baking sheet and place them in the freezer until they are completely firm (this prevents them from sticking together). Once frozen solid, transfer the cookies to an airtight, freezer-safe container or a heavy-duty freezer bag. Again, placing parchment paper between layers is a good practice. They can be safely frozen for up to 2 months. When you’re ready to enjoy them, simply remove them from the freezer and let them thaw at room temperature.
Discover More Easy Boxed Brownie Recipes
The humble boxed brownie mix is a true culinary chameleon, offering incredible versatility and convenience for a myriad of desserts! If you’ve enjoyed the simplicity and deliciousness of these Buckeye Brownie Cookies, you’re in for a treat with these other quick and easy recipes. Each one is crafted by “doctoring up” a standard boxed brownie mix, ensuring maximum flavor with minimal effort:
- Edible Brownie Batter: Indulge your raw dough cravings safely with this incredibly simple recipe made with just three ingredients. Perfect for a quick, no-bake chocolate fix!
- Classic Brownie Cookies: If you love the fudgy texture of brownies in cookie form, these are for you! This recipe delivers three dozen rich, chewy cookies in a mere 15 minutes, making them the ultimate speedy chocolate dessert.
- Mud Pie Brownies: Dive into a truly decadent experience with these rich chocolate brownies, generously topped with fluffy, toasted marshmallow fluff. It’s a showstopper dessert that tastes far more complex than it is to make.
- Easy Brownie Pizza: A fun and highly customizable dessert! Imagine a luscious, fudgy brownie “crust” lavishly topped with creamy cream cheese whipped cream and an array of your favorite sweet toppings like fresh berries, candy pieces, or chocolate drizzles.
- 5-Ingredient Brownie Batter Dip: This wonderfully creamy and luscious dessert dip is incredibly easy to make and perfect for sharing. Serve it with dippers like salty pretzels, fresh fruit slices, or vanilla wafers for an irresistible party treat.
Frequently Asked Questions About Buckeye Brownie Cookies
Here are answers to some common questions that arise when making these delicious Buckeye Brownie Cookies, ensuring your baking journey is smooth and successful:
- Can I use silicone baking mats instead of parchment paper? Absolutely! Silicone baking mats are an excellent, reusable alternative to parchment paper. They provide a superior non-stick surface, which is particularly helpful with sticky doughs like our brownie cookie base, and they also make for incredibly easy cleanup.
- What’s the best brownie mix to use for this Buckeye Cookie recipe? For consistent and reliably delicious results, we highly recommend using an 18-ounce box of either Ghirardelli Double Chocolate Brownie Mix or Duncan Hines brownie mix. These brands are known for their rich flavor and consistent texture. While you are welcome to experiment with other brands and sizes, please be aware that doing so could potentially alter the outcome of the cookies in terms of texture, spread, and baking time. Some adventurous bakers have tried using a Betty Crocker brownie mix and adding 1 teaspoon of baking soda to it, but this specific modification has not been personally tested or validated in our kitchen.
- Can I use chocolate chips instead of chocolate melting wafers for the topping? Yes, you can certainly use chocolate chips! To melt them, simply place the chocolate chips in a microwave-safe bowl and heat them in 30-second intervals, stirring frequently and thoroughly after each burst, until they are completely melted and smooth. For a slightly softer bite and easier spreading, especially since chocolate chips tend to cool and harden more than melting wafers, we suggest adding about a teaspoon of coconut oil to your melted chocolate chips. This will give you a smoother consistency and a more pleasant texture when biting into the finished cookie.
- How can I prevent these Buckeye Cookies from overbaking? Preventing overbaking is paramount to maintaining the fudgy integrity of these cookies. The baking time for brownie cookies can be quite sensitive, with even a single additional minute in the oven potentially leading to a drier, less desirable texture. To avoid this, we strongly advise baking a small test batch (2-3 cookies) first. This allows you to observe how your specific oven performs and find the “sweet spot” for perfect fudginess. Look for a thin, set film on the top of the cookies, but ensure the center still appears soft and not entirely firm. Generally, a gas oven might require around 8 minutes, whereas an electric oven will likely need 9 to 10 minutes of baking time.
- What size scoop should I use when portioning out the cookie dough? For consistent cookie sizes, which ensures even baking and a beautiful presentation, a medium cookie scoop works best. Using this size will allow you to achieve approximately two dozen uniformly shaped Buckeye Brownie Cookies.
- Can I use a double boiler to melt the chocolate melting wafers? Yes, using a double boiler is a perfectly fine and often preferred method for melting chocolate melting wafers. It provides a gentle, indirect heat that significantly reduces the risk of scorching the chocolate, leading to a beautifully smooth and glossy consistency. Just be sure to stir the chocolate continuously until it is fully melted and velvety. While a double boiler offers excellent control, remember that melting wafers are also conveniently designed to melt easily and effectively in the microwave for a quicker option.
- How do I store these Buckeye Cookies properly? To store your finished Buckeye Brownie Cookies, place them in an airtight container. For best results and to prevent the chocolate coating from sticking to other cookies, place a layer of parchment paper or wax paper between each cookie layer. They will stay fresh and delicious at room temperature for up to 4 days. If you wish to store them for a longer period, these cookies freeze exceptionally well! After the chocolate has fully set, place them in a single layer on a baking sheet and freeze until solid. Then transfer them to an airtight, freezer-safe container or heavy-duty freezer bag (again, with parchment between layers). They can be frozen for up to 2 months. Thaw at room temperature before enjoying.
Buckeye Brownie Cookies Recipe
Discover how to create these incredible Buckeye Brownie Cookies with a convenient boxed mix. This recipe offers a rich brownie base, creamy peanut butter center, and smooth chocolate coating, perfect for any dessert lover!
Author: Rebecca Hubbell
Course: Dessert
Cuisine: American
Prep Time: 15 minutes
Cook Time: 10 minutes
Total Time: 25 minutes
Servings: 28 cookies
Rating: 5 from 6 votes
Ingredients
Cookies
- 1 (18 oz.) box Ghirardelli Double Chocolate Brownie Mix
- ½ cup all-purpose flour
- 2 large eggs
- 5 tablespoons vegetable oil
- 1 tablespoon water
Peanut Butter Topping
- 1 cup creamy peanut butter
- 1 cup powdered sugar
- ½ teaspoon vanilla extract
Chocolate Topping
- 8 ounces chocolate melting wafers (milk or dark)
Instructions
- Preheat oven to 350°F (175°C) and line a large baking sheet with parchment paper.
- In a large bowl or stand mixer fitted with a paddle attachment, combine all of the cookie ingredients (brownie mix, flour, eggs, vegetable oil, water) and mix well, scraping down the sides as needed. The dough will be very sticky.
- Using a small cookie scoop, scoop out the dough and drop onto the prepared baking sheet about 2 inches apart. (If you use a medium cookie scoop, add 1 to 2 minutes to the bake time.)
- Bake for 8 minutes to start. Cookies should have a thin film on top and the batter should no longer be glossy, though you should still be able to see small ripples of darker batter. DO NOT OVERBAKE THESE COOKIES. They will cook up fast and can dry out easily if cooked too long. Every oven is different, so do a few in a test batch to see how long they need.
- While the cookies are baking, beat together the peanut butter, powdered sugar, and vanilla in a large mixing bowl until smooth and combined.
- Once the cookies come out of the oven (while they are still warm), use a medium cookie scoop to portion out the peanut butter mixture. Divide each scoopful in half and roll into a ball, then gently flatten and press into the top of the hot cookies.
- Carefully transfer cookies to a cooling rack.
- Melt the chocolate melting wafers in a medium bowl in 30-second intervals in the microwave until fully melted and smooth.
- Spread the melted chocolate over the tops of each peanut butter-covered cookie and then allow it to set completely before enjoying.
Notes
- For an easier cleanup, parchment paper is recommended, but silicone mats are also a great option!
- Recommended brownie mixes are 18-ounce boxes of Ghirardelli or Duncan Hines. Using other mixes or sizes might alter results. Some readers have tried using a Betty Crocker brownie mix and adding 1 teaspoon of baking soda to it, though this has not been personally tested.
- Chocolate chips can be used instead of melting wafers; just place them in a microwave-safe bowl and then pop them in the microwave. Be sure to stir them frequently. You may want to add a teaspoon of coconut oil to make them a little softer to bite into as chocolate chips will cool harder than melting wafers.
- To prevent overbaking these Buckeye Cookies, test a couple of cookies first instead of a whole pan. This way you can find the sweet spot for the amount of time your oven needs to bake them to perfection. All ovens perform differently; a gas oven may need 8 minutes, while an electric oven will likely need 9 to 10 minutes of baking time.
- A medium cookie scoop works best when portioning out the dough to get about two dozen cookies.
- A double boiler is fine to melt the chocolate melting wafers; just be sure to stir it continually so that it becomes nice and smooth. However, melting wafers are designed to be microwaved for ease!
- Store these Buckeye Cookies in an airtight container with parchment paper between each layer of cookies. You can store them at room temperature for up to 4 days, or freeze the cookies for up to 2 months.
Nutrition Information
Calories: 126kcal | Carbohydrates: 13g | Protein: 3g | Fat: 8g | Saturated Fat: 3g | Polyunsaturated Fat: 1g | Monounsaturated Fat: 3g | Trans Fat: 1g | Cholesterol: 12mg | Sodium: 46mg | Potassium: 82mg | Fiber: 1g | Sugar: 9g | Vitamin A: 18IU | Vitamin C: 1mg | Calcium: 9mg | Iron: 1mg
Connect With Us!
If you’ve tried this recipe, please let me know how you liked it in the comments below and leave a review. I love hearing from you!
Don’t forget to tag me – @sugarandsoulco – on Instagram and Pinterest with your photos or join our Sugar & Soul Show-offs Community and share them there, where you can join our recipe challenges!
Did You Make This Recipe?
Don’t forget to share it with me on Instagram @sugarandsoulco and follow on Tiktok @sugarandsoulco and Pinterest @sugarandsoulco for more!
Rate this Recipe
Pin Recipe
Share Recipe