
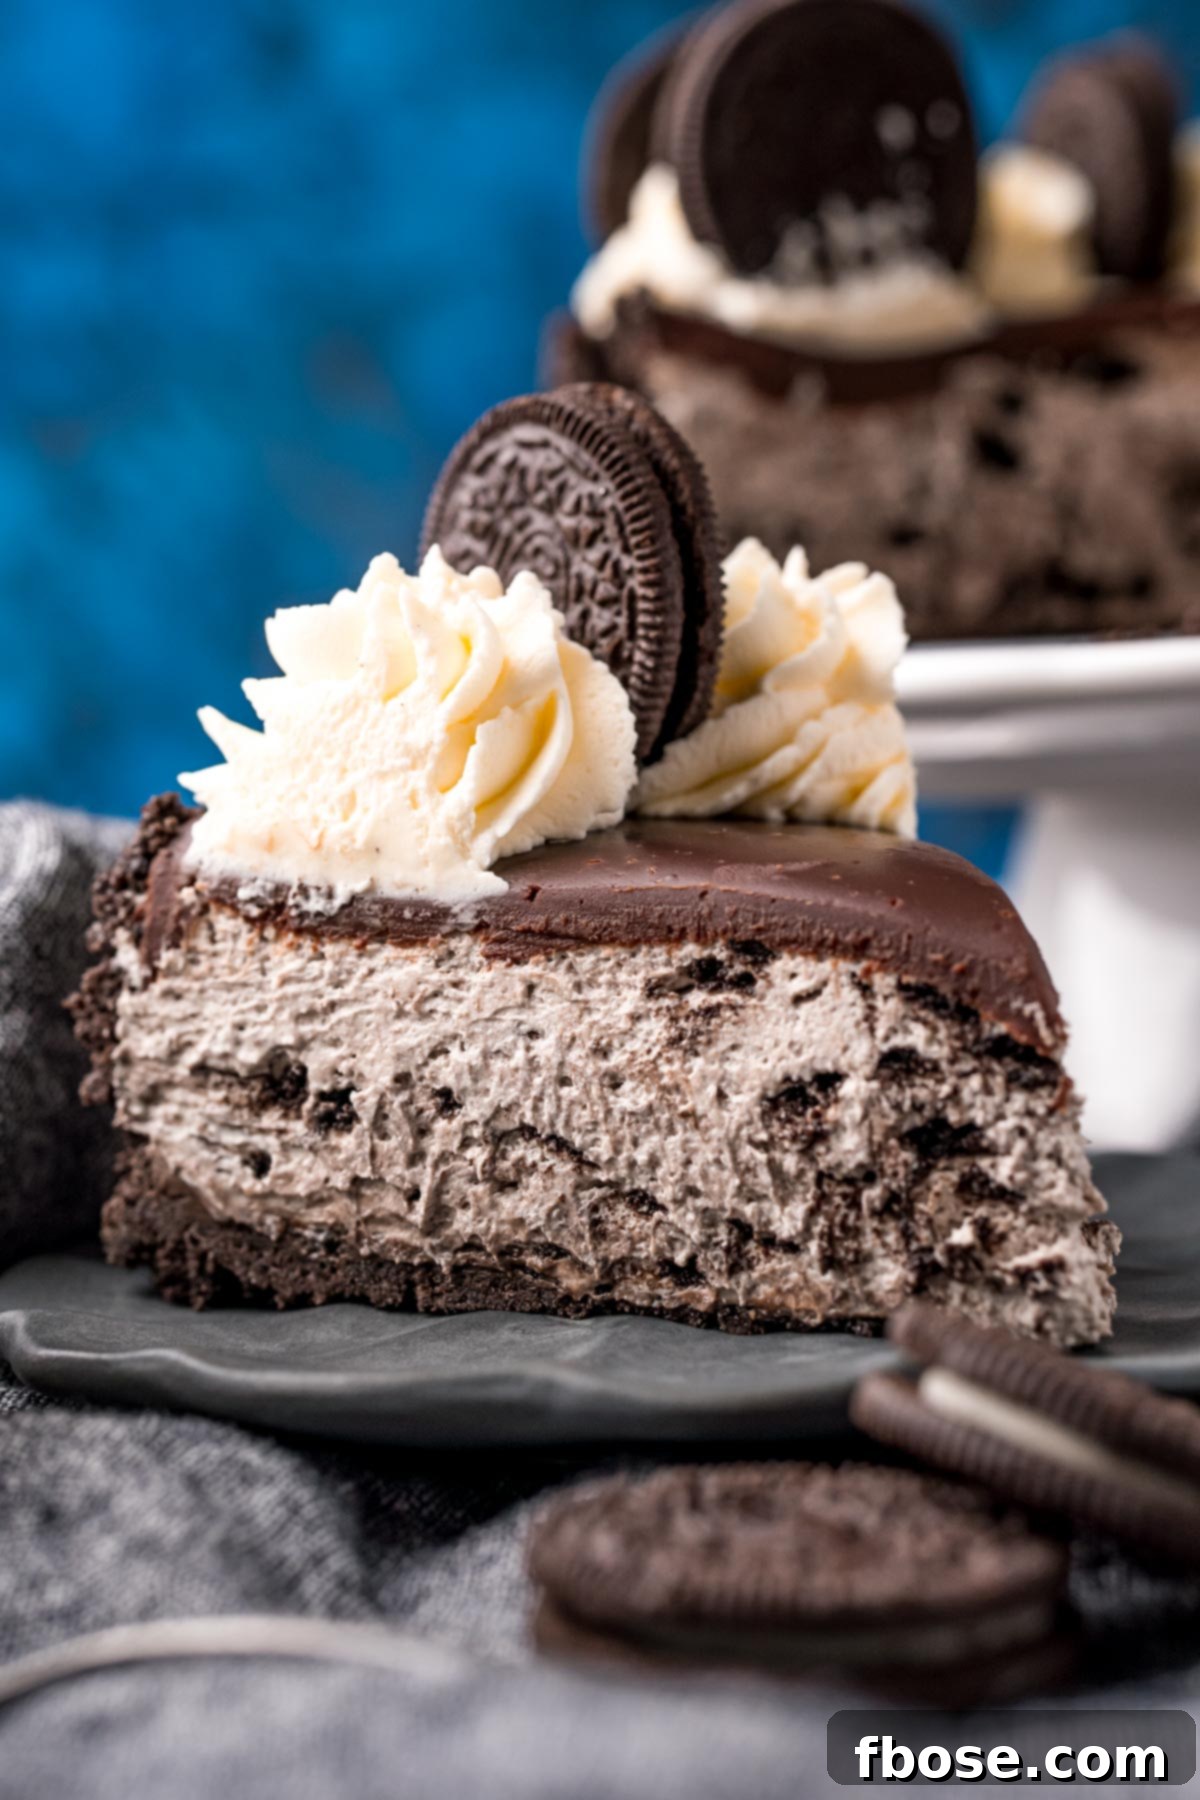
Welcome to the ultimate guide for creating the most decadent and effortlessly delicious **No-Bake Oreo Cheesecake**. This sensational dessert features a rich, buttery Oreo cookie crust, a luxuriously creamy cheesecake filling generously loaded with crushed Oreos, and a silky smooth chocolate ganache topping. Get ready to impress with this easy no-bake recipe that requires just 30 minutes of active preparation time!
Oreos are more than just cookies; they are a culinary phenomenon. While perfect on their own or dunked into a glass of ice-cold milk, incorporating them into a dessert elevates them to an entirely new level of indulgence. If you’re an Oreo enthusiast constantly seeking new ways to enjoy these iconic cookies, you’ve come to the right place. Beyond this cheesecake, explore other delightful Oreo recipes like my Easy Oreo Poke Cake or these irresistible Marshmallow Oreo Treats.
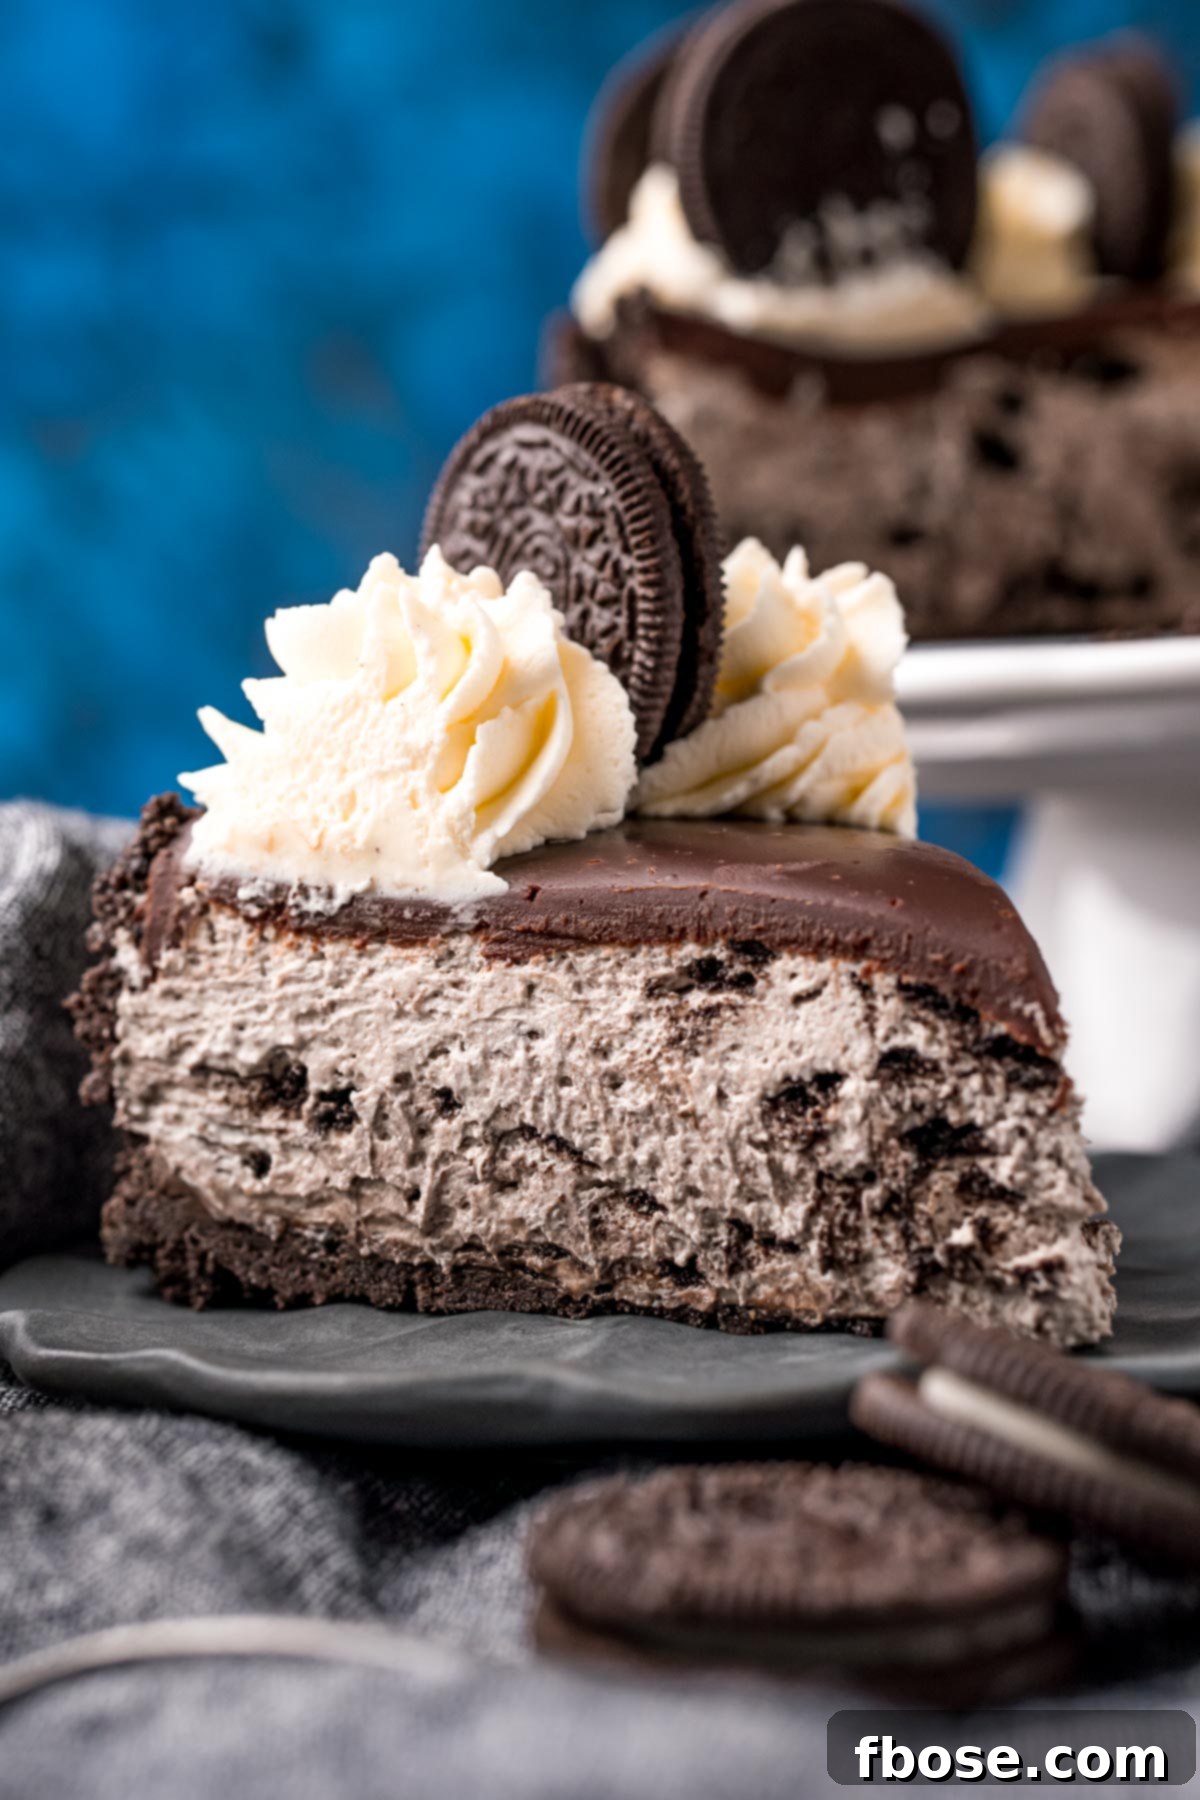
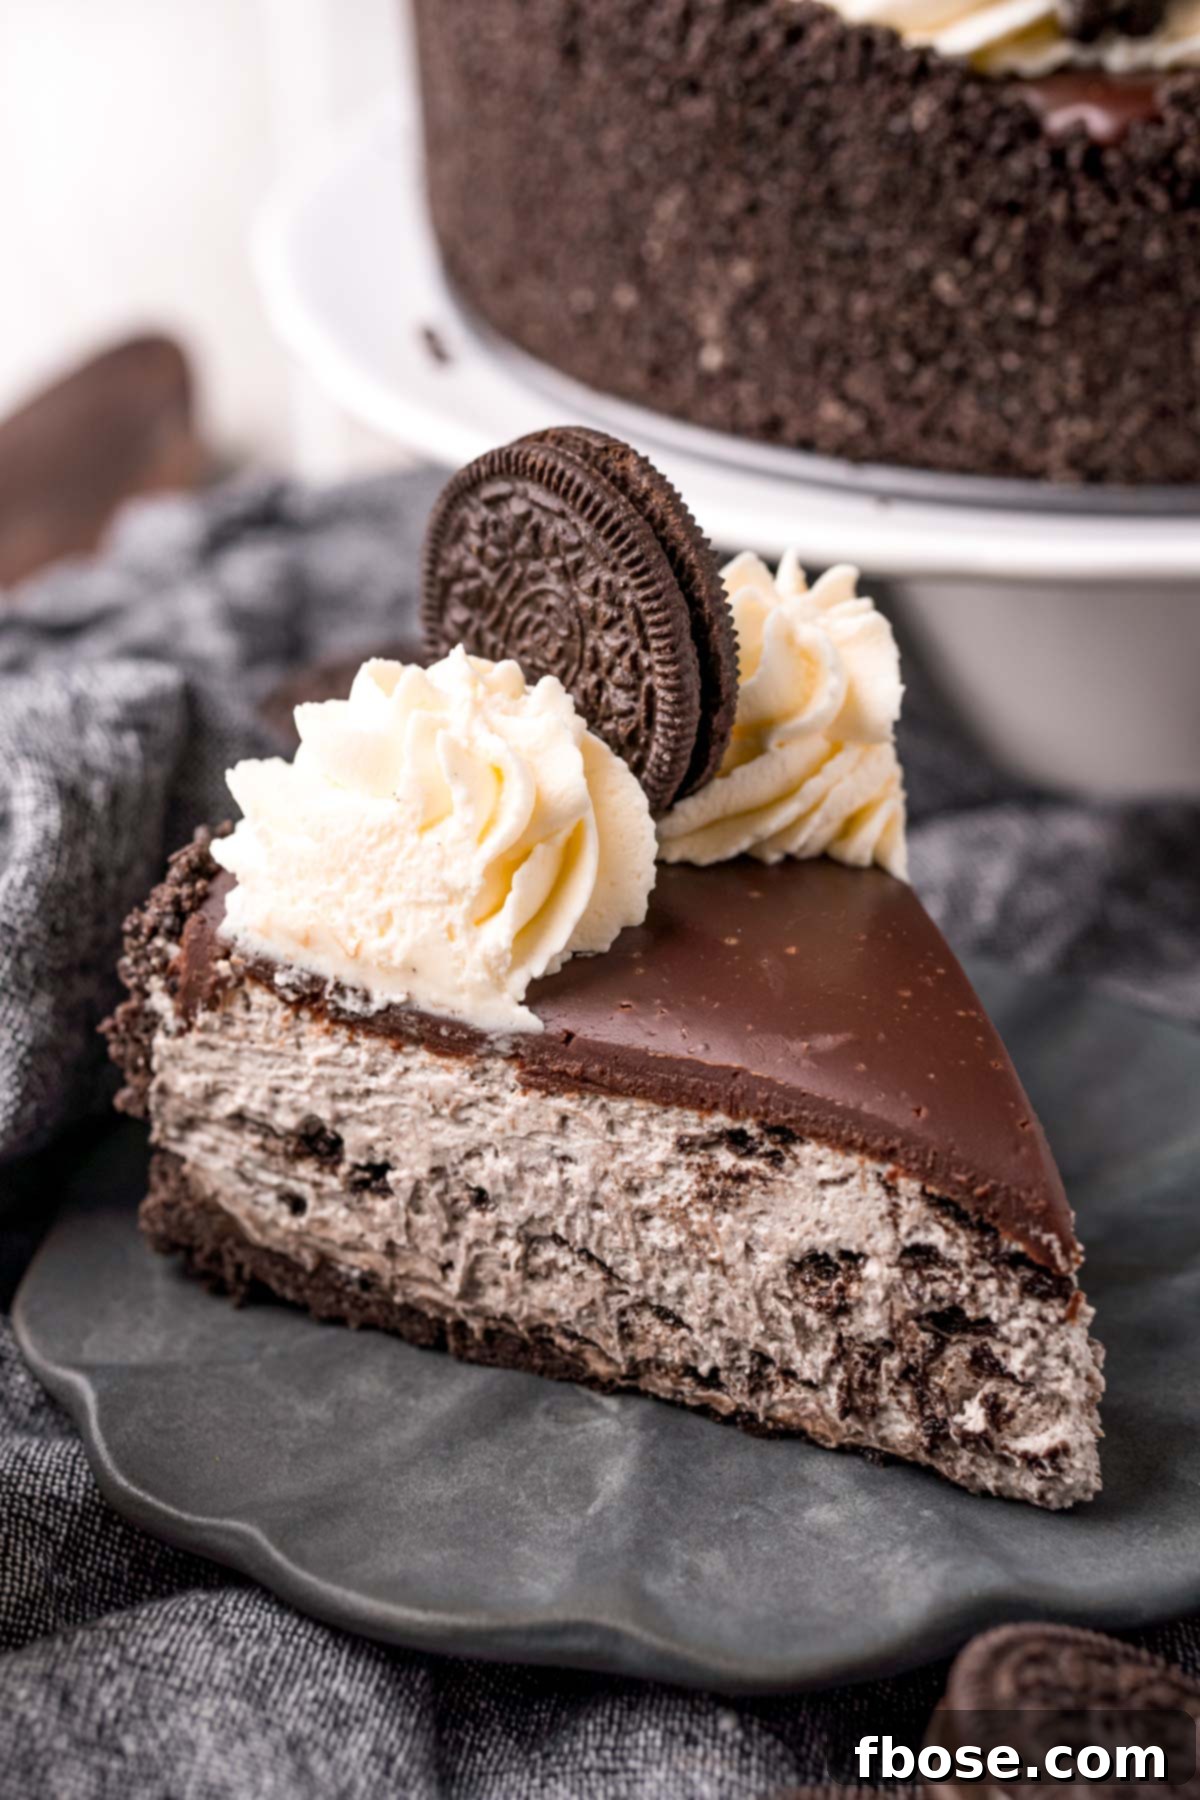
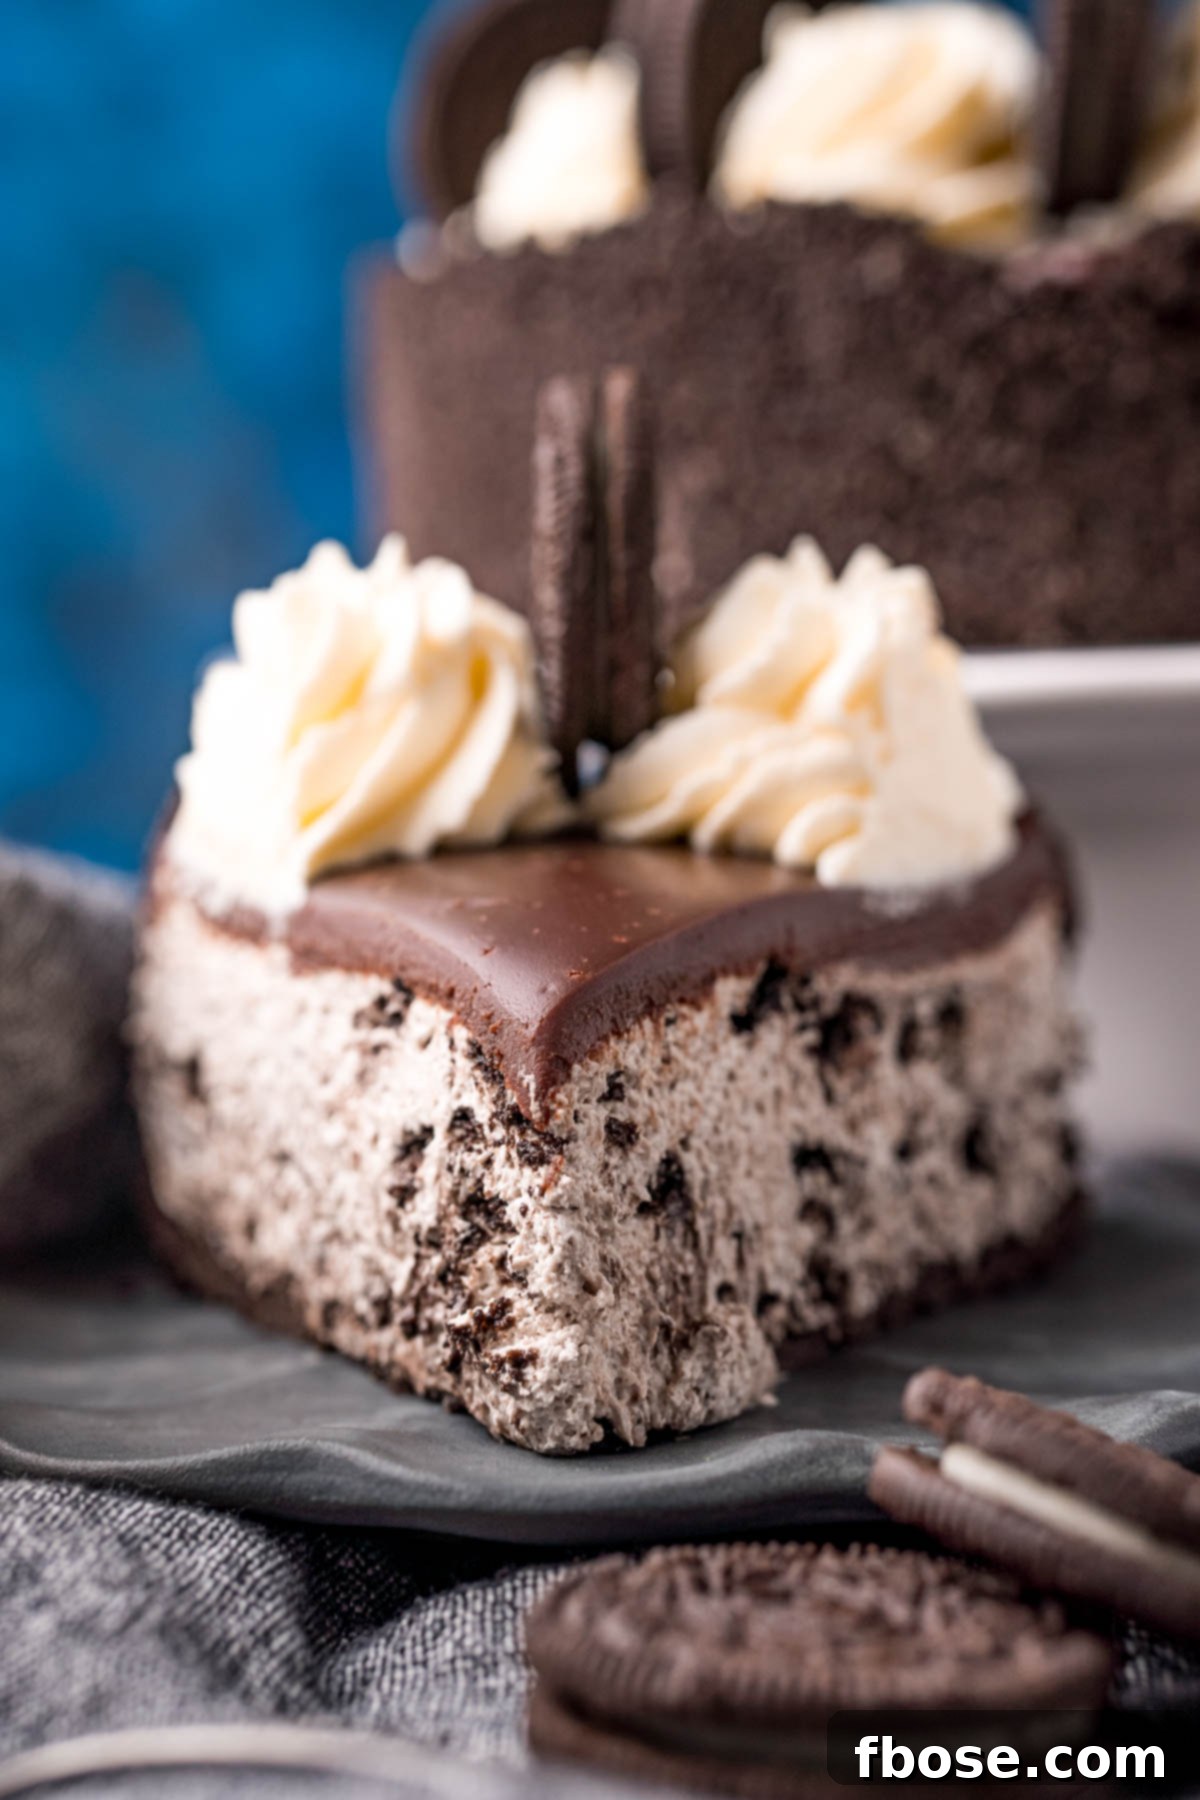
For those who adore Oreos, this No-Bake Oreo Cheesecake is truly a dream come true. It’s an amazingly rich, deeply indulgent dessert that’s surprisingly simple to create. The journey begins with a robust, homemade crust crafted from finely crushed Oreo cookies, providing the perfect foundation for what’s to come. This crunchy base is then generously filled with a thick, velvety Oreo cheesecake mixture, brimming with even more crushed cookie pieces for an authentic, layered Oreo flavor in every bite.
The masterpiece is elegantly crowned with a smooth, glossy Chocolate Ganache, a generous swirl of Perfect Homemade Whipped Cream, and a final flourish of additional Oreo crumbles. If the thought of this dessert immediately makes you crave a tall glass of ice-cold milk, you’re absolutely on the right track. After all, what could possibly be a better companion to the rich, chocolatey goodness of Oreos and cheesecake than a refreshing glass of milk?
Why You’ll Fall in Love with This No-Bake Oreo Cheesecake
- Effortless No-Bake Perfection! Say goodbye to heating up your kitchen, especially on warm days. This recipe requires absolutely no oven time, allowing you to create a sophisticated and delicious dessert without breaking a sweat. It’s the ideal treat for summer gatherings or any occasion where you want to keep things cool and simple.
- Incredibly Quick Prep Time! Time is precious, and this No-Bake Oreo Cheesecake respects that. With just 30 minutes of active prep, you can assemble this show-stopping dessert. The rest is hands-off chilling time, making it a perfect fit for busy schedules while still delivering a dessert that tastes like it took hours.
- Overflowing with Authentic Oreo Flavor! This isn’t just an “Oreo-flavored” cheesecake; it’s a true celebration of the iconic cookie. From the crunchy, dark chocolate cookie crust to the creamy filling studded with real crushed Oreos, and even the final decorative topping, every single element is infused with that unmistakable Oreo taste. It’s an Oreo lover’s paradise!
- The Ultimate Make-Ahead Dessert! Planning a party or family dinner can be stressful, but dessert doesn’t have to be. This cheesecake is a fantastic make-ahead option, allowing you to prepare it the night before or the morning of your event. This flexibility frees up valuable time, letting you focus on other preparations or simply relax before your guests arrive, knowing a fabulous dessert awaits.
- Decadent Topping Extravaganza! While the cheesecake itself is divine, the toppings truly elevate it. A rich, homemade chocolate ganache adds a layer of deep chocolate flavor and a luxurious texture. Paired with light, fluffy homemade whipped cream and extra crushed Oreos for garnish, these toppings transform a simple cheesecake into an extraordinary dessert experience that’s both visually stunning and incredibly delicious.
Essential Ingredient Notes for Your No-Bake Oreo Cheesecake
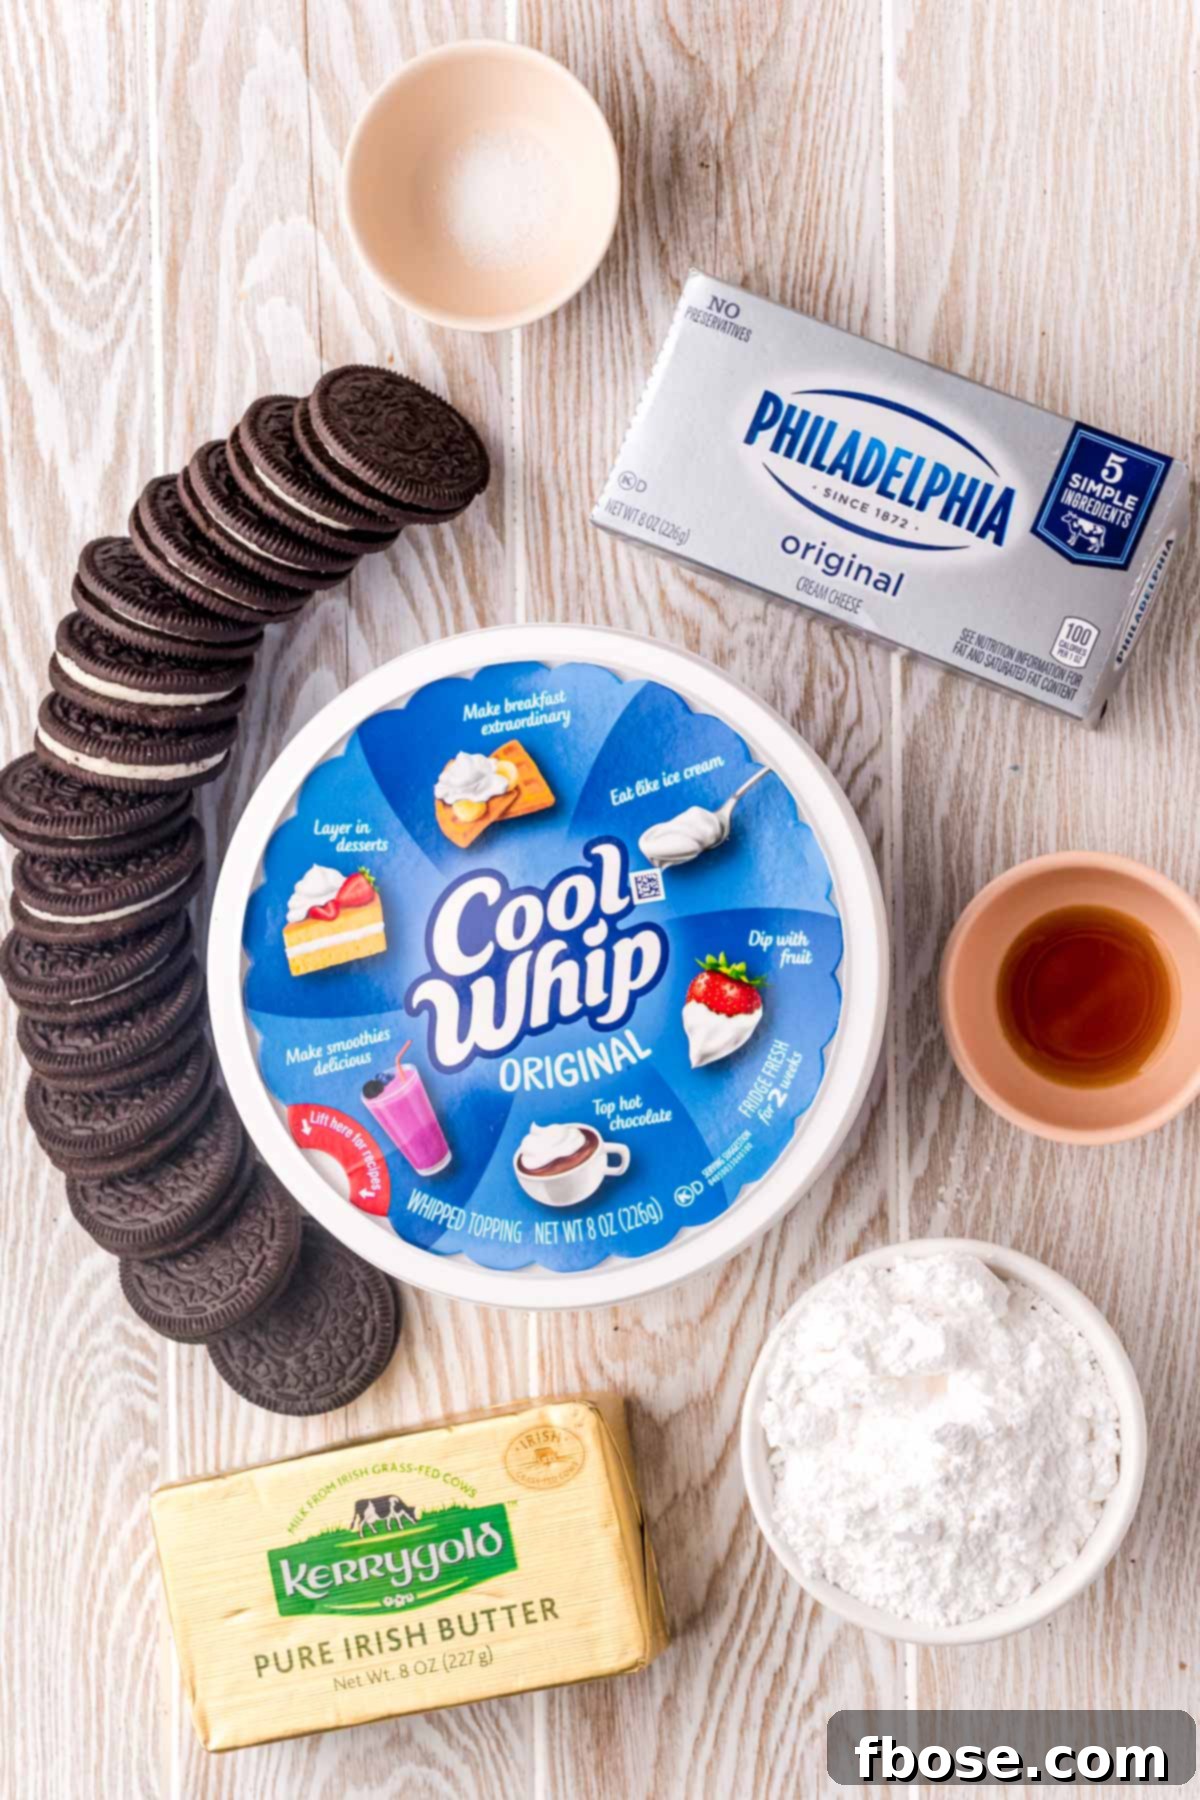
Crafting the perfect No-Bake Oreo Cheesecake starts with selecting the right ingredients. Each component plays a vital role in achieving that rich flavor and ideal texture. For the foundation of this delightful dessert, you’ll need the star ingredient: **Oreos**. I highly recommend opting for a party-size package; this ensures you have ample cookies for both the crunchy crust and to generously stud the creamy filling, with plenty left over for a beautiful garnish on top. Complementing the Oreos for the crust are rich **melted butter** to bind everything together and a touch of **salt (optional)**. While optional, the salt is a secret weapon that beautifully balances the sweetness of the Oreos, enhancing their chocolatey notes.
The luscious, homemade Oreo cheesecake filling is where the magic truly happens. It’s a simple yet profoundly satisfying combination of high-quality ingredients. You’ll need **full-fat cream cheese**, softened to ensure a silky-smooth, lump-free consistency – this is non-negotiable for that signature cheesecake richness. Sweetness comes from **powdered sugar**, which dissolves easily and contributes to the creamy texture. A dash of **vanilla extract** adds warmth and depth of flavor, while a tiny pinch of **salt** in the filling also helps to enhance and balance the overall taste profile. The light and airy texture is achieved with **Cool Whip**, and of course, more **crushed Oreos** are folded in to ensure that delightful cookie flavor permeates every spoonful. When mixed, the filling will naturally take on a lovely grayish tint from the crushed cookies.
To crown this masterpiece, we create a smooth, rich **chocolate ganache**. This optional but highly recommended step takes the cheesecake from delicious to absolutely divine. It’s surprisingly easy to make by gently whisking together warmed **semi-sweet chocolate chips** and **heavy whipping cream** until perfectly smooth and glossy. This ganache adds a sophisticated touch and an extra layer of chocolatey goodness that perfectly complements the Oreo cheesecake. Finally, before serving, a generous dollop of fresh **whipped cream** and a sprinkle of additional **crushed Oreos** provide a beautiful finish and an extra textural element.
Step-by-Step Guide: How To Make No-Bake Oreo Cheesecake
Creating this irresistible No-Bake Oreo Cheesecake is a straightforward and enjoyable process. Follow these detailed steps to achieve a perfect dessert every time:
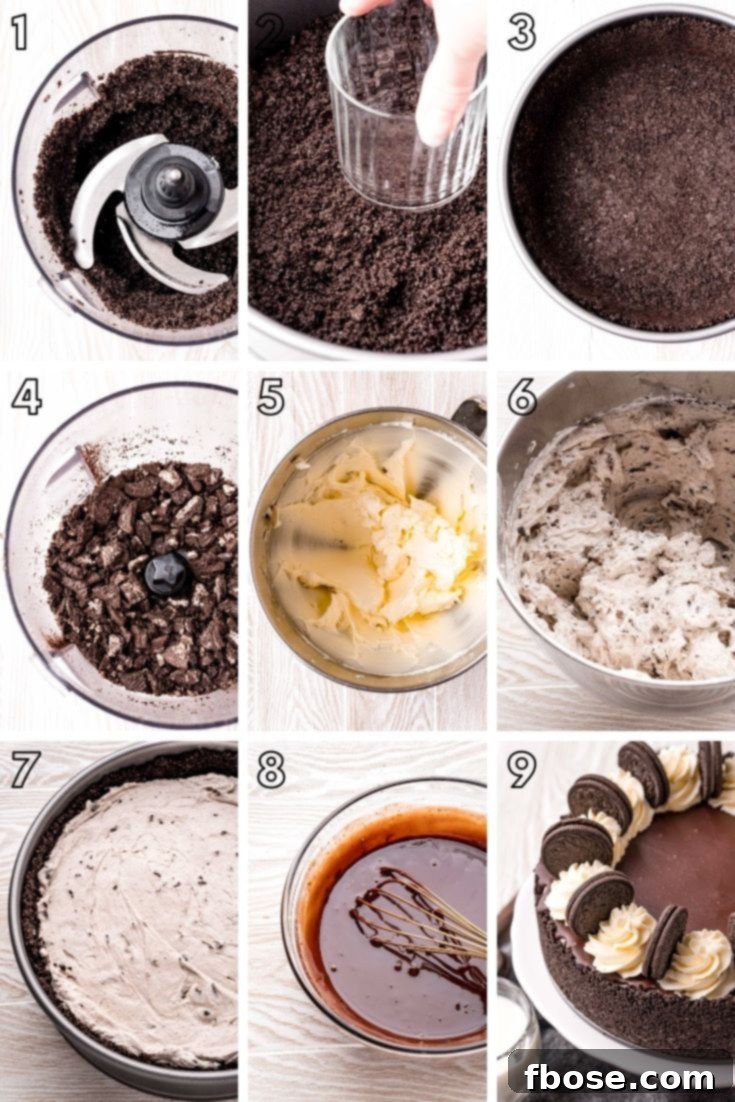
- Prepare the Oreo Crust: Begin by adding 28 Oreos (the entire cookie, including the cream filling) into a food processor. Pulse the cookies until they form fine, even crumbs. Next, add the melted butter and the optional salt to the cookie crumbs. Pulse again until the butter is fully incorporated and the mixture resembles wet sand.
- Form the Crust: Transfer the buttery Oreo crumb mixture to a 10-inch springform pan. Using the bottom of a flat-sided drinking glass or your fingers, firmly press the mixture evenly into the bottom of the pan and up the sides. Ensure it’s compact and forms a stable crust.
- Cream the Base: In a large mixing bowl, or using a stand mixer fitted with a paddle attachment, combine the softened full-fat cream cheese, powdered sugar, vanilla extract, and salt. Beat these ingredients together on medium speed until the mixture is light, fluffy, and completely smooth, with no lumps of cream cheese remaining.
- Fold in Oreo Goodness: Gently scrape down the sides of the bowl to ensure everything is well combined. Carefully fold in the thawed Cool Whip until just incorporated. Then, add the 15 crushed Oreos and continue to fold until they are evenly distributed throughout the mixture and almost no white streaks of Cool Whip are visible. The filling will have a distinct grayish tint from the cookies. Be careful not to overmix at this stage to maintain the airy texture.
- Fill the Crust: Carefully spoon the creamy Oreo filling into the prepared Oreo cookie crust. Use an offset spatula or the back of a spoon to gently spread the filling out evenly across the crust, creating a smooth top surface.
- Prepare the Ganache (Optional but Recommended): In a medium microwave-safe bowl, combine the semi-sweet chocolate chips and heavy cream. Microwave for 45 seconds. Remove and whisk vigorously until the chocolate chips are completely melted and the mixture is smooth and glossy. If any chocolate chunks remain, microwave for an additional 15 seconds, then whisk again. Allow the ganache to sit at room temperature for about 15 minutes to cool slightly and thicken.
- Top and Chill: Pour the slightly cooled ganache evenly over the top of the cheesecake filling. Gently tilt the pan to ensure the ganache spreads to the edges. Once topped, carefully transfer the cheesecake to the refrigerator and chill for a minimum of 6 hours, or preferably overnight, to allow it to set completely. This chilling time is crucial for the cheesecake to firm up and for the flavors to meld.
- Garnish and Serve: Once the cheesecake is fully set, carefully remove it from the springform pan. Just before serving, top with generous dollops of whipped cream and a sprinkle of additional crushed Oreos for an extra touch of visual appeal and flavor. Slice and enjoy!
Storing Your No-Bake Oreo Cheesecake
To ensure your delicious No-Bake Oreo Cheesecake remains fresh and delightful, proper storage is key. Any leftover cheesecake should be stored in an airtight container in the refrigerator. This will help maintain its creamy texture and prevent it from absorbing other odors in your fridge. It’s best enjoyed within 3 days. Please note that while still delicious, the Oreo crust may soften considerably after the first 36 hours due to moisture absorption from the filling. For optimal texture, consume it relatively soon after it’s fully chilled.
How to Intensify the Oreo Cookie Flavor in Your Cheesecake
If you consider yourself a true Oreo aficionado and desire an even more pronounced cookie flavor in your cheesecake, you can easily customize this recipe. When preparing the cheesecake filling, simply add up to 5 additional crushed Oreos to the mixture. This will boost the cookie presence and provide an even more robust Oreo experience in every creamy bite. You could also experiment with a tiny amount of Oreo-flavored extract, though using more actual cookies is often preferred for authentic taste and texture.
The Role of Salt in the Oreo Crust: A Flavor Secret
You might be surprised to see salt as an ingredient in a sweet dessert crust. However, adding a small amount of salt to the Oreo crust serves a very important purpose. It doesn’t make the crust salty; instead, it cleverly balances out the intense sweetness of the Oreos and enhances their inherent chocolate flavor. This subtle addition creates a more complex and satisfying taste profile, preventing the dessert from being overwhelmingly sweet. It truly elevates the crust from a mere base to an integral part of the cheesecake’s flavor harmony. That said, if you prefer, you can certainly omit the salt without significantly altering the structural integrity of the crust.
Crust Height Customization: Sides or Just the Bottom?
The beauty of homemade desserts is the ability to customize them to your preference. While the recipe suggests pressing the crust mixture up the sides of the springform pan to create a taller, more dramatic crust, this step is entirely optional. If you prefer a simpler, bottom-only crust, you can easily adjust the quantities. To achieve this, reduce the crust ingredients to 20 Oreos, 4 tablespoons of melted butter, and ¼ teaspoon of salt. Then, simply press this modified crust mixture firmly into just the bottom of the pan. This will result in a slightly thinner base, which some prefer, allowing the creamy filling to take center stage. For a 9-inch pie dish, this reduced crust ratio also works well, and you would then halve the filling ingredients (using 7 to 10 Oreos in the filling) while keeping the ganache measurements the same.
This No-Bake Oreo Cheesecake is more than just a dessert; it’s a celebration of everyone’s favorite cookie in an utterly delightful, easy-to-make format. It’s guaranteed to become a household favorite and a crowd-pleaser at any gathering. If you find yourself captivated by the magic of Oreos in desserts, be sure to explore more fantastic recipes that are sure to win over hearts and taste buds alike!
- Easy Oreo Chocolate Truffles – These bite-sized delights combine Oreo crumbs, chocolate chips, milk, cream, and cocoa powder, all dipped in more chocolate. With just 20 minutes of prep, they’re perfect for a quick, elegant treat or gifting.
- Oreo Pudding Cookies – Discover perfectly soft, chewy cookies infused with the richness of pudding and studded with Oreo pieces. These cookies come together in under 25 minutes for a warm, comforting indulgence.
- Oreo Magic Bars (7 Layer Bars) – A symphony of textures and flavors, these bars start with refrigerated cookie dough and are piled high with Oreo cookies, luscious chocolate chunks, shredded coconut, crunchy nuts, and colorful M&M’s. An effortless dessert that’s fantastic for sharing and sure to disappear quickly!
- Golden Oreo Cupcakes – A delightful twist on the classic, these yellow cupcakes feature a delightful Golden Oreo base, crowned with light vanilla cream frosting and mini Golden Oreos for an extra touch of sunshine.
- Easy Peppermint Oreo Balls – For a refreshing and festive treat, try this indulgent minty variation on the classic Oreo truffles. With a prep time of just 30 minutes, these are perfect for holiday gatherings or any time you crave a cool, chocolatey mint flavor.
Join Our Sweet Community!
Receive new recipes and exclusive content right in your inbox!
Sign up below to never miss a delicious update:
We respect your privacy. Unsubscribe at any time.
Let’s Connect! Share Your Creation!
If you’ve had the pleasure of trying this incredible No-Bake Oreo Cheesecake recipe, we would absolutely love to hear from you! Please take a moment to share your experience in the comments section below and consider leaving a review. Your feedback is invaluable and truly brightens our day!
Don’t forget to capture your delicious creation and tag us – @sugarandsoulco – on Instagram and Pinterest. You can also join our vibrant Sugar & Soul Show-offs Community on Facebook and share your culinary successes there, where you can also participate in our fun recipe challenges! We can’t wait to see your cheesecake masterpiece!
No Bake Oreo Cheesecake
Author: Rebecca Hubbell
Course: Dessert
Cuisine: American
Prep Time: 30 minutes
Chill Time: 8 hours
Total Time: 8 hours 30 minutes
Servings: 12 people
This No-Bake Oreo Cheesecake has an Oreo cookie crust, creamy cheesecake filling loaded with crushed Oreos then topped with ganache! Prep this easy no-bake dessert in just 30 minutes!
Ingredients
Crust
- 28 Oreos
- 6 tablespoons salted butter, melted
- ½ teaspoon salt (optional, see notes)
Filling
- 16 ounces cream cheese, softened (full-fat recommended)
- 1 cup powdered sugar
- 1 teaspoon vanilla extract
- ½ teaspoon salt
- 16 ounces cool whip, thawed
- 15 Oreos, crushed
Ganache (optional)
- ⅔ cup semi-sweet chocolate chips
- ½ cup heavy cream
Topping
- Whipped Cream
- Additional Oreos (crushed or whole, for garnish)
Instructions
- Prepare the Oreo Crust: Add the 28 Oreos (whole cookies with cream) to a food processor and pulse until fine crumbs form. Add in the melted butter and the optional ½ teaspoon salt, then pulse again to thoroughly combine.
- Form the Crust: Transfer the crust mixture to a 10-inch springform pan. Press it evenly into the bottom and firmly up the sides of the pan. A flat-bottomed drinking glass can be very helpful for this step to create a compact, even crust.
- Cream the Filling Base: In a large mixing bowl, or using a stand mixer with a paddle attachment, combine the softened cream cheese, powdered sugar, vanilla extract, and ½ teaspoon salt. Beat on medium speed until the mixture is light, fluffy, and completely smooth.
- Fold in Cool Whip and Oreos: Scrape down the sides of the bowl. Gently fold in the thawed Cool Whip until it’s just incorporated. Then, add the 15 crushed Oreos and fold until they are evenly distributed, and the mixture has a uniform grayish tint with hardly any white streaks remaining. Be careful not to overmix.
- Spread the Filling: Carefully spread the prepared cheesecake filling evenly and gently over the Oreo cookie crust in the springform pan.
- Prepare the Ganache (Optional): Place the chocolate chips and heavy cream in a medium microwave-safe bowl. Microwave for 45 seconds. Whisk well until the chocolate is fully melted and the ganache is smooth and glossy. If needed, microwave for an additional 15 seconds and whisk again. Let the ganache sit at room temperature for 15 minutes to cool and thicken slightly.
- Pour and Chill: Pour the slightly cooled ganache over the top of the cheesecake. Gently tilt the pan to ensure an even coating. Refrigerate the cheesecake for at least 6 hours, or preferably overnight, until it is thoroughly set before slicing and serving.
- Garnish: Just before serving, top with whipped cream and additional Oreos (crushed or whole) for an attractive garnish, if desired.
Notes
- For a stronger cookie flavor in the filling, you can add up to 5 additional crushed Oreos to the cheesecake mixture.
- If you prefer a crust that only covers the bottom of the cheesecake (and not the sides), reduce the crust ingredients to 20 Oreos, 4 tablespoons of melted butter, and ¼ teaspoon of salt. Press this mixture into just the bottom of the pan.
- To make this recipe in a 9-inch pie dish, use the reduced crust ratio mentioned above, and halve the filling ingredients (using 7 to 10 Oreos in the filling). The ganache measurements can remain the same.
- Store any leftover Oreo Cheesecake in an airtight container in the refrigerator for up to 3 days. Be aware that the crust will soften quite a bit after the first 36 hours.
- The salt in the Oreo crust is optional but highly recommended as it helps balance the sweetness and enhances the overall flavor.
- Always use full-fat cream cheese for this recipe to achieve the best rich and creamy texture.
Nutrition
Calories: 570 kcal | Carbohydrates: 57g | Protein: 7g | Fat: 37g | Saturated Fat: 19g | Trans Fat: 1g | Cholesterol: 77mg | Sodium: 595mg | Potassium: 252mg | Fiber: 2g | Sugar: 38g | Vitamin A: 906IU | Vitamin C: 1mg | Calcium: 102mg | Iron: 5mg
Did You Make This Recipe?
Don’t forget to share your delicious creation with us on Instagram @sugarandsoulco! Also, give us a follow on Tiktok @sugarandsoulco and Pinterest @sugarandsoulco for even more fantastic recipes and inspiration!