

Mocha Hot Chocolate Bombs offer a delightful fusion of rich chocolate and invigorating espresso, culminating in a luxurious, frothy drink topped with soft marshmallows. This trendy dessert beverage is a perfect pick-me-up, combining the warmth of a classic hot chocolate with the sophisticated kick of coffee. Elevate your winter evenings or special occasions with these impressive, yet surprisingly simple-to-make, treats.
If you’re craving hot chocolate but prefer a quicker preparation, explore other delicious options. Dive into my creamy Hot Chocolate Coffee for a fast and comforting brew, or try the rich, thick consistency of my Crockpot Hot Chocolate, perfect for serving a crowd with minimal effort.
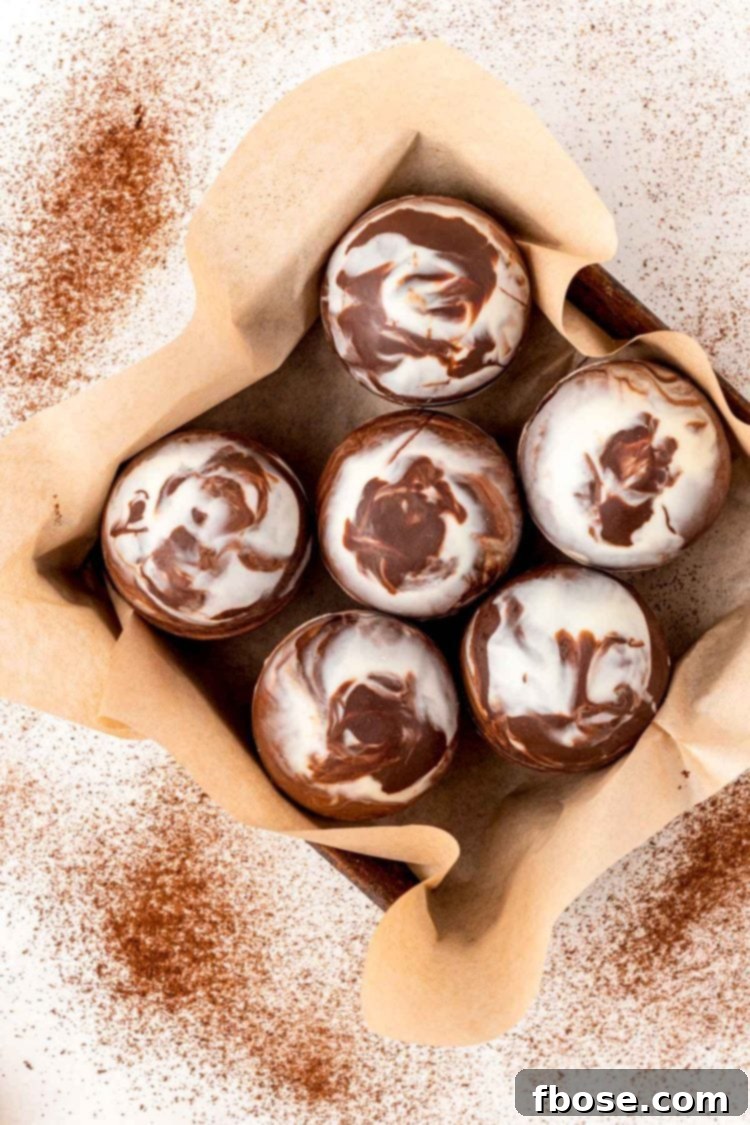
Mocha Hot Chocolate Bombs are essentially the grown-up, gourmet version of the beloved viral hot chocolate bombs. The secret lies in the espresso powder, cleverly tucked inside a decadent chocolate shell, transforming a simple sweet treat into an energizing, flavorful afternoon indulgence. Imagine the rich aroma of chocolate blending with robust coffee as your bomb melts into warm milk – it’s an experience that awakens the senses and provides that much-needed boost to power through your day.
Why You’ll Adore This Recipe
There are countless reasons to fall in love with making and enjoying Mocha Hot Chocolate Bombs. They aren’t just a drink; they’re an experience, a gift, and a delightful project all rolled into one.
- Unforgettable Flavor! What truly sets these mocha bombs apart is the unparalleled depth of flavor. The careful balance of rich semi-sweet chocolate, creamy white chocolate, and fragrant espresso powder creates a hot chocolate experience unlike any you’ve had before. Each sip offers a harmonious blend of sweetness and a subtle coffee bitterness, making it a sophisticated treat for true connoisseurs.
- Engaging Fun! While crafting hot chocolate bombs involves a few steps, the process is incredibly rewarding and genuinely fun. From melting and molding the chocolate shells to carefully filling them with cocoa, espresso, and marshmallows, watching these creations come to life is a magical experience. It’s a fantastic activity for a cozy afternoon, whether you’re alone or with family, bringing a sense of accomplishment and joy.
- Perfectly Trendy! Hot chocolate bombs have taken the dessert world by storm, and for good reason! They’re visually stunning and incredibly satisfying. Jumping on this trend with a mocha twist means you’re not just making a delicious drink, but also a show-stopping treat that’s sure to impress. Imagine the delight on someone’s face as they watch the chocolate shell melt away to reveal the goodness within.
- Thoughtful Gifting! These exquisite cocoa bombs make exceptional gifts. Elegantly nestle them into cute cupcake liners, place them in clear cello bags or decorative cupcake boxes, and tie them off with a beautiful ribbon. They’re perfect for holiday presents, hostess gifts, teacher appreciation, or simply a thoughtful way to show someone you care. Handmade gifts always carry a special touch, and these are sure to be cherished.
- Endless Variations! The beauty of hot chocolate bombs lies in their versatility. The possibilities for customization are truly limitless! While this recipe focuses on a delightful mocha blend, you can easily experiment with different chocolate types (dark, milk), added flavors (peppermint, caramel, chili), and a myriad of toppings. For even more exciting ideas and variations, be sure to check out my classic Hot Chocolate Bombs recipe!

Essential Tools for Crafting Hot Chocolate Bombs
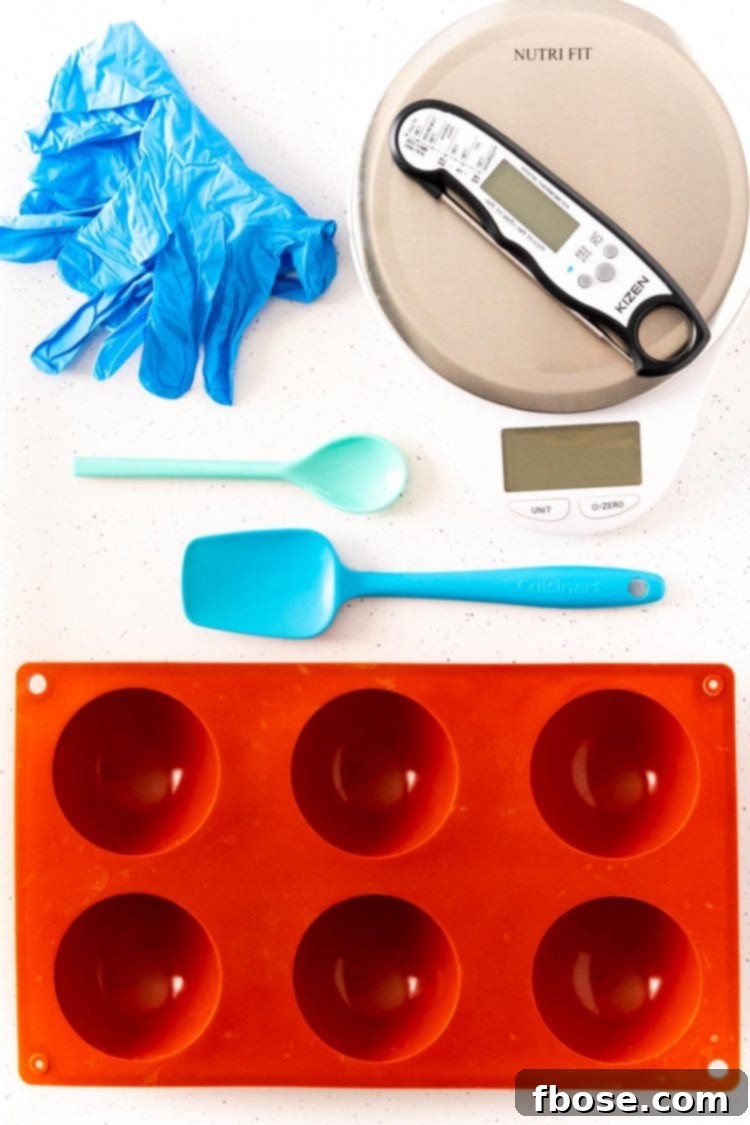
To ensure a smooth and successful hot chocolate bomb-making experience, having the right tools on hand is key. Here’s a comprehensive list of what you’ll need, along with why each item is important for achieving perfect results:
- Food Scale: This kitchen essential is primarily used if you’re working with chocolate chips or couverture chocolate, where precise measurements are crucial for tempering. While less critical for chocolate bars, a scale guarantees you use the exact amount needed for optimal consistency.
- Instant Read Kitchen Thermometer: Tempering chocolate is a delicate art, and this thermometer is your best friend. It takes the guesswork out of achieving the perfect chocolate temperature, ensuring your shells are glossy, stable, and have that satisfying snap. Without it, tempering can be quite challenging.
- Nitrile Food Prep Gloves: For those who desire a pristine, blemish-free final product, these food-safe gloves are indispensable. They prevent fingerprints and smudges from appearing on your delicate chocolate shells, maintaining their elegant appearance.
- Silicone Molds: These are non-negotiable for forming the beautiful spherical chocolate shells. Molds preferably around 2¾-inch in diameter are ideal, as they create bombs large enough to hold ample fillings while still fitting comfortably in a standard mug.
- Small Spoon or Food-Safe Paintbrush: Used to meticulously coat the inside of your silicone molds with melted chocolate. I’ve found that a smaller, rounded spoon offers the best control and ease of application, allowing for an even and consistent chocolate layer.
- Rubber Spatula: An essential tool for gently stirring your melting chocolate and scraping down the sides of the bowl. This ensures even melting, prevents burning, and helps you make the most of every last drop of your precious chocolate.
- Two Small or Medium Microwaveable Bowls: You’ll need separate bowls for melting your semi-sweet and white chocolates. Glass bowls are highly recommended as they heat evenly in the microwave and retain warmth, aiding in the tempering process.
- Baking Sheet: While not strictly essential, an 8×13-inch baking sheet proves incredibly helpful for organizing your silicone molds during preparation and for easy transfer to the refrigerator or freezer for chilling. It keeps everything tidy and prevents spills.
- Cupcake Liners: Beyond just packaging, cupcake liners provide excellent stability for your chocolate bomb halves during the filling and assembly stages, preventing them from rolling around.
- Microwaveable Flat Plate: This ingenious tool serves as a warming surface to gently melt the rims of your chocolate shells, creating a perfect seal when joining the two halves. A quick zap in the microwave is all it takes to prepare this sealing surface.
Key Ingredients for Mocha Hot Chocolate Bombs
The quality of your ingredients directly impacts the flavor and texture of your finished mocha hot chocolate bombs. Choose wisely for the most delicious results:
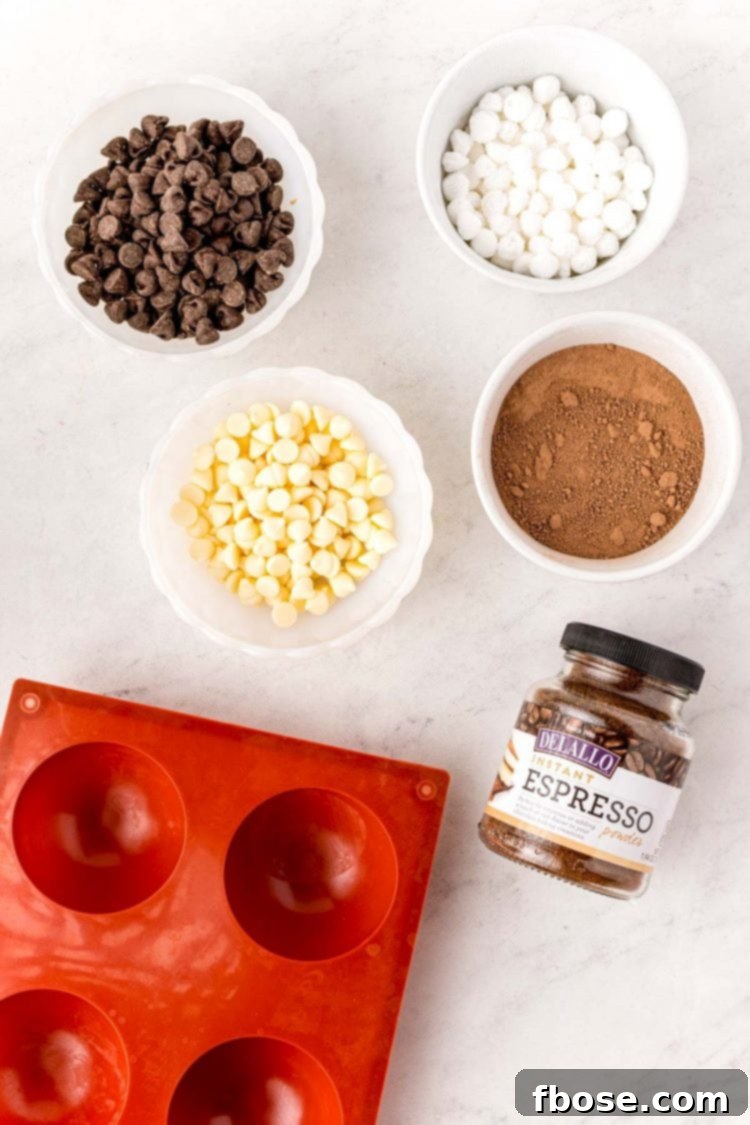
- Semi-Sweet Chocolate Chips: I often use Nestle chips for their reliable melting and balanced flavor, but feel free to select your favorite brand or whatever you have readily available. High-quality semi-sweet chocolate forms the robust base of your shells, providing that classic rich cocoa taste.
- White Chocolate Chips: Ghirardelli’s white chocolate chips are a fantastic choice due to their superior melting qualities and delicious, creamy flavor. They add a beautiful contrast and create the stunning marbled effect in your shells, complementing the semi-sweet chocolate.
- Hot Chocolate Mix: You have the flexibility to either whip up your own homemade cocoa mix for a truly personalized touch or opt for your favorite store-bought premade mix for convenience. The mix provides the essential hot chocolate flavor that will burst forth when the bomb dissolves.
- Instant Espresso Powder: This is the star ingredient that infuses these bombs with their characteristic coffee flavor, transforming them into “mocha” delights. Ensure you use instant espresso powder, not ground coffee, for proper dissolution and a smooth taste.
- Mini Marshmallows: No hot chocolate is complete without marshmallows! We love to use a combination of classic soft mini marshmallows for that gooey melt and dehydrated marshmallows (often called Mallow Bits) for an extra textural surprise and a charming visual when the bomb opens.
Mastering Chocolate Tempering for Perfect Shells
Tempering chocolate is often seen as a daunting task, but it’s a fundamental step that guarantees your chocolate shells are beautifully smooth, glossy, and possess a satisfying snap when broken. It also prevents blooming (those unsightly white streaks) and ensures the chocolate sets properly. While it requires a little precision and attention to detail, the professional finish of the end product is absolutely worth the effort.
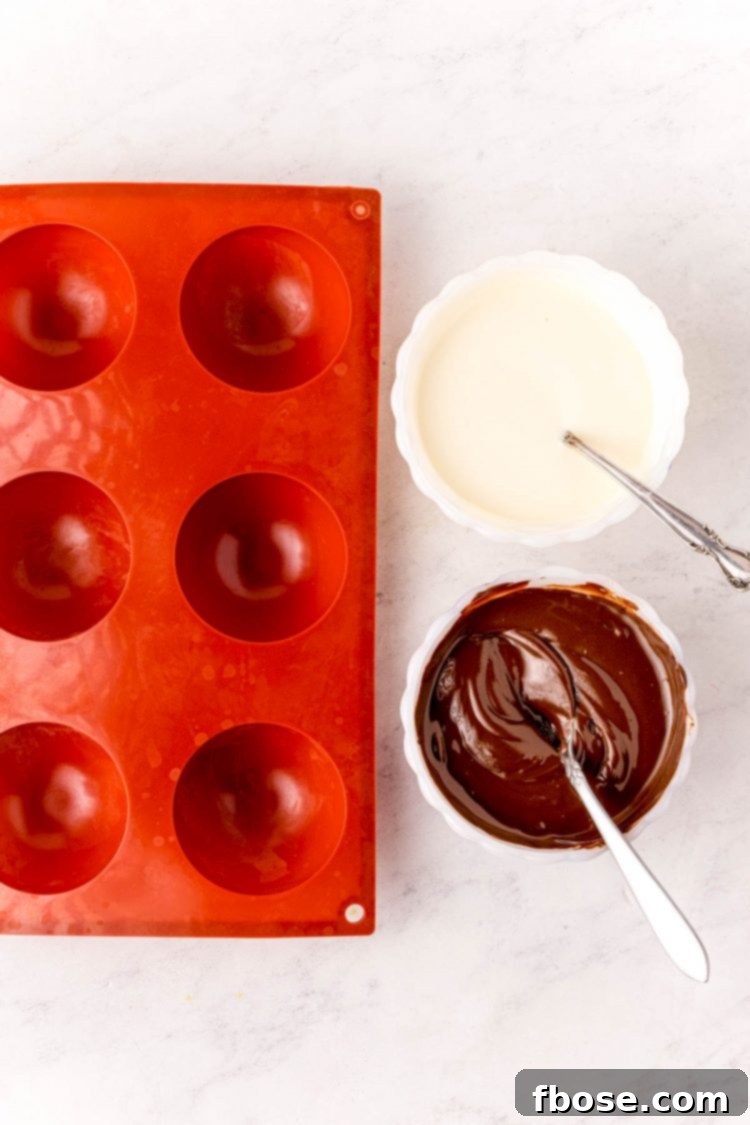
- Initial Melting: Begin by placing your semi-sweet chocolate chips and white chocolate chips into separate microwave-safe bowls. Heat each bowl in the microwave for 30-second intervals. After each interval, remove the bowl, scrape down the sides with a rubber spatula, and stir thoroughly. This ensures even melting and prevents the chocolate from burning.
- Continue Melting Gradually: Persist with the 30-second microwave intervals, stirring well after each, until the chocolate is almost entirely melted, with just a few small lumps remaining. The residual heat will melt these lumps as you continue to stir. Avoid overheating, as this can take the chocolate out of temper.
- Achieving Tempering Temperatures: This is where your instant-read thermometer becomes invaluable. Continuously stir the chocolate as it cools and check its temperature. The semi-sweet chocolate is perfectly tempered when its temperature falls between 88 and 90 degrees F (31-32 degrees C). For white chocolate, the ideal tempered temperature range is between 82 and 84 degrees F (28-29 degrees C). Maintaining these temperatures is crucial for achieving the desired glossy finish and stable texture for your hot chocolate bomb shells. Patience is key here; don’t rush the cooling and stirring process.
Crafting the Perfect Chocolate Shells
With your chocolate expertly tempered, it’s time for the creative part: forming the elegant shells that will house your mocha magic. This two-coat method ensures strong, durable, and beautiful spheres.
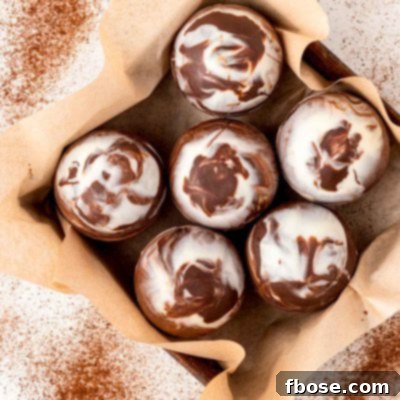
- First Coat and Marbling: Take about a tablespoon of each tempered chocolate (semi-sweet and white) and spoon it into each half-sphere silicone mold. Using the back of a small spoon or a clean, food-safe paintbrush, gently swirl the two chocolates together. Swirl just a few times to create an alluring marbled effect without fully blending the colors. Spread the chocolate evenly to coat the entire inner surface of the mold. Immediately transfer the molds to the refrigerator and chill for a quick 5 minutes to set the initial layer.
- Second Coat and Final Chill: After the first layer has set, remove the molds from the refrigerator. Apply a second, thin coat of the melted chocolate to reinforce the shells, paying particular attention to the edges for added strength. This second layer ensures your bombs are sturdy enough to handle without cracking. Once coated, place the molds in the freezer for about 10 minutes, or until the chocolate is fully hardened and easily releases from the mold.
- Careful Demolding: Once thoroughly chilled and firm, gently peel the silicone mold away from the chocolate shells. Work carefully and slowly to avoid breaking the delicate edges. It’s often helpful to wear nitrile gloves during this step to prevent fingerprints and minimize melting from the warmth of your hands. Place the freed chocolate halves on a clean, cool surface or a baking sheet lined with parchment paper.

Assembling Your Mocha Hot Chocolate Bombs
Now for the most exciting part – bringing your hot chocolate bombs to life! This is where all the delicious elements come together.
- Fill the Halves: Carefully place half of your chocolate spheres into individual cupcake liners. These liners will stabilize them as you fill. Into each of these half-spheres, spoon in a generous amount of hot cocoa mix, followed by your instant espresso powder, and finally, a handful of mini marshmallows. Don’t be shy with the fillings – this is where the magic happens!
- Prepare for Sealing: Take a small, flat, microwave-safe plate and warm it in the microwave for approximately 45 seconds. The plate should be warm enough to slightly melt chocolate on contact, but not so hot that it burns.
- Seal the Bombs: Quickly pick up an empty chocolate half-sphere and gently place its rim onto the warmed plate for just a few seconds until the edge visibly begins to melt. Immediately press this melted-edge sphere onto a corresponding filled half-sphere, ensuring the edges align perfectly. Gently press them together to create a secure seal. For a clean finish, you can run a clean finger (or gloved finger) around the seam to smooth out any excess melted chocolate. Repeat this process for all remaining hot chocolate bombs. Allow them to set for a minute or two until the chocolate has hardened and sealed completely before handling further.

Serving Your Decadent Mocha Hot Chocolate Bombs
The moment of truth! To fully enjoy your homemade mocha hot chocolate bombs, proper serving temperature is crucial for a complete melt and a perfectly warm drink. I’ve found that for adults, heating the milk to a temperature of 160 degrees F (about 71 degrees C) is ideal for melting the chocolate shell thoroughly while still resulting in a wonderfully warm beverage. When preparing these for children, I recommend an initial milk temperature of 160 degrees F to ensure the bomb melts, but allow the drink to cool slightly to a safer serving temperature of around 120 degrees F (49 degrees C).
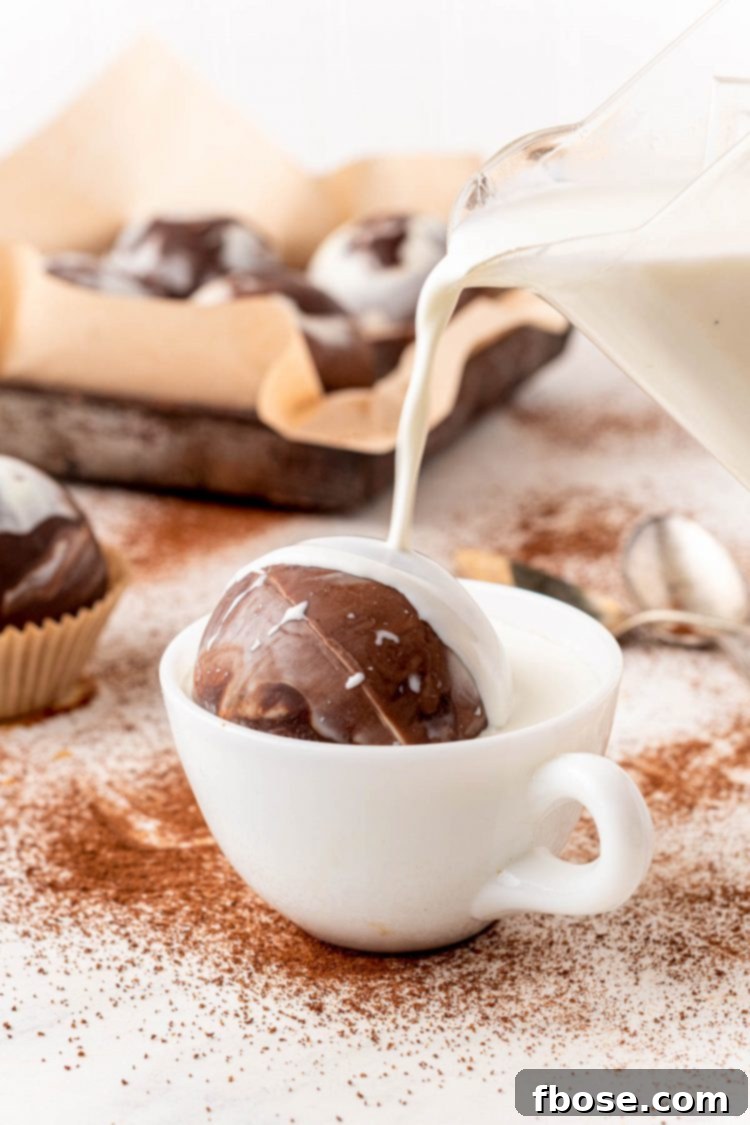
Once your milk reaches 160 degrees F, pour it slowly and steadily over a hot chocolate bomb placed in a large mug. Watch in anticipation as the chocolate shell elegantly melts away, revealing the cocoa mix, espresso powder, and marshmallows within. Stir gently until all components are fully melted and combined, creating a smooth, rich, and aromatic mocha hot chocolate. Serve immediately to savor its warmth and delightful flavor.
For an added touch of luxury and fun, top your steaming mug with fluffy Homemade Marshmallows, a generous dollop of Whipped Cream, and a sprinkle of chocolate shavings or colorful sprinkles. These garnishes not only enhance the visual appeal but also add another layer of texture and taste to your gourmet drink.
Frequently Asked Questions About Mocha Hot Chocolate Bombs
Here are some common questions and helpful tips to ensure your hot chocolate bomb making is a complete success:
How To Store Mocha Hot Chocolate Bombs
Proper storage is essential to maintain the freshness and integrity of your hot cocoa bombs. These delicious treats will keep wonderfully for up to 2 weeks when stored in an airtight container. Choose a cool, dry spot in your pantry or kitchen, away from direct sunlight or any heat sources, as extreme temperatures can cause the chocolate to bloom or melt. For the absolute best flavor and texture, however, I highly recommend enjoying them within just a few days of making them.
Can I Use A Double Boiler To Melt The Chocolate?
Absolutely! While the microwave method is quick and convenient, using a double boiler is an excellent alternative for melting chocolate. This traditional method offers more gentle and controlled heating, which can be beneficial for tempering. To use a double boiler, place a heatproof bowl (like glass or stainless steel) over a saucepan of simmering water, ensuring the bottom of the bowl does not touch the water. Stir the chocolate continuously until it melts smoothly, then proceed with the tempering temperature checks as outlined in the recipe. This method is often preferred by those who want to avoid any risk of scorching chocolate in the microwave.
Do I Have To Use Both White And Semi-Sweet Chocolate For The Shells?
Not at all! The beauty of hot chocolate bombs is their adaptability. You have complete creative freedom when it comes to the chocolate flavor for your shells. While the combination of white and semi-sweet chocolate creates a beautiful marbled effect and a balanced flavor profile, you can certainly use just one type of chocolate. Dark chocolate would pair exceptionally well with the espresso powder for an intense mocha experience. Milk chocolate would offer a sweeter, creamier shell. Experiment with your favorites to find your perfect flavor match!
What if my chocolate isn’t tempering correctly?
Tempering can be tricky! If your chocolate isn’t getting glossy or snapping, it might be over/underheated. To test, spread a tiny bit on parchment and chill for 2 minutes. If it’s shiny and snaps, it’s good. If it’s dull or bends, gently reheat to melt any solid bits, then slowly cool and stir, watching the temperature closely. Adding a few solid chocolate pieces (seed method) can also help bring it back into temper.
Can I make these hot chocolate bombs ahead of time?
Yes, these mocha hot chocolate bombs are fantastic for making ahead! Once assembled and fully set, store them in an airtight container as described above. They maintain their quality and flavor for up to two weeks, making them ideal for holiday preparations, party favors, or having on hand for spontaneous cozy moments.

While hot chocolate bombs are incredibly fun to create and even more exciting to drink, sometimes you simply need that mug of comforting hot chocolate to appear faster! For those moments, or when you’re looking to explore different flavor profiles, here are some fantastic recipes. Whether you’re in the mood for a boozy adult version or just a unique twist on classic cocoa, these options have you covered:
- Boozy or Not White Hot Chocolate: Indulge in a delightfully creamy hot chocolate infused with rich notes of luxurious white chocolate and a delicate hint of vanilla. Perfect for customizing to your preference.
- Creamy Mexican Hot Chocolate: Experience a unique twist with this recipe, where a touch of chili powder introduces an exciting and unexpected level of warmth and spice, adding depth to the traditional cocoa flavor.
- Irish Cream Hot Chocolate: On those chilly evenings, snuggle up with this incredibly creamy and utterly delicious hot cocktail. The addition of Irish cream liqueur makes it an ideal treat for adults seeking warmth and indulgence.
- Homemade French Hot Chocolate: Treat yourself to a cup of this intensely thick, luxuriously rich, and wonderfully chocolatey drink. This easy-to-make recipe brings the elegance of a Parisian cafe directly to your home.
- Kahlua Hot Chocolate: For lovers of coffee and chocolate, this boozy cup of hot chocolate is laced with the inviting flavor of coffee liqueur. It’s decadently topped with a generous swirl of Kahlua Whipped Cream for an extra layer of indulgence.
Mocha Hot Chocolate Bombs Recipe
Mocha Hot Chocolate Bombs
Rebecca Hubbell
Course:
Beverage, Dessert
Cuisine:
American
40 minutes
Chill Time:
20 minutes
Total Time:
1 hour
6 people
Pin Recipe
Mocha Hot Chocolate Bombs are a fun and trendy dessert drink that combines espresso and chocolate with frothy milk and marshmallows!
Equipment
- Silicone mold – I used a 2½-inch half sphere
- Instant read kitchen thermometer
- Nitrile food prep gloves
- Food scale
- Spoon or food-safe paintbrush
- Rubber Spatula
- Small/medium bowl (you’ll need two)
- Small baking sheet
- Cupcake liners
- Microwaveable flat plate
Ingredients
- ½ cup semi-sweet chocolate chips
- ½ cup white chocolate chips (Ghirardelli’s recommended)
- 12 tablespoons hot cocoa powder
- 6 teaspoons instant espresso powder
- Mini marshmallows (classic and/or dehydrated)
Instructions
- In two separate small, microwave-safe bowls, melt semi-sweet and white chocolate chips in 30-second increments, stirring well in between each interval. Total melting time should be approximately 60 to 90 seconds per bowl.
- Spoon about 1 tablespoon of each melted chocolate into each half-sphere mold. Using the back of a spoon or a pastry brush, gently swirl the chocolates together 3-4 times for a marbled effect, then spread to coat the sides evenly. Chill in the fridge or freezer for 10 to 12 minutes, or until fully hardened.
- Once the first layer is hardened, reinforce the edges of each chocolate half-sphere with a little of the remaining melted chocolate. Allow this second layer to set until hardened.
- Carefully remove each hardened half-sphere from the molds. To prevent fingerprints and melting, handle the chocolate as little as possible, ideally using nitrile gloves.
- In six of the half-spheres, spoon 2 tablespoons of hot cocoa powder. Top each with 1 teaspoon of instant espresso powder and a desired amount of mini marshmallows.
- Warm a small, flat plate in the microwave for 45 seconds. Place an empty half-sphere onto the warm plate for a few seconds until its edge slightly melts.
- Quickly place the melted-edge empty half onto a corresponding filled half-sphere, ensuring the edges are aligned. Gently press together and run a finger around the seam to clean up any excess melted chocolate.
- Allow the assembled bombs to sit for a minute to harden and seal before handling further. Repeat with the remaining five spheres until all mocha hot chocolate bombs are assembled.
- To prepare hot cocoa, place one assembled bomb into a mug and pour 8 ounces of hot milk (heated to 160 degrees F) over it. Once the chocolate shell has fully melted, stir to combine all ingredients. Serve immediately and enjoy!
Notes
- Nutritional information provided is an estimate and does not include milk used for serving.
- To verify if your chocolate is properly tempered, smear a small amount on a piece of parchment paper and place it in the refrigerator for a couple of minutes. If it appears shiny and snaps cleanly when bent, it is tempered. If it’s dull or flexible, it needs re-tempering.
- Cocoa butter typically starts melting at 93 degrees F. However, given the size of the bombs, they can cool down the milk significantly. I recommend heating milk to 160 degrees F for adults (aiming for a serving temperature of 135 degrees F) and 120 degrees F for children.
- Different types of chocolate temper at varying temperatures:
- Dark Chocolate & Semi-sweet: Tempered between 88-90 degrees F.
- Milk Chocolate: Tempered between 86-88 degrees F.
- White Chocolate: Tempered between 82-84 degrees F.
- If you opt to use only white chocolate, increase the total amount to 16 ounces. Start with 7 ounces and keep an additional 1 ounce on hand for re-tempering if necessary for each batch of 3 bombs.
- These bombs are best enjoyed within a few days, but can be stored for up to 2 weeks in an airtight container in a cool, dry place.
- Many recipes use only 2 teaspoons to 1 tablespoon of hot chocolate mix. This recipe uses 1-ounce packets (approximately 3 tablespoons per pack), recommending 8 ounces of milk per bomb. This accounts for the chocolate from the shell contributing to the richness, ensuring optimal results.
- While this recipe uses sphere-shaped molds, other silicone shapes like hearts are also popular. Any silicone mold should work, but for sphere molds, aim for 2 to 2¾-inch diameter to accommodate sufficient cocoa and marshmallows.
- Dehydrated marshmallows (Mallow Bits) are typically found near the hot chocolate mixes in grocery stores, not with regular marshmallows. Due to their popularity in hot chocolate bombs, online prices can be high.
- An alternative sealing method involves piping a thin line of melted chocolate around the rim of the filled half-cup and then topping with the other half, potentially rolling the seam in sprinkles. However, the warmed plate method offers a cleaner finish.
- Wearing gloves helps prevent fingerprints on the spheres. Be careful not to touch the warm plate with your gloved hand and then immediately touch the chocolate spheres, as this can leave marks.
- Silicone molds tend to attract lint; avoid drying them with a dishcloth. Air dry them or gently pat them with a paper towel instead.
- If using chocolate bars, chop them very finely, even using a food processor or blender. Smaller pieces melt more quickly and evenly, aiding in tempering.
- If you only wish to make a set of 3 bombs, 6 ounces of chocolate should suffice. For larger batches, add an additional 6 ounces of chocolate for every subsequent set of 3 bombs.
Nutrition
Carbohydrates: 40g
Protein: 3g
Fat: 15g
Saturated Fat: 9g
Polyunsaturated Fat: 1g
Monounsaturated Fat: 3g
Trans Fat: 1g
Cholesterol: 4mg
Sodium: 270mg
Potassium: 163mg
Fiber: 2g
Sugar: 32g
Vitamin A: 15IU
Vitamin C: 1mg
Calcium: 71mg
Iron: 2mg
If you’ve tried this delightful recipe, please let me know how you liked it in the comments below and consider leaving a review. Your feedback is invaluable, and I truly love hearing from you!
Don’t forget to tag me – @sugarandsoulco – on Instagram and Pinterest with your beautiful photos, or join our Sugar & Soul Show-offs Community on Facebook and share them there, where you can also participate in our exciting recipe challenges! Happy crafting and sipping!